Article ID: m0118Last Modified: 27-Sep-2024
Backing Up EC2 Instances
The Management Console features a custom Amazon EC2 backup functionality that enables EC2 instances to be backed up to Amazon S3. EC2 backup implementation takes Amazon’s native snapshots and builds on them by adding various technical improvements.
The main EC2 backup features are:
- VSS snapshots usage
- Metadata backups for further item-level restore jobs.
The item-level restore feature for EC2 instance backups is not implemented yet
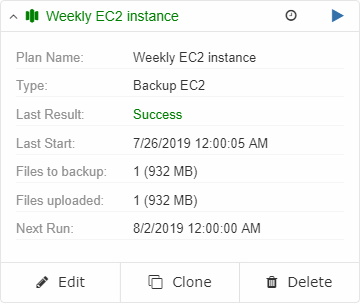
Create EC2 Backup Plan
An EC2 Backup Plan can only be created on a machine that is an EC2 instance
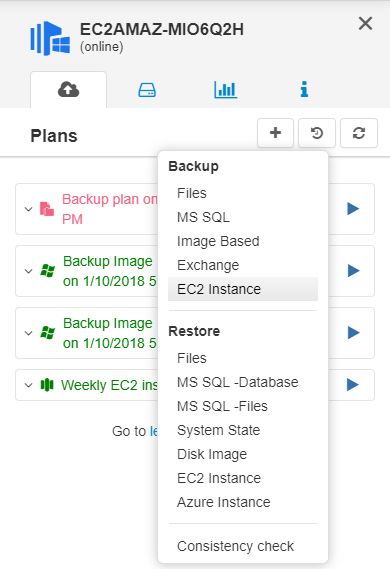
To Create a New EC2 Backup Plan
- Open the Management Console. You will need to use the legacy menu to access this feature.
- On Computers select Remote Management.
- Find the required computer, then click the configure icon in the Backup Plan Status column.
- On the side panel, click + or +Add New Plan, then select EC2 Instance.
- In the Create EC2 Backup dialog box, specify the name for the EC2 backup plan, then click Next.
- Select the EC2 storage, then click Next.
- Specify the backup source. The following options are available:
- Back up only system required partitions. Select this option to back up only partitions required for the proper functioning of the operating system
- Backup all partitions. Select this option to include all available partitions in your back up
- Select partitions to back up manually. Select this option to back up only specific partitions. If you select this option, select the partitions in the table below.
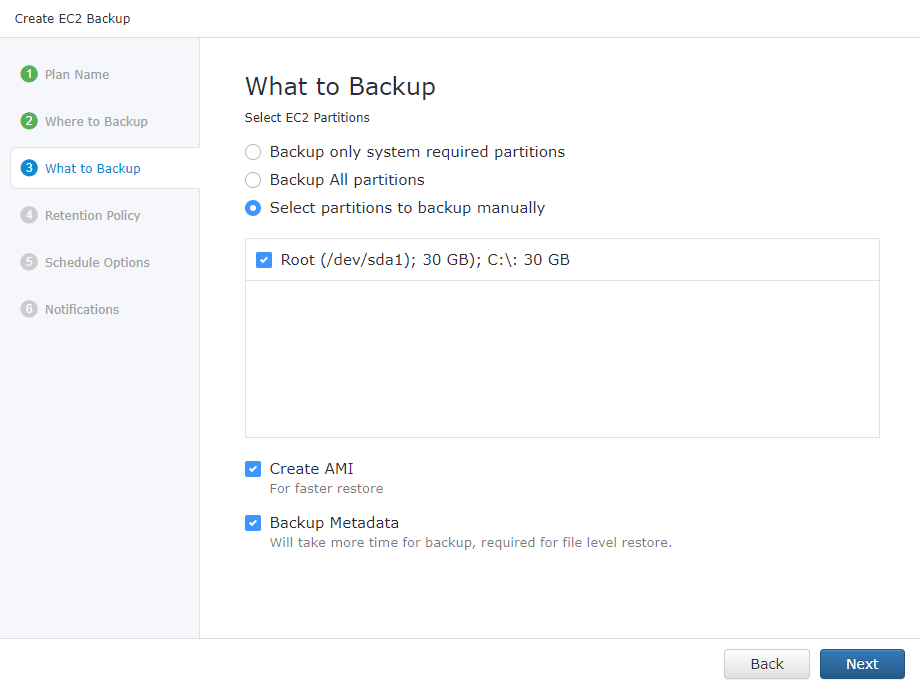
- To create an Amazon Machine Image for the backup plan, select the Create AMI check box. To learn more about AMI, refer to the Amazon Machine Images article
- To back up metadata on EC2 instance, select the Backup Metadata check box.
- Click Next.
- Specify the retention policy for the EC2 backup plan. There are separate retention policies for EC2 Snapshot and AMI:
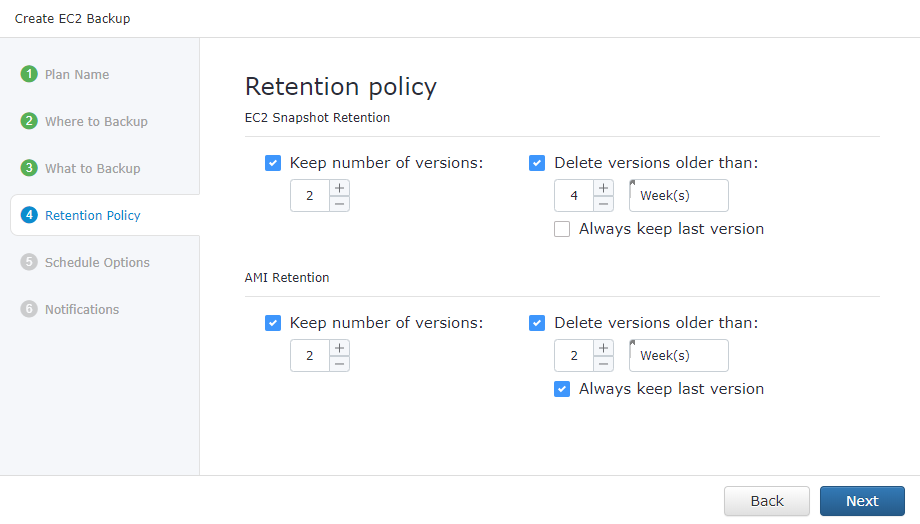
- For EC2 Snapshot Retention:
- To specify the number of backup versions to be kept in backup storage, select the Keep number of versions check box, then specify the number in the field below
- Select the Delete versions older than check box if you want to keep the restricted number of instance versions in backup storage. In the fields below, specify the criteria for deletion of old instance versions
- Always keep the last version. Select this check box if you want to keep the instance version in backup storage regardless if is deleted in the backup source
- For AMI Retention:
- To specify the number of AMI versions to be kept in backup storage, select the Keep number of versions check box, then specify the number in the field below
- Select the Delete versions older than check box if you want to keep the restricted number of AMI versions in backup storage. In the fields below, specify the criteria for deletion of old AMI versions
- Always keep the last version. Select this check box if you want to keep the AMI version in backup storage regardless if is deleted in the backup source.
- Click Next.
- Specify the schedule settings. The following schedule options are available:
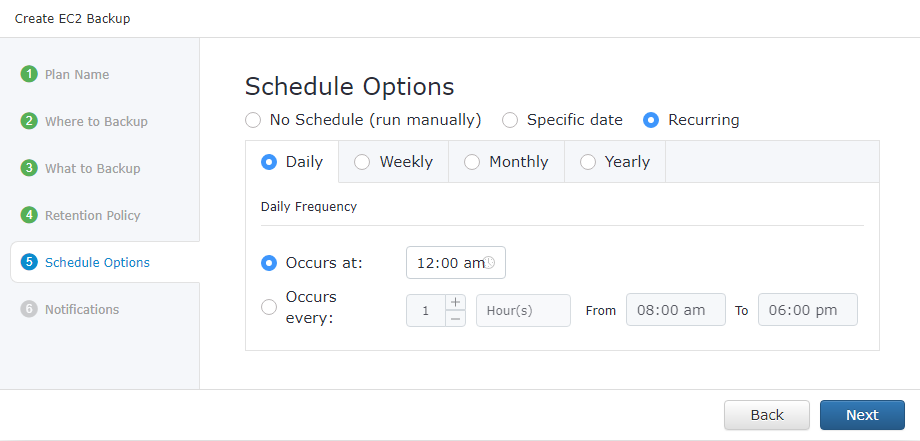
- If you plan to run the backup plan manually, select No schedule.
- If you want the EC2 backup plan to run on a particular date and time, select Specific date, then specify the date and time you want your backup plan to be run
- If you want the EC2 backup plan to be run on a regular basis , select Recurring, then specify the schedule parameters.
- Click Next.
- Specify the notification settings.
- To receive the notification after the backup plan completes, select I want to receive notification email when backup completes check box.
- Select When backup fails if you want to receive the notification message only in the case of backup plan failure.
- Select In all cases option if you want to receive the notification message in any case.
- Click Save.
Run Backup Plan
To Run the Existing Backup Plan
- On Computers select Remote Management.
- Find the required computer, then click the configure icon in the Backup Plan Status column.
- In the side panel, find the plan to run, then click on it.
- Click the Play button.
Edit Backup Plan
To edit the existing Backup Plan:
- On Computers select Remote Management.
- Find the required computer, then click the configure icon in the Backup Plan Status column.
- In the side panel, expand the plan you want to edit, then click Edit.
- Once you made the required changes, click Save.
Clone Backup Plan
To clone the existing Backup Plan:
- On Computers select Remote Management.
- Find the required computer, then click the configure icon in the Backup Plan Status column.
- In the side panel, expand the plan you want to clone, then click Clone.
- In the field below, specify a name for the cloned plan.
- Click Save.
Delete Backup Plan
To delete the existing Backup Plan:
- On Computers select Remote Management.
- Find the required computer, then click the configure icon in the Backup Plan Status column.
- In the side panel, expand the plan you want to delete, then click Delete.
- In the dialog box, confirm the deletion.