File System Storage Accounts
You can configure NAS and Synology devices, network shares, folders, or local drives as a file system storage account. To manage this feature, the Backup > Storage Account permission should be granted as the administrator permission on Organization > Administrators.
This article covers the following topics:
- Key Points for Configuring File System Storage Accounts
- Types of File System Storage Accounts
- Add New File System Storage Account (centrally managed)
- Edit locally managed Backup Destinations in Management Console
- Add File System Storage Account (locally managed)
- Manage File System Storage Account in Backup Agent
Key Points for Configuring File System Storage Accounts
You can use local and network paths to the storage account:
* When entering a network path (starting with \\), login and password fields will automatically appear for access credentials.
* If the path changes, reconfiguration and repository synchronization may be required to resolve issues.
On Linux and macOS systems, only SMB shares are supported as network paths for storage. NFS shares are not supported at this time.
Types of File System Storage Accounts and Restore Options
Storage account types
- File System Account: This storage account can only be added in the Management Console. It is suitable for centralized storage solutions like NAS or a file server, where the same storage account is accessible from multiple computers. This storage can be associated with a specific user or specific companies.
- Local File System Account: This storage account can only be added for a specific computer in the Management Console or in the local Backup Agent instance. It is best suited for external drives used on a single specific computer, allowing localized backup management without centralized access requirements.
Refer to the Hybrid Backup (BETA) article if you are planning to use these storage accounts as primary backup destinations.
Restore options
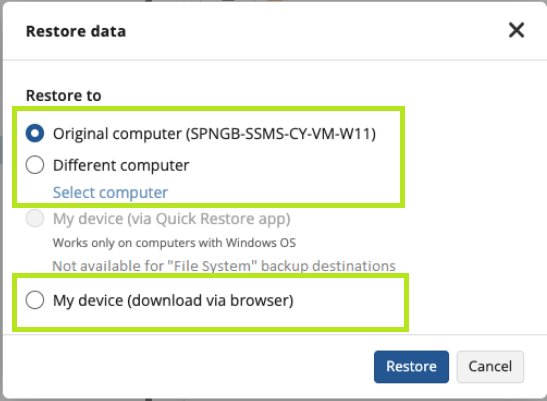
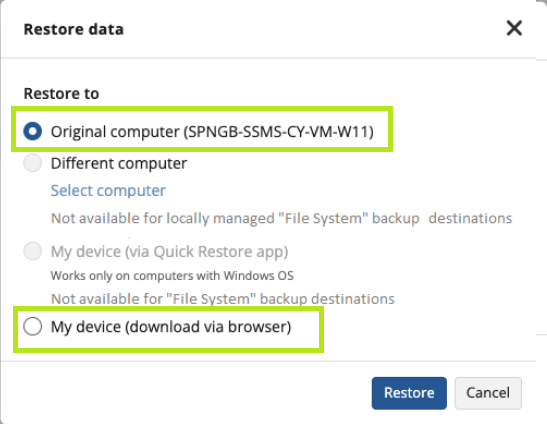
Restore options available for these types of storage accounts in the backup storage browser:
- Centrally managed (File System Account)
- Locally managed (Local File System Account)
Add a New File System Storage Account in Management Console
To add a new storage account:
- Open the Management Console.
- Open the Backup > Storage Accounts page or use the Backup > Backup Storage page. In this example, the new Backup > Backup Storage page is used.
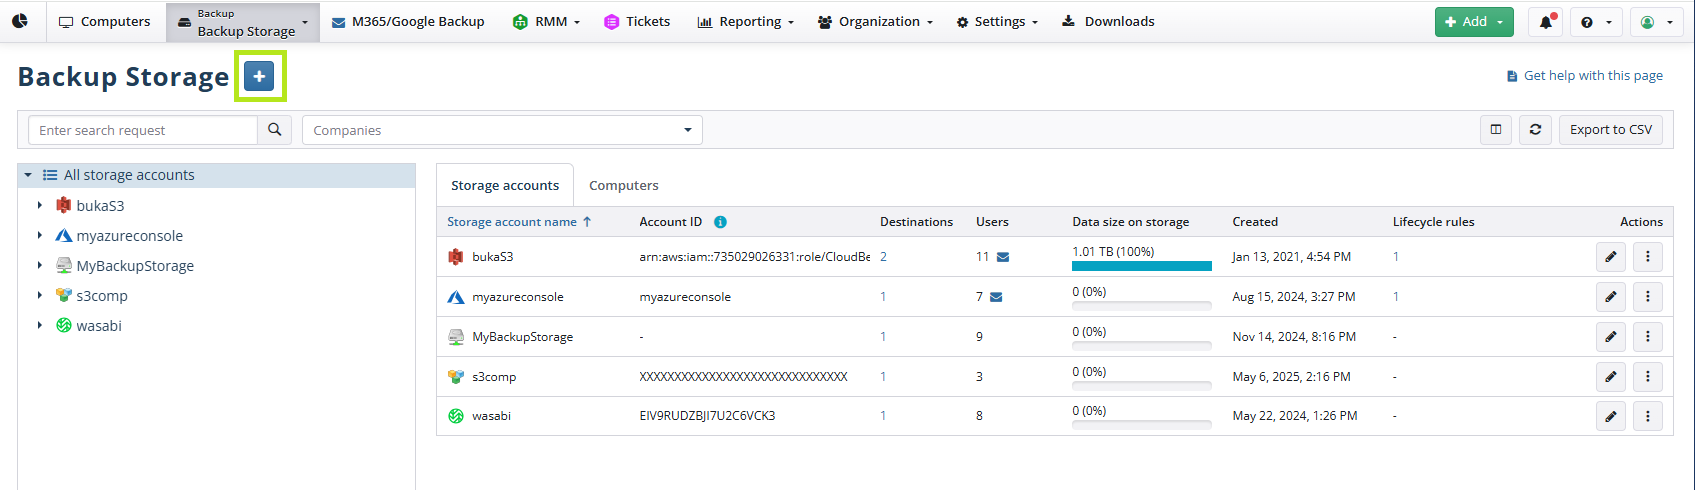
- Click + to launch the Create a new backup Destination wizard.
- On the Storage type step, select File System. Click Next.
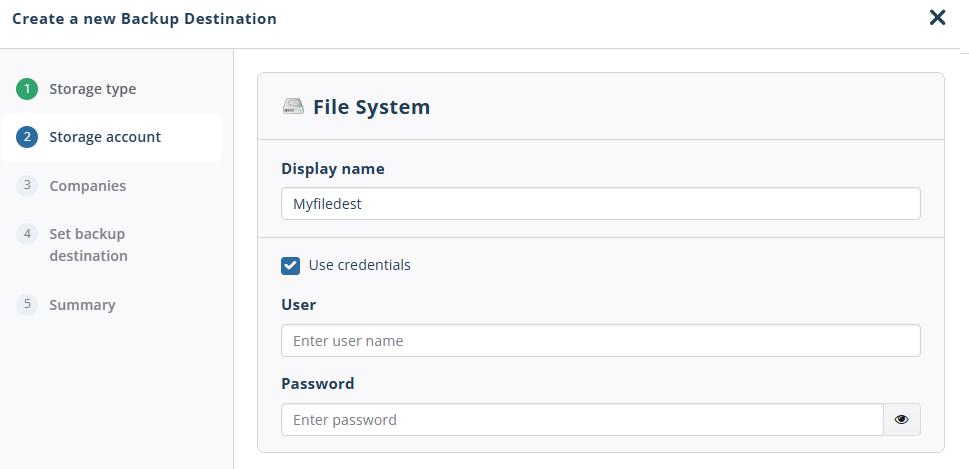
- On the Storage account step, enter the name of the storage account and provide access credentials (optional).
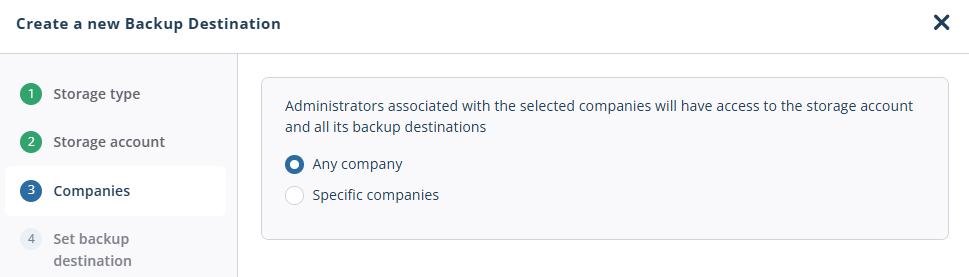
- On the Companies tab, select one or more companies to link the storage account to. Then select the access level for administrators:
- Any company - administrators associated with any company can access this storage account and all its backup destinations.
- Specific companies - administrators associated with the selected companies can access only the backup destinations linked to those companies.
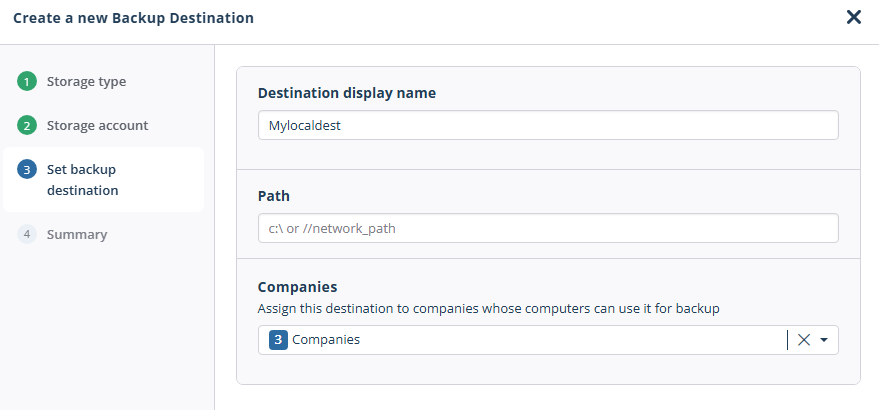
- On the Set backup destination step:
- Enter a display name for the backup destination.
- Enter the path to a folder or a network share.
- Select one or more companies to link the backup destination to.
- Click Next.
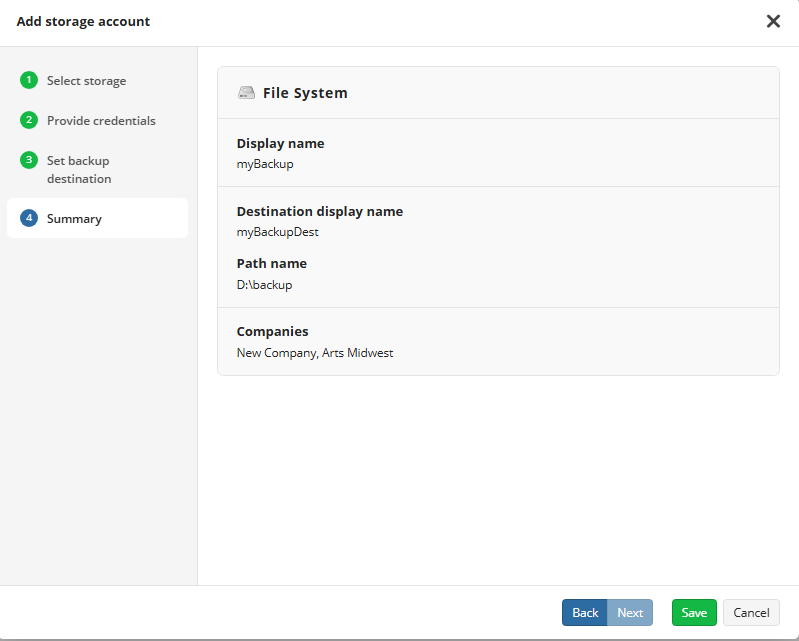
- Review the storage account on the Summary step and click Save to add the storage account.
Added storage accounts appear in the Backup Storage grid or the Storage Accounts grid. You can manage storage accounts using actions at the end of the storage account entry. Available actions depend on the storage account type.
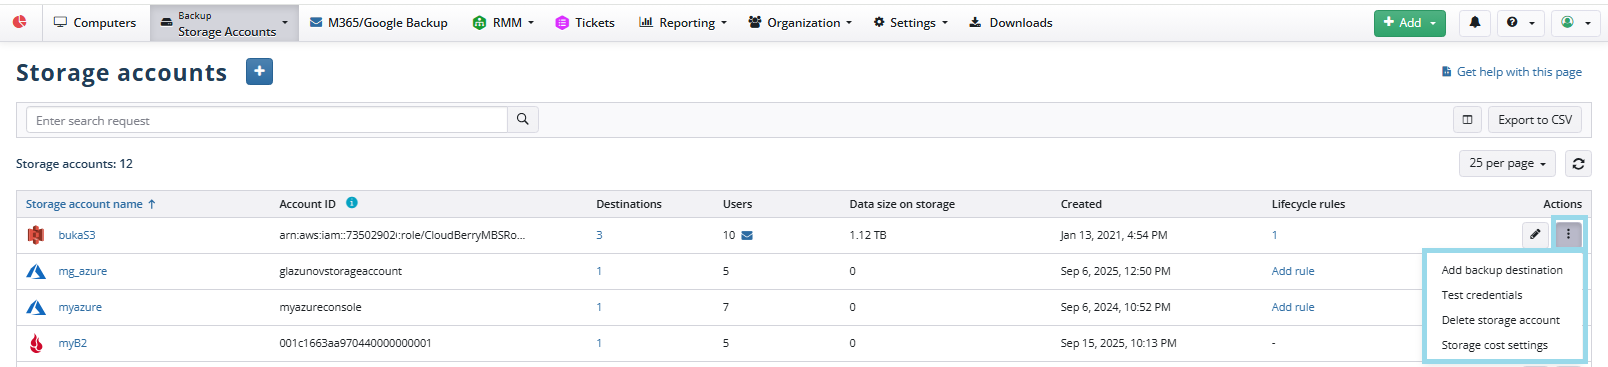
On the Storage Accounts page, you can edit the storage account, configure cost settings, or delete the storage account, if needed.
To manage backup destinations of the file system storage account, click the storage account name to open the backup destination view or use the Backup > Backup Storage page.

Manage Backup Destinations for Specific Users
If you need to override company storage destinations for specific users, perform the following steps:
- Open the Management Console.
- On Organization > Users find the user whose backup destination settings you want to modify, then click the computer name to open the side panel.
- Open the Backup destinations tab.
- Click +Add New.
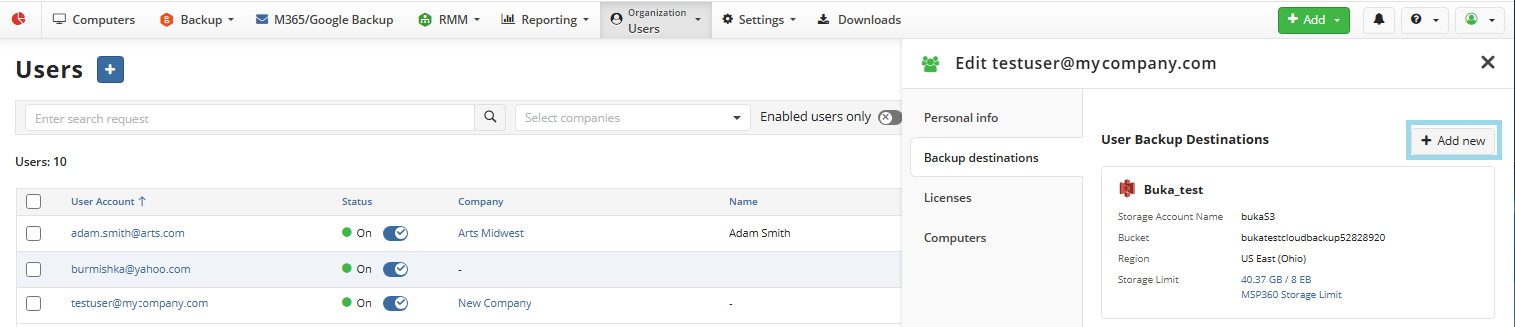
- Select one of the available backup destinations.
- Save the changes.
Add / Edit Locally Managed Backup Destinations in Management Console
To edit or add a locally managed backup destination on a specific computer:
- Open the Management Console.
- On Computers, find the computer to add or edit a locally managed backup destination for, then expand actions at the end of the computer record.
- Select Edit > Edit locally managed backup destinations.
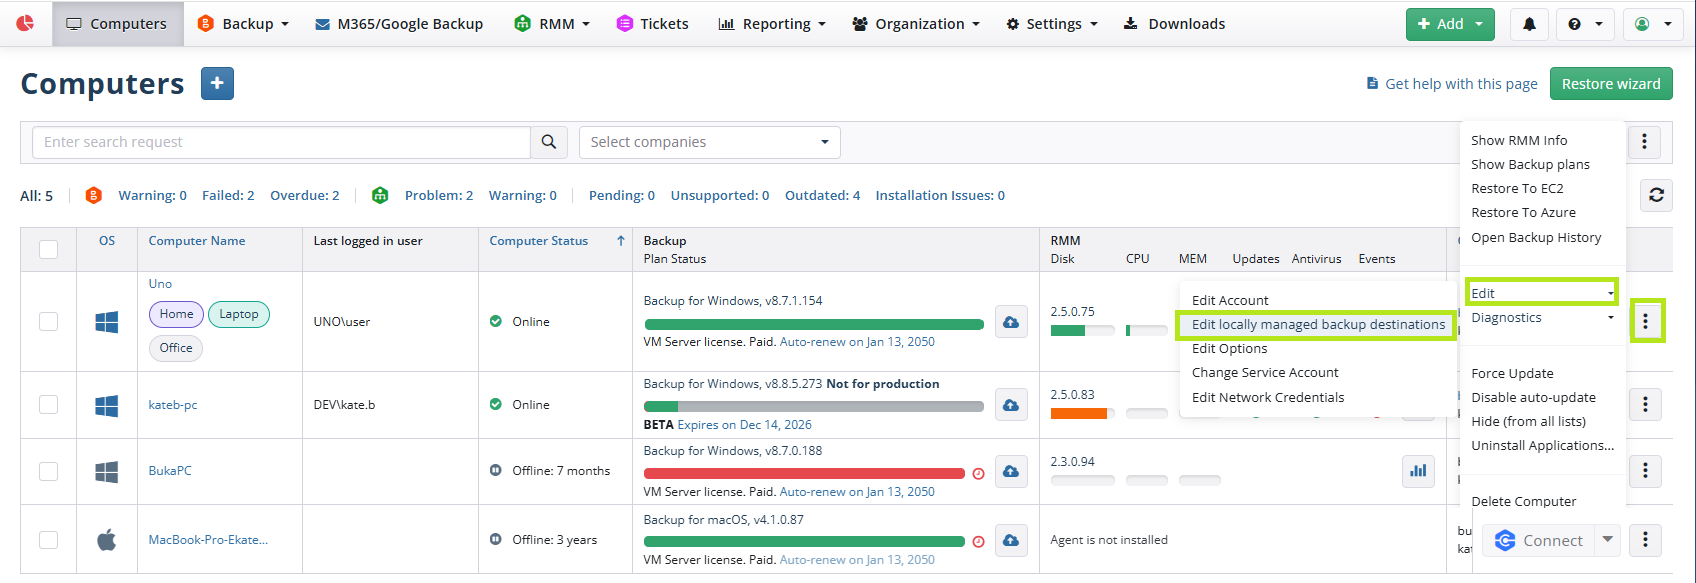
- Make the required changes. To add a new locally managed backup destination, click the Add new button and provide the Display name and path to it.
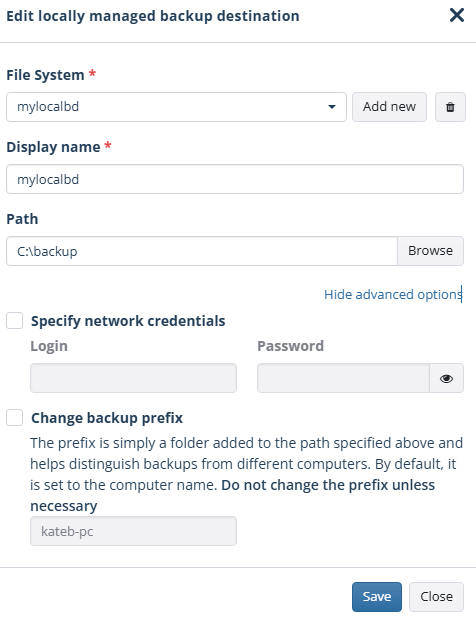
- Use advanced options to specify network credentials or change the backup prefix (optional). The prefix is simply a folder added to the path specified above and helps distinguish backups from different computers. By default, it is set to the computer name. Do not change the prefix unless necessary.
- Save the changes.
Manage Local File Storage Accounts in Backup Agent
Add New File System Storage Account
- Open the application menu, then click Add Storage Account.
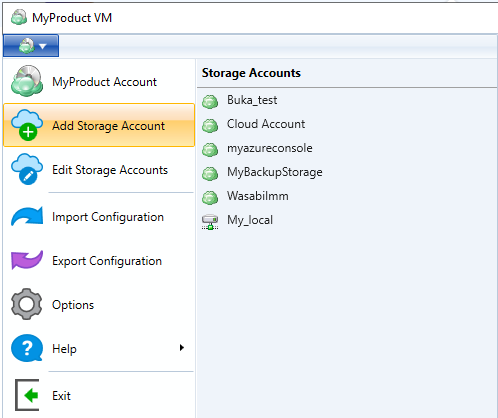
In the Select Cloud Storage dialog box, select File System.
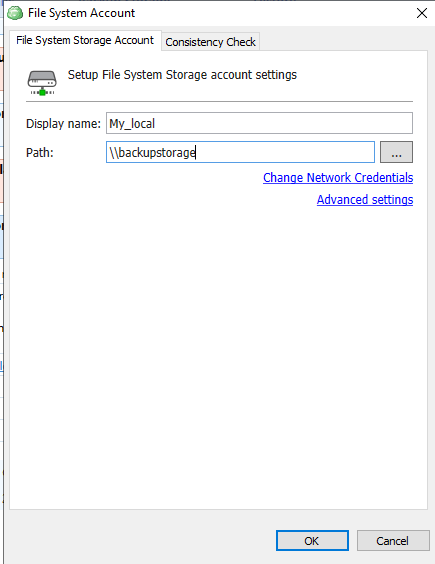
In the File System Storage Account dialog box, specify the storage name you want to be displayed in the Display Name field, and the path to the folder on the local computer or a network share in the Path field. A network path should start with
\\.
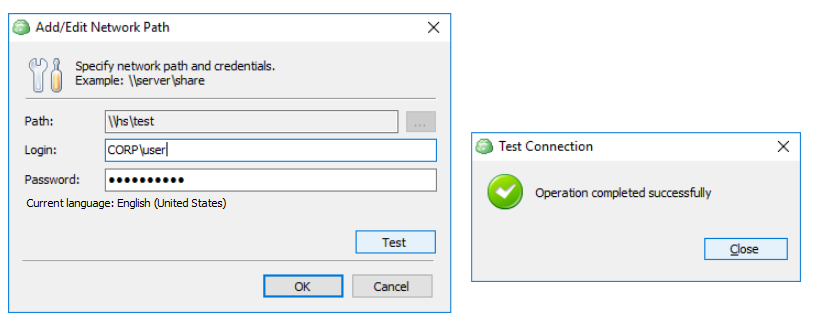
- If a network share requires authentication, specify credentials using the Change Network Credentials link. To make sure you have entered the correct credentials, click Test. The application attempts to connect to your network storage.
- Configure advanced settings and proxy settings, if needed.
- Once you are finished, click OK.
Advanced Settings in Backup Agent
MSP360 Backup offers several advanced settings related to storage usage goals. To specify the advanced settings, click the Advanced Settings link in the File System Account dialog.
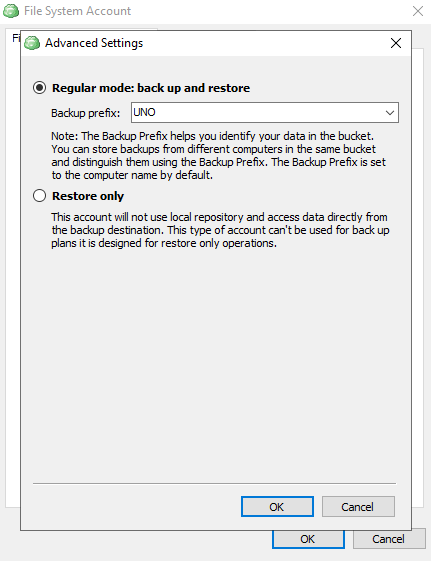
The following settings are available:
- Regular mode: back up and restore. Select this option if you plan to use this storage destination for both backup and restore jobs.
Select the backup prefix or specify a new one. The backup prefix is the name of a directory in a bucket you specified for this storage destination. By default, the backup prefix is your computer name.
Applies to the legacy backup format only.
Note that if you specify the same backup prefix as on another computer that uses this bucket on backup storage, all backup data will be uploaded to this directory. This may make it hard to figure out the origin of backup data. To avoid disorder in this bucket, it is not recommended to specify the same backup prefix for multiple instances using the same bucket and storage destination.
- Restore only. Select this option if you intend to use the backup storage only for restore plans.
Once this option is selected, this storage destination will not be available for selection while creating backup plans.
Proxy Settings in Backup Agent
To specify proxy settings in Backup Agent, proceed as follows:
- Start Online Agent, navigate to the Tools tab, and click Options.
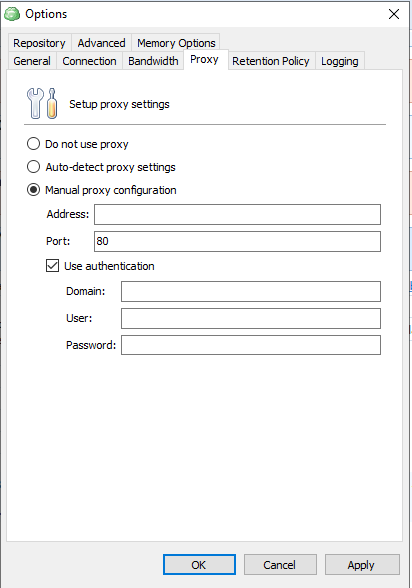
- On the Proxy tab, specify the firewall settings, then click OK.
Edit a Storage Account in Backup Agent
To Edit a Storage Account
- Open the application menu, then click Add Storage Account.
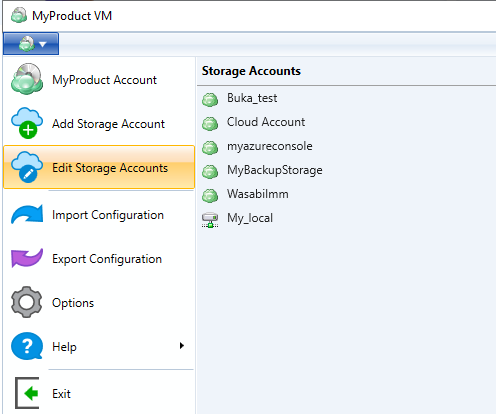
- In the Select Cloud Storage dialog box, select the file system storage account you want to edit.
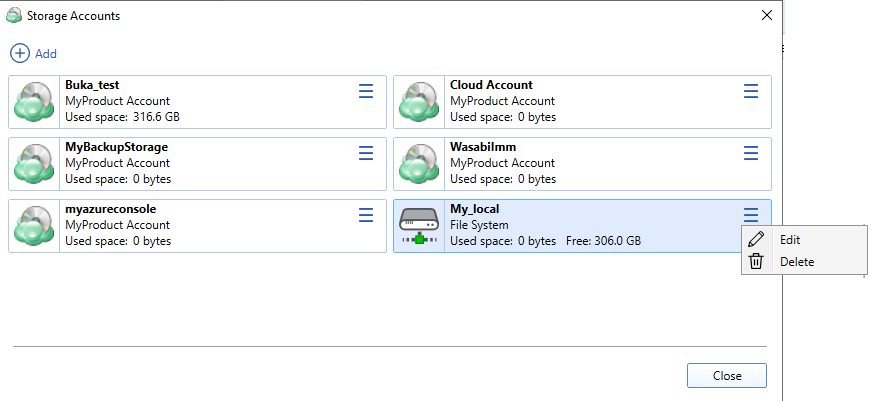
- To modify the storage account, expand actions and select Edit.
- Save your changes.
Delete Storage Account in Backup Agent
To delete a Storage Account
- Open the application menu, then click Add Storage Account.
- In the Select Cloud Storage dialog box, select the file system storage account you want to delete.
- Expand actions and select Delete.
- Confirm the storage account deletion.