Manage Storage Accounts
For information on the legacy Storage Accounts page, refer to the corresponding article.
This chapter covers the following topics:
- Add New Storage Account
- Add Backup Destination for Existing Storage Account
- Edit Storage Account and configure Default Object Lock
- Manage Backup Destinations for Specific Users
- Delete Storage Account
- Delete Backup Destination
Add New Storage Account
Only the service provider (main administrator) can manage storage accounts for all companies. To allow another administrator to manage them, grant the Backup > Storage Account permission under Organization > Administrators. If you are planning to use the Object Lock feature, ensure the storage account supports it.
To add a new storage account:
- Open the Management Console.
- Open the Backup > Storage Accounts page.

- Click + to launch the Add storage account wizard.
- On the Select storage step select the required storage account provider. Click Next.
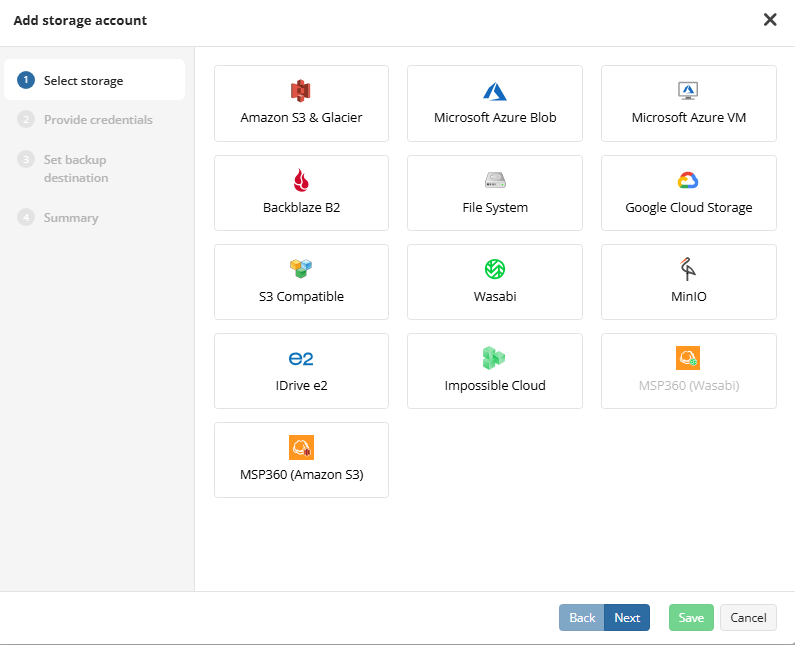
- On the Provide Credentials step, enter your details for accessing the storage account. Steps vary depending on the storage account provider. For details, refer to the following articles:
- Amazon S3 & Glacier
- Microsoft Azure Blob
- Microsoft Azure VM
- Backblaze B2
- File System
- Google Cloud Storage
- S3 Compatible
- Wasabi
- MinIO
- IDrive e2
- Impossible Cloud (New). Now added as S3 Compatible storage account.
- MSP360 (Wasabi)
- MSP360 (Amazon S3)
- On the Set backup destination step:
- Enter a display name for the backup destination
- Choose whether to create a new bucket or use an existing one
- Configure additional bucket properties, configure Default Object Lock if it is already enabled for the bucket, and then configure the protection period in days. For most storage accounts this period can be detected automatically.
- Select one or more companies to link the backup destination to.
- Click Next.
- Review the storage account on the Summary step and click Save to add the storage account.
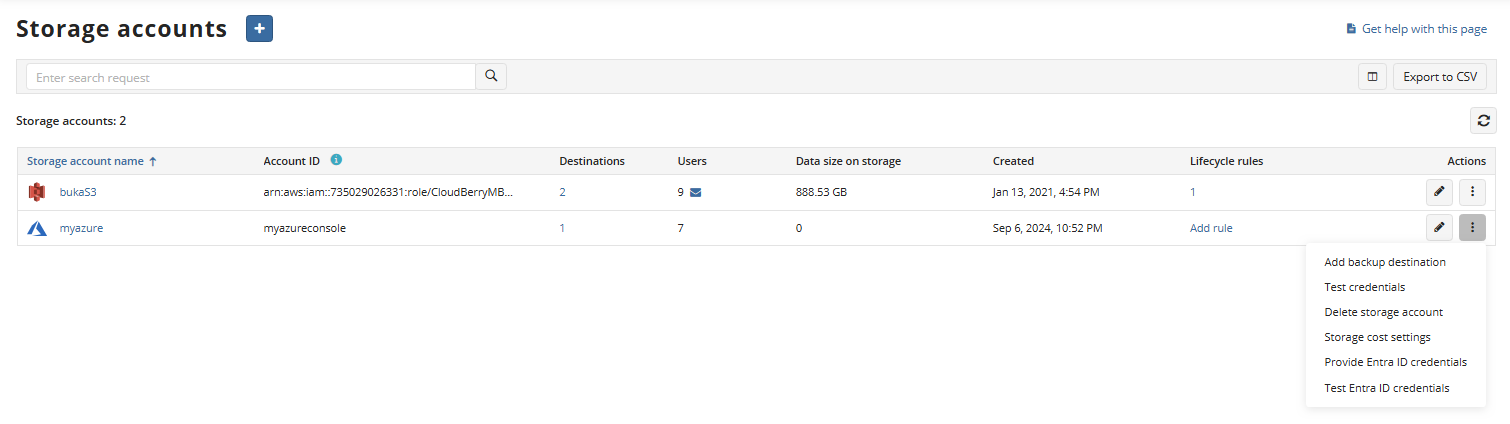
Added storage accounts appear in the Storage Accounts grid. You can manage storage accounts using actions at the end of storage account entry. Available actions depend on the storage account type.
Add Backup Destination for Existing Cloud Storage Account
- Open the Management Console.
- Open Backup > Storage Accounts.
- Find the storage account you want to add a new backup destination, then expand actions at the end of the storage account entry.
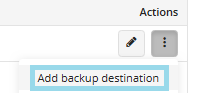
- Select Add backup destination
- Specify display name for the backup destination.
- Select whether you want to add a new bucket or one of the existing buckets. Provide required information.
- Configure available properties for the backup destination.
- Select one or more companies to link the added backup destination to.
- Click Save.
Manage Backup Destinations
Click on the storage account name on Backup > Storage accounts to see added backup destinations and companies linked to them.

Using this view you can manage backup destinations: edit, delete them or go to the capacity report to manage backup data.
On this step you can configure Default Object Lock if it is already enabled for the bucket or change the protection period, if you need to do this manually.
To enable Default Object Lock, select the Default Object Lock checkbox, and then configure the protection period in days. For most storage accounts this period can be detected automatically.
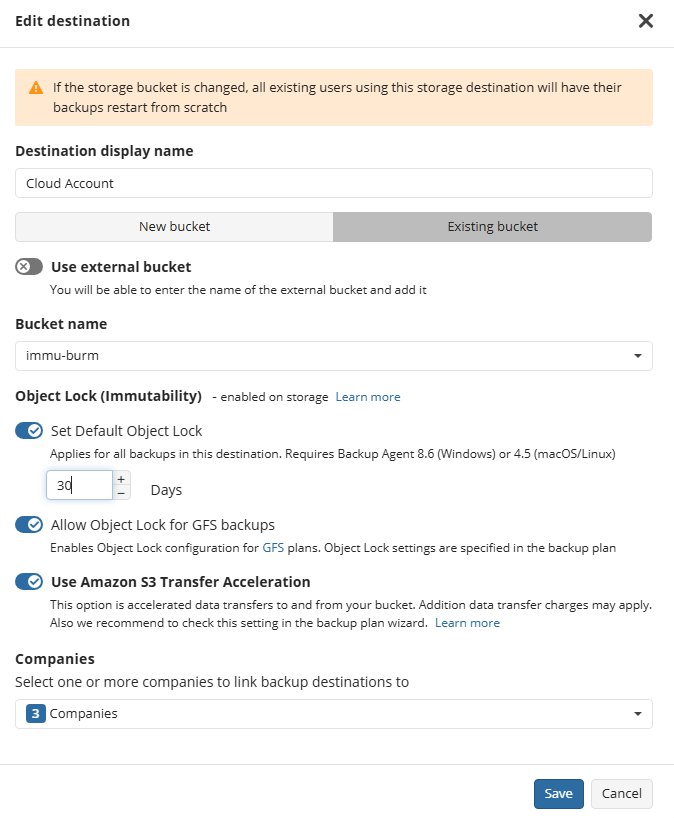
To disable Default Object Lock, clear the Default Object Lock checkbox. This only affects a newly added backup data.
Edit a Storage Account
To edit a storage account display name and change credentials
- Open the Management Console.
- Open Backup > Storage Accounts page.
- Find the storage account you want to edit, then click the Edit icon.

- Save your changes.
To edit storage cost settings for the storage account
- Open the Management Console.
- Open Backup > Storage Accounts page.
- Find the storage account you want to edit, then expand actions and select Storage cost settings.
- Specify the cost settings that will be applied for this storage account. You can specify costs for backup and restore separately.
- In the Cost per GB field, specify your own expense rate per GB for the storage account
- In the Price per GB field, specify the end user price per GB
- To add a custom price for the specific company, click Add custom price by company, then, in the Storage Cost Settings dialog box, specify your own expense rate per GB and the end user price per GB
- To add a custom price for the specific user, click Add custom price by company, then, in the Storage Cost Settings dialog box, specify your own expense rate per GB and the end user price per GB.
- Once you are finished with settings, click Save.
Manage Backup Destinations for Specific Users
In case you need to override company storage destinations for specific users, perform the following steps:
- Open the Management Console.
- On Organization > Users find the user you want to modify the backup destination settings, then click on the computer name to open the side panel.
- Open the Backup destinations tab.
- Click +Add New
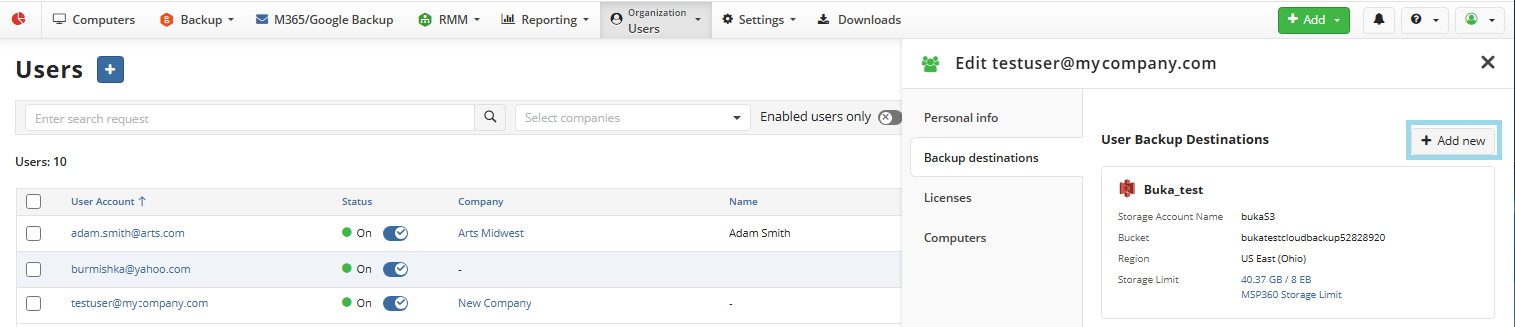
- Select one of the available backup destinations.
- Select storage limit that will be applied to the assigned backup destination.
- Save the changes.
Assign Backup Destinations to Specific Users
To assign backup destinations to specific users, perform the following steps:
- Open the Management Console.
- On Organization > Users find the user you want to modify the backup destination settings, then click on the user name to open the side panel.
- Open the Backup destinations tab.
- Click +Add New
- Select one of the available backup destinations.
- You can select a storage limit that will be applied to the assigned backup destination.
- Save the changes.
Assign Backup Destinations to Specific Companies
To assign backup destinations to specific companies, perform the following steps:
- Open the Management Console.
- On Organization > Companies find the company you want to modify the backup destination settings, then click on the company name to open the side panel.
- Open the Backup destinations tab.
- Click +Add backup destination
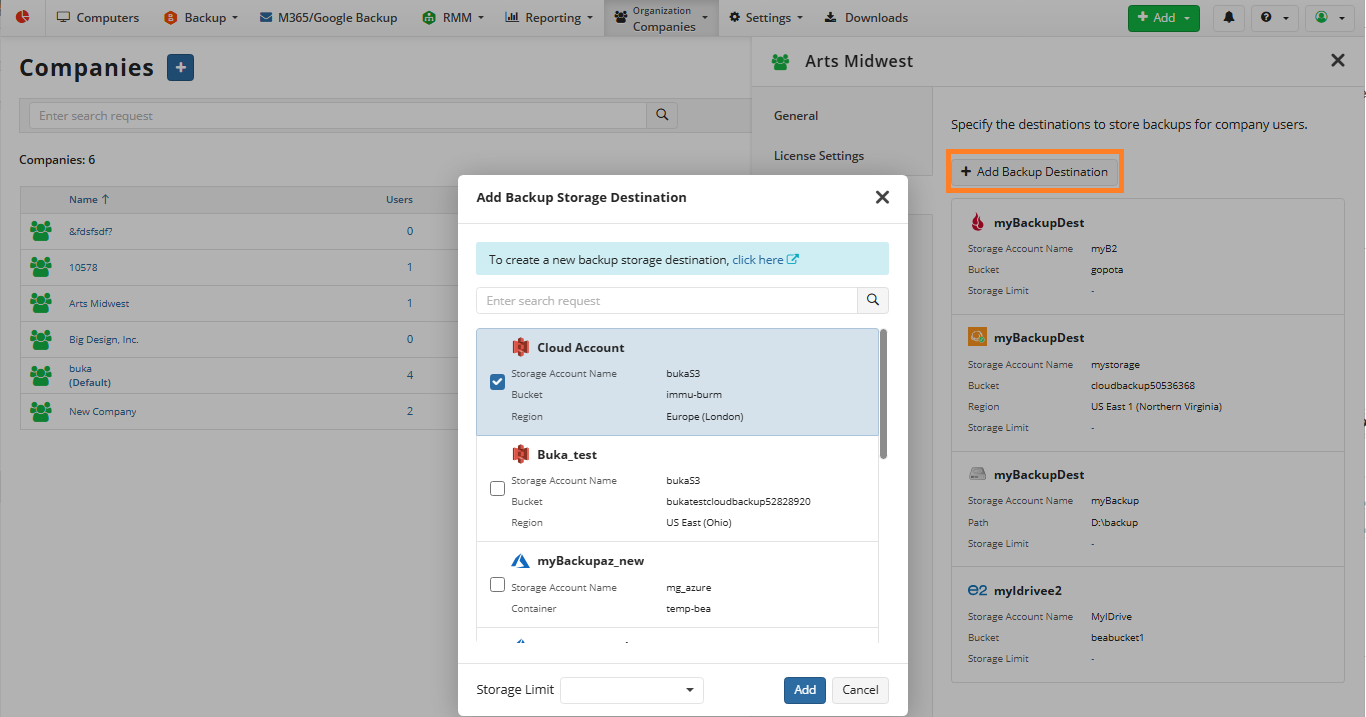
- Select one of the available backup destinations.
- You can select a storage limit that will be applied to the assigned backup destination.
- Save the changes.
Before Deleting a Storage Account
Before deleting a storage account or a backup destination, check if this storage account is linked to any company or user account.
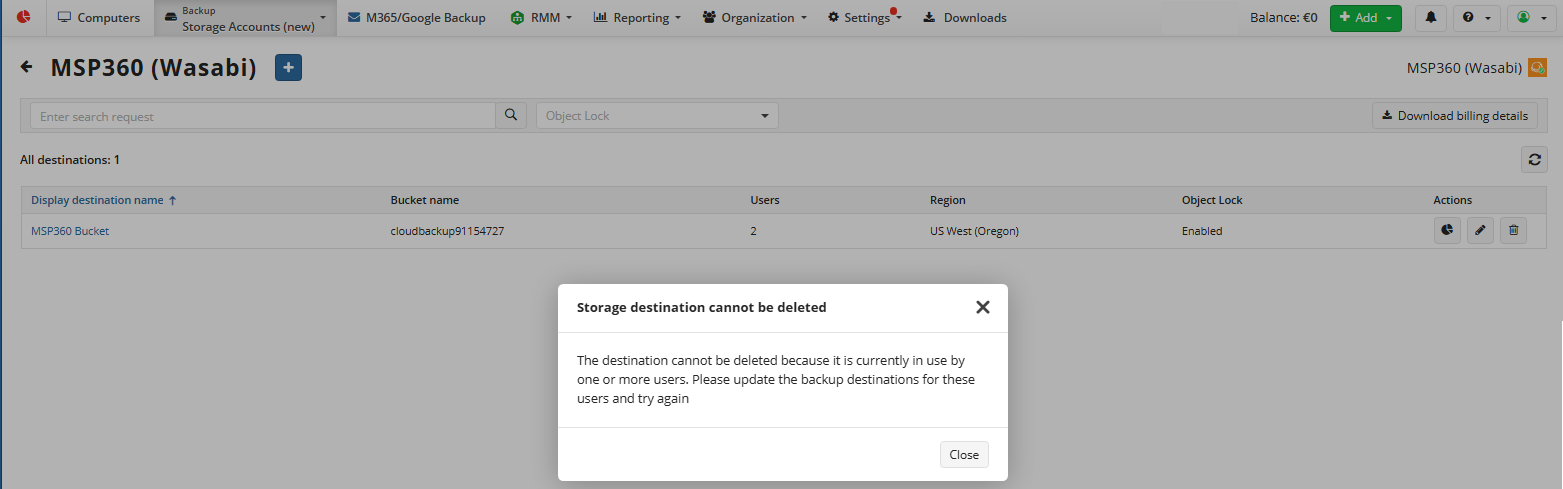
Only the storage accounts that are not linked to any company or user can be deleted. Update the backup storage destinations linked to your users as described above before deleting a storage account or a backup destination.
Delete Storage Account
To delete a storage account that is not linked to any company or user:
- Open the Management Console.
- Open Backup > Storage Accounts.
- Find the storage account you want to delete, then expand actions at the end of the storage account entry.

- Select Delete storage account, then confirm the storage account deletion.
Delete Backup Destination
To delete a backup destination that is not linked to any company or user:
- Open the Management Console.
- Open Backup > Storage Accounts.
- Find the storage account containing the backup destination you want to delete, then click on the storage account name to go to the backup destinations.
- Click the Delete destination icon, then confirm the storage account deletion.
