Changed Block Tracking for Hyper-V
Changed block tracking (Resilient Change Tracking in Hyper-V terminology) is a feature that implements changed block tracking for Hyper-V VM disks. Changed Block tracking can be enabled by users to optimize the backup procedure and save backup data reading time. Once the Changed Block Tracking option is enabled, only changed blocks of a virtual machine disk (vhdx) between two backup operations are read.
How It Works
As of Backup Agent for Windows 7.4, Changed Block tracking for Hyper-V virtual machines is supported. Note that for now the configuration of this feature can be done only in Backup Agent. Management Console tools are subject to come soon.
Changed Block Tracking is supported for the following Windows versions:
- Windows Server 2016 and later
- Windows 10 (Enterprise, Pro, Education editions) and later
Note that in order to apply the Changed Block Tracking, VM configuration version must be 6.2 or later
On a virtual machine incremental backup with enabled Back up Current Hyper-V Checkpoint only and Use Changed Block Tracking options, a new checkpoint is created of the VM disk, and the snapshot contents are uploaded to the backup storage. The checkpoint is deleted automatically on Hyper-V after the backup plan is completed.
After the backup plan is completed, the checkpoint differencing file (.avhdx) is frozen. This is a difference compared to VSS snapshot processing on Windows Server 2012 and 2012 R2 operating systems, in which the snapshot difference file is retained on the virtual to keep incremental changes.
On the next backup plan run, a new checkpoint is created and compared against the change-tracking information from the previous backup operation to determine the data that has changed. Then, only the changed blocks are backed up.
Changed Block Tracking block IDs are unique, so no block interference problems occur in case of simultaneous use of another backup software.
Enable Changed Block Tracking for Hyper-V
To enable Changed Block Tracking in Management Console, proceed as follows:
- Create or edit the Hyper-V backup plan.
- Follow the backup wizard step to the Advanced Settings step.
- Enable Advanced Settings.

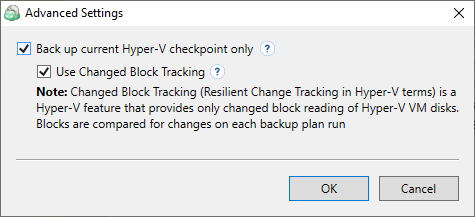
- Click Advanced Settings.
- Select the Back up current Hyper-V checkpoint only check box.

- Select the Use Changed Block Tracking check box, then click Next.
- Follow the backup wizard steps to save the backup plan configuration.