Seeding data to AWS Snowball Edge
Introduction
AWS Snowball Edge is a 100-TB data transfer solution that accelerates moving large volumes of data into and out of AWS using storage appliances designed to be secure for physical transport.
You order Snowball Edge appliance from Amazon and they ship it directly to you. Data transfer is performed by the Backup Agent for Windows with a backup plan that uses the Snowball Edge as the storage target.
Your computer must be suitable for handling this data transportation task in terms of processing, memory, and networking load. See Workstation Specifications to learn about the workstation requirements.
This following sections explain how to move data from your computer to Amazon S3 using the AWS Snowball Edge.
Ordering AWS Snowball Edge
Go to Amazon Web Services, make sure to select your region.
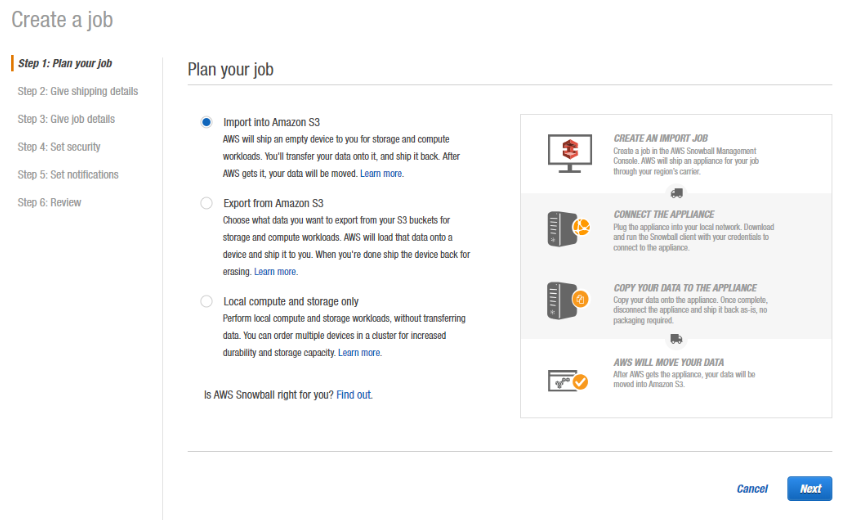
Step 1: Plan your job
Select Import into Amazon S3 option.
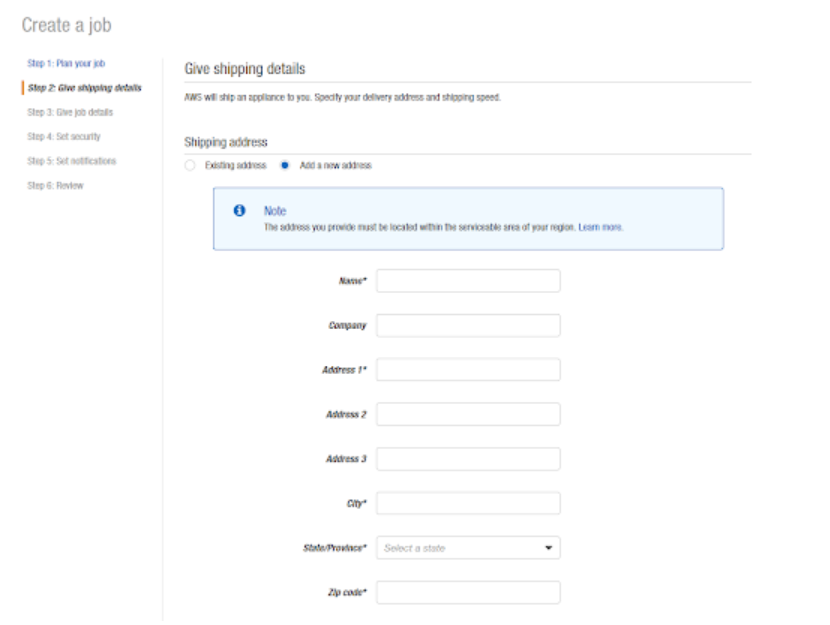
Step 2: Give shipping details
Next step is to fill in your address and select the preferred shipping speed.
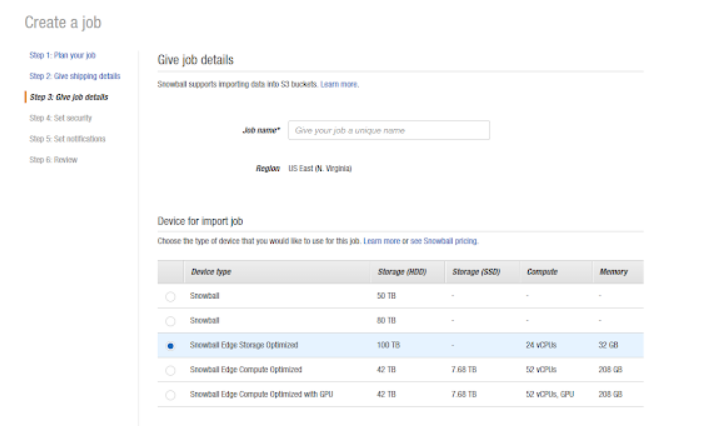
Step 3: Specify job details
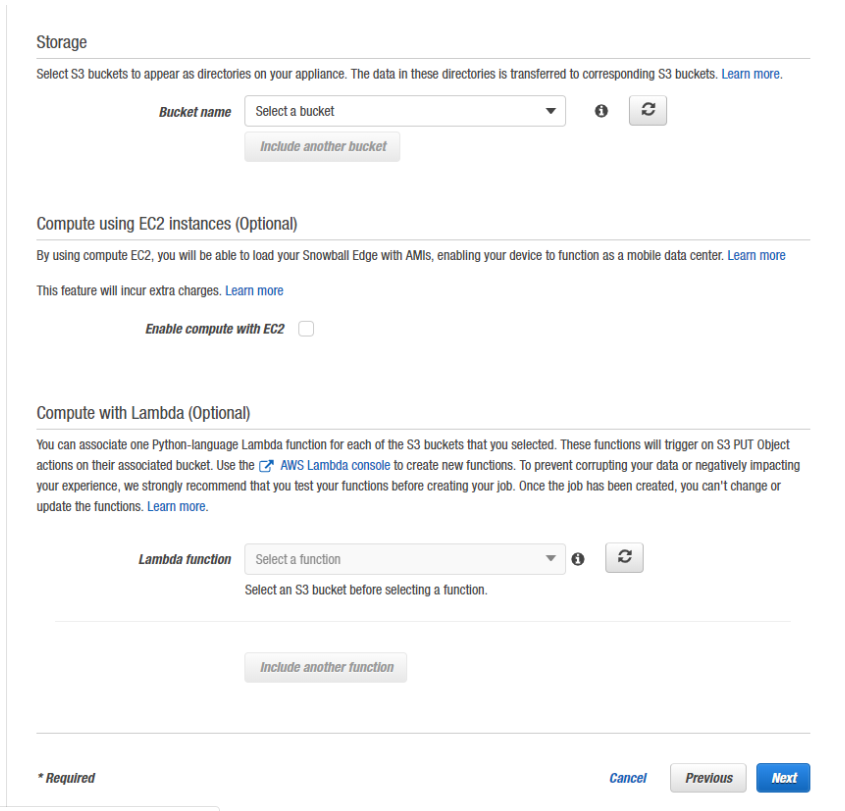
Specify the job details, such as the job name, choose a Snowball Edge capacity (device type) and specify (one or multiple) target buckets. Click Next to continue.
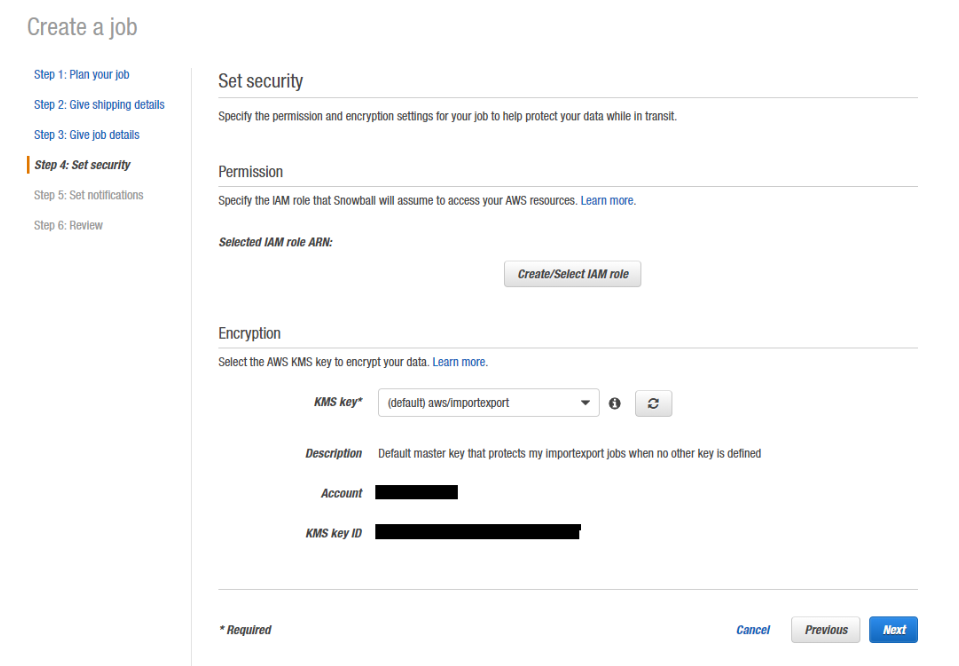
Step 4: Set security
Specify security parameters: permission and encryption settings.
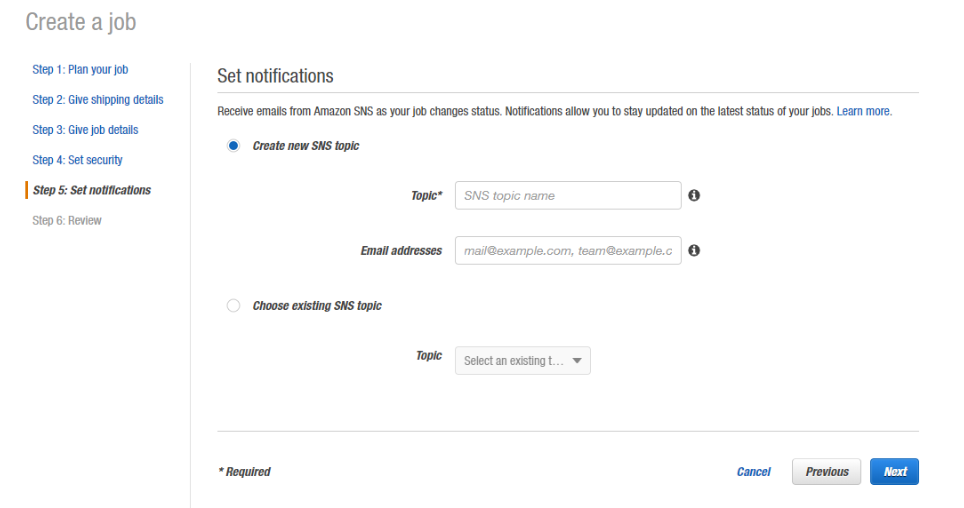
Step 5: Set notifications Configure the notification preferences.
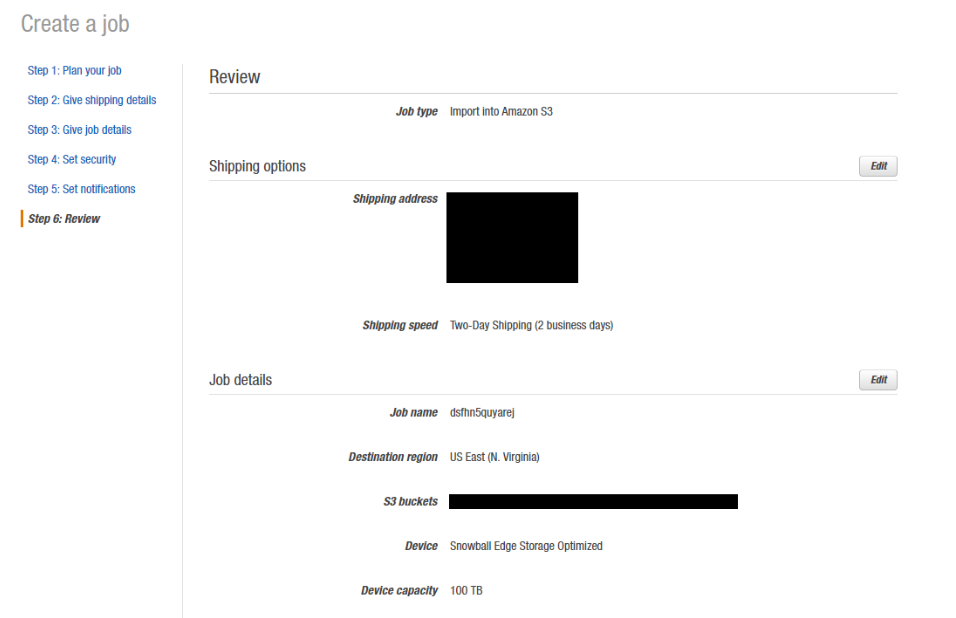
Step 6: Review
Examine the order information on the review page and click Create Job.
After receiving the device from Amazon, you can start transferring your data to the Snowball Edge.
Configuring Snowball Edge
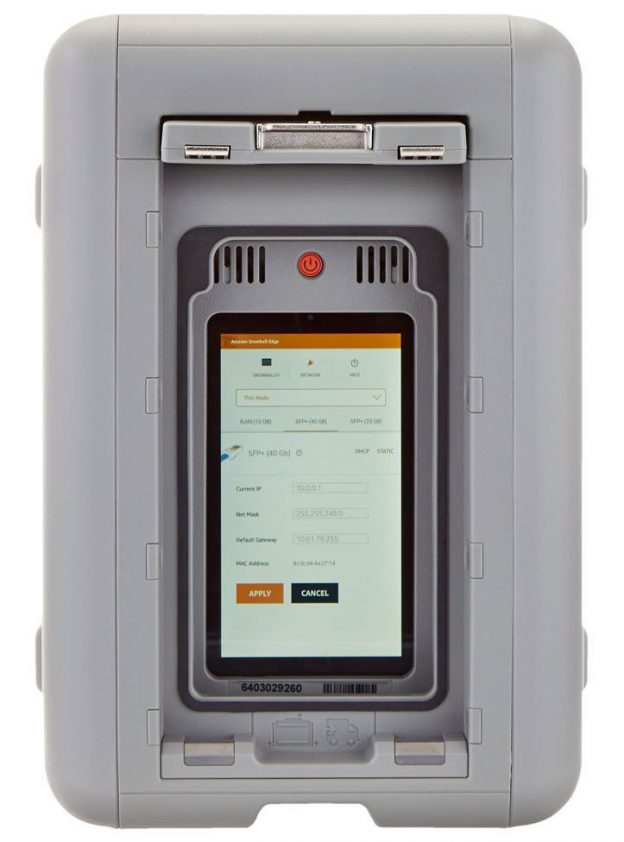
Before transferring data to your Snowball edge, you first need to configure it. Connect the powered-off box to your local network. There are various ways of doing it, be sure to read this article to learn more about connecting the Snowball to your network. Turn it on, and you will see a short video while the device is booting.
The Snowball Edge automatically fetches the IP address. Network settings can be set manually by choosing CONNECTION on the LCD display.
Important: don't disconnect the AWS Snowball Edge device or change its connection settings while it's in use!
You will need it to get a set of credentials from the AWS Snowball Management Console.
Next, download and install the Snowball Edge Client. Once installed, open the command prompt and execute the following three commands:
- unlock the AWS Snowball Edge device: snowballEdge unlock-device
- get an access key and secret access key: snowballEdge list-access-keys and snowballEdge get-secret-access-key
You can find examples at the official AWS documentation.
As an output for the last command, you'll get the secret and access keys. Write them down somewhere — you will need them later.
Adding Snowball Edge as an S3-Compatible
Now that you have the Snowball's local IP address and the secret and access keys, proceed to add it as your S3-compatible storage in the MBS Management Console.
Step 1: Adding Snowball Edge as S3-compatible storage account
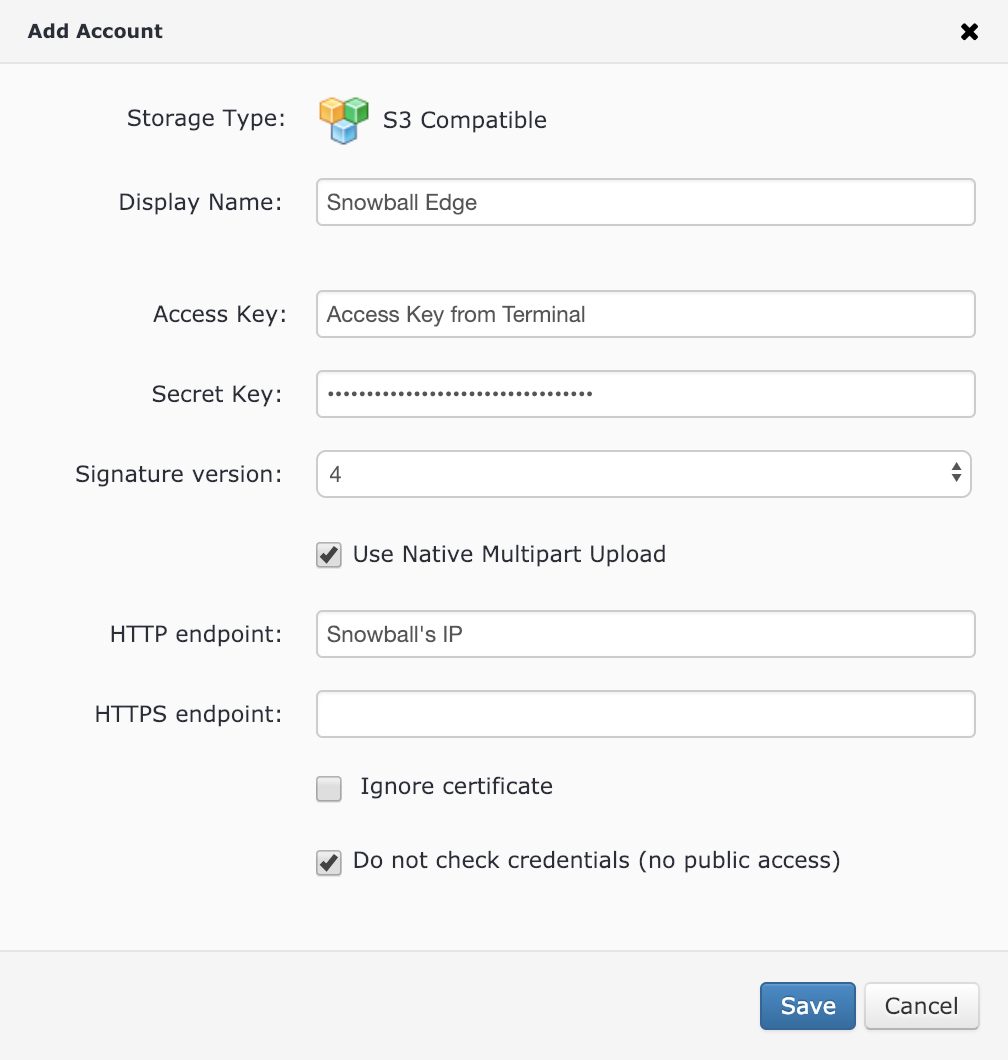
Go to the Management Console and, under Storage, click Storage. Click Add Account. Select S3-compatible.

Enter the preferable display name, access and secret keys (the ones from the CLI output), select the signature version 4, and specify the Snowball Edge's IP address in the HTTP endpoint text field. It's crucial that you use the HTTP endpoint and not HTTPS!
Finally, select the "Do not check credentials" checkbox, as MBS will be unable to connect to your local Snowball Edge to verify the specified credentials. Click Save.
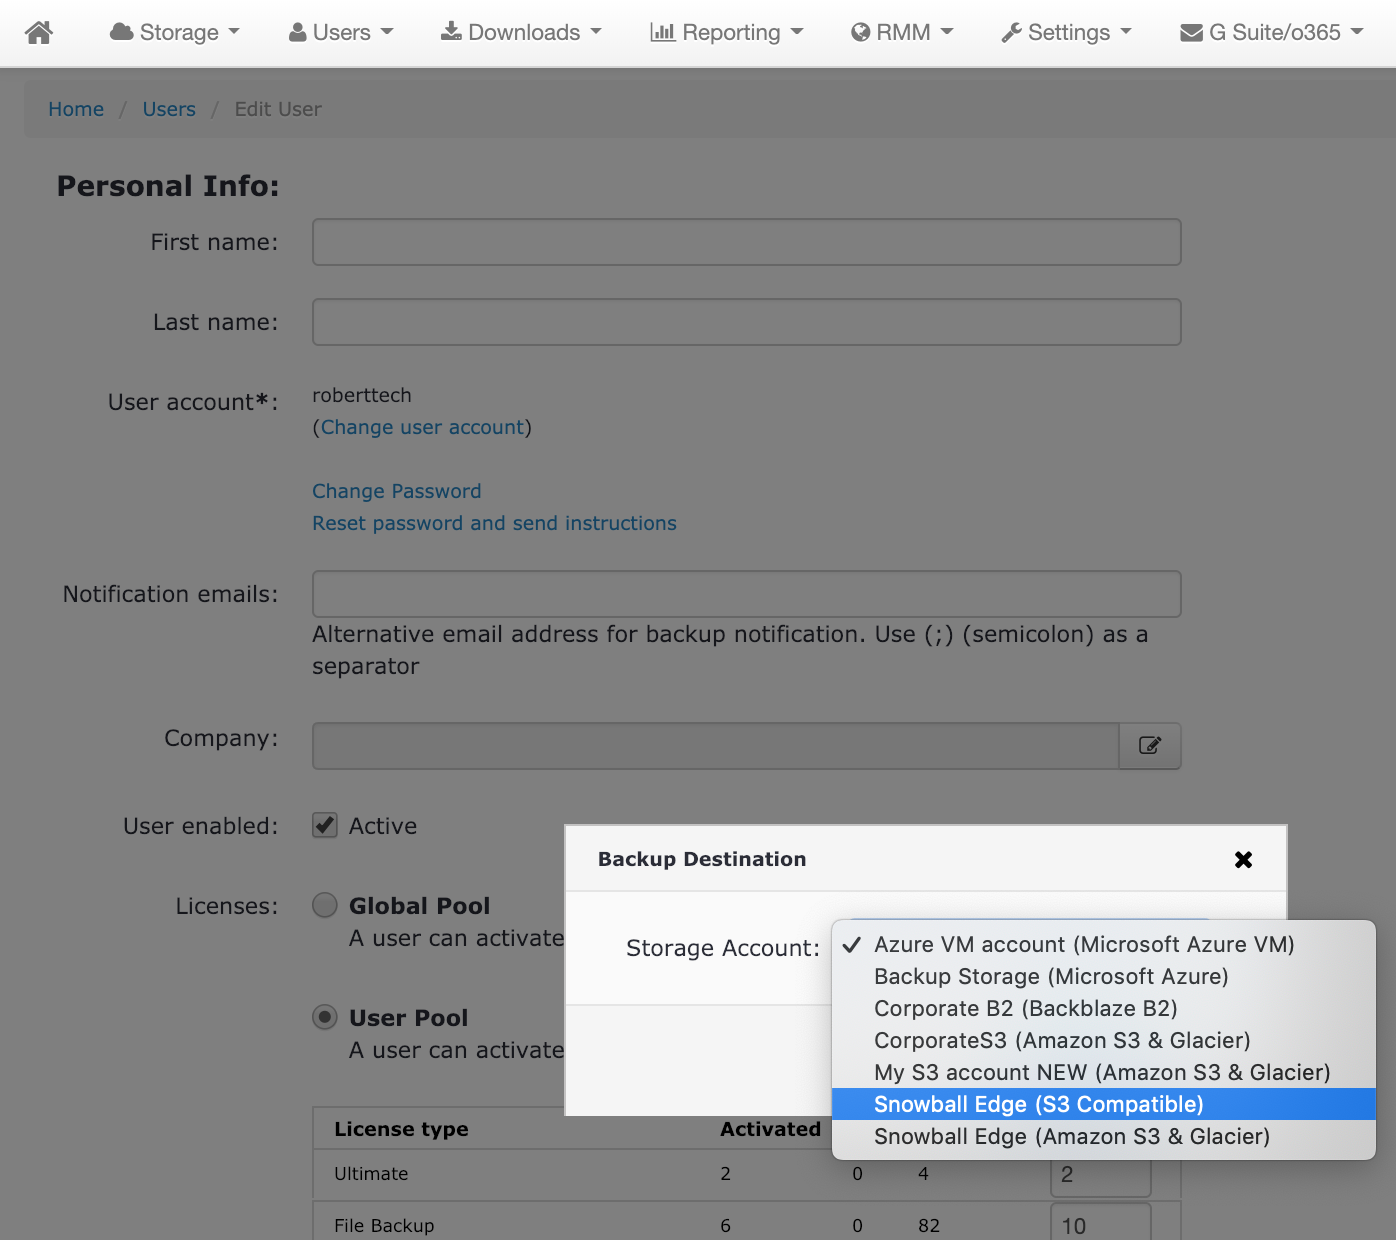
Next, add this storage account to the user whose account you are going to use in the Backup Agent. Go to the Users tab and select the required user. Under Backup Destinations, add the destination called Snowball Edge that was created in Step 1. Click Save.
Use backup prefix that your customer will use.
By default, the backup prefix is a local computer name. Make sure you have a correct backup prefix specified. To do this, proceed as follows:
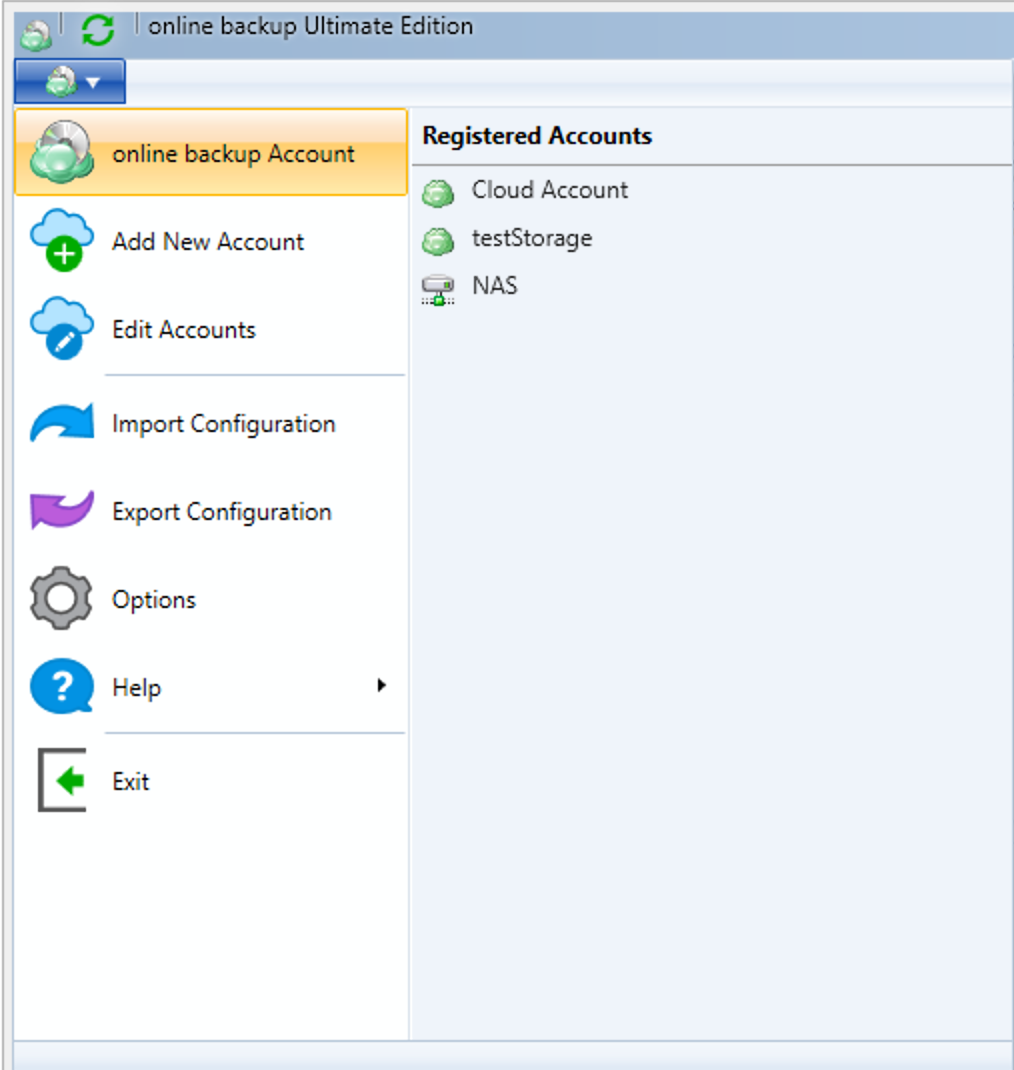
- In Backup Agent, open the application menu.
- Select the required storage account.
- In the Storage account property box, click Advanced Settings.
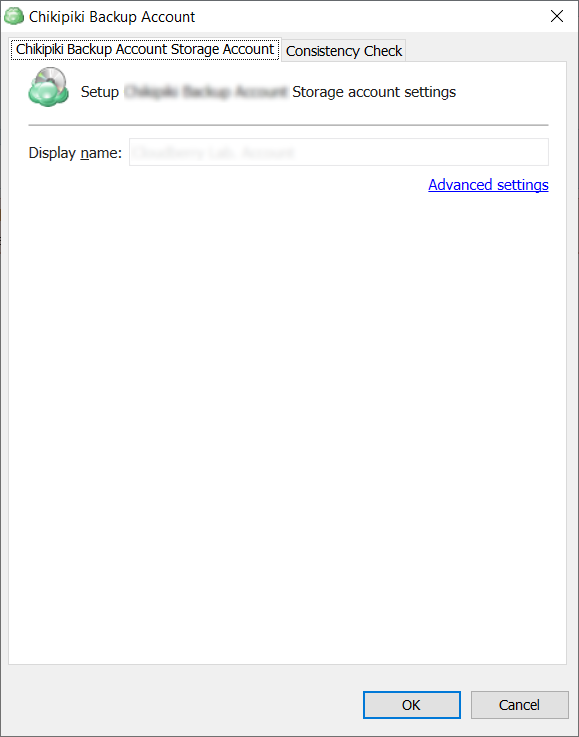
- Check the backup prefix settings.
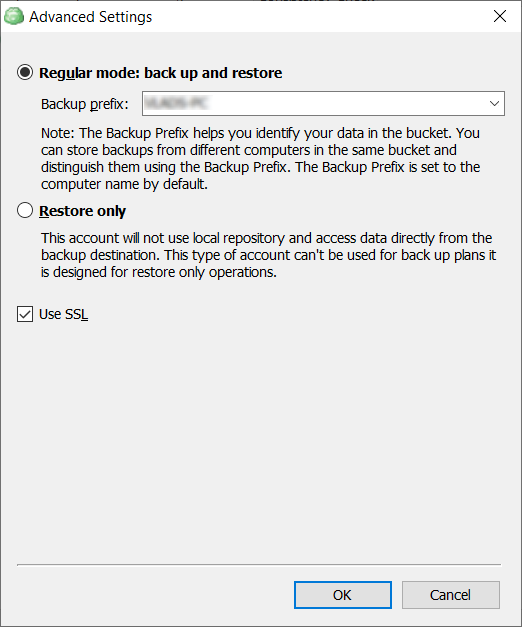
- If needed, modify the backup prefix, then click OK.
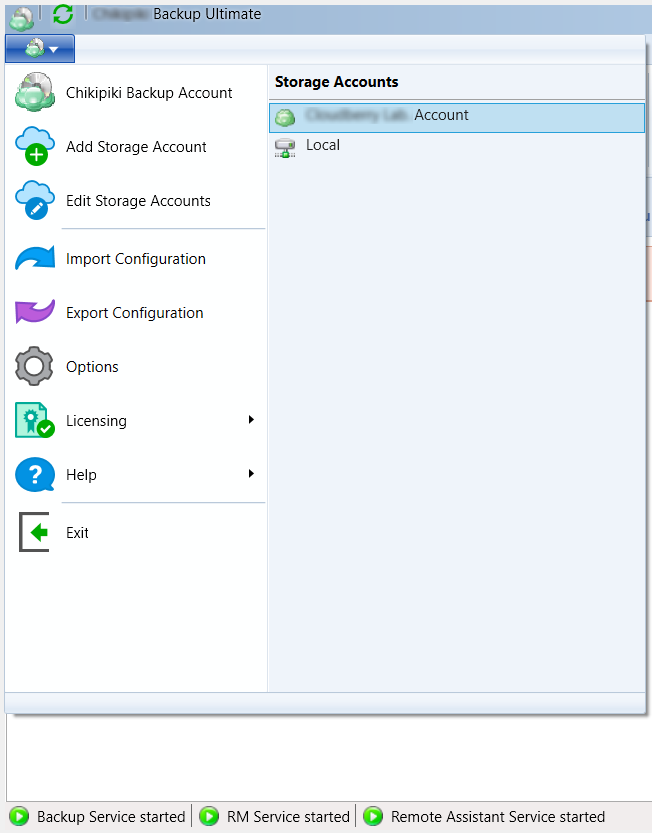
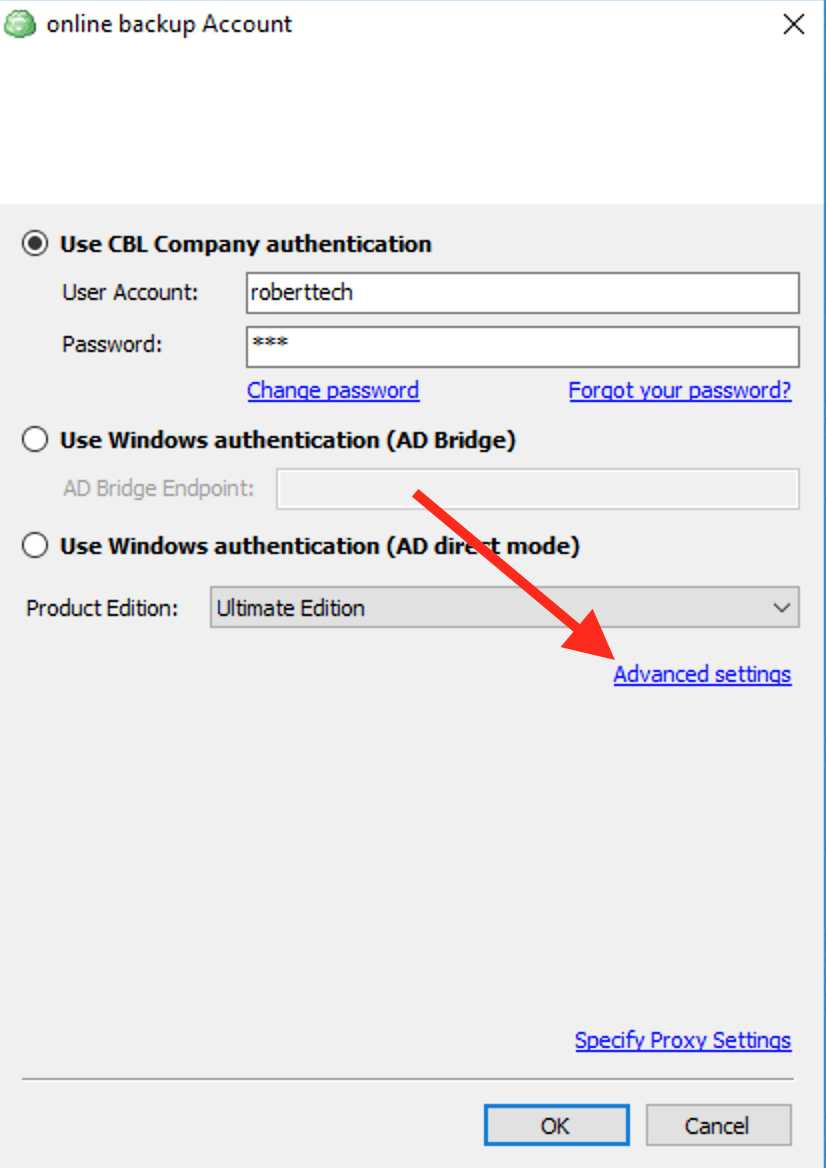
The final step is to disable SSL for the newly added S3-compatible Snowball storage. Open the Backup Agent, click on the green icon on the mail toolbar and click on your account.
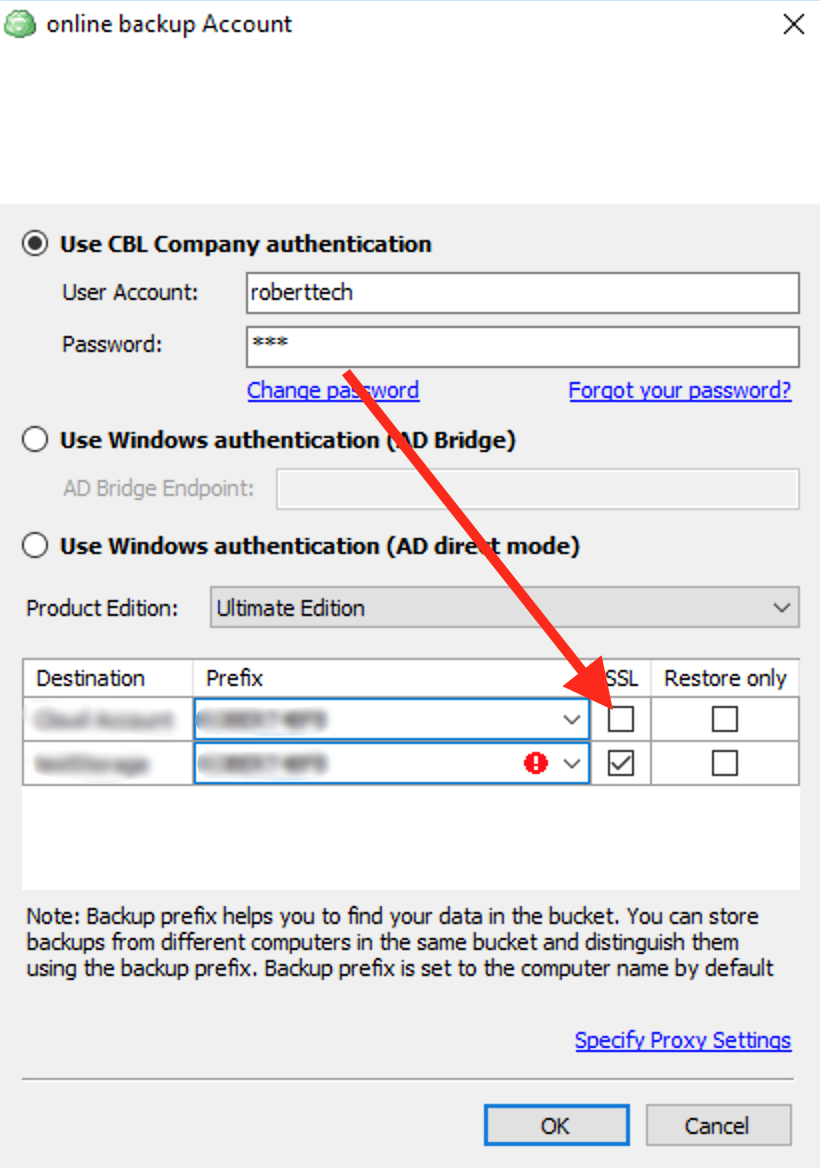
Click Advanced Settings.
Next to the Snowball storage, clear the SSL check box.
Now you are ready to transfer the data to the Snowball Edge. Proceed to create a backup plan.
Transferring Data to Snowball Edge
To transfer the data, create a new backup plan and specify Snowball Edge account as the target storage and choose your source data for transferring. Once you've finished configuring the plan, execute it and wait for it to complete.
Shipping Snowball Edge back to Amazon
Once the backup plan execution completes, ship the Snowball Edge box back to Amazon. Wait for them to process the data, you will receive a confirmation notification.
Sync Repository
After receiving a notification that your data has been moved to your S3 bucket, go back to the Backup Agent.
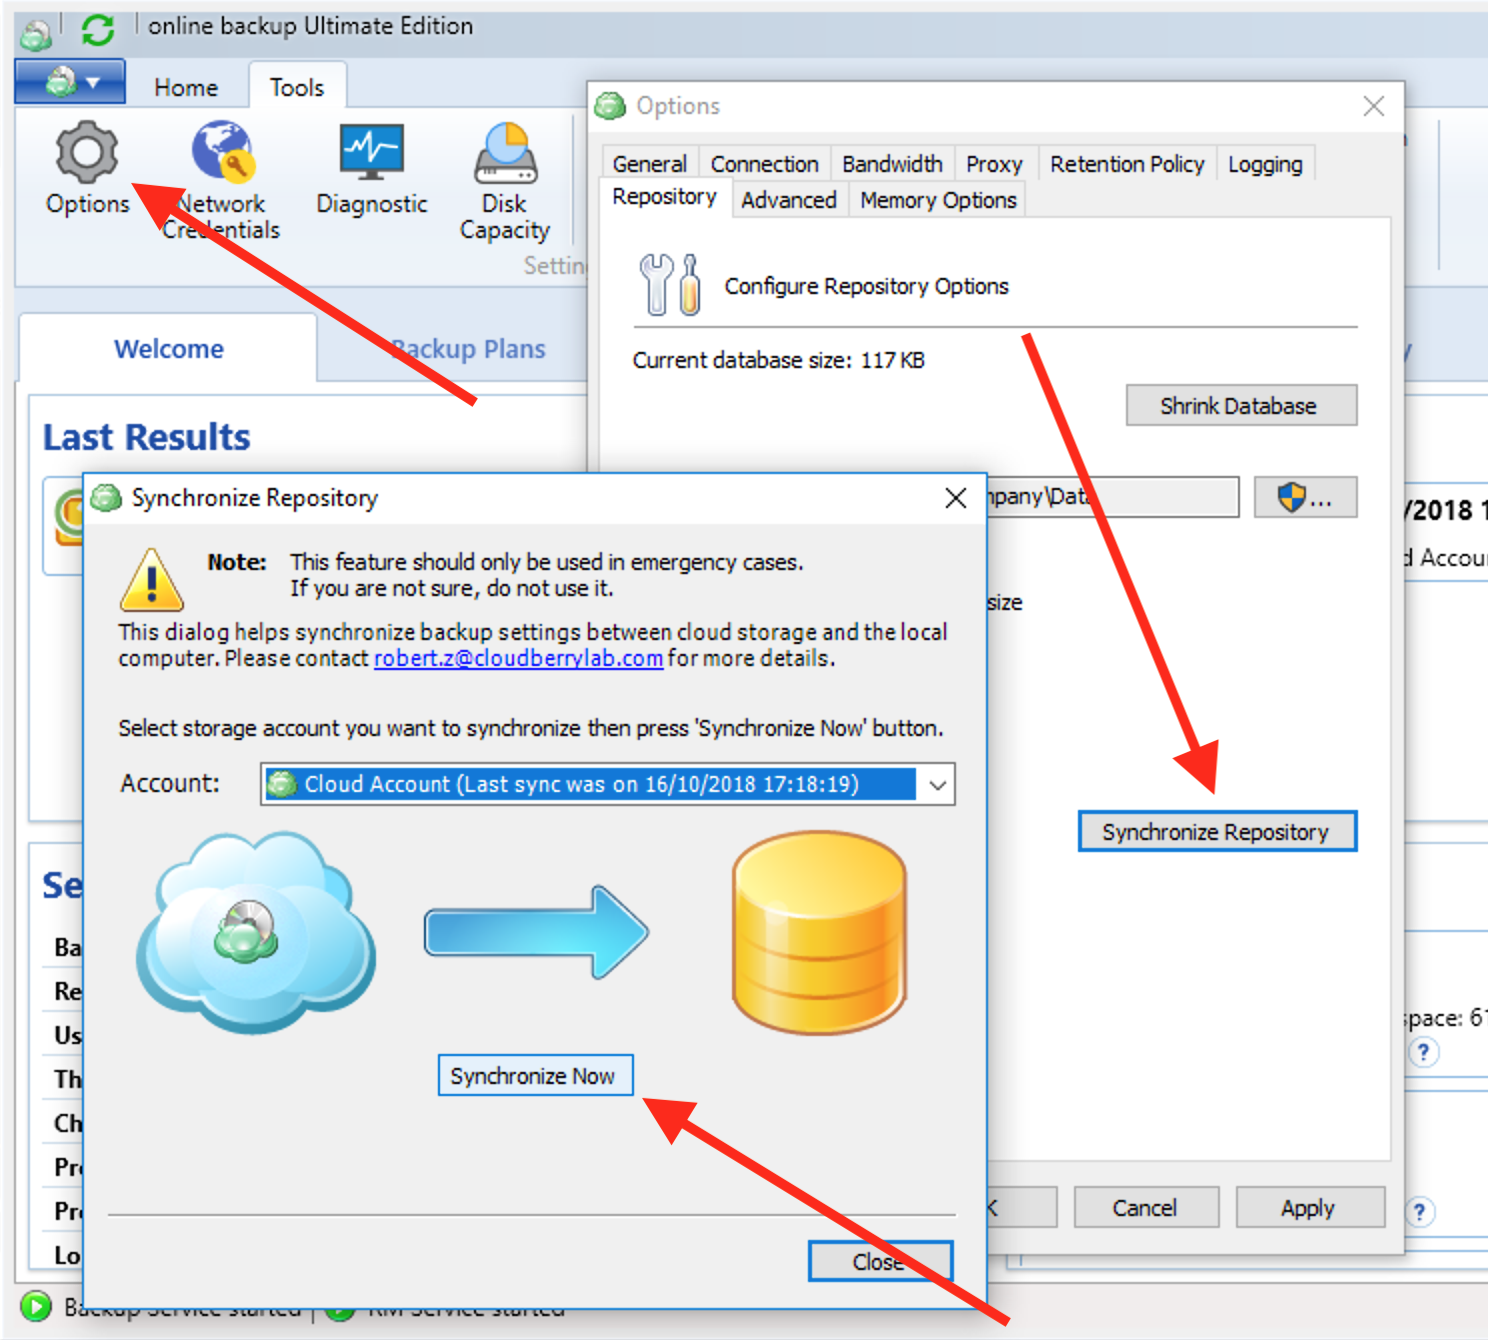
The first thing you need to do is to synchronize repository (a local database that Backup Agent uses to optimize backup processing) as Backup Agent knows nothing about the fact that your files have been uploaded to Amazon S3 using AWS Snowball Edge. To sync repository, go to the Tools | Options | Repository: Synchronize Repository and choose your Amazon S3 account there.
Once the repository is synced, the initial backup (via AWS Snowball Edge) can be considered complete. You will be able to see your initial backup files on the Backup Storage tab.
Then, to continue your incremental backups to Amazon S3, just edit your backup plan by changing the backup storage from the S3-compatible (AWS Snowball Edge) to your regular Amazon S3 account.