Restore to Azure VM Using Management Console
Management Console offers a cloud restore functionality that enables restoring the disk image backups to Microsoft Azure. This functionality requires Restore to EC2 / Azure license.
The Restore to Azure VM feature is currently provided as-is and enabled by request only. Due to limitations imposed by AWS/Azure and the unique characteristics of each cloud provider, we do not have complete control over the system stability and performance in all scenarios. If you intend to utilize this feature for real disaster recovery restores, we strongly recommend conducting thorough testing beforehand. Make sure you verify its functionality in your environment, specifically under presumed disaster recovery scenarios, and ensure that the results align with your and your customers' Recovery Time Objectives (RTO) before initiating the production restore
Note that the procedure varies depending on the type of data source (disk image backup or VM snapshot).
This chapter describes the disk image restore in Management Console to Microsoft Azure VM including preparation and related technical details.
Create User (Optional)
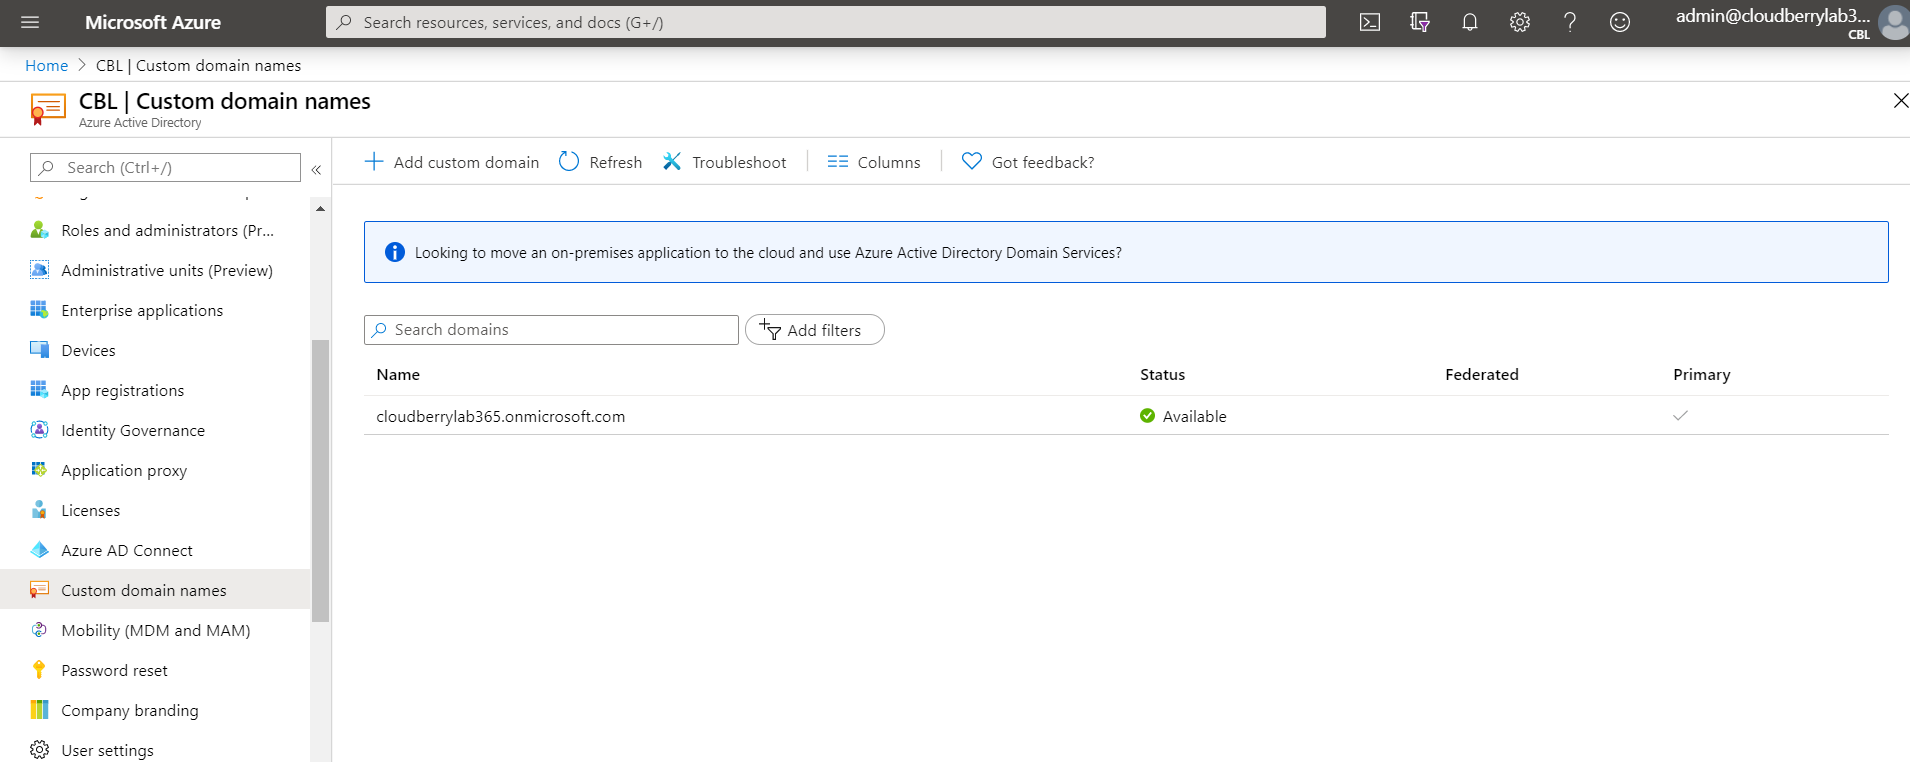
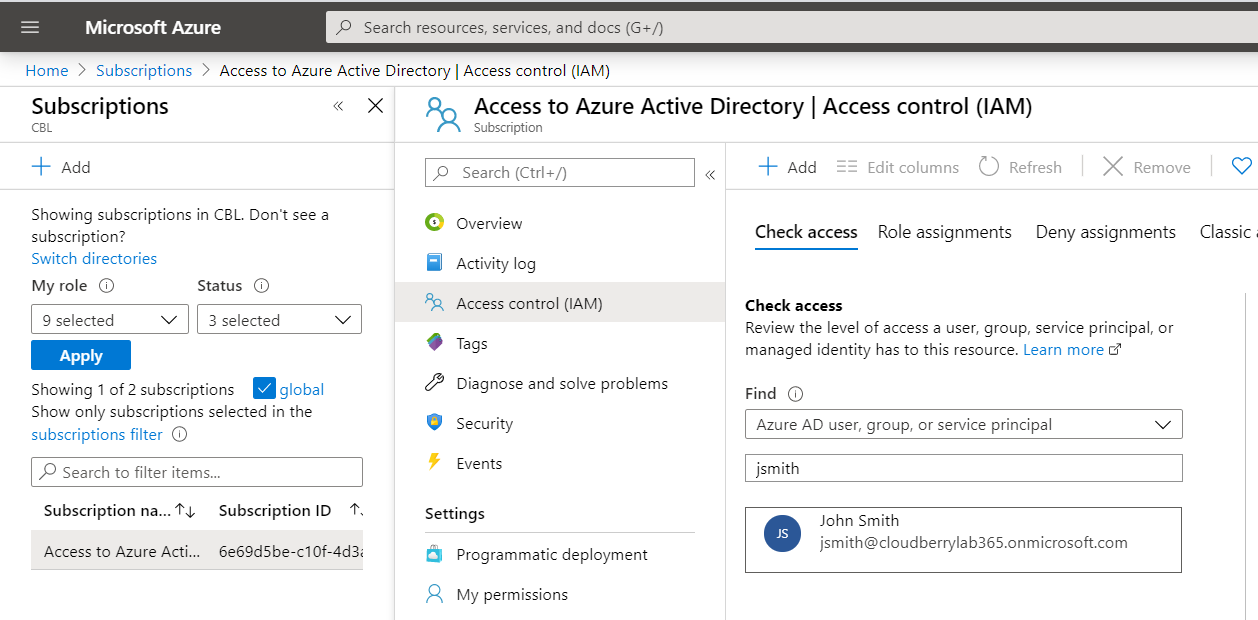
- Log in to your Azure Portal.
- Select Active Directory.
- Select Custom Domain Names and make sure which domain you use for VM restore.
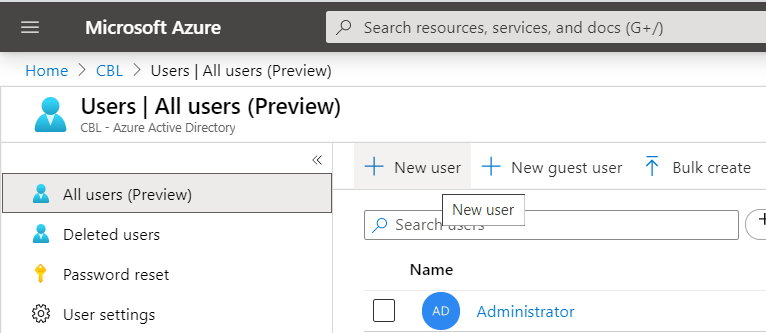
- Select Users, then click New User.
- Specify all the required data for a new user, then click Create.
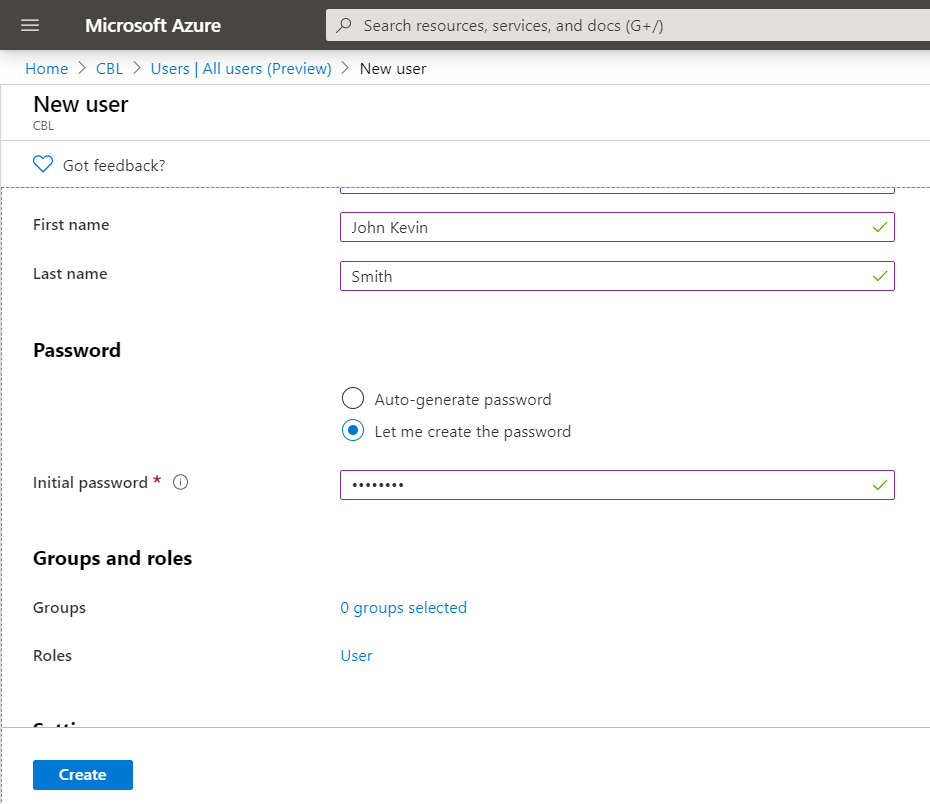
User name is the ID of the user in Azure Active Directory. Note that if you see the password while configuring user data, it means that you create the School or Working account in your domain
- Copy the specified (or automatically generated password) password. You will need it later. The initial password must be changed on your first logon.
- Assign the required subscription to this new user.
- In the main Azure portal menu, select Subscriptions.
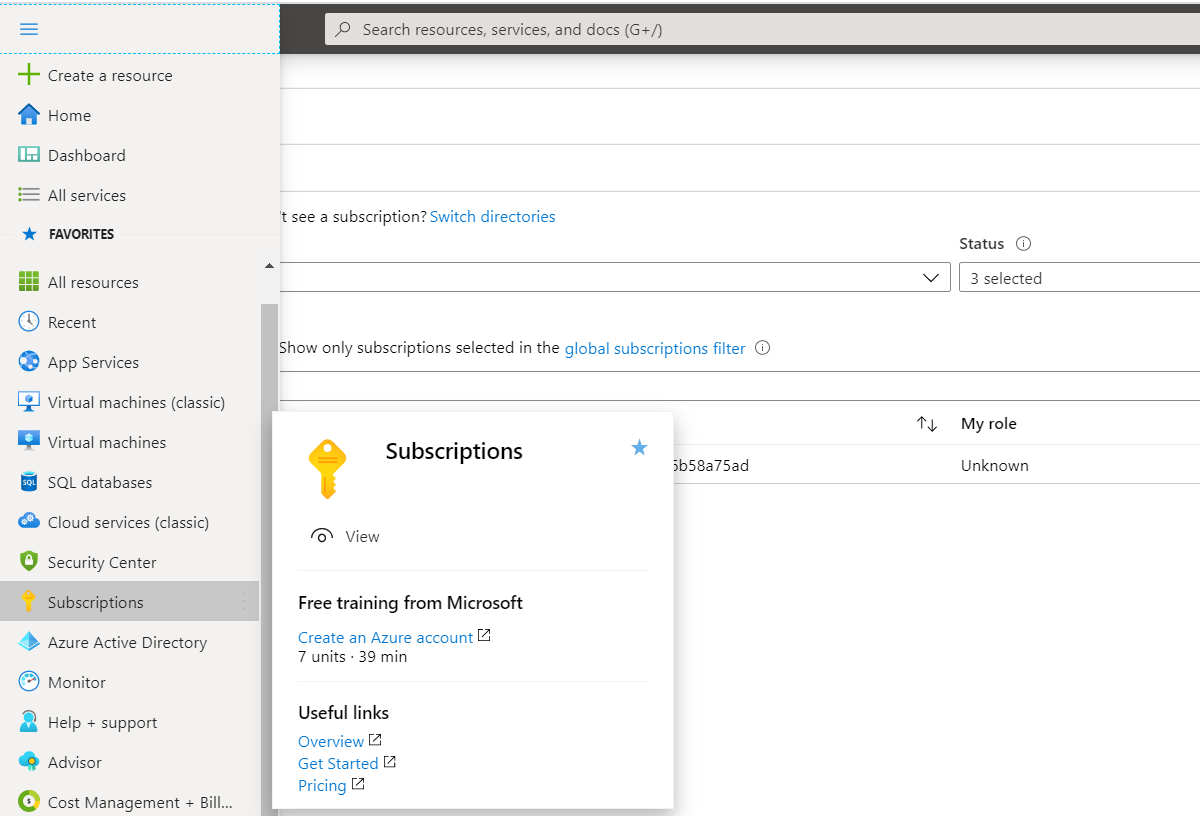
- In the Subscriptions list, select the one to use for Azure VM.
- Click Access Control (IAM).
- Add the new user to this subscription.
- Select a role with the sufficient rights for Azure VM creation.
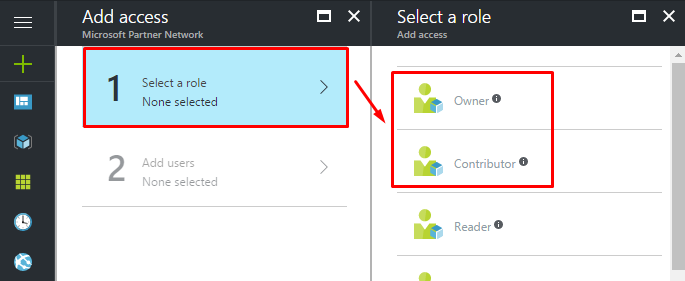
- Once you have selected the role, select the user that you recently created.
- Log out, then log in using the new user credentials, then change the initial password.
Prepare Storage Destinations
To prepare your environment for this restore job, read the article.
You also will need to set the temporary storage account, which will be used to store the intermediate .vhdx/.vhd file and perform the import operations. The .vhdx/,vhd file will be placed to implicitly selected storage. When the restore starts, the Backup Agent downloads the disk data of the backup, locally processes it in memory and then puts the blocks of the *.vhdx disk file to the remote cloud bucket.
Create Restore Plan
To restore VM image to Azure VM perform the following:
- Open the Management Console.
- On Backup select Restore to Cloud.
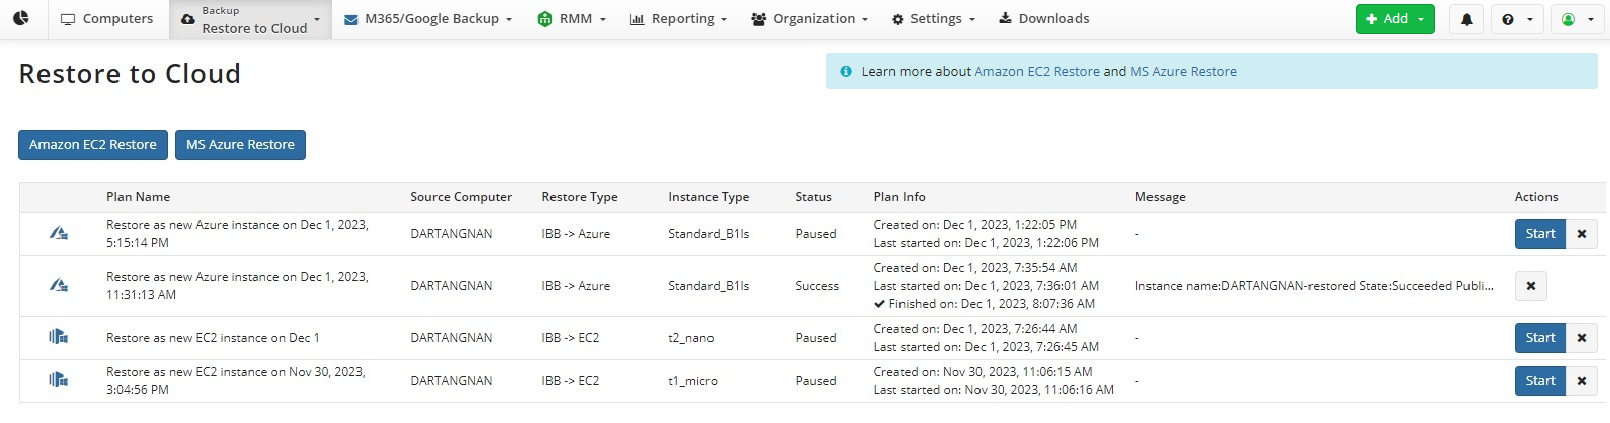
Click MS Azure Restore option
As the restore wizard opens, specify the data source parameters:
Plan Name. The plan name will appear on the Management Console
User. Select the user which storage account contains the data
Destination. Select the storage account that contains the data
Computer. Select the computer which data is to be restored
Point in Time. Select the disk image backup version to restore. Click Next.
In fact, you can even select any disk image backup: Azure as source storage is not the mandatory condition for this.
Note that for the following backup destinations: any local or shared folders, LAN-only Minio, FTP, SFTP, S3-Compatible, and OpenStack applications for NAS, intranet OpenStack clusters restore via temporary instance is unavailable
- In the second step, specify the disk partitions to restore. Once you are done, click Next.

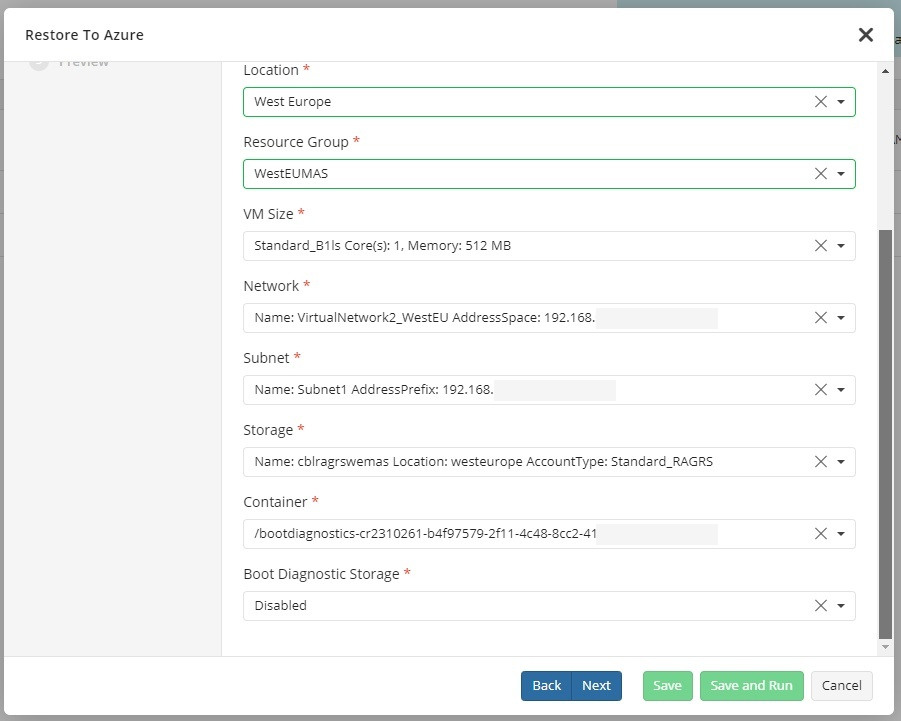
- Next, specify the target instance parameters:
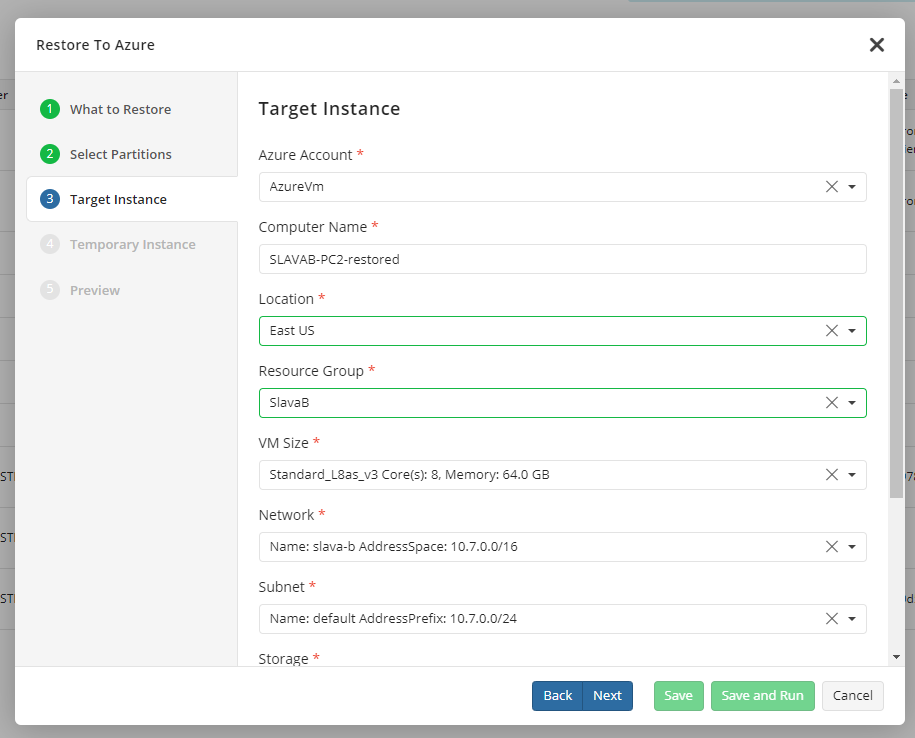
* **Azure Account**. The account under which a new Azure VM instance will be stored.
* **Computer Name**.
* **Location**. The region that is to store the newly created Azure instance.
* **Resource Group**. Azure Resource Group.
* **VM Size**. Select the required VM size that meets your [requirements in terms of cores and RAM](https://learn.microsoft.com/en-us/azure/virtual-machines/sizes).
* **Network**.
* **Subnet**. Select one of the available subnets.
* **Storage**. Select your Azure storage.
* **Container**. The Azure container is to store the temporary disk for VM import.
* **Boot Diagnostic Storage**. Select the storage where you'd like to place diagnostic files. You can leave this option disabled.
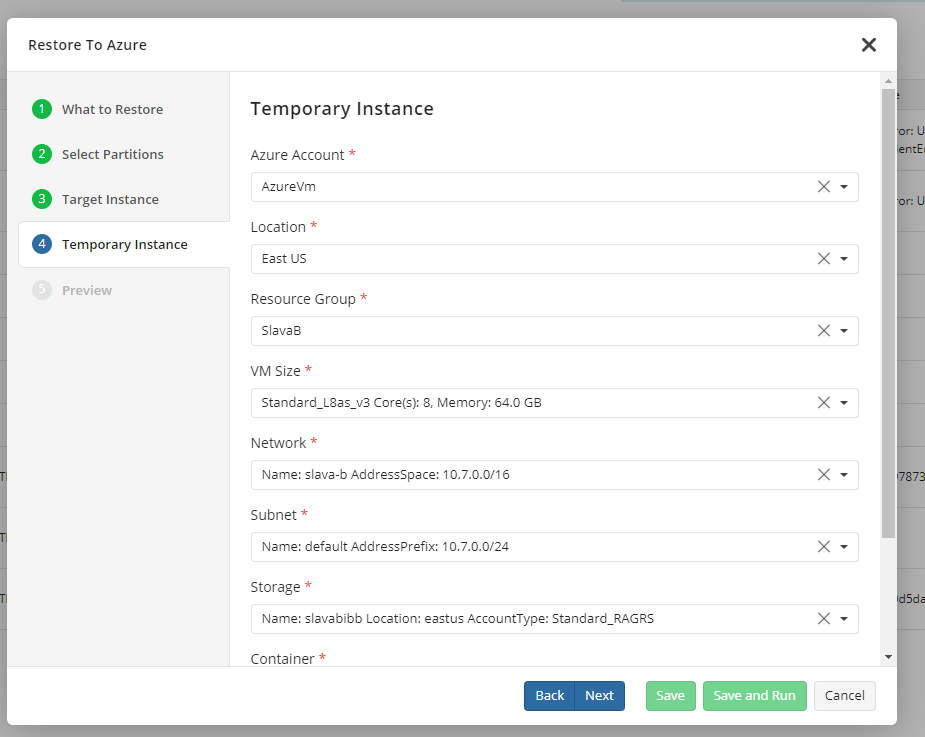
- To restore properly, Managed Backup uses a temporary Azure instance. In the next step, configure this instance's parameters. Managed Backup automatically copies the values from the previous step: if you modify these values, ensure that the target virtual machine has sufficient configuration and permissions.
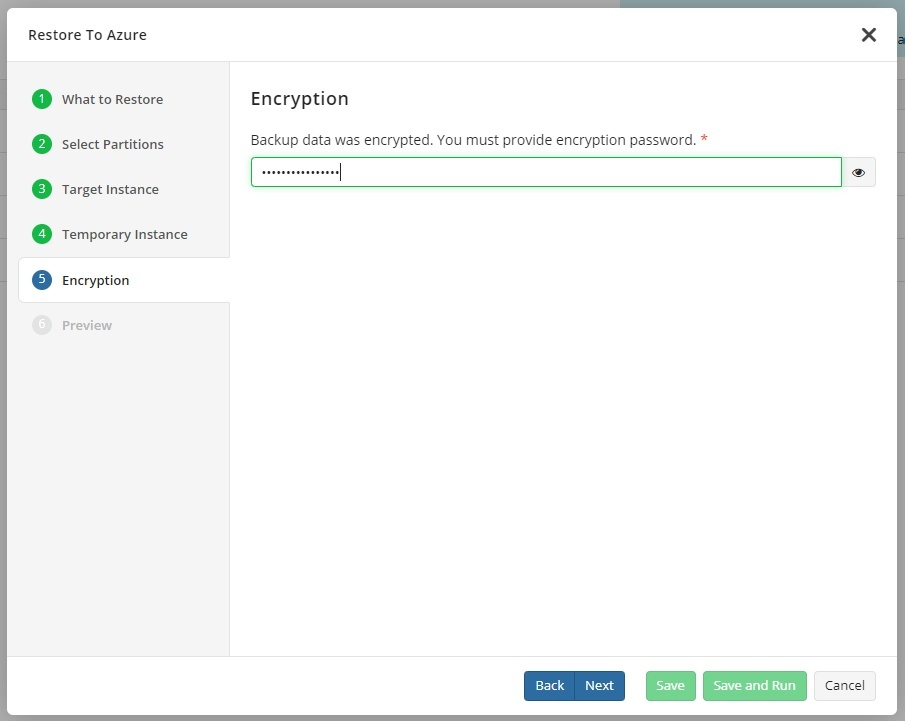
- Specify encryption password if you have encrypted objects. Consider, there is no password validation on this step. In case of wrong password, the restire will fail.
- On a Preview step, review all the specified information earlier in the wizard, make sure everything is correct, then click Save and Run to start the restore.
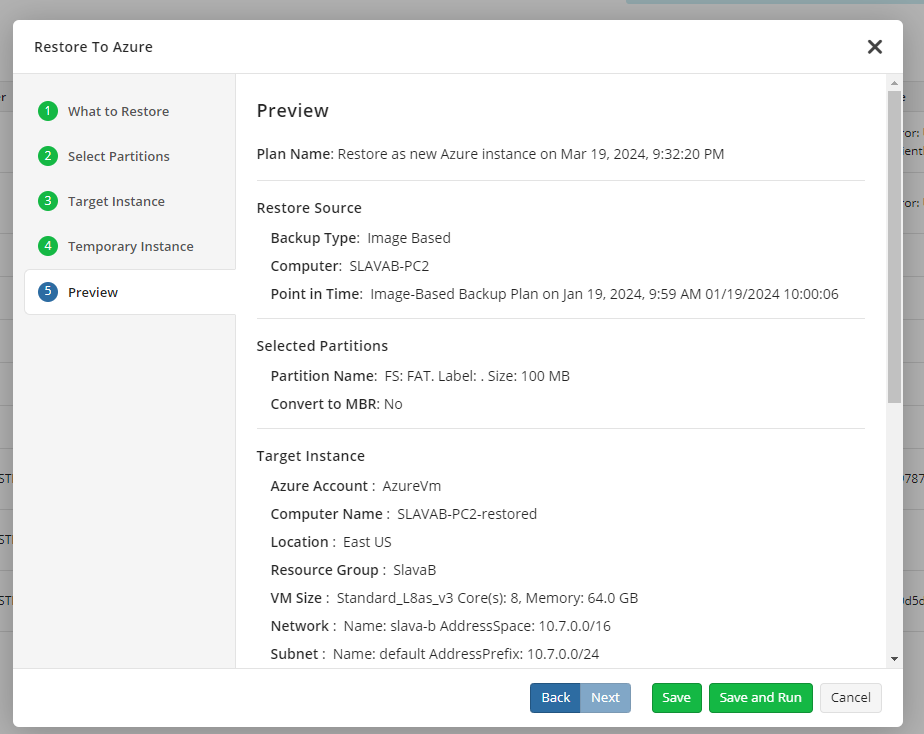
If you click Save, the plan will be saved on the **Restore To Cloud ** where you can start it manually at any time.
During the plan execution, the progress is displayed in the Management Console.
Manage Azure Instance
You can access and manage the instance from Azure Management console.
In case you have Backup or Restore Agent on restored Azure instance you also can use the Remote Management or Backup > Computers tab in the same way you usually manage your regular computers.