Restore to Another Computer In Management Console
In certain disaster recovery or data migration scenarios, you may need to restore backups to a different computer. This chapter explains how to prepare an alternate (target) computer for restore in cases where the original computer is no longer available. To perform certain steps of this procedure using Backup Agent, refer to the following article.
This procedure contains the following steps:
- Download and install Backup Agent on another computer
- Authorize the target computer with the user that was used on the original computer
- Change backup prefix to the prefix used on original computer
- Synchronize data
- Create a restore plan on target computer
Download Backup Agent to Target Computer
Backup Agent should be installed on the computer that will be used as a restore target. Download and install this software if it is not already installed. If the obsolete version of the Backup Agent is installed, update it to the latest version.
Pay attention to product edition of the Backup Agent software. Consider, for example, using VM edition for restoration of VMware or Hyper-V backup data, SQL edition for SQL backup data, or Exchange edition for MS Exchange backup data.
- Open the Management Console.
- Click Downloads.
- Find the Backup for Windows or Backup VM Edition, expand actions and select Copy link or Copy PowerShell installation script'.
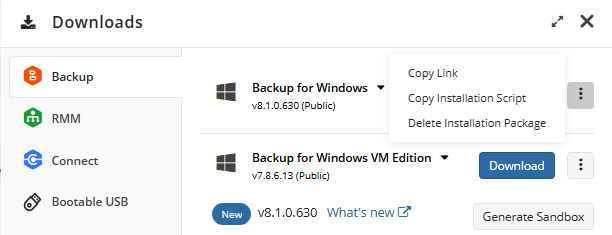
- Send the installation link or PowerShell script to the user on the target computer, or install the Backup Agent manually yourself.
Authorize Computer
As the computer appears in Management Console with Pending status, authorize it with the user credentials that were used to create a backup that is subject to restore.
If the original computer is no longer available, it is recommended to try the company and user account listed in the original computer entry on Computers

To authorize the computer, proceed as follows:
- On the Computers grid find the computer. This computer has Pending status.

- Click Authorization required.
- Select the company containing the user from the original computer, then select the user that was used on the original computer.
- Click Save.
Change Backup Prefix
This is the most important step of the procedure. You should set the same backup prefix on the storage account that was used on the original computer. A backup prefix acts as a directory within the storage account that contains the backups for a specific computer. Change the backup prefix on the storage account containing the backup to restore to the prefix that was used on the original computer.
If you are unsure which prefix was used, check all available prefixes on the storage account one by one, starting with the prefix named after the original computer
To change the backup prefix, proceed as follows:
- In the Backup, select Computers.
- Find the required target computer.
- Expand actions, select Edit, and then select Edit Account.
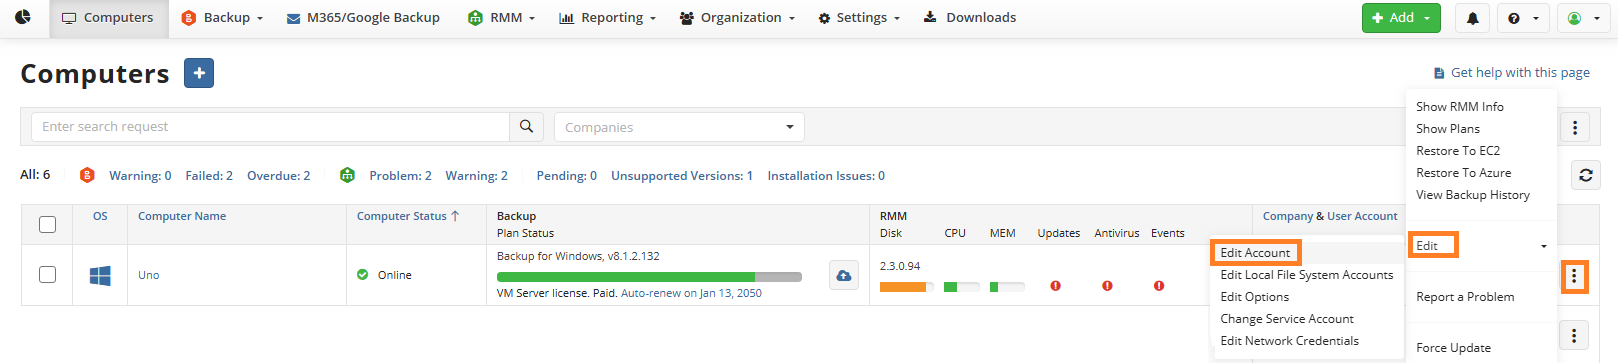
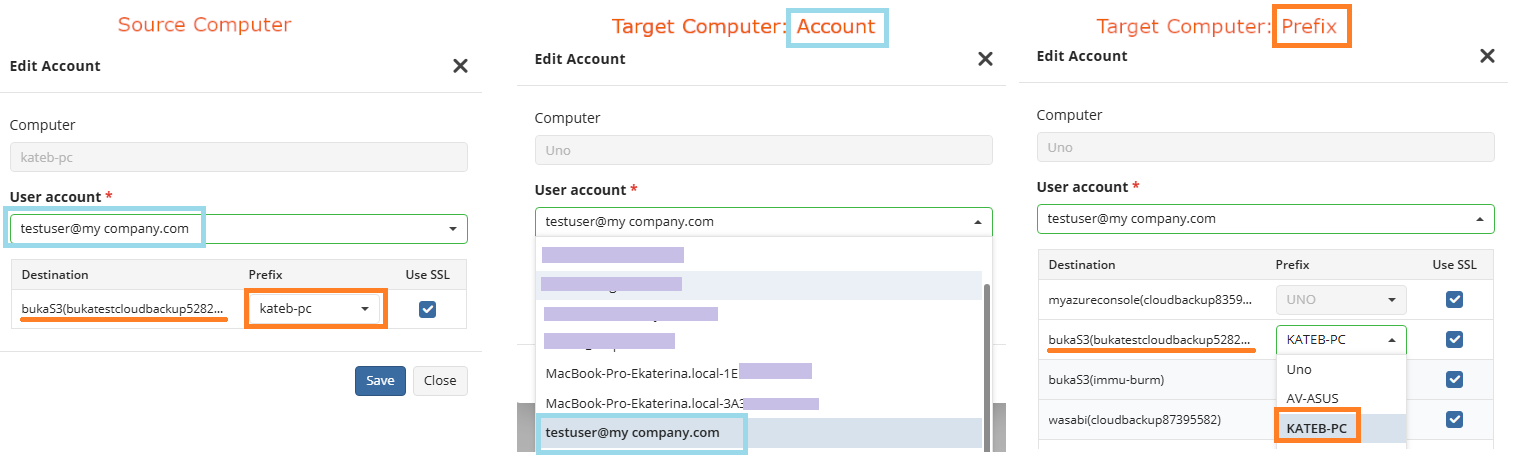
- In the Edit Account property box, locate the required storage account, verify that the correct user account (used to create the original backup) is selected, and in the Prefix column, specify the backup prefix where the original backup is stored. By default, this is the name of the computer from which the backup was originally created. For example, if the original computer was named KateB-PC and had the backup prefix KATEB-PC on the storage account bukaS3bukatestcloudbackup5282, and you are now planning to continue backups on a new computer named Uno (with a default prefix of UNO on the storage account bukaS3bukatestcloudbackup5282), you must change the prefix UNO to KATEB-PC on the target computer Uno. Change the backup prefix on the storage account containing the backup to restore to the prefix that was used on the original computer.
Synchronize Data
To retrieve information about backup contents in the backup storage, manually synchronize the repository.
Proceed as follows:
- In the Backup, select Computers.
- Find the required computer, and expand the actions.
- Select Edit, then select Edit Options.
- Open the Repository tab.
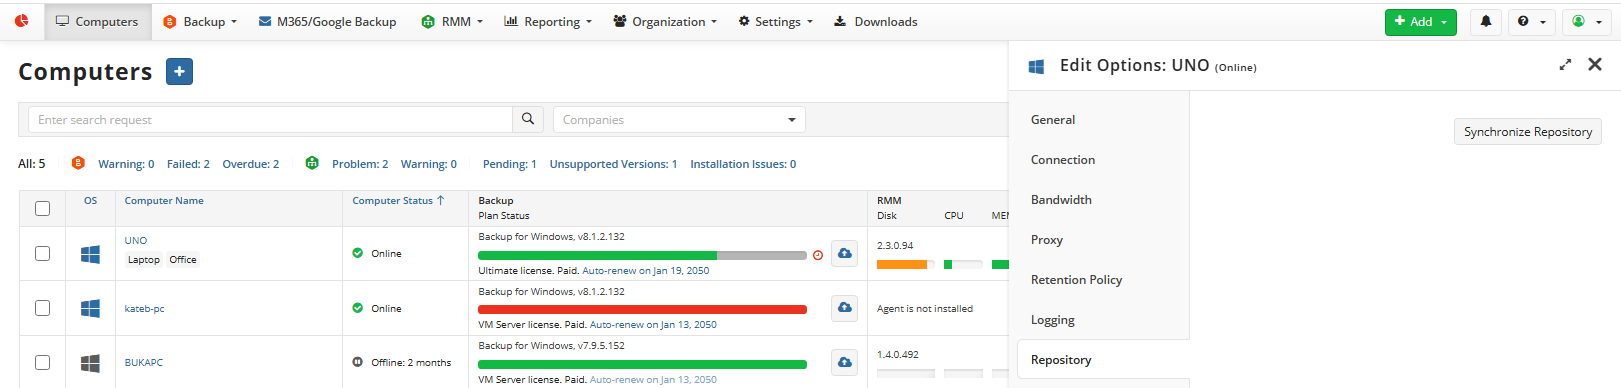
- Click Synchronize repository, then select the required storage account, then click Synchronize now
If the backup data is encrypted, you will be prompted to specify the decryption password
Now you are ready to create a restore plan.
Create Restore Plan
Once the repository is synchronized with the correct backup prefix, create a restore plan of your preference.