Disaster Recovery Scenario
This scenario allows you to help protect your data on computers running Windows and/or virtual machines using a disaster recovery server.
- Create sheduled image-based backup using Management Console or Backup Agent backup or virtual machine backup (Hyper-V or VMware).
It is recommended to use application processing if the virtual machine is in running state
Select backup storage taking into account the possibility of data egress fees on the cloud backup storage. You will need regular restore from this backup storage. Check the backup storage provider documentation to avoid extra costs.
- Prepare disaster recovery server with enabled Hyper-V role. Use the same user as on a backed up machine. This is a must. If multiple servers are required, they must all use the same user. The disaster recovery server should have enough space to store the virtual disk of the full disk image.
- Create scheduled restore plan to the VHDX virtual disk on the disaster recovery server.
This allows you to have up-to date restore point (unmounted VHDX virtual disk) on the disaster recovery server.
It is not recommended to mount the virtual disk in Hyper-V until the actual restore is needed, otherwise, the scheduled restore job may fail
To perform disaster recovery just create a Hyper-V machine and select the restored disk as a virtual disk.
Image-Based Restore with Management Console
This procedure only describe the details that are important for this scenario. In case you need step by step instructions on how to create restore plan refer to the this article.
To create a new restore plan, proceed as follows:
- Open the Management Console.
- On Computers select Remote Management if you use legacy main menu, or open Backup > Computers page in the new main menu.
- Find the required computer, then click the Configure icon in the Backup Plan Status column.
- On the side panel, click + or +Add New Plan,
- In the Restore group, select Image-Based.
Proceed with the wizard.
Plan Name Step
Select the Save Restore Plan option to save the plan configuration for future use. Specify the name of the plan. Click Next.
Select Backup Storage
Select the backup destination that contains the required backup from the list. Click Next.
Select Computer (optional)
This restore wizard step appears only if the specified backup destination contains several backups from different computers. Select the required computer. Click Next.
Select Backup
Select the backup to restore from the list of available backups. Click Next.
Select Restore Point
Select Latest Version. Click Next.
Type of Data
Select the Restore as Virtual Disk option, then select the virtual disk format (VHDX virtual disk) from the list of available formats
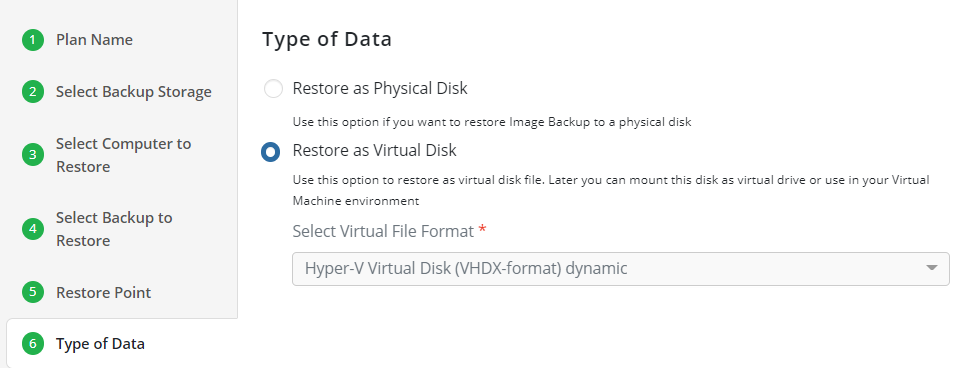
Click Next.
Select Partitions
Select all required partitions to restore.
Note that selected partitions must include system volumes as they contain data required to boot the operating system
In case you need a BIOS boot partition, select the Convert GPT to MBR check box. Read more about this option in the Convert GPT Disks to MBR chapter.
Click Next.
Select Destination
Select the specific partition on the disaster recovery server. Click Next.
Encryption Options (optional)
Enter the encryption password if your backup is encrypted. Click Next.
Schedule Options
Specify the schedule for the restore plan. It is recommended to schedule the restore plan after the backup plan scheduled on the step 1. It would be good to schedule it a several hours later. Click Next.
Proceed with the wizard, then click Save to finish the wizard.
Image-Based Restore with Backup Agent
If you prefer to use the Backup Agent to create a restore plan, refer to this article.