Add Storage Account (S3 Compatible)
This chapter covers the following topics:
- Add New Storage Account
- Add Backup Destination for Storage Account
- Native Multipart Upload
- Edit Storage Account
- Forever Forward Incremental Support
- Delete Storage Account
- Manage Backup Destinations for Users
- Add New Storage Account (Legacy)
Add New Storage Account
To manage this feature, the Backup > Storage Account permission should be granted as the administrator permission on Organization > Administrators.
As of Management Console 9.2, the compatibility of the storage account you are adding is automatically checked using the built-in S3 Storage Checker tool. You will be notified if the storage has limited compatibility or is not supported.
To Add a New Storage Account
- Open the Management Console.
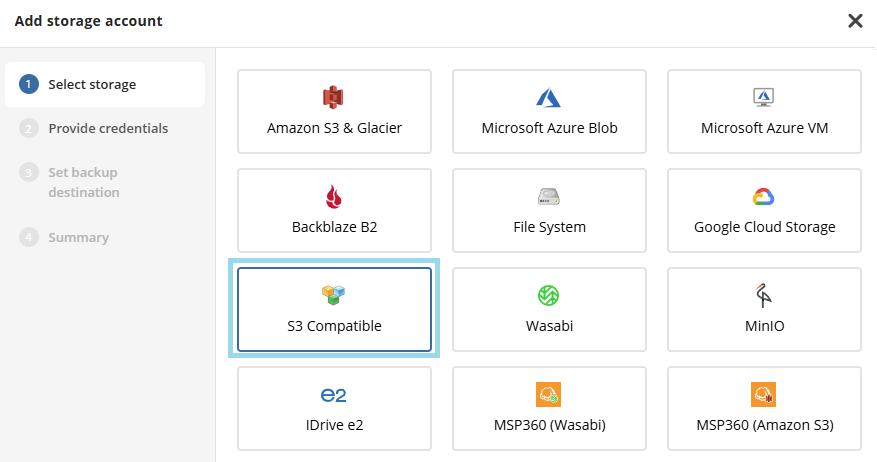
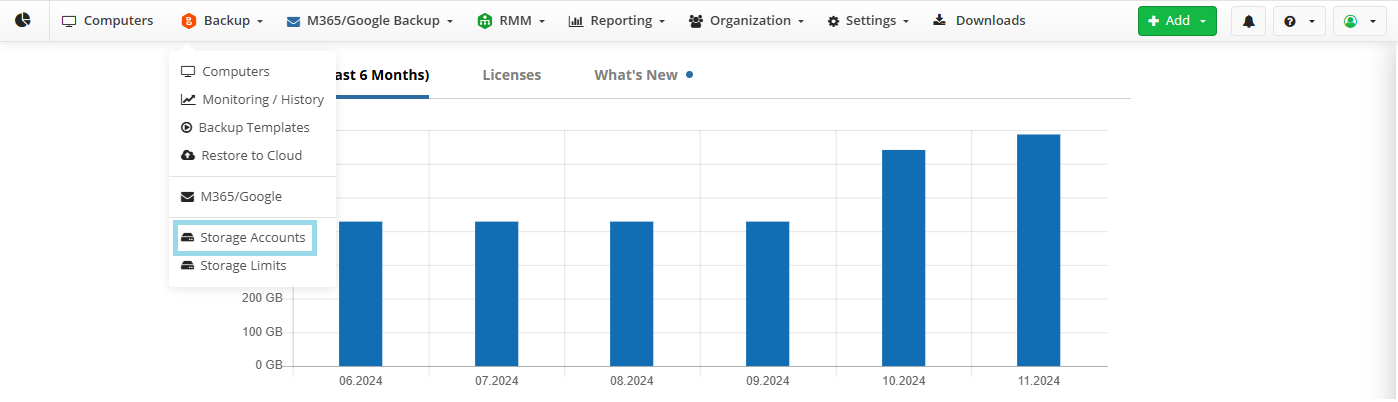
- On Backup > Storage Accounts, click + to open the Add storage account wizard.

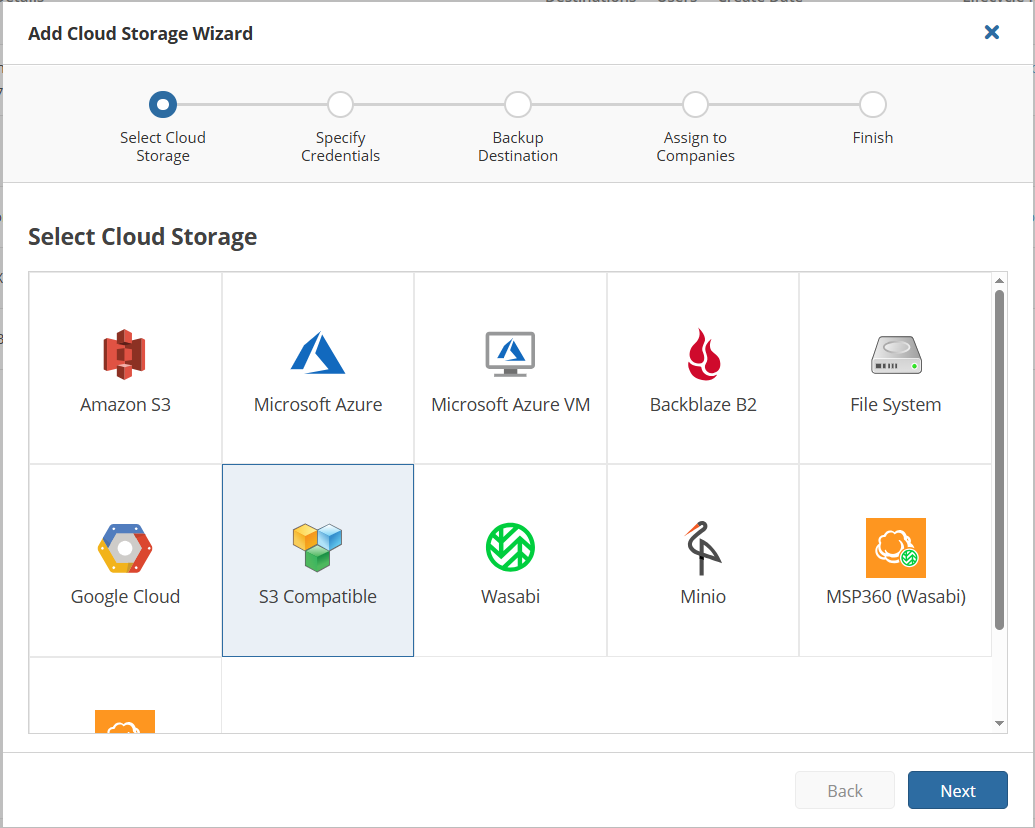
- Select S3 Compatible. Click Next.
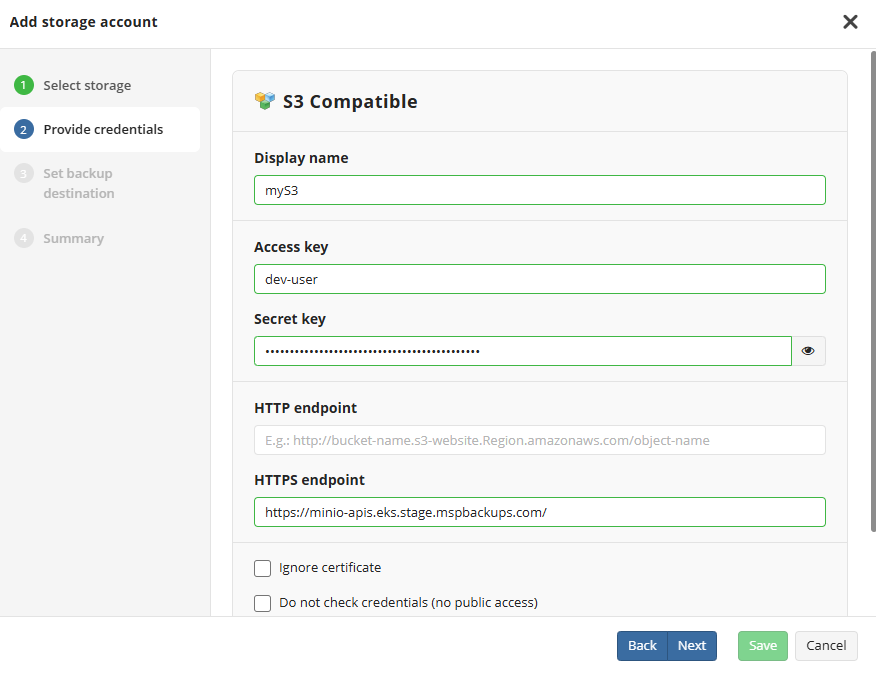
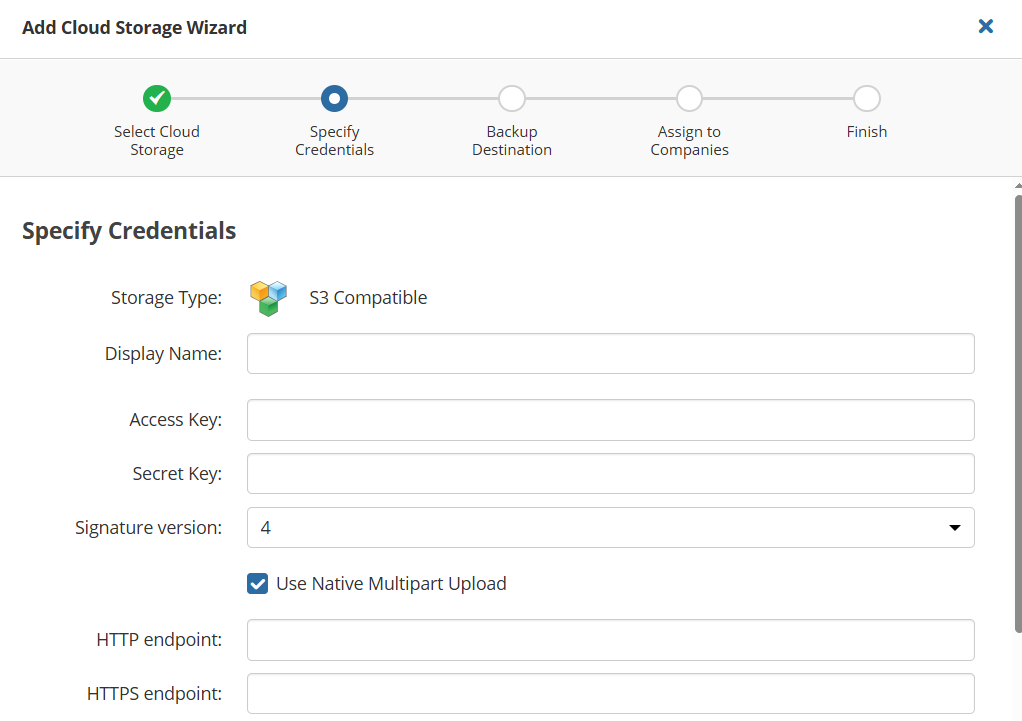
- Specify the following information:
- Display name for the backup destination (required).
- Access key (required). Provide the access key to authorize access to the storage.
- Secret key (required). Provide the corresponding secret key.
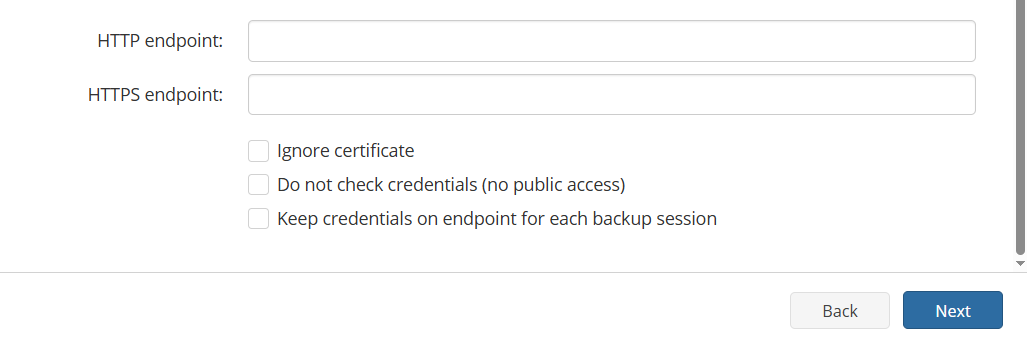
- HTPP endpoint or HTTPS endpoint. Specify your storage account endpoint depending on protocol in use.
- Ignore certificate. Choose whether to ignore the SSL certificate. Enable this option only if your storage uses a self-signed SSL certificate and you are experiencing certificate issues.
- Do not check credentials (no public access). Enable this option for storage deployed in a local network. With this option selected you cannot delete backup data using Management Console features.
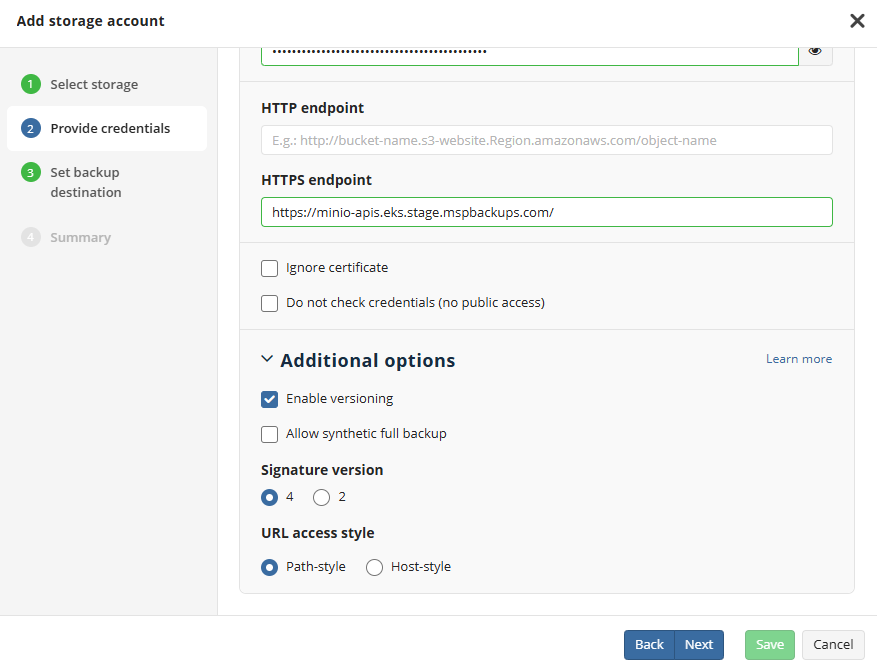
- Additional options should only be specified is this is definitely needed for your purposes. You should carefully check availability of all options, if you are planning to change them. By default, the recommended options are set.
- Enable versioning. Clear this checkbox if versioning is not needed.
- Allow synthetic full backup. Enable this option if your storage supports this feature.
- Signature version. By default, this option is set to Version 4. Use Version 2 only for backward compatibility (not recommended).
- URL access style. By default, this option is set to Path-style. You can change it to Host-style, if needed.
Click Next. Managed Backup will verify the availability of the storage.
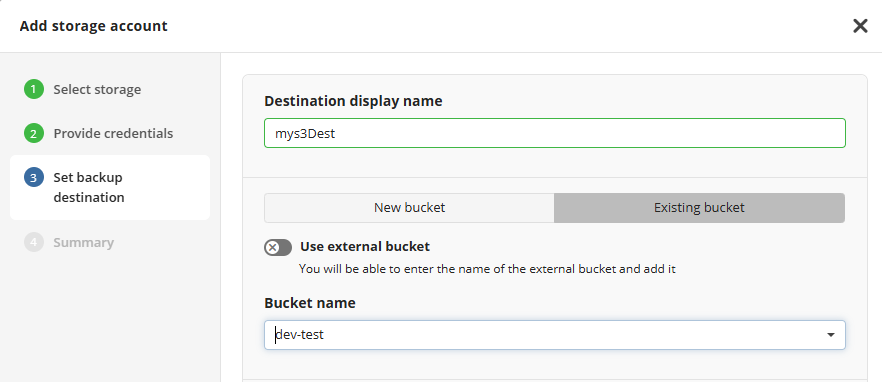
Specify the bucket. In the Destination display name field, specify the bucket name which will be displayed as a backup destination, then select whether you will use an existing bucket or create a new one:
- Select the New bucket option to create a new bucket. Name the bucket. The new bucket will be created in the region associated with provided credentials. Object Lock (Immutability) feature is enabled by default. Disable it if this functionality is not needed.
- Select the Existing bucket option to use the existing bucket, then select it in the drop-down list. Also you can select an external bucket you have access to. For the buckets with Object Lock turned on, you can enable Object Lock (Immutability)feature. Otherwise this functionality will be permanently disabled.
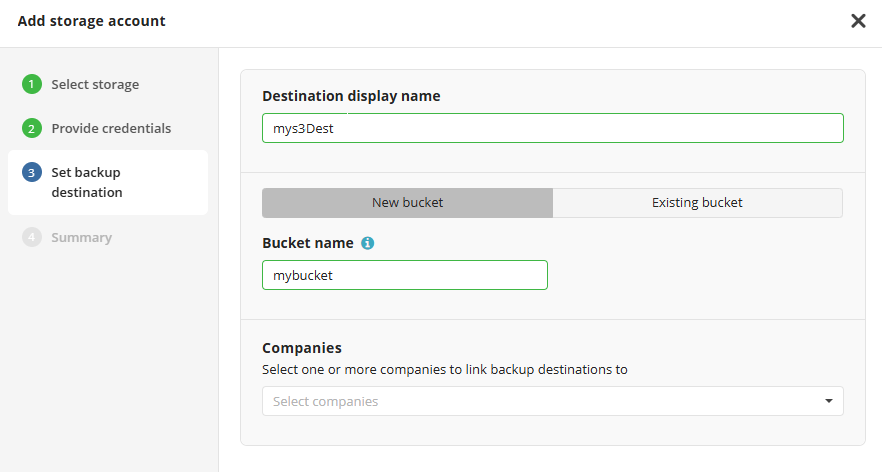
Select the companies to assign to the storage account.
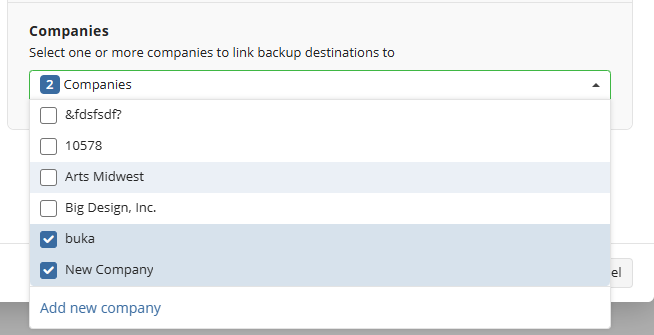
Note that it may take a while to assign companies and users to the storage account
- Click Next.
- View the storage account summary, then click Save.
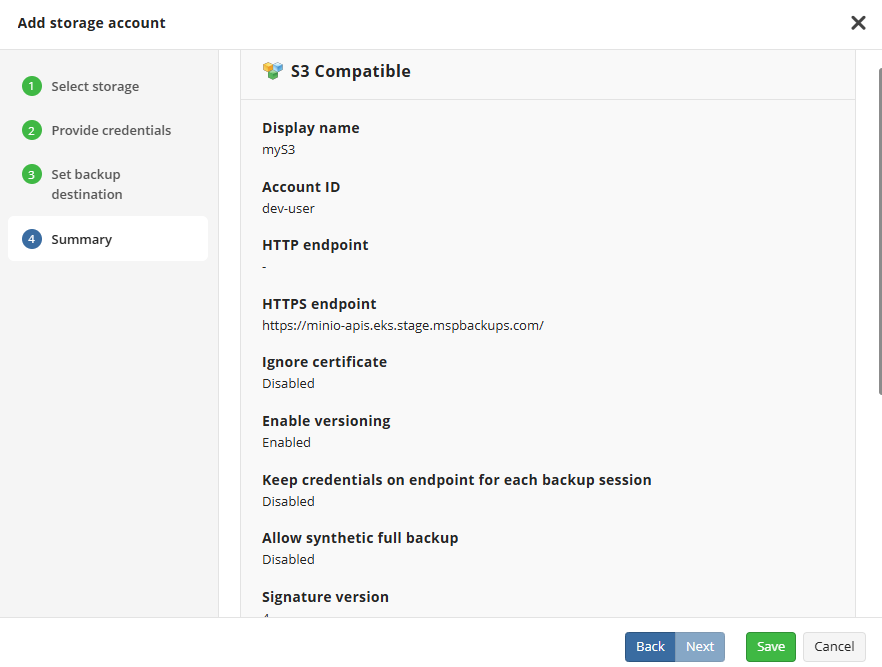
Added S3 Compatible storage account appears in the grid.
Refer to Manage Storage Accounts for more information on how to manage the added IDrive e2 storage account.
Add Backup Destination for Existing Cloud Storage Account
- Open the Management Console.
- On Storage select the Storage Accounts item if you use legacy main menu, or open Backup > Storage Accounts page in the new main menu.
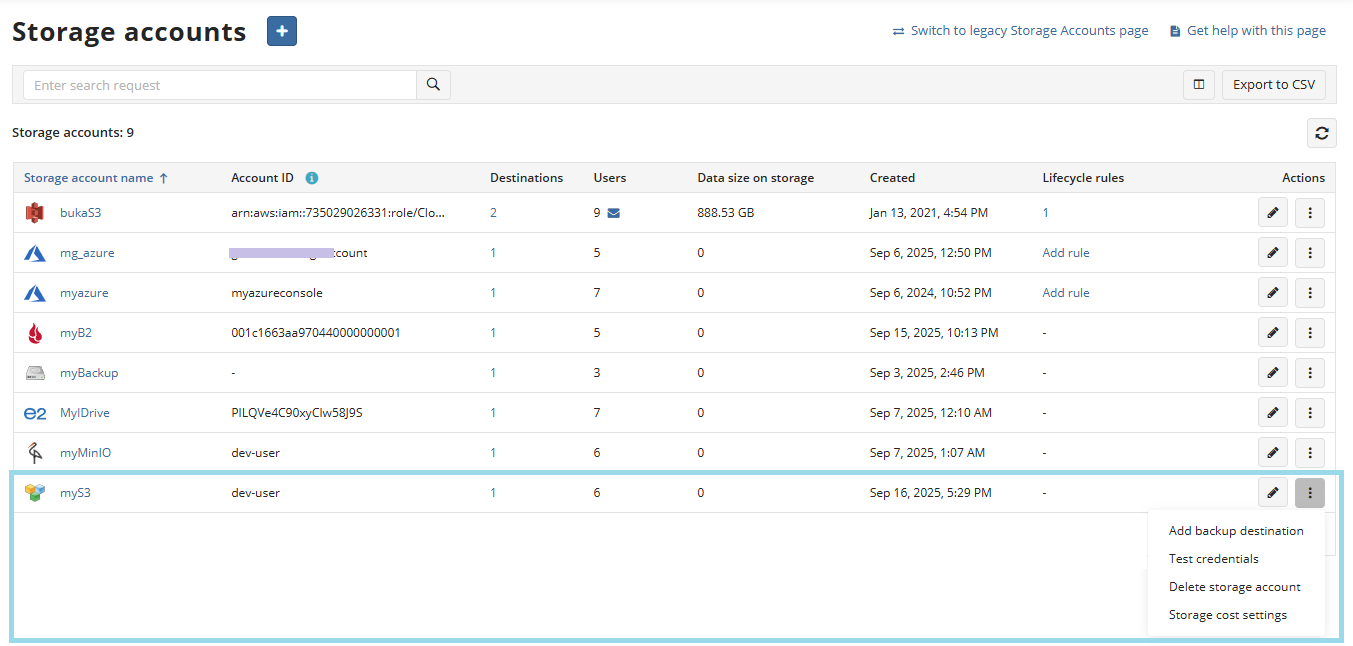
- Find the storage account you want to add a new backup destination, then expand actions.
- Select Add Backup Destination.
- Specify the bucket or container or create a new one.
- Next, select companies or users to apply this backup destination.
- Click Save.
Edit a Storage Account
To Edit a Storage Account
- Open the Management Console.
- On Storage select the Storage Accounts item if you use legacy main menu, or open Backup > Storage Accounts page in the new main menu.
- Find the storage account you want to edit, then expand actions.
To modify the display name, select Edit display name, then specify the new storage account name
To change the storage account credentials and properties, select Change Credentials
To specify storage cost settings for the billing, select Storage Cost Settings, then specify the storage cost settings that will be applied for this storage account.
- In the Cost per GB field, specify your own expense rate per GB for the storage account
- In the Price per GB field, specify the end user price per GB
- Optional: Add Custom Pricing, if needed:
- Custom Price for a Specific Company. Click Add Custom Price by Company, enter the custom expense and end user price per GB for that company.
- Custom Price for a Specific User. Click Add Custom Price by User. Enter the custom expense and end user price per GB for that user.
To add the new backup destination for the storage account, select Add Backup Destination
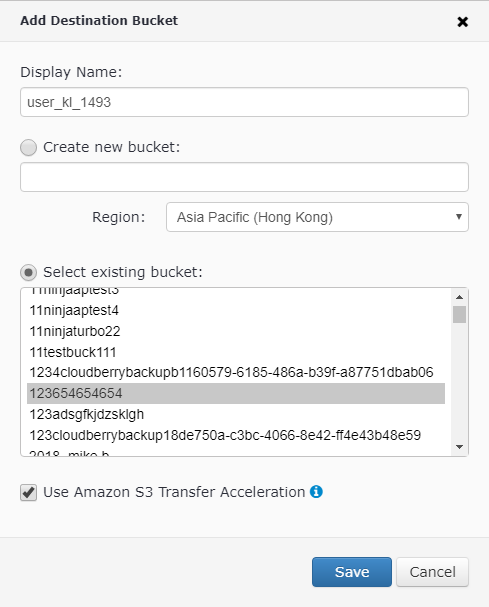
- In the Add destination bucket dialog box, specify the backup destination settings:
- In the Display Name field, specify the backup destination name
- Select the Create New Bucket option to create a new bucket for the backup destination
- Select Select existing bucket option to specify the existing bucket for the backup destination
- To specify the lifecycle rule for the storage account, select Lifecycle Rules Settings, if available.

There are some required actions to manage Lifecycle Rules Settings for Microsoft Azure. You cannot perform some operations with the added Microsoft Azure backup storage if these actions won't be performed.
To learn more about Amazon lifecycle rules, refer to the S3 Lifecycle Policies chapter.
Forever Forward Incremental Support
Forever Forward Incremental (simple schedule) requires the Synthetic Full backup enabled.
Synthetic backup is a backup type that creates a full backup using in-cloud data copying. This backup type is required for Forever Forward Incremental backup. If a plan type and backup destination support synthetic backup, it will be switched on automatically, but for MinIO and other S3-compatible storage accounts, the synthetic full backup can be enabled in the storage account properties.
To successfully enable synthetic full for the backup storage, perform the following steps:
- Enable the synthetic full backup in storage account properties .
- Create files backup plan for testing purposes using this backup storage destination. Run this plan manually once.
- Force the synthetic full backup for this backup plan. In case the forced backup plan run is successful, you can use this backup plan destination to create backup plans with a Forever Forward Incremental schedule.
Step 1. Enable Synthetic Backup for Backup Storage Destination
Management Console
To enable the synthetic full backup for your S3 Compatible storage account, proceed as follows:
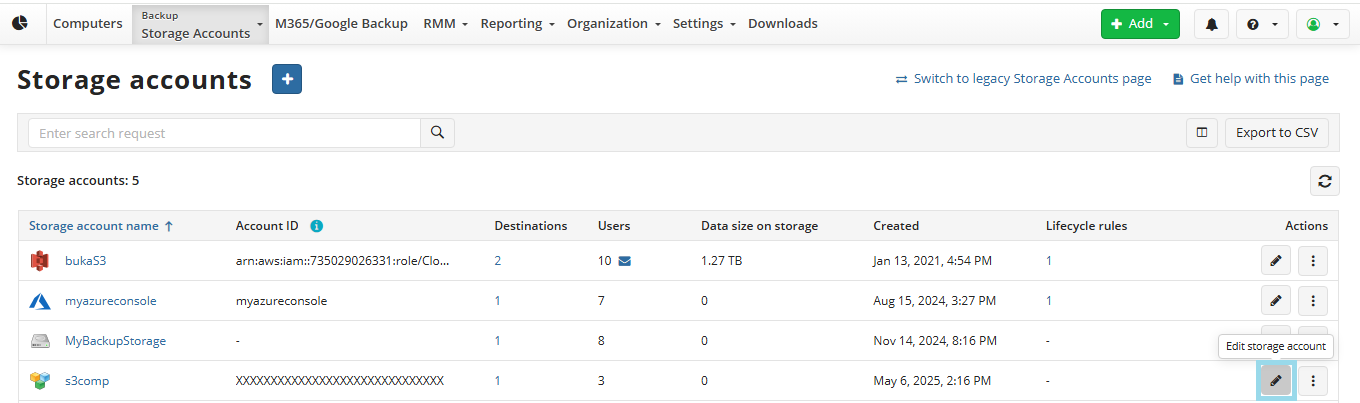
In Management Console navigate to Backup > Storage Accounts.
New Storage accounts page
- Find the required storage account, then click the edit icon.
- On the **Provide credentials step, expand Additional options to allow the synthetic full backup.
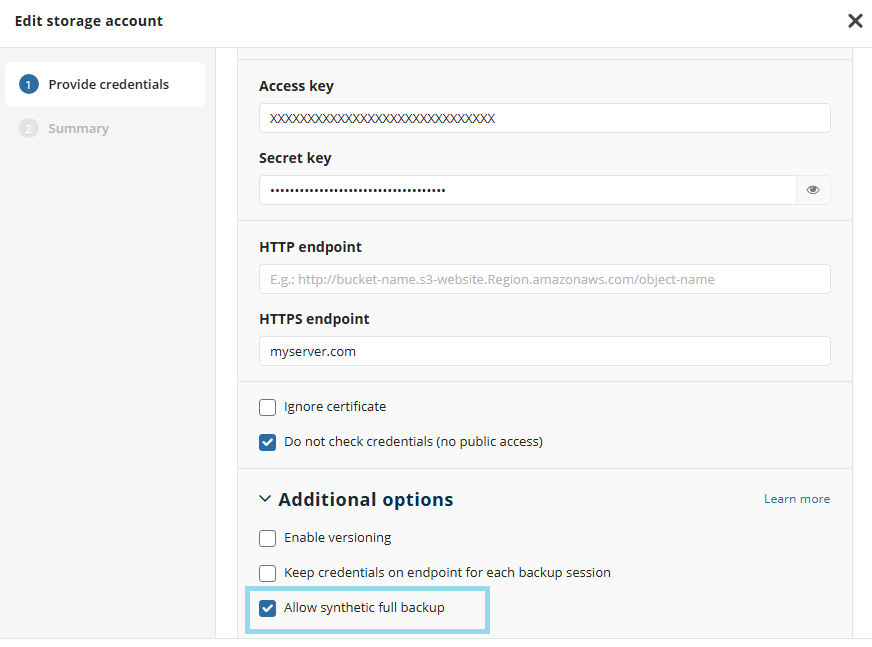
Click Next, review the summary, and save your changes.
Legacy page
- Find the required storage account then expand actions and select Change Credentials.
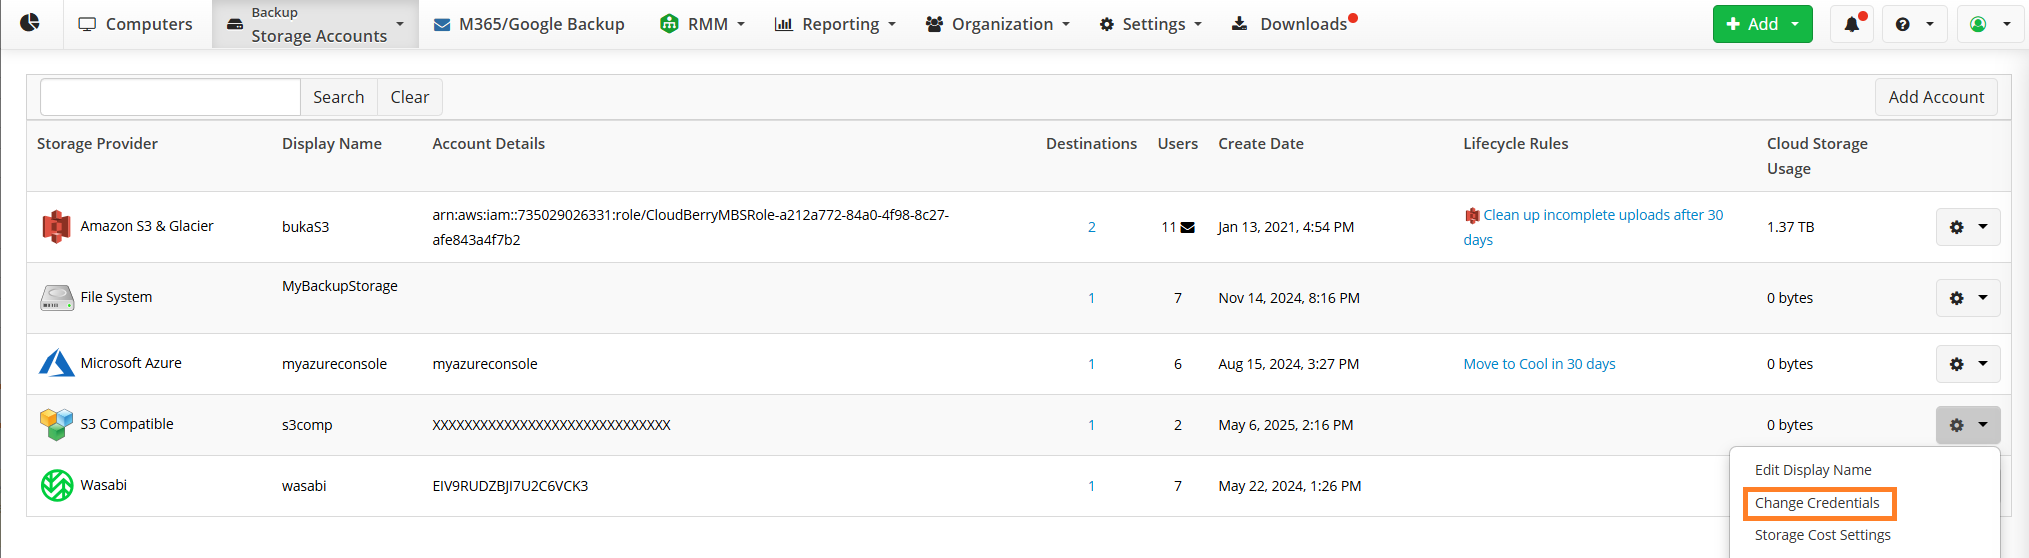
- Click Allow Synthetic Full backup.
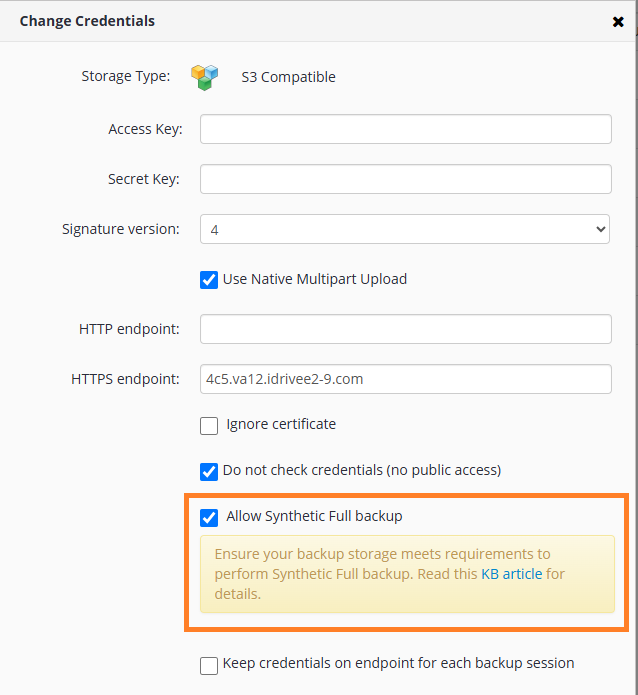
- Save your selection.
Backup Agent
To enable the synthetic full backup, proceed as follows:
- In the Backup Agent application menu, select Edit Storage Accounts.
- Find the required storage account then click Edit.
- Click Advanced Settings.
- Select the Use synthetic full backup checkbox.
- Click OK.

Step 2. Create Backup Plan for Testing Purposes
Synthetic backup applies for the following backup types:
- File-Level Backup
- Image-Based Backup
- VMware Backup
- Hyper-V Backup
For testing purposes, it is recommended to create a Files Backup plan.
Step 3. Force Synthetic Backup for Backup Plan
To force a synthetic backup for testing purposes:
Management Console
- Open Backup > Computers.
- Find the required computer, then click the Configure icon in the Backup Plan Status column.
- On the side panel, navigate to the Backup Plans tab
- Find the plan to run.
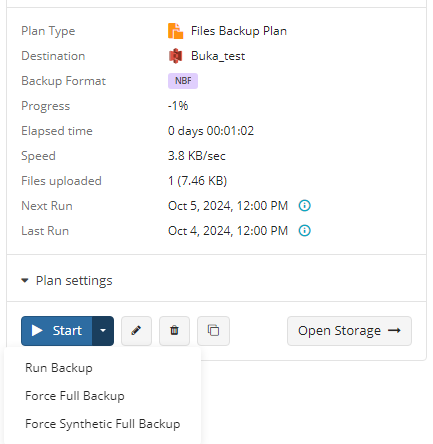
- Expand this control to use the following option:
- Force Synthetic Full Backup
Backup Agent
- In the application expand the backup plan you want to run a synthetic full backup for.
- On the Run control, open the drop-down menu.
- Click Force Synthetic Full Backup.

Check whether this backup plan run is completed successfully. It is recommended to perform a test restore using this backup plan.
Native Multipart Uploads
For backup plans in the new backup format, the enabled native multipart uploads are required for S3-compatible storage destinations. Before backing up, mind to make sure if this option is enabled in the storage account settings. To do this, proceed as follows:
- Open the Management Console.
- In the Storage menu, select the Storage Accounts item.
- Find the required storage account, click the Settings icon.
- Select Change Credentials.
- Select the Use native multipart upload checkbox.
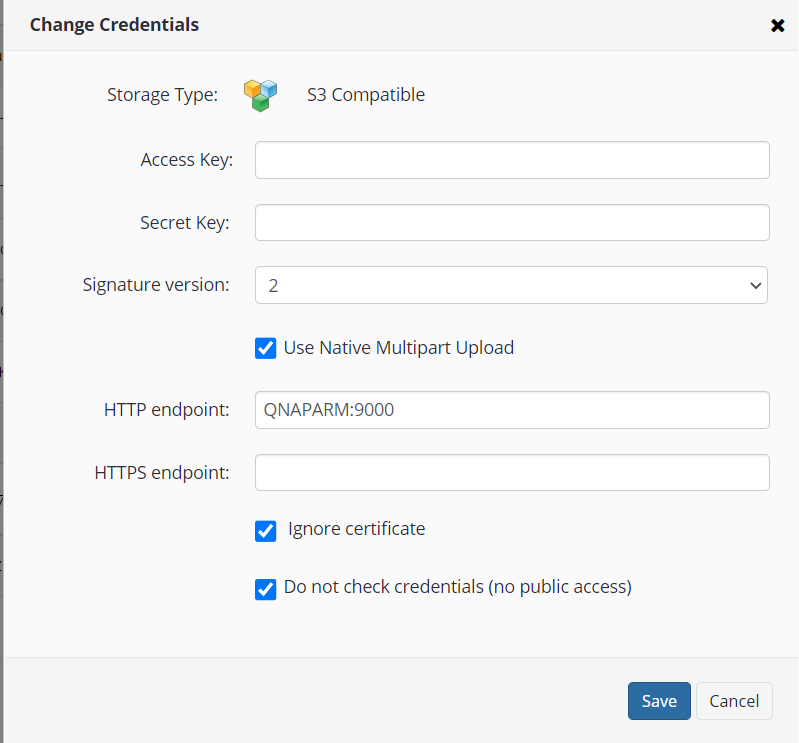
- Click Save.
Delete Storage Account
To delete a Storage Account
- Open the Management Console.
- On Storage select the Storage Accounts item if you use legacy main menu, or open Backup > Storage Accounts page in the new main menu.
- Find the storage account you want to delete, then click the Settings icon.
- Select Delete Account, then confirm the storage account deletion.
Manage Backup Destinations for Users
To Manage Backup Destinations
- Open the Management Console.
- Open Backup > Computers page.
- Find the computer you want to modify the backup destination settings, then click the Settings icon.
- Select Edit, then select Edit Account.
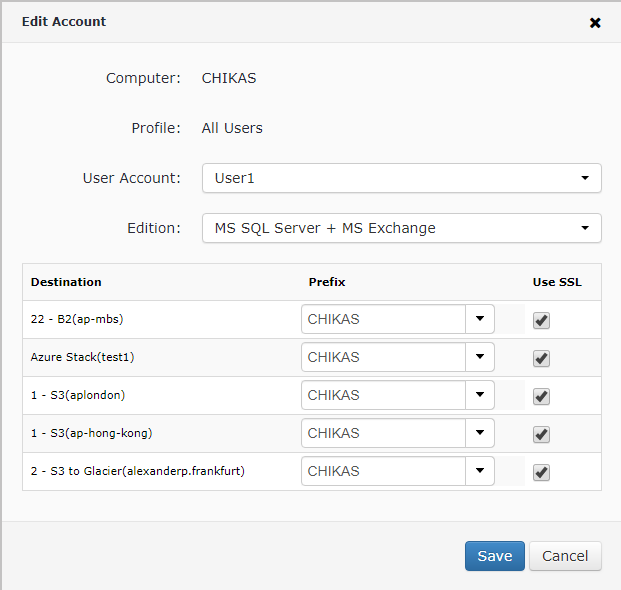
- In the User Account drop-down list, select the user for the storage account
- In the Edition drop-down list, select the license type for the storage account
- In the Backup Destination table, select computers for specific backup destinations. In the SSL column, enable the SSL protocol for connections.
- Once you are finished with settings, click Save.
Add New Storage Account (Legacy)
To manage this feature, the Backup > Storage Account permission should be granted as the administrator permission on Organization > Administrators.
To Add a New Storage Account
- Open the Management Console.
- Open the Backup > Storage Accounts page in the main menu.
- Click Add Account to open the Add Cloud Storage wizard.

- Select the S3 Compatible storage provider.
- Click Next.
- Specify the required information to access the storage account.
- Display Name (required). Specify the name for the storage account.
- Access Key (required). Provide the access key to authorize access to the storage.
- Secret Key (required). Provide the corresponding secret key.
- Signature version (required). Provide the signature version.
- Recommended: Version 4
- Use Version 2 only for backward compatibility (not recommended).
- Use Native Multipart Upload. This option should be enabled for S3 Compatible storage accounts.
- HTPP endpoint or HTTPS endpoint. Specify your storage account endpoint depending on protocol in use.
- Ignore certificate. Choose whether to ignore the SSL certificate. Enable this option only if your storage uses a self-signed SSL certificate and you are experiencing certificate issues.
- Do not check credentials (no public access). Enable this option for storage deployed in a local network. With this option selected you cannot delete backup data using Management Console features.
- Keep credentials on endpoint for each backup session. Available on demand. If enabled, credentials are used to sign backup data during each backup run. While it may improve performance, it also increases security risks.
- Click Next. If Keep credentials on endpoint for each backup session is not selected, Managed Backup will verify the availability of the storage.
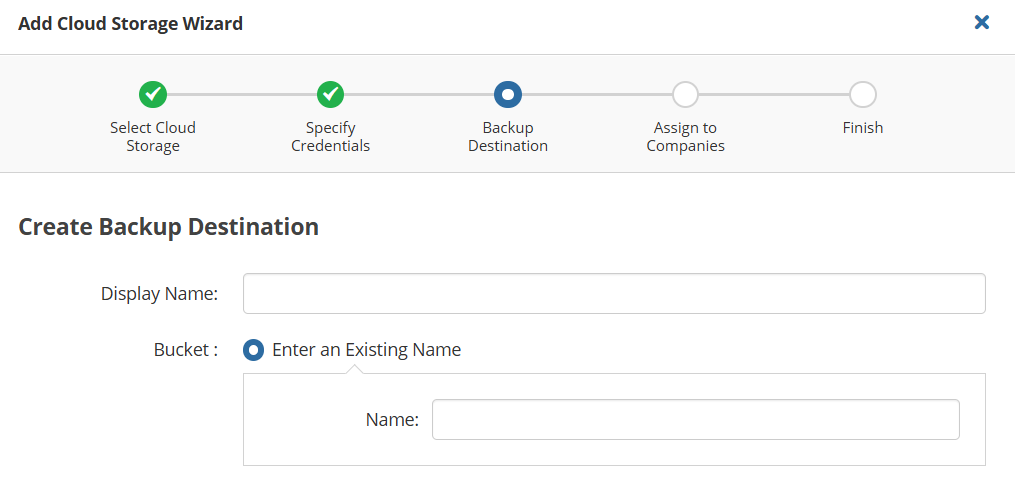
- Specify the backup destination. In the Display Name field, enter a name for the backup destination, then select whether you use an existing bucket or create a new one:
- Select the Create New option to create a new bucket
- Select the Select Existing option to use the existing bucket. Select the desired bucket from the drop-down list.
- Click Next.
- Select companies or users to assign to the storage account.
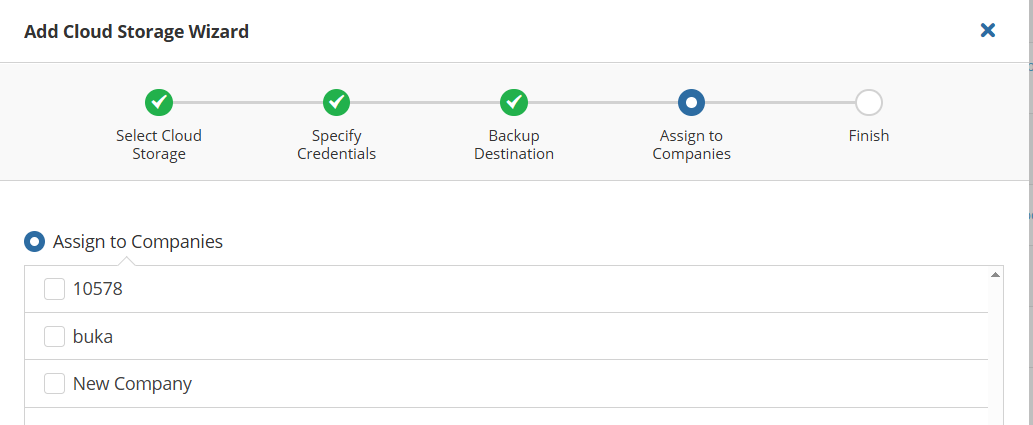
Note that it takes a while to assign companies to the storage account
- Click Next.
- View the storage account summary, then click Save.