Create User
Managed Backup is equipped with an efficient tool to manage your users. To manage users, the Organization > Users and Organization > Create/Edit Users permissions should be granted as the administrator permission on Organization > Administrators.
To Open the User Management Page
- Open the Management Console.
- In the Organization menu, select Users. Administrative accounts should have a Manage Users permission to perform this operation.

To Create a New User
- Open the Management Console.
- In the Organization menu, select Users.
- Click +.
- Specify the user's email address in the Account box, then specify the user first and last names, and the password for the user.
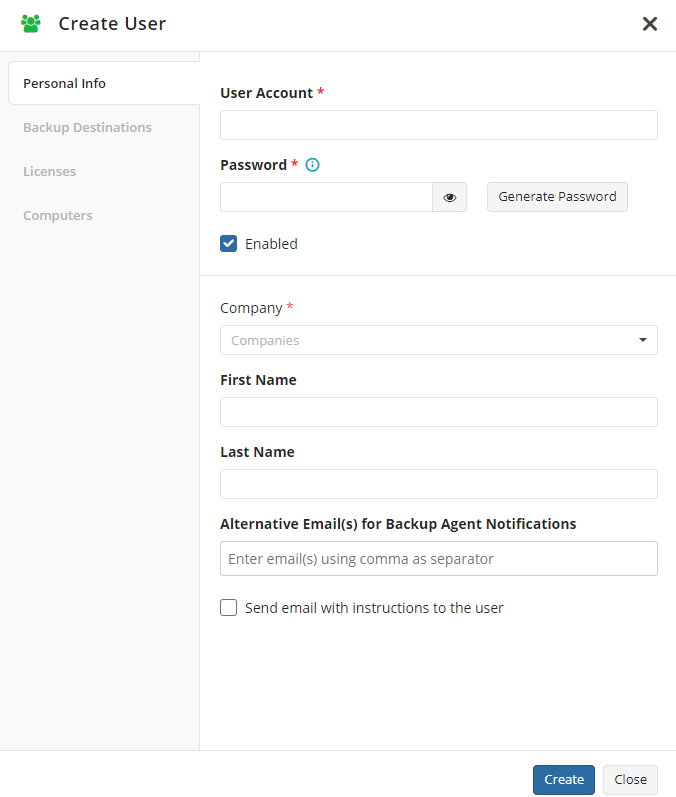
To check if the user name is not occupied, click Validate user account. In case the user name is already occupied, you will be informed with the appropriate notification.
Management Console generates the initial password for the user automatically. You can modify it manually in the Password field.
In the Company drop-down list, select the company that will include this user.
Specify alternative email addresses for notifications. These email addresses will be used to notify the user on backup plan results and other notifications. If you want to specify several email addresses, use a semicolon to separate them.
Click Create.
Now the new user is created and you can see this user on the user grid on Organization > Users. Click the user account in the User Account column to edit the user in the side panel.
Edit User
To change the user's settings perform the following:
- Open the Management Console.
- In the Organization menu, select Users. On Organization > Users, click the user account in the User Account column to edit the user in the side panel.

- Configure the user as described below.
- Once you make all required changes, click Save.
Personal Info
Configure/change the user personal info.
- You can change the user's email address in the Account box, then specify the user name and the password for the user.
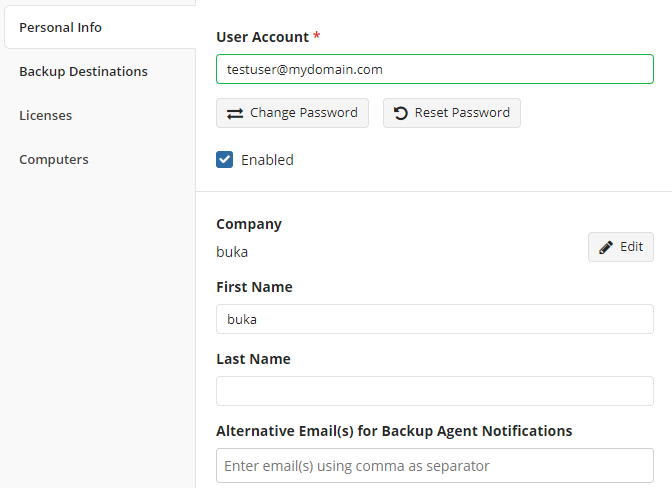
- To check if the user name is not occupied, click Validate user account. In case the user name is already occupied, you will be informed with the appropriate notification.
- You can change the user password with Change Password or send the reset password link to the user to delegate password changing.
- If you want the user will start using backup and restore plans immediately, select the Enabled check box. You can disable the user whenever you need. to stop backing up the user data. Created backups remains on the backup storage according to the applied retention period.
- Click Edit next to the Company to select the company that will include this user.
- Specify the user first and last names (optional).
- Specify alternative email addresses for notifications (optional). These email addresses will be used to notify the user on backup plan results and other notifications. If you want to specify several email addresses, use a semicolon to separate them.
Backup Destination
On this tab you can manage the backup destinations available for this user's backups.
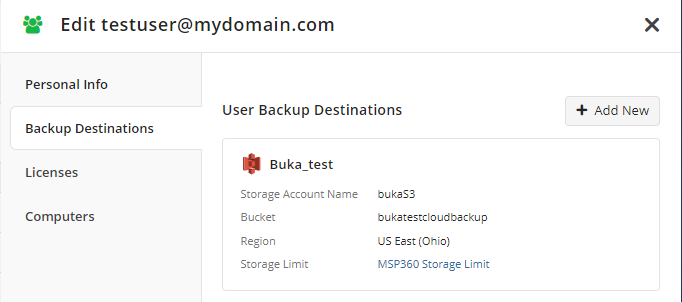
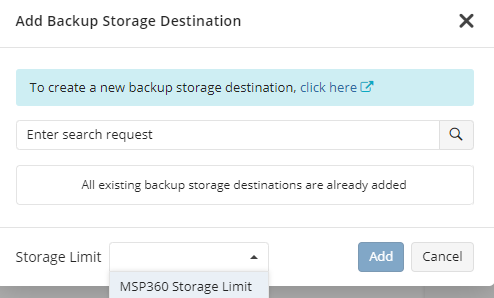
All existing backup storage destinations that are available for the user are already added to the tab. To add a backup storage destination, click + Add New. Navigate to Storage Accounts to add a new storage destination with To create a new backup storage destination, click here link or enter a search request to find a required storage account.
In the Storage Limit drop-down menu, select one of the existing storage limits for the user. To learn more about storage limits for users, refer to the Storage Account chapter.
Licenses
On this tab you can manage licensing options for the user.
In case the company containing the user has its own license settings, you cannot change them for this user only. Use Customize company license settings link to change these settings for the company.
In case of the custom company licensing settings are not applied, select the pool to assign available licenses from.
- Global Pool. Select this option if you want the new user to activate the license from the global pool.
- User Pool. Select this option if you want to restrict the number of licenses the user can activate.
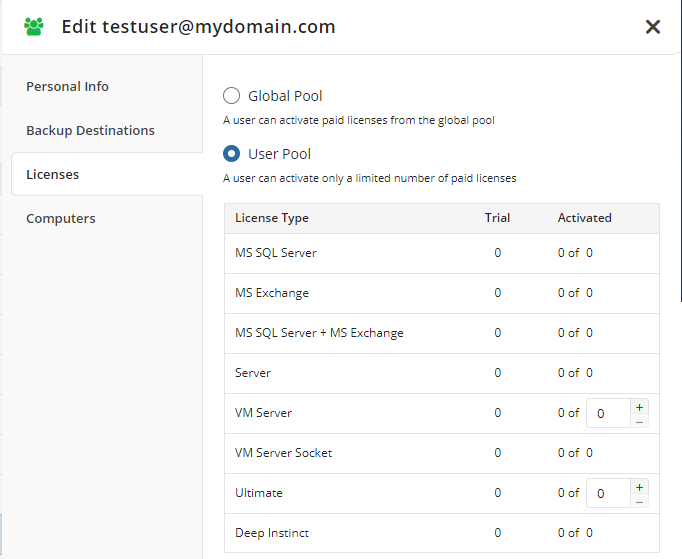
In case you selected the activation from the user pool, specify the number of licenses available for this user for each license type.
Computers
On this tab you can manage computers authorized using this user account.
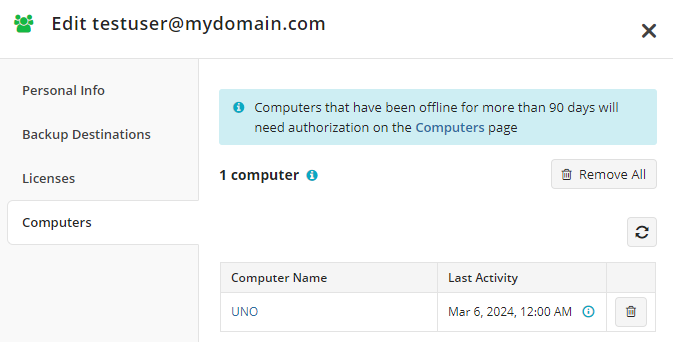
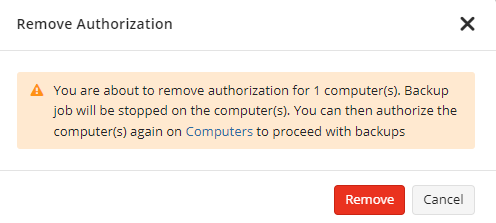
You can see how many computers are authorized using the user account, and remove authorization for all computers using the Remove All button. This action requires confirmation.
In the grid you can see all available computers, remove authorization for any of them. Also you can see who was last logged on the computer.

Once you are finished, click Save.
Search and Filtering
To view only enabled users in the user grid, turn on Enabled users only selector.

To search for users associated with a specific company, select the company in the Company filter.

To search for users, enter a search query in the Enter Search Request and then click the search icon.
