Companies
Companies are the main entity to apply Managed Backup settings to a group of managed computers, which contains all necessary attributes for efficient backup and restore management. Company is also a main entity to apply centralized settings for Connect.
To manage Companies, the Organization > Companies permission should be granted as the administrator permission on Organization > Administrators.
Companies can also be used for Microsoft 365/Google Workspace backup to group domains by companies. For details refer to Manage Companies for M365/Google Backup
This chapter covers the following topics:
Create a New Company
To create a new company, proceed as follows:
- Open the Management Console.
- In the Organization menu, select Companies or expand the + Add control on the top right corner of the screen and click Company to open Companies.
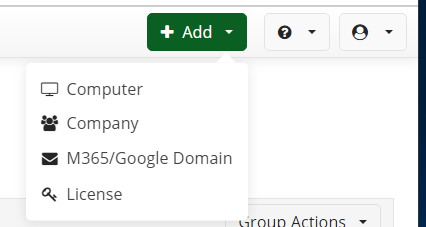
Click Company.
In the side panel, specify the company name, then click Create.
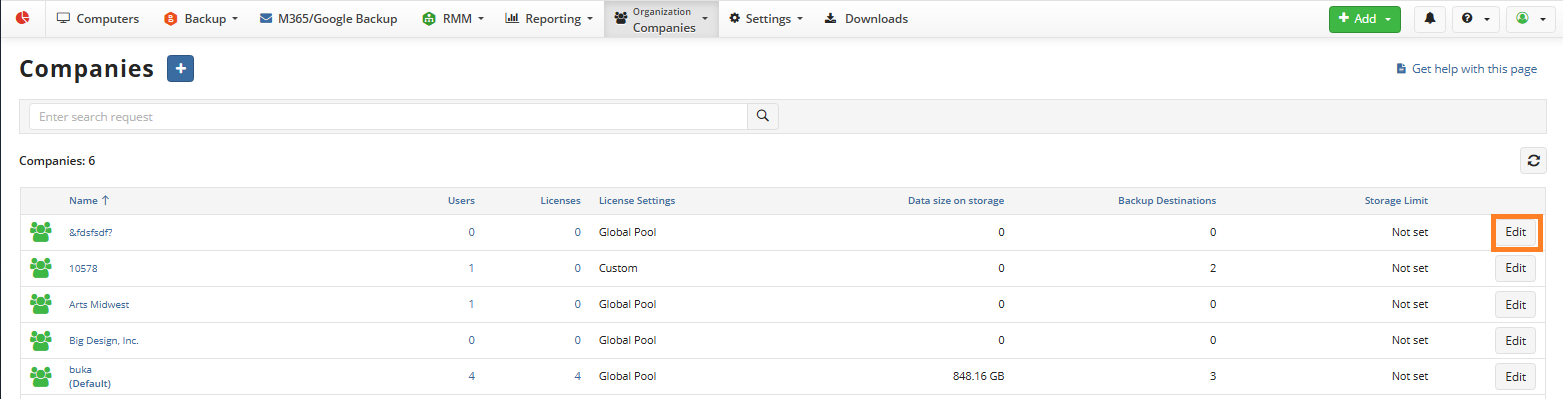
Once the company is created, proceed to the company settings on the side panel by clicking Edit at the end of the company entry.
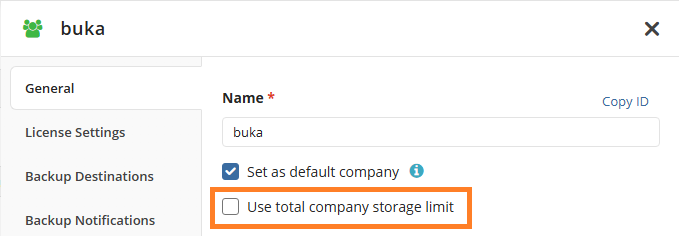
6. On the General tab, select whether you want to use this company as default and specify the total company storage limit, if needed.
The default company is used for assigning new users. Once a new user is created, it is assigned to the company set as default
Backups will be suspended for all users if the company's total storage limit is exceeded, regardless of storage limits assigned to users or backup destinations
8. Switch to the License Settings tab, then specify the licensing policy for the company Specify allowed Backup Agent license types for the company and the default license type.
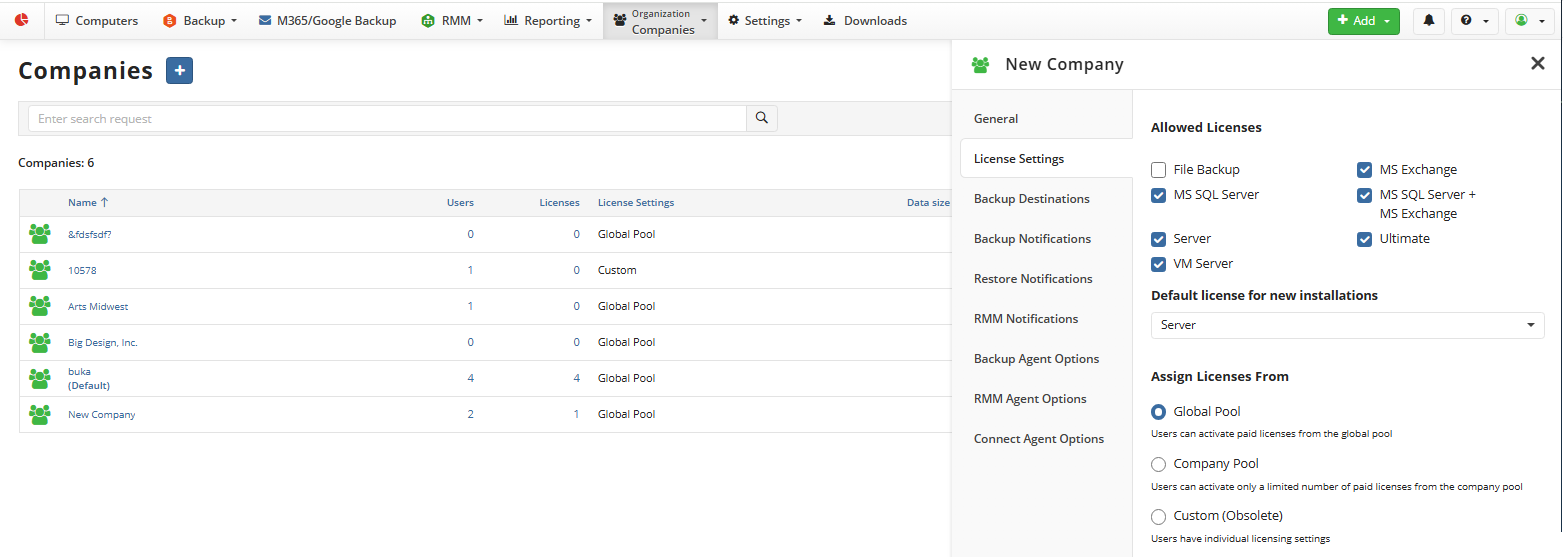
The following options are available for license assignment:
- Global Pool. Select this option to assign licenses from the global pool to company users
- Company Pool. Select this option to apply licenses for company users from the company pool only. You can manage the amount of every type of license for the company.
- Custom (obsolete). Apply separate license settings for users
9. Switch to the Backup Destinations tab.
- Click + Add Backup Destination to specify one or more existing backup destinations for the company.
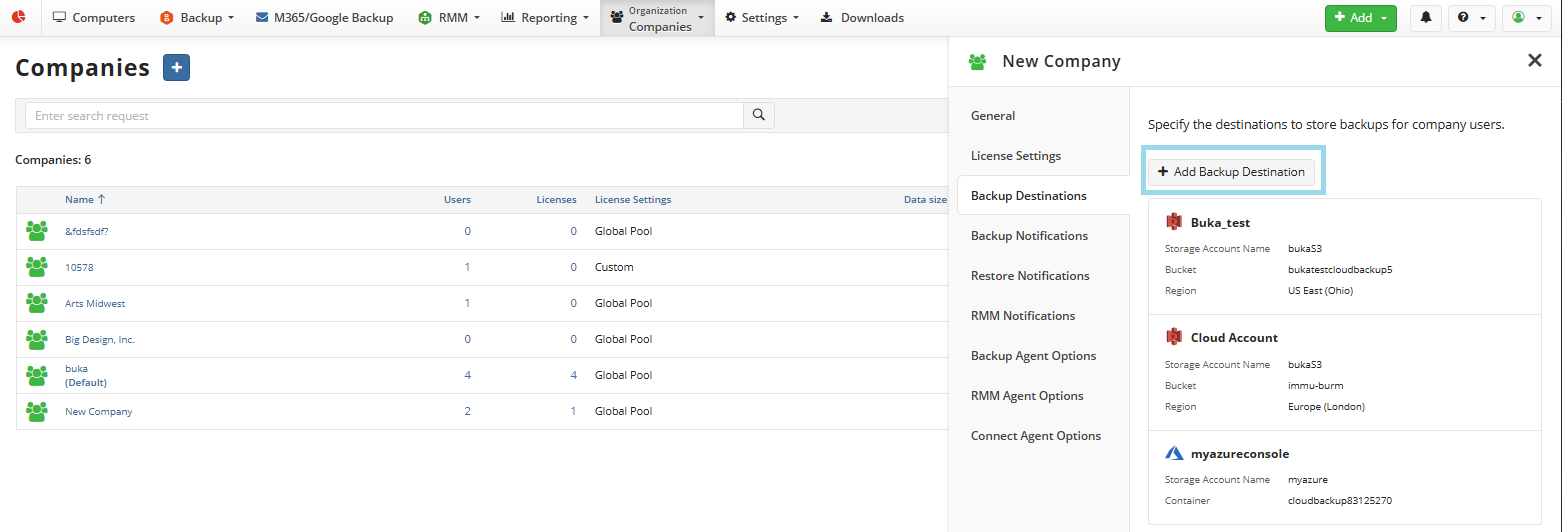
For more information on how to add a new storage account to create a new backup destination, refer to the Manage Storage Accounts chapter
11. Switch to the Backup Notifications tab.
On this tab, specify the notification policy for your backup plans for the company. The following options are available:
- Use Global Options. Select this option to apply global notification settings for the company
- Use Custom Options. Select this option to configure specific notification settings for the company. Once the option is selected the custom settings are available. Specify them for each separate backup plan result:
- Success. Specify email addresses for notification to be sent if a backup plan is completed successfully.
- Warning. Specify email addresses for notification to be sent if a backup plan is completed with warnings.
- Failed. Specify email addresses for notification to be sent if a backup plan terminates with errors. You can configure a notification threshold for Managed Backup alerts, so that notifications are sent only after a specified number of consecutive plan failures
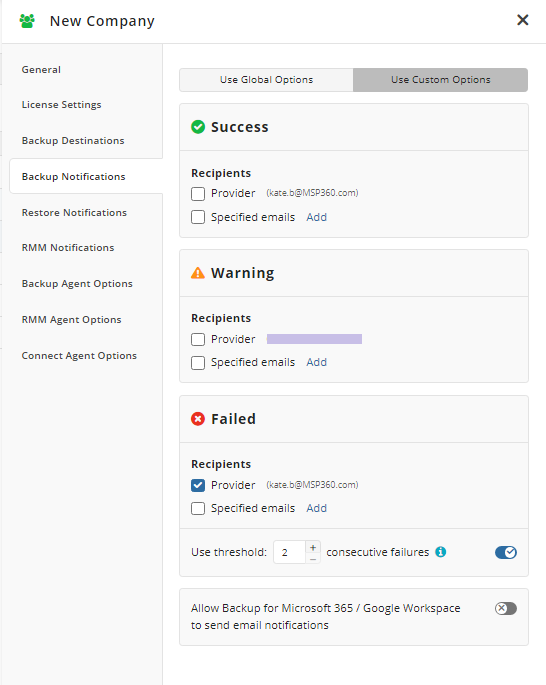
Note that you must have the Allow users to receive backup and restore notification emails option enabled in the global notification settings. To learn more, refer to the Notifications chapter
12. Switch to the Restore Notifications tab.
On this tab, specify the notification policy for your restore plans for the company. The following options are available:
- Use Global Options. Select this option to apply global notification settings for the company
- Use Custom Options. Select this option to configure specific notification settings for the company. Once the option is selected the custom settings are available. Specify them for each separate restore plan result:
- Success. Specify email addresses for notification to be sent if a restore plan is completed successfully
- Warning. Specify email addresses for notification to be sent if a restore plan is completed with warnings
- Failed. Specify email addresses for notification to be sent if a restore plan terminates with errors.
Note that you must have the Allow users to receive notification emails option enabled in the global notification settings. To learn more, refer to the Notifications chapter
13. Switch to the RMM Notifications tab.
On this tab, configure options to send RMM email notifications upon issues and failures on remote computers. This feature requires an additional license. Users granted with an RMM + Remote Desktop license can use this functionality. The following options are available:
- Use Global Options. Select this option to apply global notification settings for the company
- Use Custom Options. Select this option to configure specific notification settings for the company. Once the option is selected the specified alerts or push notifications will be sent to the specified recipients to report a problem or failure. Refer to RMM Notifications for details on available alerts. To send email and/or push notifications select ** Email Notifications** and/or Push notifications checkbox, then specify administrative accounts that will receive push notifications for this company.
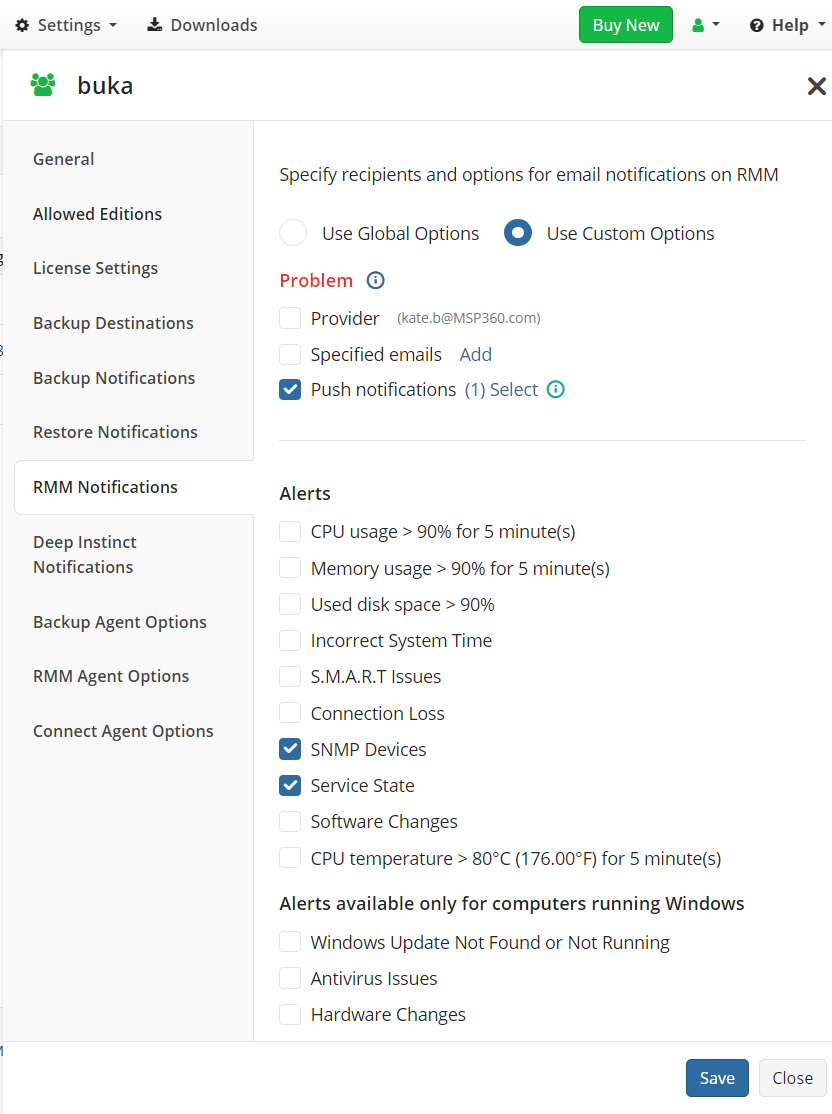
Consider, if you select administrative accounts without registered devices, or if push notifications are not enabled on the registered device, as a result the selected administrative account will not receive any push notifications.
Click Customize notification options at the bottom of the side panel. Configure notification settings. By default, no SNMP devices or services/daemons are selected to send any alerts.
14. Switch to the Deep Instinct Notifications tab (optional).
On this tab, configure options to send Deep Instinct email notifications upon security risks on remote computers. The following options are available:
- Use Global Options. Select this option to apply global notification settings for the company
- Use Custom Options. Select this option to configure specific notification settings for the company. Once the option is selected the specified notifications will be sent to the specified recipients to report security risks. Refer to Deep Instinct for details.
15. Switch to the Backup Agent Options tab.
On this tab, configure options that will be available in Backup Agent instances for users assigned to the company. The following options are available:
- Use Global Options. Select this option to apply global Backup Agent settings for the company
- Use Custom Options. Select this option to configure specific Backup Agent settings for the company. Once this option is selected, the custom settings are available. Configure them as needed as described below.
The following custom options can be selected for the company users:
Enable Backup Agent. Select this check box if you intend the company users to have an access to Backup Agent UI and will be able to change settings allowed for modification
Enable Local Backup in a Backup Agent. Select this check box to allow company users to back up to local destinations
Allow Data Deletion in Backup Agent. Select this check box to allow users to manage their backup contents on the Backup storage tab of the Backup Agent or using CLI
Enable Pre/Post actions. Select this check box to allow users to configure actions or to add scripts that can be executed before and after backup plans
Allow sending logs from the Backup agent. Select this check box to enable sending logs from Backup Agent instances installed on users' computers. If unselected, users are not able to send logs
Encryption / Compression:
Show Encryption option. Select this check box to allow users to configure their encryption settings in Backup Agent
- Show Filename Encryption option. Select this check box to allow users to configure their encryption and compression settings
Show Compression option. Select this check box to allow users to configure their encryption settings in Backup Agent
- Use Compression by default. Select this check box to apply compression for all backup plans for this company
VSS:
- Show VSS option. Select this check box to allow users to configure their VSS snapshot settings in their Backup Agent instances
- Use VSS by default. Select this check box to apply VSS usage for all allowed backup plans for the company
Remote Access
- Allow to add Connect to Recovery Disk. Select this check box to include Connect installer in the recovery disk for disaster cases
Backup/Restore:
- Enable backup plan edit. Select this check box to allow users to configure their backup plans themselves
- Enable restore plan edit. Select this check box to allow users to configure their backup plans themselves
- Show Restore to EC2 option. Select this option to allow users to restore their image-based backup to Amazon EC2 instances
- Show Restore to Azure VM option. Select this option to allow users to restore their image-based backup to Azure VM instances
Authentication:
- Show login/password authentication option. Select this check box to allow users to authenticate using their login/password combination
- Show Windows authentication (AD Bridge). Select this check box to allow users to authenticate via AD Bridge
- Show Windows authentication (AD direct mode). Select this check box to allow users to authenticate using Windows authentication
- Specify a default authentication type. To do this, in the Default Authentication drop-down menu select the required authentication type
- Enable Sign up form to end-users in your rebranded client backup application. Select this option to display signup for in Backup Agent
Amazon S3. Specify a default storage class (applies to Amazon S3 backup storage only). To learn more about Amazon S3 storage classes, refer to the Amazon S3 Storage Classes chapter.
- Show storage class options. Select this check box to allow users to select the S3 storage class themselves
- Show Amazon S3 Transfer Acceleration option. Select this check box to allow users to configure S3 transfer acceleration themselves. To learn more, refer to the Amazon S3 Transfer Acceleration chapter at docs.aws.amazon.com
- Use Amazon S3 Transfer Acceleration by default. Select this check box to force Amazon S3 transfer acceleration for all company users
- Show SSE option. Select this check box to allow users configuring the Server Side Encryption feature themselves
- Use SSE by default. Select this check box to force Server Side Encryption usage for all company users
16. Switch to the RMM Agent Options tab.
The following options are available to configure:
- Allow Remote Management. Select this option to allow licensed users to monitor or manage user computers where the RMM Agent is installed remotely. This enables RMM alerting services as configured in Settings > Notifications for selected company. This feature requires licensing
- Allow PowerShell Execution. Select this check box to allow licensed users to execute PowerShell commands on user computers of this company remotely.
- Hide RMM icon from System Tray. Use this option to hide RMM Agent on computers, in case you do not want the RMM icon to be visible for selected company.
17. Switch to the Connect Agent Options tab.
The following options are available to configure for Connect instances of the selected company if Use Custom Options tab is selected:
- Allow remote access to computers. Select this check box to enable remote access and control to user computers using Connect.
Access
- Enable Direct (authorized) access. This option allows you to pre-authorize joining all active sessions without any additional confirmation by remote computer user. Select this option to allow direct access to active sessions without any additional confirmation. The remote user will see the name and company of the person who is trying to connect to the active session. This feature requires Connect Agent version 3.4 and later. Require password before connecting with logon credentials. With this option enabled you have to enter the custom password, and then logon credentials to join. It is recommended to use long custom passwords for security reasons and keep them in the safe place.
- Approval methods to join active sessions. You can select the remote user confirmation method to join an active session. The remote user will see the name and company of the person who is trying to connect to the active session. You can configure the PIN length to increase safety or reset PIN in case you suspect it may be compromised. If you want to secure remote connections additionally, you can set a custom password for connections using logon credentials.
Session Options
Session options are intended to configure Unattended Access.
- Show black screen on the remote computer (Windows only).The black screen on the remote computer ensures that nobody on the other side cannot see your work.
- Disable remote input (Windows only). This will ensure that nobody on the other side can interfere with your work. You can configure the disconnection method from the opened Windows session. The following options are available:
- Let the program auto-detect the action (default)
- Lock the session
- Leave the session open
- Sign out(Windows).
End User Options
- Allow access to UI ((Windows only). Allows access to the Connect graphic user interface for users of remote computers. In this case you can protect application settings by password to prevent changing by the remote user.
- Allow outgoing connections. By default, outgoing connections are disabled for remote computers, but you can enable outgoing connections for remote users.
- Protect application settings with password (Windows only). If s password is set, you will need to enter it to edit settings.
Updates and Logging
- Update Connect Agent automatically. This option allows automatic updates of Connect Agent as soon as the new version becomes available. Select this option to update Connect Agent on all online computers automatically.
- Logging Level By default logging level is low. You can select the logging level you want.
Proxy Settings
On Proxy Settings area select the proxy usage settings. By default,the Do not use proxy option is set. If you select the Manual proxy configuration option, specify the proxy server address and port number. For example, if the proxy server's address is http://proxy.example.microsoft.com (https is not currently supported) and the port number is 80, the setting in the Proxy Host box should appear like this: proxy.example.microsoft.com.
If necessary, select Basic Authentication and provide credentials for connection.
- Once you are done with all settings, click Save.
Edit Company
To edit the company, proceed as follows:
- In the Organization menu, select Companies .
- In the table, find the company you want to edit, then click Edit.
- On the side panel edit company options as described in the Create New Company paragraph.
Delete Company
Note that only the main administrator has privileges to delete companies. Sub-administrator privileges are not sufficient for this action
To delete the company, proceed as follows:
- In the Organization menu, select Companies.
- Find the company to edit, then click Edit.
- Click Delete at the bottom of the side panel. Confirm the deletion.
All users assigned to the deleted company will be released and will be unassigned. All backup/restore plans with the company storage destination selected will fail but remain undeleted