Restore to EC2 in Backup Agent
The Restore to EC2 feature is currently provided as-is and enabled by request only. Due to limitations imposed by AWS/Azure and the unique characteristics of each cloud provider, we do not have complete control over the system stability and performance in all scenarios. If you intend to utilize this feature for real disaster recovery restores, we strongly recommend conducting thorough testing beforehand. Make sure you verify its functionality in your environment, specifically under presumed disaster recovery scenarios, and ensure that the results align with your and your customers' Recovery Time Objectives (RTO) before initiating the production restore
Currently, the only way to restore disk image backups as EC2 VM instances is via Backup Agent for Windows.
Restore to EC2 is not allowed for the MSP360 Storage powered by AWS
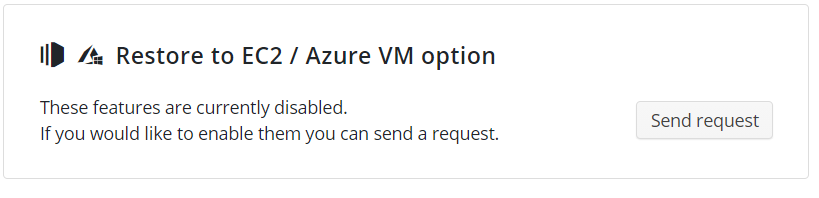
Note that you must have the Restore to EC2 feature enabled in the Management Console. This feature is enabled by request. To send a request, proceed as follows:
- Open the Management Console.
- In the Settings menu, select Global Agent Options.
- Find the Restore to EC2 / Azure VM option group, then click Send Request.
Before You Begin
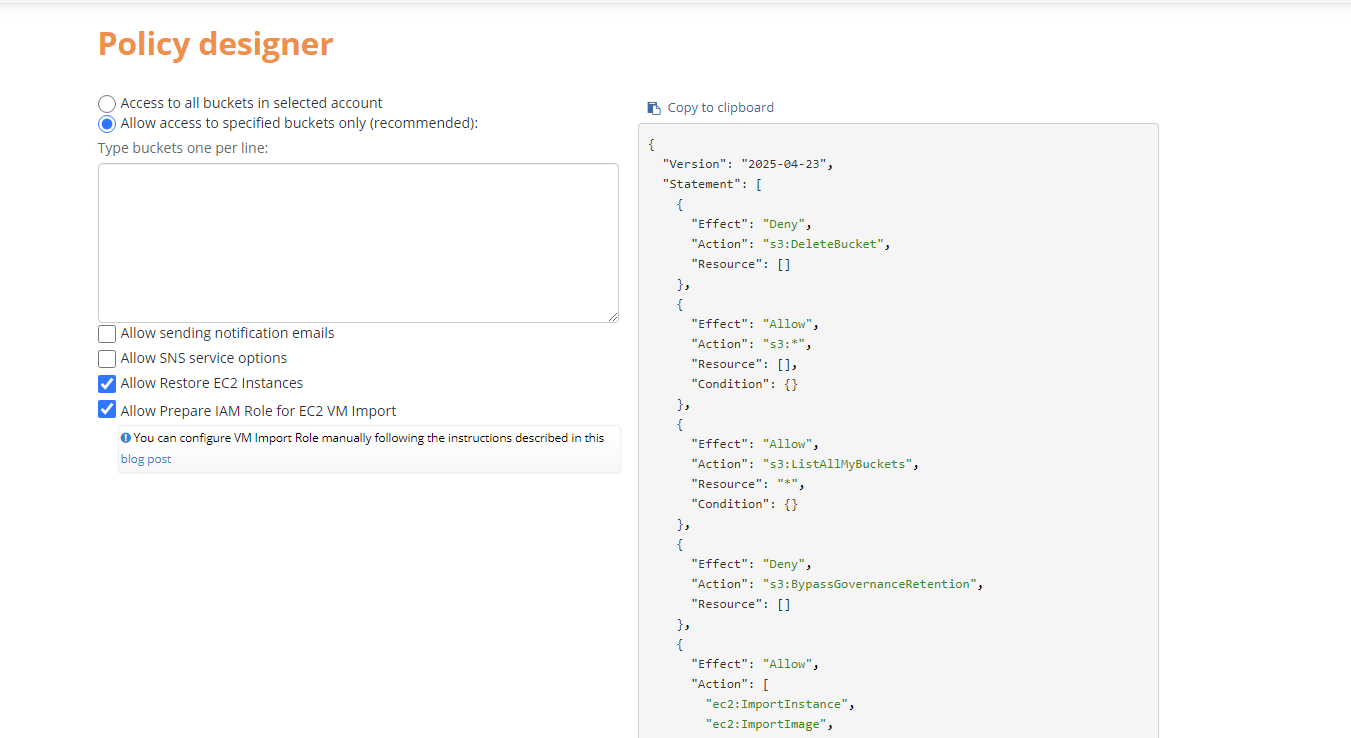
This procedure is based on the AWS VM Import/Export ability. It requires the IAM permissions to the EC2 operations for the AWS credentials or AWS IAM role used. There is no need to allow all EC2 actions: the scope of the needed permissions can be confugured using the Policy Designer.
When adding a new S3 Account, we strongly recommend that you use an IAM role with a policy that grants minimum permissions required for proper functioning of MSP360 (CloudBerry) Backup.
The IAM role should have the following permissions to be able to successfully use EC2 services:
- ImportInstance
- ImportImage
- DescribeInstances
- MonitorInstances
- RequestSpotInstances
- RunInstances
- StartInstances
- TerminateInstances
- ModifyInstanceAttribute
- CreateTags
- CancelImportTask
- StartInstances
- DescribeConversionTasks
- DescribeImportImageTasks
- ImportVolume
- DescribeAvailabilityZones
- DescribeSecurityGroups
- DescribeSubnets
- StopInstances
- DescribeKeyPairs
- ImportSnapshot
- DescribeImportSnapshotTasks
- CreateVolume
- DescribeImages
You can use MSP360 (CloudBerry) Explorer to create an IAM role and grant it the required permissions, or manually create a new user role using AWS Management Console. See the following articles for more information:
- How to Use an External ID When Granting Access to Your AWS Resources to a Third Party
- How To Setup a VMimport Role
The special vmimport role is required to be created in the AWS account before the import started - this allows the AWS import service to have access to the customers data. This role is one for all the AWS accounts and regardless of the region. If it was not created, the import fails with the error. The Management Console can create vmimport role automatically if the S3 storage account is created by the option IAM role (MBS Wizard).
To create the AMI (Amazon Machine Image), you need to configure an IAM role that has the required permissions to perform actions within EC2 (recommended). Alternatively, you have to configure a specific vmimport role.
Note: With the Create AMI (Amazon Machine Image) option you can restore Desktop OS only.
Without the Create AMI (Amazon Machine Image) option, you will have a restored EC2 instance but there will be no image on Amazon. For the restored EC2 instance you will have to configure a public IP address (Elastic IP) manually in the AWS EC2 Management Console.
Restore to EC2
To restore VM image to EC2 perform the following:
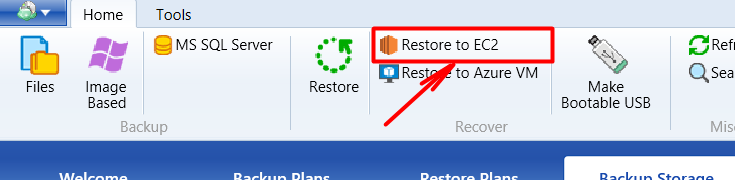
- In the Backup Agent on the main toolbar, click Restore to EC2.
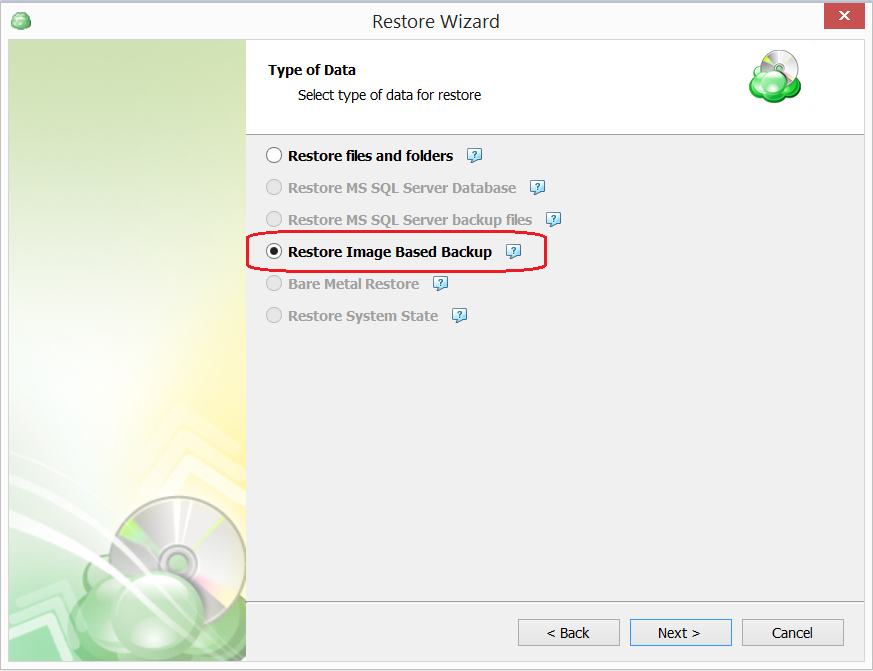
- In the "Type of Data" step of the Wizard, select the Restore Image-Based Backup option. The list of the restore points will be retrieved from the Agent repository.
- Then select the Restore as Amazon EC2 Instance option.
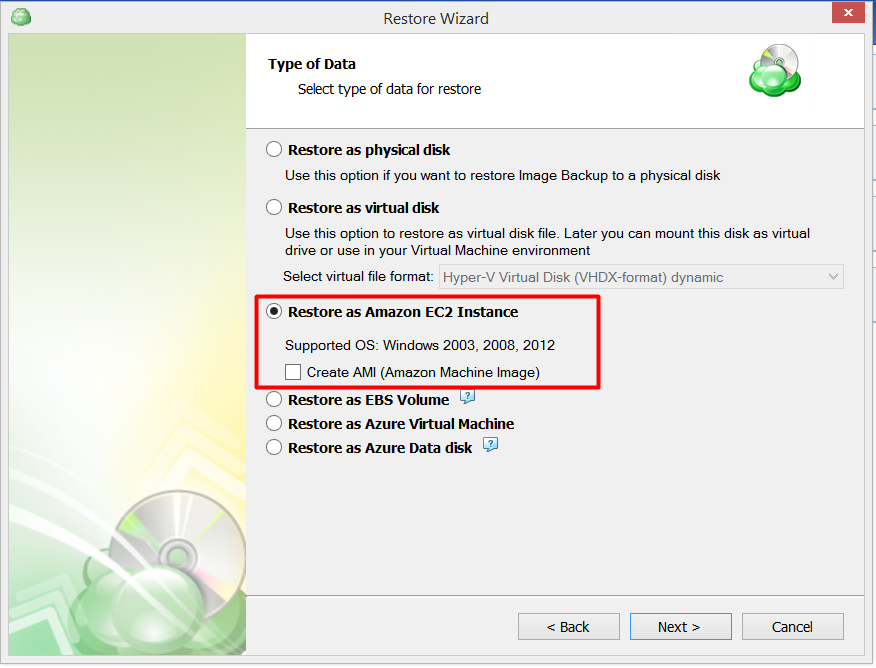
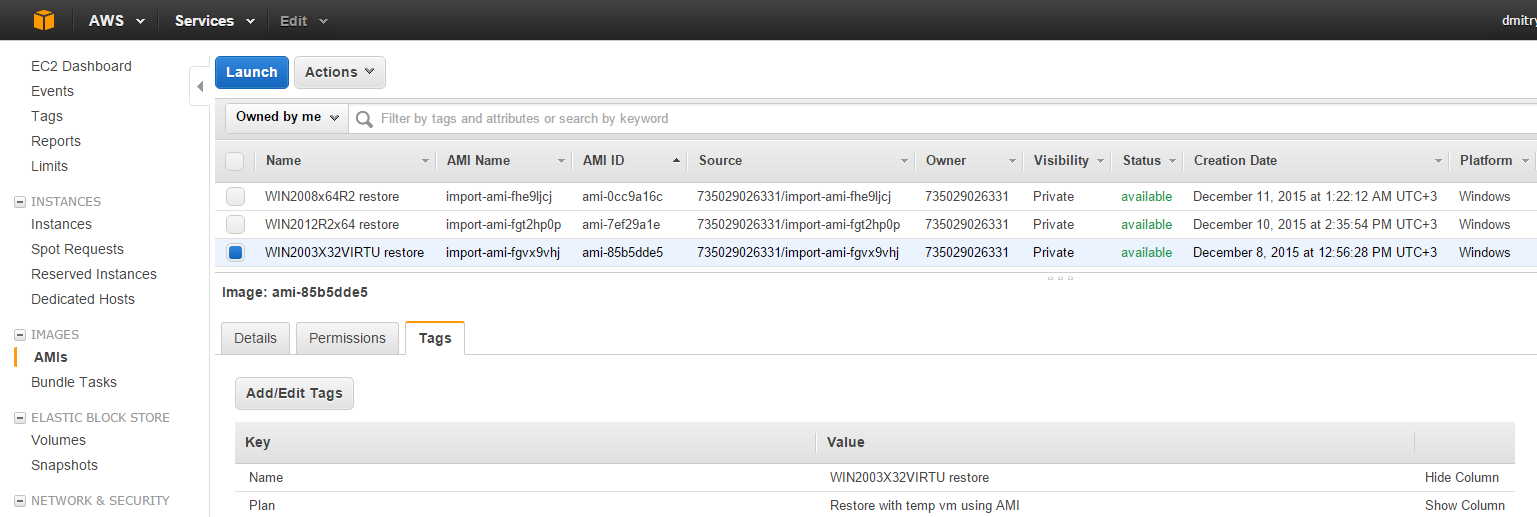
You may want to use the Create AMI (Amazon Machine Image) option. The Create AMI option allows you to create an Amazon machine image (based on your image backup configuration) in addition to a restored EC2 instance. The restored EC2 instance will be run automatically and it will have a public IP address. The created Amazon machine image can be used for setting up other EC2 instances in the future. You can find Amazon machine images on the IMAGES section of the AWS EC2 Management Console
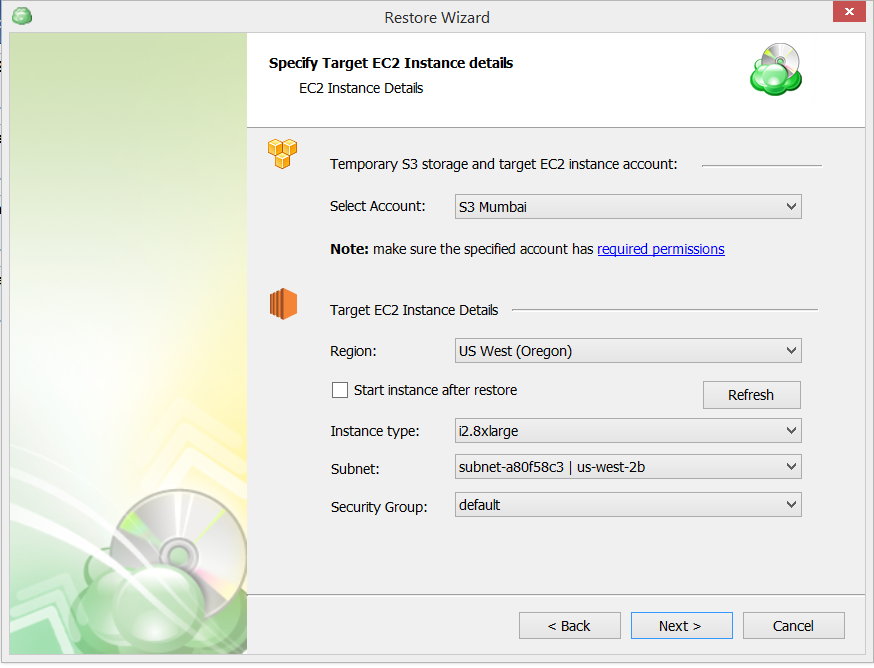
- The next step is to specifying Target EC2 Instance details:
5.Choose whether to use a temporary instance. You can set the cloud account which will be used to store the intermediate .vhdx/.vhd file and perform the import operations. The .vhdx/,vhd file will be placed to implicitly selected storage in the case of Azure VM or to the bucket/prefix set in the selected account. When the restore starts, the Backup Agent downloads the disk data of the backup, locally processes it in memory and then puts the blocks of the *.vhdx disk file to the remote cloud bucket.
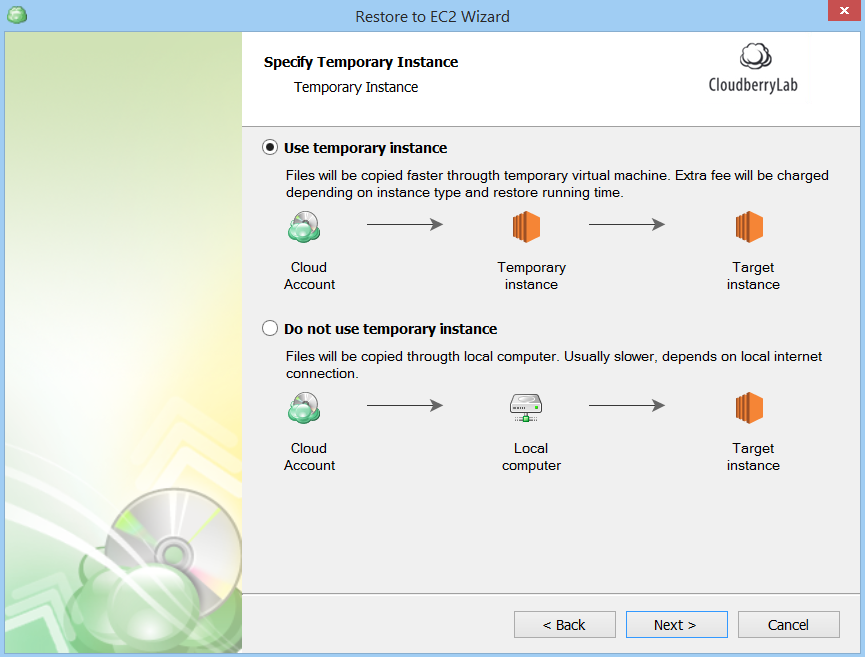
If yes, then specify the details.
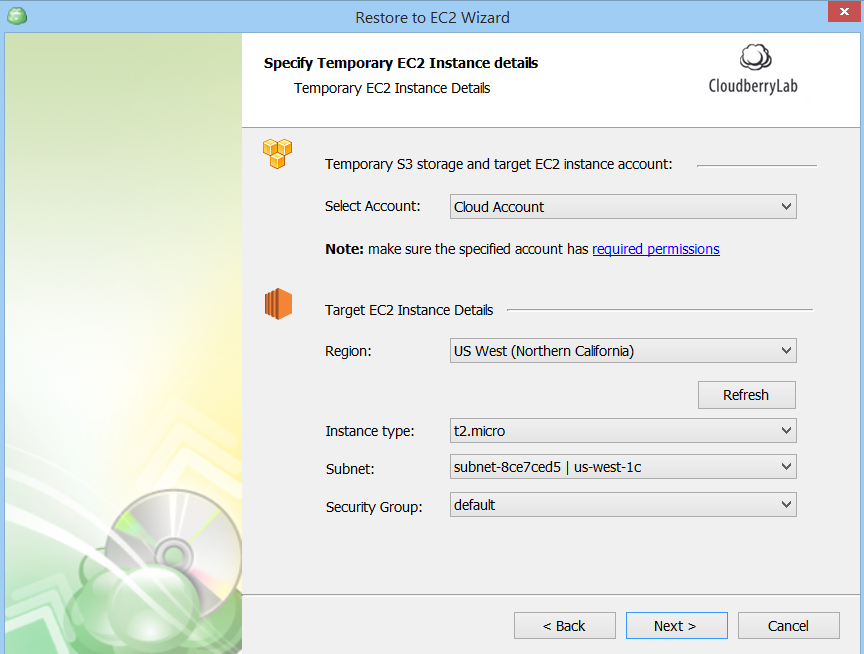
Select Account - choose the Amazon S3 account where you want to create an EC2 instance. This list contains Amazon S3 accounts that are specified in the MBS control panel (Storage Accounts tab).
Use temporary EC2 instance - this option allows you to run a restore job directly on Amazon S3. It sets up a temporary EC2 instance (Windows Server 2012). The temporary EC2 instance will be terminated when the restoration completes.
Target EC2 instance details:
- Region - select a region where to restore an EC2 instance. We recommend using the same region where you store your image backup.
- Start instance after restore - this option allows starting an EC2 instance right after the restore (available if you don't use the Create AMI option).
- Instance type - select instance type for the EC2 instance. For a list of instance types, see Instance Families and Types.
- Subnet - specify a subnet that you want to launch the instance into.
- Security group - specify a security group to assign to the Amazon EC2 instance.
- Complete the rest of the Restore Wizard steps to create and customize your restore plan.
Finally, you can find the restored server in Amazon EC2 Management Console:
