Backing Up VMware Virtual Machines (Legacy)
This chapter covers the following topics:
Create Backup Plan
To create a new VMware backup plan in the legacy backup format, select VMware Backup (Legacy).
Learn Backup Wizard steps:
- Select Backup Route
- Select Backup Storage
- Plan Name
- Advanced Options
- Select VMware Host Server
- Select Virtual Machines
- Compression and Encryption Options
- Retention Policy
- Schedule
- Pre / Post Actions
- Notifications and Logging
Licensing
There are two types of licenses for the Virtual Machine edition:
- Virtual Machine Edition license. This is the main license that covers 2 processor sockets
- Virtual Machine Socket license. This is an additional license that covers 1 processor socket
Note: additional Virtual Machine Socket license cannot be used without the Virtual Machine Edition license
For example, if you have a vCenter server with two hosts with 2 processor sockets per each (i.e. 4 in total), you will need 1 Virtual Machine Edition + 2 Virtual Machine Socket licenses.
Managed Backup supports the backup and restore of virtual machines located and managed by the ESXi server which is a part of the VMware vSphere product. Therefore as the target for a backup, it will be necessary to specify vCenter or ESXi Host.
Select Backup Route
Specify the backup route. The following options are available:
- Local or Cloud Backup (default option). Select this option if you want to back up your data directly to a local or cloud storage.
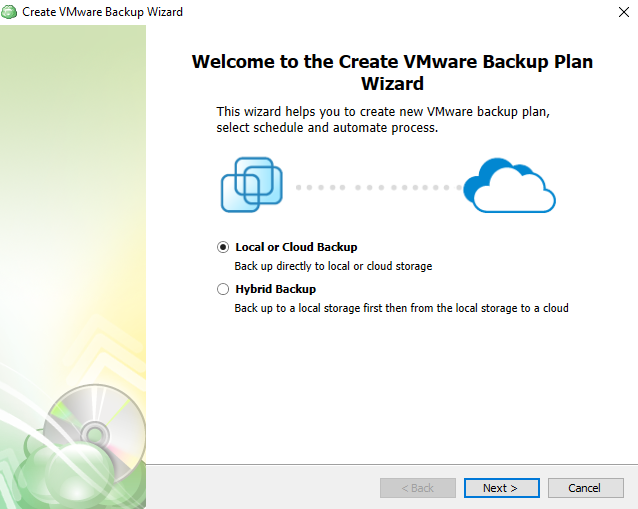
- Hybrid Backup. This option implies an intermediate local storage before backing up your data to a cloud storage. Select this option if you want to back up your data locally first.
With the Hybrid Backup option selected, the backup service first processes your data and moves it to a Network-attached storage (NAS) or similar local storage, from where the already processed backup makes its way to a cloud storage.
This allows you to avoid repeated processing of your data when you need it to be compressed and/or encrypted in both target storages, because the backup service performs these operations only once, before the saving the backup to the local storage.
For this reason, when you only need to compress and/or encrypt your backup in a cloud, and not in a local storage, consider creating two separate one-way backup tasks instead of selecting the hybrid backup option.
Mind that you will not be able to convert your existing backup plan from Local/Cloud to a Hybrid mode. To create a Hybrid backup plan, you will need to do it separately using Backup Wizard.
Only common retention policy is available for both the local and cloud storage at the time.
Select Backup Storage
Select a storage account for the backup plan from the list of available backup storages.
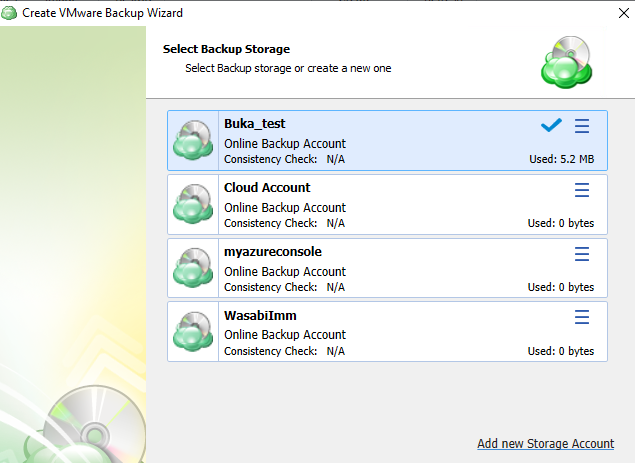
Click Next.
Plan Name
Specify the name for the backup plan.
Click Next.
| Top |
Advanced Options
Specify advanced options for the backup plan. Advanced option set depends on the selected backup storage.

The following options are available:
- Use synthetic full backup. Select this option for cloud storages to enable the synthetic full backup usage for the backup plan. If a long-term storage class is selected as the backup destination, this will result in high storage costs.
Additional Advanced Options for Amazon S3
- If your backup storage destination is Amazon S3, select the S3 storage class for the backup plan:
- Standard
- Intelligent-Tiering
- Standard-IA
- One Zone-IA
- Glacier Instant Retrieval
- Glacier Flexible Retrieval (formerly S3 Glacier)
- Glacier Deep Archive
Usage of different storage classes for different backups helps optimize your storage costs.
Learn more about Amazon S3 storage classes here
- Select Use S3 Transfer Acceleration to accelerate file transfer for an extra fee. The target bucket must have this feature enabled. Select this checkbox if you want to use the data transfer acceleration service provided by Amazon. To learn more, refer to the Amazon S3 Transfer Acceleration.
Additional Advanced Options for Microsoft Azure
If your backup storage destination is Microsoft Azure, and you have the General Purpose v2 Azure account, select the required storage class (access tier).

The following options are available:
- Hot tier. An online tier optimized for storing data that is accessed or modified frequently. The hot tier has the highest storage costs, but the lowest access costs.
- Cool tier. An online tier optimized for storing data that is infrequently accessed or modified. Data in the cool tier should be stored for a minimum of 30 days. The cool tier has lower storage costs and higher access costs compared to the hot tier.
- Cold tier. An online tier optimized for storing data that is rarely accessed or modified, but still requires fast retrieval. Data in the cold tier should be stored for a minimum of 90 days. The cold tier has lower storage costs and higher access costs compared to the cool tier.
- Archive tier. An offline tier optimized for storing data that is rarely accessed, and that has flexible latency requirements, on the order of hours. Data in the archive tier should be stored for a minimum of 180 days.
Note that this feature is only supported for General Purpose v2 Azure accounts. If you are using another kind of account, you need to upgrade your account to be able to use this feature
Be aware of the additional charges and increased blob access rates after your Azure account upgrade
To learn more about the difference between Azure storage tiers, refer to the Azure Blob Storage - Hot, cool, cold, and archive storage tiers article at docs.microsoft.com.
Click Next . | Top |
Select VMware Host Server
Select "VMware Host Server" you want to back up and specify login and password for access. It can be vCenter or ESXi Host and you can use an IP address or machine/hostname. If the target which you chose is vCenter then a list of hosts from the server will be requested, and the host can be selected from the list.
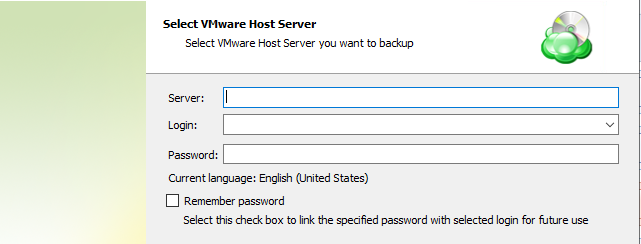
Click Next
Select Virtual Machines
Choose the virtual machines to back up. The following options are available:
- Back up all Virtual Machines - initiates backup of all virtual machines on the selected host.
- Back up only running Virtual Machines - initiates backup only of running machines on the selected host. The stopped and not started virtual machines will be skipped.
- Back up selected Virtual Machines - allows you to select virtual machine(s) from the list to back up.
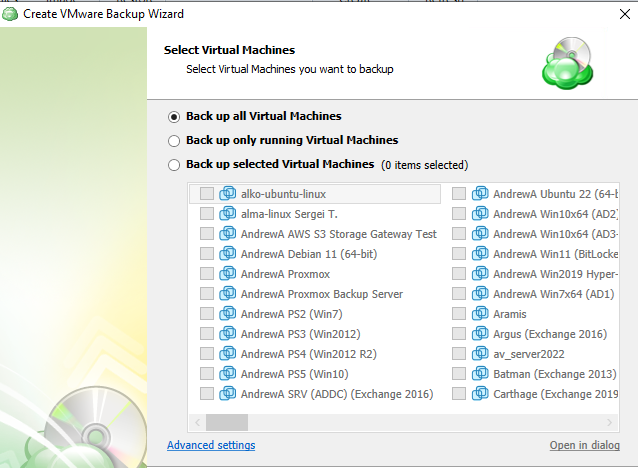
Click Next.
| Top |
Compression and Encryption Options
Compression
Managed Backup offers compression to reduce the storage space required for your backup and to speed up the upload process to the target storage.
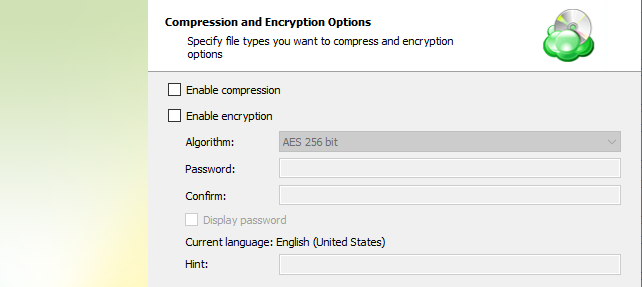
Encryption
You can protect your backup by encrypting its contents. Managed Backup supports AES encryption with key sizes of 128, 192, and 256 bits. A larger key size provides stronger encryption but may increase the time required for processing your backup. For more details on AES encryption, refer to the Advanced Encryption Standard.
If you choose to save your backup plan configuration to the destination storage, be aware that the encryption password is not stored in the configuration file for security reasons. Ensure that you save this password securely, as it will be required to restore the backup's contents.
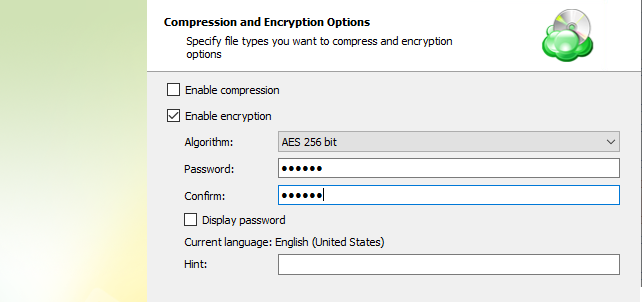
If you change any encryption settings (algorithm or password) for an existing backup plan, a full backup will be executed the next time the backup plan runs.
Note that the encryption password will NOT be stored in the backup plan configuration for security reasons. Keep this password in a safe place to be able to restore the backup contents afterwards
Click Next.
| Top |
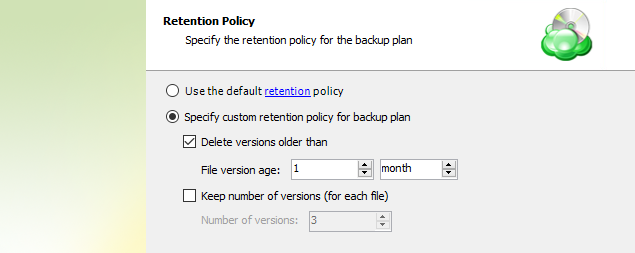
Retention Policy
Specify the retention policy settings for the backup plan. To read more about retention, refer to the Retention Policy chapter.
The following settings are available:
- Use the default retention policy. Select this option to use the predefined retention policy settings. To view and edit them, click the retention link in the option.
- Specify custom retention policy for backup plan. Select this option to use custom retention settings for this backup plan
- Delete versions older than. Select this checkbox to delete old file versions in cloud storage, then specify the period and the criteria of this action applying: whether the counting starts from a modification date of an object or the last backup date
- Keep number of versions (for each file). Select this checkbox to specify the number of versions of files that are kept in backup storage, then, in the Number of versions field, specify the value.
Click Next.
Schedule
Specify the schedule settings for the backup plan.
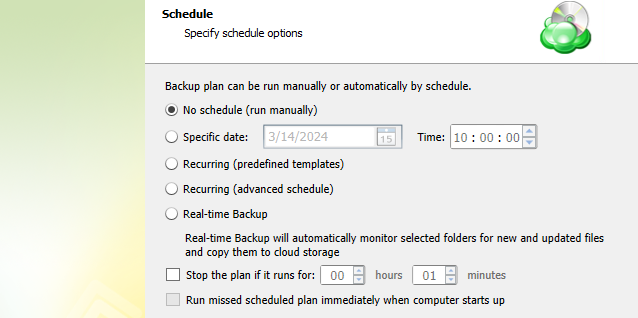
The following options are available:
- If you plan to run the backup plan manually, select No schedule (run manually) option
- If you intend the backup plan to run on a particular date and time, select the Specific date option, then specify the date and time you want your backup plan to be run
- If you want the backup plan to run on a constant periodic basis with the use of templates available in the Backup Agent, select Recurring (predefined templates) option
- If you want the backup plan to run on a constant periodic basis using custom settings, select Recurring (advanced schedule) option
- Real-time Backup. Select this option to allow Backup Agent to detect object changes in selected folders and back them up to the cloud storage (this occurs every 15 minutes)
- To stop the backup plan if it continues suspiciously long, select Stop the plan if it runs for checkbox, then specify the backup plan maximum duration
- To run the backup plan after the computer is on in case the backup plan run has been missed, select Run missed scheduled backup immediately when computer starts up checkbox. Click Next.
Simple Recurring Schedule
In case you selected the Recurring (predefined templates) option, specify the recurring schedule settings.
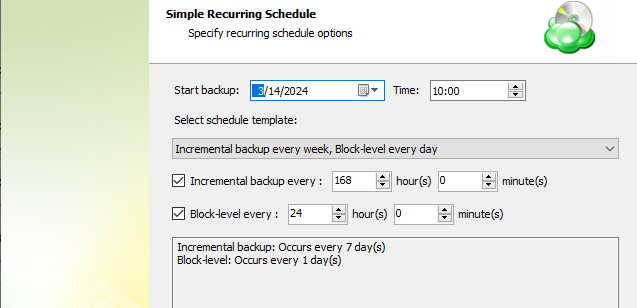
- In the Start backup field, specify the date and time of the first backup plan run
- Select the required schedule from the Select schedule template drop-down list. The following schedules are available:
- Incremental backup every week, block-level backup every day
- Incremental backup every day, block-level backup every hour
- Incremental backup every day
- In case you want to customize the schedule templates:
- Select or deselect the Incremental backup every: checkbox, and, if the checkbox is selected, specify the period of an incremental backup run in hours and minutes
- Select or deselect the Block-level every: checkbox, and, if the checkbox is selected, specify the period of a block-level backup run in hours and minutes.
Note that block-level feature applies to files with a size more than 1 MB due to block size limitations
Click Next.
Advanced Recurring Schedule
In case you selected the Recurring (advanced schedule) option, specify the recurring schedule settings.
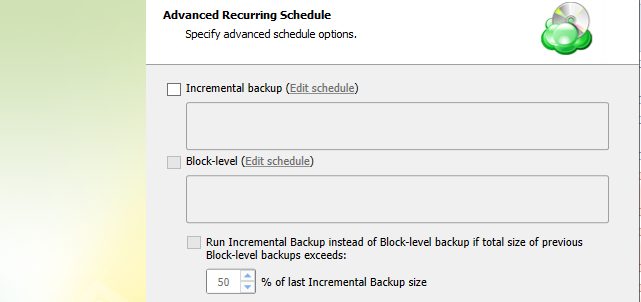
- Select or deselect the Incremental backup: checkbox, then click Edit schedule and specify the period of an incremental backup in the Recurring Schedule Options dialog box. Once you are finished, click OK
- Select or deselect the Block-level backup: checkbox, then click Edit schedule and specify the period of a block-level backup in the Recurring Schedule Options dialog box. Once you are finished, click OK
Click Next.
Pre / Post Actions
Starting from Management Console version 5.0, pre- or post- actions for Backup Agents can be restricted by the provider. To learn more about the pre-/post action settings, refer to the Global Agent Options and Companies chapters
Specify actions to be executed before and/or after the backup plan run.
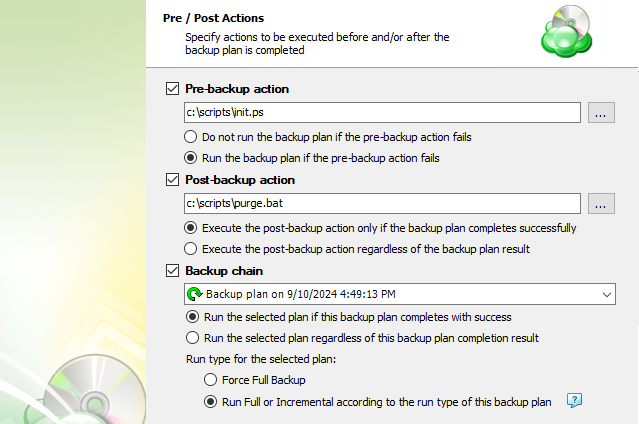
- To specify the action that will be performed before the backup plan starts, select Pre-backup action checkbox, then, in the field below, specify the path to the script to be executed before the backup plan run
- Specify the conditions of the script's execution:
- Do not run the backup plan if pre-backup action fails option if you do not want the backup plan to run if the pre-backup script fails
- Select Run the backup plan if pre-backup action fails option if you want the backup plan to be launched regardless of the pre-backup script execution result
- To specify the action that will be performed after the backup plan is completed, select Post-backup action checkbox, then, in the field below, specify the path to the script to be executed after the backup plan terminates
- Select Execute post-backup action if backup plan completes successfully option if you want to run it only if the backup plan is successfully completed
- Select Execute post-backup action regardless of the backup result option if you want the script to execute regardless of the backup plan execution results
- To chain the backup plan with another plan, select Backup chain checkbox, then select the plan name in the drop-down menu
- Select Run the selected plan if this backup plan completes with success option if you want to run the specified plan only if the backup plan has been successfully completed
- Select Run the selected plan regardless of the backup plan completion result option if you want to run the chained backup plan regardless of the current backup plan execution results.
- In case you chained a backup plan, you can enable the full backup for it regardless of the contents in the backup storage. To do this, select the Force full backup for the chained plan. By default, full or incremental backups will be started according to the schedule of this backup plan.
Notifications and Logging
You can receive email notifications informing you about the backup process results, and maintain logging.
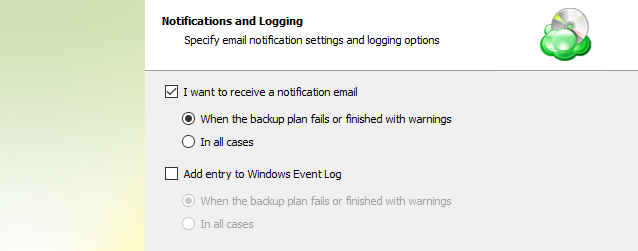
You can receive email notifications after each run of the backup plan or only if it fails for some reason.
In addition, you can register the activity related to the backup routine in the Windows Event Log. You can choose whether to log all activity, or add new entries to the log only when a backup routine fails.
Summary
Review the configuration of the backup plan.
Click Next to proceed to the last wizard page.
Select the Run backup now checkbox to execute the backup plan immediately.
If you want to run the backup plan later, click Finish.
| Top |
Edit a Backup Plan
To edit the backup plan, proceed as follows:
- Switch to the Backup Plans tab.
- Open the backup plan you want to edit by expanding it, then click Edit.
- Proceed through the Backup Wizard steps to adjust settings as needed.
- If the plan is currently running, you'll need to select one of the following options:
- Apply changes after the backup plan completes
- Stop the plan and apply changes.
- After choosing the desired option for the running backup plan, click Apply.
- Save the edited plan configuration.
You can edit certain backup plan parameters directly, without using the backup wizard, as long as the backup plan is not currently running. Editable parameters are marked with a pencil icon. To make a quick edit, simply click the pencil icon next to the parameter
Delete a Backup Plan
To delete the backup plan, proceed as follows:
- Switch to the Backup Plans tab.
- Open the plan to delete, expand it, then click Delete.
- Confirm the backup plan deletion.
| Top |