Global Agent Options
Starting from version 6.6.7 of Management Console, you can specify the global options for all instances of Backup / RMM / Connect Agents. You can override them in the company settings later. Configured global or company Agent options will be applied to all online Agent instances.
To configure the global notification settings, proceed as follows:
- Open the Management Console.
- In the Settings menu, select Global Agent Options.

Select the tab named after the Agent you want to configure global options for.
Backup Agent Tab
You can configure the following Backup Agent properties:

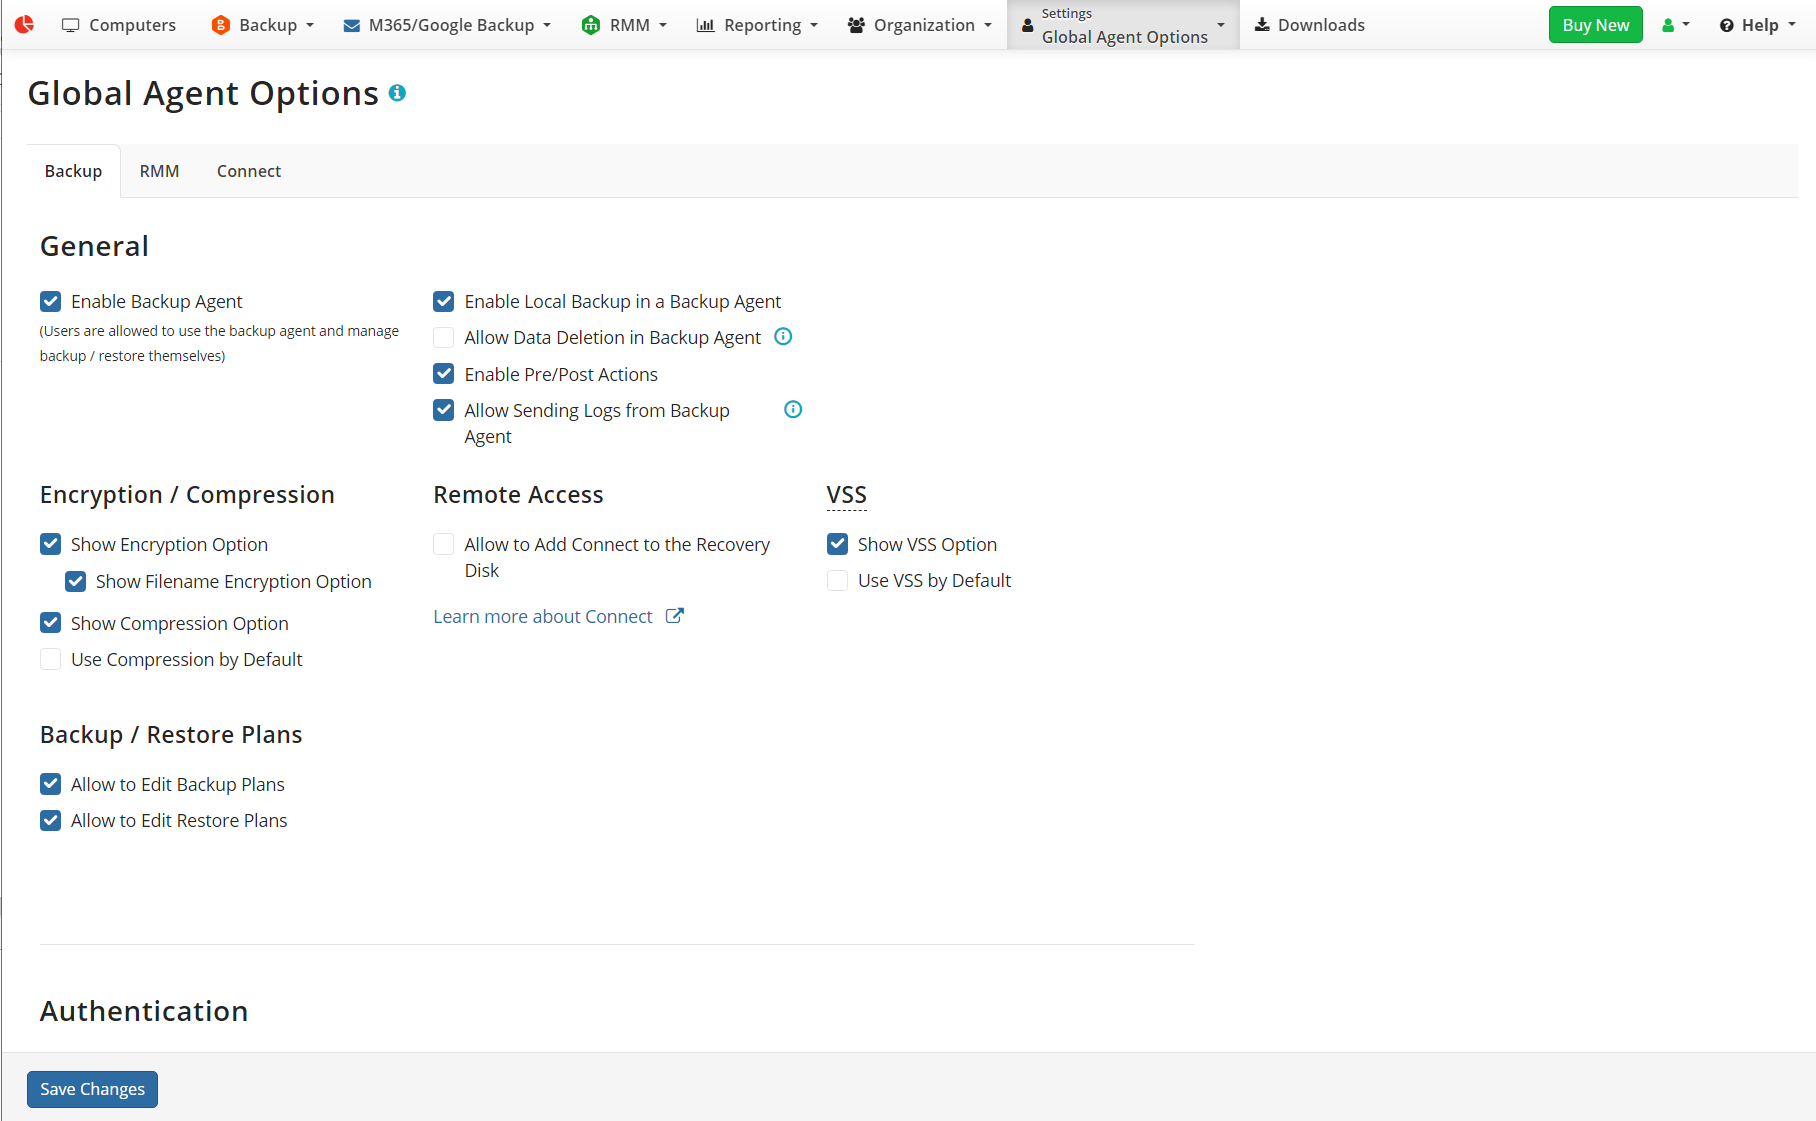
- Enable Backup Agent. Select this check box if you intend all users have an access to Backup Agent GUI and will be able to change settings allowed for modification
- Enable Local Backup in Backup Agent. Select this check box to allow users to back up to local destinations
- Enable ability to delete files from the Storage tab. Select this check box to allow users to manage their backup contents on the Backup storage tab of the Backup Agent
- Enable pre/post actions. Select this check box to allow users to configure actions or to add scripts that can be executed before and after backup plans
Encryption/ Compression Options
Show Encryption option. Select this check box to allow users to configure their encryption settings in Backup Agent
- Show Filename Encryption option. Select this check box to allow users to configure their filename encryption settings
Show Compression option. Select this check box to allow users to configure their compression settings in Backup Agent
- Use Compression by default. Select this check box to apply compression for all backup plans
Remote Access options
- Allow to add Connect to Recovery Disk. Select this check box to include Connect (formerly Remote Desktop) installer in the recovery disk for disaster cases
VSS Options
- Show VSS option. Select this check box to allow users to configure their VSS snapshot settings in their Backup Agent
- Use VSS by default. Select this check box to apply VSS usage for all allowed backup plans
Backup / Restore Plan options
- Enable to Edit Backup Plan. Select this check box to allow users to configure their backup plans themselves
- Enable to Edit Restore Plan. Select this check box to allow users to configure their restore plans themselves
Authentication Options
- Show login/password authentication option. Select this check box to allow users to authenticate using their login/password combination
- Show Windows authentication (AD Bridge). Select this check box to allow users to authenticate via AD Bridge
- Show Windows authentication (AD direct mode). Select this check box to allow users to authenticate using Windows authentication
- Select a Default Authentication mode for clients.
- Enable Sign up form to end-users in your rebranded client backup application. Select this option to display the sign-up form in Backup Agent instances
Amazon S3 Options
- Specify a default storage class (applies to Amazon S3 backup storage only). To learn more about Amazon S3 storage classes, refer to the Amazon S3 Storage Classes chapter
- Show storage class options. Select this check box to allow users to select the S3 storage class themselves
- Show Amazon S3 Transfer Acceleration option. Select this check box to allow users to configure S3 transfer acceleration themselves. To learn more, refer to the Amazon S3 Transfer Acceleration chapter at docs.aws.amazon.com
- Use Amazon S3 Transfer Acceleration by default. Select this check box to force Amazon S3 transfer acceleration for users
- Show SSE option. Select this check box to allow users to configure the Server Side Encryption feature themselves
- Use SSE by default. Select this check box to force Server Side Encryption usage for users.
Once you are done, click Save Changes
RMM Tab
You can configure the following RMM Agent properties:

- Allow Remote Management. Select this option to allow licensed users to monitor or manage user computers where the RMM Agent is installed remotely. This enables RMM alerting services as configured in Settings > Notifications. This feature requires licensing
- Allow PowerShell Execution. Select this check box to allow licensed users to execute PowerShell commands on user computers remotely.
- Hide RMM icon from System Tray. Use this option to use RMM Agent on users computers in case you do not want the RMM icon to be visible.
Once you are done, click Save Changes
Connect Tab
As of Management Console 6.6.7 you can use centralized configuration for Connect Agent. Consider, centralized configuration is available only for the computers running the Managed Connect version 3.4. Created configuration will be automatically applied to all online instances of Connect Agent version 3.4 and later. Previous Connect Agent versions will not be affected.
Update the Connect as described here to start using centralized configuration management.

The following options are available to configure Connect instances:
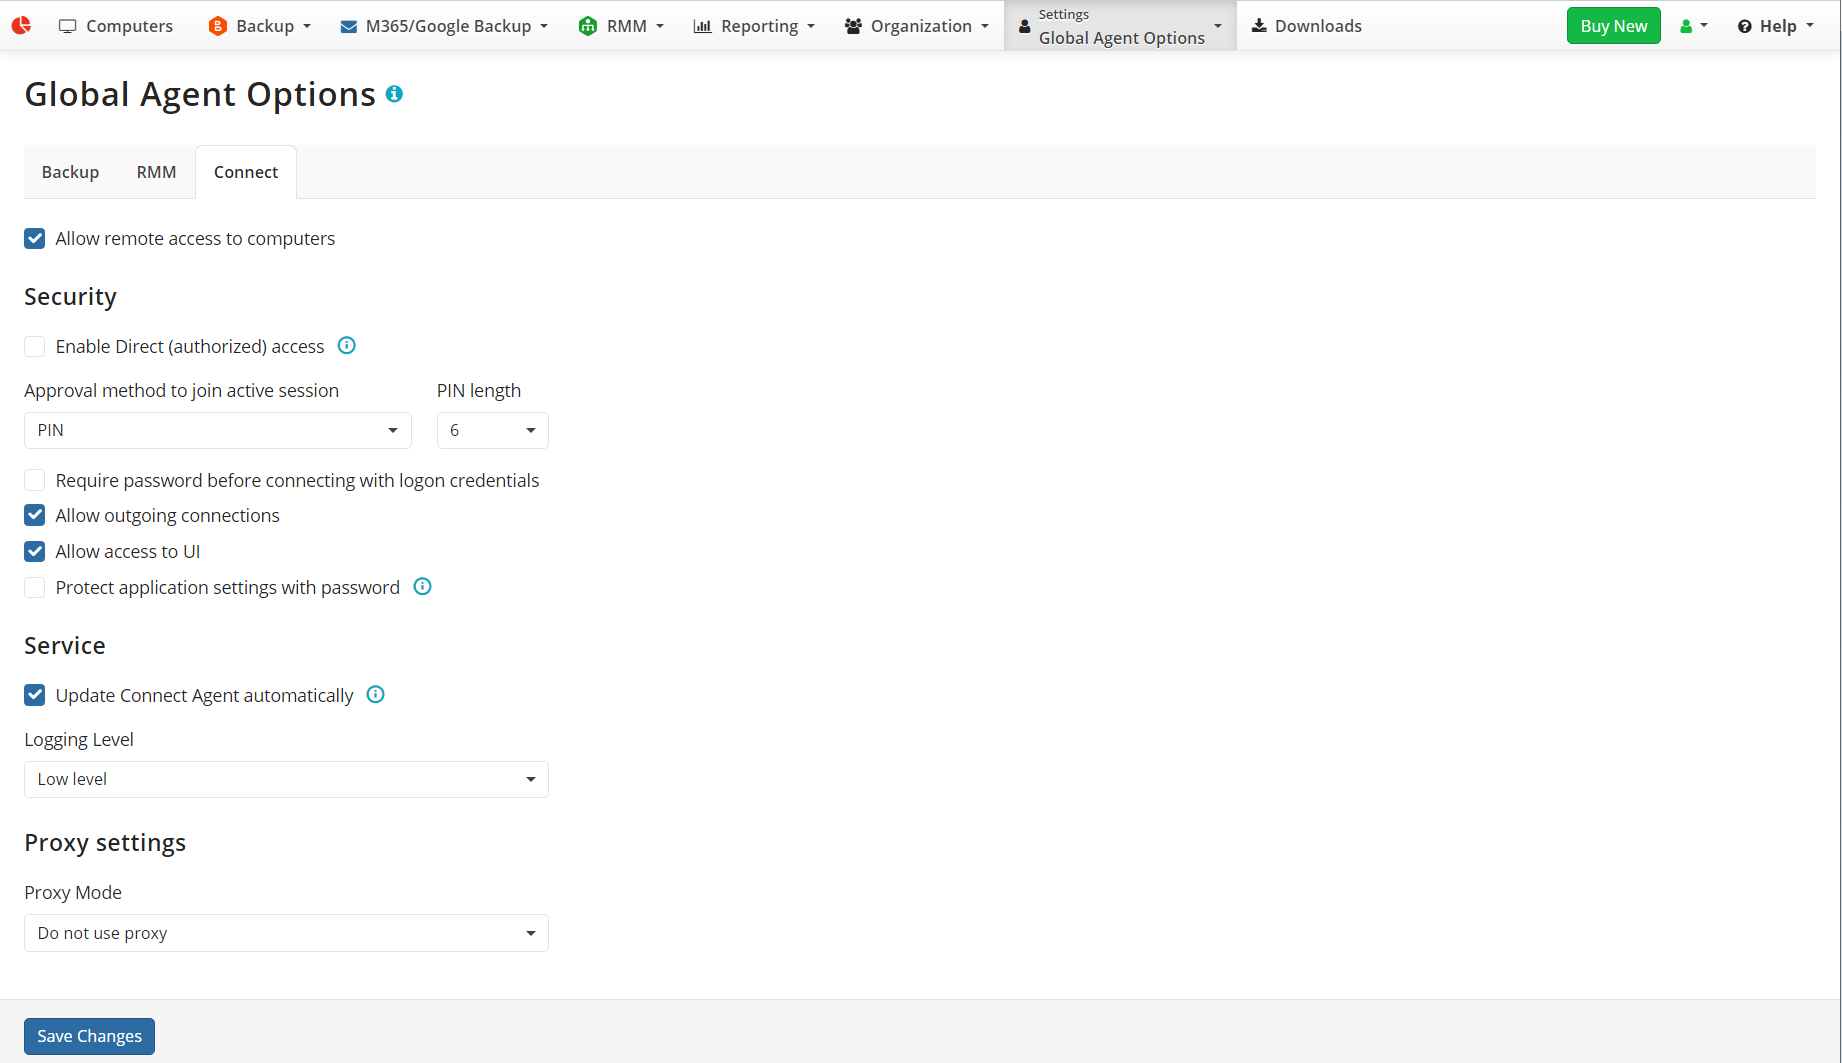
- Allow remote access to computers. Select this check box to enable remote access and control to user computers using Connect.
Security
- Enable Direct (authorized) access. This option allows you to pre-authorize joining all active sessions without any additional confirmation by remote computer user. Select this option to allow direct access to active sessions without any additional confirmation. The remote user will see the name and company of the person who is trying to connect to the active session. This feature requires Connect Agent version 3.4 and later.
- Approval methods to join active sessions. You can select the remote user confirmation method to join an active session. The remote user will see the name and company of the person who is trying to connect to the active session. You can configure the PIN length to increase safety or reset PIN in case you suspect it may be compromised. If you want to secure remote connections additionally, you can set a custom password for connections using logon credentials. To use a custom password, select Require password before connecting with logon credentials. With this option enabled you have to enter the custom password, and then logon credentials to join. It is recommended to use long custom passwords for security reasons and keep them in the safe place.
- Allow outgoing connections. By default, outgoing (from the remote computer) connections are disabled for remote computers, but you can enable outgoing connections for remote users.
- Allow access to UI. Allows access to the Connect graphic user interface for users of remote computers. In this case you can protect application settings by password to prevent changes by the remote user.
Service
- Update Connect Agent automatically. This option allows automatic updates of Connect Agent as soon as the new version becomes available. Select this option to update Connect Agent on all online computers automatically.
- Logging Level By default logging level is low. You can select the logging level you want.
Proxy Settings
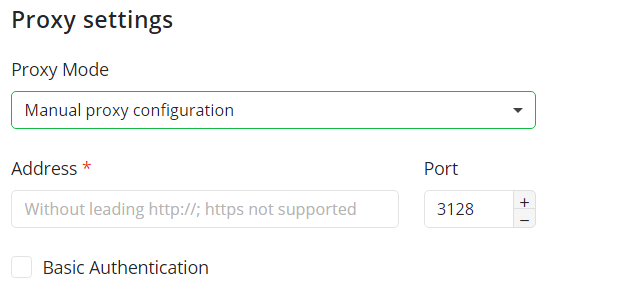
In the Proxy Settings area select the proxy usage settings. By default,the Do not use proxy option is set. If you select the Manual proxy configuration option, specify the proxy server address and port number. For example, if the proxy server's address is http://proxy.example.microsoft.com (https is not currently supported) and the port number is 80, the setting in the Proxy Host box should appear like this: proxy.example.microsoft.com port 80.

If necessary, select Basic Authentication and provide credentials for connection.
Once you are done, click Save Changes