Backup Agents for Linux and macOS
Learn about the available settings in the Backup Agents for Linux and macOS. To access settings, open the Backup Agent, then click the gear icon.
Run across the available settings and configure them:
Backup Settings
Switch to the Backup tab to manage the following settings:
- Symlinks
- Default retention policy
Symlinks Management
Backup Agent offers comprehensive symlink management. The following options are available:
- Do not back up symlinks. Symlinks will not be backed up, and original files will also not be backed up
- Back up symlinks only. Symlinks will be backed up, but original files (to which symlinks point) will not be backed up
- Back up original files instead of symlinks. Original files will be backed up (instead of symlinks) in the folder that contains symlinks. For example, if you have a symlink located in /Desktop that points to a file called "report.docx" in /Downloads, that file will be backed up in /Desktop
- Back up original files in their original locations. Original files will be backed up instead of symlinks in the original folder (not in the folder that contains symlinks). For example, if you have a symlink located in /Desktop that points to a file called "report.docx" in /Downloads, that file will be backed up in /Downloads
- Back up original files in their original locations and symlinks. Original files will be backed up along with symlinks.
Retention Policy
The second group on the Backup tab refers to the default retention policy. The following options are available for configuration:
- Delete version older than. Files in the backup storage will be deleted after the specified time period has passed. The time period will be tracked either from the backup date or the modification date
- Always keep the last version. Retain the last version of any file in the backup storage regardless of the default retention policy
- Keep number of versions. Retain the specified number of versions of each file in the backup storage.
| Top |
Network Settings
To configure network settings, proceed as follows:
- In the horizontal menu bar, click Settings.
- Switch to the Network tab.
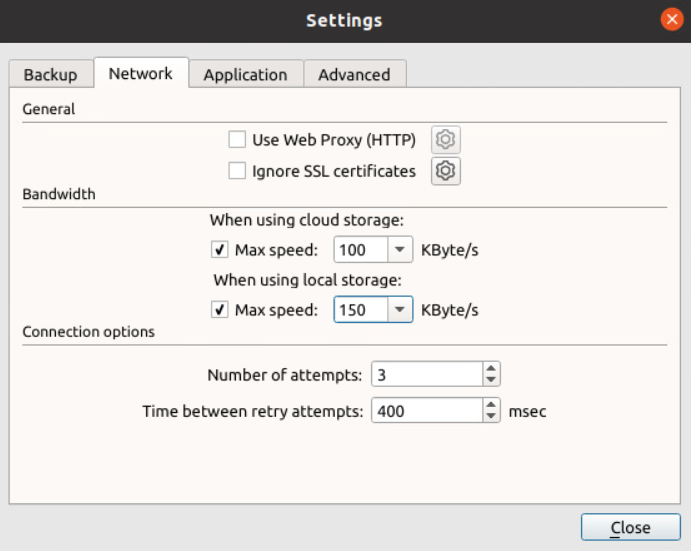
- General. Enable or disable the web proxy (HTTP only) usage. To specify the proxy address and port, click the Gear icon
- Bandwidth. Specify bandwidth settings. Different bandwidth values are available for cloud and local storage
- Connection options. Specify the number of retry attempts and the period between them in case the connection is lost for some reason
Once you are done with network settings, click Close.
| Top |
Application Settings
To configure application settings, proceed as follows:
- In the horizontal menu bar, click Settings.
- Switch to the Application tab.
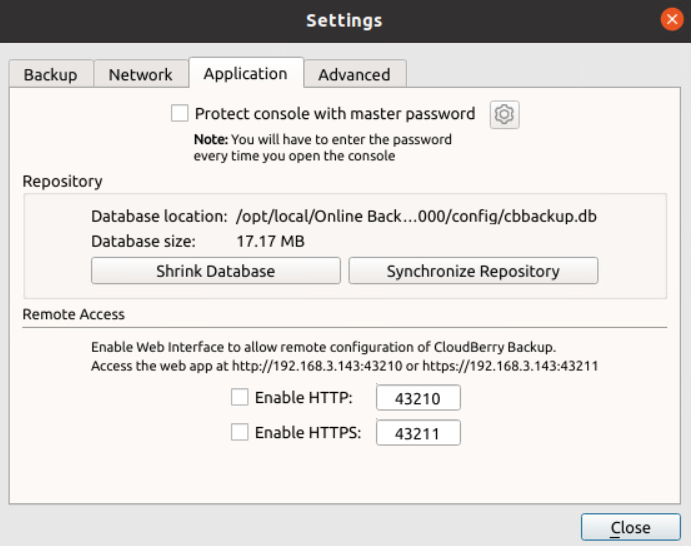
The following settings are available:
- Protect console with master password. Set the master password for security purposes. Upon every start of Backup for Linux, the master password must be provided
- In the Repository group, the following actions are available:
- Shrink database. Database shrinking is a reduction of repository database size on a disk. To shrink the repository database, click Shrink Database
- Synchronize repository. This function allows you to synchronize backup settings between cloud storage and the repository. To start the synchronization, click Synchronize Repository, then select the cloud storage account to synchronize, then click Synchronize Now
- In the Remote Access group, the following settings are available:
- Enable HTTP. Select this check box to enable HTTP access to the web UI, then specify the port number
- Enable HTTPS. Select this check box to enable HTTPS access to the web UI, then specify the port number
| Top |
Advanced Settings
Set up advanced settings in Backup Agent.
To configure advanced settings, proceed as follows:
- In the horizontal toolbar, click Settings.
- Switch to the Advanced tab.
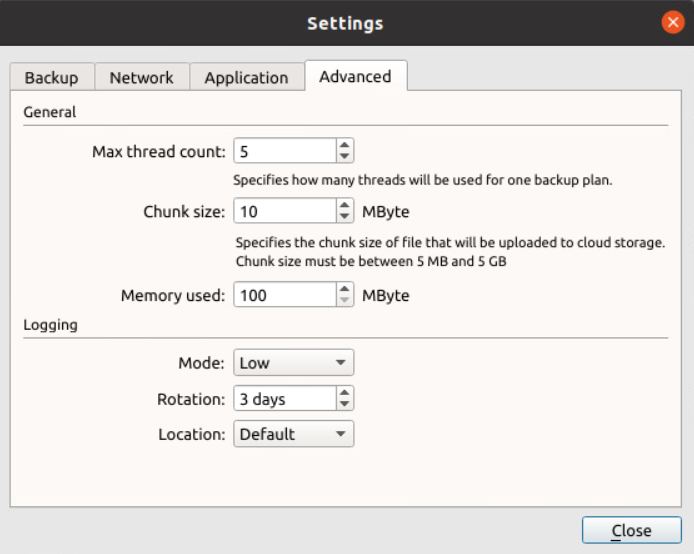
- Maximum number of utilized threads. Do not set this number too high unless your hardware can handle the specified number of threads
- Chunk size. The default size for a chunk. During backup, each file is broken down into these chunks and they are subsequently uploaded one by one
- Memory used. Cap the amount of RAM utilized by the app
- Logging. Specify the logging level according to the required degree of detailing. Specify the logging rotation to delete older logs. Finally, specify the default location for logs
| Top |