Ticket Management
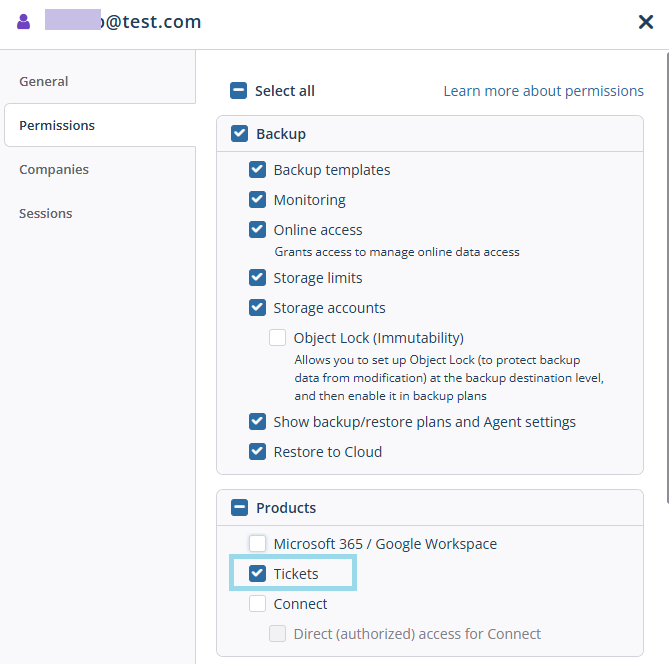
For ticket management, the Products > Tickets permission should be granted as an administrator permission on the Organization > Administrators page. If you are a service provider and the Tickets page is not visible, contact the support team to enable it for your service. To configure ticket settings for integrations with HaloPSA, ConnectWise PSA, or Autotask, refer to the following article.
Click Tickets in the main menu to access Tickets:
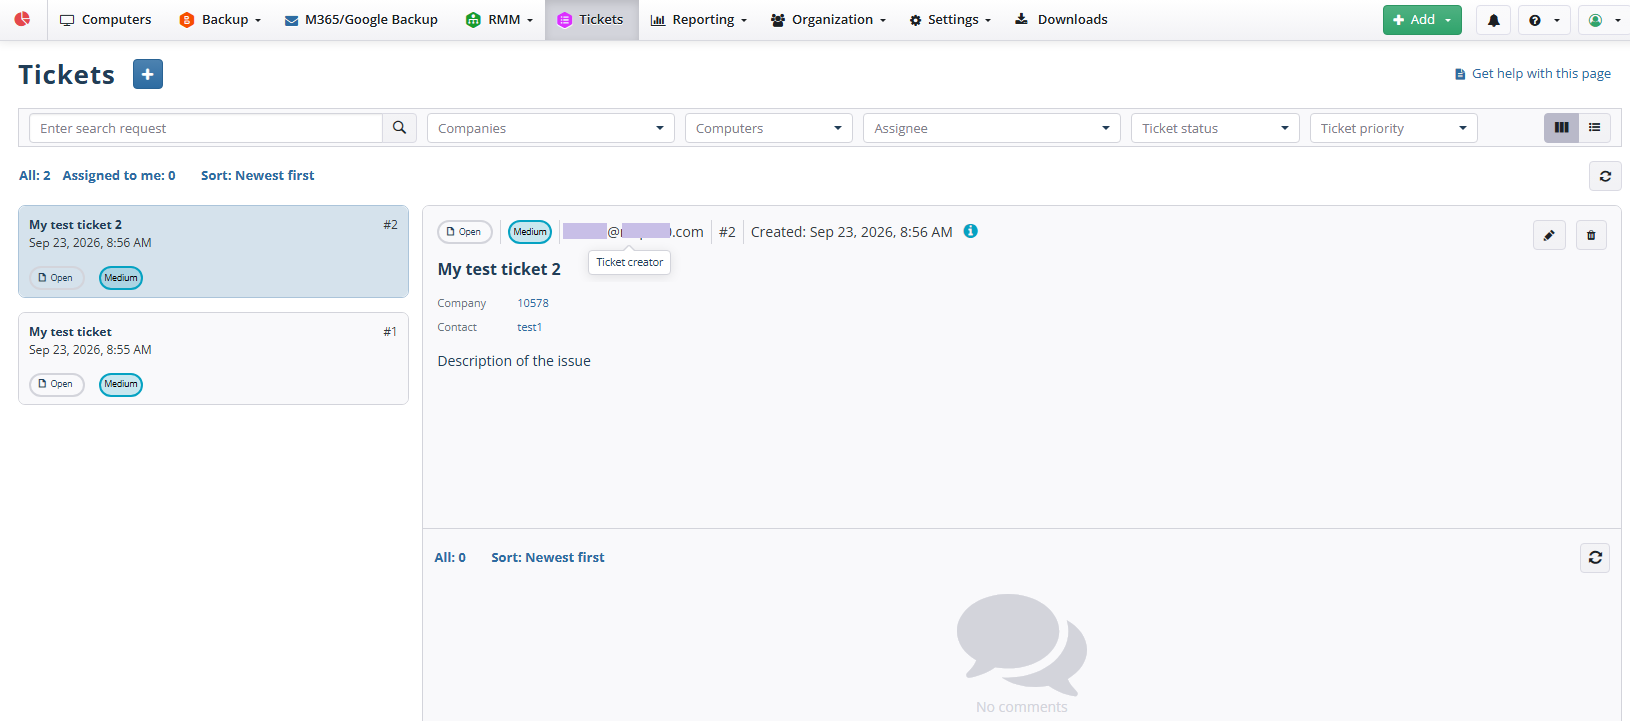
The ticket management is available even if the computer or any service is offline. By default, tickets are displayed in a split view. To switch the view, use the switch at the end of the horizontal menu.

You can switch to the grid view, if needed.

Online Access to My Tickets
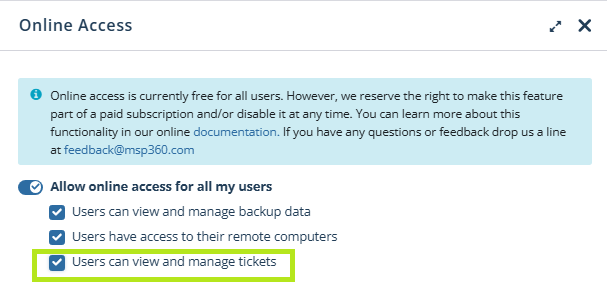
If you want users to be able to create tickets and view public comments on them, navigate to Settings > Online Access and select Users can view and manage tickets.
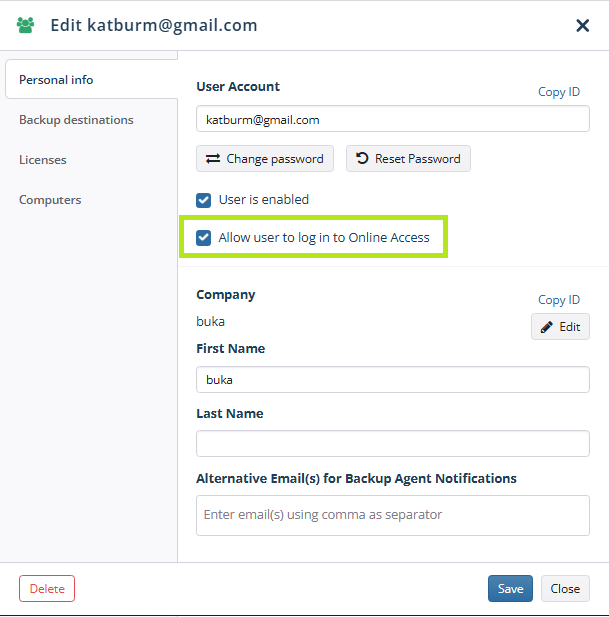
Online Access must be enabled for each user who should be allowed to create tickets on the Organization > Users page.
Users can access the My Tickets section in Online Access to create a ticket. They can view only their own tickets and create public messages. Administrators can communicate with end users via public messages, but internal messages remain hidden from the users.
Add Ticket in Management Console
To add a new ticket, perform the following:
- Open the Management Console.
- Navigate to Tickets in the main menu.
- Click + next to Tickets to create a new ticket.

- Provide a subject and description to identify the issue. By default, the ticket priority is medium; you can escalate it once if needed.
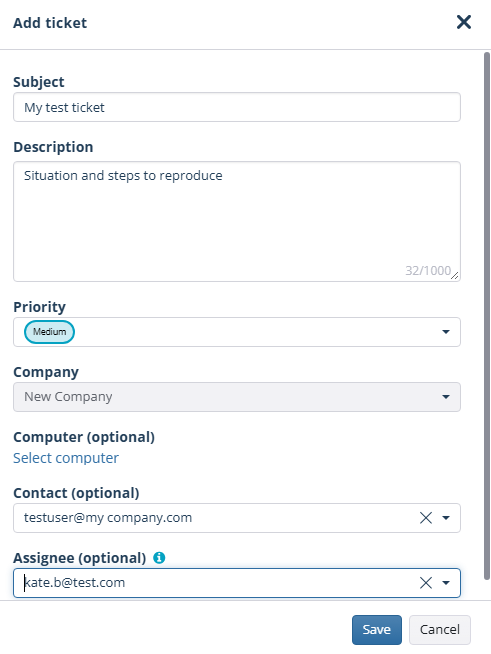
- Select the affected company.
- Select the affected computer (optional).
- Specify a contact.
- Select an account to assign the ticket to (optional).
- Once you have provided all the required information, save the ticket to add it.
Add Ticket in My Tickets (Online Access)
To add a new ticket, perform the following:
- Log in to Online Access.
- Navigate to My tickets.

- Click + next to Tickets to create a new ticket. Provide a subject and ticket description. If possible, describe what steps resulted in the situation.
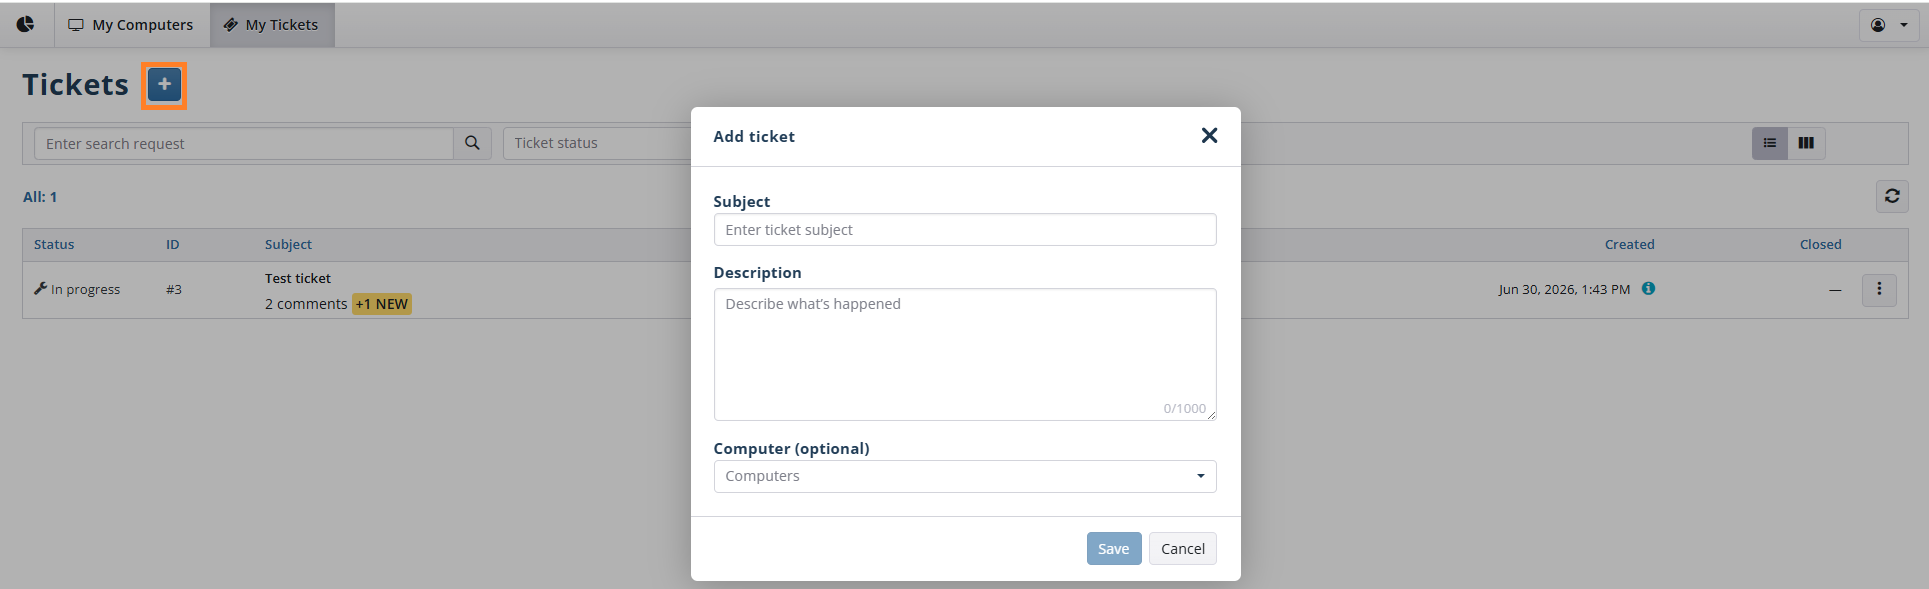
- Select the affected company.
- Select the affected computer (optional).
- Once you have provided all the required information, save the ticket to add it. Created tickets appear in the grid.

Manage Tickets
Management Console
You can edit, set the status of, assign the ticket to the selected account, close, and delete tickets from the system.

The following statuses are currently available:
- Open
- In progress
- Pending
- Closed
Use the Ticket status filter to find the required tickets by status in the long lists.

My tickets using Online Access
You can edit, comment on, set the status of, assign the ticket to the selected account, close, and delete tickets from the system.

The following statuses are currently available:
- Open
- In progress
- Pending
- Closed
Use the Ticket status filter to find the required tickets by status in the long lists.
Filter Tickets in the Management Console
Most of the elements on the page are clickable and help to filter tickets.
Use the search box to find the required tickets in the long lists.

You can filter the tickets:
- By company using the Companies filter
- By computer using the Computers filter
- By assignee using the Assignee filter
- By the ticket status
- By the ticket priority

You can refresh the tickets to see the recent updates using the refresh button:

You can select the view of the page:
Edit Tickets
Management Console
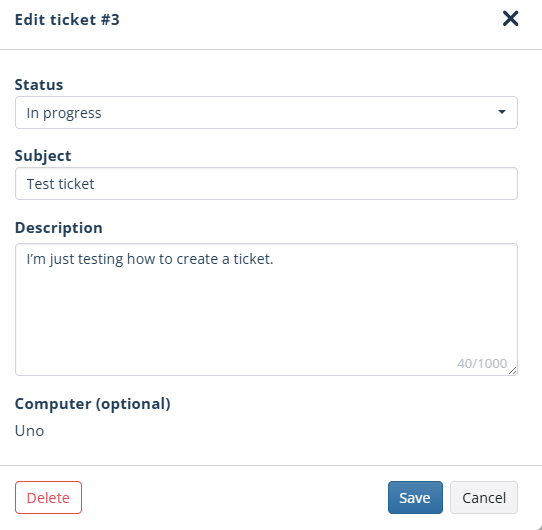
Tickets can only be edited by the administrators who have created the ticket. To edit a ticket, expand the ticket actions and select Edit.
Make the required changes and save the ticket.
My Tickets using Online Access
Tickets can only be edited by the users who have created the ticket or administrators. To edit a ticket, expand the ticket actions and select Edit.
Make the required changes and save the ticket.
Comment Tickets
Management Console
Tickets can be commented on by administrators to share important information. Comments may be:
- Public, visible to all stakeholders
- Private, visible to administrators only.
To add a public comment to a ticket, expand the ticket actions and click Comment.
To add a private comment to a ticket, expand the ticket actions and select Comment. Turn on the Send for admins only switch.
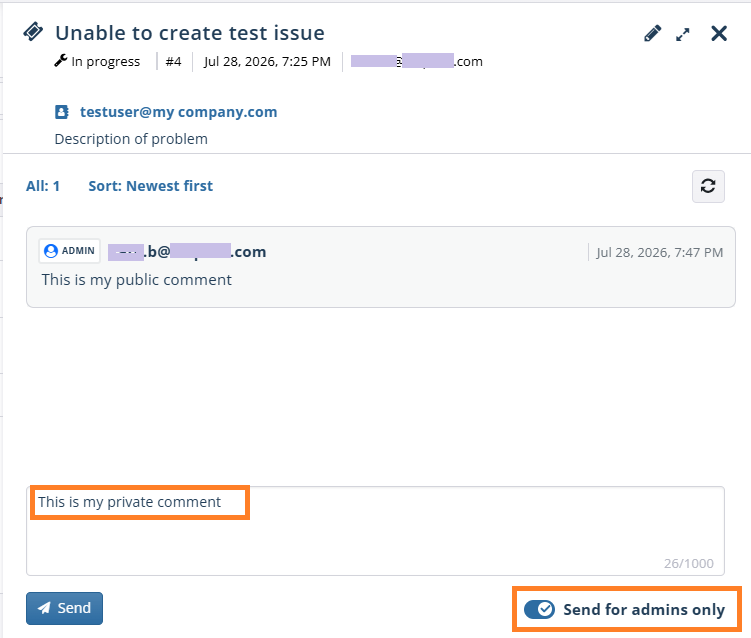
Click Send to add the comment message.
To see all comments inside the ticket, click the ticket subject to open the communication history.
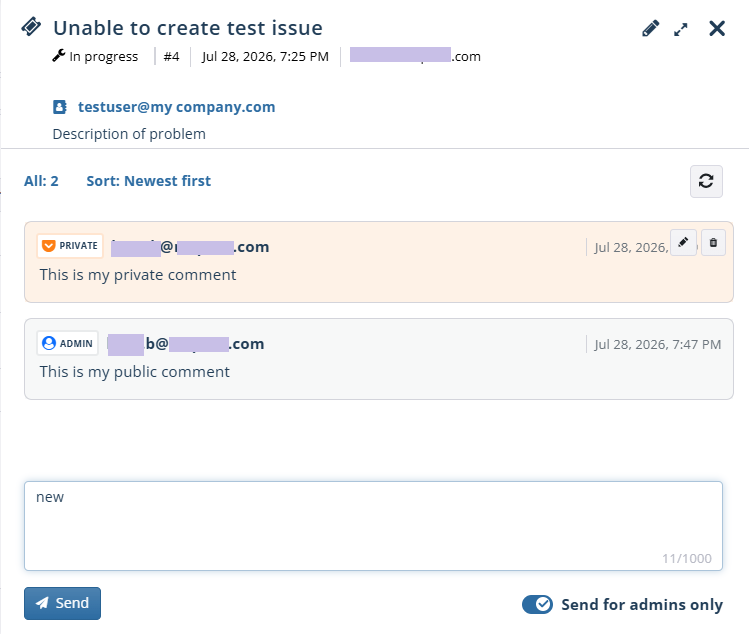
Notifications about new unread comments will appear in the Ticket column when such comments are available.
My Tickets using Online Access
To view public messages or add a public comment to your ticket, click the ticket subject to open the side panel.
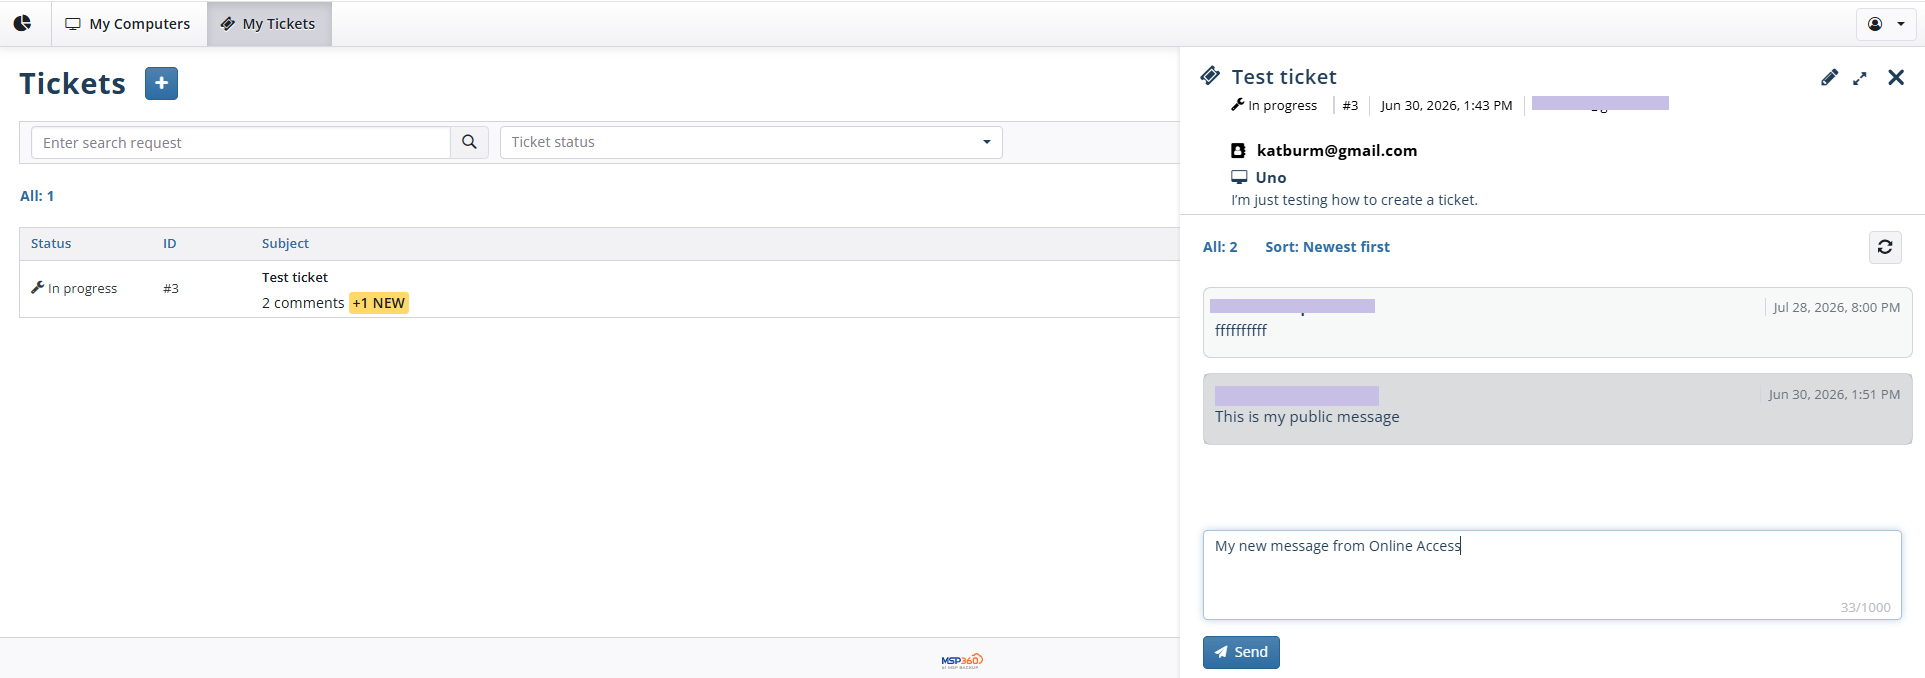
Write your comment message and click Send to add it.
Close Tickets
To mark a ticket as resolved, expand the ticket actions and set the Closed status.
Management Console
This action needs confirmation.
My tickets using Online Access
Closed tickets cannot be edited or deleted.
Delete Ticket
Management Console
To delete a ticket, expand the actions and select Delete.
My tickets using Online Access
To delete a ticket, expand the actions and select Delete.
Deleted tickets are no longer visible in the Tickets tab. This cannot be undone.