Capacity Report
Capacity Report contains information about stored backup data.

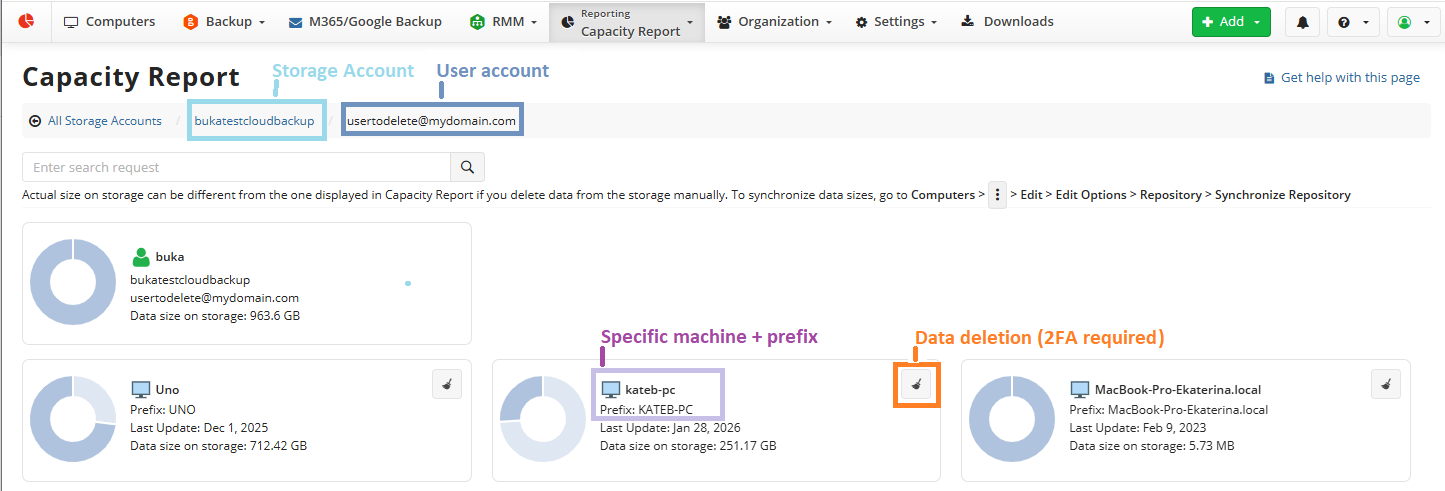
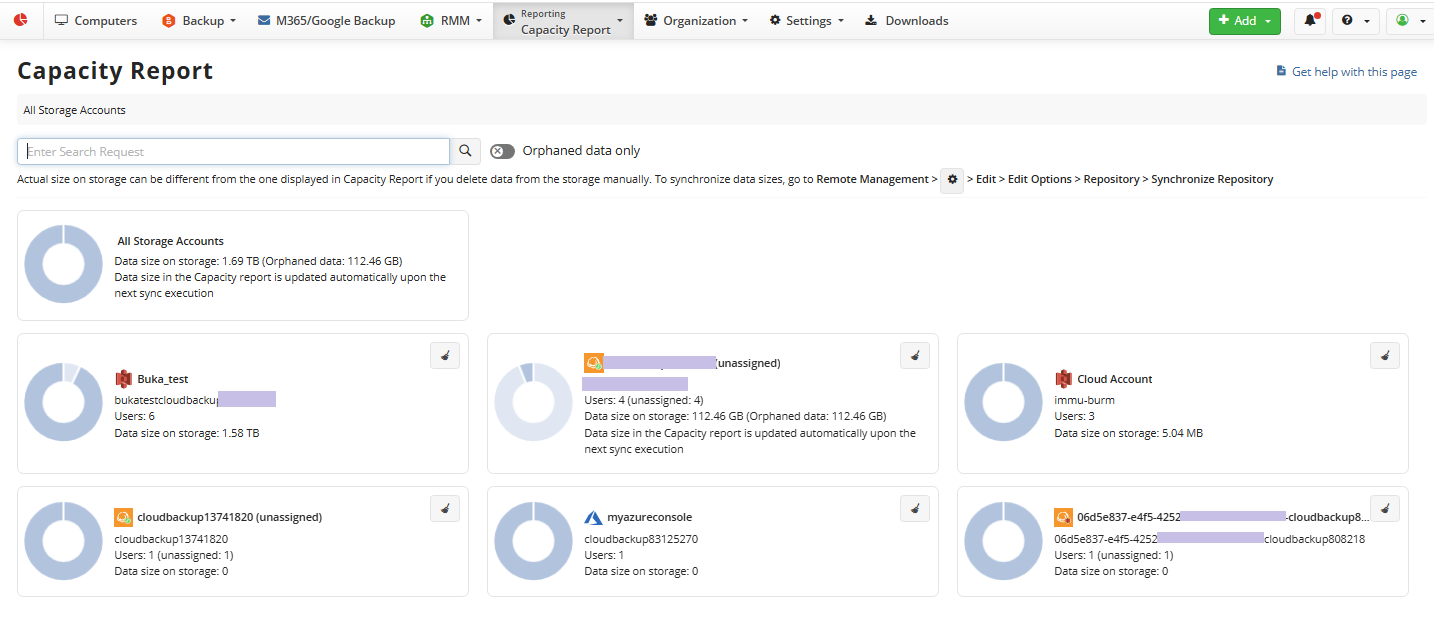
There are three data levels in the Capacity report:
- All storage accounts
- Specific storage account (buckets (backup destinations)
- Specific user backups (computers, backup prefixes)
Browsing on different data levels is easy: just click the required object in the Capacity report to open the lower level. Thus, to view specific computer data, click the required backup destination, then click the required computer or backup prefix, if one computer (endpoint) is associated with multiple backup prefixes.
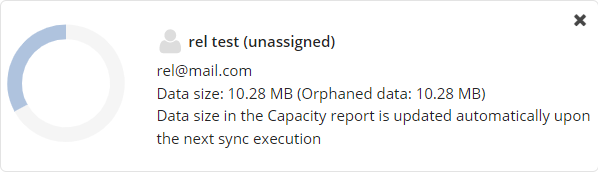
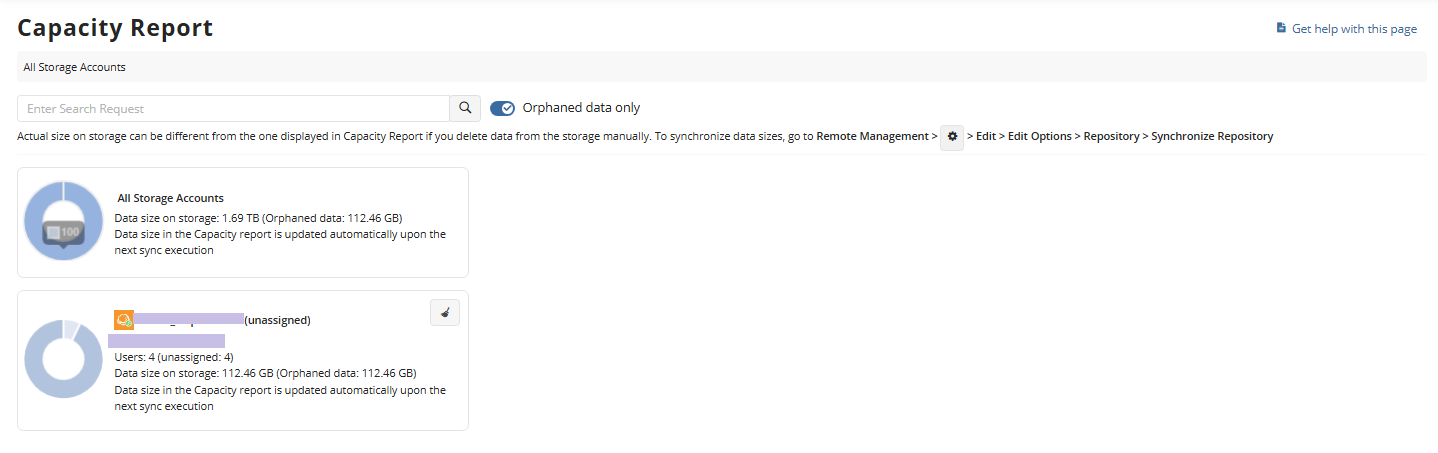
- The unassigned status of buckets means that no backup destination in Managed Backup is currently associated with this bucket. All data in this bucket is marked as orphaned
If you see any discrepancies between the actual storage usage and information in the Capacity report, please run a consistency check on your computers using this destination. In some cases, the storage provider also calculates the size of incomplete multipart uploads, which are not visible to the Backup Agent. Read more about removing incomplete multipart uploads here.
Actual size on storage can be different from the one displayed in Capacity Report if you delete data from the storage manually. To synchronize data sizes,refer to the Synchronize Repository chapter.
Delete Backup Data for Specific Computer or Backup Prefix
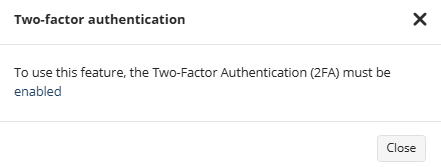
For all actions related to data deletion with the Capacity report, Two-Factor Authentication must be enabled
Backup data created by Microsoft 365 / Google Workspace Backup or protected by Object Lock cannot be deleted and remains in the backup storage
To delete backup data in for specific computer:
Use Orphaned data only filter to quickly identify the backup data to delete

If you see any discrepancies between the actual storage usage and information in the Capacity report, please run a consistency check on your computers using this destination. In some cases, the storage provider also calculates the size of incomplete multipart uploads, which are not visible to the Backup Agent. Read more about removing incomplete multipart uploads here.
For removal of redundant backup data:
- Open your Management Console.
- In the Reporting menu, select Capacity Report;
- Navigate to storage account and Managed Backup user account associated with backup data that needs to be deleted;
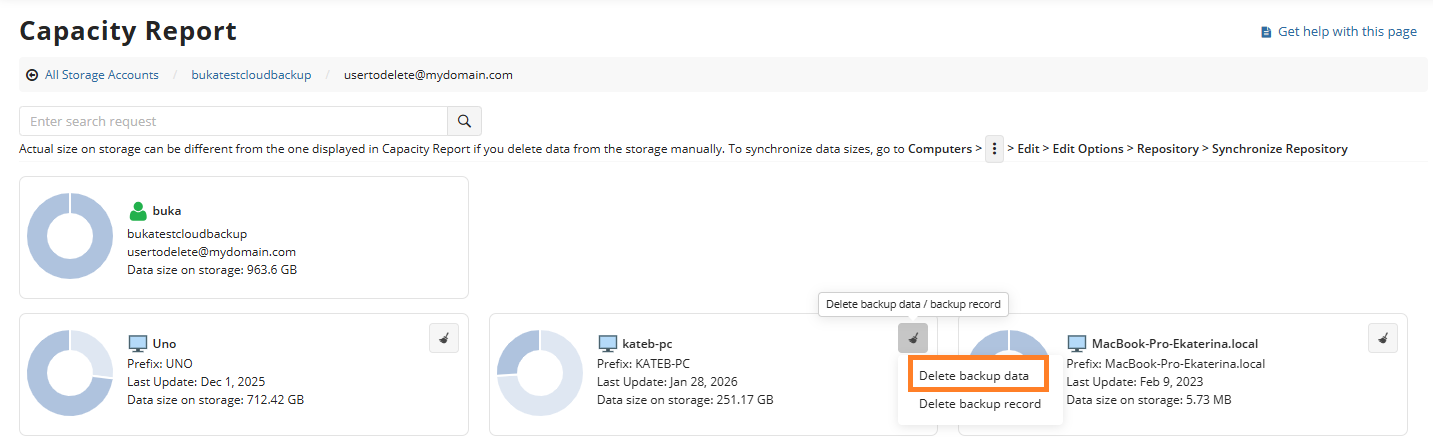
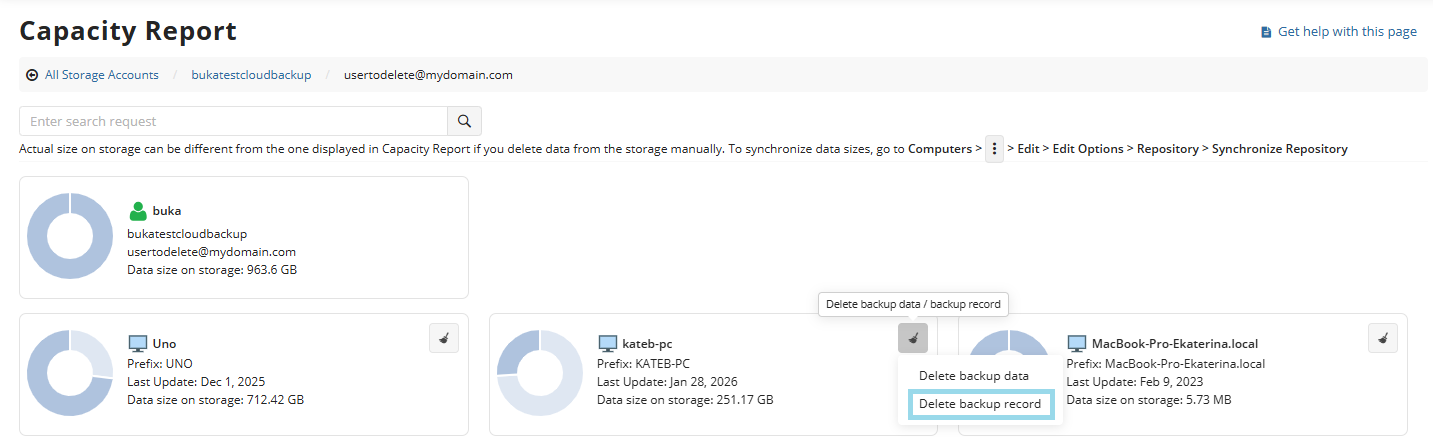
- Click the Delete backup data/ backup record button to initiate deletion of backup data for retired machine(-s) or backup prefix
- Select Delete backup data.
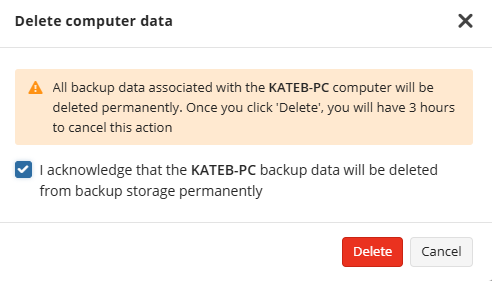
- Confirm deletion.
- The deletion operation will be queued.

How It Works
When you confirm backup data deletion in the Management Console, a special task is created to delete the backup data. This data is not deleted immediately, as there is a 3-hour delay before deletion begins. In some cases, the delay may be longer if the deletion tool is heavily used. During this delay period, before deletion begins on storage, the task can be canceled. However, once data deletion has begun, it cannot be canceled.
Displayed Data After Deletion Is Completed
Note that if not all data is deleted (for example, because some data is under Object Lock (Immutability)), information about this data in the corresponding element (user or computer) in the Capacity Report will not change, but you will receive a message confirming that the data is correct after synchronization. Synchronization is performed by the Backup Agent automatically upon the next backup plan execution.
If all backup data is deleted, zero data is immediately displayed in the 'Used data,' or the corresponding element (user or computer) is simply not visible in the report.
Backup Record Removal
In some rare cases it is necessary to remove backup record. If you are sure this backup data is deleted, perform the following:
- Open your Management Console.
- In the Reporting menu, select Capacity Report;
- Navigate to storage account and Managed Backup user account associated with backup data that needs to be deleted;
- Click the Delete backup data/ backup record button to initiate deletion of backup data for retired machine(-s) or backup prefix
- Select Delete backup record.
- Confirm the record deletion. This record will no longer be visible in the Capacity record.
Delete Backup Data in Specific Bucket (Backup Destination)
For all actions related to data deletion with the Capacity report, Two-Factor Authentication must be enabled
Backup data created by Microsoft 365 / Google Workspace Backup or protected by Object Lock cannot be deleted and remains in the backup storage
To delete backup data in specific backup destination
Use Orphaned data only filter to quickly identify the backup data to delete
- Open the Management Console.
- In Reporting, select Capacity Report.
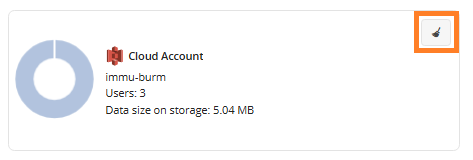
- Click Remove backup data icon on the required backup destination tile to delete backup data from the bucket.
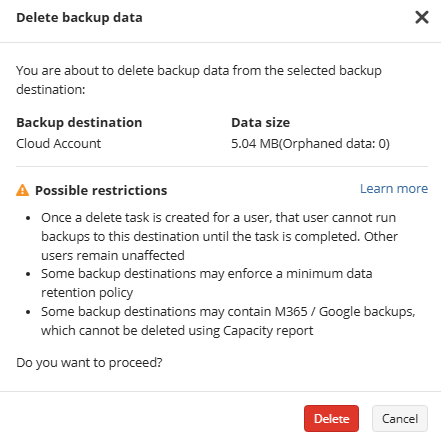
- Confirm the action in the dialog box.
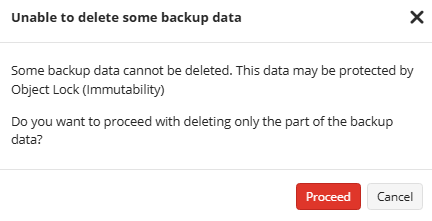
- If some backup data in the backup destination cannot be deleted, this situation will be reported.
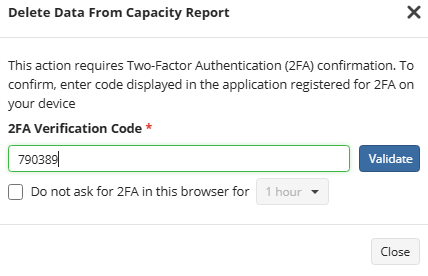
- Provide the 2FA confirmation code.
- You can cancel deletion 3 hours after the deletion task is created.
If 2FA is disabled for your account, you will be prompted to enable it.