Files Restore Plan In Management Console
With Managed Backup you can restore files directly to users' computers using Management Console.
If you need several files only, it is reasonable to use Quick Restore application. Navigate to backup storage browser in Management Console. You can use this functionality for restore to Downloads folder on your computer. You may be prompted to install the Quick Restore Application if it is not yet installed
This chapter covers the following topics:
Create New File Restore Plan
- On Computers select Remote Management if you use legacy main menu, or open Backup > Computers page in the new main menu.
- Find the required computer, then click the Configure icon in the Backup Plan Status column.
- On the side panel, click + or +Add new plan

- In the Restore plans tab, select Files restore plan.
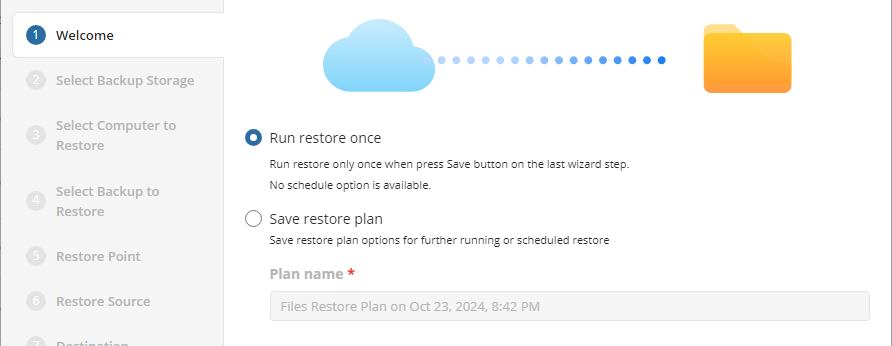
Welcome
Select the restore plan mode:
- Select the Run restore once option to restore files only once
- Select the Save Restore Plan option to save the plan configuration for future use. Specify the name of the plan
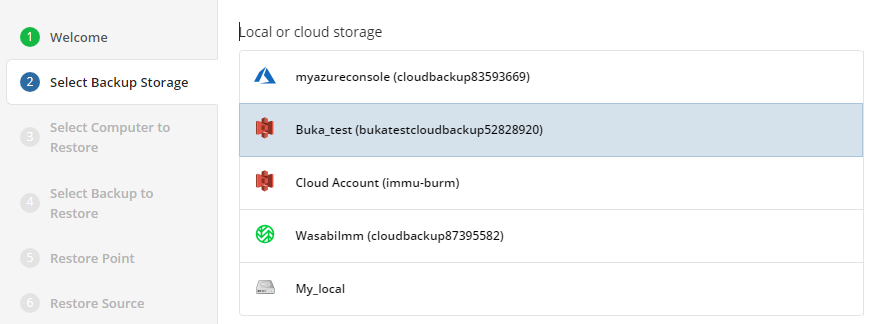
Select Backup Storage
Select the backup destination that contains the required backup from the list.
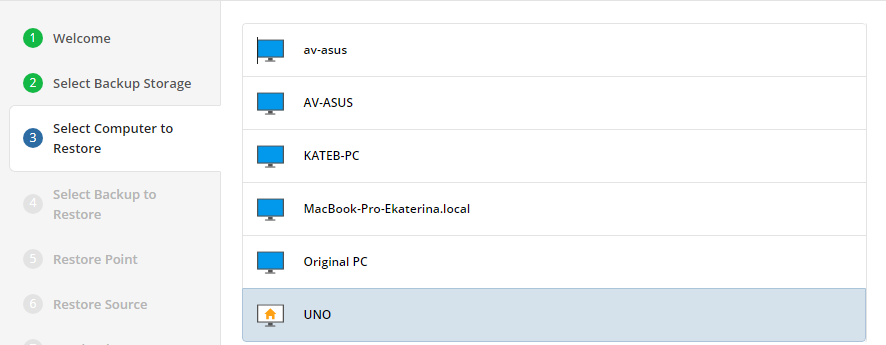
Select Computer (optional)
This restore wizard step appears only if the specified backup destination contains several backups from different computers.
Select the required computer.
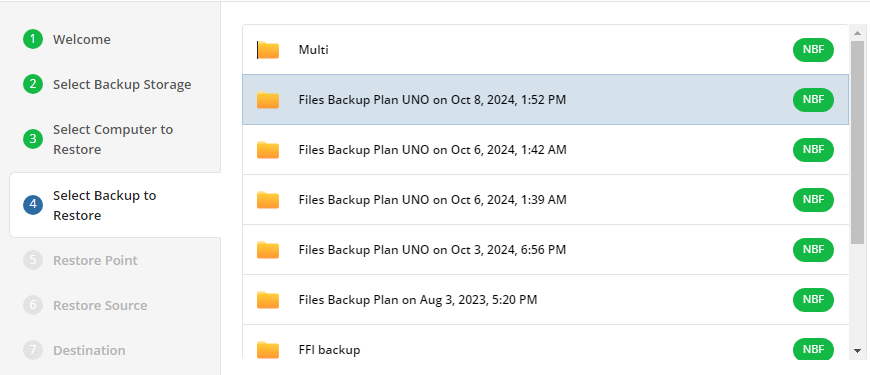
Select Backup
Select the backup to restore from the list of available backups.
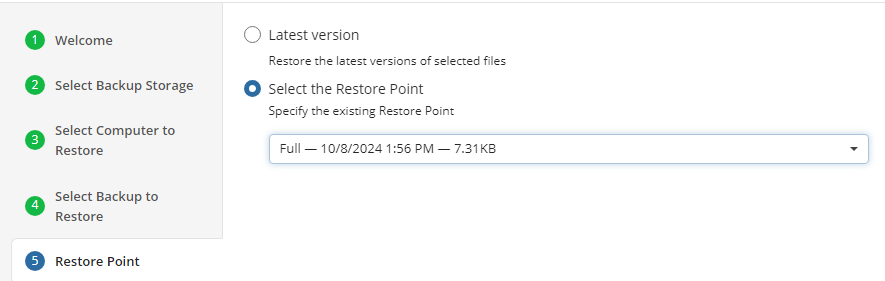
Select Restore Point
Select what to restore.
For backups made in the new backup format, select the latest version or a specific restore point from the list below:
For backup made in the legacy backup format, select one of the available options:
- Select the Latest Version option to restore the latest image version of the selected backup
- Select the Point in Time option to restore the image version for the specified date and time
- Select the Modified Period option to restore the image version based on the modification period, then specify the period
- Select the Backup Period option to restore the image version based on the backup period, then specify the period
- Select the Manually option to proceed to manual image version selection
Note that the time must be specified in the provider time zone. Point the mouse to the hint icon to see the provider time zone
If there is no copy of a specific file at the selected restore point, the application will automatically select the newest version from previous restore points
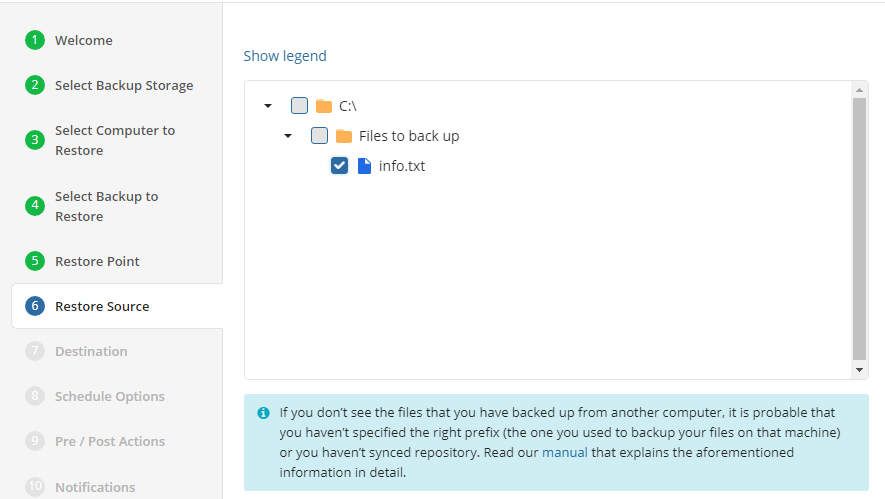
Restore Source
Next, select the files and folders to restore from the selected restore point.
Select Destination
Select the destination to restore files.
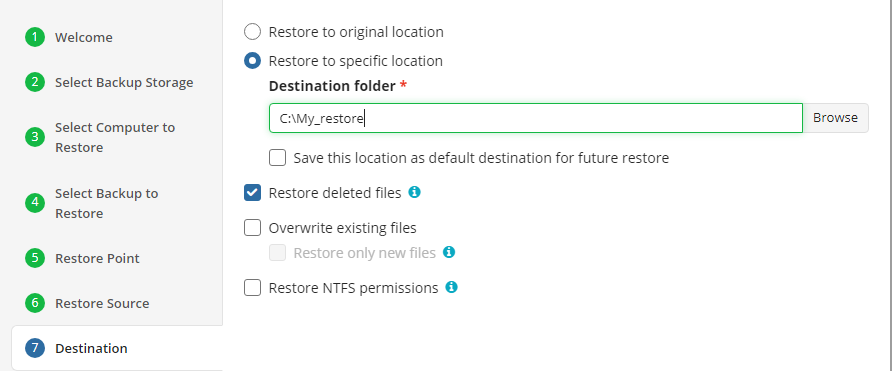
To restore files and folders to their original location, select the Restore to original location option. To restore files and folders to specific location, select the Restore to specific location option, then speciy it in the field below. You can save the specified path for future restores. To do this, select the Save this location as default destination for future restores checkbox.
Additionally, the following options are available:
- Restore deleted files. This option allows you to restore locally deleted files that had been deleted prior to restore
- Overwrite existing files. This option specifies whether to replace the existing files in the destination folder with their newer versions or keep the older files and do not restore their newer versions. Different file versions are attributed to the same file only if their names are identical to that of the original file. This is why a file that has been renamed in local storage will not be considered to be a new version of the previously named file. When this option is enabled, you can also specify whether to restore only newer file versions or all files regardless of their modification time
- Restore only new files. This option can be enable only with the Overwrite existing files option. With this option enabled, only files with modification date and time newer than the ones at the restore destination are restored
- Restore NTFS permissions. If a backup contains supported NTFS permissions of files and folders backed up, you can enable this option to restore these permissions along with the selected files
Encryption Options (optional)
Enter the encryption password if your backup is encrypted.

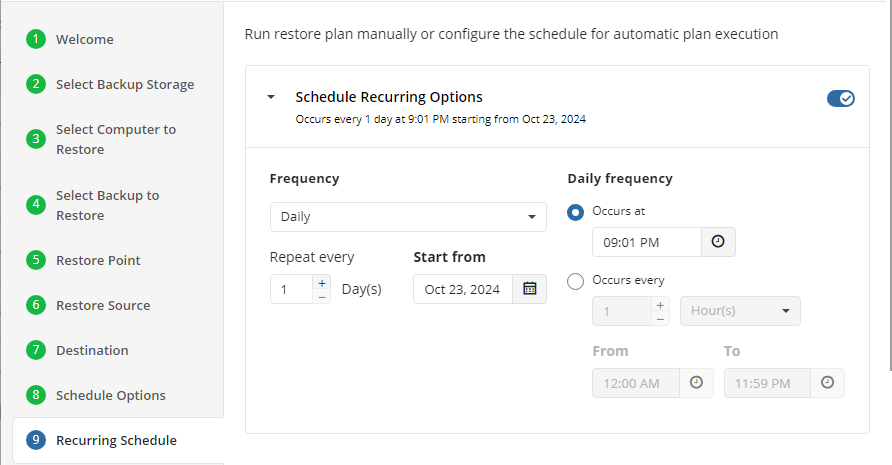
Schedule Options
Specify the schedule for the restore plan.

The following options are available:
- No schedule (run manually). Select this option to run the restore plan manually, only when it is required
- Specific date. Select this option to specify the date and time the restore plan is to be executed
- Recurring. Select this option to run the restore plan on a periodic basis, then configure the schedule
- Stop the plan if it runs for. Select this option if you want to stop the restore plan if it runs longer than the time you specified. Use this option with care since sometimes it is hard to predict the restore time due to many factors
- Alert the plan as Overdue. Select this option to monitor the plan execution. If the restore plan fails or is finished with warnings for the specified period of time, it will be assigned with the Overdue status that will appear on the Monitoring/History page
- Run missed scheduled plan immediately when computer starts up. Select this option if you want the restore plan would run as the computer boots in case it was down at the moment of the scheduled run
Pre / Post Actions
Specify the actions before and/or after the restore plan. Usually, these are scripts that perform particular jobs before or after the plan is executed. The following settings are available:
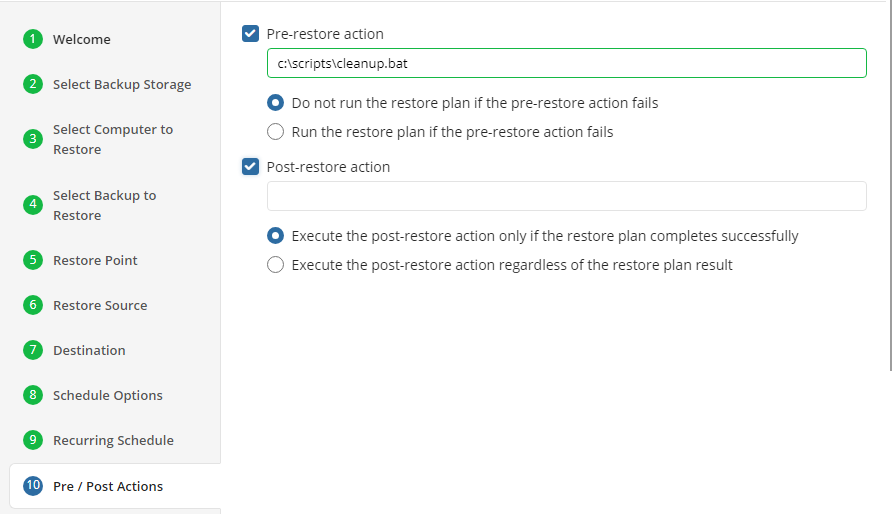
- To specify the action that must be performed before the restore plan starts, select the Pre-restore action checkbox
- Specify the path to the script before the restore plan
- Specify the conditions for pre-action execution:
- Select the Do not run the restore plan if the pre-restore action fails option to suspend the restore plan execution in case the pre-action fails
- Select the Run the restore plan if the pre-restore action fails option if you want the restore plan to run regardless of the pre-action execution result
- To specify the action that will be performed after the restore plan completes, select the Post-restore action checkbox
- Select the Execute the post-restore action only if the restore plan completes successfully option if you want to run it only if the backup was executed without any errors or warnings.
- Select the Execute post-restore action regardless of the restore plan result option if you want the post-action to be executed regardless of the restore plan result
Notifications
Specify notification settings for restore plan results. You can use the company notification settings or customize them as needed: specify the required recipients and customize the notifications for different restore plan results:
- Success
- Failed
- Warning

Select the I want to receive a notification email to enable notifications.
- Select When the restore plan fails or finished with warnings option if you want to receive the notification message in case the restore plan terminates with errors or warnings
- Select the In all cases option if you want the notification to be delivered in all cases
If you want the restore plan results to be added to Windows Event Log, select the Add entry to Windows Event Log checkbox
- Select When the restore plan fails or finished with warnings option if you want to receive the notification message in case the restore plan terminates with errors or warnings
- Select the In all cases option if you want the entry to be put in Windows Event Log in any case.
Click on Save when you are happy with your selections. If the plan is set to run only a single time and has no set schedule, it will automatically start. Otherwise, if it is set to run only once and is scheduled, it will display in the list of plans until the scheduled time. If it is only set to run once, then when it completes successfully it will remove itself from the list of plans. Only Restore Plans which are saved will remain in the list for future use.
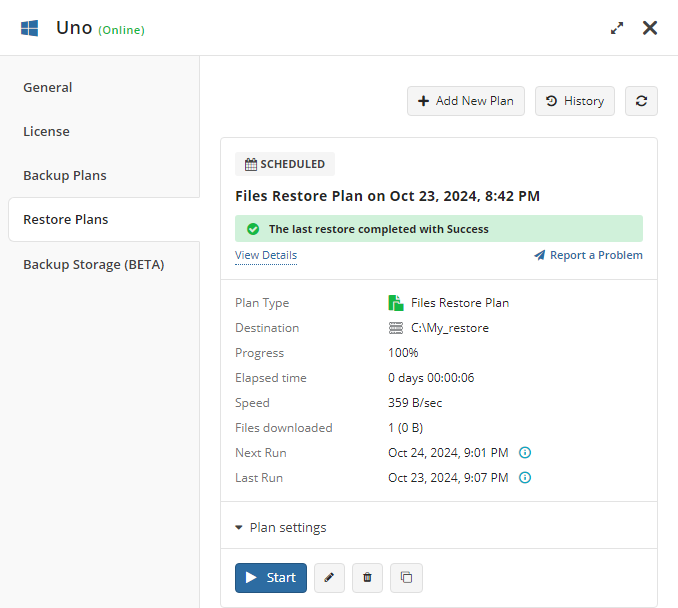
Run the Restore Plan
To run the restore plan, proceed as follows:
- On Computers select Remote Management if you use legacy main menu, or open Backup > Computers page in the new main menu.
- Find the required computer, then click the Configure icon in the Backup Plan Status column.
- On the side panel, click the Start button.
| Top |
Edit the Restore Plan
To edit the restore plan, proceed as follows:
- On Computers select Remote Management if you use legacy main menu, or open Backup > Computers page in the new main menu.
- Find the required computer, then click the Configure icon in the Backup Plan Status column.
- On the side panel, click Edit icon below the backup plan tile.
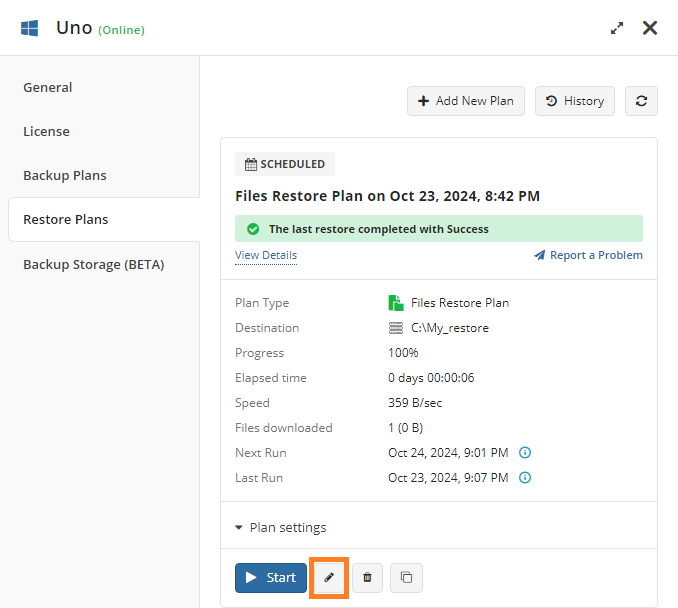
- Make the required changes, then click Save.
| Top |
Delete the Restore Plan
To edit the restore plan, proceed as follows:
- On Computers select Remote Management if you use legacy main menu, or open Backup > Computers page in the new main menu.
- Find the required computer, then click the Configure icon in the Backup Plan Status column.
- On the side panel, click Edit icon below the backup plan tile.
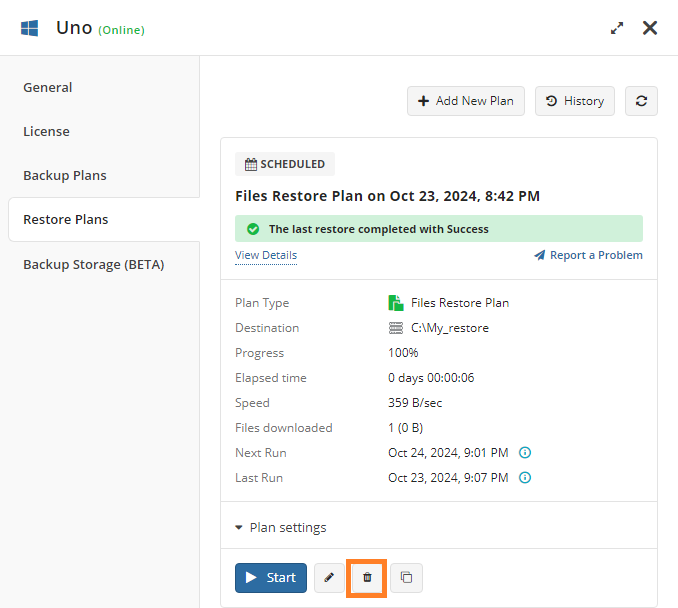
- Confirm the plan deletion.
| Top |