Restore MS SQL Server Database
With MSP360 Managed Backup you can restore backed-up Microsoft SQL Server databases. This chapter covers the following topics:
Step 1
In the Management Console, open Backup > Computers page.
Step 2
Find the computer hosting the MS SQL instance to which you want to restore a previously backed up database or databases, then click the computer name or the Configure icon in the Backup Plan Status column.
Step 3
In the side panel, navigate to the Restore plans tab. Click on the +Add New Plan button and select MS SQL database restore plan from the drop-down menu.

Step 4
The first step when creating a new MS SQL database restore plan is to decide whether to run it a single time immediately after plan creation, or give it a name and save it for later.
- Select the Run restore once option to restore a backup only once
- Select the Save Restore Plan option to save the plan configuration for future use. Specify the name of the plan
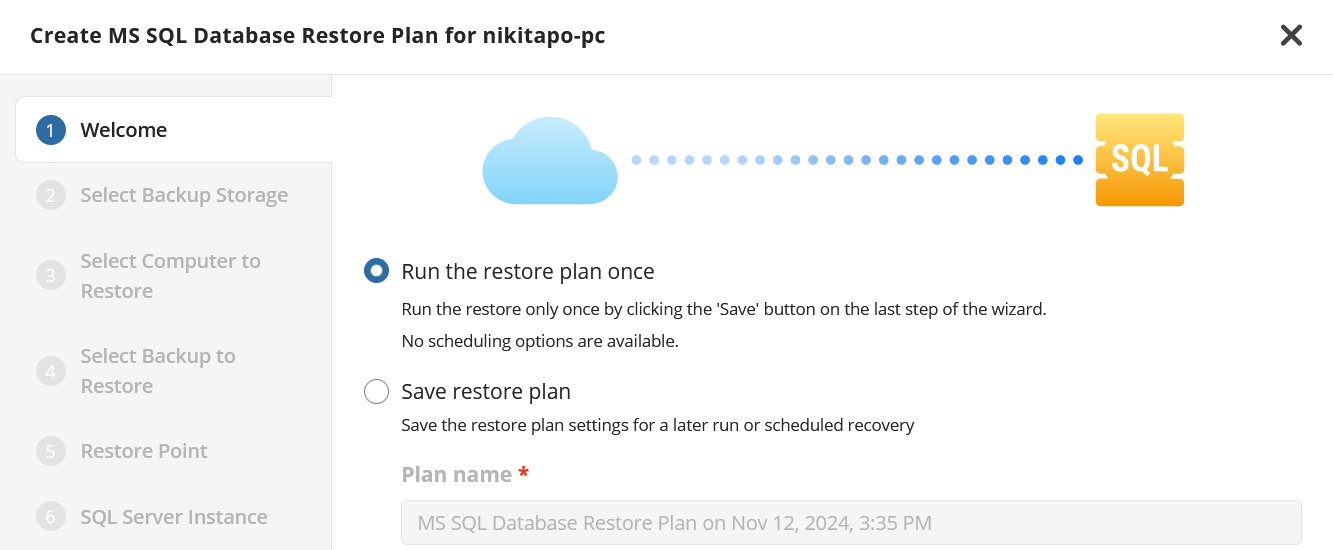
It is recommended to use a descriptive name which will distinguish the plan from others
Step 5
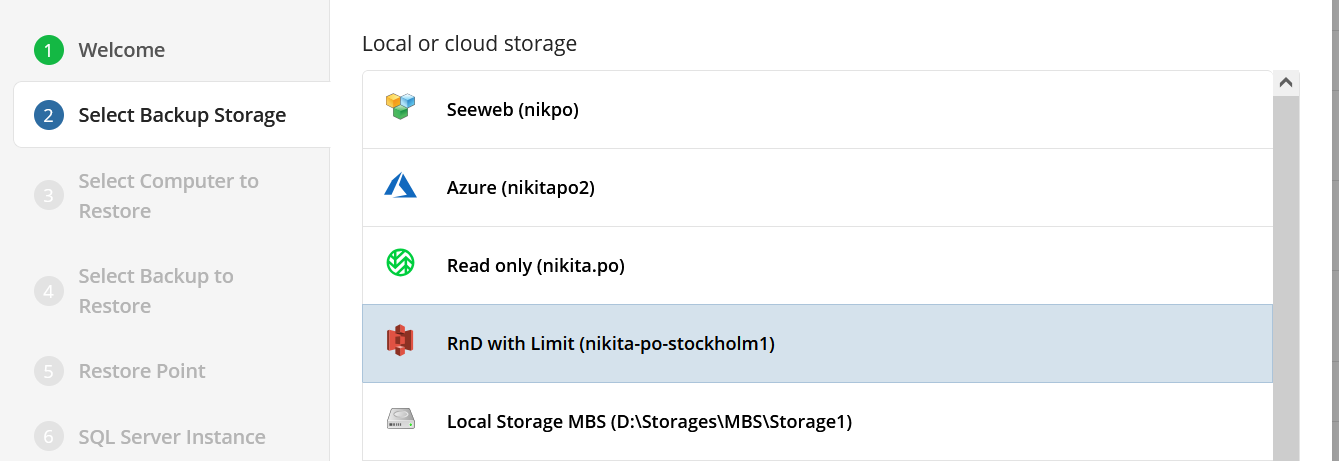
Next, select the storage which contains the desired data.
Step 6 (optional)
With the backup storage selected, the next step is to select the computer associated with the backup which you would like to restore.

Step 7
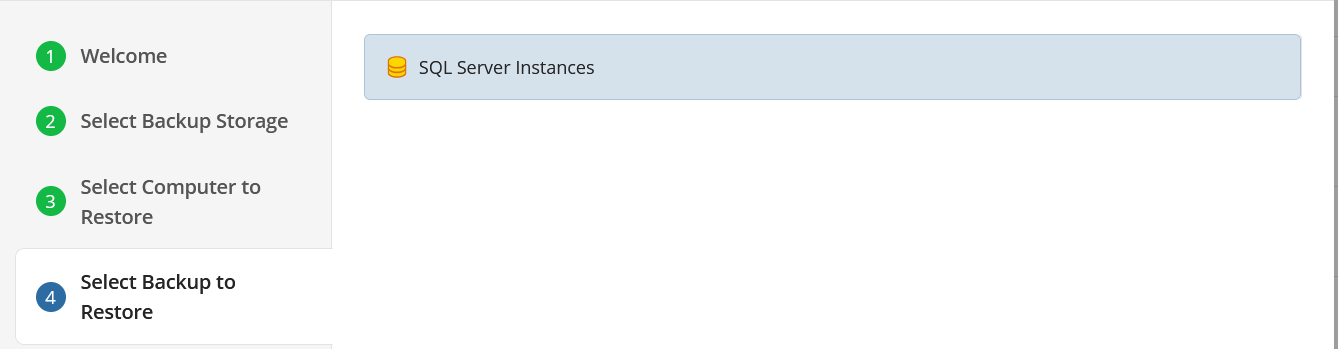
Next, you will be presented with a list of available backup types for the selected host. Select the “SQL Server Instances” option to continue.
Step 8
The next step is to select the desired point in time to restore to. Select the latest version or the specific restore point from the list below.
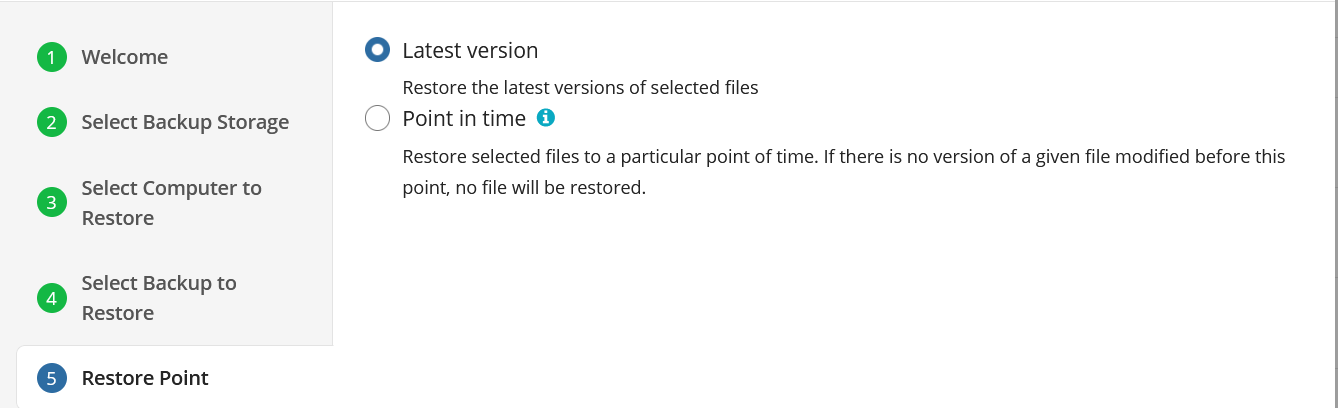
If there is no exact match for the point in time selected, the application will automatically select the closest previous restore point
Step 9
Next you will be prompted to select the SQL Server Instance as well as specify the credentials to be used by the application.
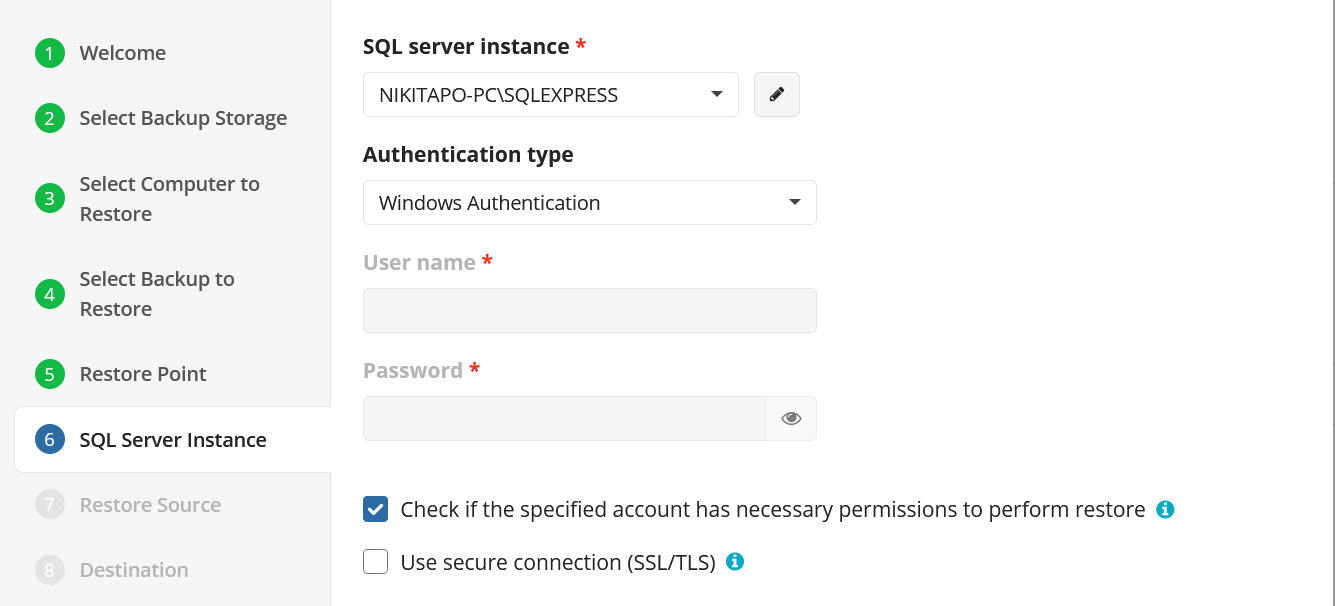
- SQL Server Instance: Select the instance containing the database to be backed up from the list. Note that only local instances can be selected.
- Authentication: Choose between Windows or SQL Authentication. If “Windows Authentication” is selected, the application will run the backup as the local service account.
- User Name: If “SQL Server Authentication” was selected, enter the user name in this field.
- Password: If “SQL Server Authentication” was selected, enter the password for the specified SQL user here.
Only local databases and instances can be restored to
Step 10
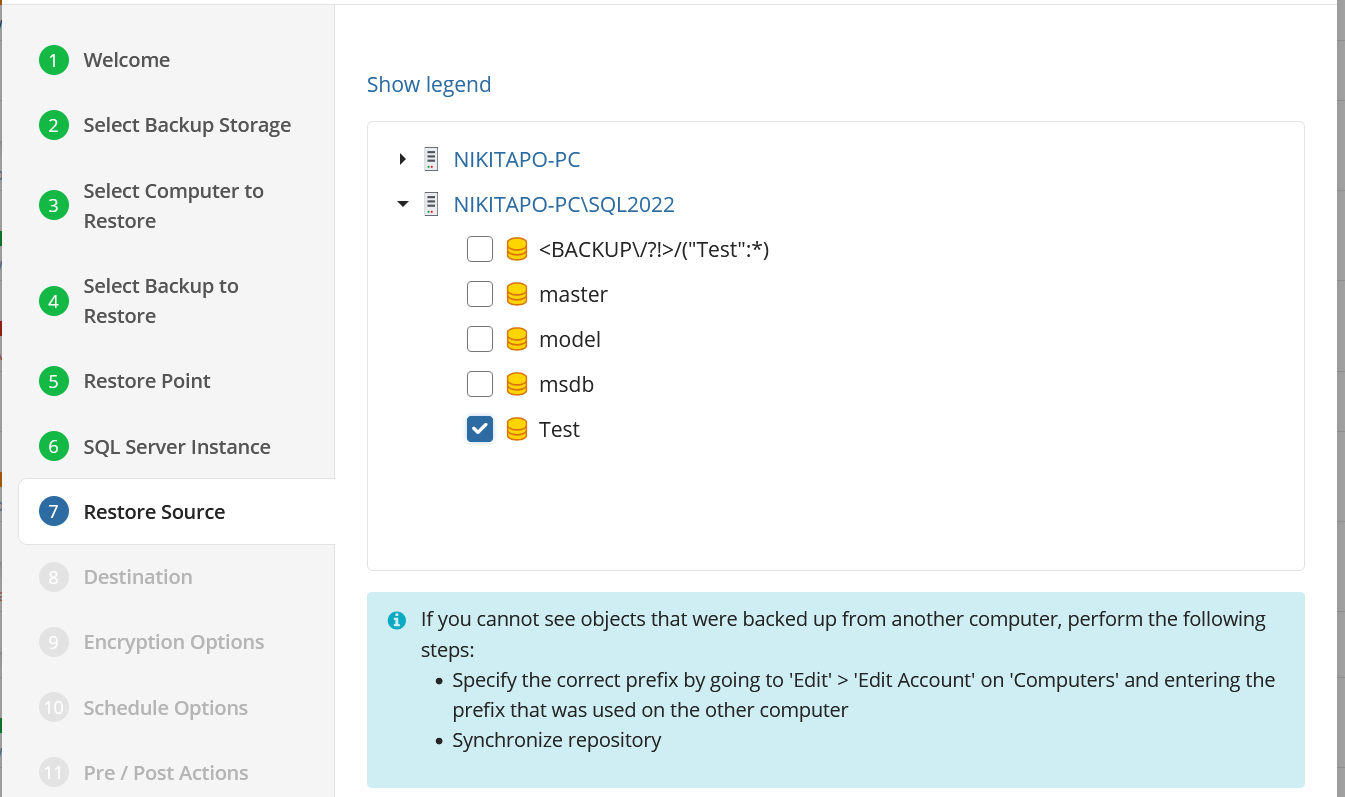
Next, select the source of the backup to be restored, then select which databases to restore from the list.
Step 11
The next step asks you to provide the paths the database files will be restored to, and you will be given options to overwrite an existing database or restore the database with a new name.
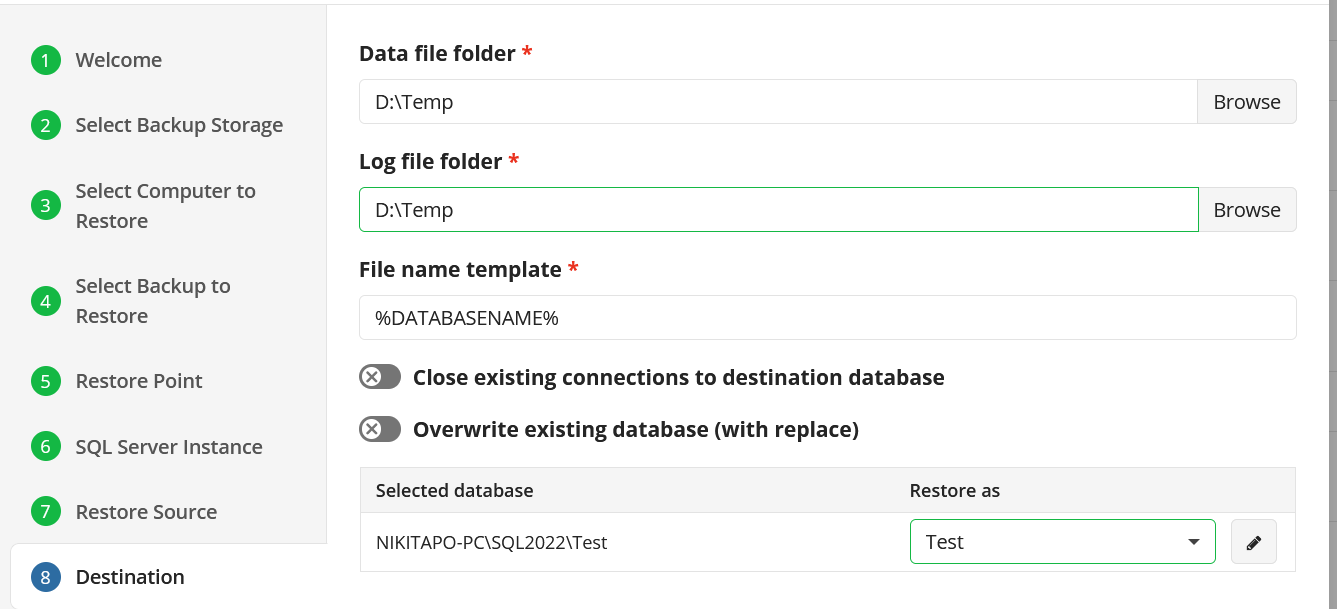
Select one of the following actions:
- You can close existing connections to destination database,
- You can overwrite the existing database using the Overwrite the existing database option.
When selecting the databases from the list they will restore with their existing name by default, but if you would like to restore it as a new or different name, type the new name into the “Restore As” field.
Step 12
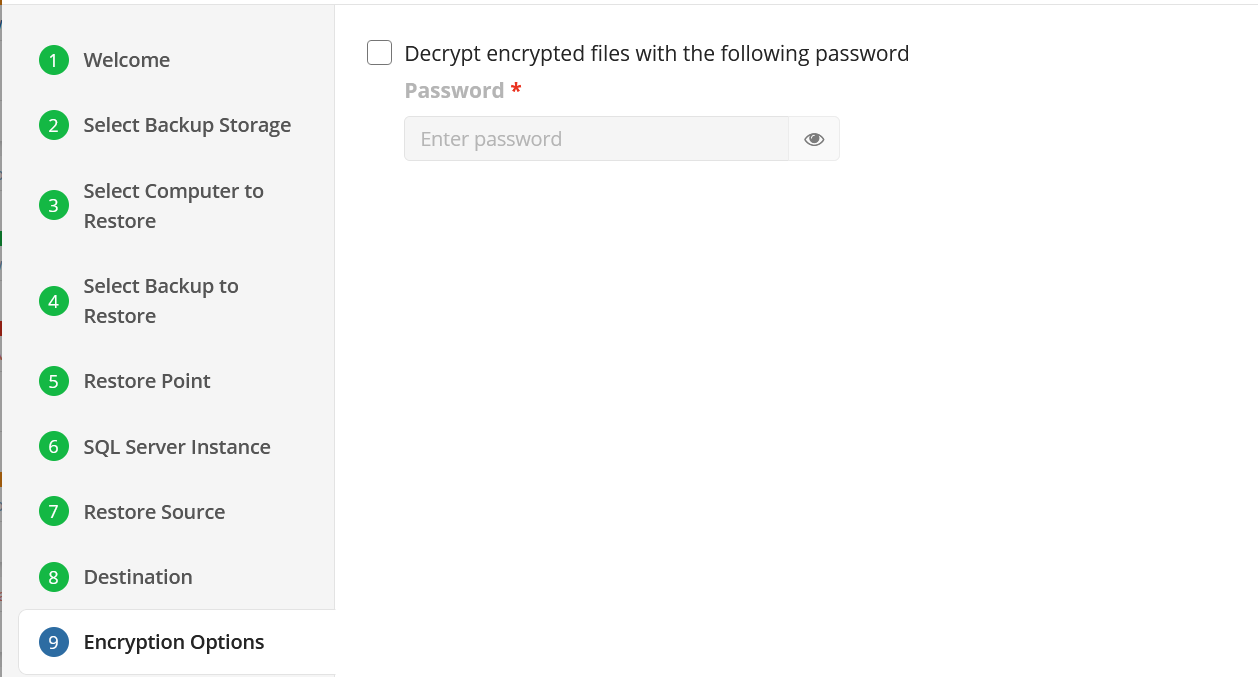
If the backed up data was encrypted, the next step will be to enter the encryption password for decryption. If the password is incorrect or missing, the restore plan will fail and you will need to edit the plan to input the correct password.
Step 13
If you restore data from the S3 Glacier Flexible Retrieval or Glacier Deep Archive storage classes, specify Smart Restore options.
Step 14
Next, if you opted to save the restore plan, the next step is to specify how the plan should be triggered.
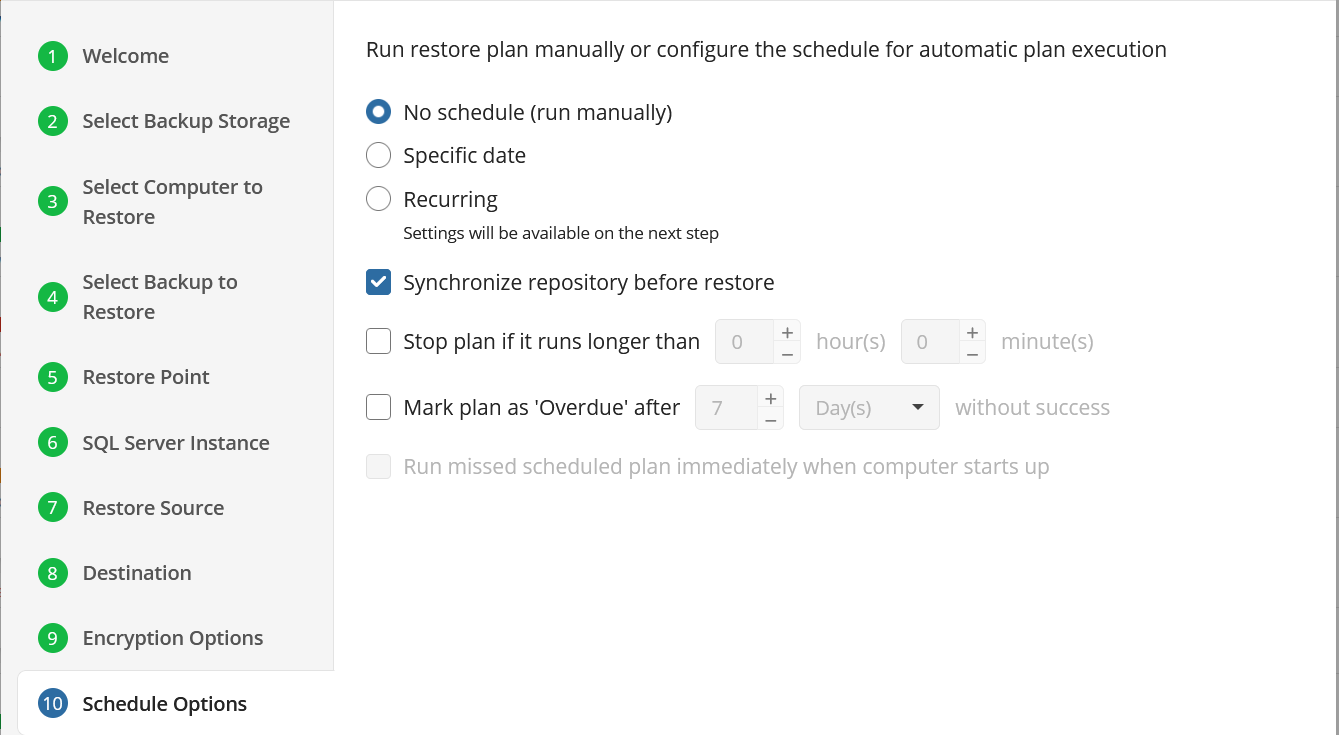
- No schedule (run manually): Use this option only when you wish to execute the Restore manually.
- Specific date: Use this to schedule a one-time Restore at the specified date and time.
- Recurring: Using this option enables you to schedule recurring Restorations based on the criteria in the fields below.
Do not use the Stop the plan if it runs for: option if you have a slow or unstable internet connection
Enabling the Run missed scheduled restore immediately when computer starts up option will ensure that the restore plan will begin automatically after the computer starts up if it was unable to run at the scheduled time. This is only recommended for desktops and laptops. For servers, it is recommended that you run the restore plan manually when all maintenance works are completed to avoid adversely affecting server performance and internet bandwidth during working hours
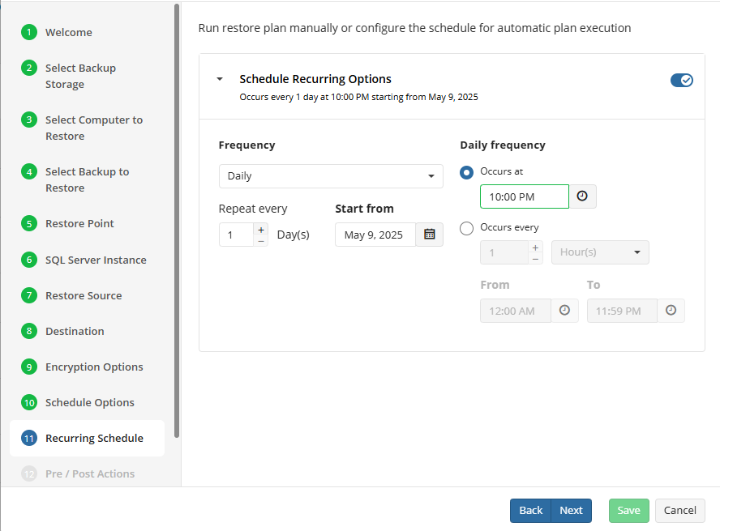
Step 15
With Recurring selected on the previous step, you are then prompted to define the time and frequency the plan should execute.
Step 16
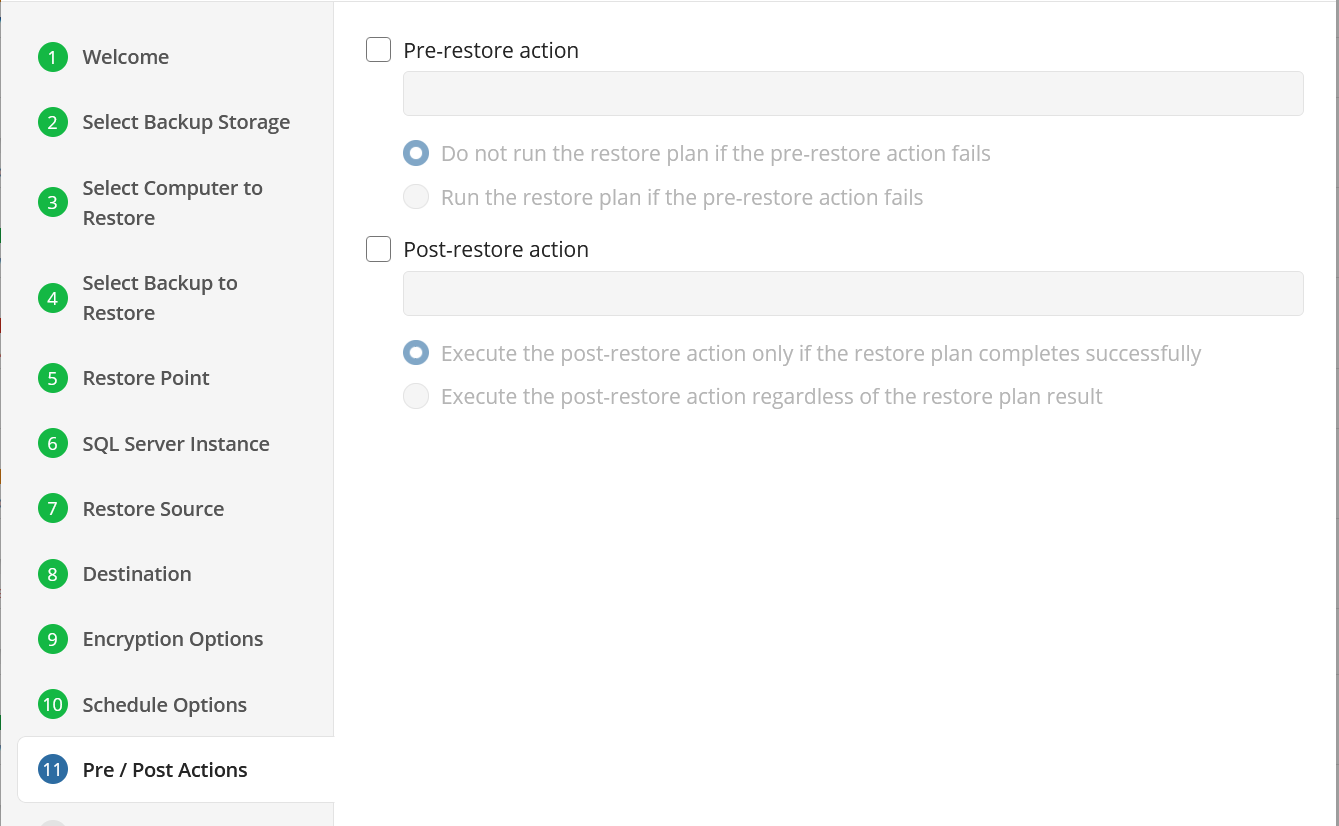
The Pre/Post Actions page allows the execution of custom scripts before and/or after the running of a backup task.
Step 17
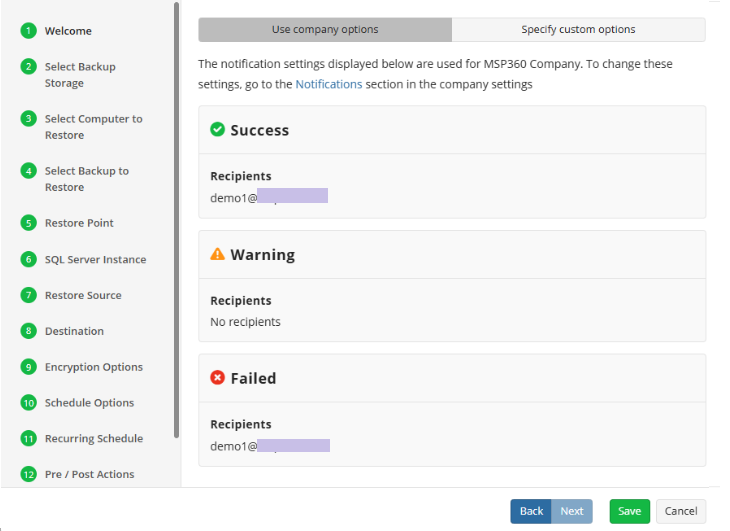
The final step is to review notification settings. The default settings applied at the Company level are selected by default, however you are also able to specify custom options per plan.
Step 18
Click on Save when you are happy with your selections. If the plan is set to run only a single time and has no set schedule, it will automatically start. Otherwise, if it is set to run only once and is scheduled, it will display in the list of plans until the scheduled time. If it is only set to run once, then when it completes successfully it will remove itself from the list of plans. Only Restore Plans which are saved will remain in the list for future use.
| Top |
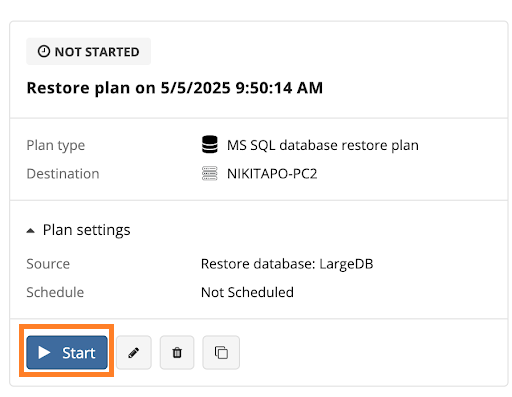
Run the Restore Plan
To run the restore plan, proceed as follows:
- On Computers select Remote Management if you use the legacy main menu, or open Backup > Computers page in the new main menu.
- Find the required computer, then click the Configure icon in the Backup Plan Status column.
- On the side panel, click the Start button.
| Top |
Edit the Restore Plan
To edit the restore plan, proceed as follows:
- On Computers select Remote Management if you use the legacy main menu, or open Backup > Computers page in the new main menu.
- Find the required computer, then click the Configure icon in the Backup Plan Status column.
- On the side panel, click the Edit icon below the backup plan tile.
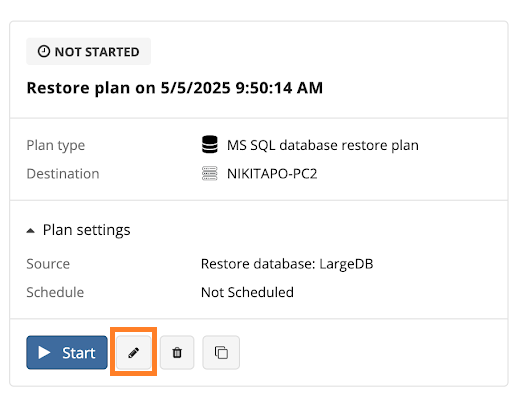
- Make the required changes, then click Save.
| Top |
Delete the Restore Plan
To delete the restore plan, proceed as follows:
- On Computers select Remote Management if you use the legacy main menu, or open Backup > Computers page in the new main menu.
- Find the required computer, then click the Configure icon in the Backup Plan Status column.
- On the side panel, click the Delete icon below the backup plan tile.
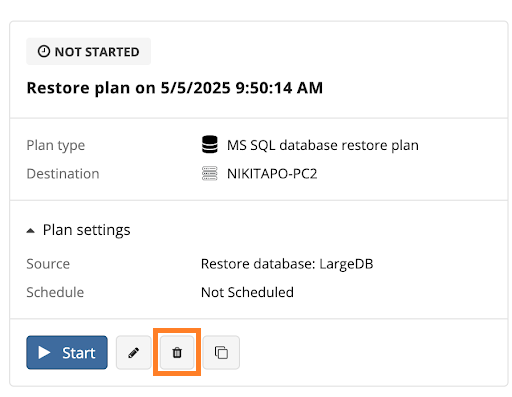
- Confirm the plan deletion.
| Top |