Article ID: m0145Last Modified: 17-Dec-2025
Restore MS SQL Server Database
Backup Agent for Windows offers Microsoft SQL Server cloud backup and restore. This chapter explains how to restore MS SQL data with MBS for Windows.
How to Restore MS SQL Database
Restore MS SQL Databases in Backup Agent
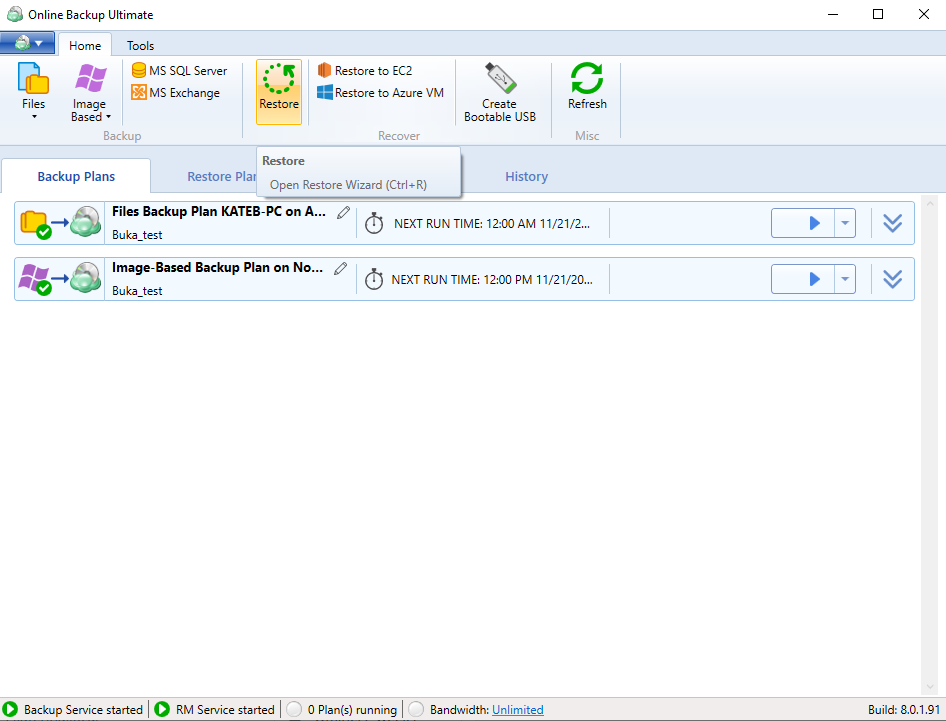
- Run your Backup Agent.
- Click Restore.
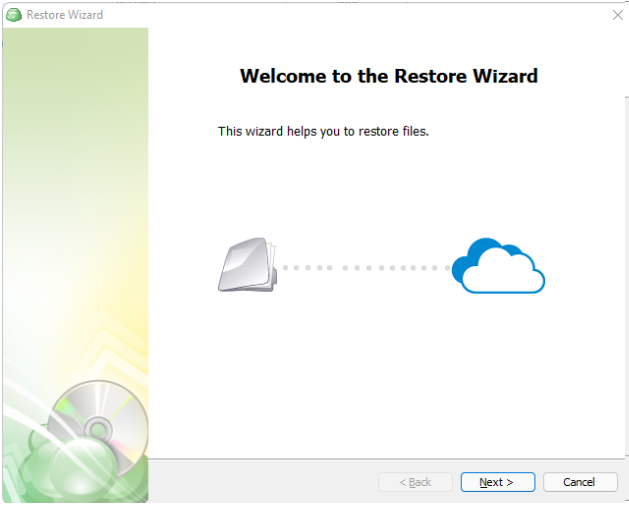
- Once the wizard starts, click on Next to advance to the next step.
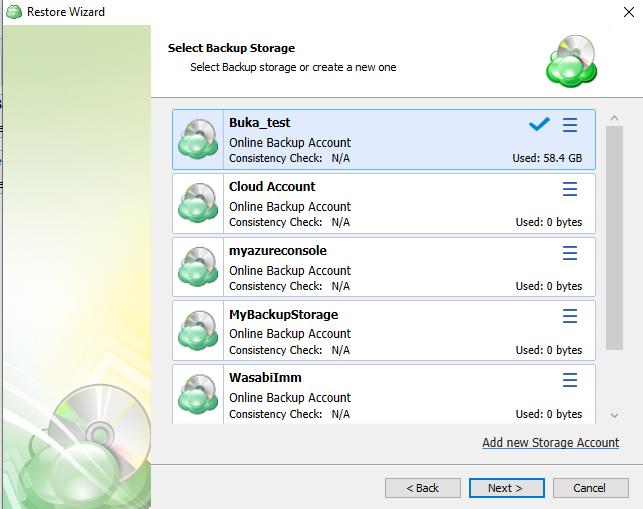
- Use the Restore Wizard to select a backup storage to restore from (restore source). If the desired destination is not in the list, you can click Add new storage account to add it.
- On the Plan Name screen, select whether to run the restore just once or to save a created restore plan for further use. Click Next.
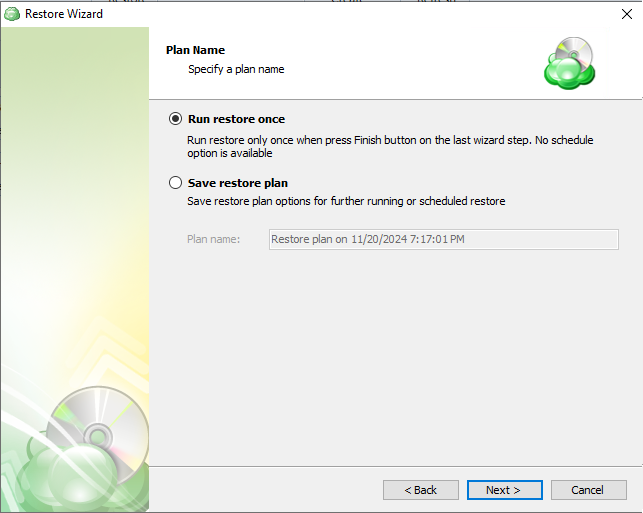
It is recommended to use a descriptive name which will distinguish the backup from others
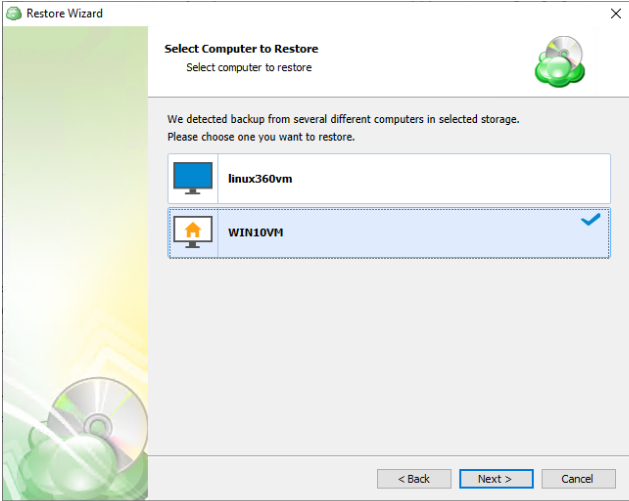
- With the type of restore selected, the next step is to select the computer associated with the backup which you would like to restore.
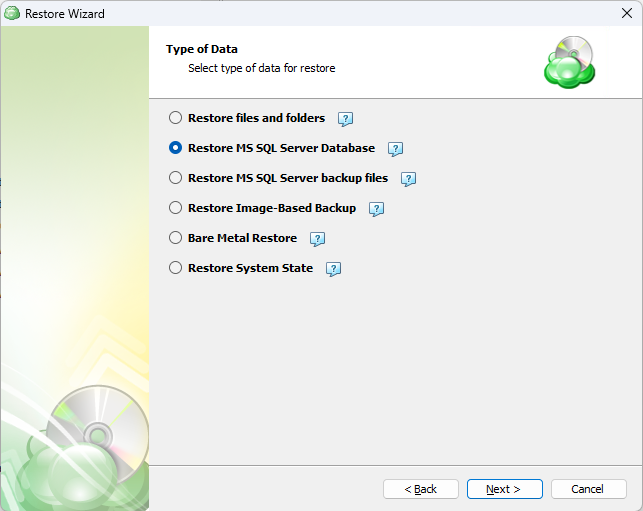
- Select the Restore MS SQL Server Database to restore to an SQL Server instance that will be selected on the next steps.
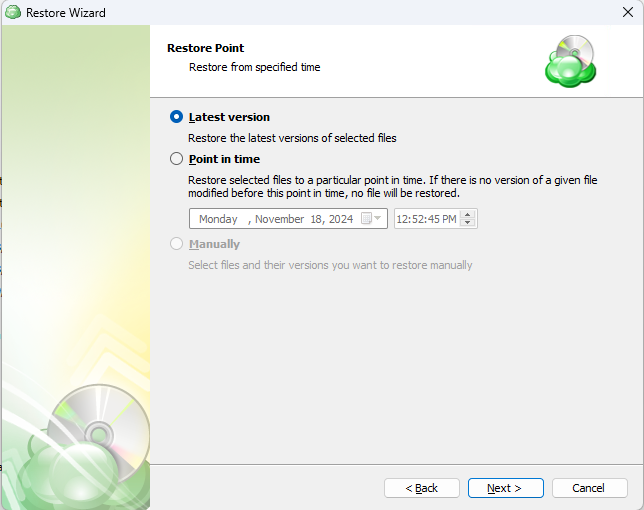
- Select one of the version options for the data to be restored:
- Latest version
- Point in time. If there is no exact match for the point in time selected, the application will automatically select the closest previous restore point.
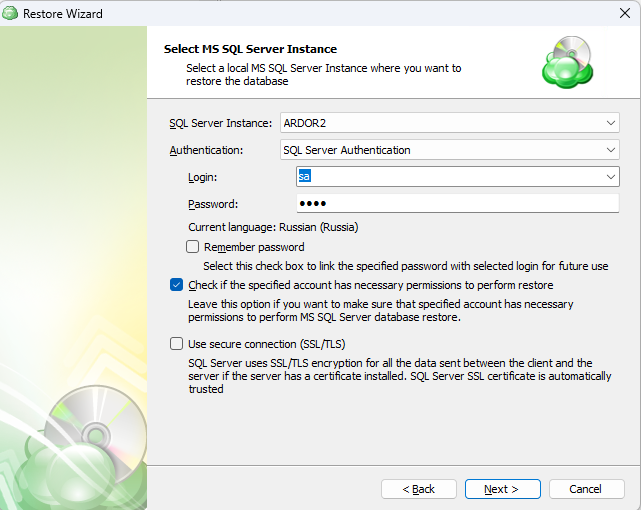
- elect the instance containing the database to be backed up from the list. Note that only local instances can be selected.
- SQL Server Instance: Select the instance containing the database to be backed up from the list. Note that only local instances can be selected.
- Authentication Type: Choose between Windows or SQL Authentication. If “Windows Authentication” is selected, the application will run the backup as the local service account.
- User Name: If “SQL Server Authentication” was selected, enter the user name in this field.
- Password: If “SQL Server Authentication” was selected, enter the password for the specified SQL user here.
- Check if the specified account has necessary permissions to perform backup: The application will check for the appropriate permissions prior to attempting to backup the database. It is recommended to use this option to prevent unexpected backup failures.
- Use secure connection (SSL/TLS): Enabling this will allow the application to connect to the SQL instance using encryption, if configured on the database host.
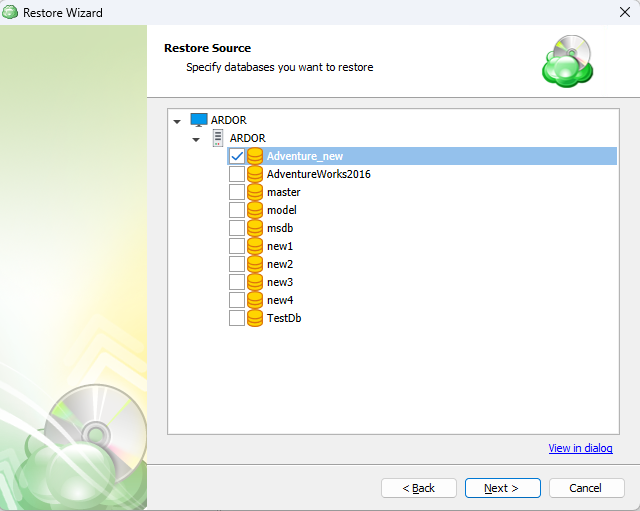
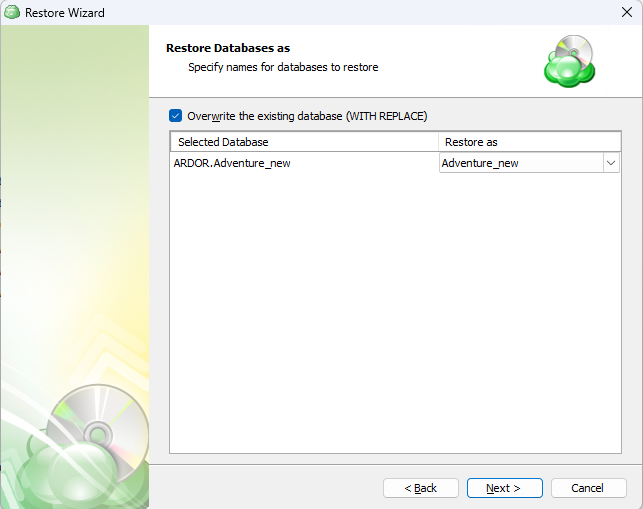
- Select the databases to be restored. After selecting the database(s) to be restored, you will be given options to overwrite an existing database or restore the database with a new name. Click Next.
- Select one of the following actions:
- You can change the original database name to restore it under another name,
- You can overwrite the existing database using the Overwrite the existing database option.
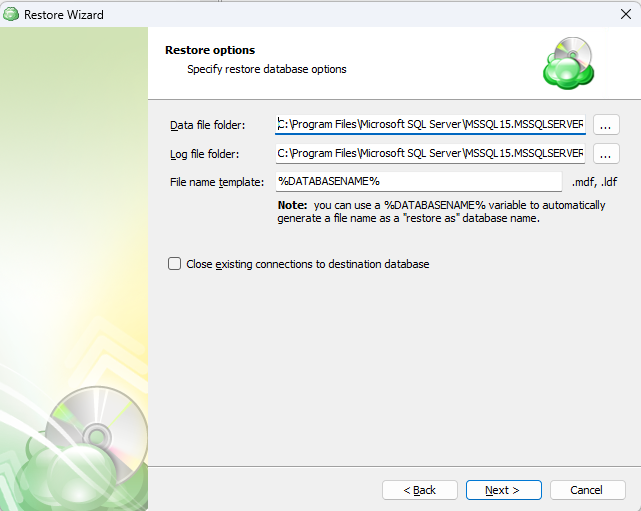
- Select data file folder and Log file folder. Specify a file name template.
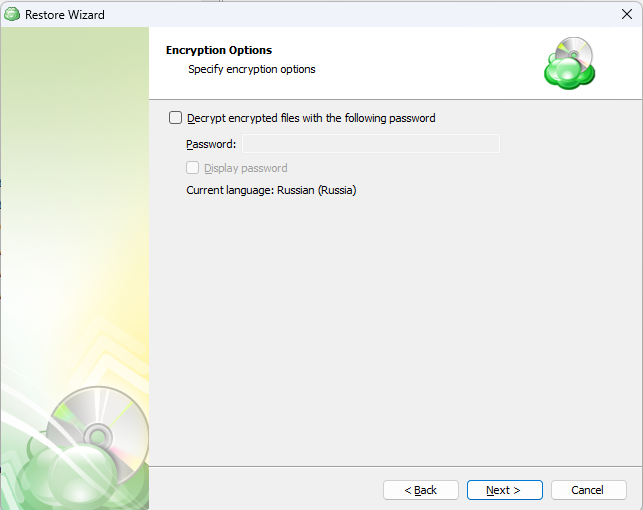
- For the data encrypted on the client side, select the "Decrypt encrypted files with the following password" option. Enter your password and re-enter in to confirm, then click Next.
(Optional) If you restore data from the S3 Glacier Flexible Retrieval or Glacier Deep Archive storage classes, specify Smart Restore options.
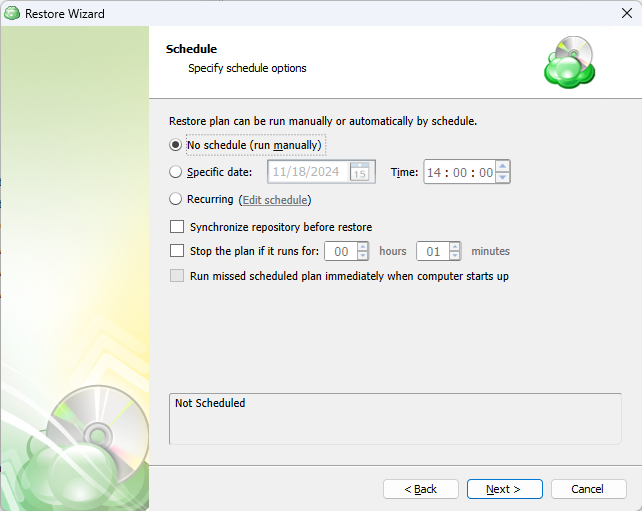
If you selected to save a created restore plan for further use, select schedule options, then click Next.
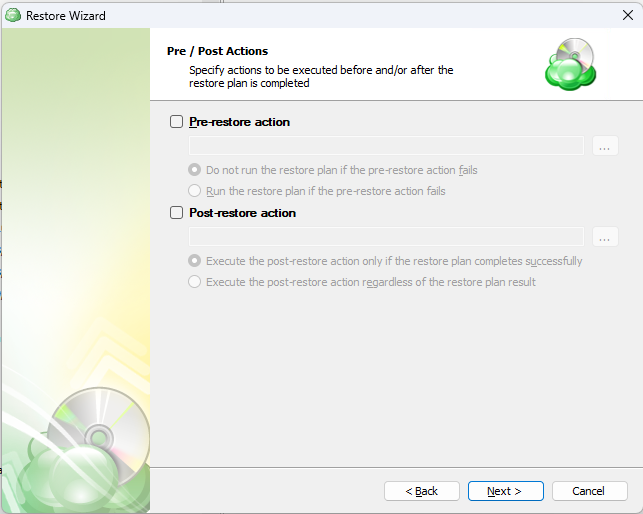
- (Optional) Specify pre-restore and post-restore actions
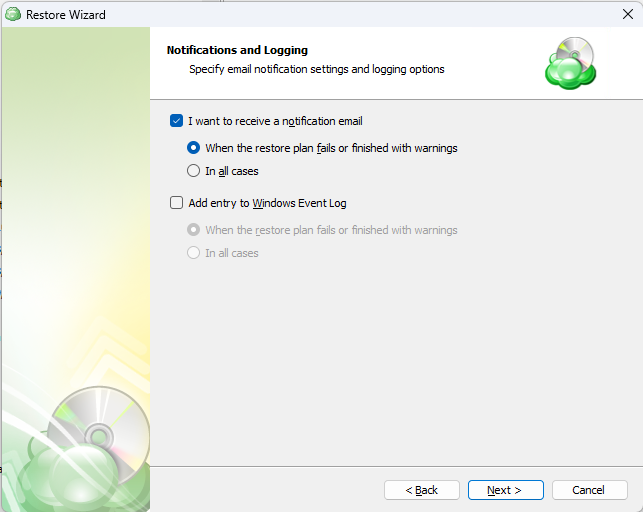
- Specify the notifications options, then click Next.
- Review the summary. After you are sure that the selected options suit you, click Next to create the restore plan.

Run the Restore Plan
To run the restore plan, proceed as follows:
- On the Restore plans tab in the Backup Agent, select the restore plan to
- Click the Start button.

Edit the Restore Plan
To edit the restore plan, proceed as follows:
- On the Restore plans tab in the Backup Agent, select the restore plan to edit
- Expand the plan, then click the Edit icon below the backup plan tile.

- Make the required changes, then click Save.
Delete the Restore Plan
To delete the restore plan, proceed as follows:
- On the Restore plans tab in the Backup Agent, select the restore plan to delete.
- Expand the plan, then click the Delete icon below the backup plan tile.

- Confirm the plan deletion.