Products: Managed Backup (Web)
Article ID: m0442Last Modified: 17-Oct-2024
Configuring Billing in Autotask
Log in to Autotask.
Hover over Autotask logo and select "Features and Settings" from Admin menu.

- Expand the list of "Contracts & Un-Posting" options of Admin menu.
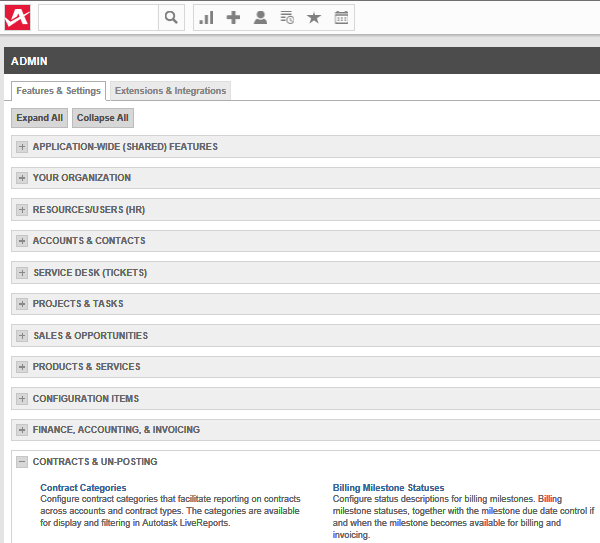
Go to "Contract Categories" section.
Click "New" to create a new category.
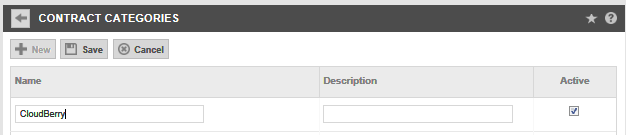
Type CloudBerry in the "Name" section and click "Save".
Click a "return" icon next to "Contract Categories" section name for returning to the "Admin" menu.
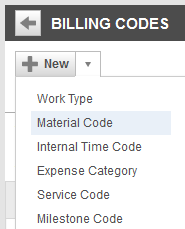
Expand "Finance, Accounting, & Invoicing" option of the Admin menu.
Go to "Billing Codes" section.
Expand the list of "New" button options and click "Material Code".
- Type CloudBerryBillingCode in the "Name" field and select "Taxable" option from the list of Tax Category options.
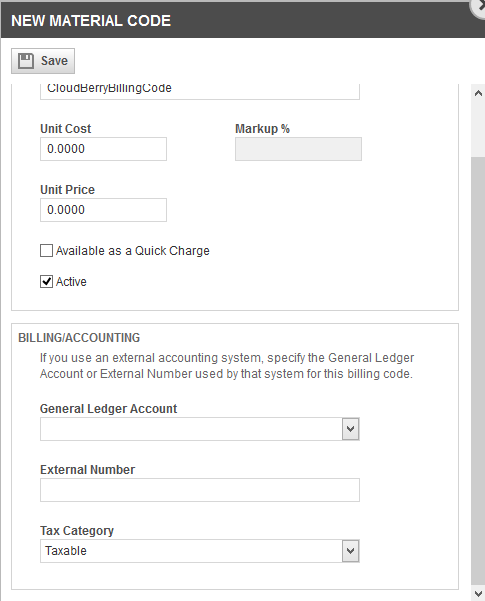
- Click "Save" button at the top of the pop-up window.
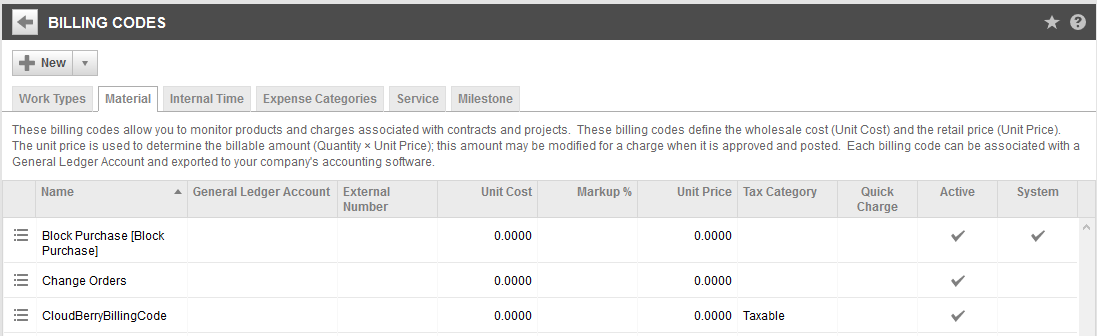
The newly added category appears on the Material list, and now billing in Autotask is configured.
Learn more how to send billing statistics to Autotask from the Management Console.