Branding Settings
Once you start working with branding, a base branding is available by default. This is the default Backup Agent layout with a minimal set of editable settings.
Base Branding
To view and edit the Base Branding settings, proceed as follows:
- Open the Management Console.
- In the Settings menu, select Branding.

- Click Base Branding.

- The following fields are available for editing:
- Vendor Name. The name of the service provider.
- Product Name. The name used for Backup Agent (for example, MyCompany Backup Service).
- Show links to MSP360 resources. If disabled, links to any pages that include MSP360 branding (e.g., online help) will be hidden in the user interface.
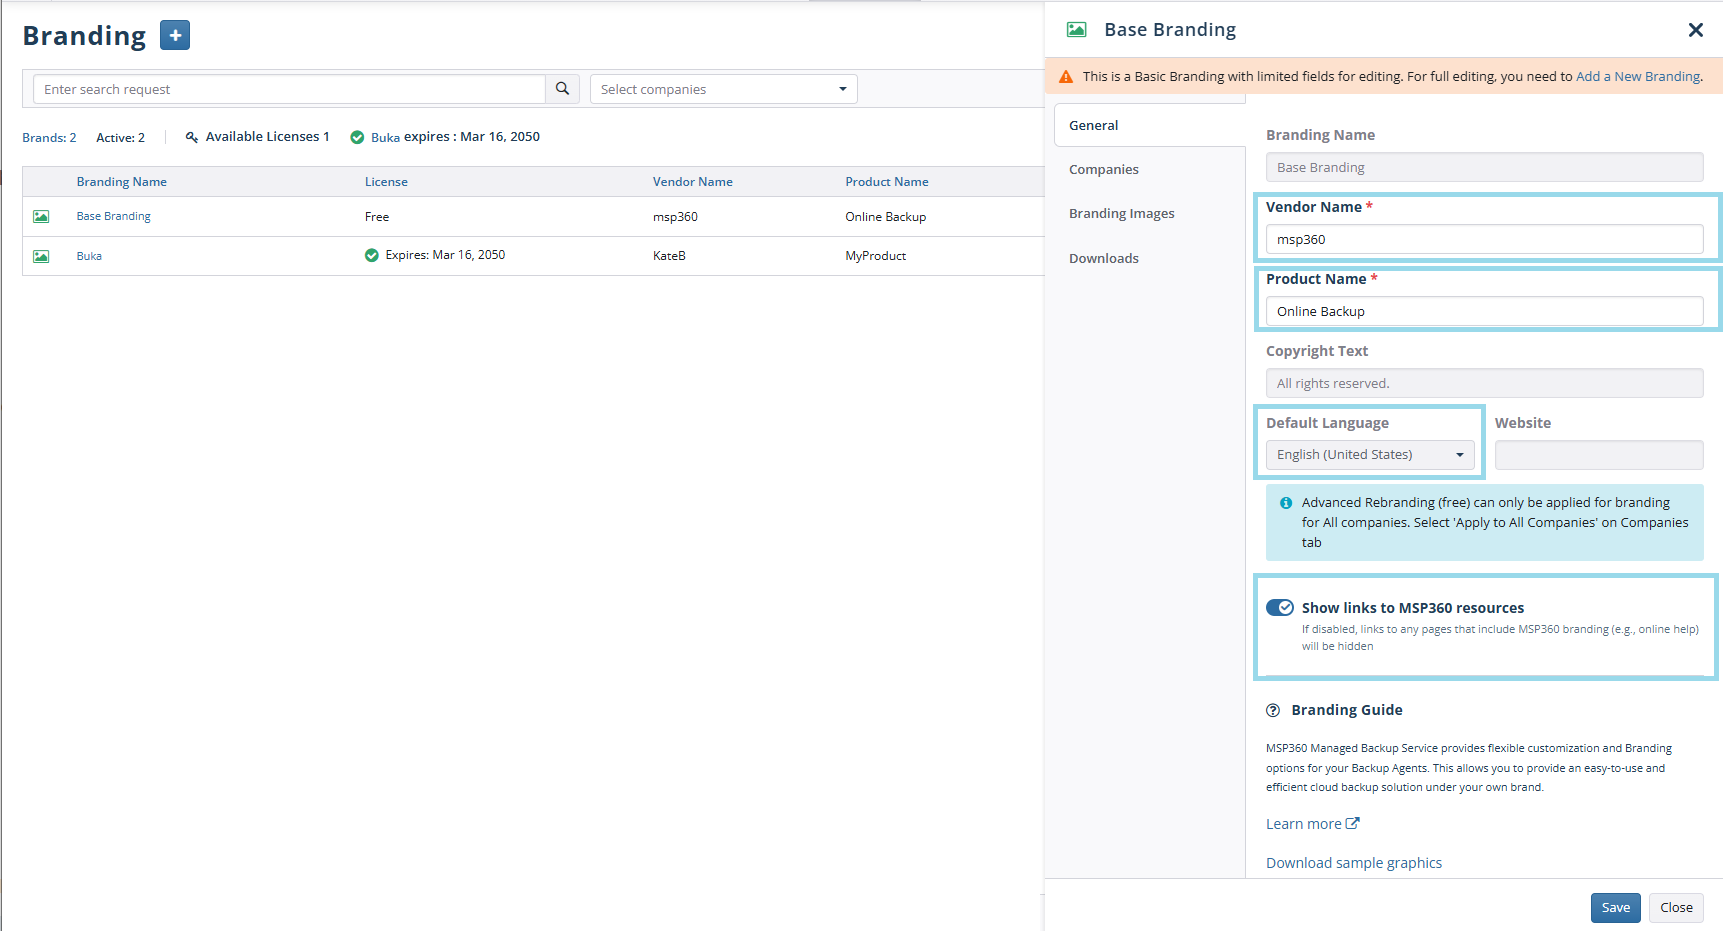
- Once you finish editing, click Save.
Base branding applies to all computers that do not have custom branding assigned to them. If the custom branding license expires, base branding will be applied instead of the custom branding.
Learn more about the Branding feature for the Management Console and Backup Agent in the Rebranding chapter.
Create Branding
Advanced Rebranding can be used in the following ways:
- For free for all companies. Advanced Rebranding (free) can only be applied to all companies. Select 'Apply to All Companies' on the Companies tab.
- With an Advanced Rebranding & Custom SSL license for selected companies. To use branding for selected companies or add it to Downloads, you must purchase an Advanced Rebranding & Custom SSL license under Organization > Licenses, and then assign this license to the created branding.
To create your own branding, proceed as follows:
- Open the Management Console.
- In the Settings menu, select Branding.
- Click +.
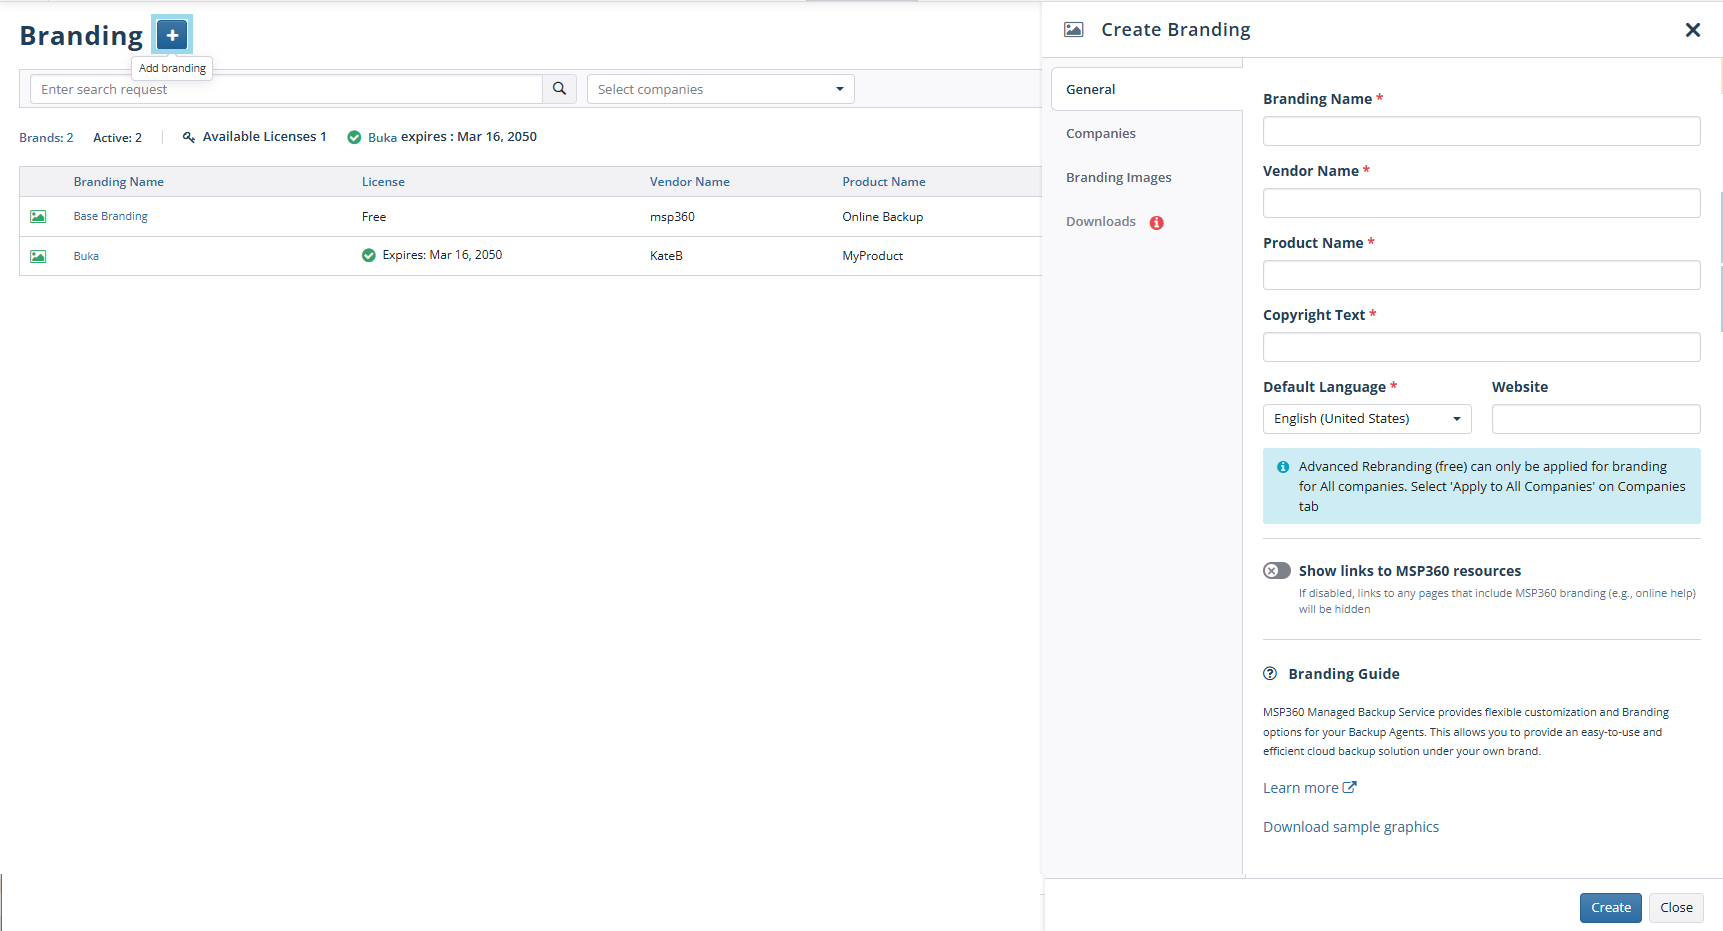
- On the General tab, specify the branding name, vendor name, product name, and the copyright text. Set the default language and, optionally, add your website, if any. Also, you can manage the visibility of MSP360 resources with Show links to MSP360 resources. If disabled, links to any pages that include MSP360 branding (e.g., online help) will be hidden in the user interface.
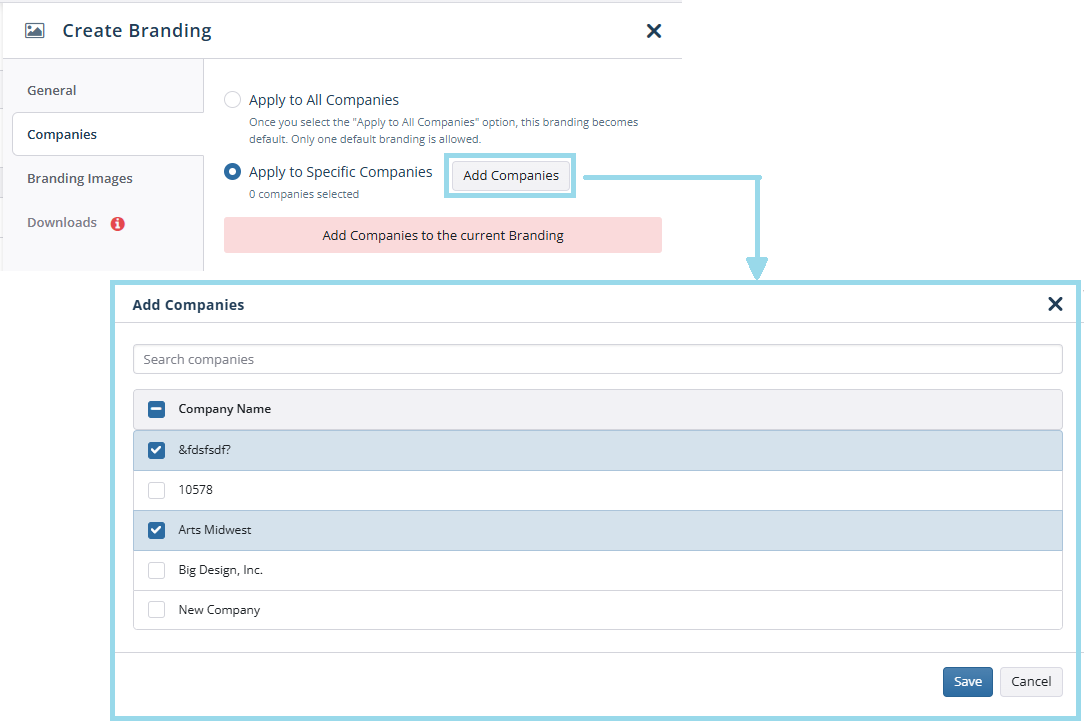
- On the Companies tab, select the companies to which the branding will be applied. You can select the Apply to all companies option to create a default branding. The default branding (free) will be used for all your companies. Only one default branding is allowed. If you want this branding to be applied to specific companies only, click the Apply to specific companies option, then select the companies this branding will be applied to.
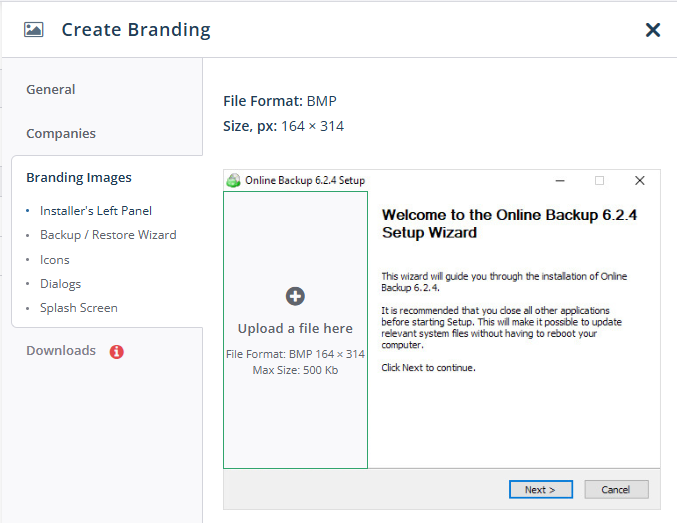
- On the Branding Images tab, you can add your corporate identity images to replace the default images.
- Once you finish editing, click Create.
- If you have selected All Companies on the Companies tab, the branding becomes active and will work for all companies.
- If you have selected specific companies, you should grant an Advanced Rebranding & Custom SSL license to this brand on the General tab or in the License column. The brand becomes active and will work for the selected companies.
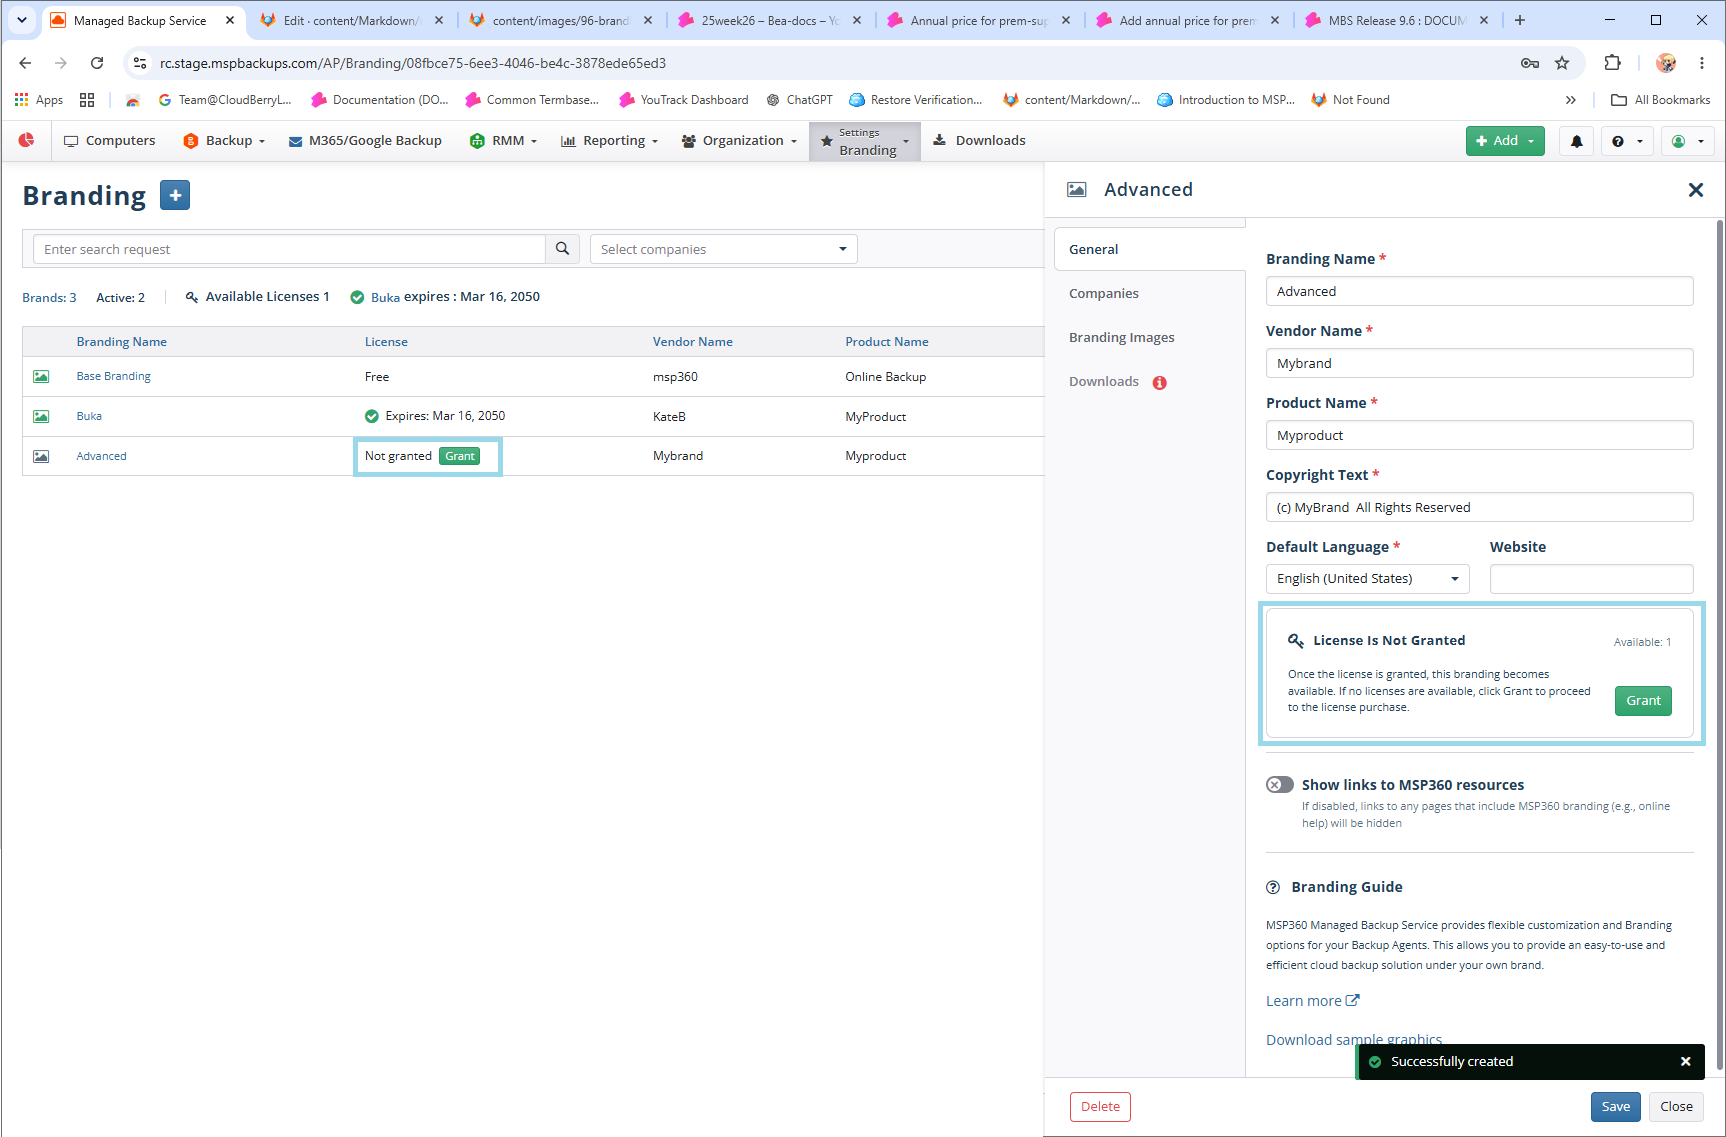
- With a granted Advanced Rebranding & Custom SSL license, on the Downloads tab, you can apply branding to downloadable builds.
Edit Branding
To edit your own branding, proceed as follows:
- Open the Management Console.
- In the Settings menu, select Branding.
- Click the branding name to edit it.
- On the General tab, specify your branding name, vendor name, product name, and the copyright text. Set the default language and, optionally, add your website, if any. Also, you can manage the visibility of MSP360 resources with Show links to MSP360 resources. If disabled, links to any pages that include MSP360 branding (e.g., online help) will be hidden in the user interface. If you want to use this branding for selected companies or to download rebranded builds (Windows) on the Downloads tab, you should grant an Advanced Rebranding & Custom SSL license to this brand in the License column.
- On the Companies tab, select the companies you want the created branding to be applied to. You can select the Apply to all companies option to create a default branding. The default branding will be used for all your companies. Only one default branding is allowed. If you want this branding to be applied to specific companies only, click the Apply to specific companies option, then select the companies this branding will be applied to.
- On the Branding Images tab, you can add your corporate identity images to replace the default images.
- On the Downloads tab, you can add branding to downloads. This feature requires an Advanced Rebranding & Custom SSL license.
- Once you are done with editing, click Save.
Learn more about the Branding feature for the Management Console and Backup Agent in the Rebranding chapter.
Delete Branding
To delete your own branding, proceed as follows:
- Open the Management Console.
- In the Settings menu, select Branding.
- Click the branding name you want to delete.
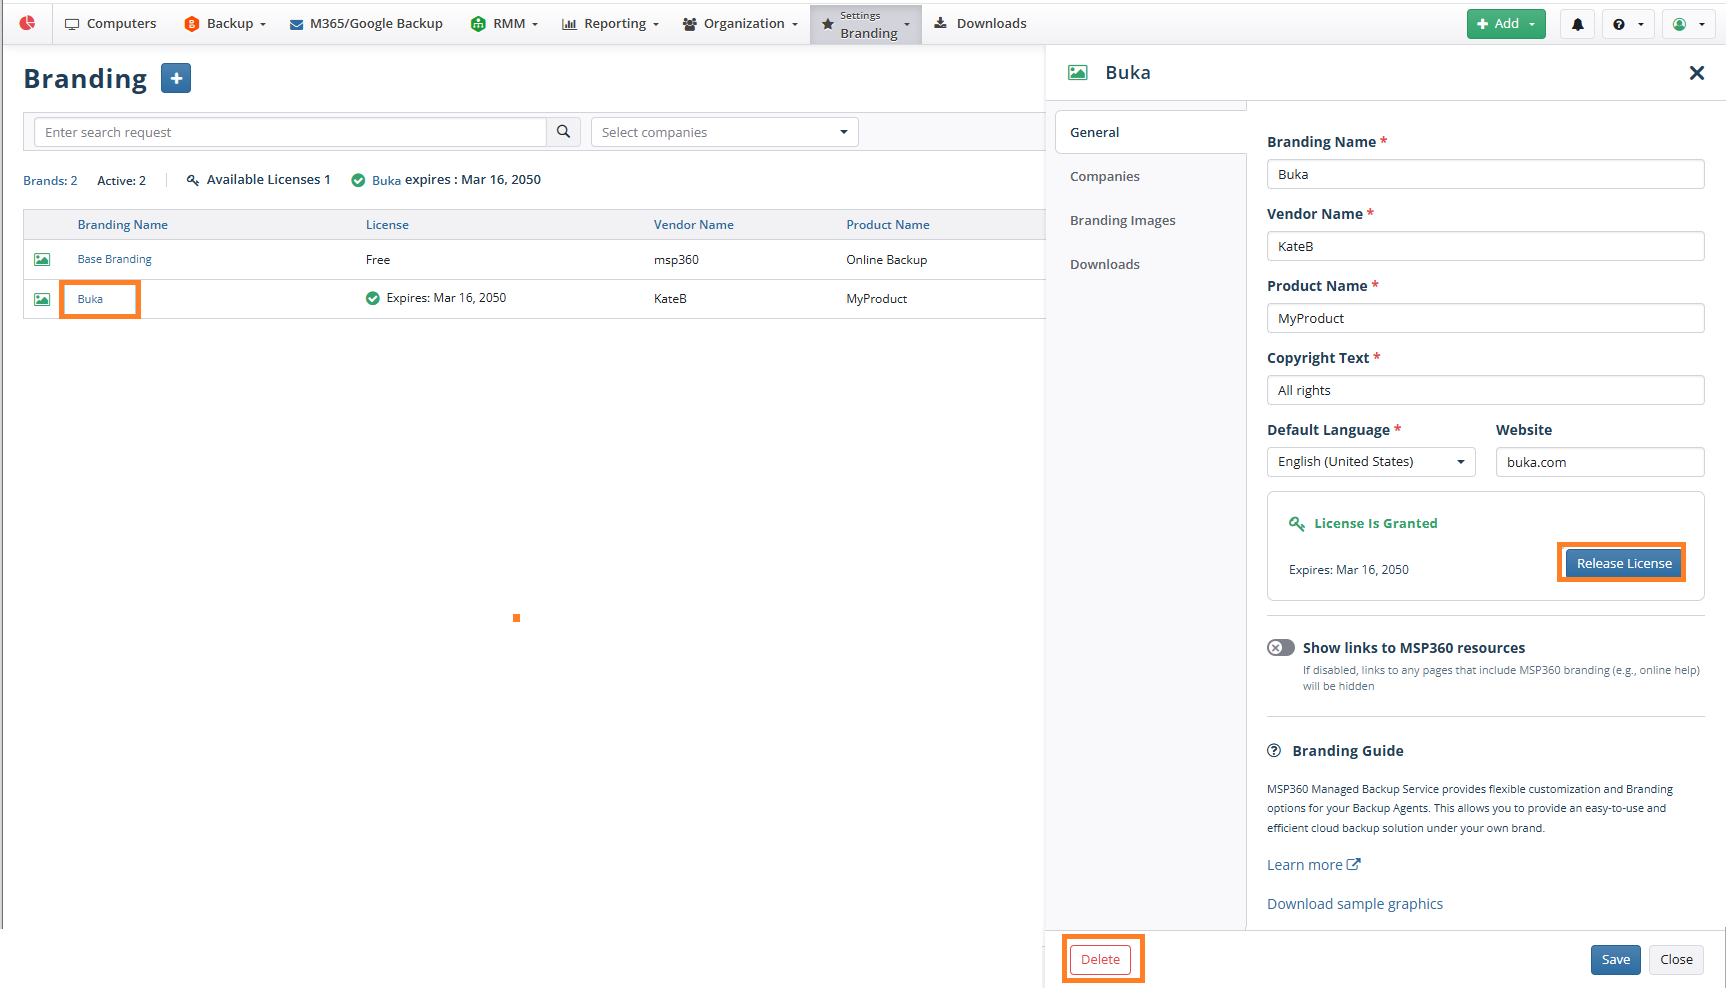
- Click Delete and confirm this action. This cannot be undone. Base branding will now be applied to all companies that used the deleted branding.