Add MinIO Storage Account
This chapter covers the following topics:
- Add New Storage Account
- Add Backup Destination for Storage Account
- Edit Storage Account
- Forever Forward Incremental Support
- Delete Storage Account
Add New MinIO Storage Account
To manage this feature, the Backup > Storage Account permission should be granted as the administrator permission on Organization > Administrators.
Add New MinIO Storage Account in Management Console
- Open the Management Console.
- Open the Backup > Storage Accounts page.
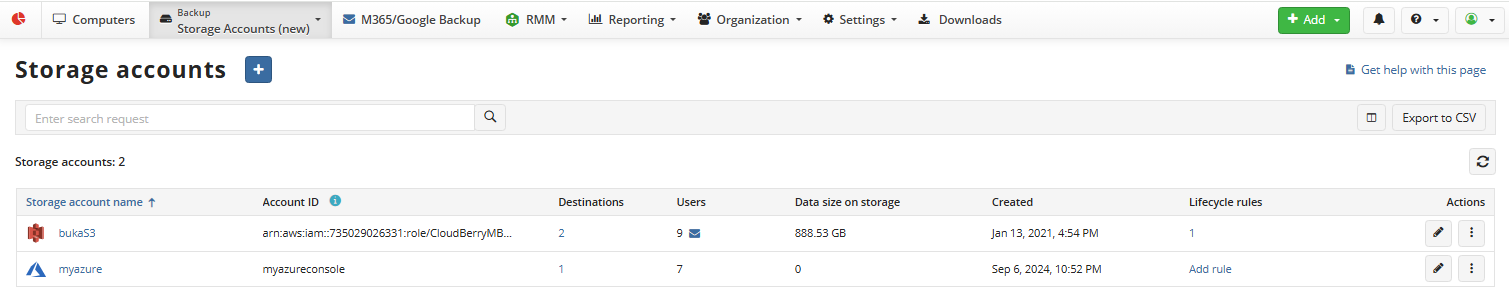
- Click + to launch the Create a new Backup Destination wizard.
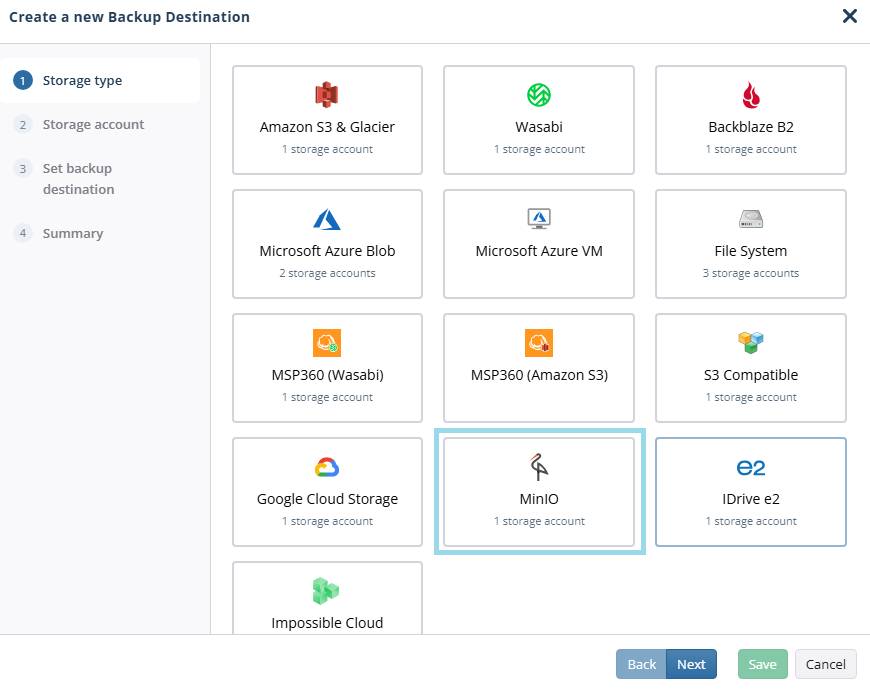
On the Storage type step, select MinIO. Click Next.
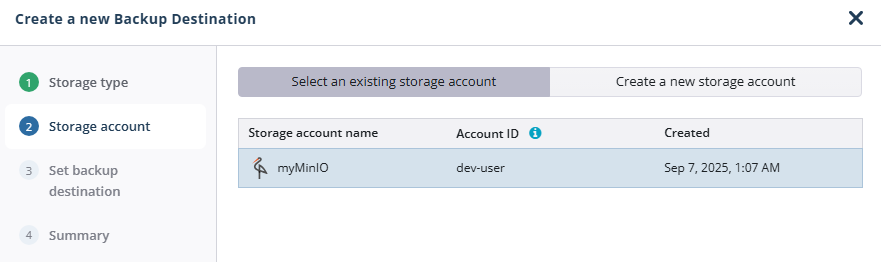
On the Storage account step, select an existing storage account or create a new one. By default, existing storage accounts are displayed. To add a new storage account, click Create a new storage account.
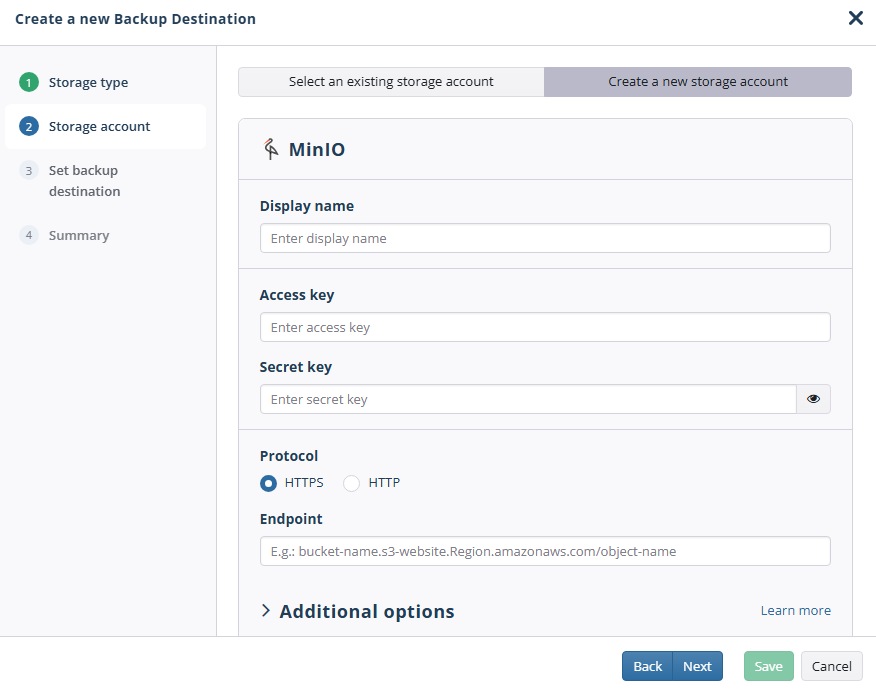
- Specify the required information to access the storage account:
- Display Name (required). Specify the name for the storage account.
- Access Key (required). Provide the access key to authorize access to the storage.
- Secret Key (required). Provide the corresponding secret key.
- HTTP endpoint or HTTPS endpoint. Specify your storage account endpoint depending on the protocol in use. If both protocols are in use, provide both endpoints.
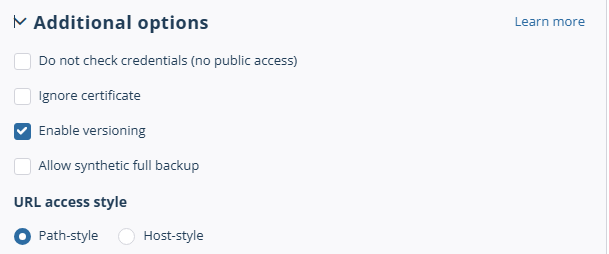
- Additional options > Ignore certificate. Choose whether to ignore the SSL certificate.
- Additional options > Do not check credentials (no public access). Enable this option for storage deployed in a local network. With this option selected, you cannot delete backup data using Management Console features.
- Additional options > Enable versioning. Enable this option for storage deployed in a local network to enable versioning.
- Additional options > Allow synthetic full backup. Enable this option for storage deployed in a local network to support the simple schedule (Forever Forward Incremental).
- Select the URL access style if you need to change the default.
- Click Next. Specify the bucket. In the Destination display name field, specify the bucket name that will be displayed as a backup destination, then select whether you will use an existing bucket or create a new one:
- Select the Create New option to create a new bucket. Name the bucket.
- Select the Select Existing option to use an existing bucket, then select it in the drop-down list. You can also select an external bucket you have access to.
- For buckets with Object Lock turned on, you can enable the Default Object Lock feature.
- Enable the Object Lock for GFS backups feature. Otherwise, this functionality might be permanently disabled. Disable it if this functionality is not needed.
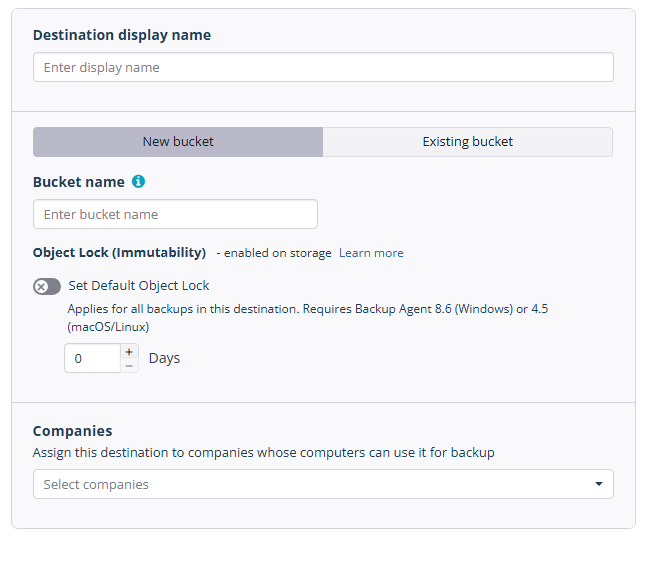
- Select the companies or users to assign to the storage account.
Note that it may take a while to assign companies and users to the storage account.
- Click Next.
- View the storage account summary, then click Save.
The added storage account appears in the grid.
Add Backup Destination for Existing Cloud Storage Account
- Open the Management Console.
- Open the Backup > Storage Accounts page in the new main menu.
- Find the storage account you want to add a new backup destination to, then expand actions.
- Select Add backup destination.

- Specify an existing bucket or create a new one.
- Next, select companies or users to apply this backup destination to.
- Click Save.
Edit a Storage Account
To Edit a Storage Account:
- Open the Management Console.
- Open Backup > Storage Accounts.
- Find the storage account you want to edit, then click the Edit icon.

- Make the required changes and complete the wizard to save them.
Manage storage account
Expand actions next to the storage account:
- To add a new backup destination for the storage account, select Add Backup Destination.
- To check credential validity, select Test credentials.
- To remove the storage account, select Delete storage account.
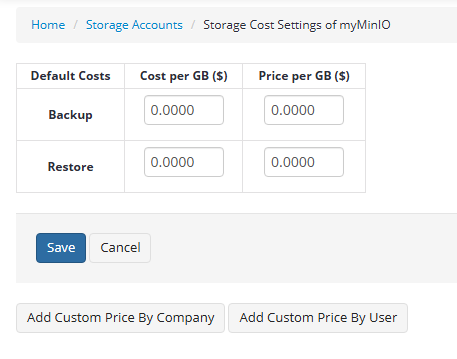
- To specify storage cost settings for billing, select Storage Cost Settings, then specify the storage cost settings that will be applied to this storage account.
- In the Cost per GB field, specify your own expense rate per GB for the storage account.
- In the Price per GB field, specify the end user price per GB.
- Optional: Add Custom Pricing, if needed:
- Custom Price for a Specific Company. Click Add Custom Price by Company, then enter the custom expense and end user price per GB for that company.
- Custom Price for a Specific User. Click Add Custom Price by User. Enter the custom expense and end user price per GB for that user
.
Forever Forward Incremental Support
Forever Forward Incremental (simple schedule) requires Synthetic Full backup to be enabled.
Synthetic backup is a backup type that creates a full backup using in-cloud data copying. This backup type is required for Forever Forward Incremental backup. If a plan type and backup destination support synthetic backup, it will be switched on automatically, but for MinIO and other S3-compatible storage accounts, the synthetic full backup can be enabled in the storage account properties.
To successfully enable synthetic full for the backup storage, perform the following steps:
- Enable the synthetic full backup in the additional options of the MinIO storage account.
- Create a files backup plan for testing purposes using this backup storage destination. Run this plan manually once.
- Force the synthetic full backup for this backup plan. If the forced backup plan run is successful, you can use this backup destination to create backup plans with a Forever Forward Incremental schedule.
Step 1. Enable Synthetic Backup for Backup Storage Destination
Management Console
To enable the synthetic full backup, proceed as follows:
- In the Management Console, navigate to Backup > Storage Accounts.
- Find the required storage account, then expand actions and click the Edit icon.
- Enable Allow Synthetic Full backup.
- Save your selection.
Backup Agent
To enable the synthetic full backup, proceed as follows:
- In the Backup Agent application menu, select Edit Storage Accounts.
- Find the required storage account, then click Edit.
- Click Advanced Settings.
- Select the Use synthetic full backup checkbox.
- Click OK.

Step 2. Create Backup Plan for Testing Purposes
Synthetic backup applies to the following backup types:
- File-Level Backup
- Image-Based Backup
- VMware Backup
- Hyper-V Backup
For testing purposes, it is recommended to create a Files Backup plan.
Step 3. Force Synthetic Backup for Backup Plan
To force a synthetic backup for testing purposes:
Management Console
- Open Backup > Computers.
- Find the required computer, then click the Configure icon in the Backup Plan Status column.
- On the side panel, navigate to the Backup Plans tab.
- Find the plan to run.
- Expand this control to use the following option:
- Force Synthetic Full Backup
Backup Agent
- In the application, expand the backup plan you want to run a synthetic full backup for.
- On the Run control, open the drop-down menu.
- Click Force Synthetic Full Backup.

Check whether this backup plan run completed successfully. It is recommended to perform a test restore using this backup plan.
Delete Storage Account
To delete a Storage Account
- Open the Management Console.
- Open the Backup > Storage Accounts page in the new main menu.
- Find the storage account you want to delete, then expand actions.
- Select Delete storage account, then confirm the storage account deletion.
enable the SSL protocol for connections.
- Once you are finished with settings, click Save.