Discover and Deploy Tool (Beta)
The Discover and Deploy Tool is designed to simplify the bulk installation of Managed Backup components (Backup Agent, RMM Agent, Connect) for administrators. Currently available in beta, this tool enables you to efficiently manage the installation process across multiple computers within a domain or a network.
This tool can be operated as both a graphical user interface (GUI) application and a command-line interface (CLI) tool.
This chapter covers the following topics:
- Required permissions
- Download the tool
- Discover domain computers
- Deploy Managed Backup components
- How it works
Required Permissions
An administrative account must have sufficient permissions to perform the following actions:
- Copy an installation package using ADMIN$ share
- Use the Remote Service Control Manager
Copying an Installation Package Using ADMIN$ Share
- The account must have local administrator credentials on the remote machine
- File Sharing must be enabled
- ADMIN$ share on the remote computer must be enabled
- The following ports on the remote computer must be open:
- TCP 445 (SMB)
- TCP 139 (NetBIOS)
Permissions for Remote Service Control Manager
- User should meet one of the following requirements
- The account must be a member of the local Administrators group on the remote machine
- The account must have specific service control permissions granted via security descriptors.
- Minimum Required Privileges To start, stop, modify, or query services remotely, the account must have:
| Permission | Description |
|---|---|
| SC_MANAGER_CONNECT | Allows connecting to the Service Control Manager (SCM) |
| SC_MANAGER_ENUMERATE_SERVICE | Allows listing services on the remote machine |
| SERVICE_QUERY_STATUS | Allows querying the status of a service |
| SERVICE_START | Allows starting a service |
| SERVICE_STOP | Allows stopping a service |
| SERVICE_CHANGE_CONFIG | Allows modifying service configurations |
| SERVICE_QUERY_CONFIG | Allows querying service configurations |
| SERVICE_INTERROGATE | Allows requesting updated service status |
Download and Install the Discover and Deploy Tool
To download the Discover and Deploy tool, perform the following steps:
- Open the Management Console.
- Select Downloads.
- On the Discover and Deploy tab, click Download or copy download link in actions.
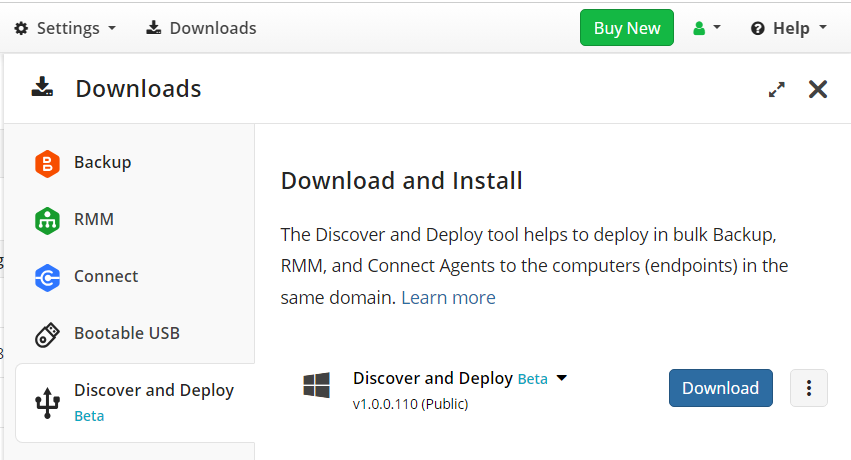
- Run the setup file and follow the installation wizard to complete the installation.
| Top |
Discover Computers
To create a list of target computers for installing Managed Backup components, perform a computer search within your domain or network by IP address.
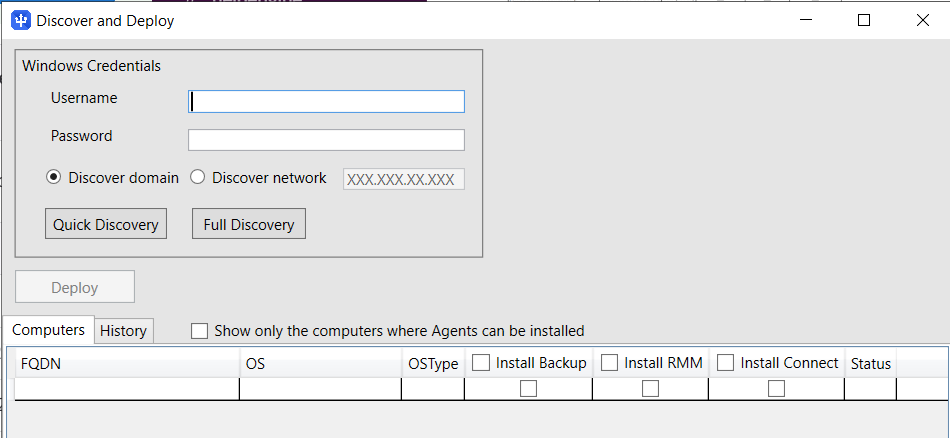
Discovery Modes:
Quick Discovery:
- Performs a fast scan of the domain or specified network.
- Generates a list of available computers.
- Does not detect the presence of Managed Backup components or determine if they can be installed.
Full Discovery:
Conducts a thorough scan of the domain or specified network.
Detects the presence and installation readiness of Managed Backup components.
Full discovery may take longer to complete
Discover Domain Computers using GUI
In order to perform the discovery and deployment, make sure that the specified account has local administrator privileges on every target computer.
Note that if the computer where the tool is installed is in a domain, credentials for quick discovery are optional, so you can simple click Quick Discovery
- Start Discovery:
- Open the tool and provide administrative credentials.
- Ensure File & Printer Sharing is enabled on all domain computers.
- Select Discover Domain and choose either Full Discovery or Quick Discovery.
- Monitor Progress:
- Track the discovery progress on the History tab.
- Once complete, view the results on the Computers tab.
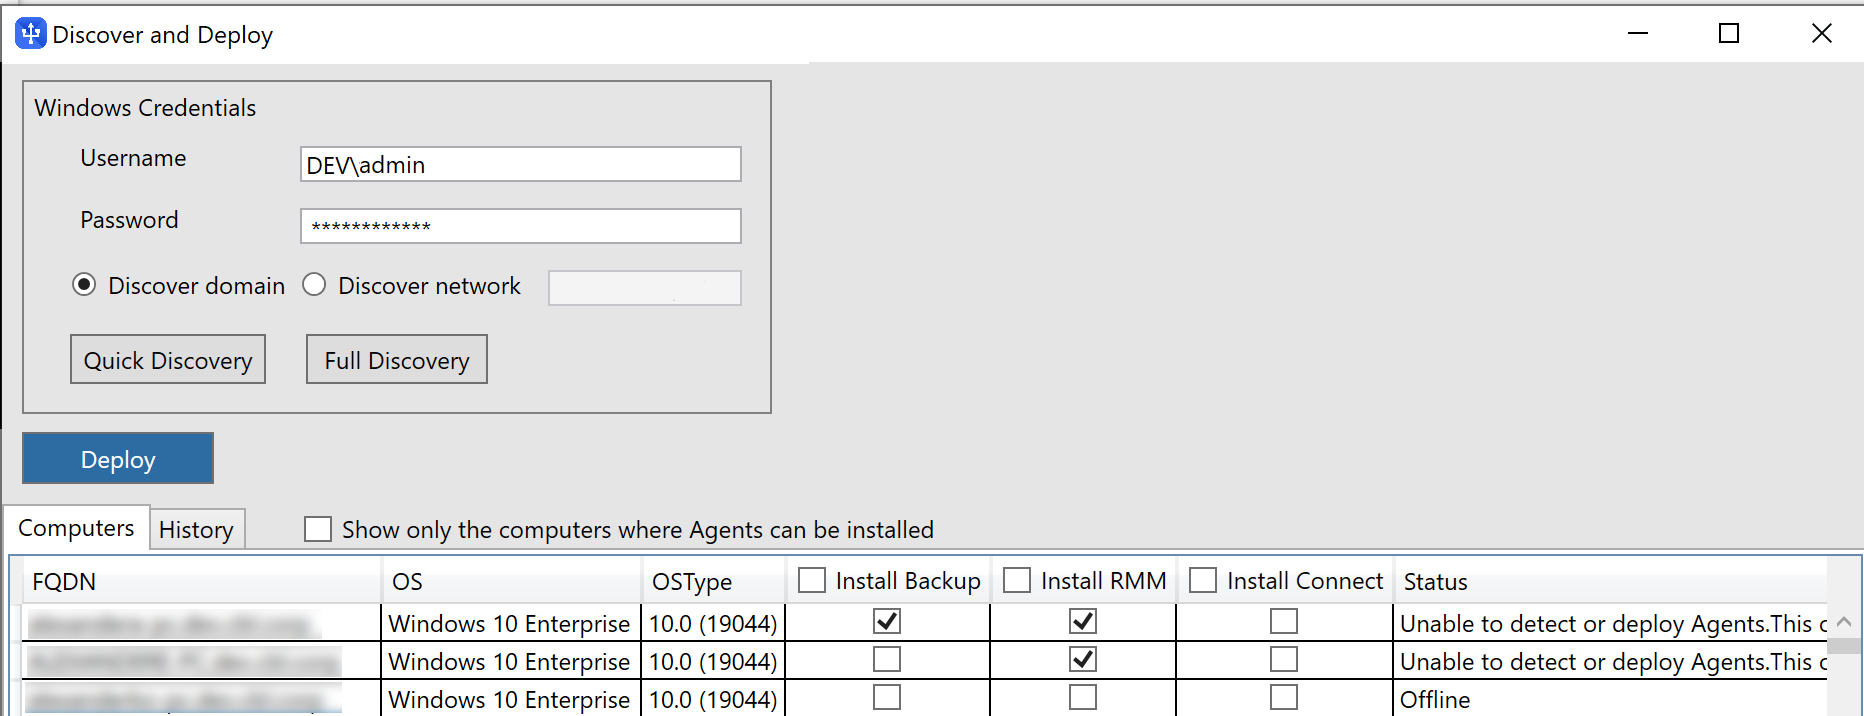
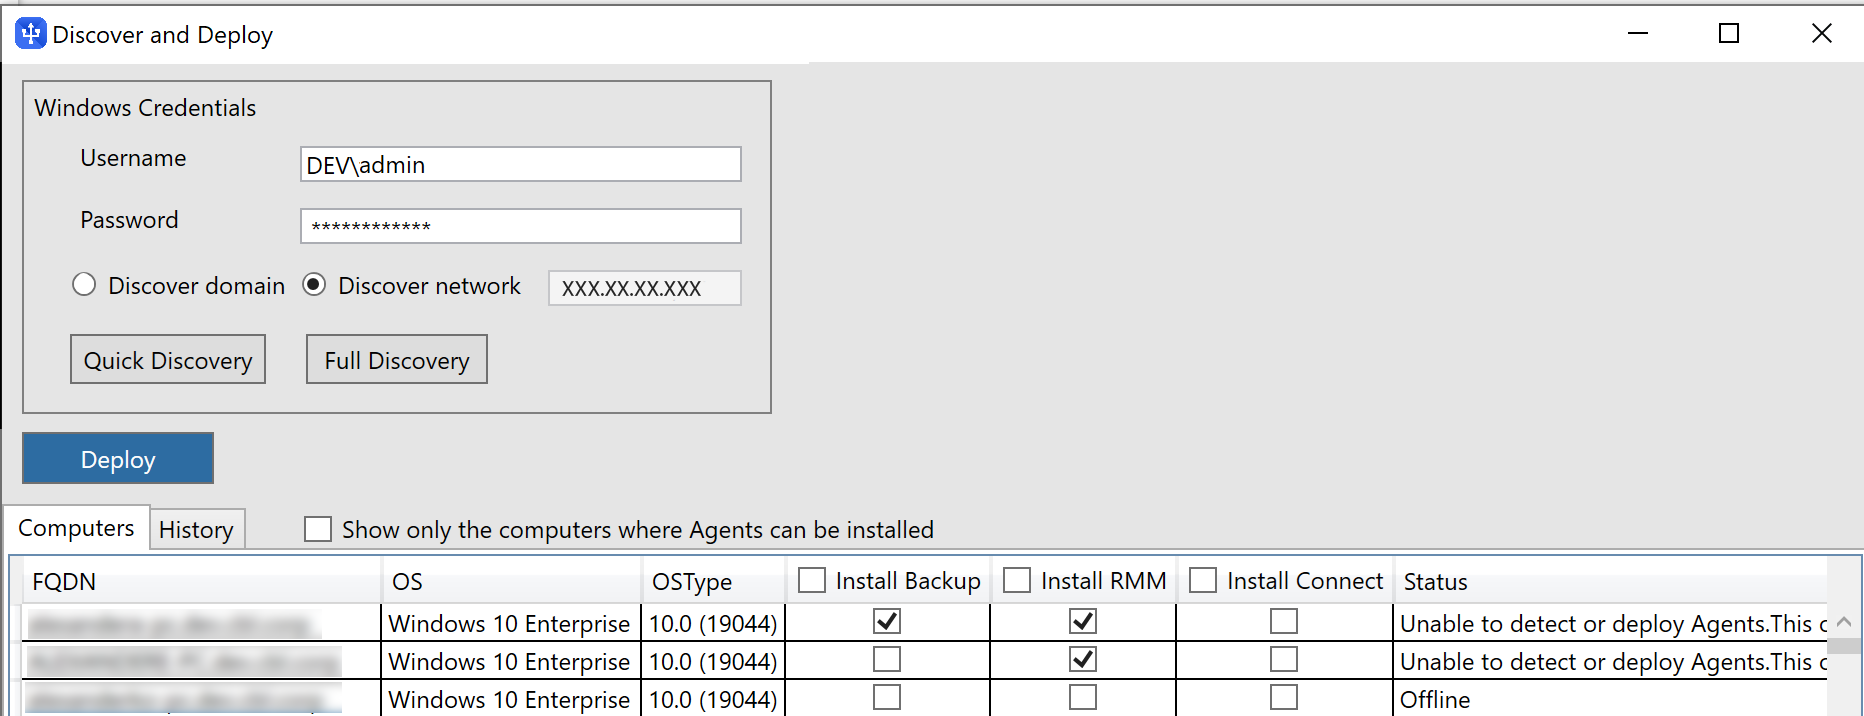
Upon full discovery execution, the tool collects data about available computers across the domain, The following data is included in the grid on Computers tab:
- Full computer name in the domain
- Operating system
- Operating system version
- Backup Agent installation flag (check mark is to install, empty if no installation needed)
- RMM Agent installation flag (check mark is to install, empty if no installation needed)
- Connect installation flag (check mark is to install, empty if no installation needed)
- Status of the computer with comments about the possibility of agent deployment. If there are no issues, this entry will be empty.
You can monitor the progress on History tab. Once discovery is complete, the result will be visible on the Computers tab:
Discover Domain Computers via CLI
- Open Command Prompt. Change the working directory to where the tool is located.
- Run Discovery Command. Use the following syntax:
deploy discover --user domain\user --password yourpassword
Note that if the computer where the tool is installed is in a domain, username and password are optional, so you can use the simplified syntax: deploy discover
The search result will be saved in a computers.csv file and can be read and edited with any text editor.
For files with large computer lists, use Excel or Google Sheets
In discover mode the tool discovers computers under specified user account:
deploy discover --user adam.smith@wef.local.corp
| Parameter | Description | Possible Values / Comments |
|---|---|---|
| -f (--file) | Defines the filename for the report on discovered computers | If the parameter is not set, the computer list will be saved with the default name computers.csv |
| -U (--user) | Sets user name to perform computer discovery in a domain. The parameter is optional, but if not specified in cases it is required, an appropriate error is reported | Values must be specified in USER@DOMAIN or DOMAIN\USER formats. Example: admin.mycompany.corp\admin1919 |
| -P (--password) | Sets password for the specified user. The parameter is optional | If the password is not set in the command that requires it, you will be prompted to enter it upon the command execution |
| -w | Specifies path to working directory | Default value is .) |
| -y (--overwrite) | Allows overwriting existing files in working directory | true/false, default: true |
| -c, --checkexists | Allows overwriting existing files in working directory | true/false, default: true |
| --help | Displays this help screen | |
| --version | Displays version information |
Note that parameters are case-sensitive
To read the command help on the discover mode, use the following command:
deploy discover --help
| Top |
Discover Network
- Provide Administrative Credentials. Ensure you have the necessary credentials to access network computers.
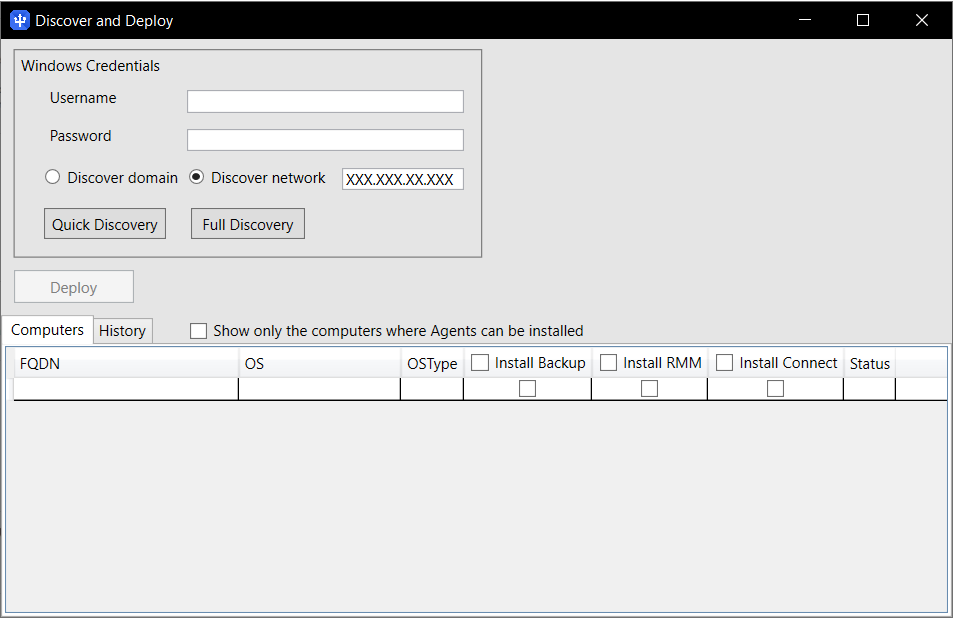
- Select Discover network
- Provide IP Address of the network or subnet
- Select Full Discovery or Quick Discovery
You can monitor the progress on History tab. Once the discovery is complete, the result will be visible on the Computers tab.
Deploy Managed Backup Components
GUI
- Select Components. Once the discovery process is complete, you can proceed to deploy Managed Backup components on the identified computers, select what Agents should be installed on which computers.
In case of the computer list is long, select Show only the computers where Agents can be installed filter
- Click Deploy You can monitor the progress on History tab. Once the deployment is complete, the result will be visible on the Computers tab.
CLI
Once the discovery process is complete, you can proceed to deploy Managed Backup components on the identified computers. Run the following command:
deploy deploy
For example, to deploy the RMM Agent (the link to the build is rmmagenturl) and the Backup Agent (the link to the build is backupagenturl) to the domain computers from the file adminlist.csv under the admin1 user, run the following command:
deploy deploy -f computers_list.csv -R rmmagenturl -B backupagenturl -U mydomain\admin1
Deploy on failure.csv computers:
deploy deploy --file failure.csv
Deploy on computers.csv computers under user account:
deploy deploy --file success.csv --user adam.smith@wef.local.corp
| Parameter | Description | Possible Values |
|---|---|---|
| -f (--file) | Defines the filename with a list of computers for bulk installation | If the parameter is not set, the utility will search for the (computers.csv file in the working (current directory) |
| -R (--rmm) | Sets the download link for RMM Agent | The value of this parameter must be a download link. For example: **-R https://s3.amazonaws.com/cb_setups/MBS/1A989AFD-C148-477F-87C5-64FF602A9BCB/Brands/0F57AF21-35E4-4853-0CE7-C97581A07CD6/MSP360RMMAgent_v1.5.0.231_ALLEDITIONS_Setup.exe |
| -B (--backup) | Sets the download link for Backup Agent | The value of this parameter must be a download link. For example:https://s3.amazonaws.com/cb_setups/MBS/1A9A9EFD-C248-487F-88C5-63FF502A9BCB/MSP360MSP360ManagedBackupService_v7.8.2.252_netv4.0_ALLEDITIONS_Setup_20221220172623.exe |
| -C (--connect) | Sets the download link for Connect | The value of this parameter must be a download link. For example: https://mspbackups.com/downloads/ConnectSetup/ab20e4df-2779-48eb-c0f3-82588215cf09 |
| -r (--result) | Sets the filename for the report file with successful installations | Default value is success.csv |
| -e (--error) | Sets the filename for the report file with failed installations | Default value is failure.csv |
| -U (--user) | Sets user name to perform computer discovery in a domain. The parameter is optional, but if not specified in cases it is required, an appropriate error occurs | Values must be specified in USER@DOMAIN or DOMAIN\USER formats. Example: admin.mycompany.corp\admin1919 |
| -P (--password) | Sets password for the specified user. The parameter is optional | If the password is not set in the command that requires it, you will be prompted to enter it upon the command execution |
| -w | Specifies path to working directory | Default value is .) |
Parameters are case-sensitive.
Upon execution with the deployment parameters, the utility downloads the components set for installation from the URL specified in the command to temporary directories on target computers and then executes the installation. Installation results are reported in two separate files:
- Report with successful installations
- Report with failed installations
To read the command help on the discover mode, use the following command:
deploy deploy --help
| Top |