Download and Install RMM Agent for Windows
Generate New Installation Package
First, make sure you have the latest RMM Agent version available for installation. To do this, proceed as follows:
- Open the Management Console.
- Select Downloads.
- Open the RMM tab.
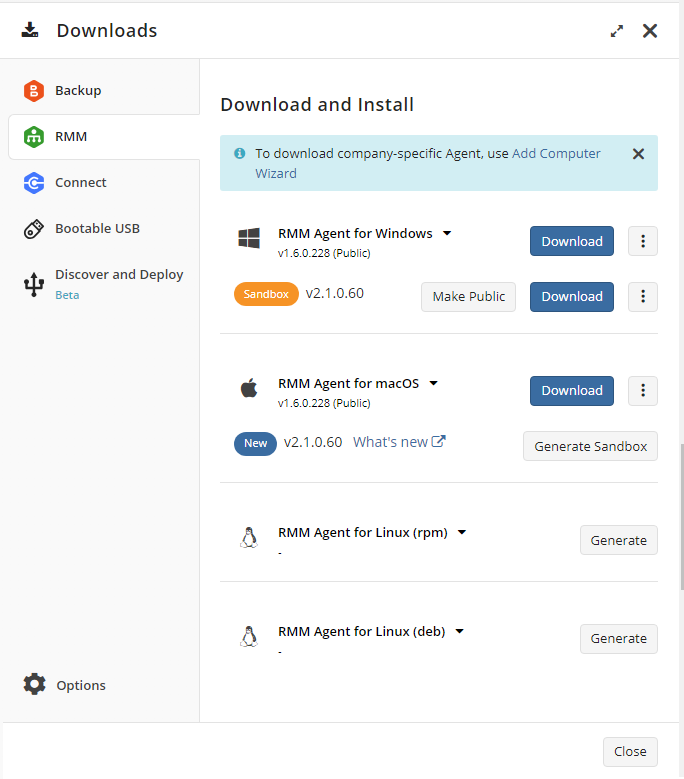
- Find the RMM Agent version that suits your operating system (Windows). In case there is no generated installation package, click the Generate button after the product version you are going to install. Wait while the package will be generated for you. By default, the public package is suggested to be installed. You can see the newest version of the product and can make it public by the Make Public button. As soon as the newest version becomes public, it will be available for all users. In case you already have generated installation packages and the Enable Sandbox option for the download panel is enabled, you can add the newest version to your sandbox to test it before making it public. To add the newest version to sandbox, click the Make Sandbox button.
Note that if a target computer has the Backup Agent installed, you can install the RMM Agent straight from the Management Console. To do this, click Install in the RMM column on the Remote Management page
System Requirements
The RMM Agent for Windows installation requires some additional components to be installed. These components are as follows:
- MS Visual 2015 C++ Redistributable Update 3
- .NET Framework 4.7.2
- .Net Desktop Runtime 6.0.3
Note that if the operating system on the target computer does not support .Net Framework 4.7.2, a Windows upgrade is required. View the list of Windows versions that support .Net Framework 4.7.2 (32-bit versions are not listed since the support for them in RMM Agent is deprecated):
- Windows 7 Service Pack 1 (64-bit)
- Windows 8.1 (64-bit)
- Windows 10 Anniversary Update (version 1607) (64-bit)
- Windows 10 Creators Update (version 1703) (64-bit)
- Windows 10 Fall Creators Update (version 1709) (64-bit)
- Windows 11
- Windows Server 2008 R2 Service Pack 1 (64-bit)
- Windows Server 2012 (64-bit)
- Windows Server 2012 R2 (64-bit)
- Windows Server 2016 (version 1709)
- Windows Server 2022
Install RMM Agent
To install the RMM agent to the local computer only, proceed to the Downloads menu in Management Console.
- Open the Management Console.
- Click Downloads.
- In the side pane, open the RMM tab, select or generate the required installation package, and then click the Download button. To download the RMM Agent version that will associate the computer with a specific company, click Add Computer Wizard on the top banner.
- Run the installation file.
- Follow the setup wizard steps.
RMM Agent Installation on Selected Computers
To install the RMM Agent on selected computers, proceed as follows:
- Open the Management Console.
- Select the computers on which you want to install RMM Agent, then expand Install > RMM.
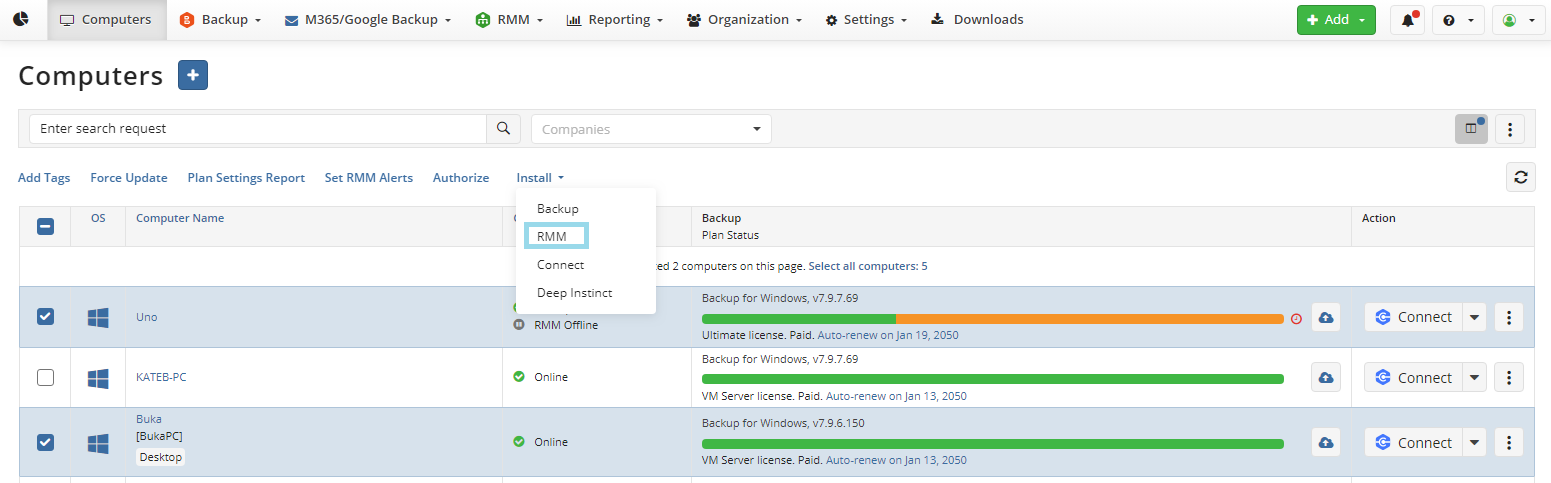
- Confirm to proceed with the installation.
In the Task Manager the RMM Agent appears as the Online Backup Service Remote Management on the Services tab.
Note that target computers must be restarted if the RMM Agent is installed with additional software
Using RMM Agent on Local Computer
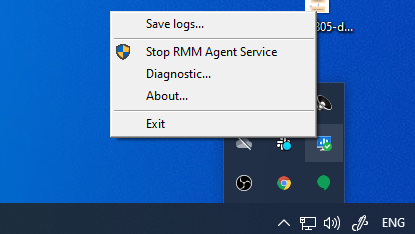
The following RMM Agent options are available:
- Save logs. Select a location to save the RMM Agent logs
- Stop/Start RMM Agent Service. Stops or starts the RMM Agent service
- Diagnostic. Report an issue to the MSP360 technical support team or open the logs folder
- About. Displays the RMM Agent version installed
- Exit. Exits the tray application. Note that this action does not stop the RMM Agent service
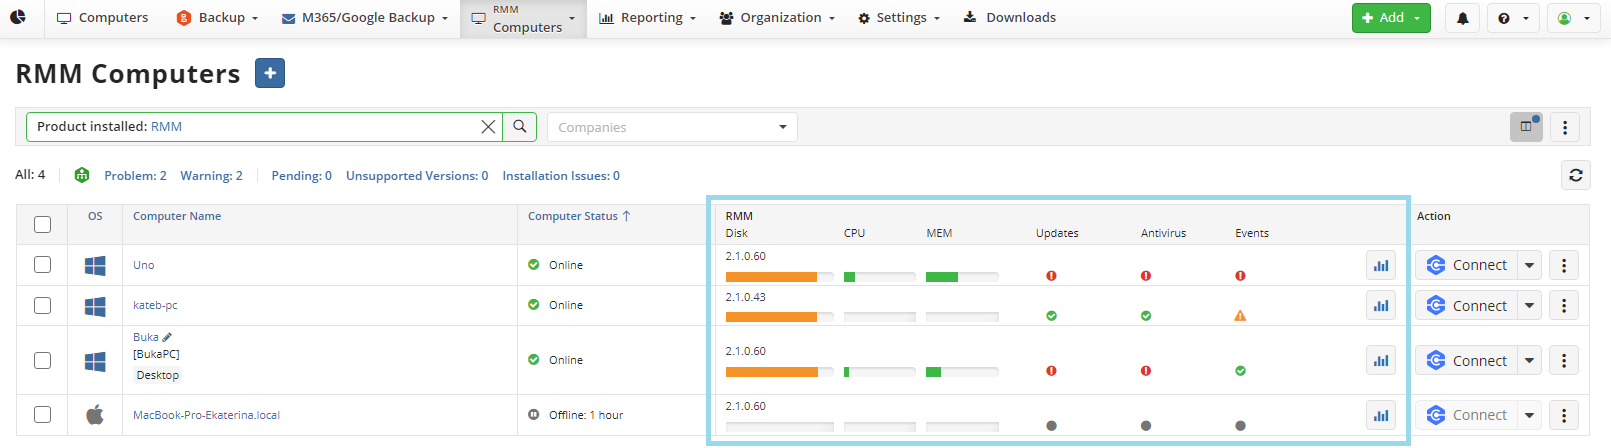
You can view data collected by the RMM Agent in the Management Console. To learn more, read the RMM Service In Management Console chapter.
The information collected by the RMM Agent is displayed in the RMM column on the Remote Management page.