Proxmox VM Restore in Management Console
Backup for Windows offers restores of Proxmox virtual machine backups to Proxmox Virtual Environment (VE). This functionality is now available in beta version.
Beta version limitations for restore:
- High memory consumption is possible during the item-level restore process.
- Only one Proxmox backup or restore job can run at a time; concurrent execution is not supported.
- In the beta version, restore is only supported to a Proxmox server. Restore as a virtual disk is not currently available.
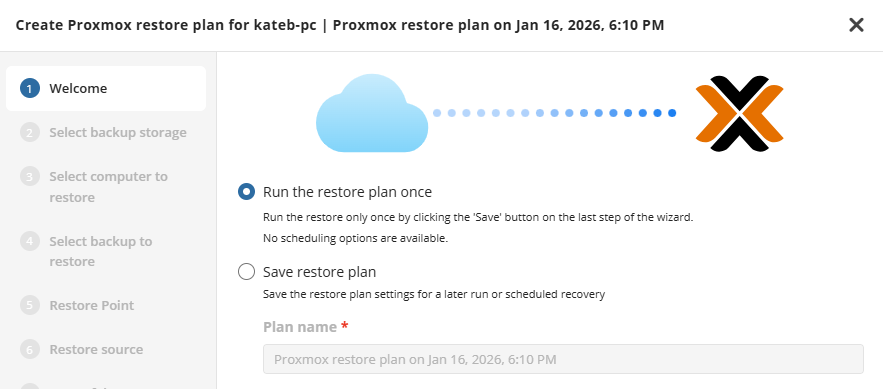
Create Restore Plan
To create a new restore plan:
- Open Backup > Computers in the Management Console.
- Open the current list of plans by either clicking on the name of the computer, or the Configure icon in the Backup Plan Status column.
- To create a new Proxmox Restore Plan, click on “+ Add new plan” on the Restore Plans tan of the side panel, then click on Proxmox restore plan.

The Restore wizard starts.
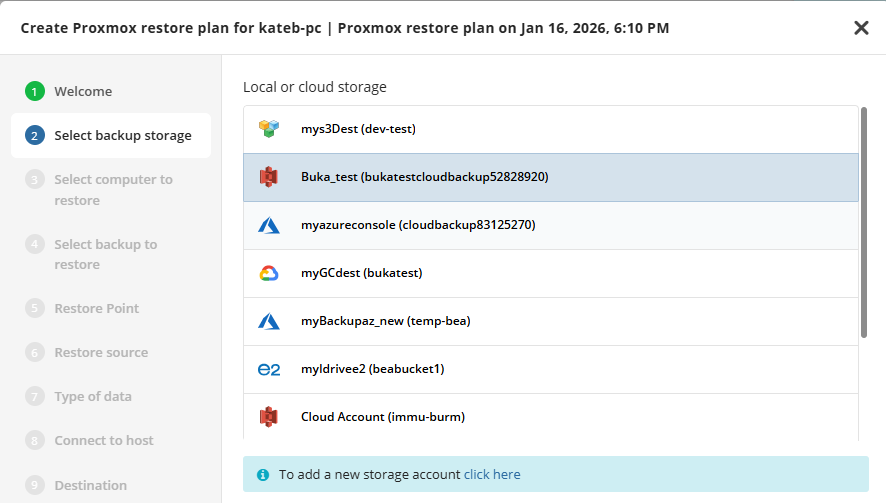
Select Backup Storage
Select a backup storage account that contains the dataset to restore.
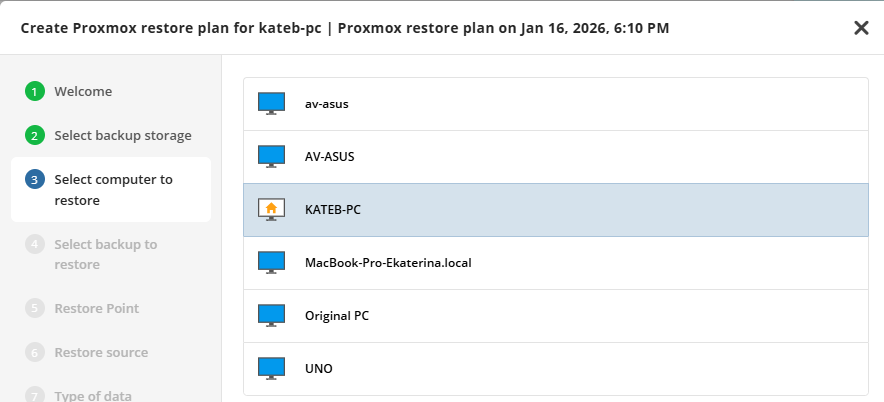
Select Computer to Restore
If you have multiple computers stored in the backup storahe, you will be prompted to select a computer (backup prefix) associated with the stored Proxmox backup.
This step is optional.
Select a backup plan that contains the dataset to restore. Entries are named after backup plans previously created and executed successfully.
Click Next.
Select Backup Plan to Restore
Select a backup plan that contains the dataset to restore. Entries are named after backup plans previously created and executed successfully.
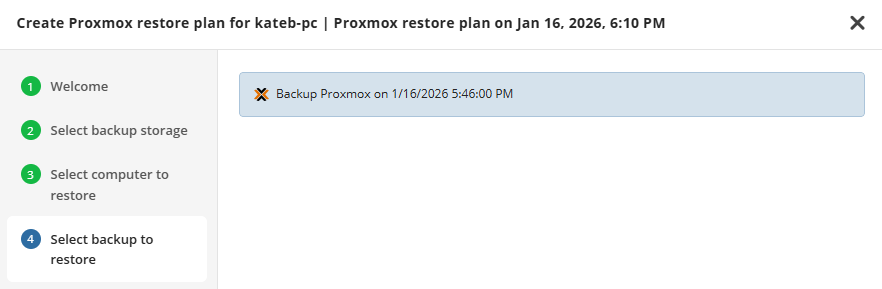
Click Next.
Select Restore Point
Select the required restore point for the plan. You can select the latest available restore or select the required one manually from the list.
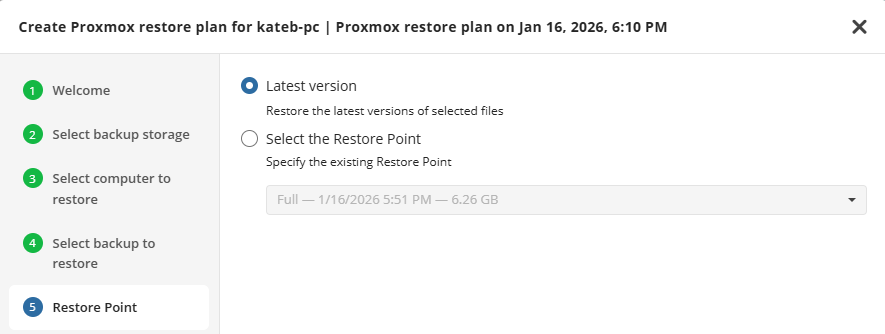
Click Next.
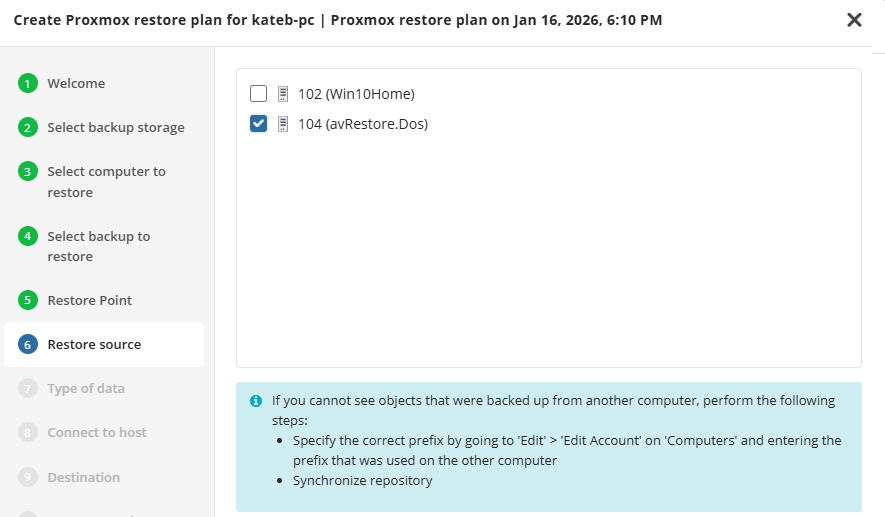
Restore Source
Select virtual machines to restore from the list.
Restore Type
This step displays all possible restore types that are available for backups currently stored in backup storage. Select Restore to Proxmox server.
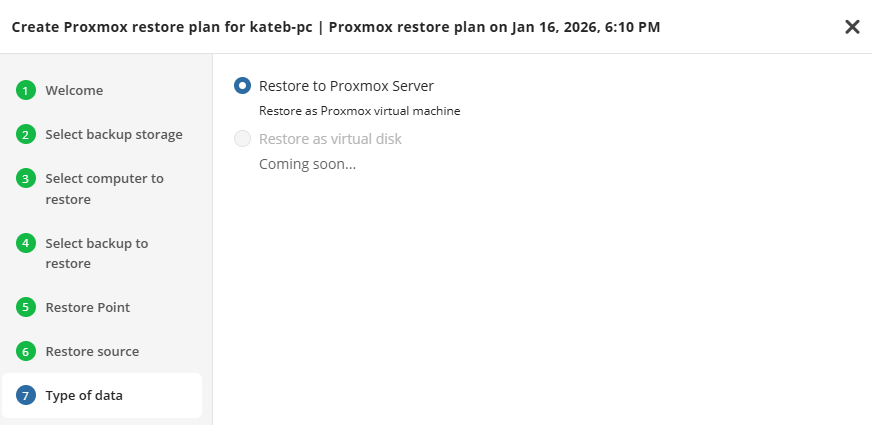
Click Next.
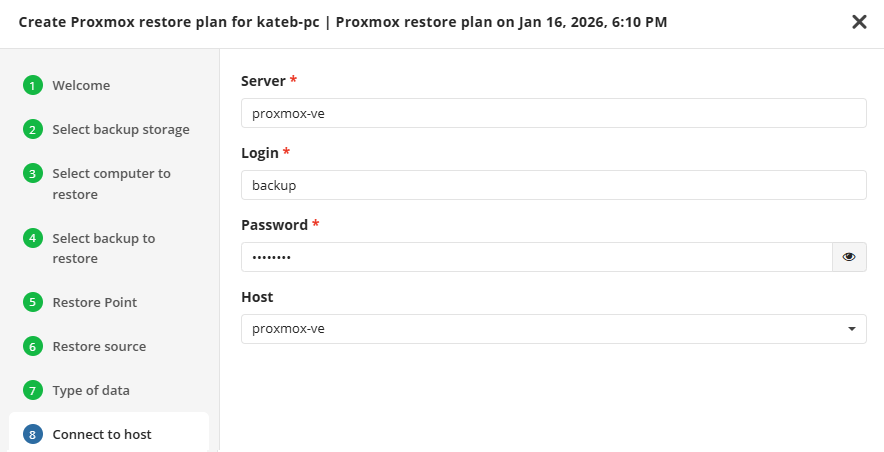
Select Proxmox Host Server
Select Proxmox Host Server where you want to restore the selected virtual machine. Use FQDN name or IP Address of the Proxmox Host Server.
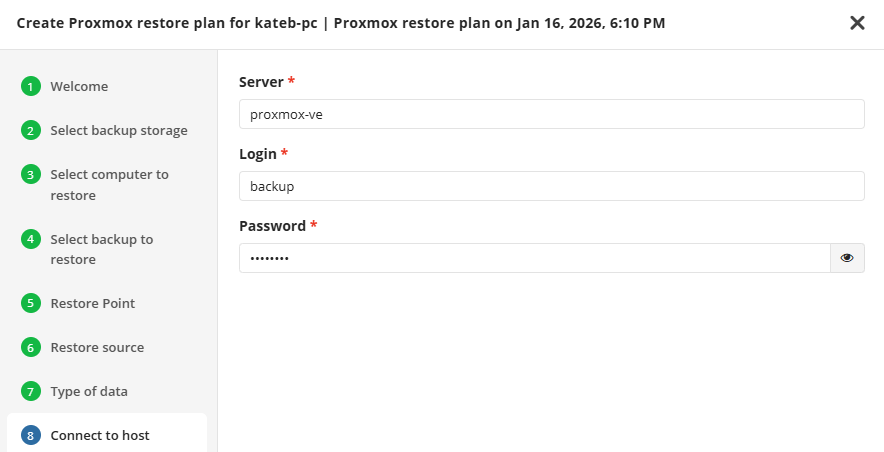
A Proxmox hostname examples (often an FQDN) are pve-server01.home.local, proxmox.mydomain.com, or a simple functional name like pve-lab. Also the IP address of the Proxmox host server can be used. Local IP addresses can be used only if the backup is created on the computer connected to the LAN containing these addresses.
Do not copy hostnames directly from the Proxmox GUI (e.g., https://pve-server01.home.local:8006). Instead, use the base hostname such as pve-server01.home.local.
You may be prompted to enter the Proxmox host.
Proxmox hostname examples (often an FQDN) are pve-server01.home.local, proxmox.mydomain.com, or a simple functional name like pve-lab. Also the IP address of the Proxmox host server can be used. Local IP addresses can be used only if the backup is created on the computer connected to the LAN containing these addresses. Do not copy hostnames directly from the Proxmox GUI (e.g., https://pve-server01.home.local:8006). Instead, use the base hostname such as pve-server01.home.local.
In case credentials are invalid or the Proxmox host server cannot be accessed, you will not be able to proceed to the next Restore Wizard step
Click Next.
Restore Options
Select the target datastore to put the restored VMs from the list of available, then configure the restore options.
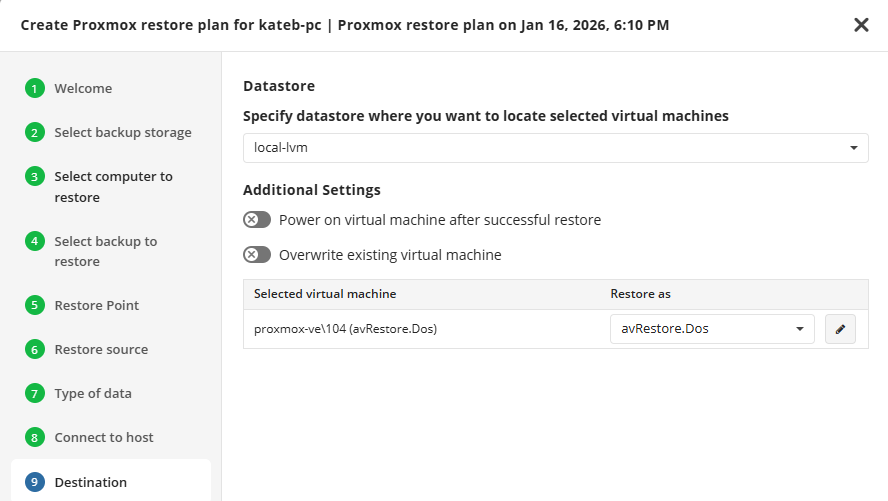
The following restore options are available:
- Configure the action for running virtual machines. You can power the VMs off and then restore or skip the restore if a virtual machine is up and running
- To run the restored virtual machines after the restore plan completes, select the Power on virtual machines after successful restore check box
By default new machine will be created. Specify the names for the restored VMs if required. The name should meet the DNS naming standards.
To overwrite the existing virtual machines on the target datastore, select the appropriate checkbox.
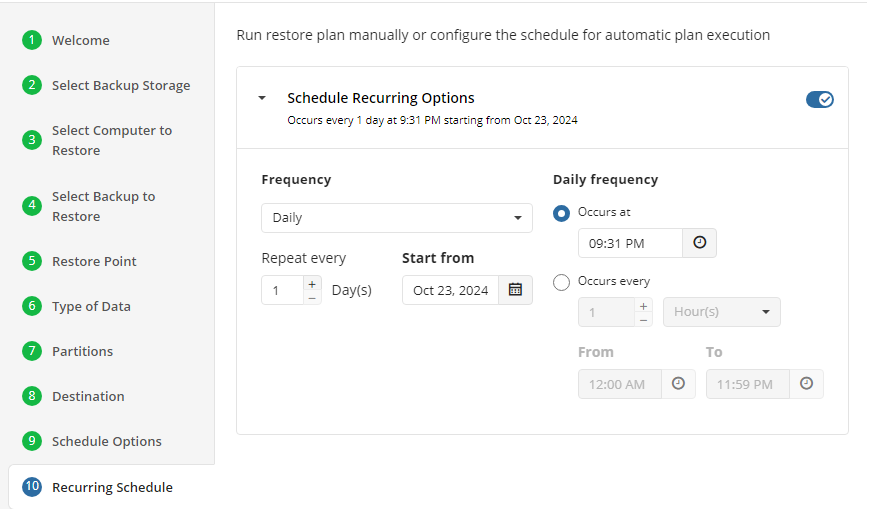
Schedule Options
Specify the schedule for the restore plan.
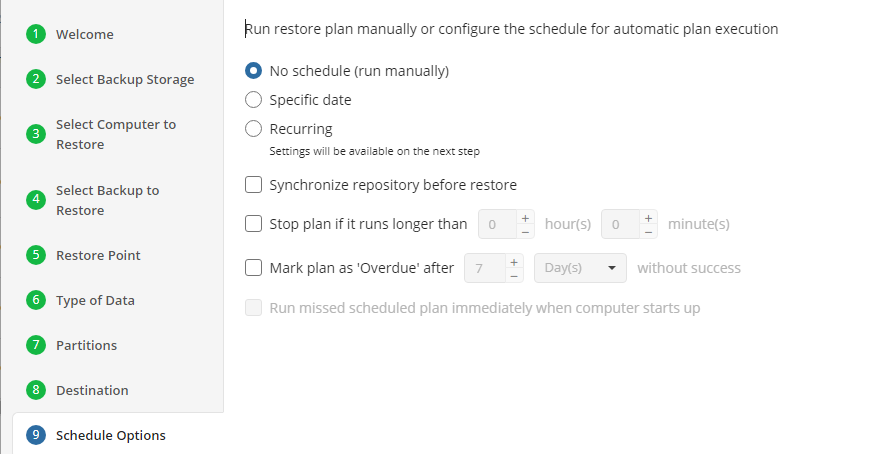
The following options are available:
- No schedule (run manually). Select this option to run the restore plan manually, only when it is required
- Specific date. Select this option to specify the date and time the restore plan is to be executed
- Recurring. Select this option to run the restore plan on a periodic basis, then configure the schedule
- Stop the plan if it runs for. Select this option if you want to stop the restore plan if it runs longer than the time you specified. Use this option with care since sometimes it is hard to predict the restore time due to many factors
- Mark plan as Overdue after. Select this option to monitor the plan execution. If the restore plan fails or is finished with warnings for the specified period of time, it will be assigned with the Overdue status that will appear on the Monitoring/History page
- Run missed scheduled plan immediately when computer starts up. Select this option if you want the restore plan would run as the computer boots in case it was down at the moment of the scheduled run
Click Next.
| Top |
Pre / Post Actions
Specify the actions before and/or after the restore plan. Usually, these are scripts that perform particular jobs before or after the plan is executed. The following settings are available:
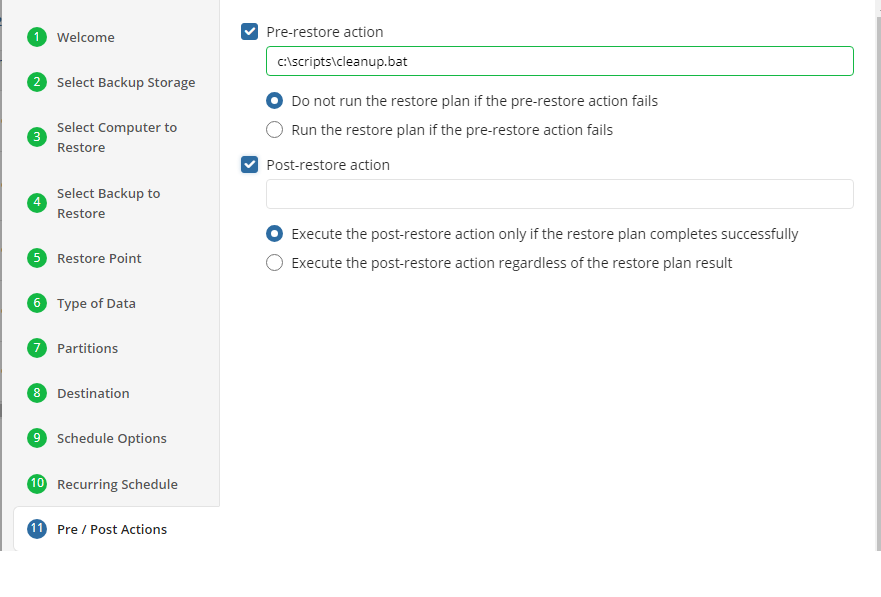
- To specify the action that must be performed before the restore plan starts, select the Pre-restore action checkbox
- Specify the path to the script before the restore plan
- Specify the conditions for pre-action execution:
- Select the Do not run the restore plan if the pre-restore action fails option to suspend the restore plan execution in case the pre-action fails
- Select the Run the restore plan if the pre-restore action fails option if you want the restore plan to run regardless of the pre-action execution result
- To specify the action that will be performed after the restore plan completes, select the Post-restore action checkbox
- Select the Execute the post-restore action only if the restore plan completes successfully option if you want to run it only if the backup was executed without any errors or warnings.
- Select the Execute post-restore action regardless of the restore plan result option if you want the post-action to be executed regardless of the restore plan result
Click Next.
Notifications
Specify notification settings for restore plan results. You can use the company notification settings or customize them as needed: specify the required recipients and customize the notifications for different restore plan results:
- Success
- Failed
- Warning

Select the I want to receive a notification email to enable notifications.
- Select When the restore plan fails or finished with warnings option if you want to receive the notification message in case the restore plan terminates with errors or warnings
- Select the In all cases option if you want the notification to be delivered in all cases
If you want the restore plan results to be added to Windows Event Log, select the Add entry to Windows Event Log checkbox
- Select When the restore plan fails or finished with warnings option if you want to receive the notification message in case the restore plan terminates with errors or warnings
- Select the In all cases option if you want the entry to be put in Windows Event Log in any case.
Click Next.
Complete Restore Plan Creation
Proceed with the restore wizard. Once you have reviewed your selections on the Summary step, click Next to create the restore plan.
The final step in the wizard will confirm that the Restore Plan has been created successfully. If the plan was scheduled, you can opt to run it immediately by checking the Run restore now checkbox and clicking Finish. Otherwise, the plan will be set to run at the next scheduled time.