Get Started with Hyper-V Virtual Machine Backup
This chapter describes the first steps of Managed Backup beginners. Read this to create your first image-based backup on another computer:
- Log in to the Management Console.
- Configure Email Service.
- Create User for Hyper-V Host.
- Download Backup Agent for VM to Hyper-V Host.
- Assign Created User to Hyper-V Host.
- Create First Hyper-V VM Backup
1. Log in to Management Console
As you signed up for a free trial, check your inbox for an email message with instructions on how to log in to the Management Console. This email has the You’ve signed up for MSP360 Managed Backup subject and contains your initial password.
Click the https://console.msp360.com/ link in the email to access the Management Console.
2. Configure Email Service
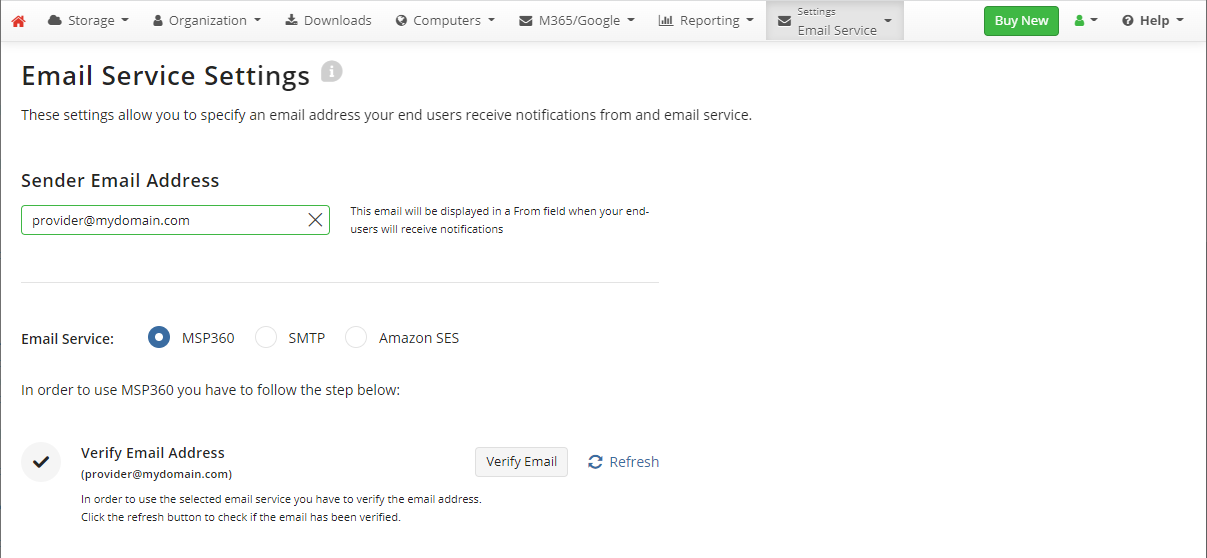
Configure the Email Service. (This step is mandatory in case the Hyper-V host is on another computer). In the Management Console, navigate to Settings > Email Service to specify an email address your end users receive notifications from and select the email service. This step is mandatory.
Verify the email address and click Save Changes.

3. Create User for Hyper-V Host
To create a user, proceed as follows:
- Open the Management Console.
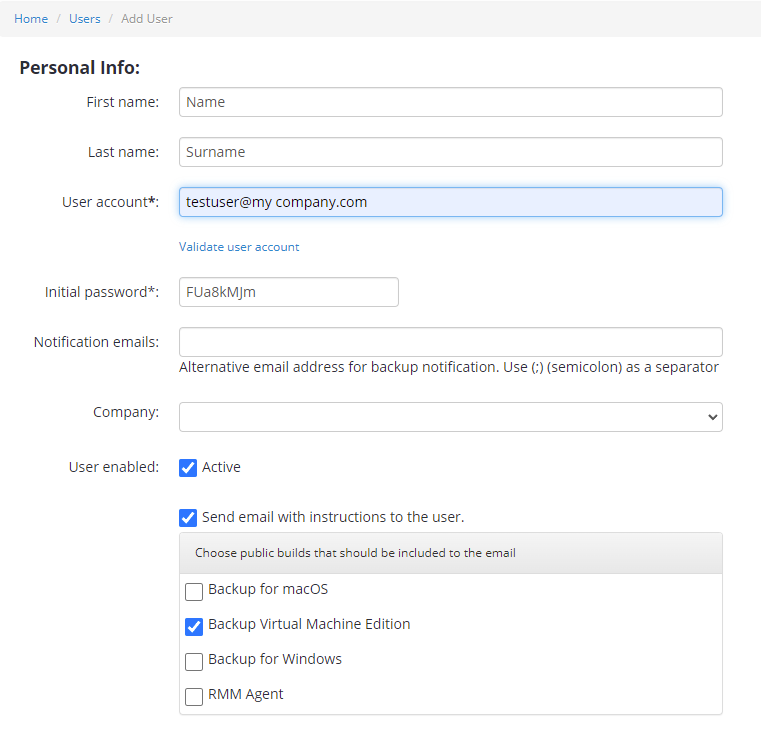
- In the Organization menu, select Users. The user account (provider account) already exists with the email address used during the signup. It is not recommended to use this user for backup purposes. Instead, click Create User.

- Fill in the form, in the Public builds that should be included to email group, select the Backup Virtual Machine Edition build. You can assign the new user to the company (read about company creation in the Create Company paragraph), or create a new company with another backup destination, if necessary.
- Once you are done, click Save.
Now you are ready to install the Backup Virtual Machine Edition and create a backup plan on the Hyper-V Host computer.
4. Download Backup Virtual Machine Edition to Hyper-V Host
The Backup Virtual Machine Edition download link is sent to the new user automatically in the initial email message.
Ask this user to install Backup Virtual Machine Edition to their computer according to instructions in this email or do it on their behalf.
Backup Virtual Machine Edition agent must be installed in the default location. After the Backup Agent is installed on the computer and the user authenticates, this computer appears in Computers > Remote Management grid if you use the legacy main menu, or on Backup > Computers page in the new main menu.
5. Assign Created User to Hyper-V Host
In the Computers > Remote Management grid if you use the legacy main menu, or on the Backup > Computers page in the new main menu, find the computer. In the Company & User Account column, click Add User Account.

In the dialog, select user and Backup Agent for Backup Virtual Machine edition from the list of available editions.
Assign the backup destination, then click Save.
As you are done, proceed to create a new Hyper-V VM backup.