Recovery from System Recovery Tool Using Management Console
- Target computer: Insert the bootable USB drive or mount the ISO image to adjust settings and start the Online Backup Service.
- Management Console: Authorize the target computer.
- Management Console: Create and run the restore plan.
- Management Console or target computer: Restart the target computer once the restore is completed.
- Management Console or target computer (Optional): Use Management Tools to save logs, execute commands in Command Prompt, or modify the registry.
- Management Console: Switch the backup prefix.
- Management Console: Synchronize the repository.
Insert Bootable USB Drive or Mount ISO Image
This step must be completed on the target computer. If the restore fails with the STOP 0x7B INACCESSIBLE_BOOT_DEVICE error, refer to the Install Boot-Critical Drivers chapter to resolve the issue.
- Insert the bootable USB drive or mount the ISO image as a drive into the target computer and restart it.
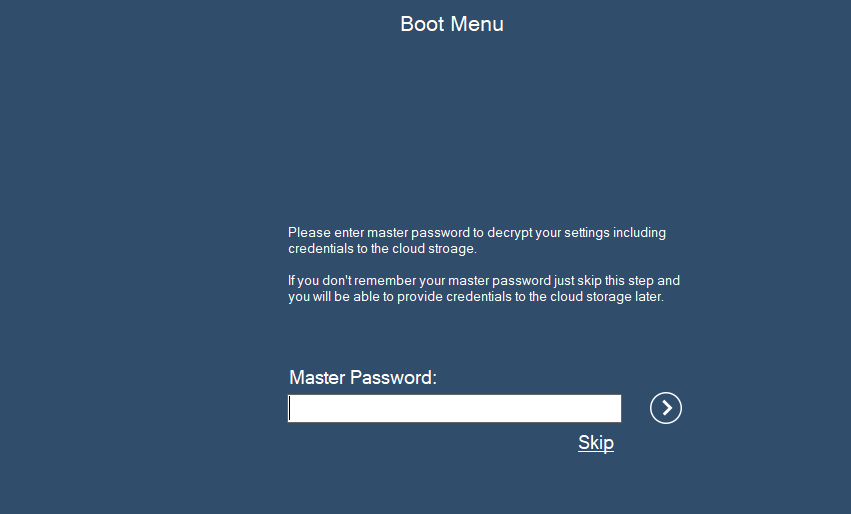
- You will see the welcome screen of the "Boot Menu", where you will be prompted to enter the Master Password that you specified when creating the bootable device (if you did not specify any password, this step will be skipped).
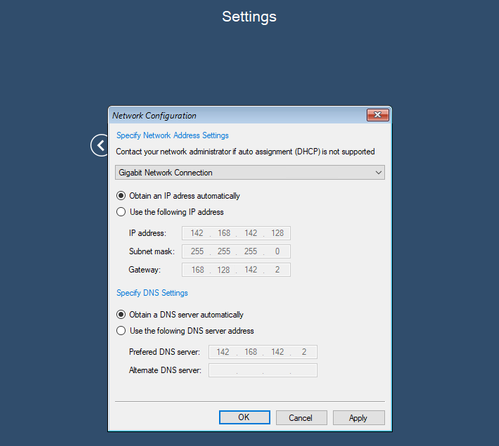
(Optional) Provide the network configuration if the target computer is on a local network:
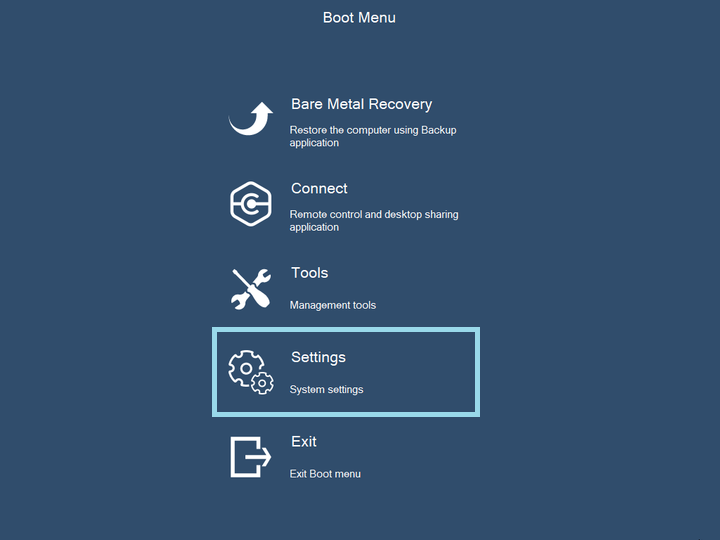
- Click Settings.
- Click Network.
- Configure your local network settings. Apply the updated network settings.
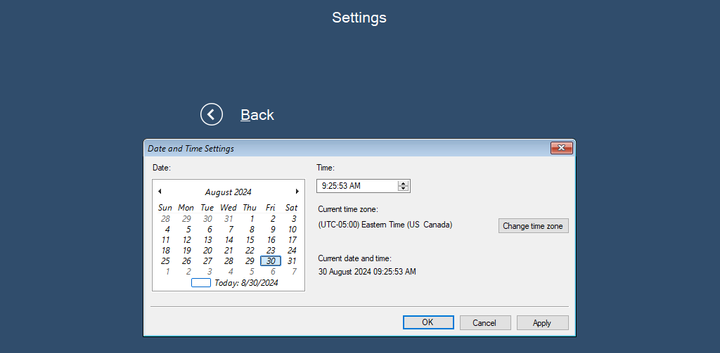
(Optional) Adjust the system time on the target computer if it differs from the local time by more than 5 minutes:
- Click Settings.
- Click Date and Time.
- Adjust the date and time settings according to the local time zone. You can select the required time zone with the Change time zone button. Apply the updated date and time settings.
Click Bare Metal Recovery in the main boot menu.
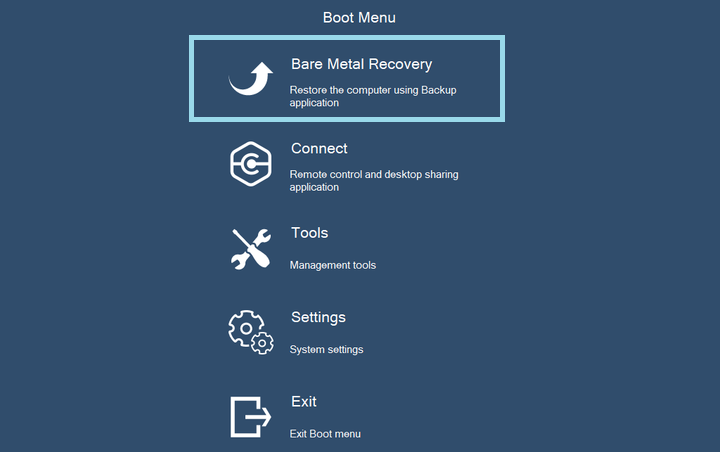
- This will install and start the Online Backup service, and you will be prompted to log in. Use the credentials of the user that was authorized for the computer you are trying to restore.
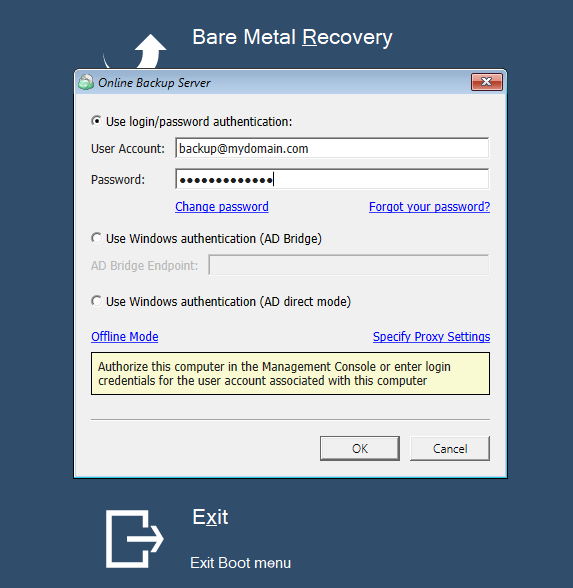
- Once Backup Agent is started, you can use the Management Console to proceed with the recovery process as described below.
Authorize the Target Computer in Management Console
Once the Backup Service is started on the target computer, refresh the Computers page in the Management Console. Use the Pending filter to quickly find added but not yet authorized computers.
- In the Computers grid, find the target computer.
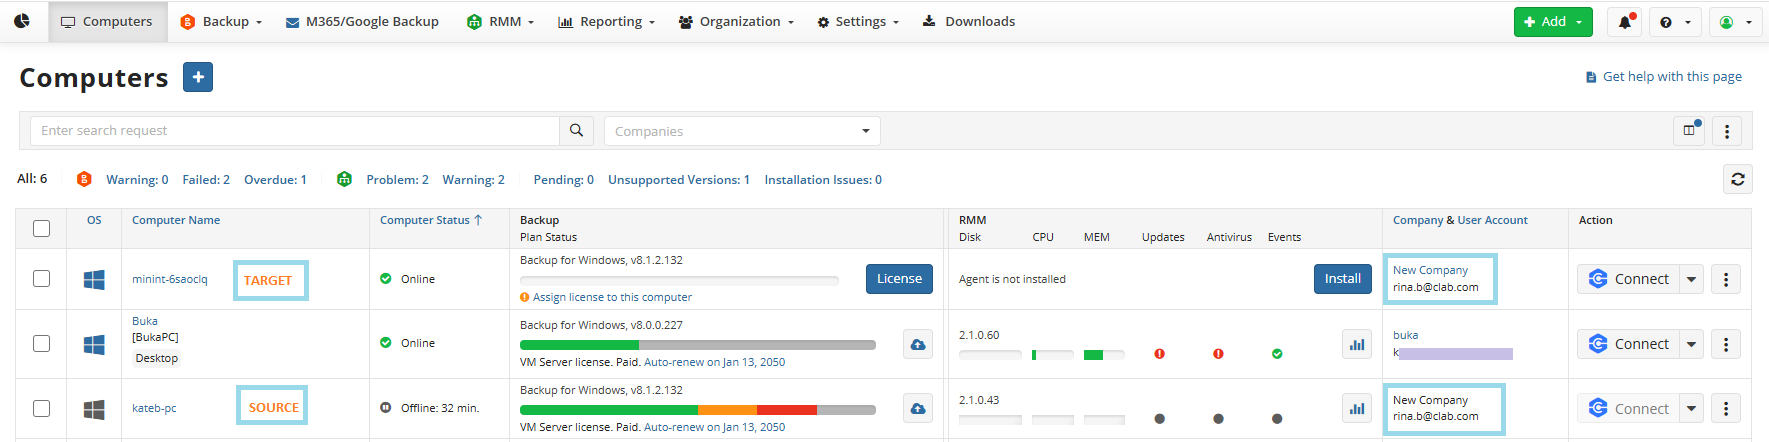
- In the Company & User Account column, click Authorization required.
- Select the company containing the user from the original computer, then select the user that was used on the original computer.
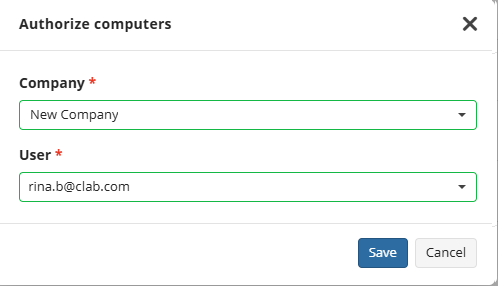
- Click Save. Now the target endpoint is authorized using the same account that was used on the original computer.
If you select a specific user, ensure that the selected user is enabled. Check the user status under Organization > Users.
- Expand the Connect control and select In web browser. The connection to the target computer will open in another tab.
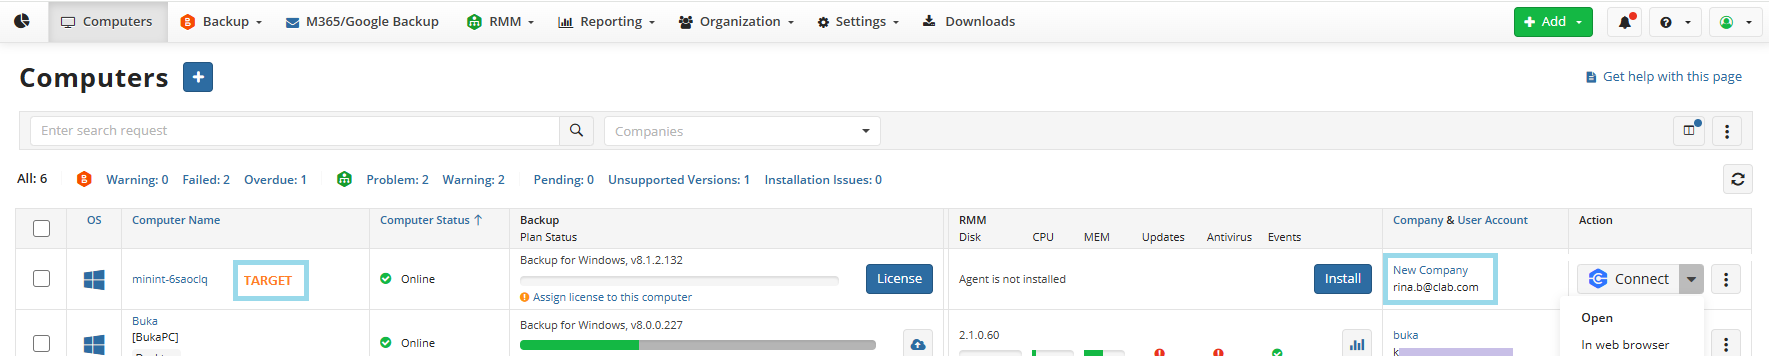
Now you are ready for bare-metal restore on the target computer directly from the Management Console.
Create and run the restore plan
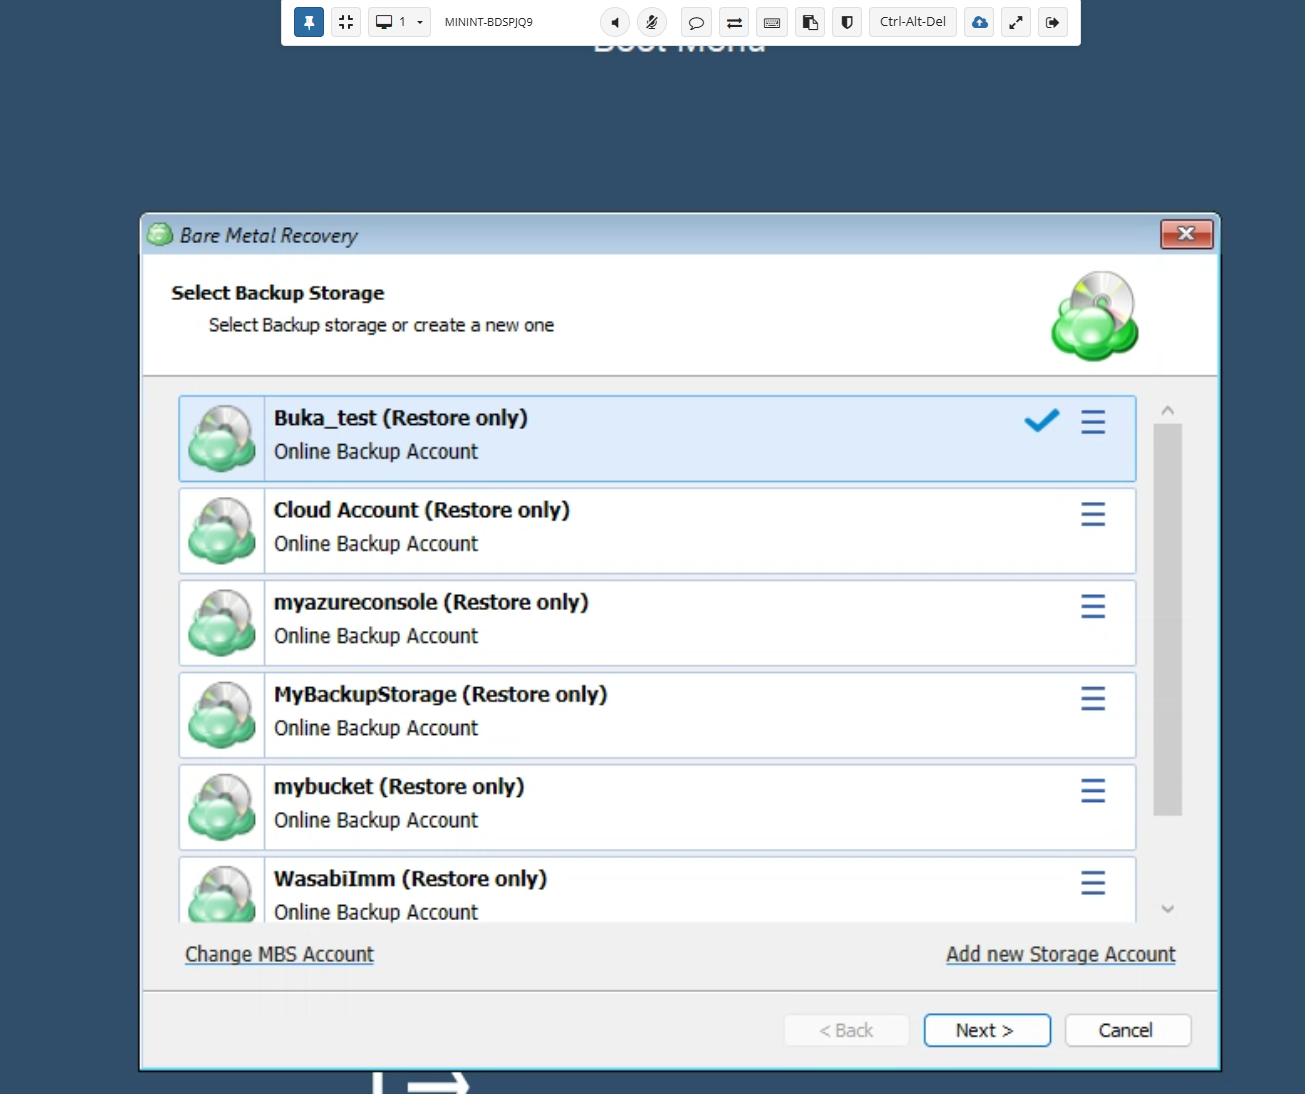
- As soon as the remote connection is established, click Bare Metal Recovery.

- On the Select Backup Storage step, select the backup destination that contains the required backup from the list. Click Next.
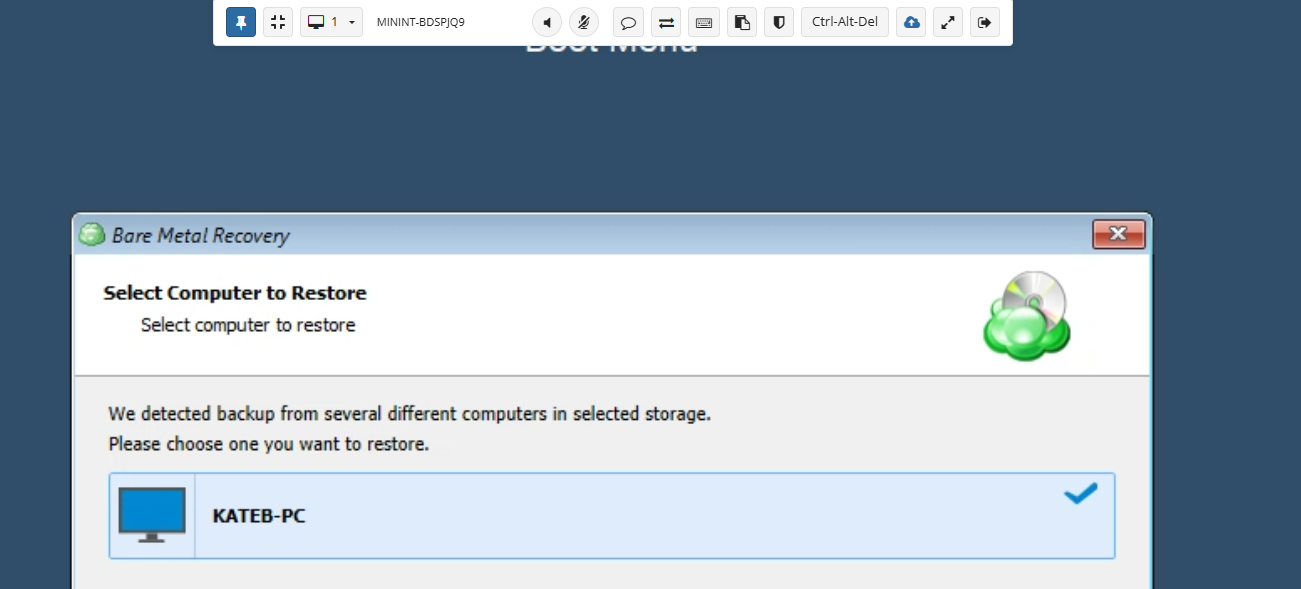
- On the Select Computer step, select the required computer to restore. Click Next.
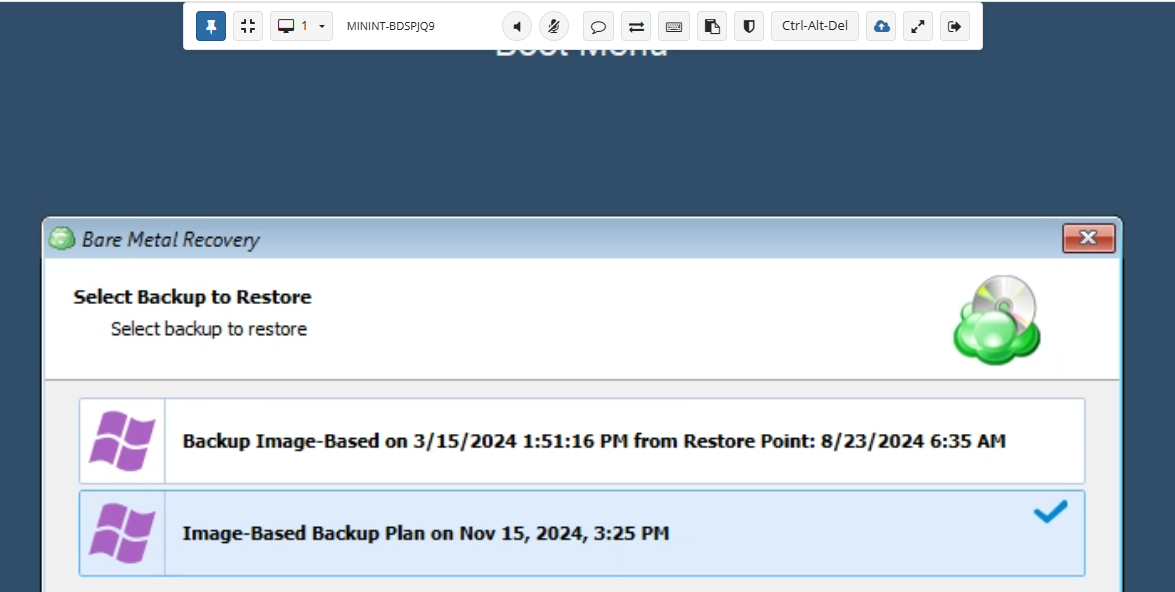
- On the Select Backup step, select the image-based backup plan you are planning to use for the restore, then select the backup to restore from the list of available backups. Click Next.
- On the Restore Point step, select the latest version or a specific restore point from the list below. Click Next.
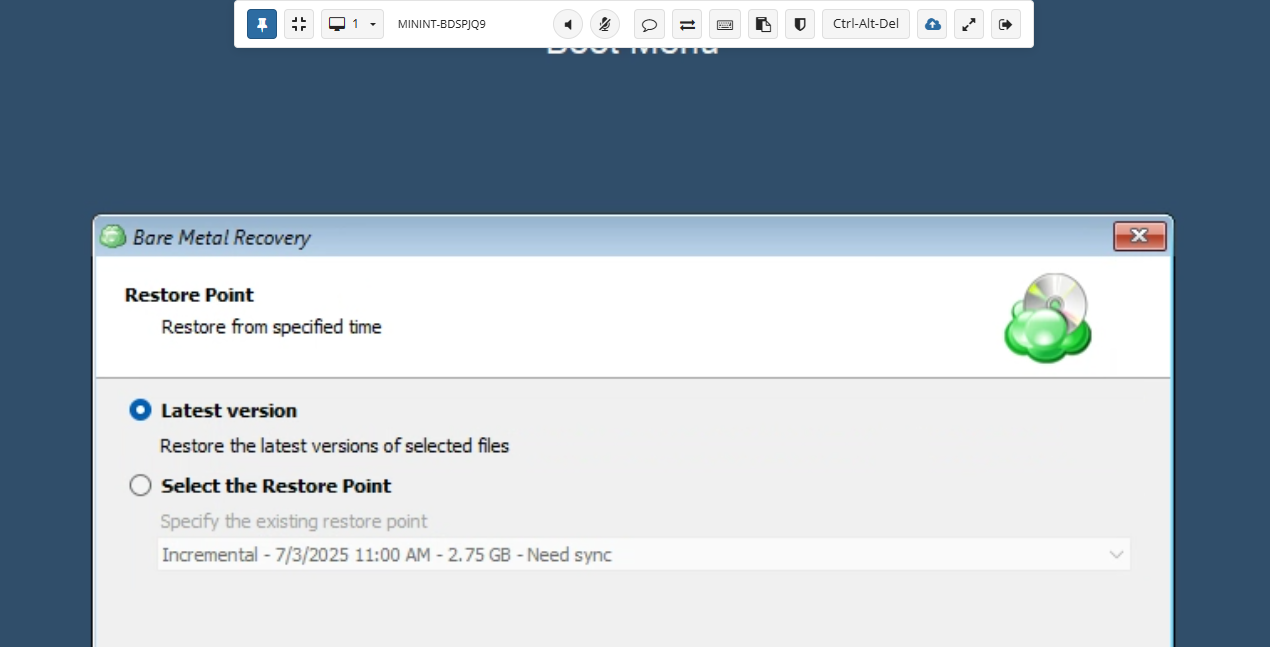
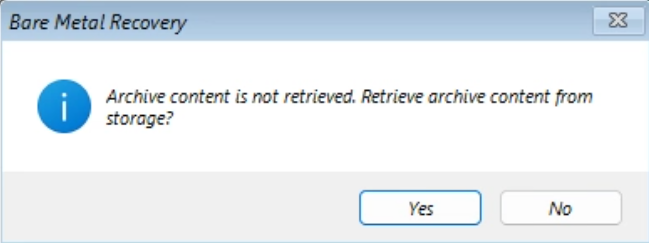
- Confirm the retrieval of backup content. Wait until the backup content is retrieved.
- On the Select Partitions step, select the partitions to restore.
- To exclude some files and folders from the restore, click the partition size value in the Used column, then select the objects to exclude.
- To specify a custom partition size, click the value in the Target size column. Click Next.
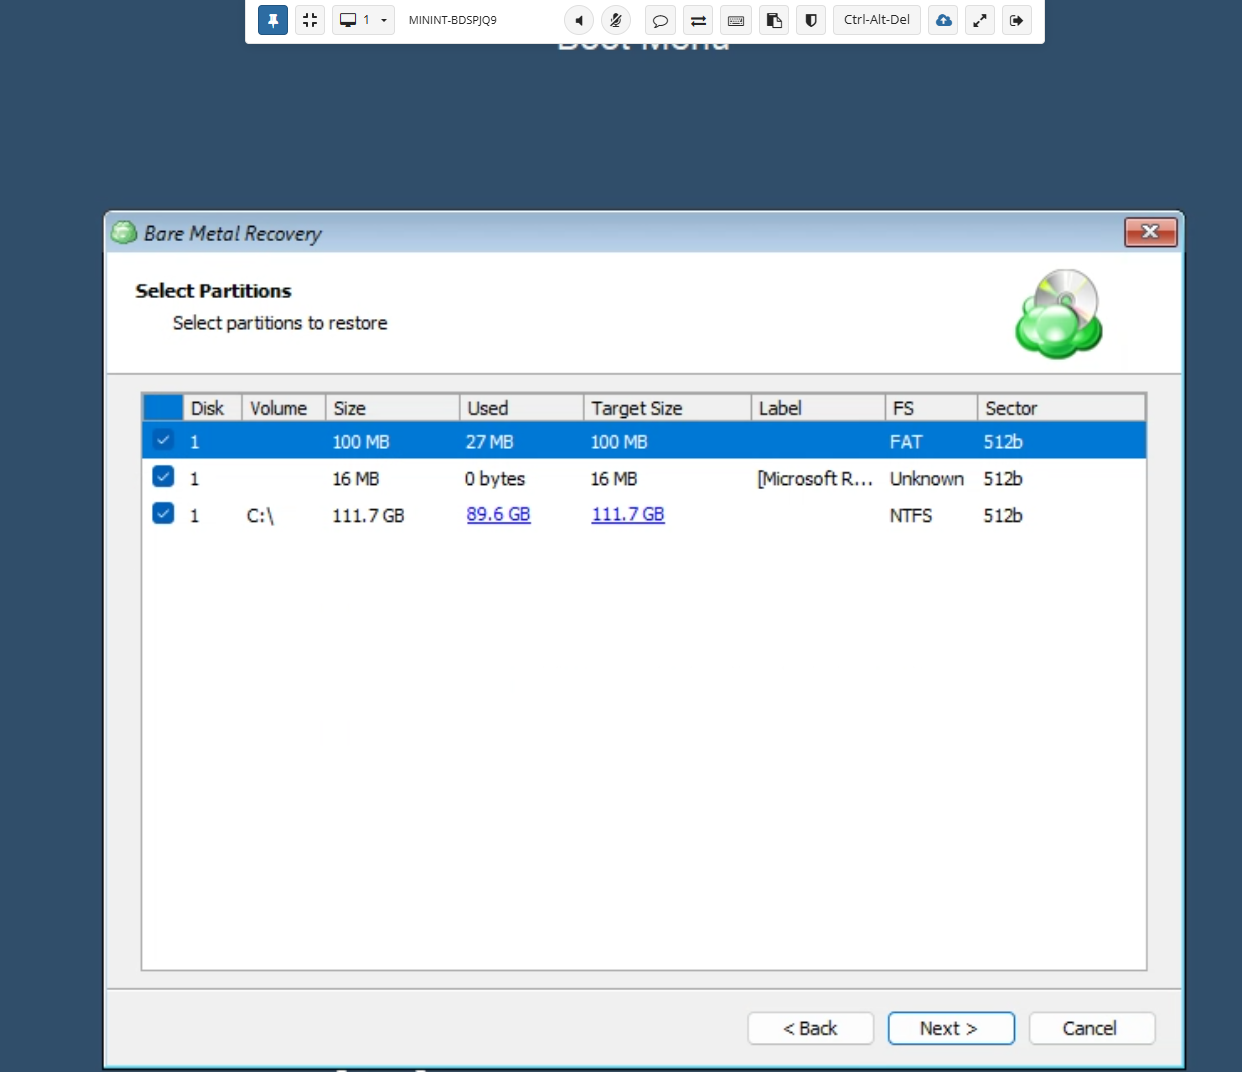
Selected partitions must include system volumes, as they contain data required to boot the operating system.
Attempting to restore to smaller partitions may only succeed if no blocks in the backup image are used beyond the size of the new partition. If such blocks exist, the restore plan will fail with a 'block intersection exists' error. If restoring to a smaller partition is inevitable, make the partition as large as possible.
The Convert GPT to BIOS/MBR option is not applicable to bare metal recovery scenarios.
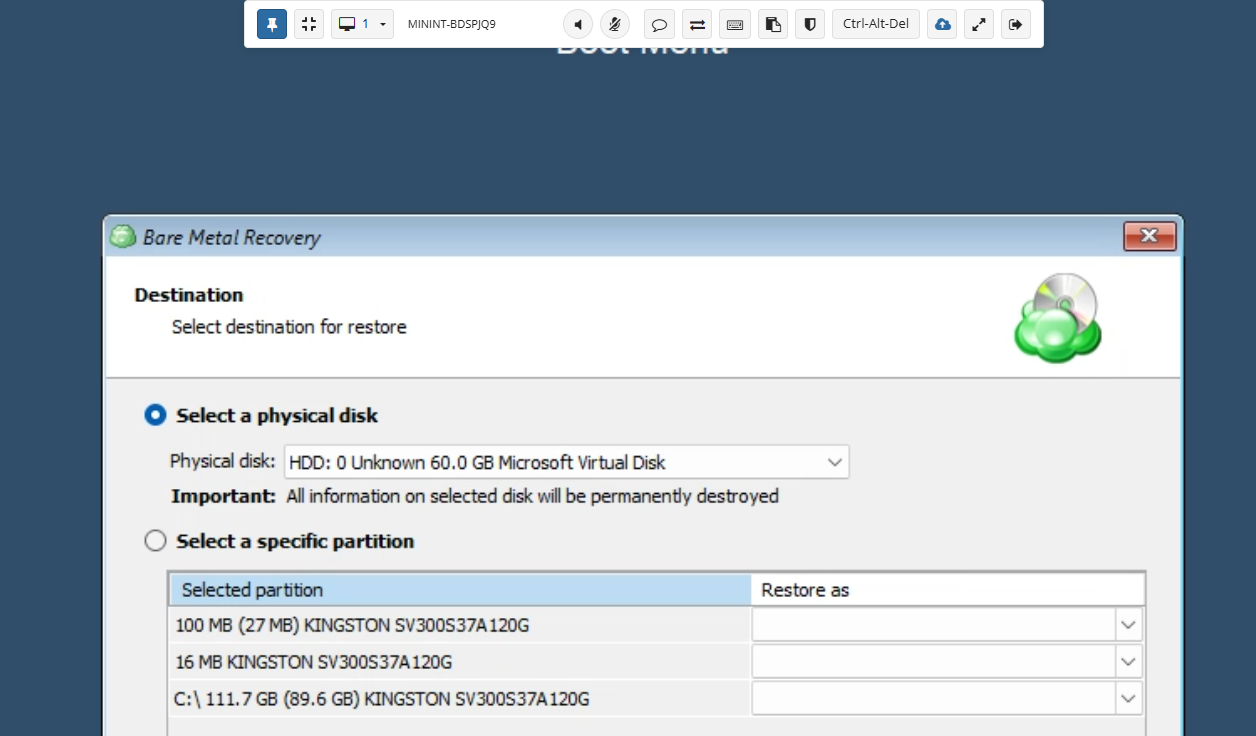
- On the Destination step, select the destination to restore the disk image. Select the disk or specific partition. Click Next.
On the Encryption Options (optional) step, enter the encryption password if your backup is encrypted. Click Next.
On the Notifications and Logging step, specify notification settings for restore plan results as described here. Click Next.
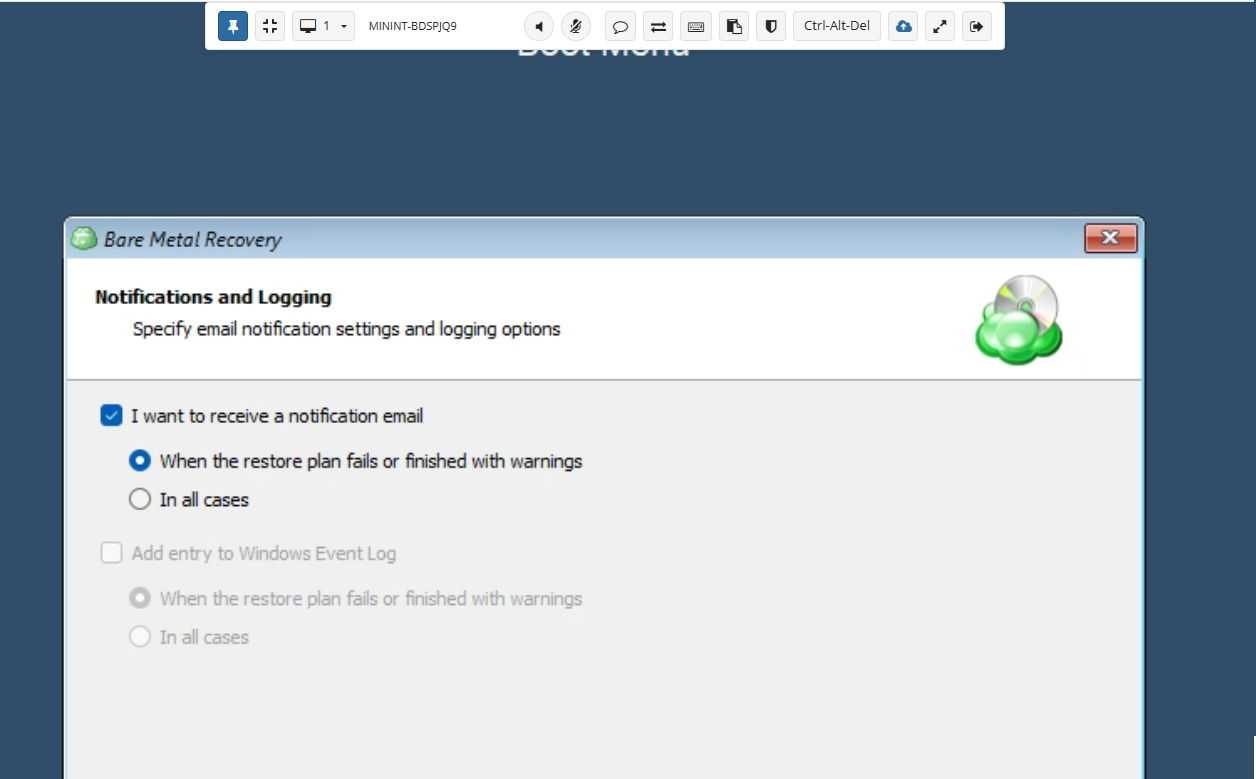
- Click Finish to run the restore plan.
Restart the Target Computer from Management Console
You can access the target computer from the Management Console using the Connect button at the end of the computer entry on the Computers page to restart the target computer, or ask the user on the target computer to restart it.
Use Management Tools to Save Logs, Use Command Prompt or Modify Registry (Optional)
You may want to take advantage of the management tools to perform some specific actions (for example, download logs or modify the registry). Find the management tools by clicking System Tools. You can access the target computer from the Management Console using Connect.
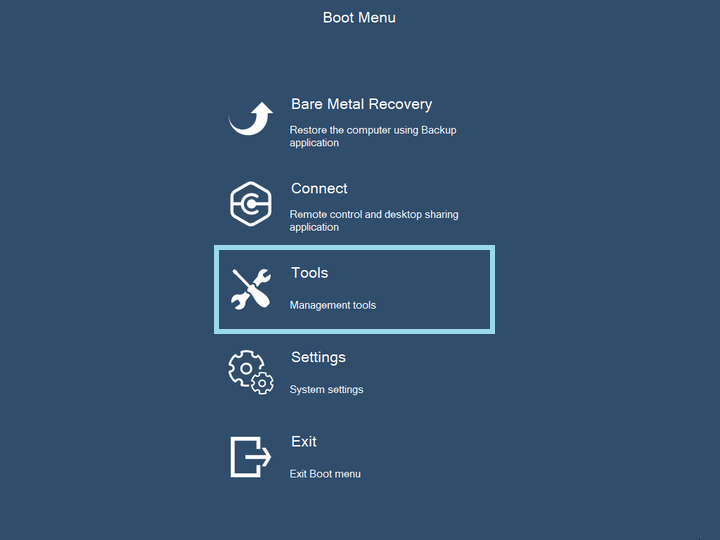
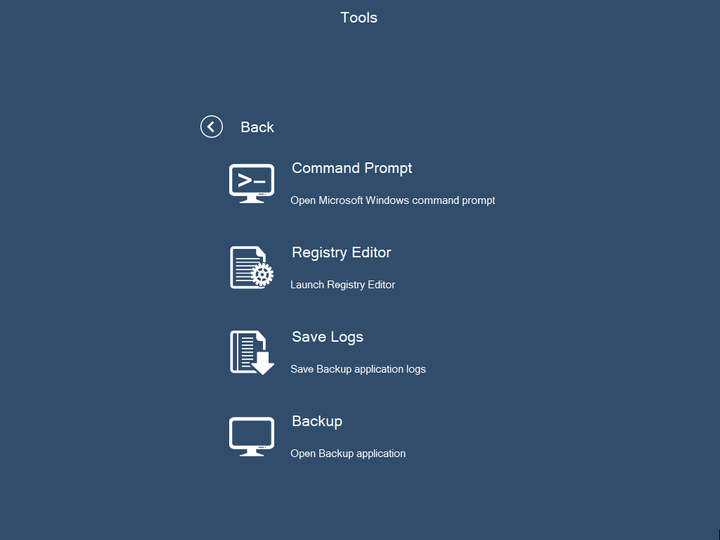
The Tools section contains the following options:
- Command Prompt
- Registry Editor
- Save Logs. Note that the logs should be saved during the current restore session. If you exit the boot menu, the logs will be overwritten.
- Backup. This option starts the Online Backup application.
Switch Backup Prefix
If you cannot see the required backup plan, try to change the backup prefix to the one used on the source computer.
To change the backup prefix, proceed as follows:
- On the Computers page, find the target computer.
- Expand actions, select Edit, and then select Edit Account.
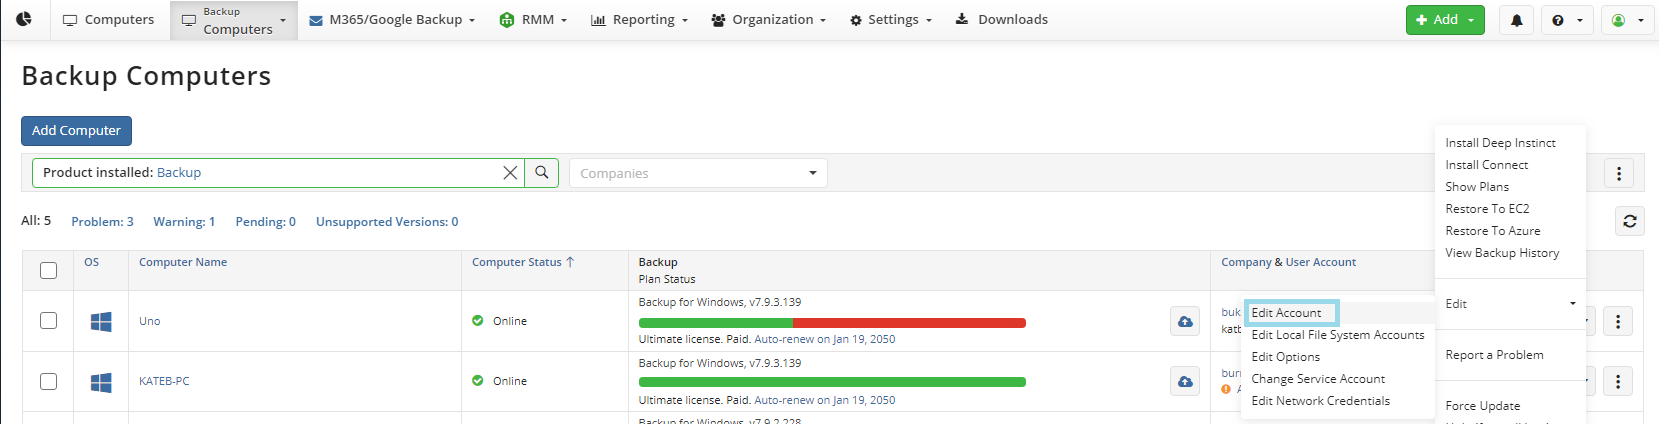
- In the Edit Account property box, find the required storage account, and in the Prefix column, specify the backup prefix name where the original image-based backup is located (by default, this is the name of the computer from which the original backup was made).
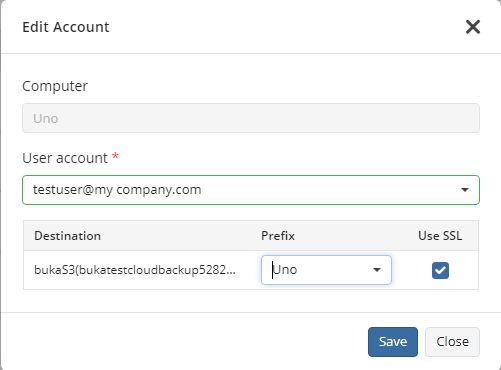
- Click Save.
Synchronize Repository Using Management Console
If there is not enough space where the repository is located to perform all required actions, you will be prompted to change the repository location. Select a location with more than 1 GB of free space for the repository.
Once the correct backup prefix is set, backup data needs to be synchronized.
- On the Computers page, find the target computer.
- Expand the actions, select Edit, then select Edit Options.
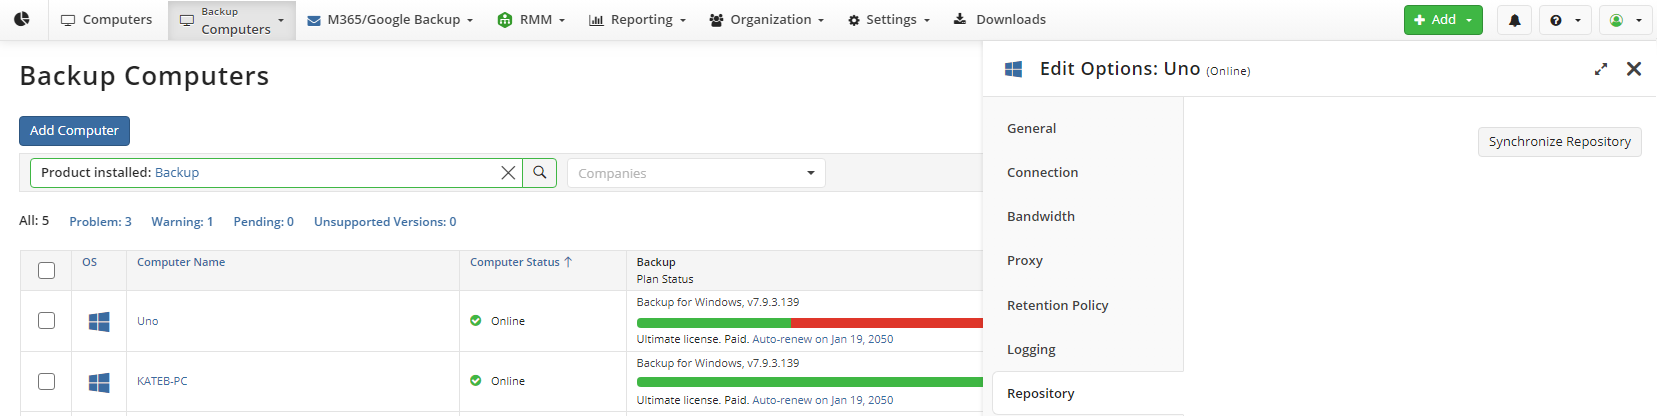
- Open the Repository tab.
- Click Synchronize repository, select the required storage account, and then click Synchronize now.
If the backup data is encrypted, you will be prompted to specify the decryption password. If the Password Recovery feature was enabled before the image-based backup was created, you can use the Forgot Password link to recover your encryption password.
Now you are ready to create a restore plan.
| Top |