Article ID: m0756Last Modified: 21-Oct-2025
Restore Plan in Backup Agent for macOS/Linux
- After launching the Online Backup, you can run the Restore Wizard by clicking on “Restore” main toolbar.

- The next step will prompt you to select the source storage for the restore. If the desired storage is not in the list, you can click on the “plus” to add it.

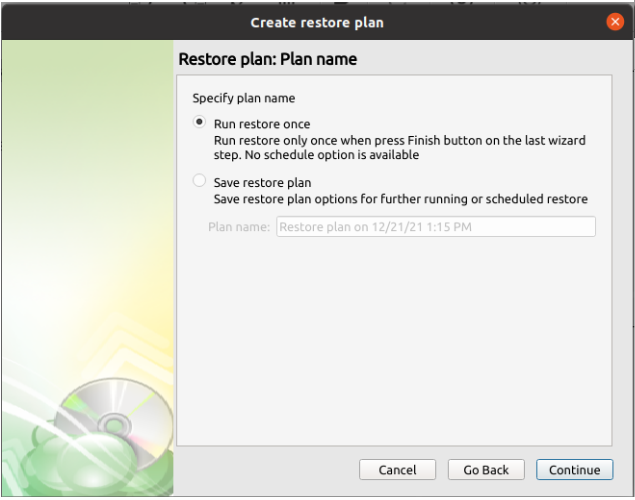
- Once the storage has been selected, the next screen allows you to choose between running the plan a single time or saving it for later use.
- Run restore once will execute the restore immediately upon completing the wizard. There is no option to schedule this type of restore.
- Save restore plan will allow you to schedule the plan to run at a later time and also schedule repeating restorations if needed.
- Next you will have to select which backup you are going to restore.

- Next you will be given a choice for what point in time you would like to restore the endpoint to.
- Latest Version: Automatically restores the newest version of each file in the source regardless of which restore point it belongs to.
- Point in time: Restores the files as they existed at the specified time.
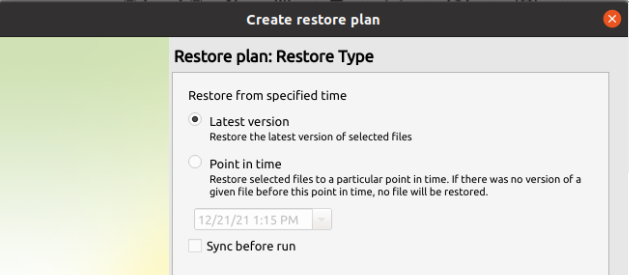
If there is no exact match for the point in time selected, the application will automatically select the closest previous restore point
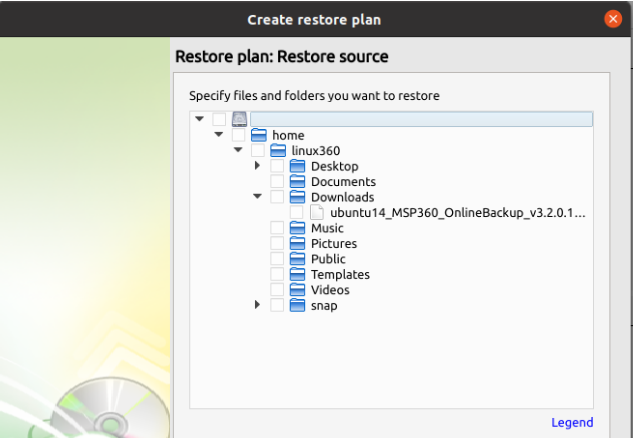
- Next, you will be able to expand the restore source and browse through the available files and folders.
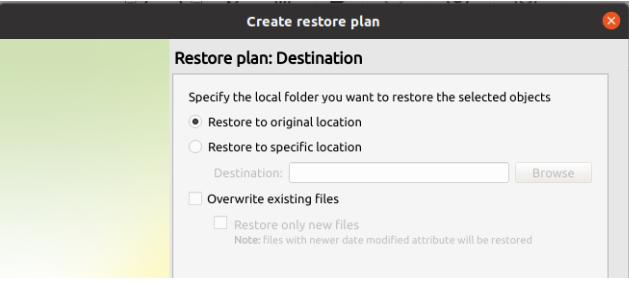
- After selecting the files or folders to restore, you are able to select the location they should be restored to.
- Restore to original location: Automatically restores all files to their original location but does not overwrite existing files unless otherwise specified.
- Restore to specific location: Allows you to choose the path to where the files should be restored. Any files or folder structure needed will be created within the designated path.
- Overwrite existing files: Allows existing files to be overwritten by the restore process.
- Restore only new files: The plan will intelligently detect the files currently in the destination and only files for which the version in the backup is newer than the destination.
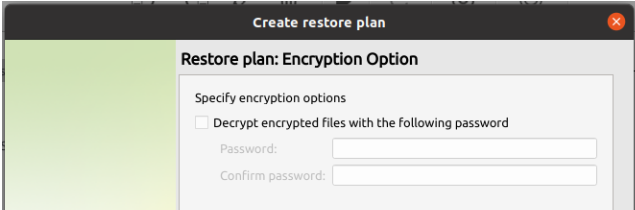
- After selecting the destination and any associated options, you will be prompted to provide the password to decrypt the restored data.
- If “Save restore plan” was selected at the start of the wizard then the next step is to set the schedule for the restore plan. Otherwise this step will be omitted.
- Enable schedule: Leave this unchecked if you want to execute the Restore manually. Otherwise check it to enable the scheduling options.
- Specific date: Use this to schedule a one-time Restore at the specified date and time.
- Recurring: Using this option enables you to schedule recurring restorations based on the criteria in the fields below.
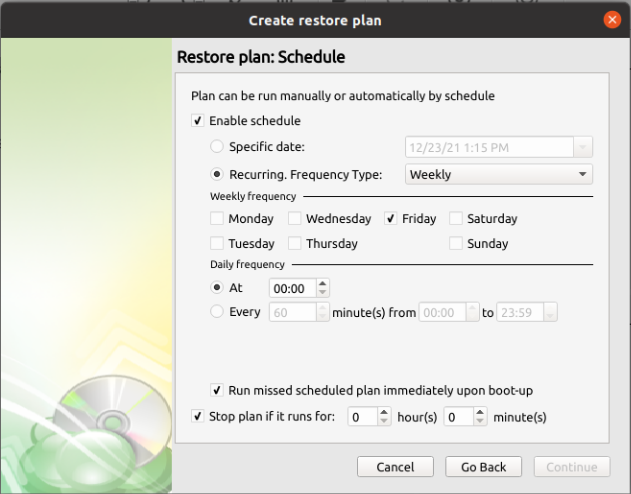
Do not use the “Stop the plan if it runs for:” option if you have a slow or unstable internet connection
Enabling the “Run missed scheduled restore immediately when computer starts up” option will ensure that the restore plan will begin automatically after the computer starts up if it was unable to run at the scheduled time. This is only recommended for desktops and laptops. For servers, it is recommended that you run the restore plan manually when all maintenance works are completed to avoid adversely affecting server performance and internet bandwidth during working hours
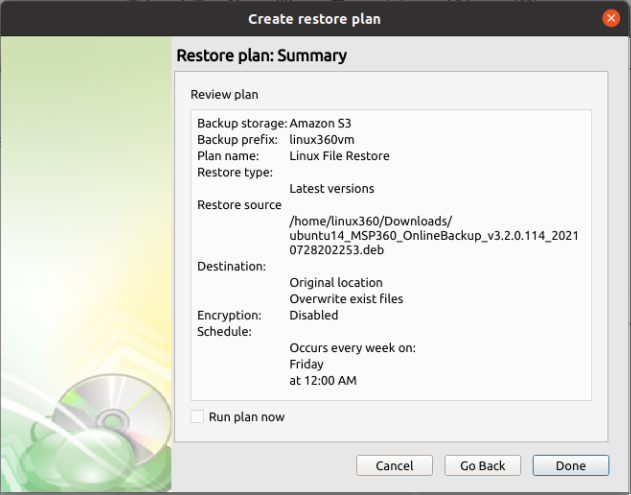
- The final step in the wizard will provide you with a summary of all previously selected options. If the plan was scheduled, you can opt to run it immediately by checking the “Run plan now” box and clicking “Done”. Otherwise, the plan will be set to run at the next scheduled time.