Restore to Virtual Disk in Management Console
To create a new restore plan, proceed as follows:
- Open the Management Console.
- Open the Backup > Computers page in the main menu.
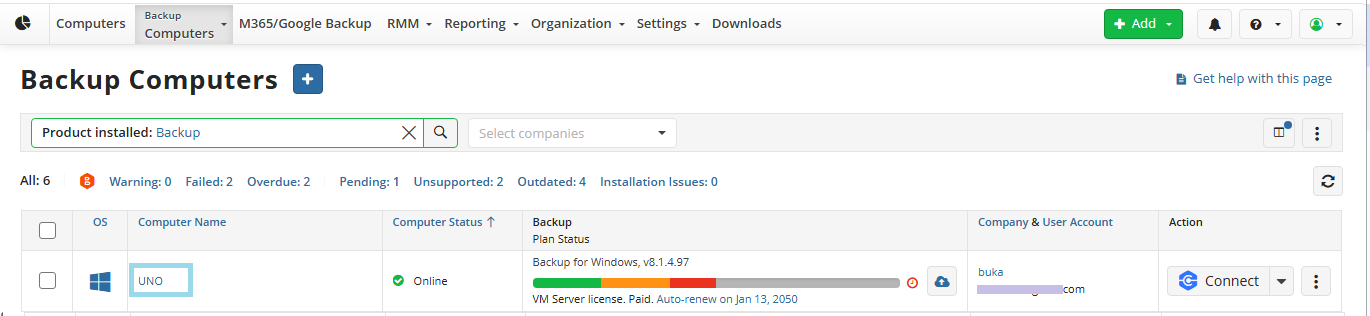
- Locate the required computer which backup dataset you want to restore, then click the Configure icon in the Backup Plan Status column.

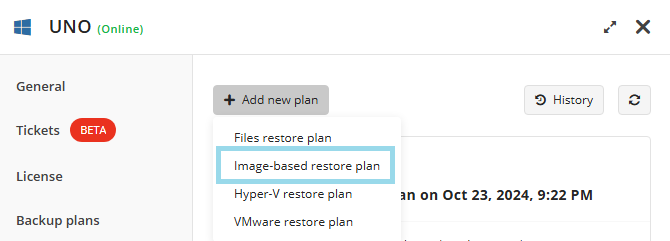
- Switch to the Restore Plans tab of the side panel, and then click +Add New Plan

- Select Image-based restore plan.
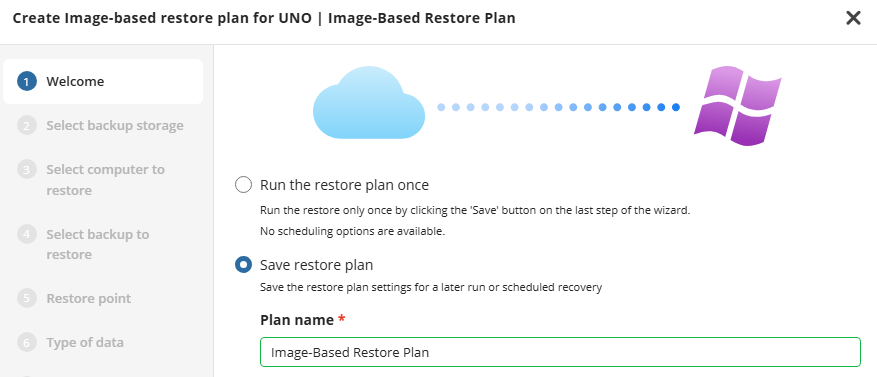
- The first step when making a Restore Plan is to select if it should run only once, or if it should be saved for future or scheduled use. The latter will allow you to name the plan.
- Next you will need to select the restore source. Select the backup destination that contains the required backup from the list.
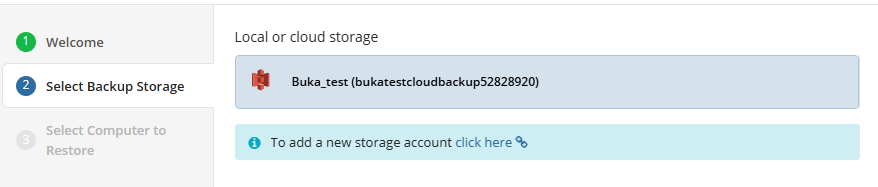
Note that item-level restore from long-term (cold) backup storages is not currently supported
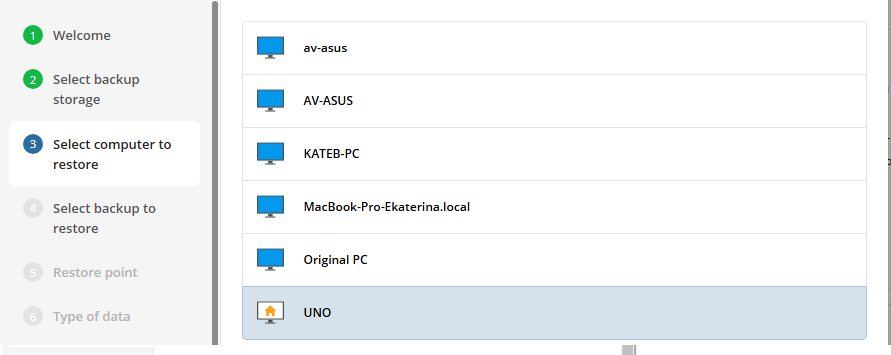
- Next you will need to select the computer to be restored. This restore wizard step appears only if the specified backup destination contains several backups from different computers.
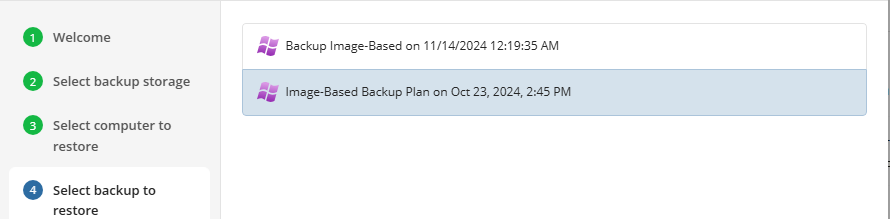
- Next you will need to select the backup plan which contains the desired restore point. Select the backup to restore from the list of available backups.
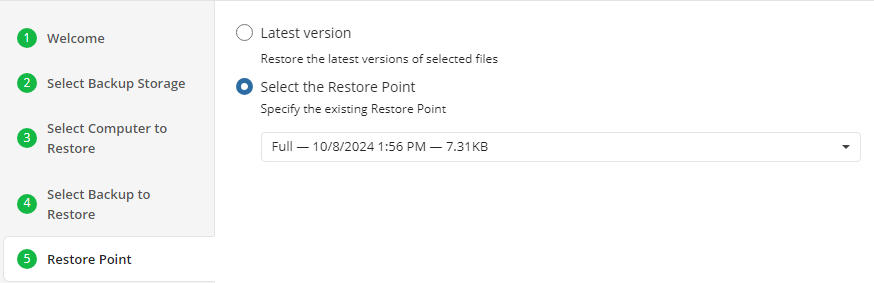
- The next step is to select the desired point in time to restore to. For backups made in the new backup format, select the latest version or the specific restore point from the list below.
- Latest version: Automatically restores the newest version of each file in the source regardless of which restore point it belongs to.
- Select the Restore Point: Restores the image as it existed at the specified restore point
- (legacy) Select the Point in Time option to restore the image version for the specified date and time
- (legacy) Select the Modified Period option to restore the image version based on the modification period, then specify the period
- (legacy) Select the Backup Period option to restore the image version based on the backup period, then specify the period
- (legacy) Select the Manually** option to proceed to manual image version selection
Note that the time must be specified in the provider time zone. Point the mouse to the hint icon to see the provider time zone
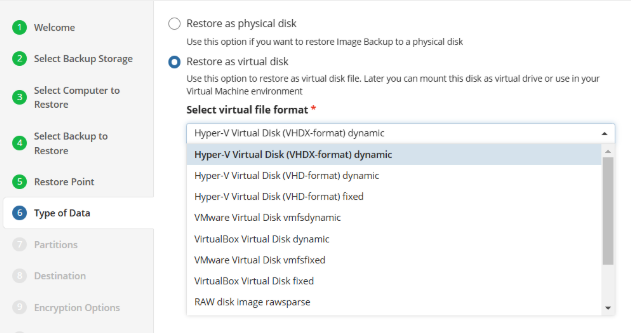
- Select the desired target format for the restored data. To restore the image as a virtual disk file, select the Restore as Virtual Disk option, then select the virtual disk format from the list of available formats
- Restore as physical disk: Restores the partitions selected later to a physical disk.
- Restore as virtual disk: Restores the data as a virtual disk in multiple popular formats.
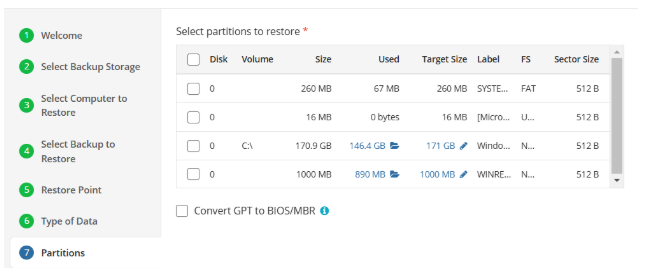
- After selecting the type of restore target in the previous step, you now need to select which partitions to restore. You can also select to convert GPT to MBR if needed.
- Convert GPT to BIOS/MBR: Select this checkbox if the target instance or the target OS does not support UEFI boot and requires BIOS boot.
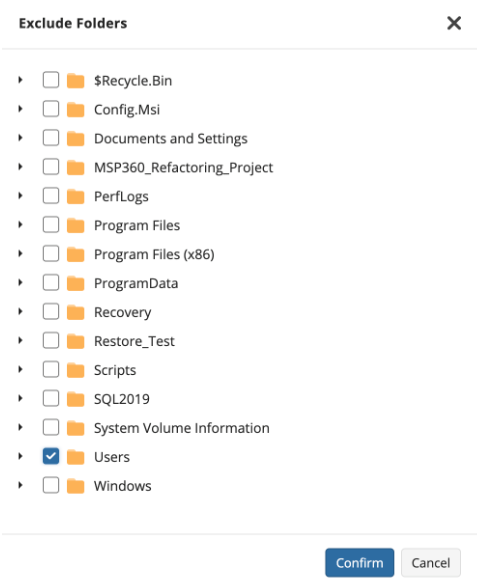
- If you click on the highlighted in blue used space or folder icon, it will open an exclusion menu:
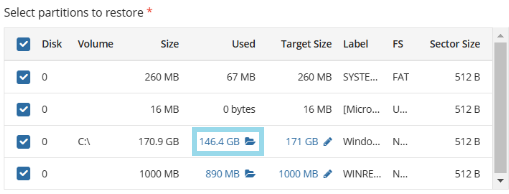
- Using this menu, you can select folders you want to exclude from the restore job:
- If you click on highlighted in blue target size or pen icon, it will open the partition size menu:
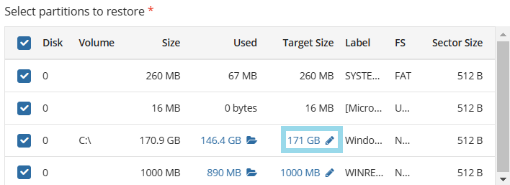
- Using the partition size menu, you can extend your target partition:

Attempts to restore to a smaller partition can succeed if no blocks in the backup image are used beyond the size of a new. If such blocks exist, the restore plan will fail with a “block intersection exists” error
- After selecting the partitions to be restored, next you will be prompted to select the destination disk or partitions.
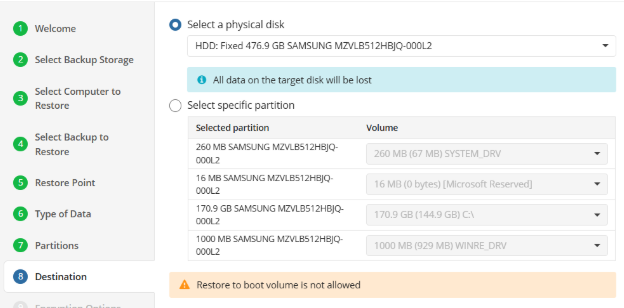
Be careful to select the correct target disk(s) and partition(s). All data in the selected targets will be permanently destroyed.
The application will now allow you to restore to the boot volume of the target computer from Windows or MBS. To restore the boot volume, use the Bare Metal Restore bootable USB.
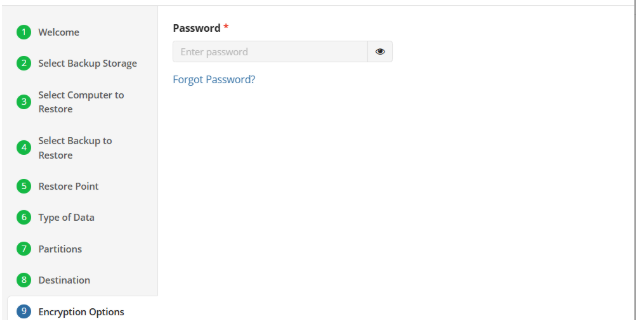
- If the image backup dataset was encrypted, the restore plan will prompt you to enter the password.
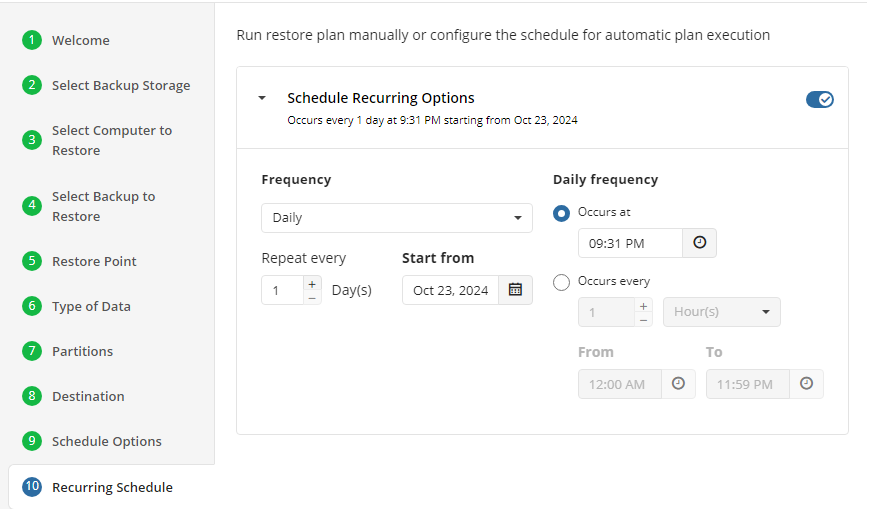
- If the restore plan is saved for later, next you will set the schedule for the plan, otherwise proceed to the next step.
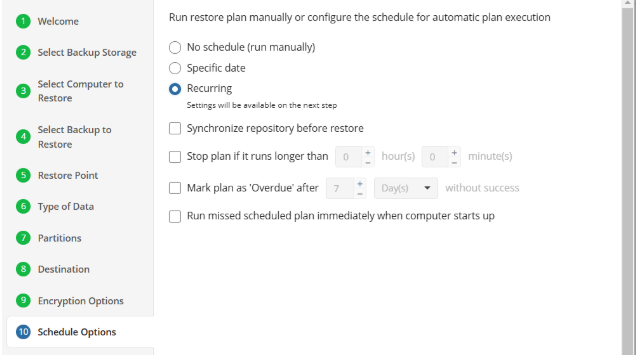
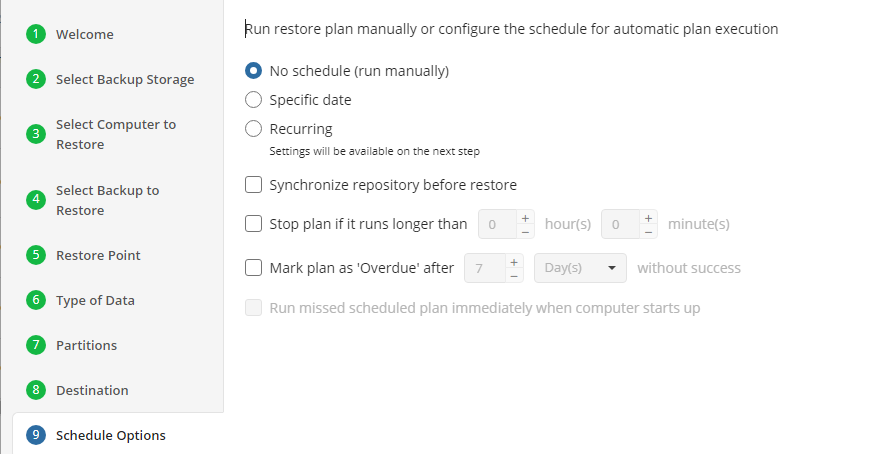
The following options are available:
- No schedule (run manually). Select this option to run the restore plan manually, only when it is required
- Specific date. Select this option to specify the date and time the restore plan is to be executed
- Recurring. Select this option to run the restore plan on a periodic basis, then configure the schedule
- Stop the plan if it runs for. Select this option if you want to stop the restore plan if it runs longer than the time you specified. Use this option with care since sometimes it is hard to predict the restore time due to many factors
- Mark plan as Overdue after. Select this option to monitor the plan execution. If the restore plan fails or is finished with warnings for the specified period of time, it will be assigned with the Overdue status that will appear on the Monitoring/History page
- Run missed scheduled plan immediately when computer starts up. Select this option if you want the restore plan would run as the computer boots in case it was down at the moment of the scheduled run
It is recommended to Synchronize repository before restore if you are restoring a backup dataset for a computer different from the original or if you are signed in with a different backup user.
Do not use the Stop the plan if it runs for option if you have a slow or unstable internet connection
Enabling the Run missed scheduled restore immediately when computer starts up option will ensure that the restore plan will begin automatically after the computer starts up if it was unable to run at the scheduled time. This is only recommended for desktops and laptops. For servers, it is recommended that you run the restore plan manually when all maintenance works are completed to avoid adversely affecting server performance and internet bandwidth during working hours.
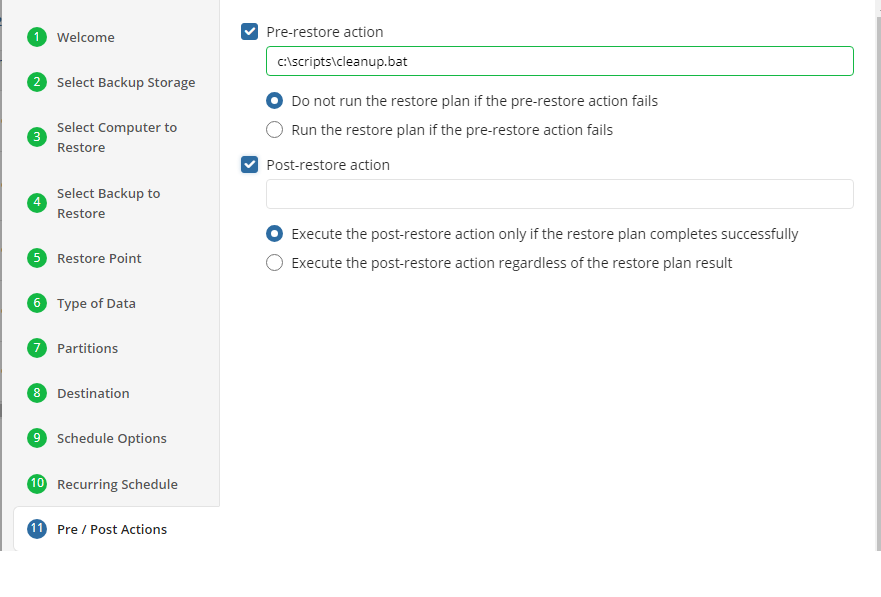
- The next step is to specify any Pre or Post Actions which should be triggered by the Restore Plan (optional).
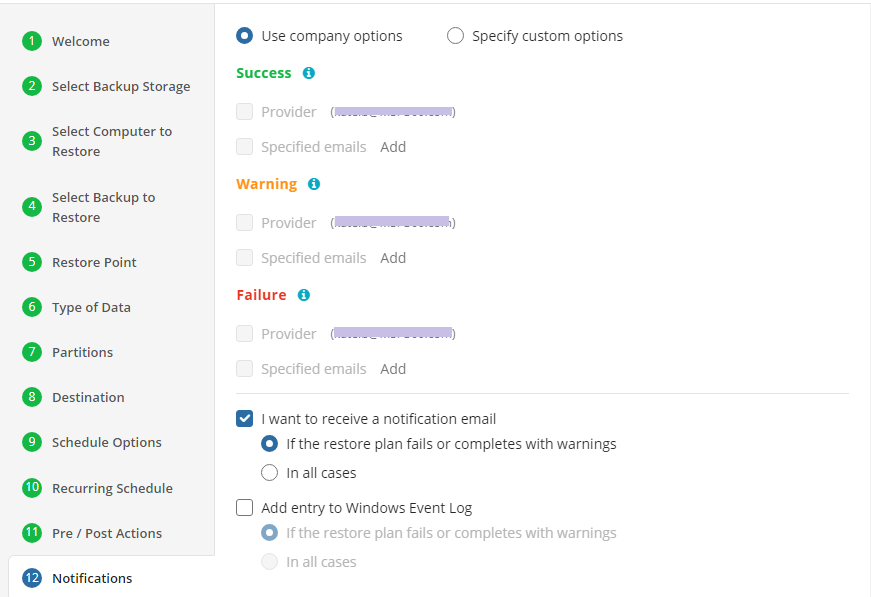
- Finally, specify any notifications you would like to receive when the plan runs.
- Click on Save when you are happy with your selections. If the plan is set to run only a single time and has no set schedule, it will automatically start. Otherwise, if it is set to run only once and is scheduled, it will display in the list of plans until the scheduled time. If it is only set to run once, then when it completes successfully it will remove itself from the list of plans. Only Restore Plans which are saved will remain in the list for future use.