Continue Backup on Another Computer
In some disaster recovery or data migration scenarios, you may need to continue your backups on other computers. This chapter explains how to prepare another computer to continue a backup plan, in case the original computer is not available.
Download Backup Agent To The Target Computer
- Open the Management Console.
- Click Downloads.
- Find the Backup for Windows or Backup Virtual Machine Edition and click 'Copy link' or 'Copy PowerShell installation script'.
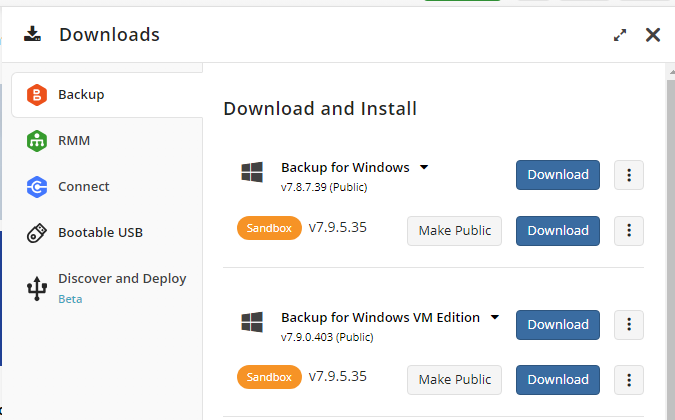
- Send it to the user on the target machine or install the Backup Agent yourself manually using the link or the PowerShell script.
Synchronize Data
Synchronize Data Using Management Console
Before starting repository synchronization,
- As the computer appears in Management Console with Pending status, authorize it with the user credentials that were used to create a backup that is subject to continue.
- Add the backup storage accounts the backups are located, if these storage accounts are not already added. Change the backup prefix to the prefix that was used on the source computer.
To change the backup prefix, proceed as follows:
- In the Backup, select Computers.
- Find the required computer.
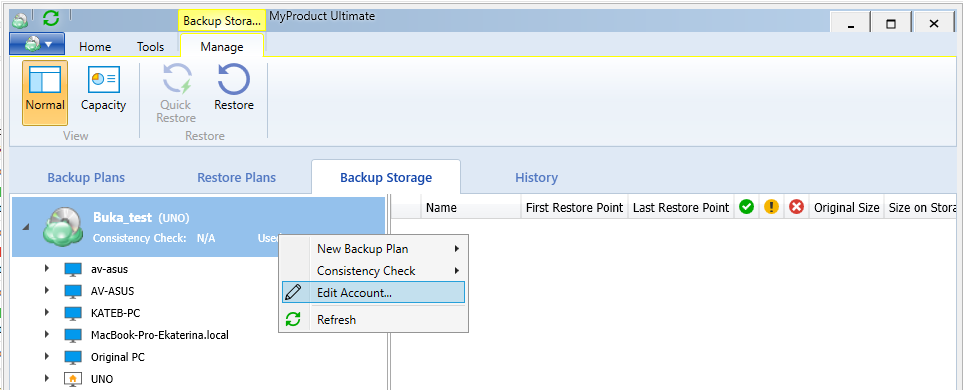
- Expand actions, select Edit, and then select Edit Account.
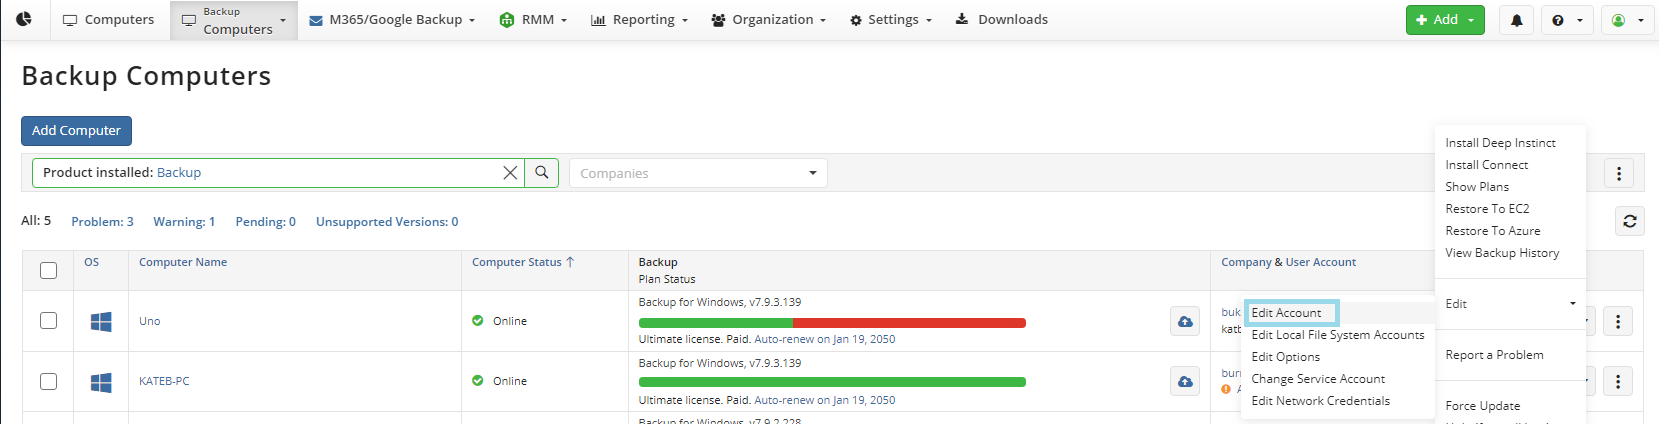
- In the Edit Account property box, find the required storage account, check whether the user account that were used to create a backup is selected, and in the Prefix column, specify the backup prefix name where the original backup is located (by default, this is the name of the computer the original backup was made from)
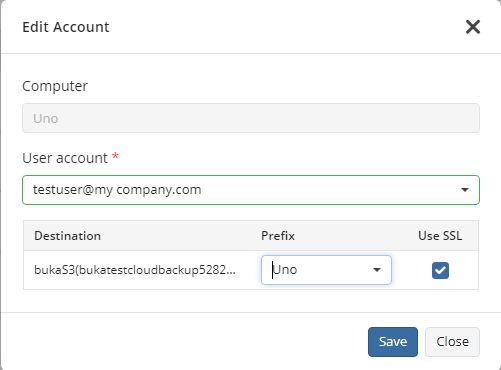
- Click Save.
As the correct backup prefix is set, backup data needs to be synchronized.
- In the Backup, select Computers.
- Find the required computer, and expand the actions.
- Select Edit, then select Edit Options.
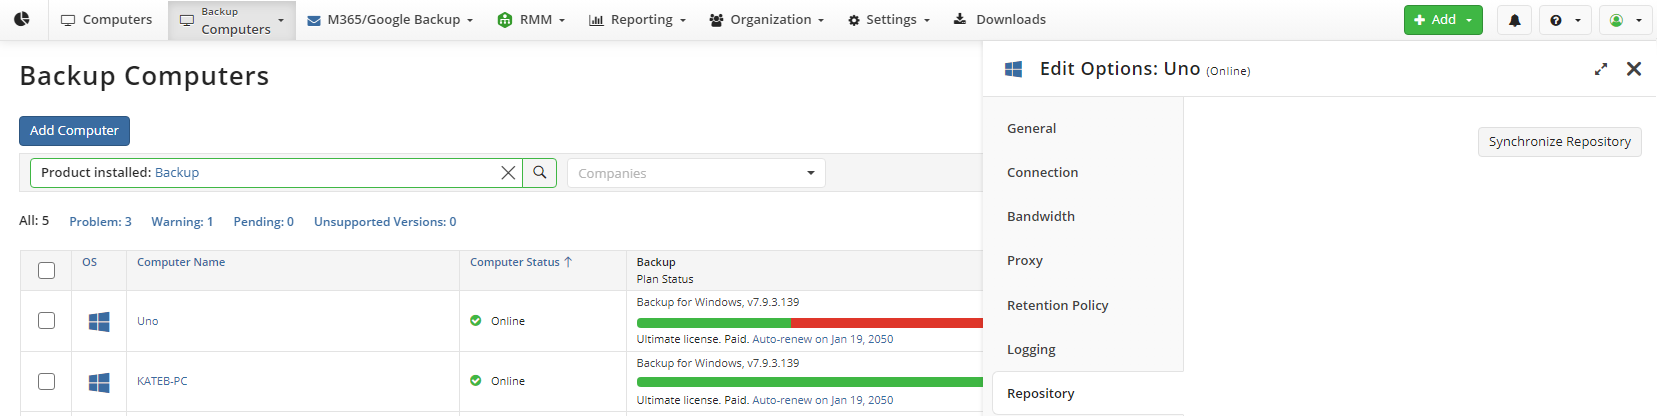
- Open the Repository tab.
- Click Synchronize repository, then select the required storage account, then click Synchronize now
If the backup data is encrypted, you will be prompted to specify the decryption password
Now you are ready to add the backup plan.
Synchronize Data Using Backup Agent
As the Backup Agent is installed on the target computer, run it and authenticate with the user credentials that were used to create a backup that is subject to continue.
- Add the backup storage accounts the backups are located, if these storage accounts are not already added.
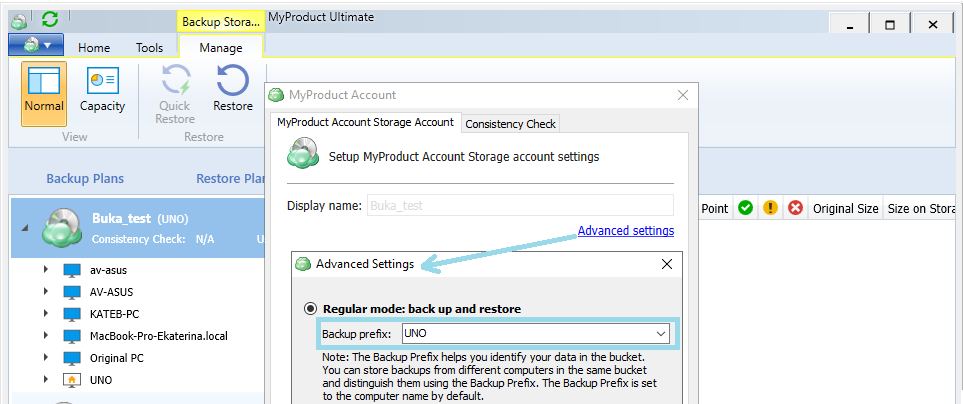
- Change the backup prefix in the storage account the backup is located: open Backup Storage tab, select the required storage account, then click Edit, then click Advanced Settings. In the Advanced Settings property box, specify the required backup prefix.
- As the correct backup prefix is set, backup data needs to be synchronized. To do this, in Tools click Option, switch to the Repository tab, click Synchronize repository, then select the required storage account to do it. Note that with a large amount of backup data, synchronization may take a significant time.
If the backup data is encrypted, you will be prompted to specify the decryption password
Now you are ready to add the backup plan.
Add Backup Plan
Once the repository is synchronized with the correct backup prefix, you will need to restore the backup plan to continue. Consider, creating the plan from scratch will not continue the backups, because in this case the upload will be started to the new folder location and will not continue the existing backups.
- Open the Backup Agent instance on target computer.
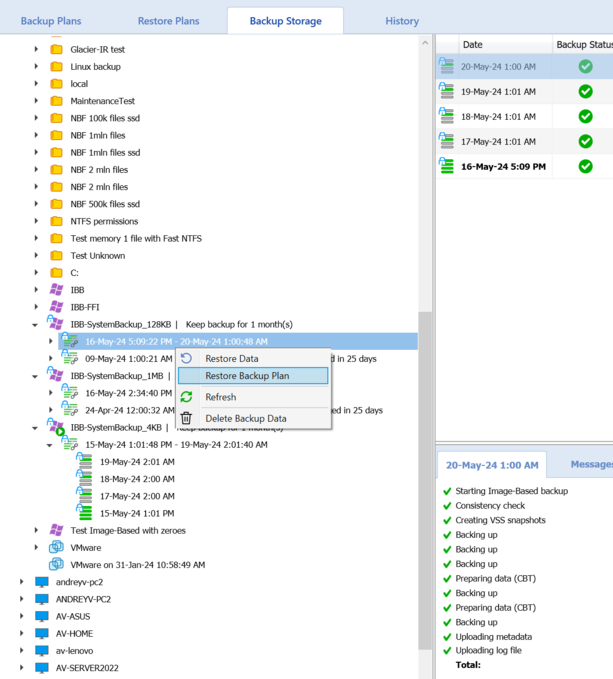
- On the Backup Storage tab expand required storage account, and then right-click the backup plan to select Restore Backup Plan option and proceed with restore Backup Plan dialog.
- If this option is not available, use one of the solutions mentioned below.
Import Backup Plan Configuration
You can import the backup configuration exported from the original computer.
Now imported backup plan from the original computer will be continued on this computer.