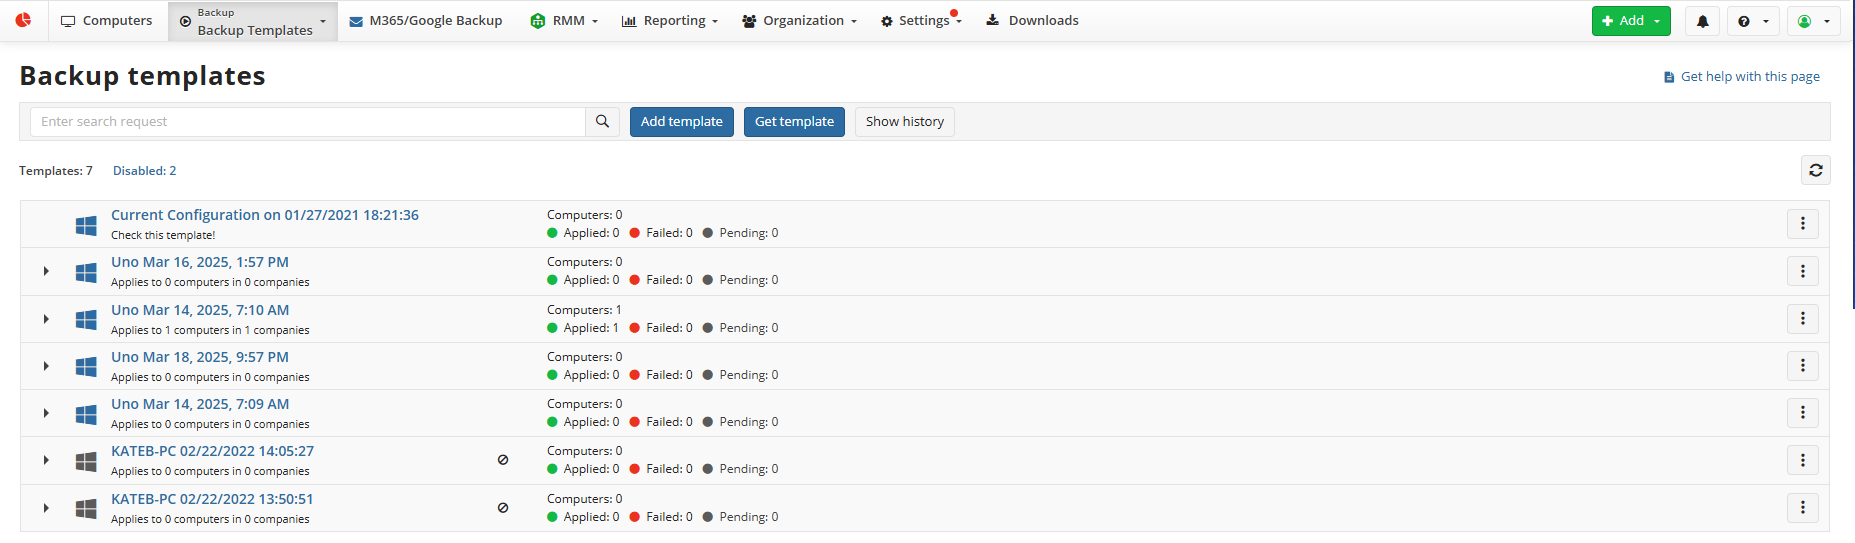
Backup Templates
Backup Templates (formerly Remote Deploy) enable backup plan management across multiple computers. Using Backup templates, you can create, import, edit, and delete backup plan templates efficiently.
Backup templates can propagate to multiple computers:
- Settings (the Settings tab):
- Protect the Backup Agent and CLI with a master password
- Set interface language
- Limit bandwidth
- Configure proxy
- Backup plans (the Backup plans tab)
Required Permissions
To manage Backup Templates, ensure that the Backup > Backup Templates permission is granted under Organization > Administrators.
Applying Backup Templates
Backup templates can be applied:
- To selected computers
- To specific companies
- To all companies
Also you can use tags to select computer. The template can be applied to a computer marked with any of selected tags automatically or manually, if the template was already applied to the computer.
Backup templates can include backup plans:
- Backup plans can be included if the target computers are running the same operating system
- Backup plans can be included if the target companies share at least one backup destination.
- If common backup destinations exist across the selected companies, the backup template can include backup plans.
- If no common backup destinations exists, only settings from the Settings tab will be applied.
Before You Begin
The following is required to deploy templates remotely:
- A Backup Agent instance must be installed on each target computer (i.e., the computer where the template will be deployed).
- Target computers should be authorized.
- Administrator permissions:
- Administrators can create or edit templates for companies they have access to.
- If an administrator has partial access (i.e., some target companies are not accessible), the template will be read-only.
- Group computers into companies to simplify template deployment by applying the same template.
- This allows you to use company backup destinations in backup plans within the template.
- If a template includes multiple companies and is intended to incorporate backup plans, ensure that these companies share at least one common backup destination.
Manage Backup Templates
To access Backup Templates perform the following steps:
- Open the Management Console
- Open Backup > Backup Templates.
Template Deployment Workflow
The basic workflow for template deployment is shown on the below:
- Add a new template on Backup Templates or import it from one of the managed computers
- Edit the template to make it suitable for the computers this template will be applied to.
- Enable the template to apply. On the Backup Templates you can create, edit, clone to re-use as a template, or delete the templates.
Also, you can get any template from one of the managed computers.
By default, all templates are added in a disabled state. To deploy templates to the managed computers, enable them.
All enabled templates are automatically deployed to selected computers only once.
To modify the template applied on a computer, select this computer in the Apply Template dialog box. This dialog pops up when you save the modified template. In case some settings or plans conflict during deployment, the latest ones will be used.
Note that on computers with running plans at the moment of deployment, execution of the deployed plan will be postponed until a running plan is completed. Backup Agents on managed computers request templates periodically to deploy them.
If a computer has connection issues at the time a new or updated template is enabled for selected computers, a template cannot be deployed. As connection issues are resolved, you can forcibly apply the template to these computers in order the latest template is delivered.
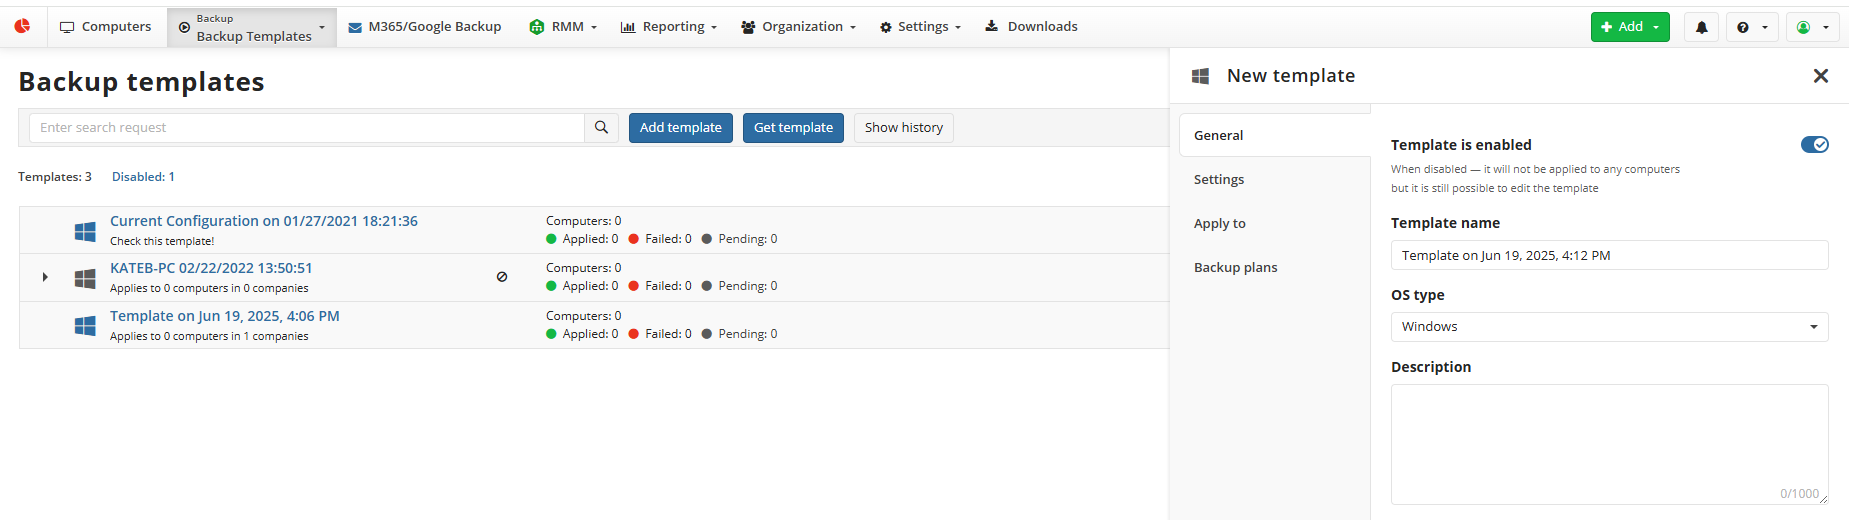
Create New Template
To create a new template, proceed as follows:
- On Computers select Backup Templates if you use the legacy main menu, or open Backup > Backup Templates page in the new main menu.
- Click Add template. The New template pane appears. This pane helps you to create a template from scratch.

Select the operating system type or apply the template to all OS types. This setting is mandatory.
With the All types (Settings Only) option selected, you can set template settings for all operating systems, but this template cannot contain backup plans
It is reasonable to create different templates depending on an operating system in order to avoid conflicts. Currently, image-based backup plans are supported only for Windows OS.
If needed, make a short description of the template.
Switch to the Settings tab, then specify template settings. You can protect the Backup Agent and CLI with a master password. To edit it, enable the appropriate setting. The master password can only be set in case you set the interface language of the Backup Agent. Note that you need to enter this master password on every target computer. Also, you can set the interface language, configure bandwidth for the local or cloud destinations, and/or configure proxy settings, if necessary.

On the Apply To tab you can set rules to apply the template to selected computers, selected companies, or to all companies. You may need to have multiple templates for different computers.
- To apply the template to all computers in specified companies, select Computers in Selected Companies. Click Select Companies to select companies from the list.
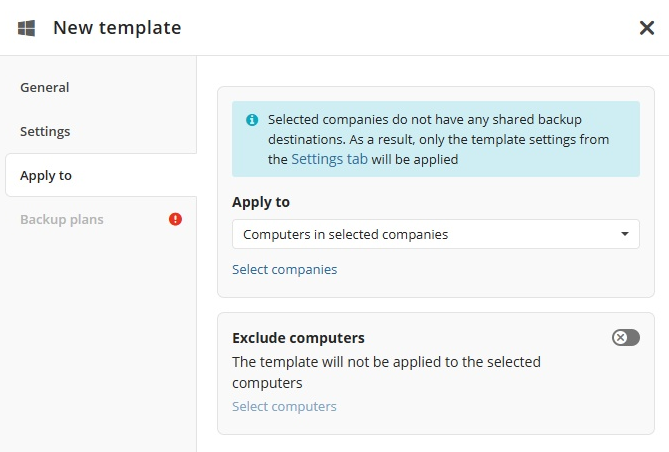
Use one of the shared backup destinations for backup plans. If there are no shared backup destinations, you can only apply the template settings from the Settings tab.
- To apply the template to specific computers, select Selected Computers only, then select target computers in the list
- To apply the template to all managed instances, select All Companies. In this case, the template applies to all your users even in case they are not assigned to any company By design, backup destinations for users that are not assigned to any company will be assigned according to the following rules:
- If a user has only one backup destination assigned, this backup destination will be selected for the backup plan even if the backup plan contains a different one
- If a user has multiple backup destinations assigned that do not match the backup destination in the backup plan, the backup destination will not be assigned with the following error reported: Account is not specified
- To exclude specific computers, select the Exclude computers from the template option
Select the computers to exclude from the list. The template will not be applied to excluded computers.
- Save your selection. You can edit your selection later.
- You can add the backup plans to be applied according to template settings on this step, or save the template to add backup plans later.
- Click Create. The template appears in the Backup Templates grid. The template is created in a disabled state. Enable it to automatically apply the template once to specified target computers.
Get New Template from Specific Computer
You can create a backup template based on any managed computer.
- Open the Management Console.
- Open Backup > Computers page in the new main menu.
- Find the required computer, then click on the computer name.
- On the side panel, navigate to the Backup Plans tab
- Expand the Template control and select Create template.
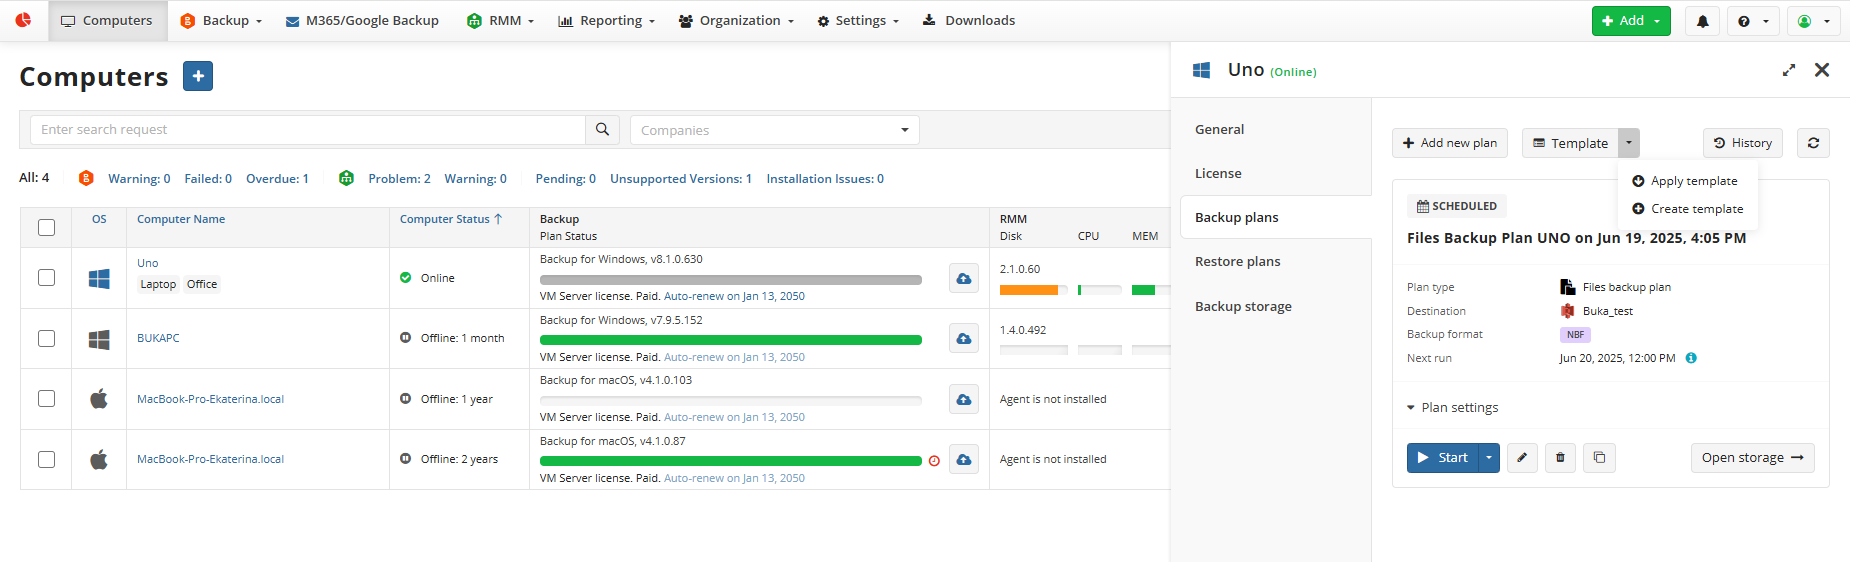
You will be redirected to the Backup Templates page to finalize the template. The template is enabled but not applied to any computers by default. Complete the template setup as described above
Save the template to apply it, or disable the template and save it to apply later.
Edit Template
The backup template van be applied to the target computer automatically only once
In case you edit the template that was already applied to some computers, it will be applied automatically only to the new computers in the list.
In case you need to modify the template applied on a specific computer, select this computer in the Apply template dialog box. This dialog box pops up as you save the modified template.
All settings and plans will be overwritten in case of conflict and the latest settings will be used.
To change the template, on the Backup Templates select the template, expand actions and click Edit template in the template menu.

An administrator can edit a template only if they have access to all companies included in the template. In case this administrative account has access to some of the companies included in the template scope, this template is read-only. If an administrator does not have access to these companies, this template is not visible in the grid
Save the template. You will be provided with a computer list this template can be applied to. Select the computers you want to apply the modified template again, then click Save and Apply.
Add Backup Plan
- To create a backup plan for a template, select the template and click Edit template in the template menu.
- On the Backup Plan tab, click + Add New Plan, then select the type of plan from available options. Follow the backup wizard steps. You can save the backup plan to the backup storage. In case you have enabled encryption, keep the encryption password in a safe place: for security reasons it is not kept anywhere. You will need the encryption password on restore.
Refer to the following chapters for instructions on how to create backup plans:
All types (Settings Only)
You cannot add any backup plans to this template.
Windows
Linux
macOS
Refer to Example chapter to learn how to create a template with plan for Remote Deploy
Enable Template
To deploy the template, enable it using the template menu.
- Open the Management Console.
- On Computers select Backup Templates if you use the legacy main menu, or open Backup > Backup Templates page in the new main menu.
- Select the template, then click Edit template. Switch Enable the template on.
The enabled template will be automatically applied to selected computers, selected companies, or to all companies as specified in the Apply to tab of the template pane. Note that on computers with running plans at the moment of deployment, execution of the deployed plan will be postponed until a running plan is completed.
If connection issues occur on a computer at the time you set the default template, you can forcibly apply the template from the Management Console for selected computers.
In case a computer has several connection issues at the time you have set the default template for selected computers after the connection issues have been resolved, you can forcibly apply the template from the Management Console to be sure that those computers will have a default template too.
Note: if a template was not changed, it won't be re-applied. Workaround: you can make a minor change in the template to re-apply it.
Clone Template
To clone the template, select Clone template in the template menu on Backup Templates. Later you can edit this template to change settings and add new plans, if necessary.
Cloned template is disabled by default
Import Template
You can get (import) templates from any of the managed computers for future use. This template will contain combined settings and plans that are on selected computers at the moment the template is imported
To import template, proceed as follows:
- Open the Management Console.
- On Backup select Backup Templates, then click Get template
- Select the computer to import the template. The imported template appears in the list of templates.
- This template will be named after the source computer it was imported from. This template contains combined settings and plans that were active at the moment of template import.
The imported template is disabled by default. If required, edit it, then enable it to apply
Delete Template
To delete the template, select the Delete template option in the actions next to the template on Backup Templates and confirm this action. This action cannot be undone.
Note: if a template is removed, plans that were already deployed to remote computers remain unchanged. To change these plans, import the template from one of the user computers, edit these plans, apply the template to computers these plans are subject to change, then enable this template