Manage Domains
Domain Management Using Management Console Companies
You can group domains by Management Console companies to ensure role-based access by company-specific administrators, detailed storage and license usage reports, and accurate billing.
- Efficient Domain Management. Simplify the management of your Microsoft 365 and Google domains by grouping them into companies within the Management Console.
- Delegated Administration. Assign administrative rights to company-specific administrators for more targeted management.
- Detailed Reporting. Generate comprehensive storage and license reports for each company, providing clear insights into resource usage.
- Accurate Billing. Ensure billing accuracy with invoices based on the specific storage usage of each company.
Add Domain to Back Up
If your tenant has multiple domains, you only need to add the primary domain or the domain used by administrators to log in. By adding this domain, you are effectively adding the entire tenant, including all other domains associated with it.
Refer to Get Started with Microsoft 365 / Google Workspace Backup for complete preparation steps.
To enable Microsoft 365 / Google Workspace Backup for the primary domain in your tenant, perform the following steps:
- Open the Management Console.
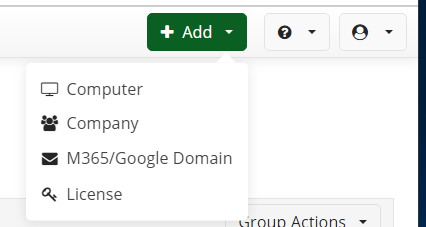
- Expand the + Add control at the top right of the screen, and click M365/Google Domain to open Domains.
-OR-
In the M365/Google Backup menu, click +.

Proceed with Add domain to back up wizard as described in the Get Started with Microsoft 365 / Google Workspace Backup article.
Configure Access Link
- In the Management Console, select M365/Google Backup to access Domains.
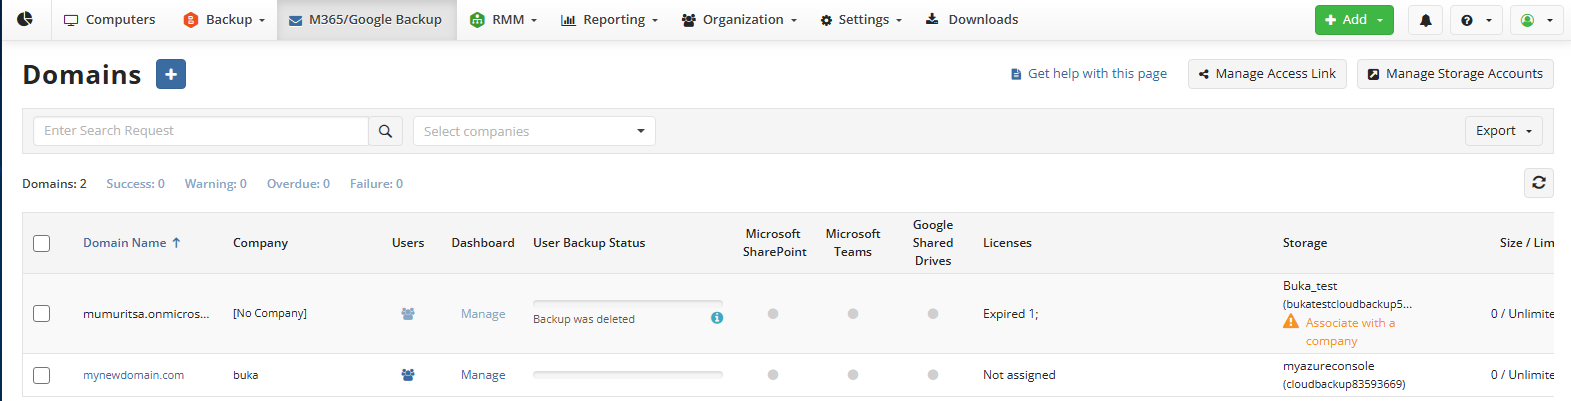
- Create/edit access link for your administrators and users. Click Manage Access Link over the grid. Specify an alias that will be used for your Microsoft 365 / Google Workspace Dashboard URL. Click Close when you are done.
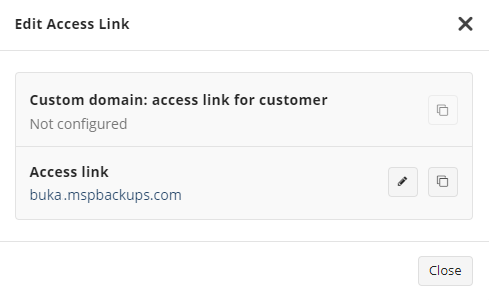
Purchase an Advanced Rebranding & Custom SSL license to fully customize the link for customer access, allowing you to use your custom domain name. If you have already purchased this license, navigate to Settings > Branding to add your branding and activate the license. Information on DNS binding is available under Settings > Branding. With the Advanced Rebranding & Custom SSL license enabled, in Settings > Web Console Rebranding you can rebrand the Management Console and Service Dashboard for your administrators and users.
If necessary, you can edit the domain to change the default settings.
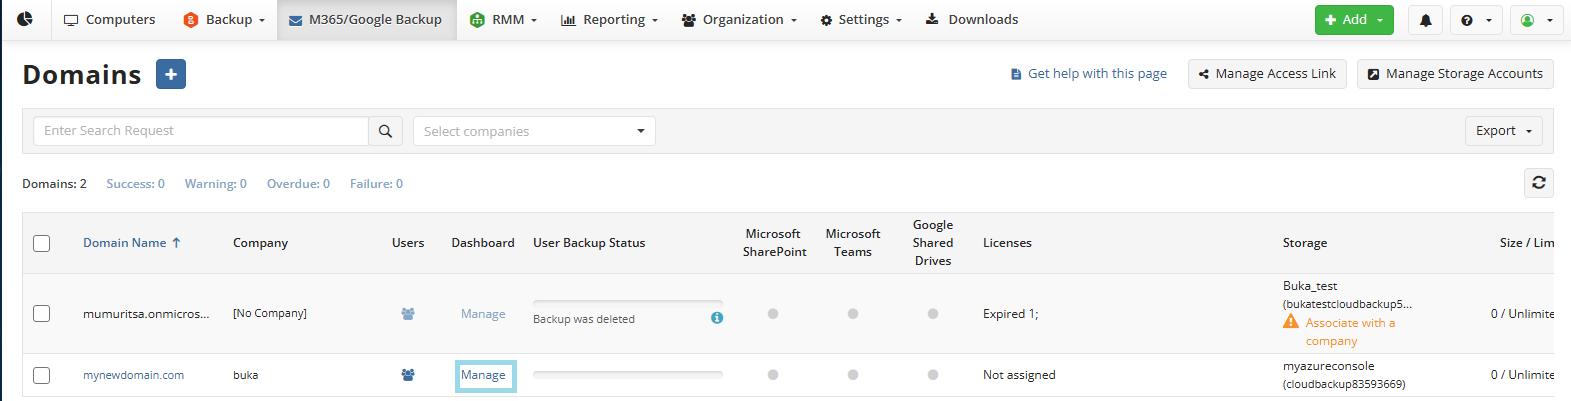
Now you are ready to configure your backup for the domain. Click the Manage link in the Dashboard column in the added domain entry for transition to Microsoft 365 / Google Workspace Dashboard for managing and browsing backups and restores and configuring retention policies.
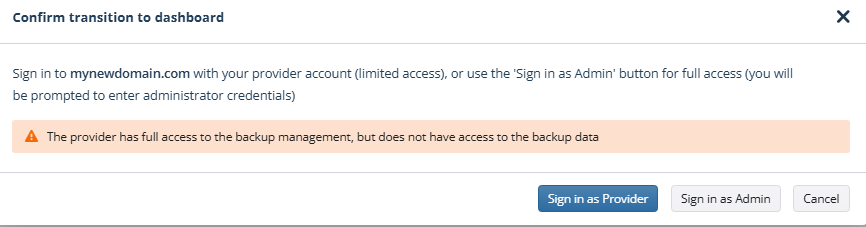
In the Confirm transition to dashboard dialog, choose the appropriate access level:
- Sign in as the service provider to configure backup for the domain and manage retention settings. This option does not provide access to the backup content.
- Sign in as the domain administrator to manage the backup and restore operations and retention settings. You will be prompted to enter the domain administrator credentials. Access to backup content can be enabled with the Global admin access setting on the Access step of Add/Edit domain to back up wizards.
Manage Added Domain
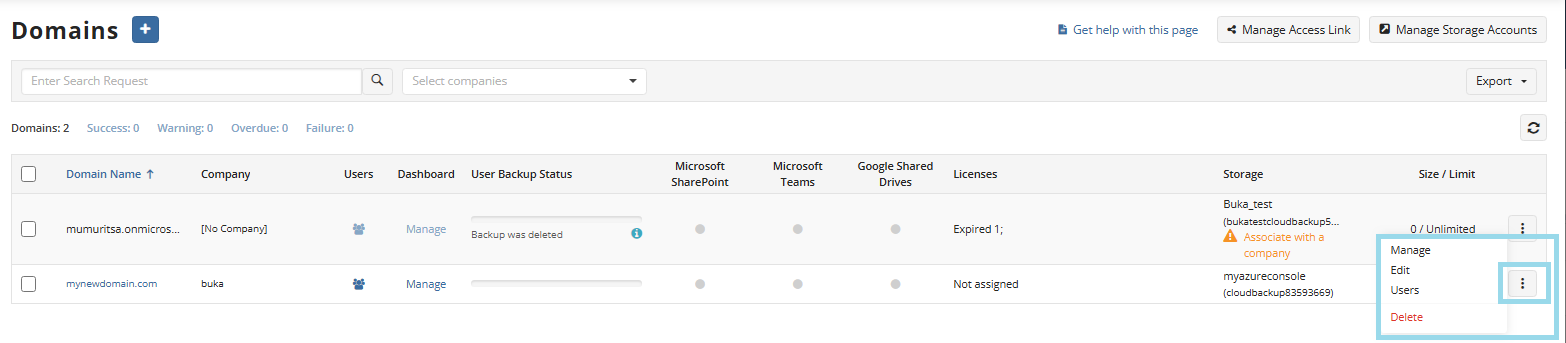
Added domains appear in the grid.
This grid allows you to perform the following actions:
- Navigate to Domain User Grid: Click the user group icon in the Users column to manage domain users.
- Access Service Dashboard: Click the Manage link in the Dashboard column to fine-tune backups and perform backup/restore operations, then select the access level as described above.
- Monitor User Backup Status: Check backup statuses for each domain.
- Manage SharePoint, Teams, or Shared Drives Backup Services: Verify these services are enabled.
- View Assigned Licenses and Backup Destinations: Review licenses and storage details.
- Edit or Delete Domains: Use the Edit or Delete actions to modify or remove domains. You can also select multiple domains for batch operations like deletion.
Edit Domain Settings
To edit domain settings:
- In the Management Console, select M365/Google Backup.
- Select a domain to edit.
Expand actions and select Edit. The edit domain wizard appears.
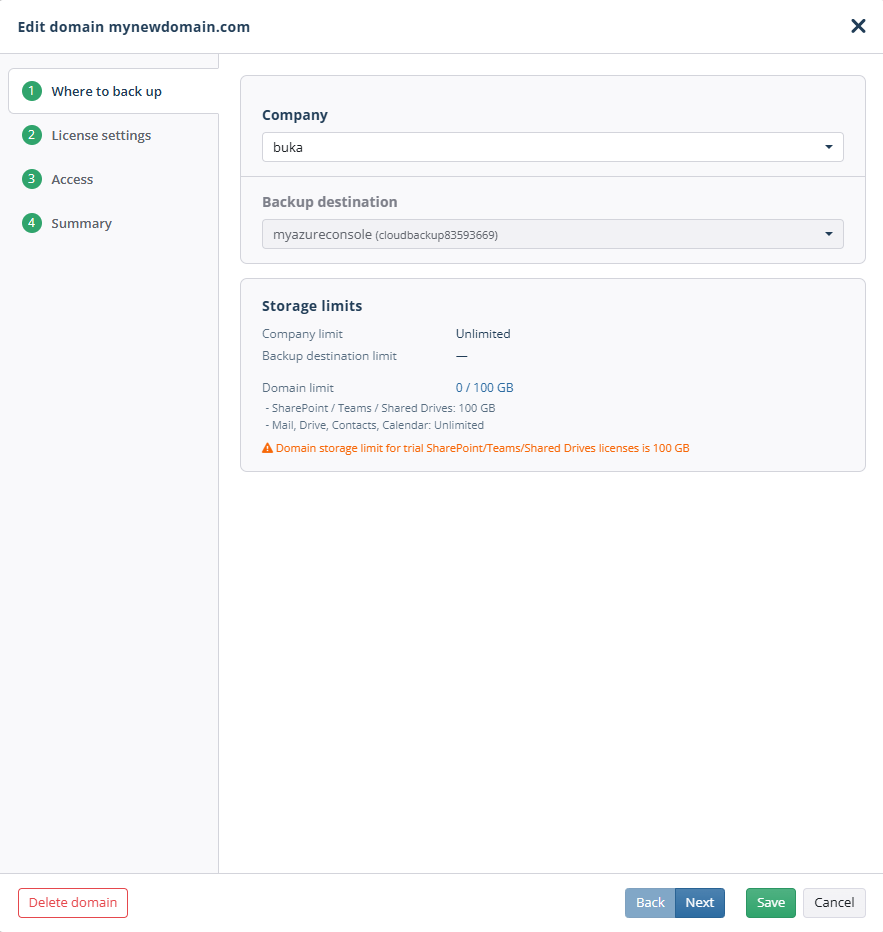
On the Where to back up step of the wizard, you can change the associated company, manage the backup destination and storage limit settings. After the domain is added to backup, you cannot change the selected backup destination without deleting the domain from Management Console. If you need to change the company, ensure that the selected backup destination will be available for the new company.
The backup destination that is already used for domain backup data cannot be changed without deleting the domain
Consider the following:
- Administrators with access to all companies can associate the domain with any company
- Company-specific administrators can only associate the domain with the company they manage and select backup destinations assigned to that company
- Manage the storage limit for the domain:
- Company Limit. The total company storage limit configured in Organization > Companies.
- Backup destination limit. The storage limit configured for the selected backup destination.
- Domain limit. The storage limit for all backup data within the domain. The domain storage limit for SharePoint/Teams/Shared Drives licenses is set to 100GB. for details on how to set and manage storage limit for the domain, refer to the Manage Storage Limit
- Also you can set service-specific limits:
- SharePoint/Teams/Shared Drives
- Mail, Drive, Contacts, Calendar.
In case you are using the trial SharePoint/Teams/Shared Drives license, you can only manage the Mail, Drive, Contacts, Calendar service-specific limit
- Click Next.
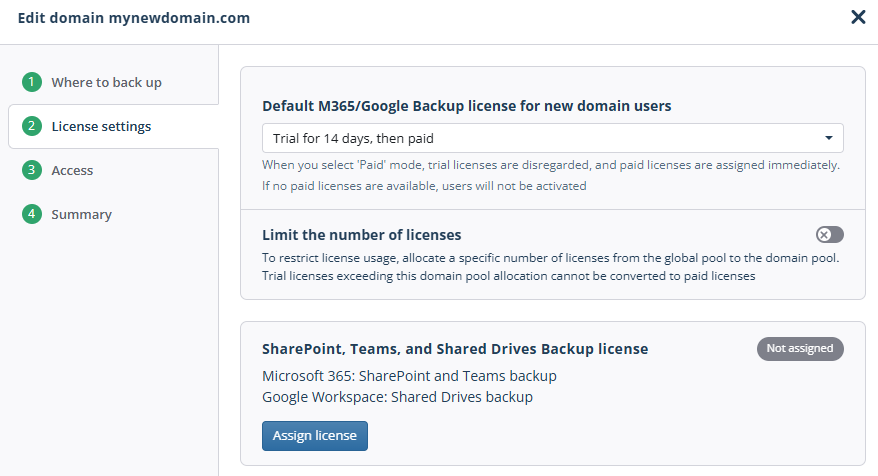
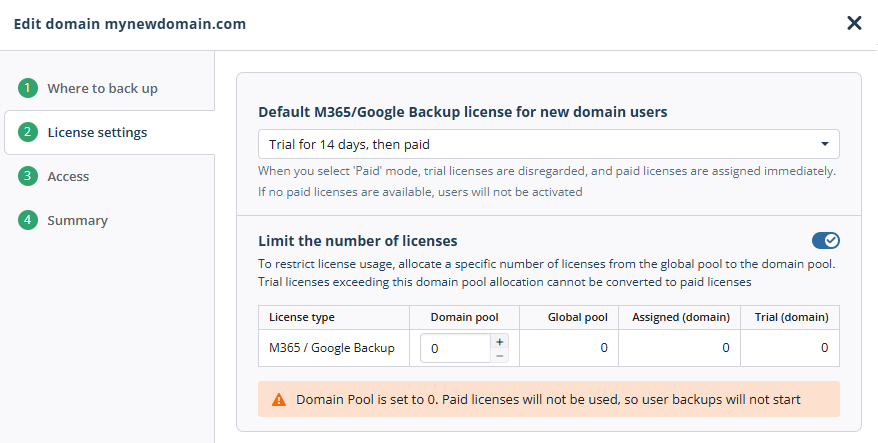
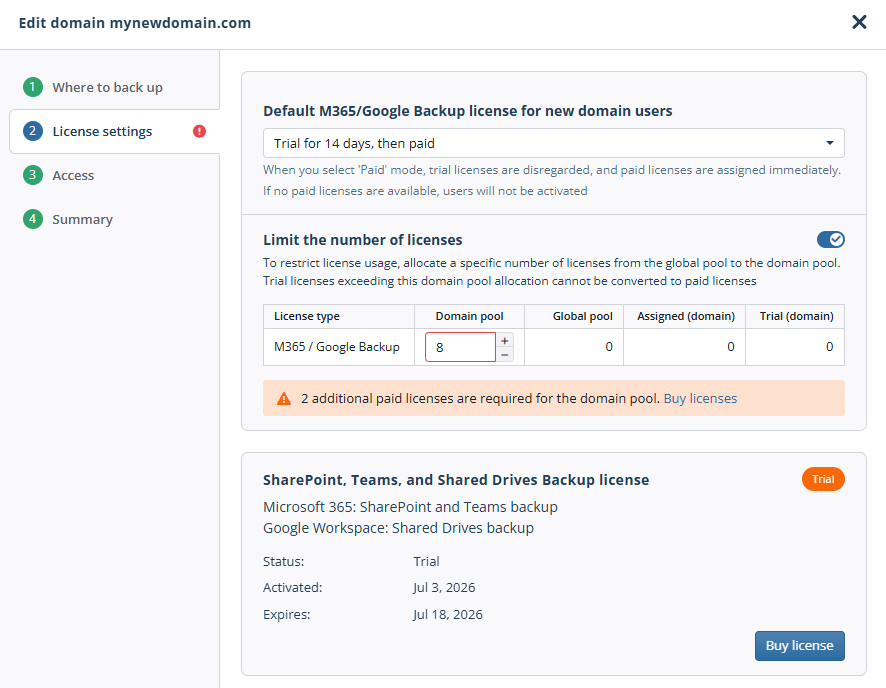
- On the License settings step, you can limit the number of licenses available for the domain to control license usage. Trial licenses auto-convert to paid after trial ends if pool allows. Trial licenses exceeding the domain pool allocation will not be converted to paid licenses. Backup will be suspended for users assigned those licenses.
- You will receive a trial SharePoint / Teams / Shared Drives license when the first administrator signs in. If you need the storage limit larger than 100 GB, you should buy the paid license.
- Click Next.
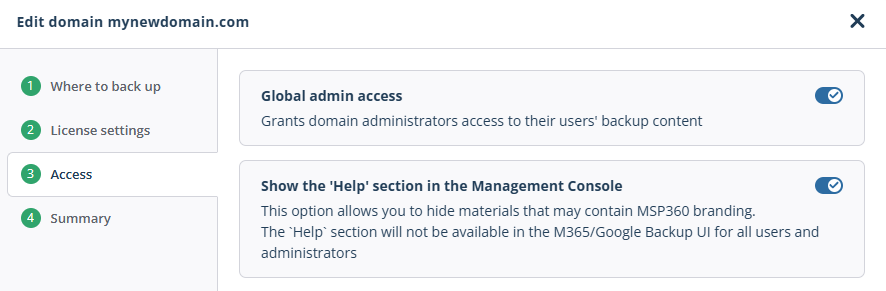
- On the Access step, specify whether Global Admin access to the backup content is allowed to the administrators. You can also hide materials containing MSP360 branding.
- Click Next.
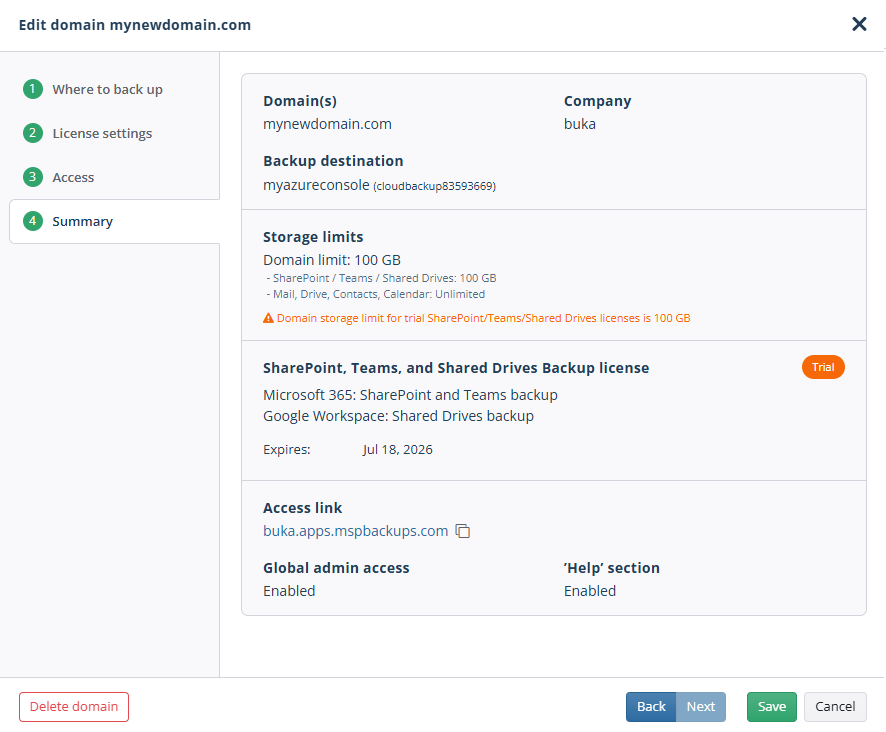
- Check the settings on the summary step and click Save to save your changes.
Manage Domain Users
Click the user group icon in the Users column in the domain entry to access the grid.

This grid allows you to perform the following actions:
- Select multiple users for group operations
- Enable selected users
- Disable selected users to release assigned licenses
- Delete selected users to release assigned licenses and delete backed up data of these users
- View licenses assigned to the user
- Check whether Mail, Contacts, Drive or Calendar backup service is enabled for the user
For more details refer to Manage Users
Delete Domain
To delete a domain, Two-Factor Authentication (2FA) must be enabled. Deleting a domain will remove all backed-up data and release assigned licenses. All licenses assigned to the members of this domain will be released and returned to the Global Pool.
To delete a domain, perform the following steps:
- In the Management Console, select M365/Google Backup > Domains.
- Select a domain to delete.
- Expand actions and select Delete. Confirm with 2FA. The domain will be marked as "Deleting" and will be removed once the process is complete.
Create Your Custom Branding
Custom branding, including the Management Console access link and corporate identity elements, requires an Advanced Rebranding & Custom SSL license. This license allows you to customize the dashboard URL with your domain name. If you already have this license, navigate to Settings > Branding to add your branding and grant this license to turn it on. You can also rebrand Management Console by changing the favicon.