Hyper-V VM Restore to Proxmox in Backup Agent
As of Backup Agent 8.7.1 for Windows, you can restore a Hyper-V VM backup to the Proxmox VE environment as a virtual machine.
Note that item-level restore from long-term (cold) backup storages is not currently supported.
Create Restore Plan
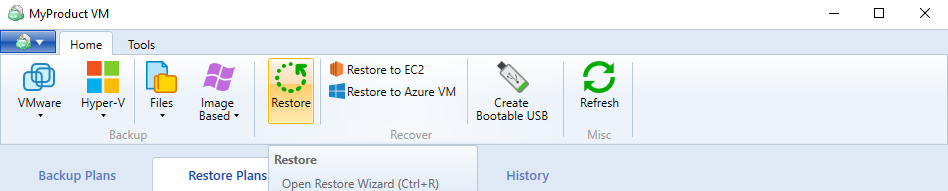
In Backup Agent, click Restore to proceed with a restore plan.
Select Backup Storage
Select a source cloud or local storage containing the backup to restore.
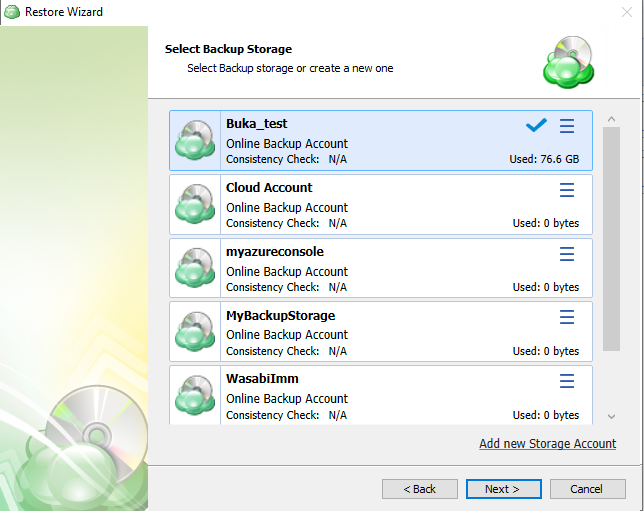
To add a new storage account, click Add new storage account. Click Next.
Plan Name
Specify whether you need to save the restore plan after completing the wizard, or run the restore procedure only once (without saving this plan and running it automatically on schedule).
You can change the default plan name, if needed.
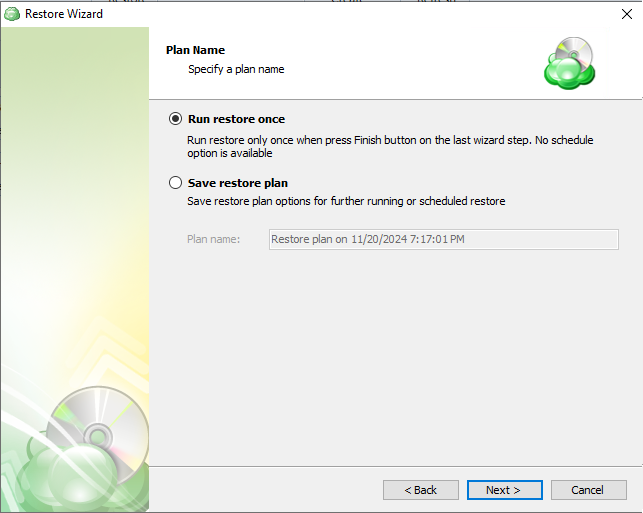
Click Next.
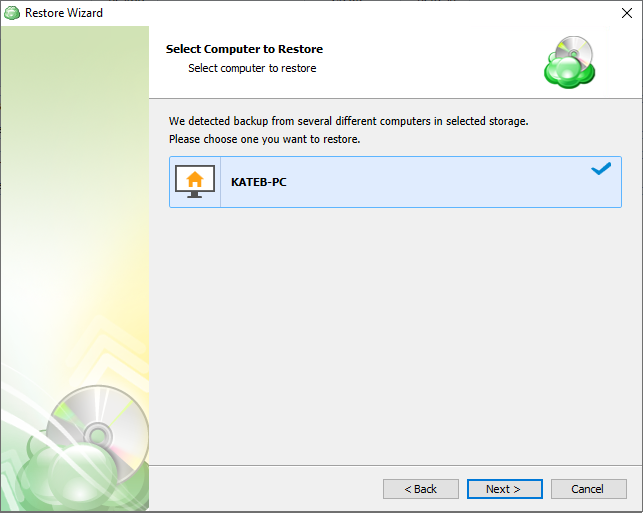
Select Computer to Restore (Optional)
If the selected backup storage contains backup data from several computers, you will be prompted to select the computer whose backup you are planning to use.
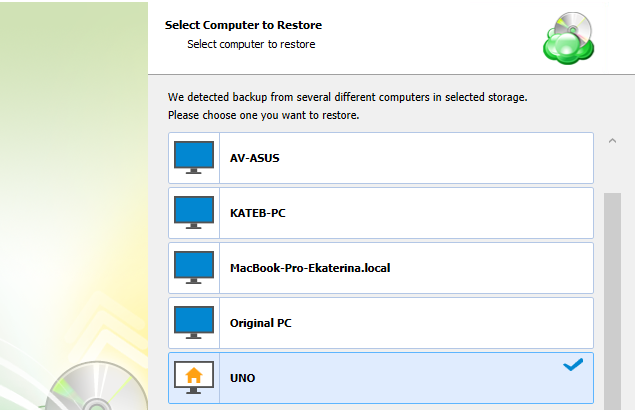
Click Next.
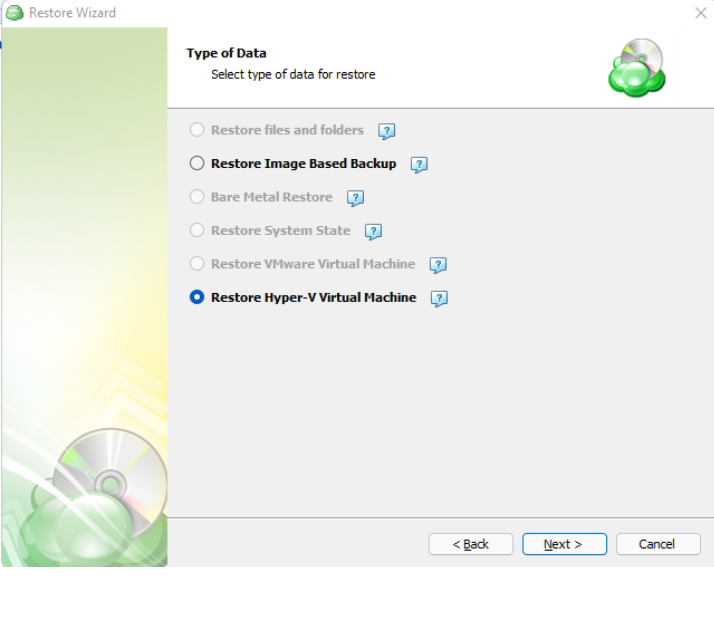
Type of Data
On this wizard page, select the type of data you want to restore.
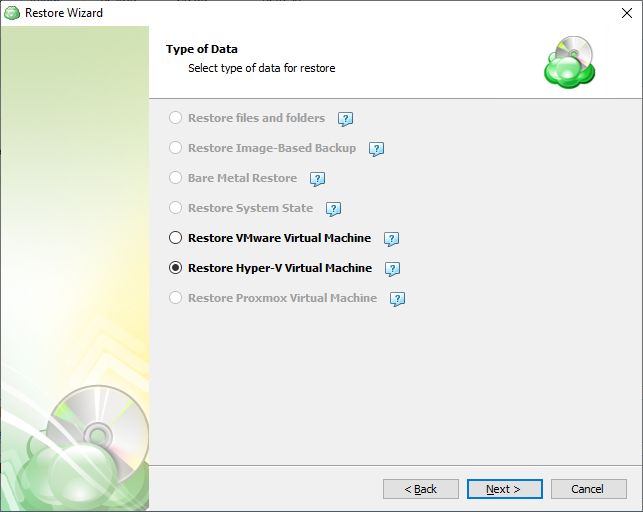
Note that item-level restore from long-term (cold) backup storages is not currently supported.
The type of data also depends on the license type you are using.
All available restore options are active. To proceed with restoring an image-based backup, select the Restore Image-Based Backup option.
Click Next.
Select Backup to Restore
On this wizard page, you choose which backup plan you want to restore.
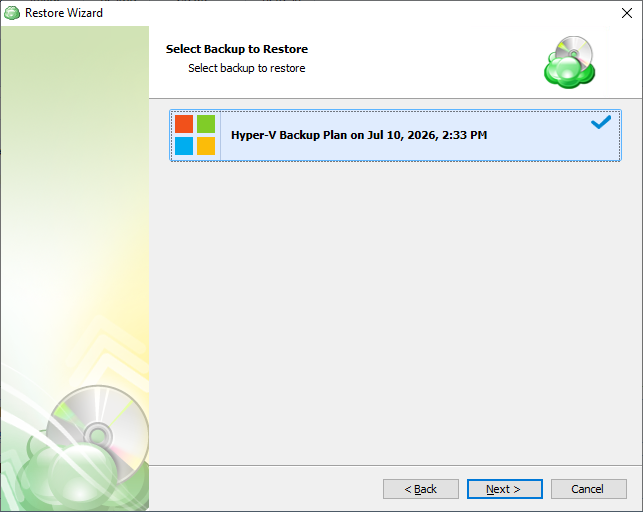
Click Next.
Restore Point
On this wizard page, you can select whether you need to restore specific file versions, or restore to a specific point in time.
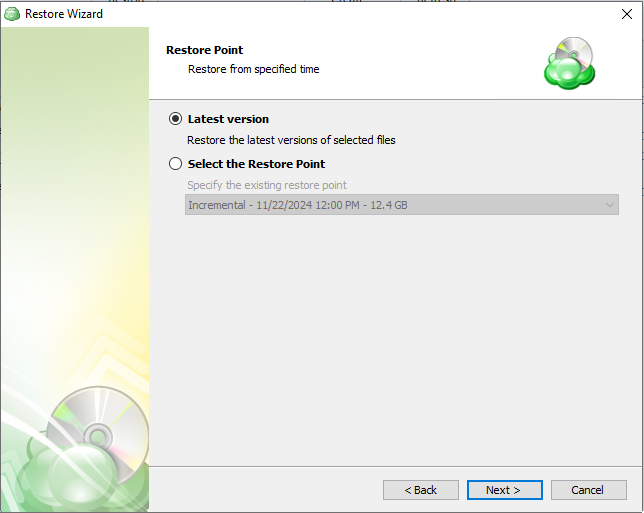
The following options are available in the wizard:
- Latest version
Enables you to restore the latest versions of your images available in a backup. Selecting this option will restore only those image versions that were modified before the most recent backup. - Select the Restore Point
Enables you to restore image versions available in your backup storage at the specified date and time. Selecting this option will restore only those image versions that were modified before the most recent backup and are not yet available in the destination folder. If earlier versions of the corresponding images already exist in the destination folder, they will not be restored unless you explicitly enable their overwriting further in this wizard.
When restoring a backup that was made on another computer, you may need to synchronize the repository to refresh the file tree.
Click Next.
Restore Source
On this wizard page, you expand the list of VM backups on the selected host and choose which to restore.

Click Next.
- On the Restore Type step, select Restore to Proxmox server to restore the image as a virtual machine in Proxmox VE. If you need to perform other restore operations, refer to the articles related to other options:
- Restore and import Hyper-V VM: Restores the image and integrates it into your existing Hyper-V environment.
- Restore as Hyper-V VM files: Use this option to restore Hyper-V VMs as files.
- Restore as virtual disk. Restores the virtual disks in the backup as files that can later be mounted to a VM. No configuration files are included.
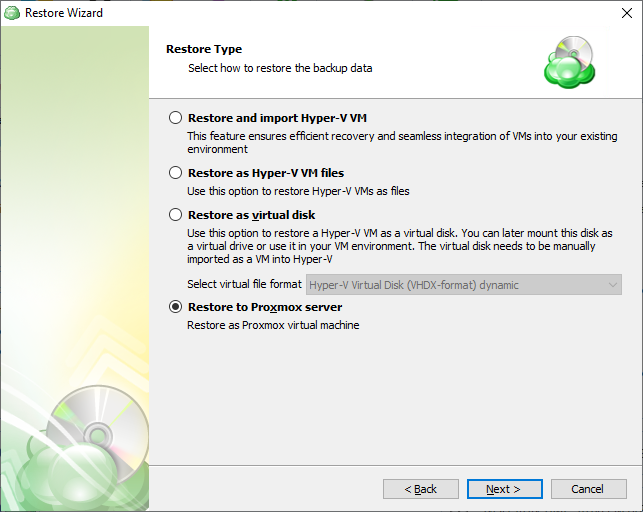
- Connect to the Proxmox host server to restore the image. Enter the Proxmox host server access information in the format that is most convenient for you.
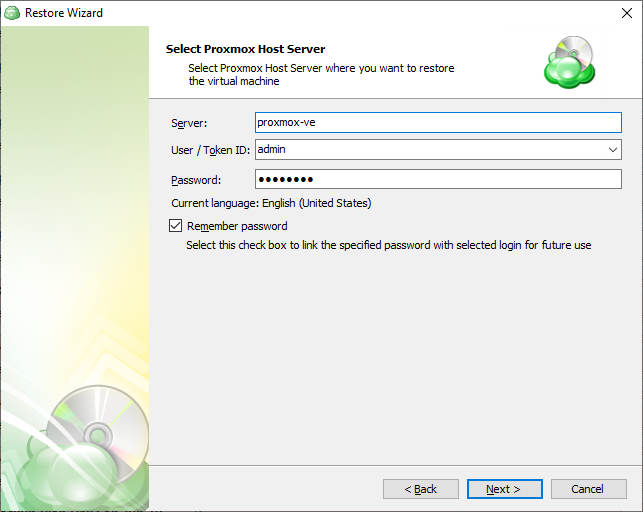
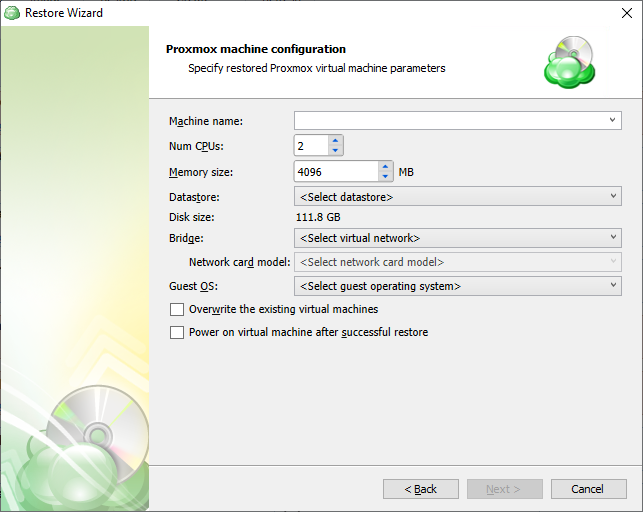
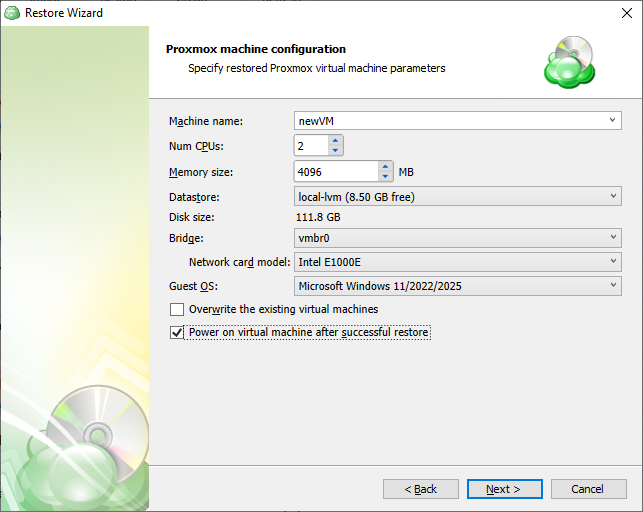
- Configure the virtual machine to restore. First, select an existing virtual machine or type a name for a new one. Specify the VM parameters. Configure the restore settings, including the datastore, disk provisioning type, number of virtual processors, memory size (sufficient for the restored virtual machine), virtual network, and guest operating system.
- To power on the restored virtual machine automatically after the restore is complete, enable the corresponding option (optional).
Encryption Password (Optional)
Specify the encryption password to decrypt the encrypted backup.
Click Next.
Glacier Smart Restore (Optional)
If you restore data from the S3 Glacier Flexible Retrieval or Glacier Deep Archive storage classes, specify Smart Restore options.
The following options are available:
- Skip files located in Glacier. Select this option to bypass objects located in Glacier. Usually, the restore from Glacier takes up to several hours and may incur significant expenses.
- Restore files located in Glacier. Select this option to restore objects stored in S3 Glacier storage class, then specify a retrieval type. The following types are available: Expedited, Bulk, and Standard.
To learn about retrieval rates, refer to the Amazon S3 Glacier pricing chapter at docs.aws.amazon.com.
Click Next.
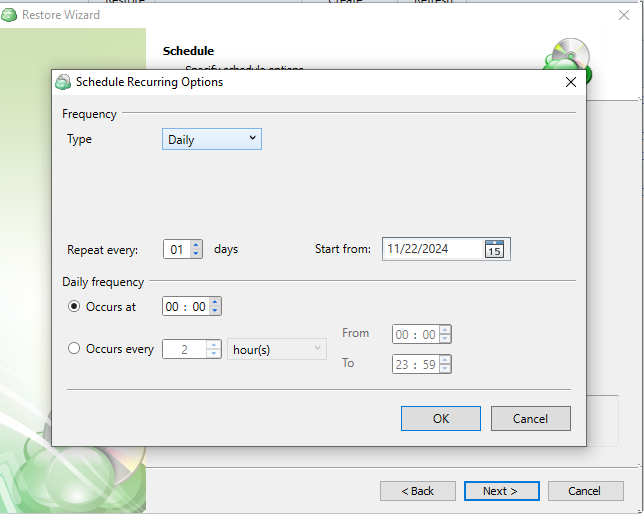
Schedule Your Restore Plan (Optional)
If you chose to save the created restore plan for further use, select schedule options.
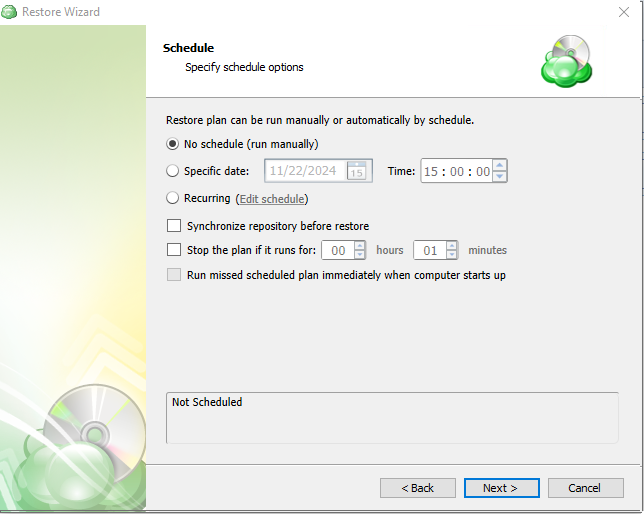
Click Next.
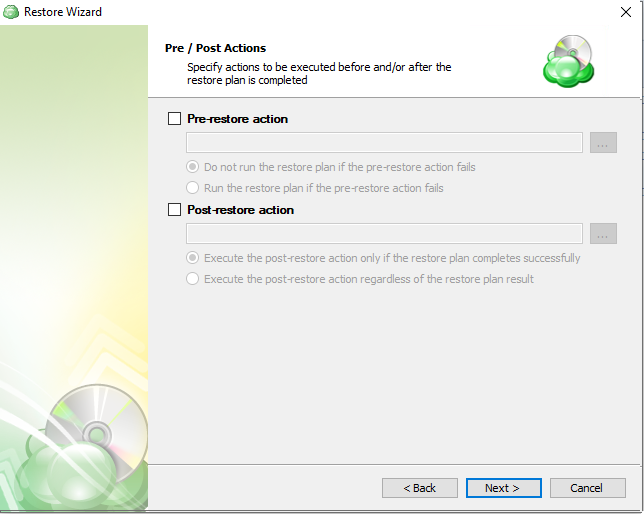
Pre-/Post Actions (Optional)
Specify actions to be executed before or after the restore plan completion.
Pre- or post-actions for Backup Agents can be restricted by the provider. To learn more about the pre-/post-action settings, refer to the Global Agent Options and Companies chapters.
Click Next.
Notifications
Specify email notification settings.

Click Next.
Summary
Check and manage your restore plan.
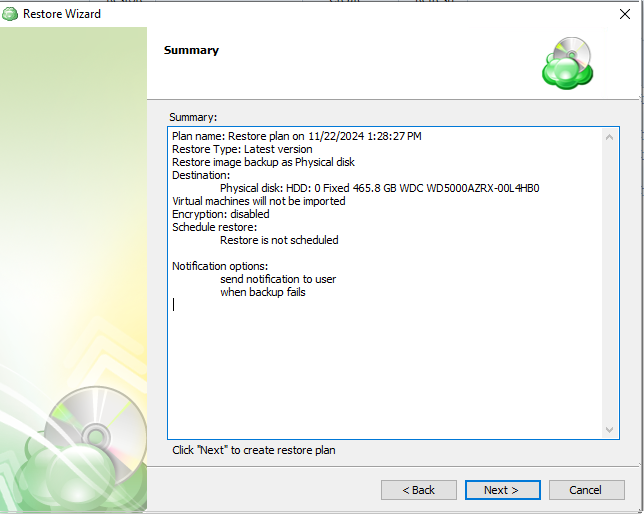
Click Next to create the restore plan. On the Summary step, view the restore plan configuration to make sure everything is set up correctly. Select the Run the plan now checkbox to run the plan immediately, or leave it unselected and click Finish to run the plan later. You can see the created plan on the Restore Plans tab.
Edit a Restore Plan
To edit the restore plan, proceed as follows:
- Switch to the Restore Plans tab.
- Open the restore plan you want to edit by expanding it, then click Edit.
- Proceed through the Restore Wizard steps to adjust settings as needed.
- If the plan is currently running, you'll need to select one of the following options:
- Apply changes after the restore plan completes
- Stop the plan and apply changes.
- After choosing the desired option for the running restore plan, click Apply.
- Save the edited plan configuration.
You can edit certain scheduled restore plan parameters directly, without using the restore wizard, as long as the restore plan is not currently running. Editable parameters are marked with a pencil icon. To make a quick edit, simply click the pencil icon next to the parameter.
Delete a Restore Plan
To delete the restore plan, proceed as follows:
- Switch to the Restore Plans tab.
- Open the plan to delete, expand it, then click Delete.
- Click Yes to confirm the restore plan deletion.
Step 1
After launching Backup Agent, you can run the Restore Wizard by clicking Restore on the Home tab of the horizontal menu.

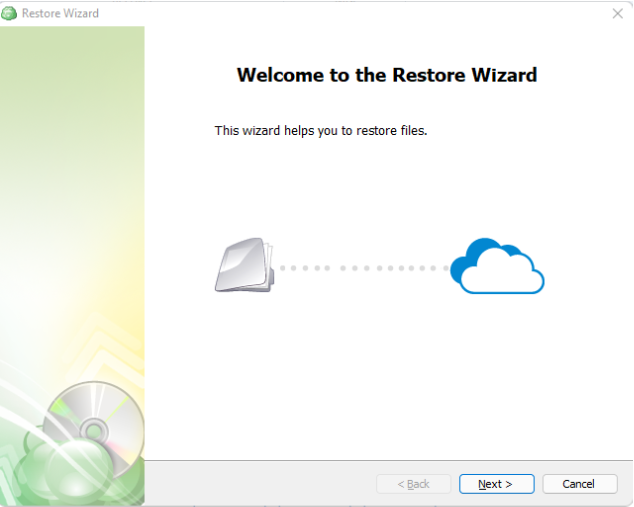
Step 2
Click Next to advance past the welcome screen of the wizard.
Step 3
The next step will prompt you to select the source for the restore.
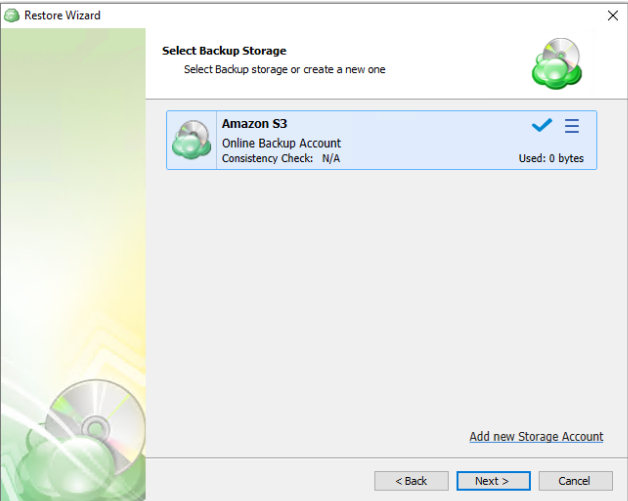
If the desired source is not in the list, you can click Add new Storage Account to add it.
- The backup storage is the one that contains the backup data.
- The required backup prefix is set for the storage account.
If necessary, switch the backup prefix.
Step 4
Once the source has been selected, the next screen allows you to choose between running the plan a single time or saving it for later use.
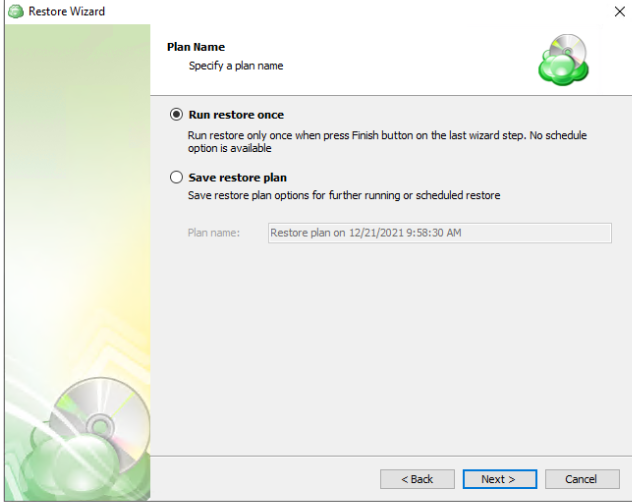
Run restore once will execute the restore immediately upon completing the wizard. There is no option to schedule this type of restore.
Save restore plan will allow you to schedule the plan to run at a later time and also schedule repeating restorations if needed.
Step 5
With the type of restore selected, the next step is to select the correct host server on which the VM resides.
Step 6
Next, you will be presented with a list of available backup types for the selected host. Select the Restore Hyper-V Virtual Machine option to continue.
Step 7
With the correct type of restore selected, the application will generate a list of available backup plans to restore from.

Step 8
Next, you will be given a choice of what point in time you would like to restore the VM to.
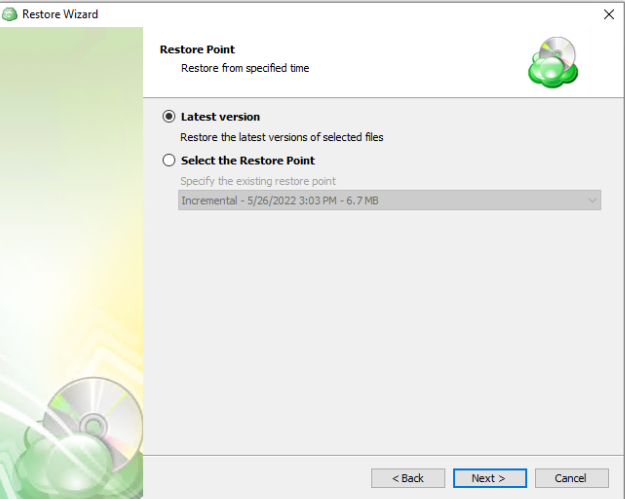
- Latest Version: Automatically restores the newest version of each file in the source regardless of which restore point it belongs to.
- Select the Restore Point: Restores the files as they existed at the specified restore point.
If there is no exact match for the point in time selected, the application will automatically select the closest previous restore point.
Step 9
Next, you will be able to expand the list of VM backups on the selected host and choose which to restore.
Step 10
After selecting the files or folders to restore, you can select the restore type. In this example, we perform the restore as an imported Hyper-V machine.
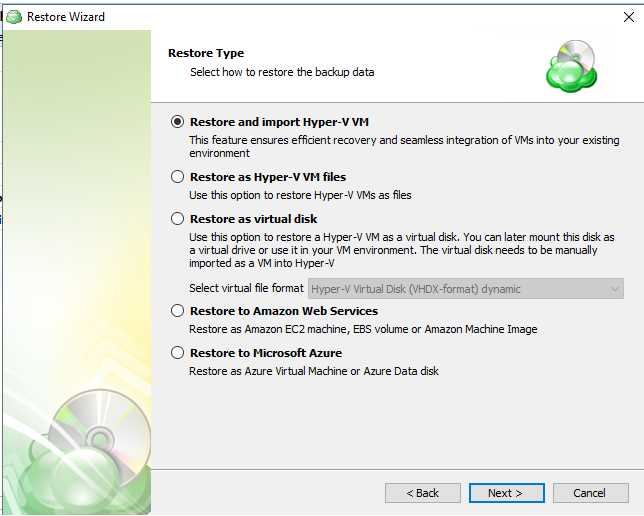
Restore and import Hyper-V machine: Selecting this option restores the virtual machine configuration as well as the virtual disks as files. Use this option to have the VM automatically imported to the hypervisor.
Restore as Hyper-V VM files: Use this option to restore Hyper-V VMs as files.
Restore as virtual disk: Restores the virtual disks in the backup as files that can later be mounted to a VM. No configuration files are included. Several formats are available:

- Restore to Amazon Web Services: If enabled, this will restore the selected VM directly to the AWS Cloud as an EC2 instance, EBS volume, or AMI.
- Restore to Microsoft Azure: This will restore the VM directly to Azure as either an Azure Virtual Machine or Azure Data disk.
Step 11
The next step is to select the disks to be restored.
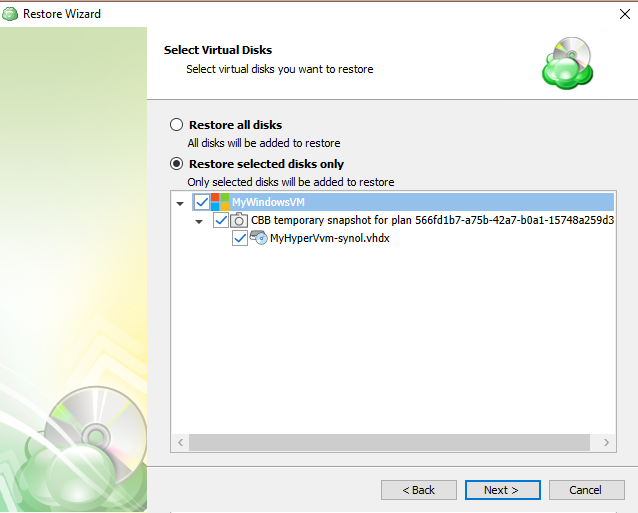
Here you can choose whether to restore all virtual disks associated with each selected VM or only restore selected disks.
Step 12
The next step is to choose a destination for the restored VM or virtual disk. You will be asked whether you would like to overwrite the VM. If you wish to restore it under a different name or to a different target VM, select or type over the value in the Restore as list.
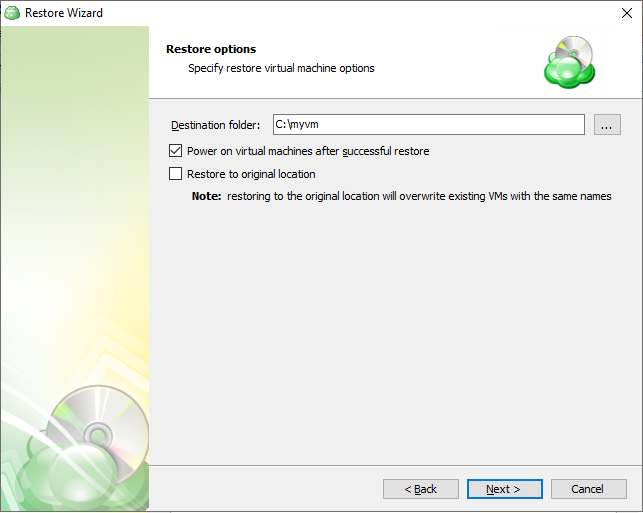
Step 13
After selecting the destination and any associated options, you will be prompted to provide the password to decrypt the VM backup data, if encrypted.

Step 14
(Optional) If you restore data from the S3 Glacier Flexible Retrieval or Glacier Deep Archive storage classes, specify Smart Restore options.
Step 15
If Save restore plan was selected at the start of the wizard, the next step is to set the schedule for the restore plan. Otherwise, this step will be omitted.
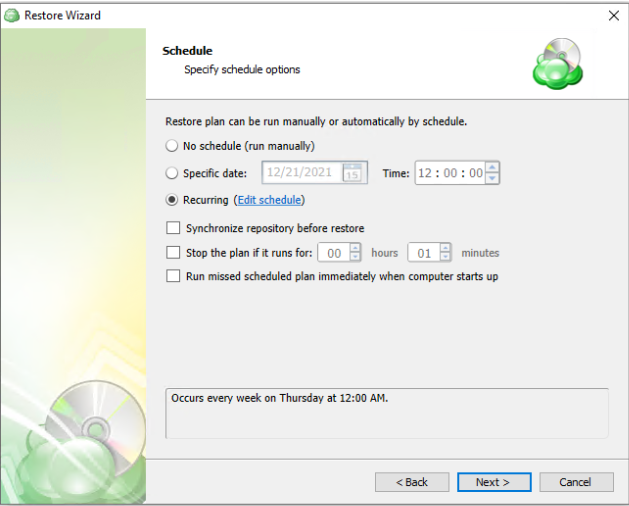
- No schedule (run manually): Use this option only when you wish to execute the restore manually.
- Specific date: Use this to schedule a one-time restore at the specified date and time.
- Recurring: This option enables you to schedule recurring restorations based on the criteria in the fields below.
- Synchronize repository before run: Enable this option to ensure the file tree reflects the latest modifications made to your storage. It is a good practice to use it when you restore to a different computer.
Do not use the Stop the plan if it runs for: option if you have a slow or unstable internet connection.
Enabling the Run missed scheduled restore immediately when computer starts up option will ensure that the restore plan will begin automatically after the computer starts up if it was unable to run at the scheduled time. This is only recommended for desktops and laptops. For servers, it is recommended that you run the restore plan manually when all maintenance work is completed to avoid adversely affecting server performance and internet bandwidth during working hours.
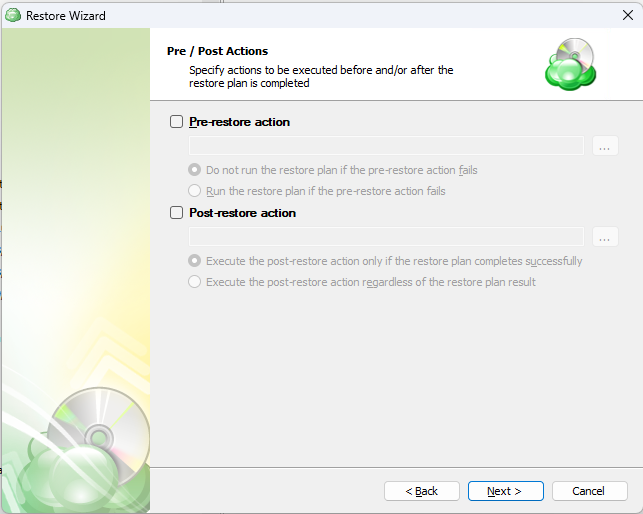
Step 16
The next step is to set any custom scripts which should execute before and/or after the restore plan runs.
Step 17
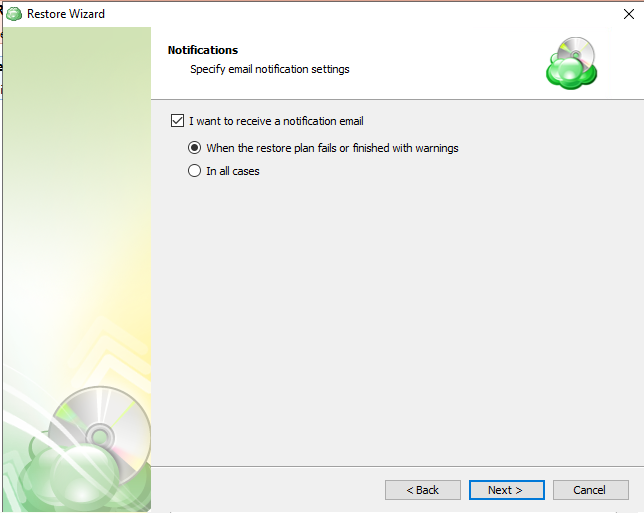
Specify the notification options, then click Next.
Step 18
The next step of the wizard displays a summary of the selections made throughout the process. Once you have reviewed your selections, click “Next”.
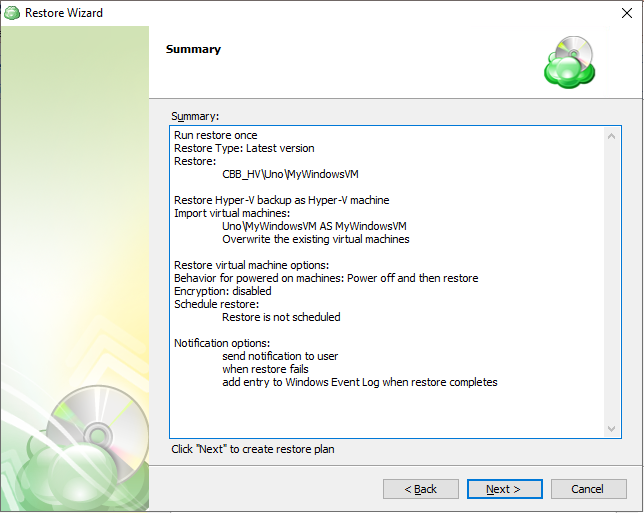
You can see the saved plan on the Restore Plans tab. If Run restore once was selected at the beginning of the wizard, the plan will immediately execute once you click Next.
Edit a Restore Plan
To edit the restore plan, proceed as follows:
- Switch to the Restore Plans tab.
- Open the restore plan you want to edit by expanding it, then click Edit.
- Proceed through the Restore Wizard steps to adjust settings as needed.
- If the plan is currently running, you'll need to select one of the following options:
- Apply changes after the restore plan completes
- Stop the plan and apply changes.
- After choosing the desired option for the running restore plan, click Apply.
- Save the edited plan configuration.
You can edit certain scheduled restore plan parameters directly, without using the restore wizard, as long as the restore plan is not currently running. Editable parameters are marked with a pencil icon. To make a quick edit, simply click the pencil icon next to the parameter.
Delete a Restore Plan
To delete the restore plan, proceed as follows:
- Switch to the Restore Plans tab.
- Open the plan to delete, expand it, then click Delete.
- Click Yes to confirm the restore plan deletion.