Start Free Trial
This chapter describes the first steps for Managed Backup beginners. Read it to get your first vision on how to start:
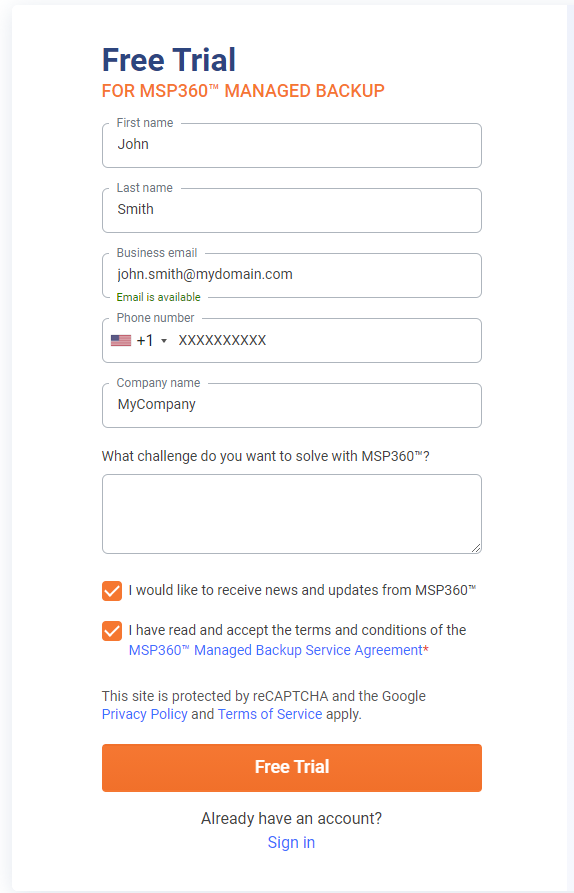
Sign Up for Managed Backup
- Open the MSP360 website.
- On a title page, click Free Trial.
- Complete the signup form, read the service agreement, then select the appropriate check box.
- Click Free Trial.
Once you open the Management Console for the first time, you will be prompted to pass the Getting Started wizard. Follow the instructions on the wizard steps.
You are offered or with 1 TB of the MSP360 (in collaboration with Amazon AWS) trial storage for 30 days for testing purposes. You will be able to add your storage account later or continue using the selected storage account on a paid basis.
Along with MSP360 (AWS) storage, you can use a trial Wasabi storage account with 2 TB of the MSP360/Wasabi for 30 days for testing purposes. You can add it manually later.
Download Backup Agent
- Once you click Continue, you will be prompted to download the Backup Agent for Windows.
- Click Download. We recommend to complete installation and proceed with the wizard, if you are planning to create backups on this computer. In case you want to [back up another computer] or [Microsoft 365 / Google Workspace], you can exit the wizard. You can install a Backup Agent later, if necessary
- Complete the wizard to create your first backup plan for testing purposes.
Configure Email Service
On Management Console navigate to Settings > Email Service to specify an email address your end users receive notifications from and Email Service. This step is mandatory. Verify this email address and click Save Changes.

Create Company
Create a company and assign the backup destination to it. To do this, proceed as follows:
- Open the Management Console.
- In the Organization menu, select Companies, then click Add Company.
- Enter the company name, then click Create.
- Switch to the Backup Destinations tab, then click Add Backup Destination.
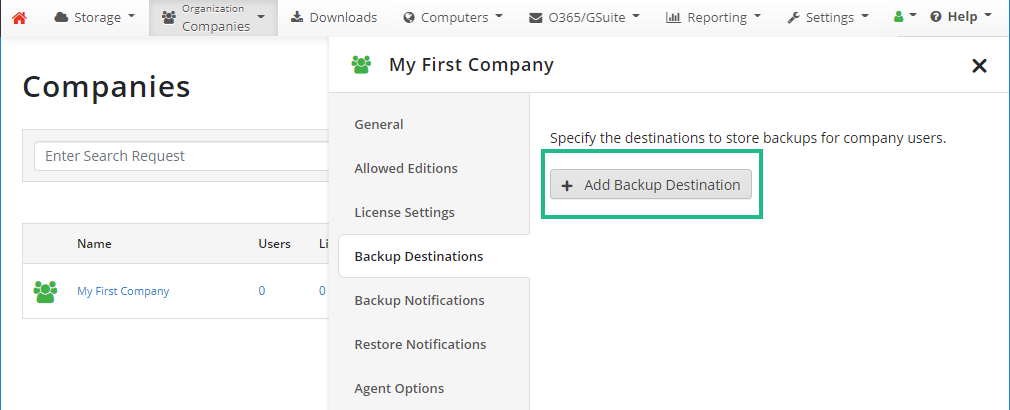
- In the Add Destination* dialog box, select the MSP360 Bucket, then click Add. Now all users assigned to this company will back up their data to the specified bucket.
Create User
Once a company is created and the backup destination is assigned, create a user. To create a new user, proceed as follows:
- Open the Management Console.
- In the Organization menu, select Users. One user account already exists with the email address used during the signup. It is not recommended to use this user for backup purposes. Instead, click Create User.
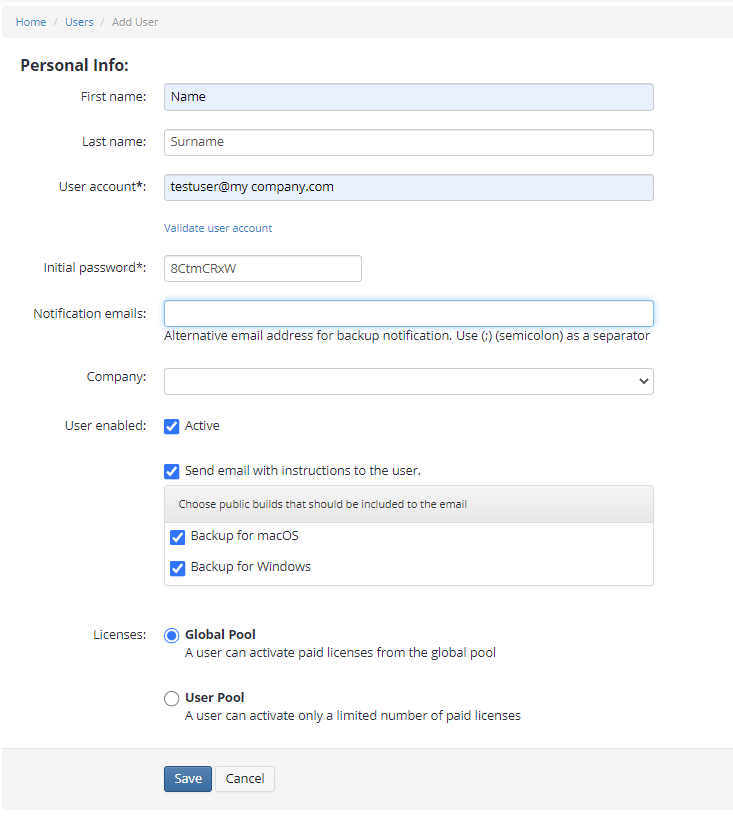
- Fill in the form and assign the company created on the Create Company paragraph.
- Once you are done, click Save.
Now you are ready to install the Backup Agent and create your first backup on this computer.
Create First File Backup on Local Computer
Install the previously downloaded Backup Agent:
- In the Management Console, click the Downloads tab.
- Find the required Backup Agent edition, then click the download icon.
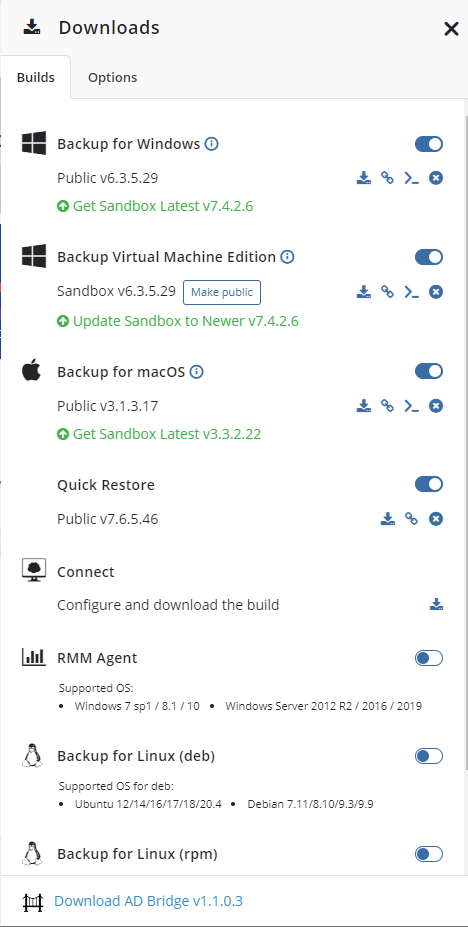
- Follow the installation wizard steps.
- Once the installation is complete, go back to the Management Console to assign the created user to the given computer. In the Computers menu, select the Remote Management. The computer name with the Backup Agent installed is displayed in the grid.
- Click Add user account to associate the computer with the user you just created.
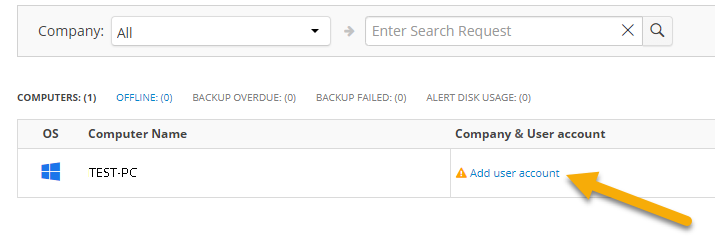
- In the Edit Account dialog box, select the created user, then click Save.
- Once you are done, select the computer, click the gear icon and select Show plans to create your first backup plan on your computer for testing purposes. In the right pane, click +, then select Files.
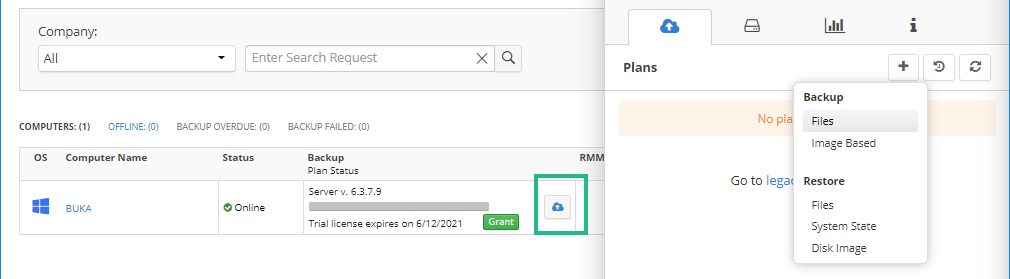
- Follow the backup wizard steps. For details, read the File Backup chapter.
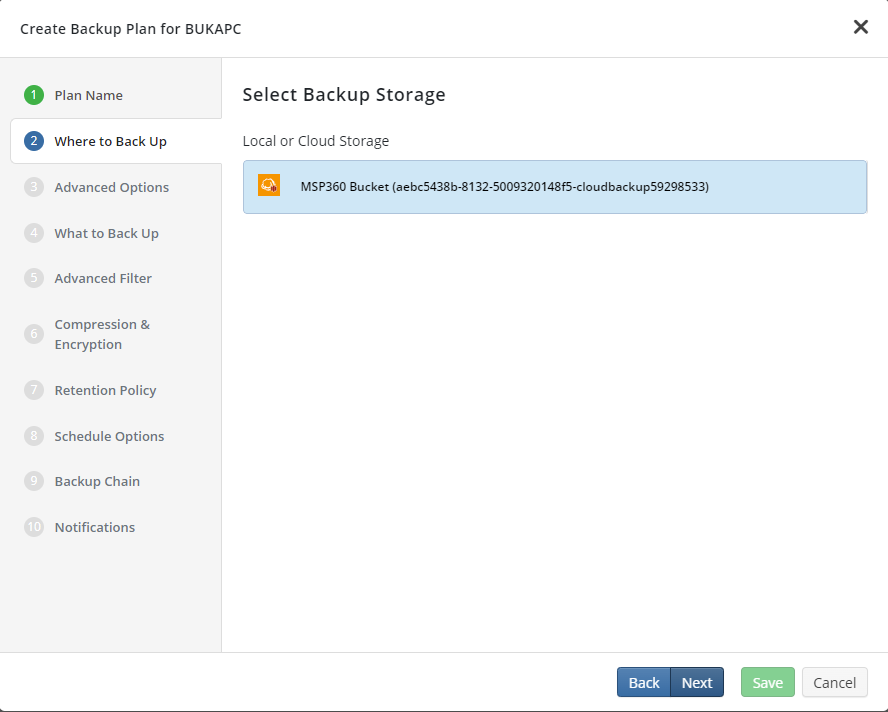
- On the Where to Back Up step of the backup plan wizard, select the MSP360 trial backup destination. Click Next.
- On the What to Back Up step, select some files for testing purposes.

- Follow the backup wizard steps. Once you are finished, click Save.
- As the backup plan is created, it is displayed in the Plans tab on the right pane.
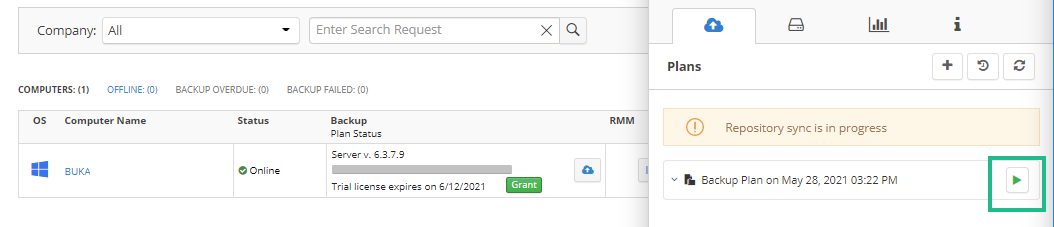
- To run the backup plan now, click the play button.
Your first backup plan in MSP360 Managed Backup is started.
