Restore as Virtual Disk in Backup Agent
To perform this restore operation, on the Restore type step of the Restore wizard in Backup Agent, you need to choose the Restore as virtual disk option.
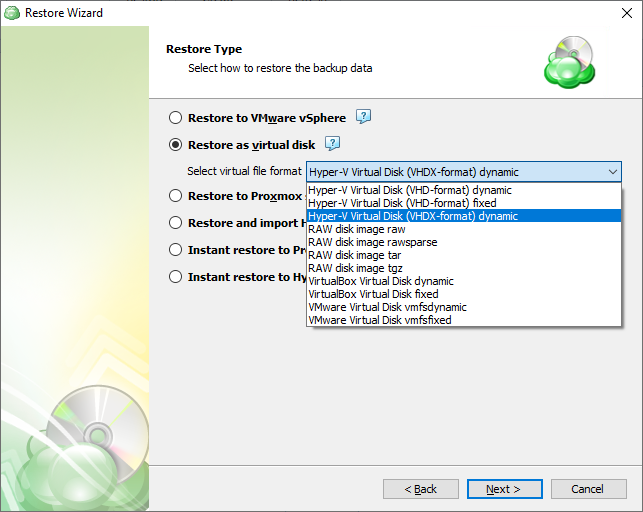
You can mount this disk as a virtual drive or use it in your VM environment later on.
The following virtual file formats are supported:
- Hyper-V Virtual Disk (VHD-format), dynamic
- Hyper-V Virtual Disk (VHD-format), fixed
- Hyper-V Virtual Disk (VHDX-format), dynamic
- RAW disk image, raw
- RAW disk image, rawsparse
- RAW disk image, tar
- RAW disk image, tgz
- VirtualBox Virtual Disk, dynamic
- VirtualBox Virtual Disk, fixed
- VMWare Virtual Disk, vmfsdynamic
- VMWare Virtual Disk, vmfsfixed
Users must have administrator-level access to create or edit the restore plans.
After launching Backup Agent, you can run the Restore Wizard by clicking Restore on the Home tab of the horizontal menu.

Select Backup Storage
Select a source cloud or local storage containing the backup to restore.
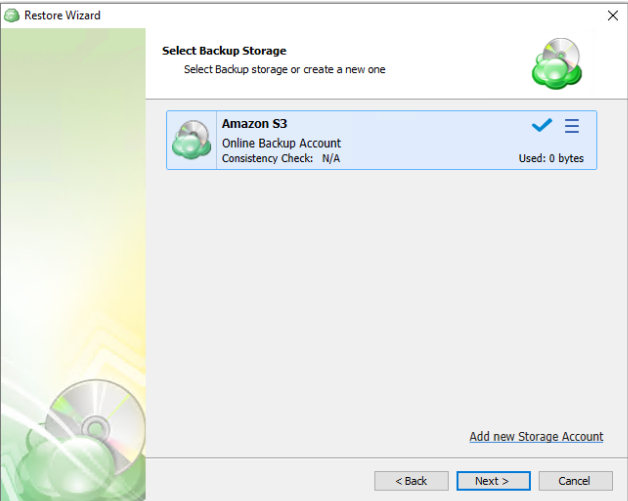
To add a new storage account, click Add new storage account. Click Next.
Plan Name
Specify whether you need to save the restore plan after completing the wizard, or run the restore procedure only once (without saving this plan and running it automatically on schedule).
You can change the default plan name, if needed.
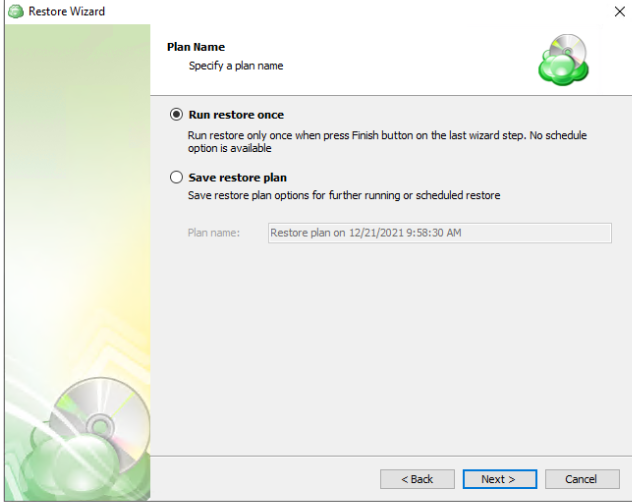
Click Next.
Type of Data
On this wizard page, you choose what kind of data you need to restore. Select
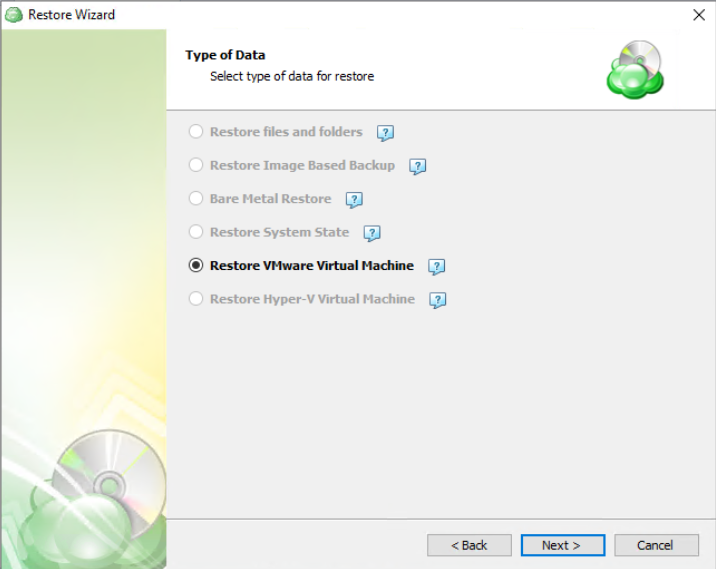
All available restore options are active. To proceed with restoring an image-based backup, select the Restore Image-Based Backup option.
Click Next.
Select Backup to Restore
On this wizard page, you choose which backup plan you want to restore.
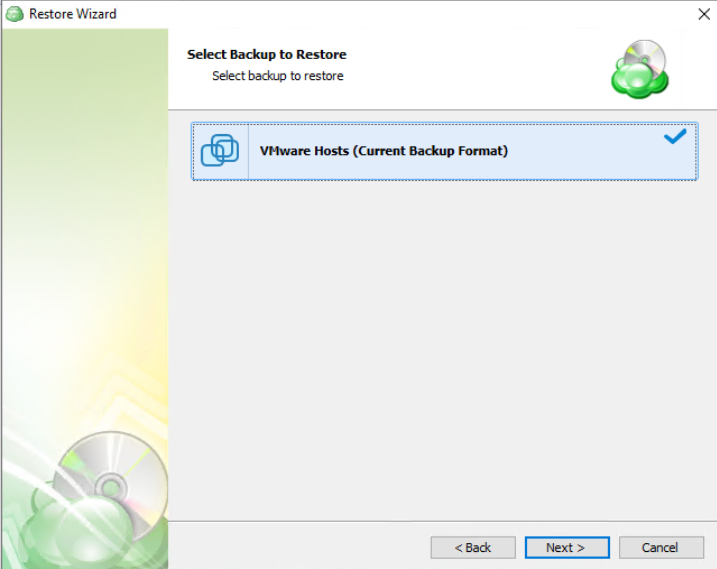
Click Next.
Restore Point
On this wizard page, you can select whether you need to restore specific file versions, or restore to a specific point in time.
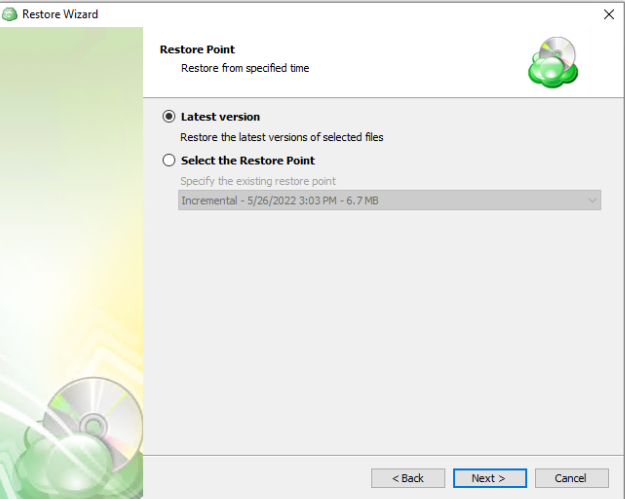
The following options are available in the wizard:
- Latest version
Enables you to restore the latest versions of your images available in a backup. Selecting this option will restore only those image versions that were modified before the most recent backup. - Point in time
Enables you to restore image versions available in your backup storage at the specified date and time. Selecting this option will restore only those image versions that were modified before the most recent backup and are not yet available in the destination folder. If earlier versions of the corresponding images already exist in the destination folder, they will not be restored unless you explicitly enable their overwriting further in this wizard. - Manually (This option can appear if you are restoring legacy backups)
Enables you to select which versions of each image to restore. You can specify which versions to restore on the next wizard page.
When restoring a backup that was made on another computer, you may need to synchronize the repository to refresh the file tree.
Click Next.
Restore Source
On this wizard page, you can select the virtual machines to restore.
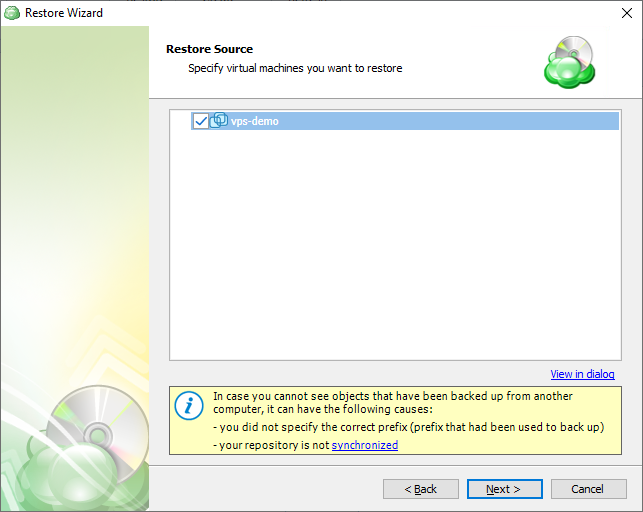
If you select multiple VMs, only restore to vSphere is available. To restore to other destinations (to Proxmox Server, for example), create separate restore plans for separate VMs.
Click Next.
Restore Type
On this wizard page, you need to choose how to restore your data.
The following options are available:
- Restore to VMware vSphere. Restore as VMware VM.
- Restore as virtual disk. Use this option to restore a VMware VM as a virtual disk. You can then mount this disk as a virtual drive or use it in your VM environment. You can select a virtual file format from the available options.
- Restore to Proxmox server. Restore as Proxmox virtual machine.
- Restore and import Hyper-V-VM. The feature ensures efficient recovery and seamless integration of VMs into your existing environment.
- Instant restore to Proxmox. Restores the backup instantly as a Proxmox VM.
- Instant restore to Hyper-V. Restores the backup instantly as a Hyper-V VM.
In this example the Restore as virtual disk option is selected. Click Next.
Destination
Specify the destination disk for the restore of the backup.
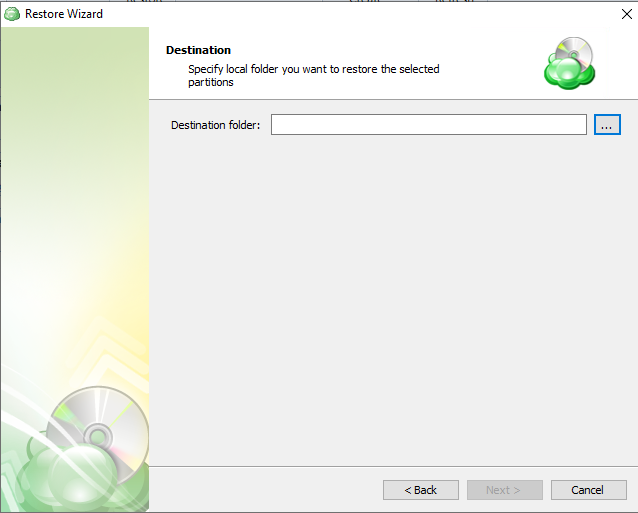
Click Next.
Encryption Password (Optional)
Specify the encryption password to decrypt the encrypted backup.
Click Next.
Glacier Smart Restore (Optional)
If you restore data from the S3 Glacier Flexible Retrieval or Glacier Deep Archive storage classes, specify Smart Restore options.
The following options are available:
- Skip files located in Glacier. Select this option to bypass objects located in Glacier. Usually, the restore from Glacier takes up to several hours and may incur significant expenses.
- Restore files located in Glacier. Select this option to restore objects stored in S3 Glacier storage class, then specify a retrieval type. The following types are available: Expedited, Bulk, and Standard.
To learn about retrieval rates, refer to the Amazon S3 Glacier pricing chapter at docs.aws.amazon.com.
Click Next.
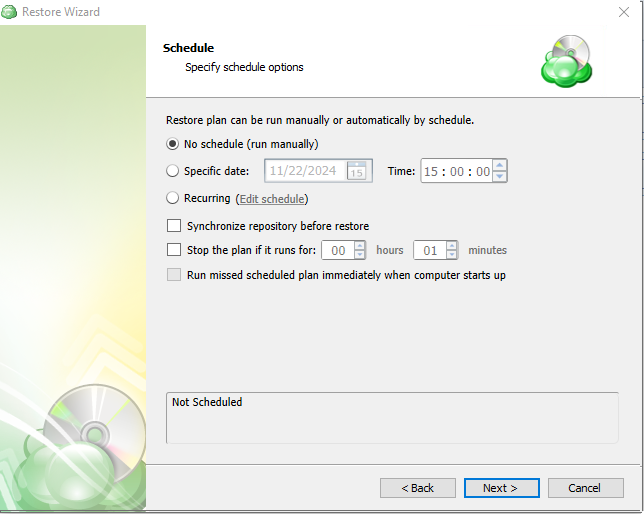
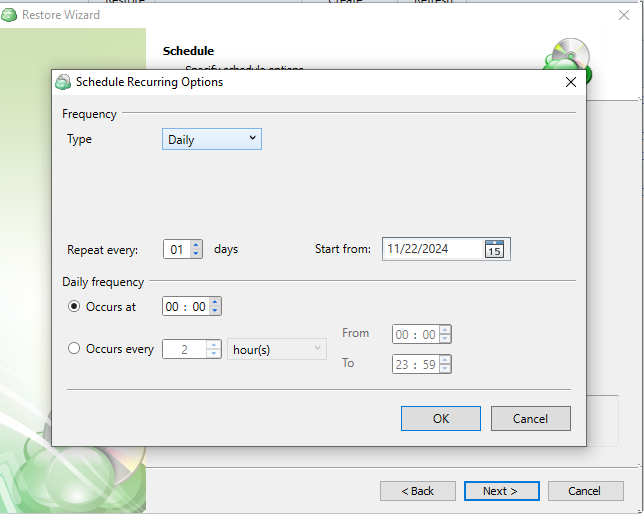
Schedule Your Restore Plan (Optional)
If you chose to save the created restore plan for further use, select schedule options.
Click Next.
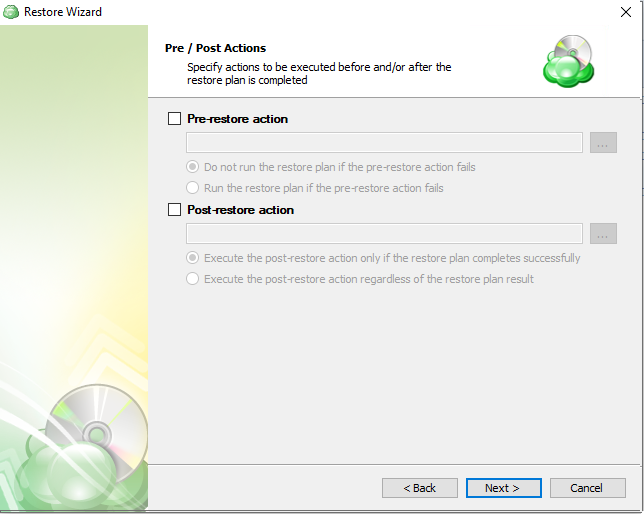
Pre-/Post Actions (Optional)
Specify actions to be executed before or after the restore plan completion.
Starting from Management Console version 5.0, pre- or post-actions for Backup Agents can be restricted by the provider. To learn more about the pre-/post-action settings, refer to the Global Agent Options and Companies chapters.
Click Next.
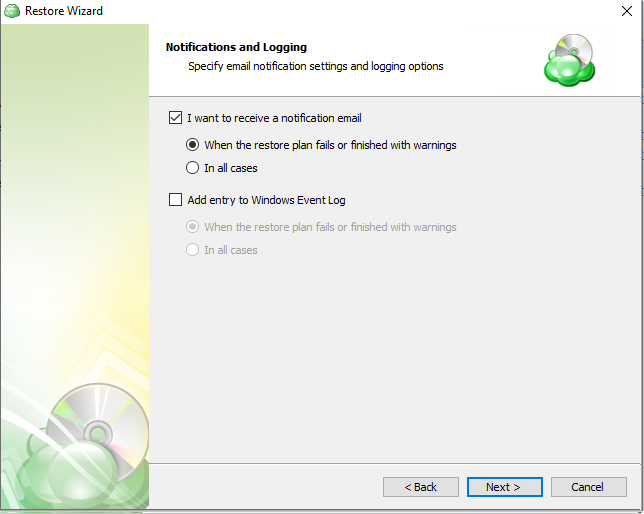
Notifications
Specify email notification settings.
Click Next.
Check Network Shares (Optional)
If you specified one or more network locations on the previous wizard pages, you can make the wizard verify access to these locations.
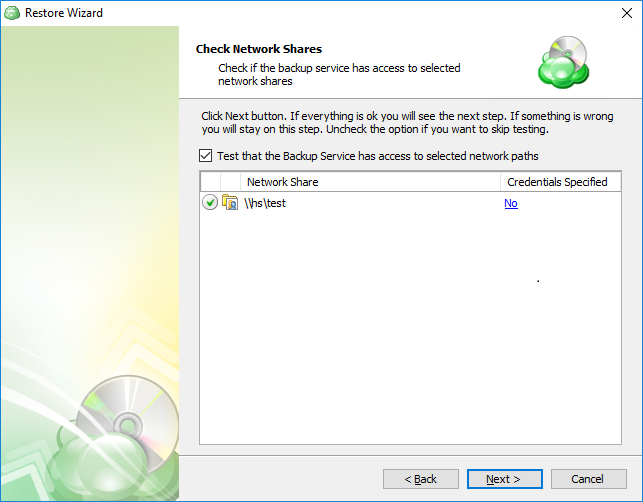
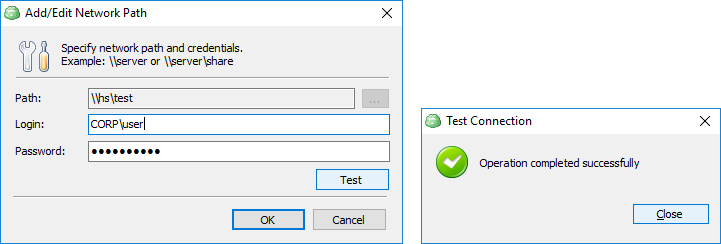
Click Next.
Summary
Check and manage your restore plan.
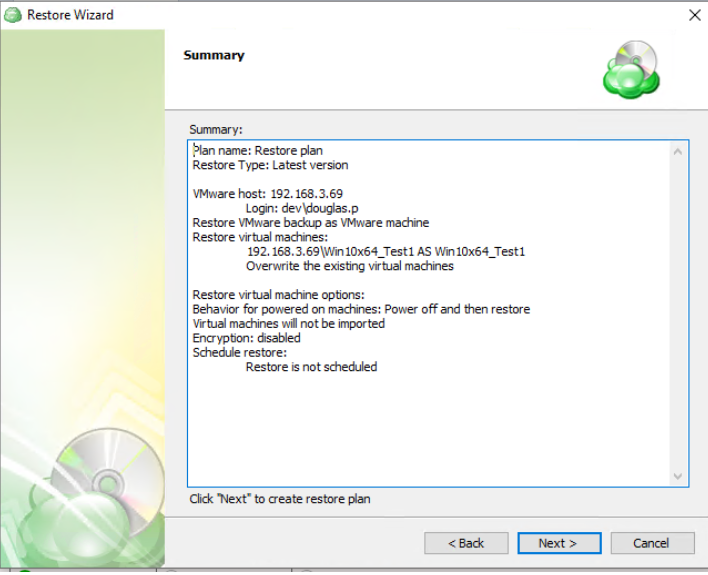
Click Next to proceed to the final page of the wizard. Select whether to start the restore process immediately after closing the wizard by choosing Run Restore now, or run it on a schedule (available only if you saved the restore plan earlier in the wizard). Click Finish to apply the changes.
Edit a Restore Plan
To edit the restore plan, proceed as follows:
- Switch to the Restore Plans tab.
- Open the restore plan you want to edit by expanding it, then click Edit.
- Proceed through the Restore Wizard steps to adjust settings as needed.
- If the plan is currently running, you'll need to select one of the following options:
- Apply changes after the restore plan completes
- Stop the plan and apply changes.
- After choosing the desired option for the running restore plan, click Apply.
- Save the edited plan configuration.
You can edit certain scheduled restore plan parameters directly, without using the restore wizard, as long as the restore plan is not currently running. Editable parameters are marked with a pencil icon. To make a quick edit, simply click the pencil icon next to the parameter.
Delete a Restore Plan
To delete the restore plan, proceed as follows:
- Switch to the Restore Plans tab.
- Open the plan to delete, expand it, then click Delete.
- Click Yes to confirm the restore plan deletion.
| Top |