Add Microsoft Azure Blob Storage Account
Add New Storage Account
By default, only the service provider (main administrator) can manage storage accounts for all companies. To allow another administrator to manage backup destinations, grant the Backup > Storage accounts permission under Organization > Administrators.
To create a new backup destination:
- Open the Management Console.
- Open the Backup > Storage Accounts page.
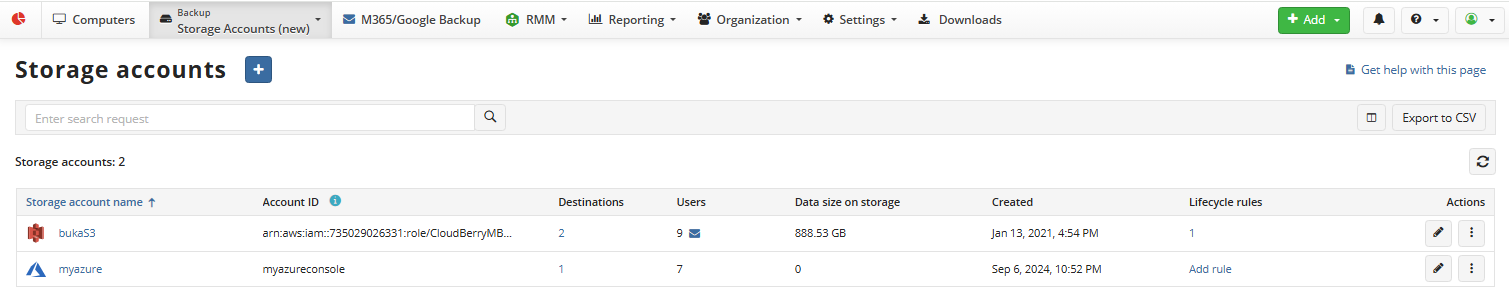
- Click + to launch the Create a new Backup Destination wizard.
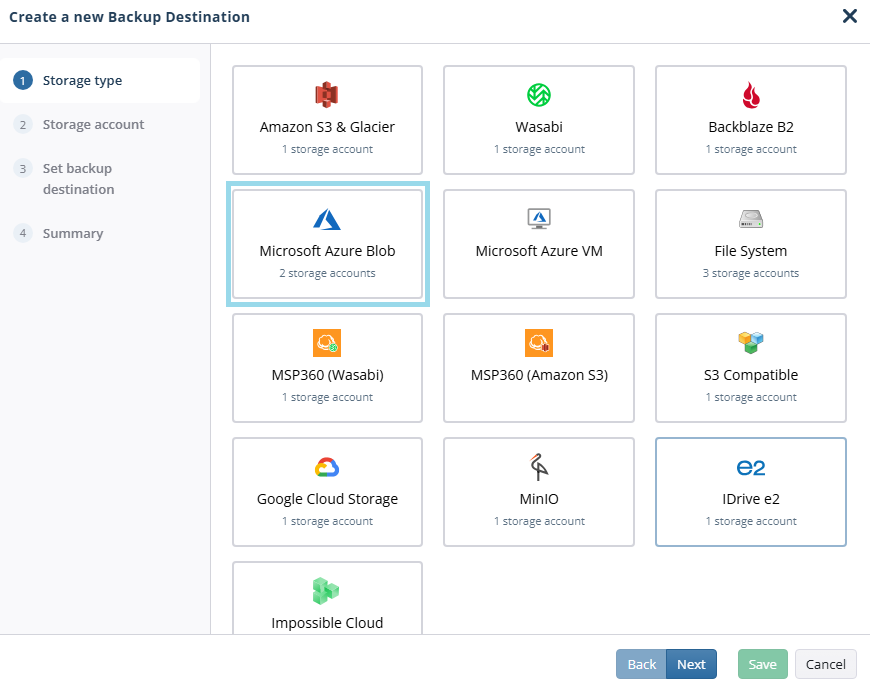
- On the Storage type step, select Microsoft Azure Blob. Click Next.
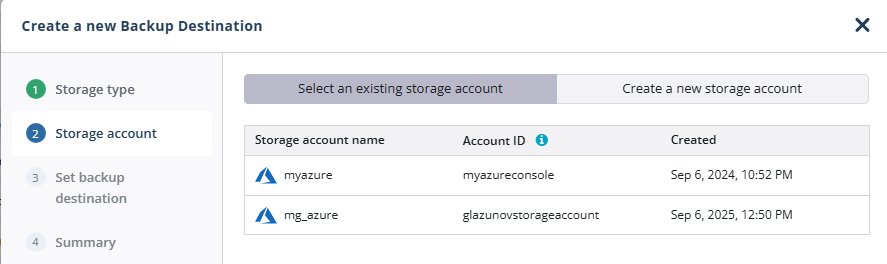
- On the Storage account step, select an existing storage account or create a new one. By default, existing storage accounts are displayed. To add a new storage account, click Create a new storage account.
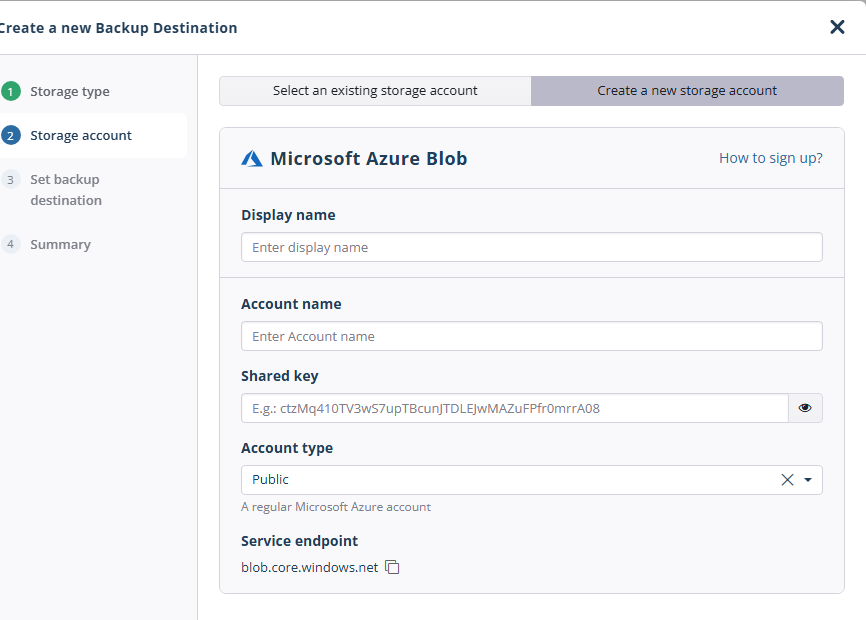
- Enter a display name for the storage account and enter your details for accessing the storage account.
- Provide the account name and shared key to access the storage account.
- Select the account type (Public, Azure Stack, China, Germany, or Government).
- Specify the service endpoint if it is not detected automatically.
- Click Next. Now you can set the backup destination.
- Specify the container. In the Destination display name field, specify the container name that will be displayed as a backup destination, then select whether you will use an existing container or create a new one:
- Select the New container option to create a new container. Name the container.
- Select the Existing container option to use an existing container, then select it in the drop-down list. You can also select an external container you have access to.
- For containers with Object Lock turned on, you can enable the Default Object Lock feature.
- Enable the Object Lock for GFS backups feature. Otherwise, this functionality might be permanently disabled. Disable it if this functionality is not needed.
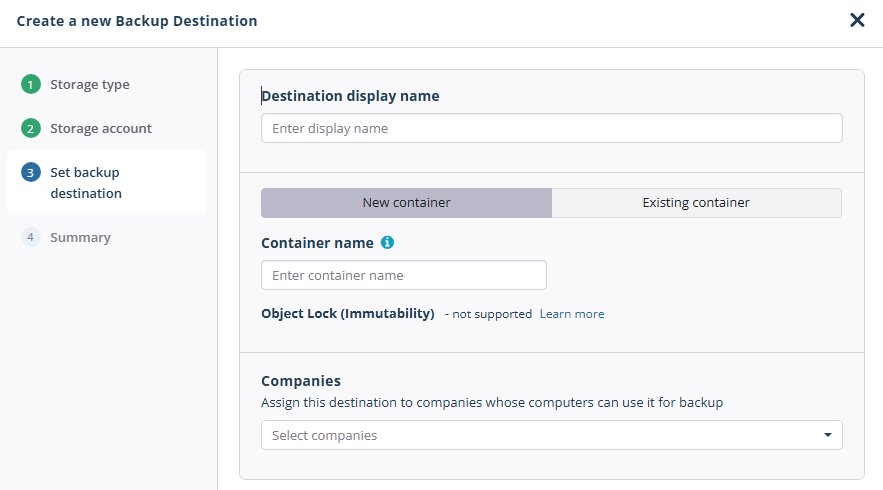
- Select the companies or users to assign the backup destination to.
Note that it may take a while to assign companies and users to the backup destination.
- Click Next.
- View the backup destination summary, then click Save.
The added storage account appears in the grid.
Refer to the Manage Storage Accounts chapter for more information on how to manage the added storage account.
Note that the Lifecycle Rules Settings are not yet configured for the Azure Storage account.
To manage Lifecycle Rules Settings for the Azure storage account, refer to the Azure Lifecycle Policies article.
There are some actions required to manage the Lifecycle Rules Settings. Some operations with the added backup storage cannot be performed unless these actions are completed.
Add Backup Destination for Existing Cloud Storage Account
- Open the Management Console.
- Open Backup > Storage Accounts.
- Find the storage account you want to add a new backup destination to, then expand actions at the end of the storage account entry.

- Select Add backup destination.
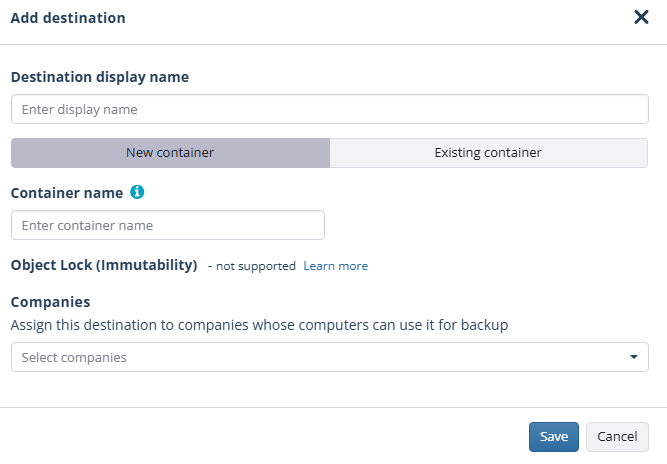
- Specify a display name for the backup destination.
- Select whether you want to add a new container or one of the existing ones. Provide the required information.
- Configure available properties for the backup destination.
On this step, you can configure Default Object Lock if it is already enabled for the container or change the protection period. The protection period value configured for this storage cannot be retrieved automatically. Enter the correct value manually here. This feature is not available if the Manage Object Lock (Immutability) permission is not granted to the administrative account.
To enable Default Object Lock, select the Set Default Object Lock checkbox, and then configure the protection period in days.
To disable Default Object Lock, clear the Set Default Object Lock checkbox. This only affects newly added backup data. 8. Select one or more companies to link the added backup destination to. 9. Click Save.
Manage Backup Destinations
Click the storage account name on Backup > Storage accounts to see added backup destinations and companies linked to them.
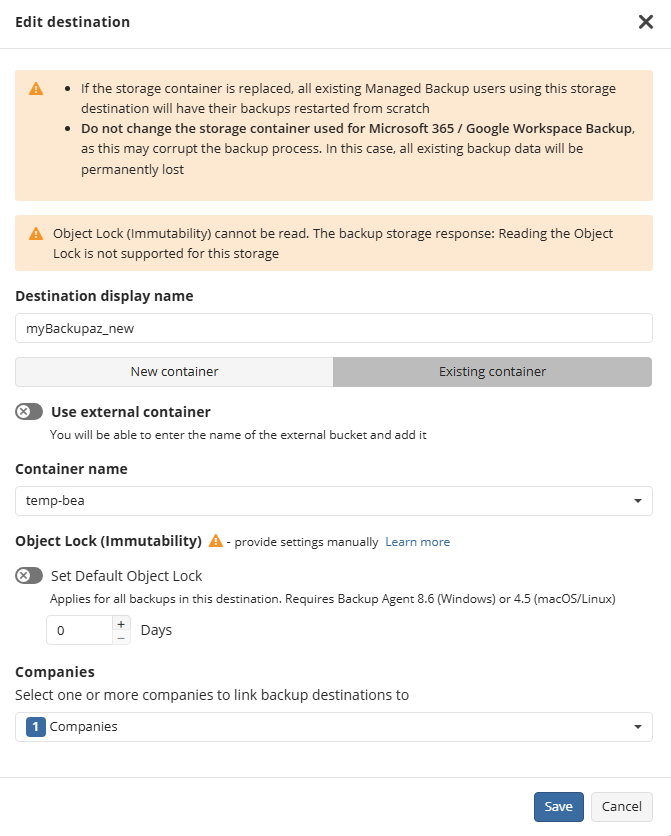
Using this view, you can manage backup destinations: edit or delete them, or go to the capacity report to manage backup data.
On this step, you can configure Default Object Lock if it is already enabled for the container or change the protection period. For this storage, the protection period cannot be read, so you should provide it manually. This feature is not available if the Manage Object Lock (Immutability) permission is not granted to the administrative account.
To enable Default Object Lock, select the Set Default Object Lock checkbox, and then configure the protection period in days.
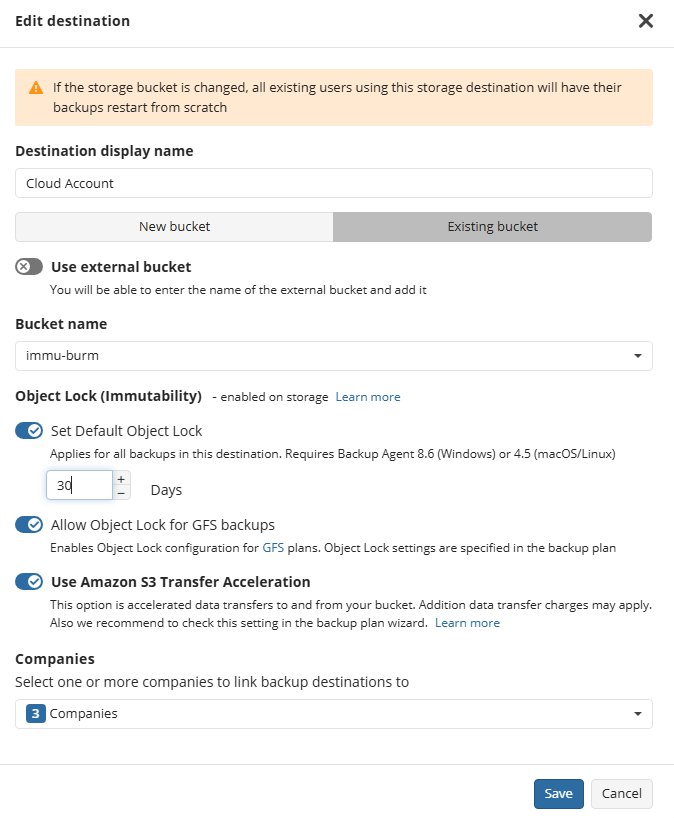
To disable Default Object Lock, clear the Set Default Object Lock checkbox. This only affects newly added backup data.