Add Wasabi Account Using IAM Role
This chapter covers the following topic: how to add a Wasabi account to Managed Backup using IAM roles.
To start backing up your data, you need to specify the cloud storage your data will be backed up to. One of the most popular storage providers is Wasabi. You can add an account in the Management Console using the following authentication modes:
- Using the IAM role (recommended). You can use the Managed Backup wizard or do this manually.
- Using Secret & Access keys (legacy)
Wasabi recommends using IAM roles for security purposes. IAM roles allow flexible custom settings for available features. Thus, for example, you can create a policy for a user that can back up only to Wasabi or restore image-based backups to EC2.
To add a Wasabi storage account using the IAM role, proceed as follows:
- Open the Management Console.
- Open the Backup > Storage Accounts page.
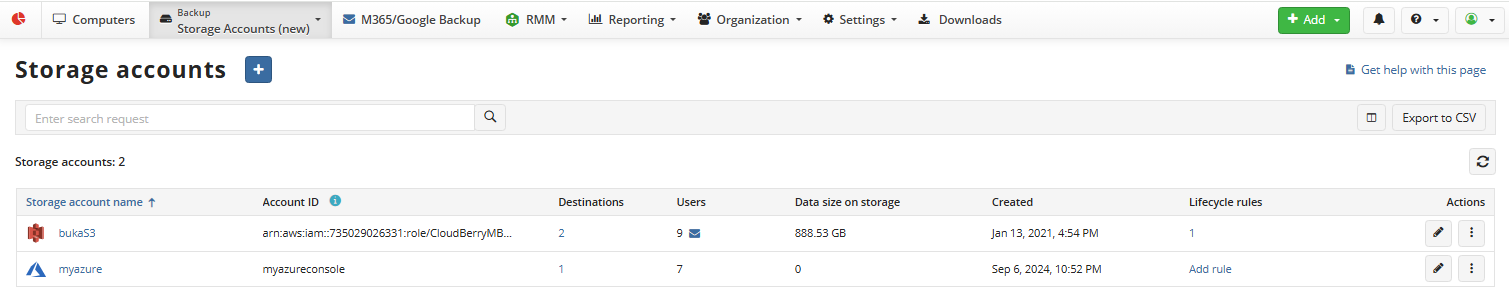
- Click + to launch the Create a new Backup Destination wizard.
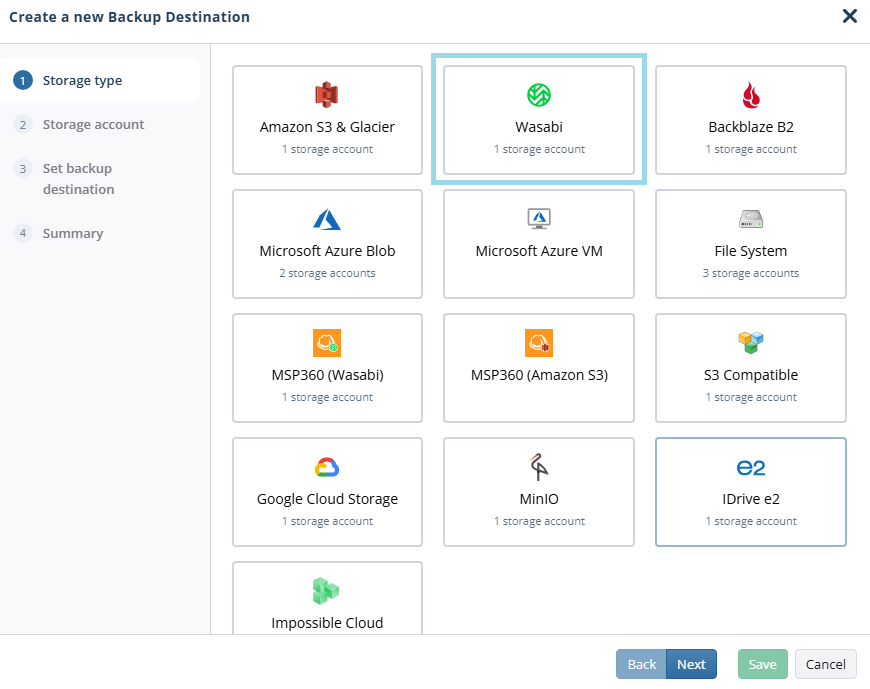
- On the Select storage step, select Wasabi. Click Next.
- On the Storage account step, select an existing storage account or create a new one. By default, existing storage accounts are displayed. To add a new storage account, click Create a new storage account.
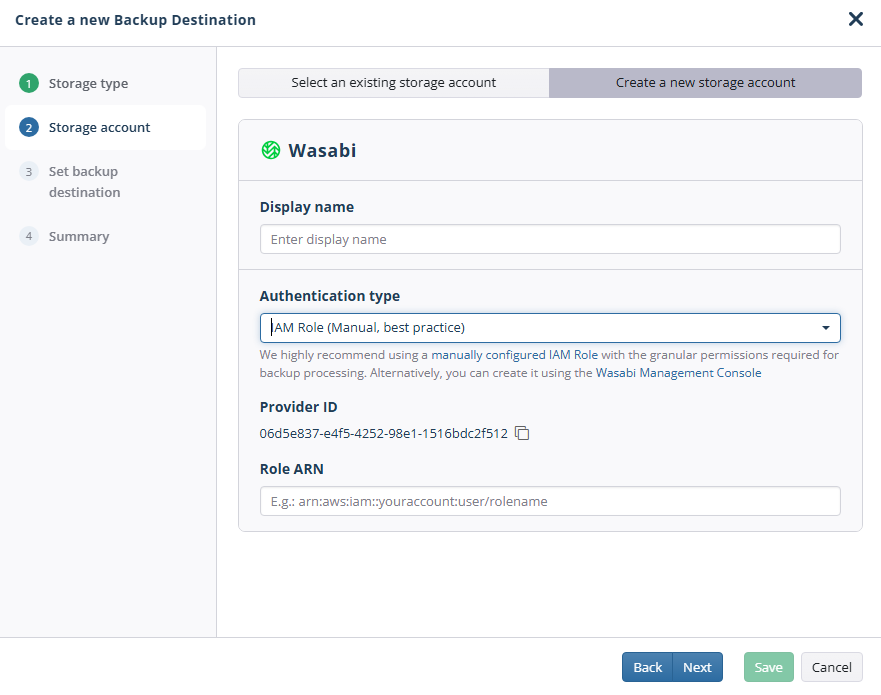
- In the Authentication type field, select IAM Role (Manual, best practice). Alternatively, you can select IAM role (MBS wizard) for step-by-step instructions.
- The Provider ID will be added automatically. You can click the Copy to clipboard icon to copy the Provider ID.
- Enter Role ARN. Refer to the Create IAM role chapter for details.
- Specify the bucket. In the Destination display name field, specify the bucket name that will be displayed as a backup destination, then select whether you will use an existing bucket or create a new one:
- Select the Create New option to create a new bucket. Name the bucket. Select the region to create the new bucket. The Object Lock (Immutability) feature is enabled by default. Disable it if this functionality is not needed.
- Select the Select Existing option to use an existing bucket, then select it in the drop-down list. You can also select an external bucket you have access to.
- For buckets with Object Lock turned on, you can enable the Object Lock (Immutability)(/backup/about/object-lock/feature-types) feature. Otherwise, this functionality might be permanently disabled.
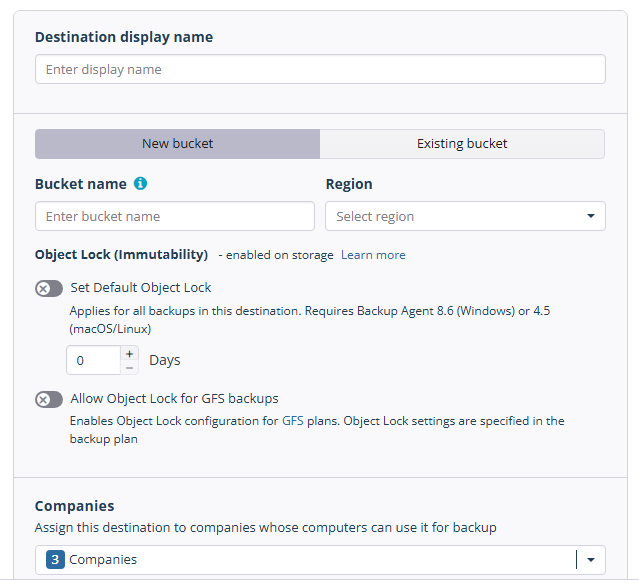
- Select the companies or users to assign to the storage account.
Note that it may take a while to assign companies and users to the storage account.
- Click Next.
- View the storage account summary, then click Save.
The added storage account appears in the grid.