Create IAM role
Introduction
As recommended by Wasabi, we are now shifting toward using the so-called IAM roles. An IAM role is similar to an IAM user in that it is a Wasabi identity with permission policies that determine what the identity can and cannot do in Wasabi. Also, a role does not have any credentials (password or access keys) associated with it. Instead, if a user is assigned to a role, access keys are created dynamically and provided to the user. Essentially, instead of using your keys, our service account will assume that role (generated automatically via the Management Console). Alternatively, you can generate a role via CloudBerry Explorer and then just import it to the Management Console.
In this article, we explain how to create an IAM role:
- Using the Management Console (IAM Role (MBS Wizard))
- Using the Wasabi console (IAM role (manual, best practice))
Generate an IAM Role using the Management Console
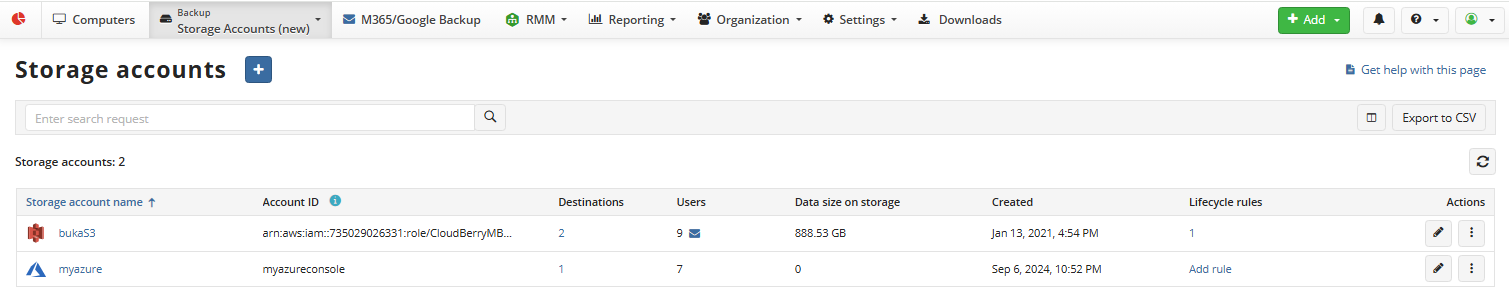
Let’s get started. Go to the Management Console. Under Backup, click Storage Accounts.
- On the Storage type step, select Wasabi. Click Next.
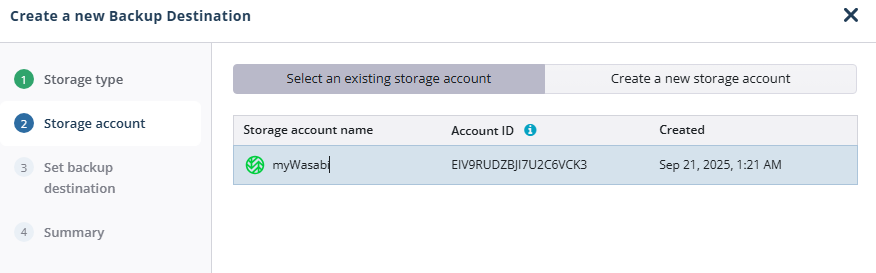
- Select Create a new storage account. Enter the preferred display name. For the Authentication type, let's select IAM Role (MBS Wizard).
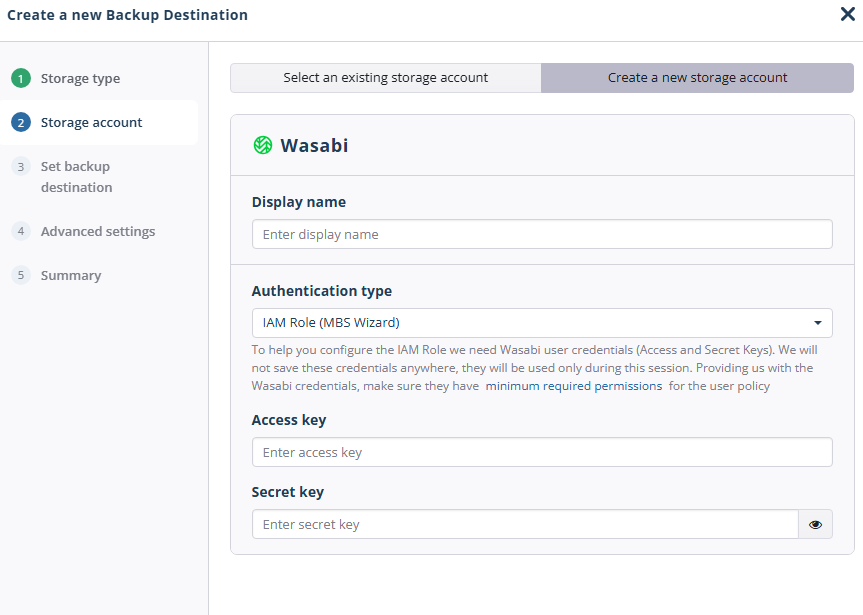
- Now enter the Access and Secret keys. Again, they will only be used for the policy creation session and will not be stored in any of our databases.
- Proceed to configure a backup destination — either a new or an existing one. Complete the wizard.
The IAM Role account will be created automatically, and you will be able to find it in the list of Storage Accounts.
Generate an IAM Role using the Wasabi Management Console
Alternatively, you can create an IAM role in the Wasabi Management Console and then use its ARN to configure the storage account in the Managed Backup Management Console.
- Go to the Wasabi console to add a role. Click Create Role.
- Enter the role name (no spaces) and click Create. The role name will be required later to configure the role ARN.
- Review or modify the trust policy, if necessary.
- Save the role.
- Attach one or more user permission policies to define what the role can access.
Get the Role ARN
The ARN has the following format:
arn:aws:iam::<youraccount>:role/<RoleName>
Where:
- arn – Amazon Resource Name (ARN) prefix.
- aws – ARN namespace (Wasabi uses the AWS-compatible ARN format).
- iam – IAM service.
- youraccount – Wasabi Account ID.
- role – Resource type.
- myRole – IAM role name.
For example:
arn:aws:iam::987654321098:role/MSP360BackupRole
If the Wasabi Management Console does not display the ARN directly, you can construct it using your Wasabi Account ID and the role name.
On the next step, you can select backup destinations that will contain the backup data.
Add the Role to Managed Backup
Return to the Managed Backup Management Console.
- Under Backup, click Storage Accounts.
- Click + and select Wasabi.
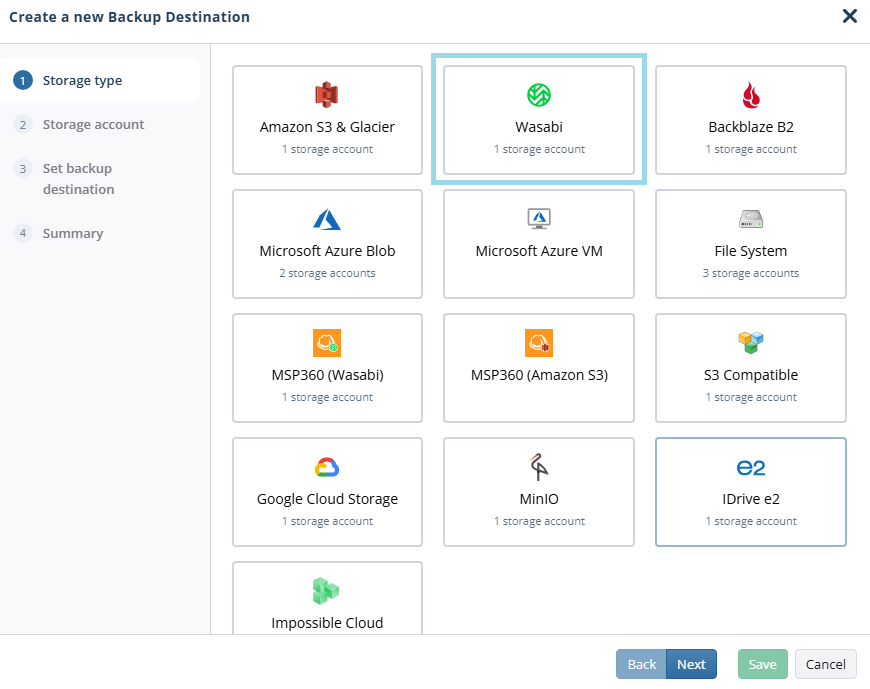
- On the Storage type step, select Wasabi. Click Next.
- In the Create a new Backup Destination wizard, select Create a new storage account, and then select IAM role (manual, best practice) as the Authentication type.
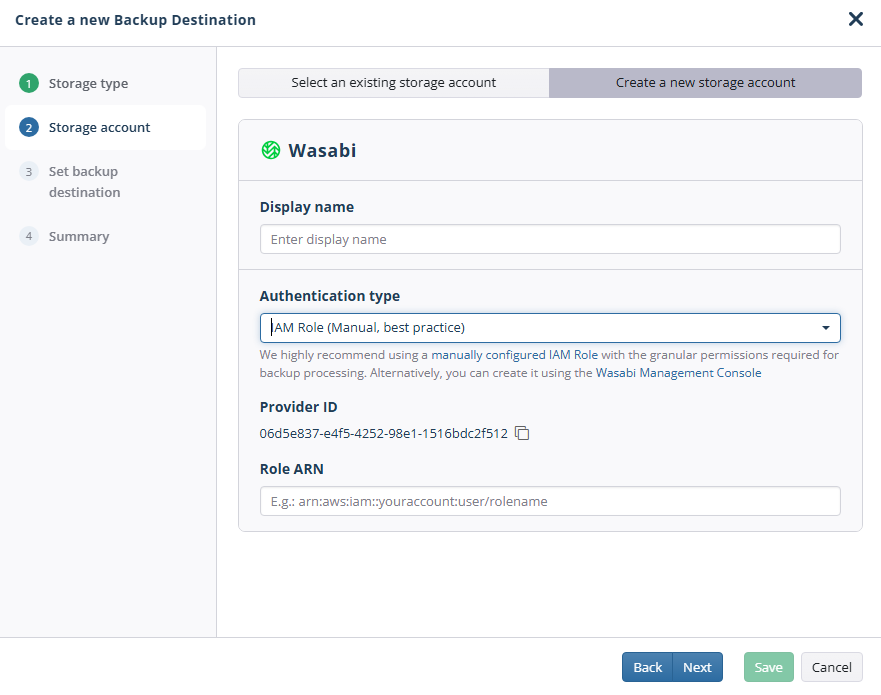
- Enter the Role ARN in the Role ARN box.
- Continue through the wizard.
- On the next step, select or create the backup destination.
- Finish the wizard to save the backup destination.