Computer-Level Settings
You can configure computer-level Connect Agent settings that will be applied to selected computers. If you set custom settings for the computer, centralized (global or company-level) settings will no longer be applicable for it. To configure computer-level Connect Agent settings:
- Update Connect to the latest version as described here.
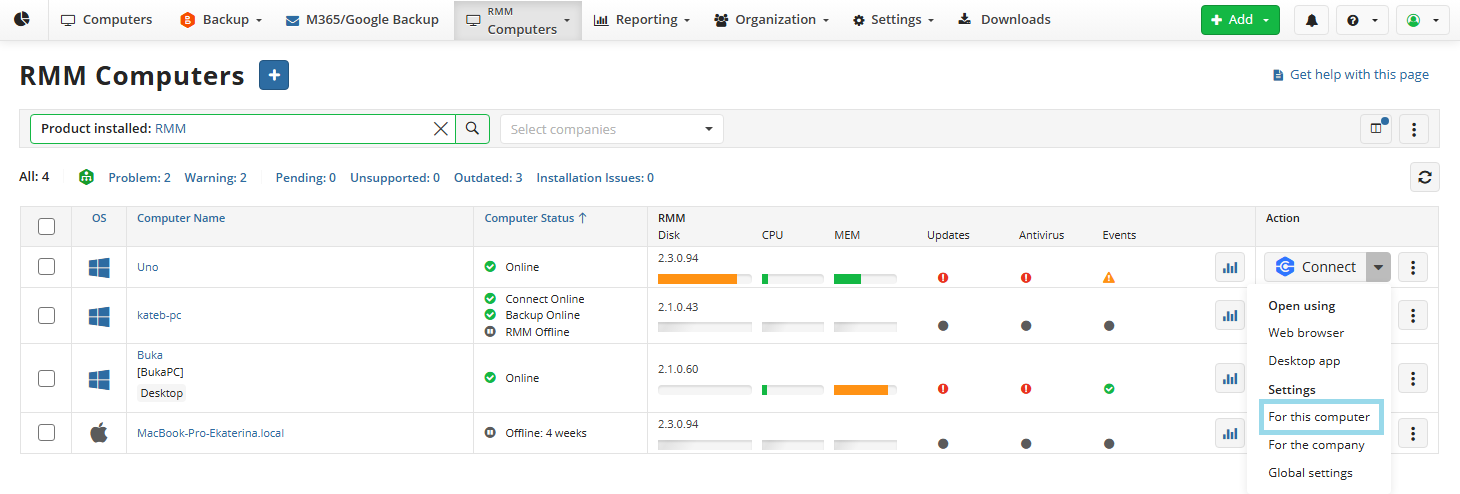
- On the RMM > Computers page, select the computer to apply the settings to and click the computer name to access the side panel. Alternatively, expand the Connect menu and click For this Computer in the Settings area.
- On the Connect Agent Options tab, select Use Custom Options.
The following options are available to configure for Connect instances downloaded on the computer after these options are configured:
- Allow remote access to computers. Select this check box to enable remote access and control to user computers using Connect.
Access
- Enable Direct (authorized) access. This option allows you to pre-authorize joining all active sessions without any additional confirmation by the remote computer user.
- Require password before connecting with logon credentials. It is recommended to use long custom passwords for security reasons and keep them in a safe place. If you want to secure quick connections to remote users instead of using a different PIN every time, you can set up a custom password. To use a custom password, select Require password before connecting with logon credentials.
- Approval methods to join active sessions. If Enable Direct (authorized) access is not enabled, you can select the remote user confirmation method to join the active session. You can configure the PIN length to increase safety or reset the PIN if you suspect it may be compromised. If you want to secure remote connections to remote users instead of using a PIN every time, you can set up a custom password.
Session Options
These options are intended to configure Unattended Access.
- Show black screen on the remote computer (Windows only). The black screen on the remote computer ensures that nobody on the other side can see your work.
- Disable remote input (Windows only). This will ensure that nobody on the other side can interfere with your work. You can configure the disconnection method from the opened Windows session. The following options are available:
- Let the program auto-detect the action (default)
- Lock the session
- Leave the session open
- Sign out (Windows)
End User Options
- Allow access to UI (Windows only). Allows access to the Connect graphic user interface for users of remote computers. In this case, you can protect application settings with a password to prevent the remote user from changing them.
- Allow outgoing connections. By default, outgoing connections are disabled for remote computers, but you can enable outgoing connections for remote users.
- Protect application settings with password (Windows only). If a password is set, you will need to enter it to edit settings.
Updates and Logging
- Update Connect Agent automatically. This option allows automatic updates of Connect Agent as soon as a new version becomes available. Select this option to update Connect Agent on all online computers automatically.
- Logging Level. By default, the logging level is low. You can select the logging level you want.
Proxy Settings
In the Proxy Settings area, select the proxy usage settings. By default, the Do not use proxy option is set. If you select the Manual proxy configuration option, specify the proxy server address and port number. For example, if the proxy server's address is http://proxy.example.microsoft.com (https is not currently supported) and the port number is 80, the setting in the Proxy Host box should appear like this: proxy.example.microsoft.com If necessary, select Basic Authentication and provide credentials for connection.
- Save the settings.