License Usage Report
The License Usage Report provides detailed information about license usage. To view license usage history and create reports, the Organization > License usage history permission should be granted as the administrator permission on Organization > Administrators.
The report layout may vary slightly depending on your payment mode.

Report Table Details
The report includes the following dataabout the licenses:
- Number of licenses by type:
- Ultimate
- Desktop
- MS SQL Server
- MS Exchange
- MSSQL + MSExchange
- VM Server
- VM Servet Socket
- Microsoft 365 / Google Workspace
- Company name
- User account data
- Trial or paid license type
- User First and Last name (if provided)
Add and Configure New Scheduled Report
To create a scheduled License Usage Report:
- Open the Management Console.
- In the Reporting menu, select Scheduled Reports.

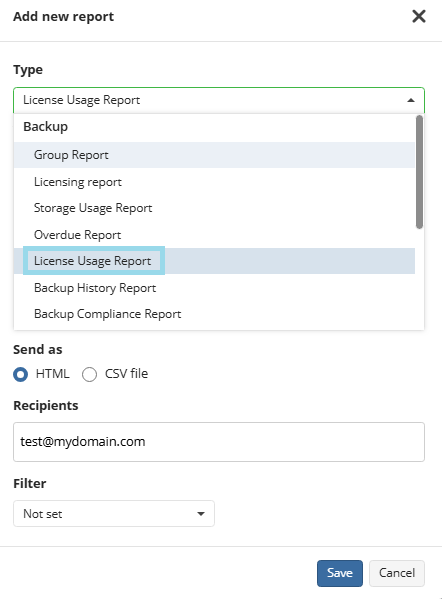
- Click +.
- In the drop-down list in the Backup group, select the License Usage Report.
Name the report.
Set the Schedule Options:
- No schedule. Select this option if you want to generate and receive a report manually
- Daily. Select this option if you want to receive reports on a daily basis
- Weekly. Receive reports weekly.
- In Day of week drop-down list, select the required day of report delivery
- In Sending Time drop-down list, select the required time of report delivery
- Monthly. Receive reports monthly.
- In Day of month drop-down list, select the required day of report delivery
- In Sending Time drop-down list, select the required time of report delivery
Specify the report format. The following formats are available:
- HTML
- CSV
Specify recipients for the report.
Apply filtering options.
- Not Set: Receive the full report (default).
- By Company: Receive reports for a specific company.
- Select the company from the Company drop-down list.
- By User: Receive reports for a specific user.
- Select the user from the User drop-down list.
Once you are finished, click Save.
Manage Scheduled Reports
The list of scheduled reports is displayed in a grid view with the following columns:
- The report type
- Schedule options
- Filtering options
- The next report delivery time
- List of recipients
- Report state
To open an HTML report or download a CSV file, use the actions menu next to the report.

Select Send Now to send the report immediately.
Edit Scheduled Report
To edit an existing report:
- In the Reporting menu, select Scheduled Reports.
- Click the edit icon next to the report you wish to change.

- Make the necessary changes (refer to the Add and Configure New Scheduled Report section for settings details).
- Click Save.
Delete Scheduled Report
To delete a scheduled report:
- In the Reporting menu, select Scheduled Reports.
- Click the delete icon next to the report you wish to remove.

- Confirm the report deletion in the dialog box.