Licensing Report
This report contains information on existing trial and paid licenses, their activation and expiration dates for each user or company.
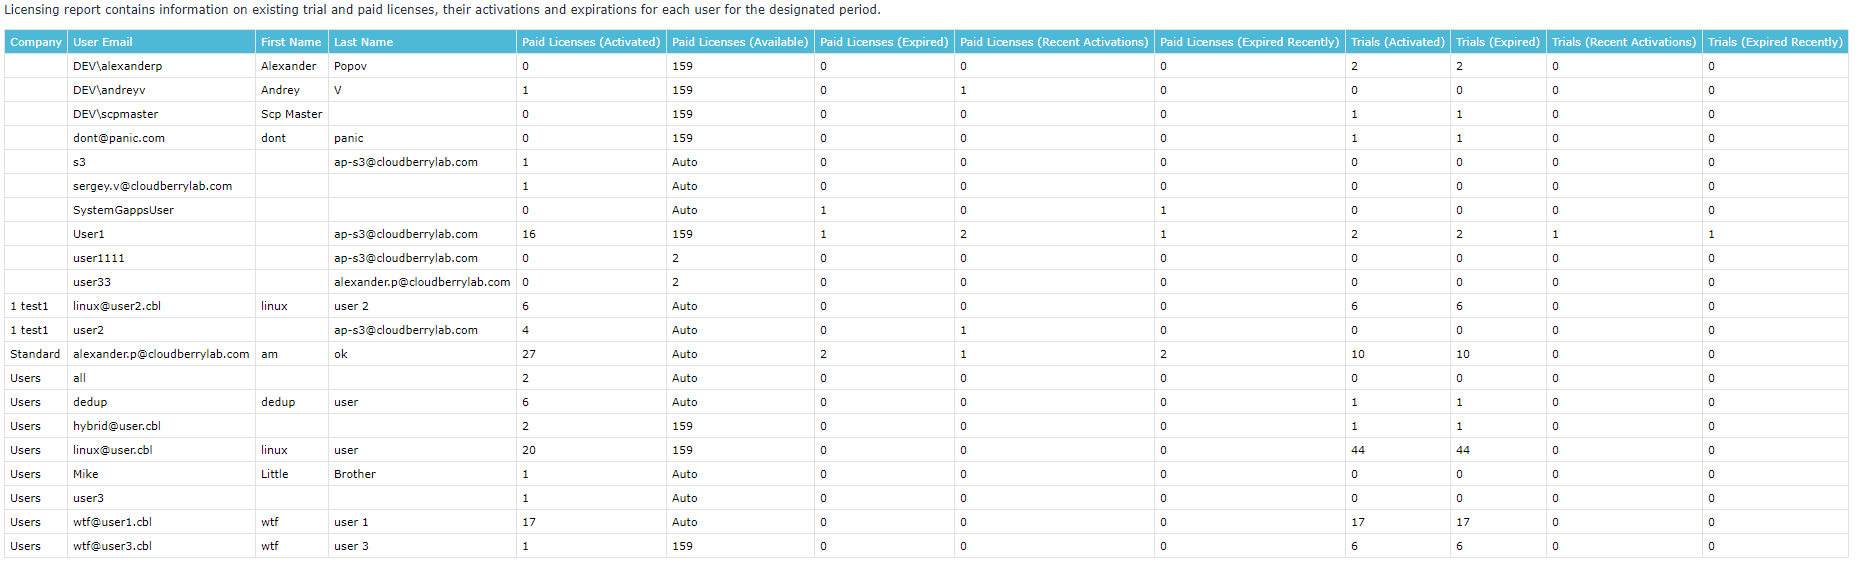
The report table contains the following data:
- Company name
- User details: email address, first and last name
- Number of paid licenses: activated, available, expired
- Number of recent activations and recently expired paid licenses
- Number of trial licenses: activated, expired
- Number of recent activations and recently expired trial licenses.
This chapter covers the following topics:
View Reports
To view the list of available reports, select the Scheduled Reports item in the Reporting menu.
The list of available reports has a grid view.

The report table columns contain the following data:
- The report type
- Schedule options
- Filtering options
- The next report delivery time
- List of recipients
- Report state
To open the HTML report or download the CSV file, expand the actions next to the report.

Select Send Now to send the report immediately.
Add and Configure New Report
To configure a new report, proceed as follows:
- Open the Management Console.
- In the Reporting menu, select Scheduled Reports.
- Click +.
- In the drop-down list in the Backup group, select the Licensing Report.
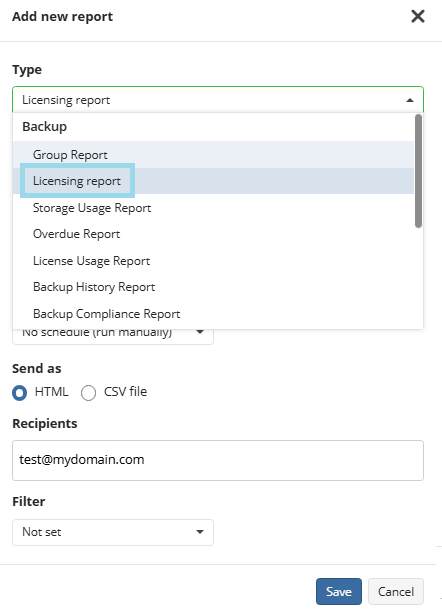
- Name the report.
- Specify the schedule options for the report. The following options are available in the Schedule type option group:
- No schedule. Select this option if you want to generate and receive a report manually
- Daily. Select this option if you want to receive reports on a daily basis
- Weekly. Select this option if you want to receive reports on a weekly basis
- In the Day of week drop-down list, select the required day of report delivery
- In the Sending Time drop-down list, select the required time of report delivery
- Monthly. Select this option if you want to receive a report on a monthly basis
- In the Day of month drop-down list, select the required day of report delivery
- In the Sending Time drop-down list, select the required time of report delivery
Specify the report format. The following formats are available:
- HTML
- CSV
Specify recipients for the report.
Specify filtering options.
- Select the Not set option (set by default) to receive the full report
- Select the By company option to receive reports on a specific company
- In the Company drop-down list, select the company you want to receive the report on.
- Select the By user option to receive reports on a specific user
- In the User drop-down list, select the user you want to receive the report on
Once you are finished, click Save.
Edit a Report
To Edit a Report
- In the Reporting menu, select Scheduled Reports.
- Click the edit icon in the line of the report you want to edit.

- Make the required changes (refer to the Add a New Report paragraph to learn about the available settings).
- Once you are finished, click Save.
Delete a Report
To Delete a Report
- In the Reporting menu, select Scheduled Reports.
- Click the delete icon in the line of the report you want to delete.

- Confirm the report deletion in the dialog box.