Get Started with Microsoft 365 / Google Workspace Backup
With Management Console, Managed Service Providers (MSPs)/Resellers can turn on backup and restore for services, such as Mail, Contacts, Calendars, Drives, SharePoint, and MS Teams under Microsoft 365 and Google Workspace accounts. This chapter will help you prepare to back up your data: manage subscriptions, set up backup destinations, and configure provider and administrator accounts.
- Configure your account
- Getting Started Wizard
- Prepare to Microsoft 365 Backup
- Prepare to Google Workspace Backup
- Add a Storage Account (optional)
- Manage Licenses
- Add Domain/Single User to Back Up
- Rebrand Management Console and Dashboard
- Sign in to Microsoft 365
- Sign in to Google
Start Free Trial and Configure Your Provider Account
- Navigate to Microsoft 365 / Google Workspace Backup site and click Start Free Trial.
- Provide your provider account credentials or skip the form completion by signing in in case you already have an account.
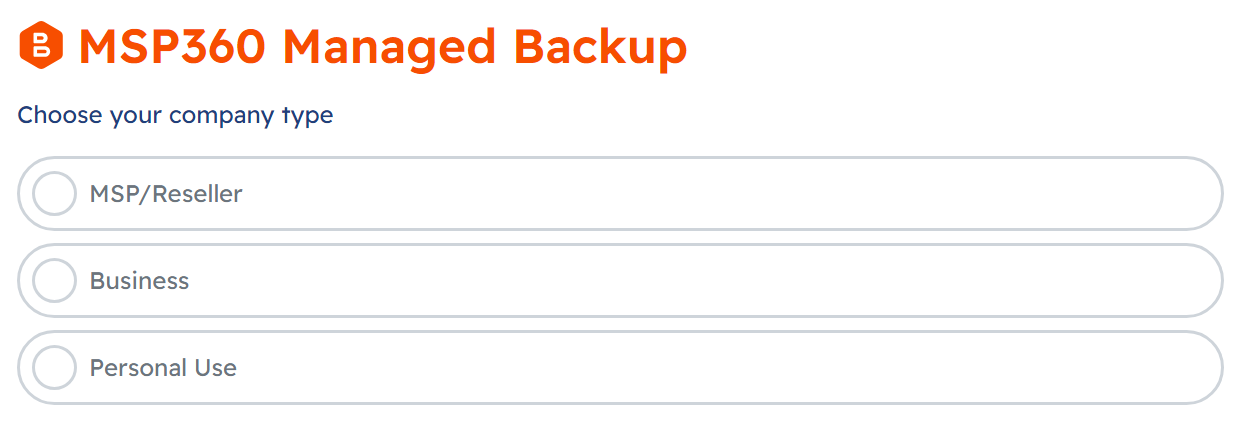
- Select your company type. Depending on your selection, proceed to provide required personal data.
- After you have created an account, you will be signed in to the Management Console. For MSP/Resellers, it is recommended to configure your payment method.
Configure your payment method.
Each new domain user account includes a 14-day trial period. After the trial expires, a monthly Microsoft 365/Google Workspace Backup subscription is required to continue using the service..
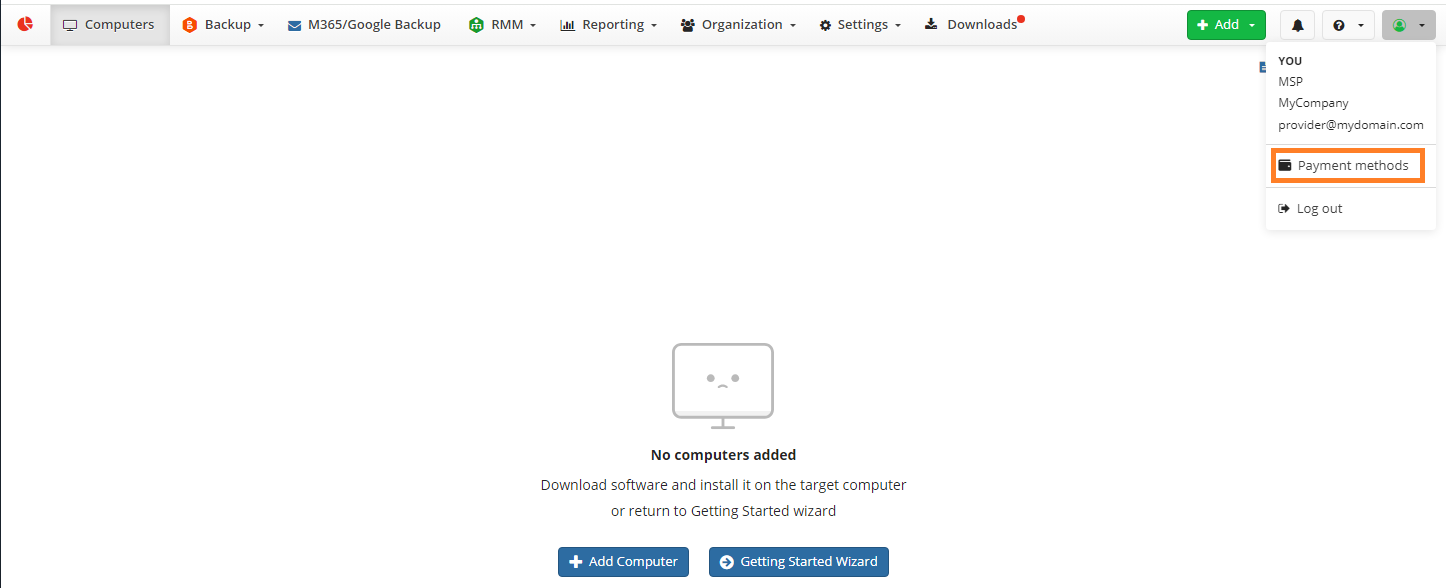
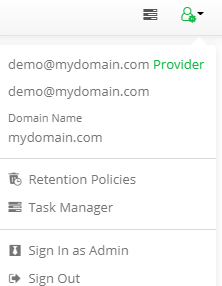
- Expand the Account menu in the top-right corner of the Management Console.
- Select Payment methods.
You will be redirected to the payment page, where you can choose one of the supported payment methods:
- Credit or debit card
- PayPal
- Google Pay
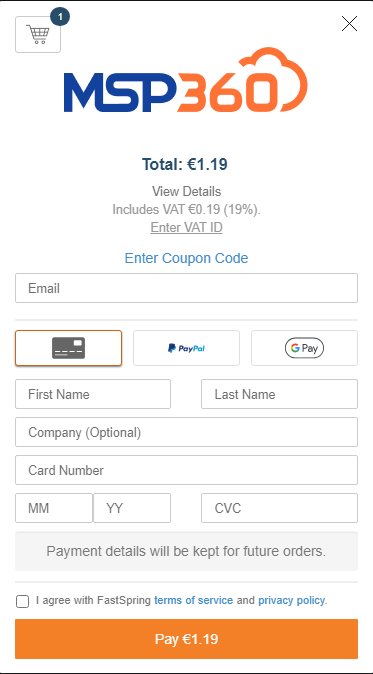
Fill in the required payment details and complete the transaction by clicking Pay or Place Your Order (for Google Pay).
A temporary $1.19 hold is placed to verify your card. It’s not a charge and will be released automatically.
To ensure your subscription purchases are successful, make sure your account balance has sufficient funds.
Getting Started Wizard
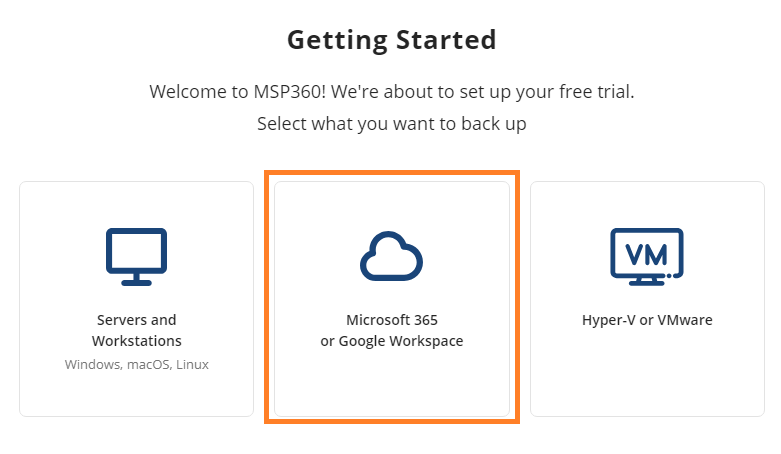
It is recommended to use the new Getting Started wizard to create your first Microsoft 365 / Google Workspace Backup. This wizard is available once for all new providers. Once you are signed in to the Management Console, Getting Started Wizard appears on the welcome screen.
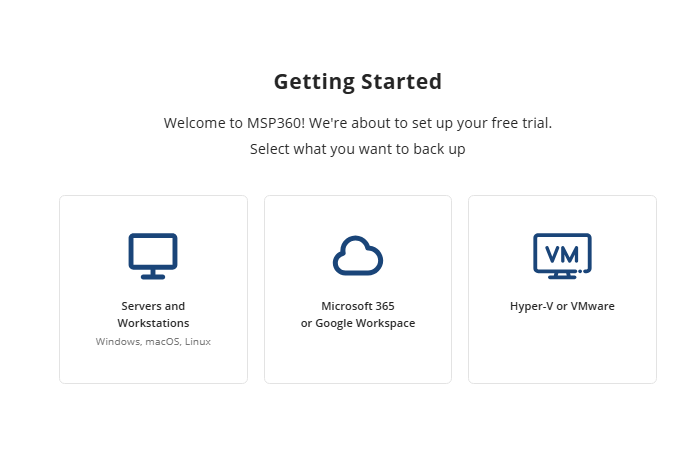
There is no need to add a computer for Microsoft 365 / Google Workspace Backup
- Select Microsoft 365 or Google Workspace
- To start you will be provided with a MSP360 storage powered by Wasabi.

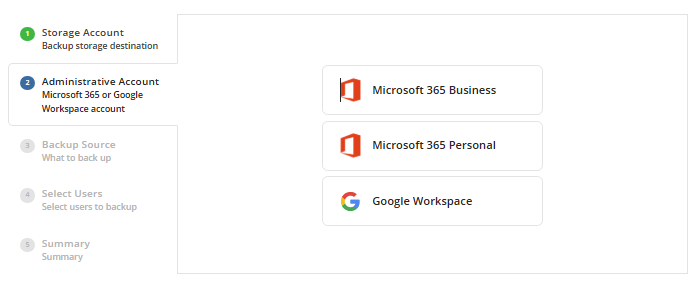
- Add the Administrative account (Administrator) to manage your backup, view backup content and perform restore operation. It is recommended to use Super administrators of the Google Workspace domain or Global Administrators of Microsoft 365 domains for this purpose. As a provider you will not have access to the user backup data.
- Sign in with Your administrative account.
If your tenant has multiple domains, you only need to add the primary domain or the domain used by administrators to log in. By adding this domain, you are effectively adding the entire tenant, including all other domains associated with it.
- Proceed with the wizard to create your first backup.
After you have finished the wizard, created administrative accounts should sign in to Management Console for initial setup.
Initial Setup for Microsoft 365 Backup
To begin setting up your Microsoft 365 backup, follow these steps:
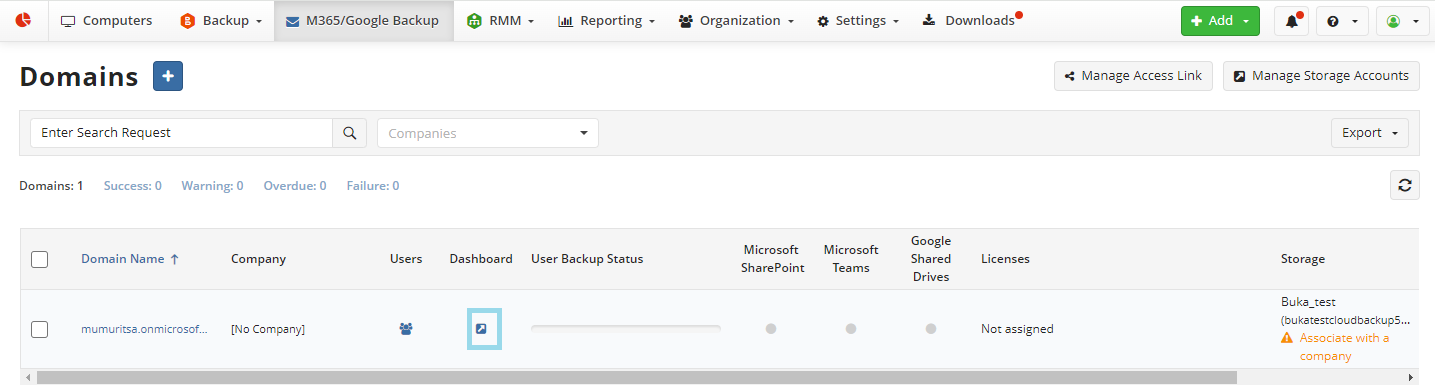
- In the Management Console, select M365/Google Backup to access Domains.
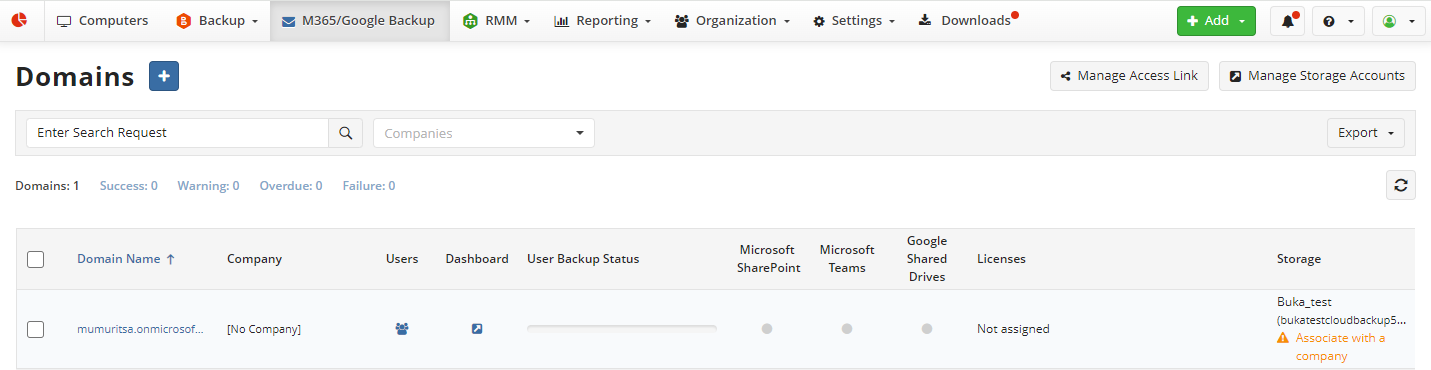
- Create/edit access link for your administrators and users. Click Manage Access Link. Specify an alias that will be used for your Microsoft 365 / Google Workspace Dashboard URL.
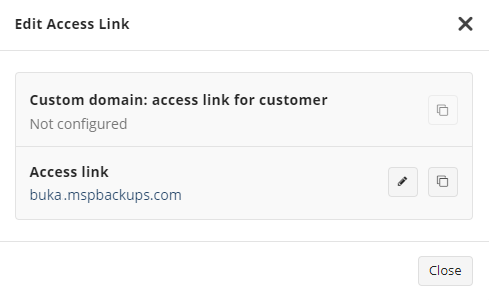
Purchase an Advanced Rebranding & Custom SSL license to fully customize the link for customer access, allowing you to use your custom domain name. If you have already purchased this license, navigate to Settings > Branding to add your branding and activate the license. Information on DNS binding is available under Settings > Branding. With the Advanced Rebranding & Custom SSL license enabled, in Settings > Web Console Rebranding you can rebrand the Management Console and Service Dashboard for your administrators and users. 3. Click Close when you’re done.
Initial Setup for Google Workspace Backup
To start working with Google Workspace Backup, follow these steps:
- In the Management Console, select M365/Google Backup to access Domains.
- Create/edit access link for your administrators and users. Click Manage Access Link. Specify an alias that will be used for your Microsoft 365 / Google Workspace Dashboard URL.
Purchase an Advanced Rebranding & Custom SSL license to fully customize the link for customer access, allowing you to use your custom domain name. If you have already purchased this license, navigate to Settings > Branding to add your branding and activate the license. Information on DNS binding is available under Settings > Branding. With the Advanced Rebranding & Custom SSL license enabled, in Settings > Web Console Rebranding you can rebrand the Management Console and Service Dashboard for your administrators and users.
Click Close when you’re done.
Install MSPBackups Application from GoogleApps
Configure Trusts for Google Backup
Sign in to https://admin.google.com/ with your super administrator.
Click Main Menu > Security > Access and data control > API Controls. Requires having the Security settings administrator privilege. You can also use the direct link.
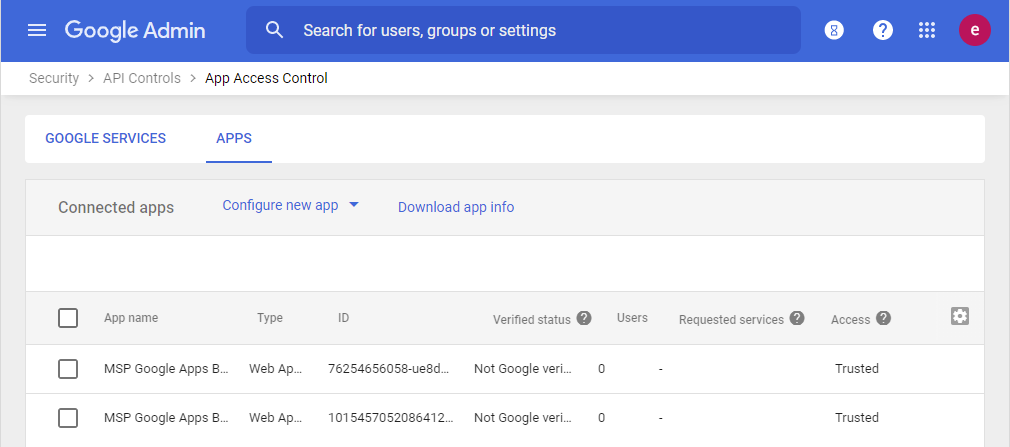
In App access control, click Manage Third-Party App Access.
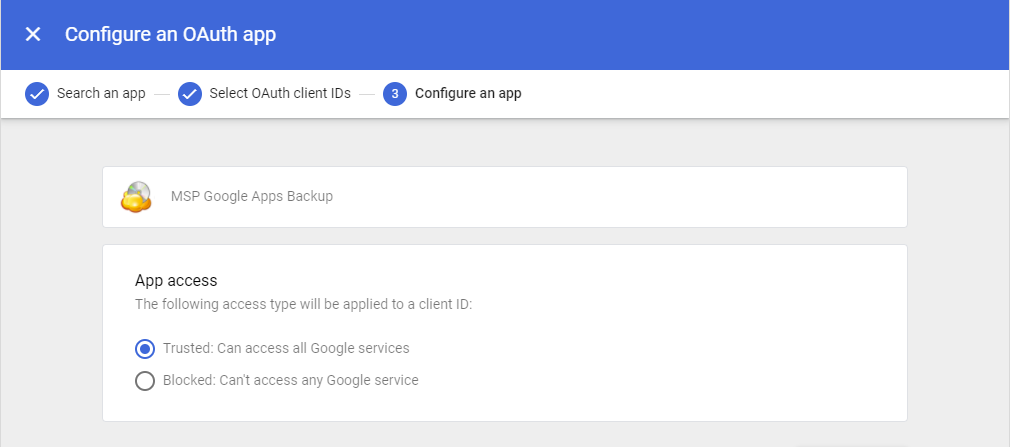
Click Configure new app.

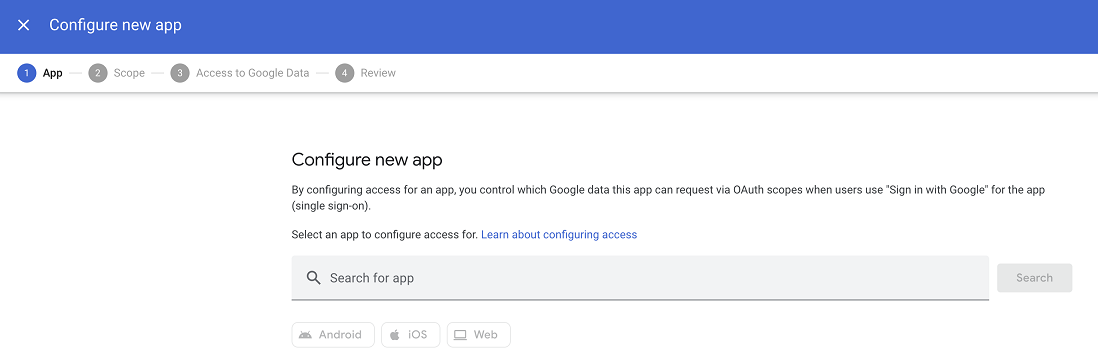
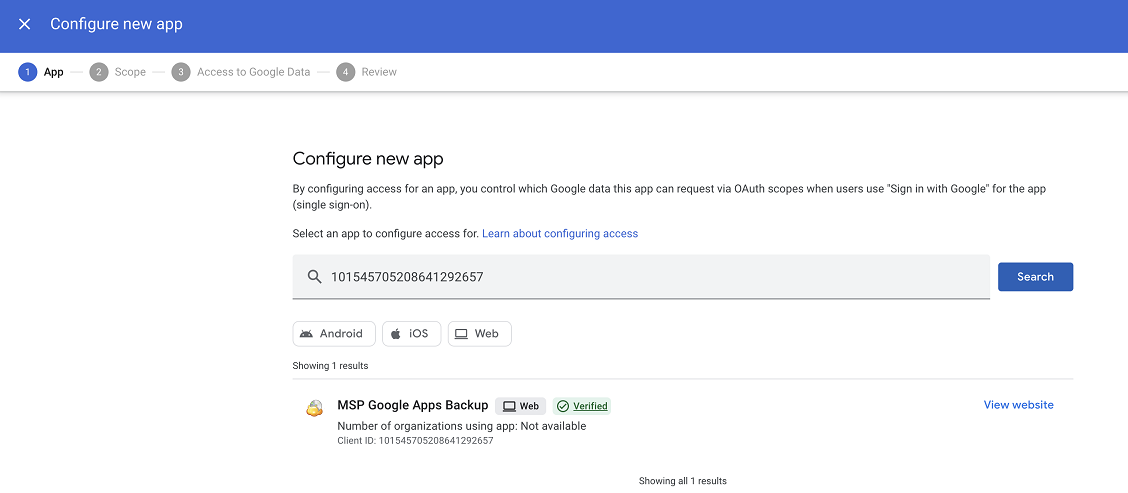
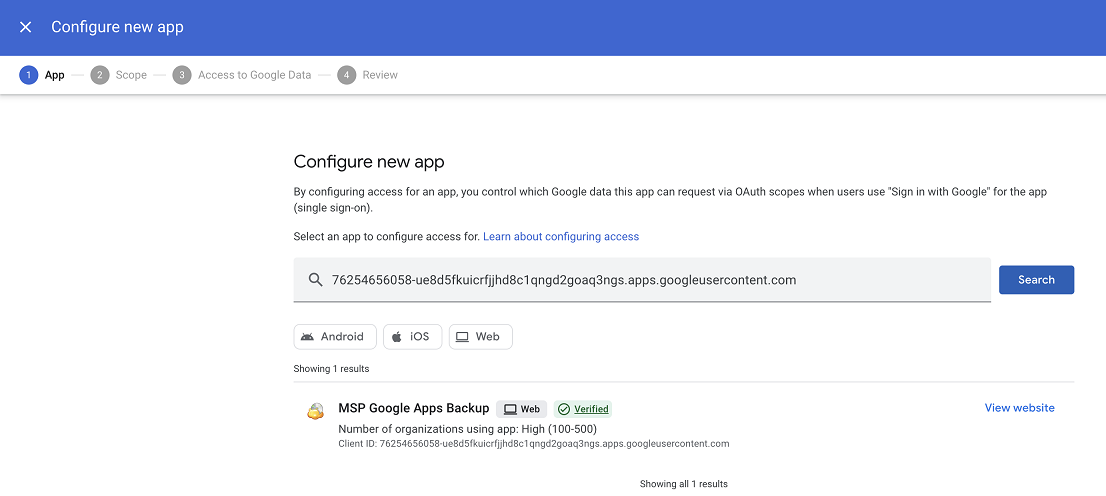
- Add two MSP Google Apps Backup web applications with the following OAuth Client IDs to the trusted applications:
- 101545705208641292657
- 76254656058-ue8d5fkuicrfjjhd8c1qngd2goaq3ngs.apps.googleusercontent.com
- Select who to configure access for.
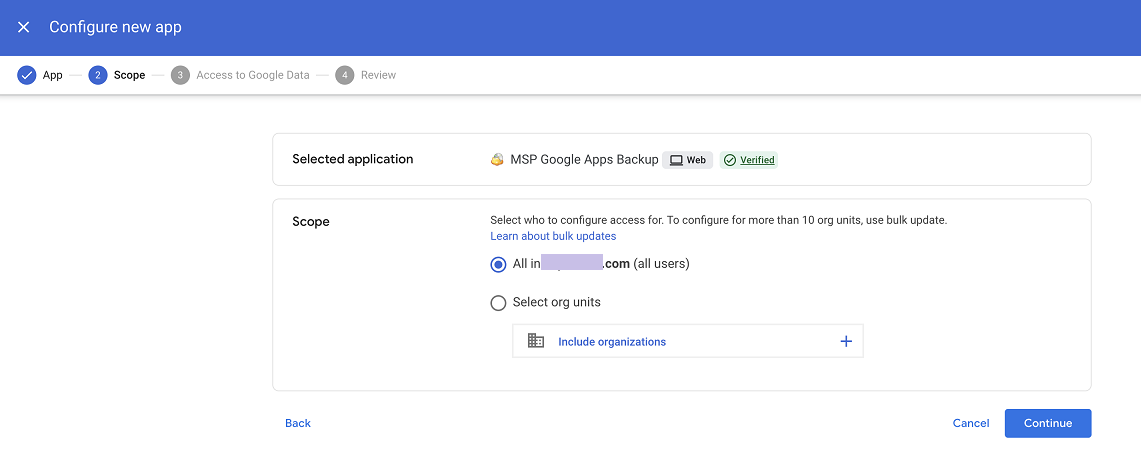
- Click Configure.
Install MSPBackups Application from GoogleApps
When you first log in to the Service Dashboard, you will be redirected to the GoogleApps Marketplace to install the MSPBackups Application to your domain. This application is required to manage permissions and operations for your Google Workspace backup. Once installed it appears between the installed applications.
you can also instaoll MSPBackups app by clicking the link
The MSPBackups application is not designed for login purposes as it isn’t tied to any specific account. Instead, it is only associated with the managed domain. For login access, please use the customized or default customer access links
Add Storage Account (Optional)
If you don’t have a storage account, add a new storage account. Consider, you cannot change selected backup destination later. To change backup destination, the entire domain along with backup data should be deleted from Management Console, and then added again. To add a backup destination, the Management Console select M365/Google Backup.
- Create/edit access link for your administrators and users. Click Manage Storage Accounts to access Backup > Storage Accounts. Refer to the Manage Storage Account chapter for instructions on adding and managing storage accounts. The selected backup storage destination should be assigned to the company associated with the added domain.
Long-Term Storage Usage
Long-term (cold) storage classes are not supported. If you choose to use these classes, you are responsible for all transitions and selecting the appropriate long-term storage classes. We are not responsible for user manipulations with the storage or the costs associated with these operations.
- Retrieval Time: Retrieving backup content from cold storage can take up to 48 hours (e.g., AWS Glacier Deep Archive).
- Retrieval Costs: Data retrieval operations can be costly, depending on the type and amount of data.
Manage Subscriptions
The product includes a 15-day free trial. After the trial period, a subscription is required for each domain user to continue backup operations. Ensure you have sufficient subscriptions for your Microsoft 365 / Google Workspace users by checking the Organization > Licenses page of Management Console. If you plan to back up collaboration tools like Microsoft Teams, SharePoint, or Shared Drives, ensure you have the necessary SharePoint/Teams/Shared Drives license.
Refer to Licensing for details.
Configure your payment method.
For MSP/Resellers, it is recommended to configure your payment method.
- Expand the Account menu in the top-right corner of the Management Console
- Select Payment methods
You will be redirected to the payment page, where you can choose one of the supported payment methods:
- Credit or debit card
- PayPal
- Google Pay
Fill in the required payment details and complete the transaction by clicking Pay or Place Your Order (for Google Pay).
A temporary $1.19 hold is placed to verify your card. It’s not a charge and will be released automatically.
To ensure your license purchases are successful, make sure your account balance has sufficient funds.
Add Domain/Single User to Back Up
To enable Microsoft 365 / Google Workspace Backup), perform the following steps:
In the Management Console, select M365/Google Backup to access Domains. Click + to add a new domain.
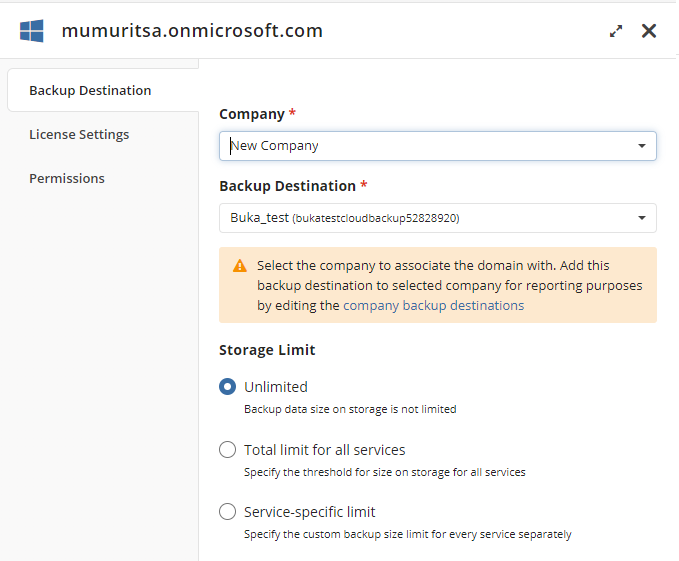
- On the Backup Destination tab of the side panel, specify the domain name, and associated company
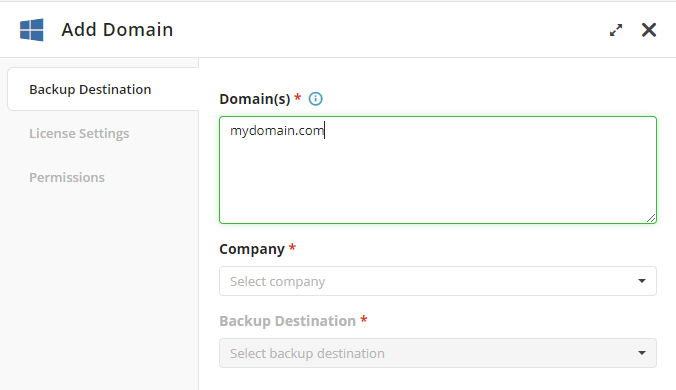
The backup destinations (Storage Account + Bucket) assigned for this company can then be selected as the backup destination for this domain.
Domain and User Syntax:
- Google and Microsoft 365 domains: Use domain names like mydomain.com, alternatedomain.com.
- Microsoft Home users: Use full email addresses with the suffix (MSFT). Separate users/domains with commas. Google Home users are not currently supported.
Consider the following:
- Administrators who can manage any companies can associate the domain with any company
- Company-specific administrators can only associate the domain with the company they manage and select a backup destination added for that company
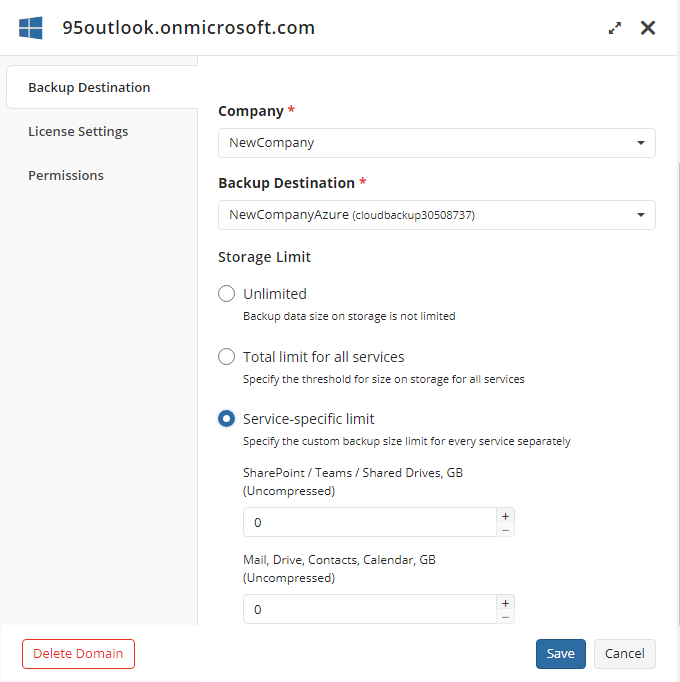
- Specify the storage limits:
- Unlimited. No limit on backup data size at the backup destination.
- Total limit for all services. Set a total limit for all services associated with this domain. Set to 0 if no limit is planned.
- Service-specific limit. Set limits for SharePoint/Shared Drives and other services. Set to 0 if no limit is planned for any service.
- Click Add.
Configure License Settings and Permissions for the Domain.
- Navigate to M365/Google Backup.
- Click on the domain name to edit the domain.
- On License Settings tab of the side panel select licensing mode:
- Auto. Licenses from the global pool are allocated automatically, except for SharePoint/Teams/Shared Drives licenses. You will be notified in case of there are no enough paid licenses.
- Manual: Specify the number of licenses manually.
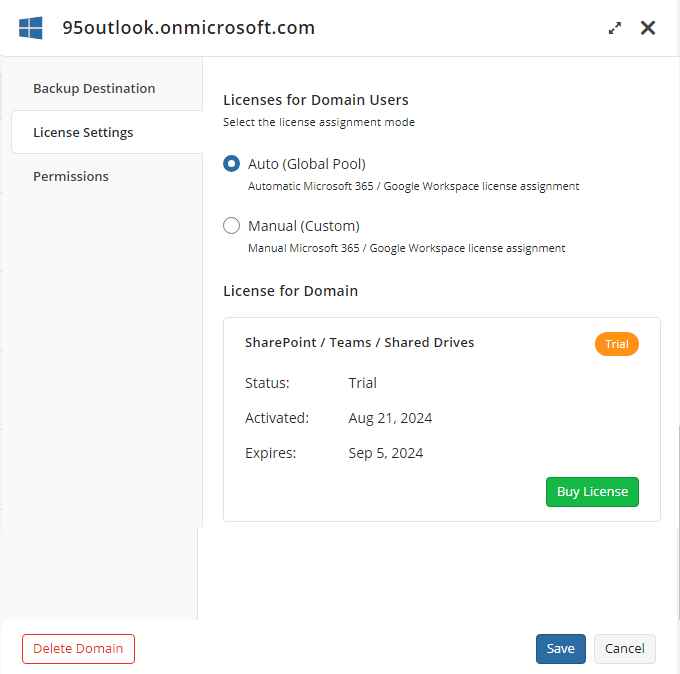
Purchase a SharePoint/Teams/Shared Drives license if you want to back up SharePoint, Teams, and/or Shared Drives.
On the Permissions tab of the side panel specify whether the Global Admin access will be allowed.
Click Save.
If necessary, you can edit the domain to change the default settings.
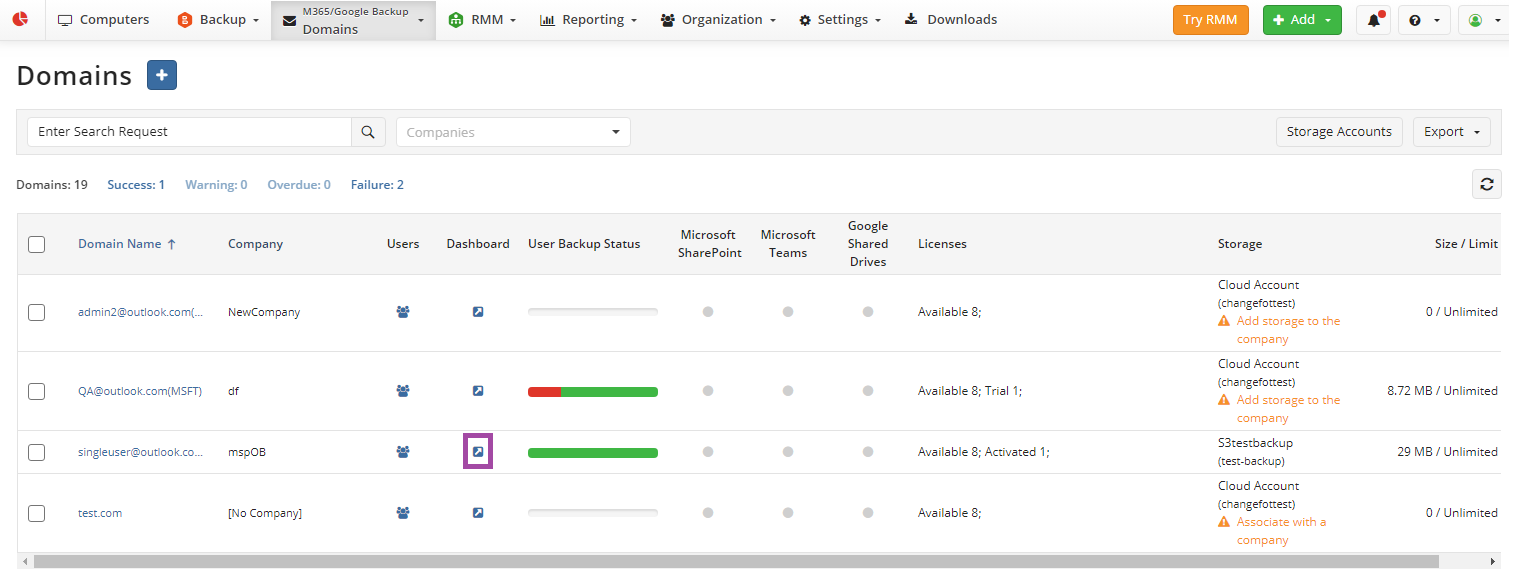
Now you are ready to configure your backup for the domain. Click the dashboard icon in the Dashboard column in the added domain entry. You will be redirected to Microsoft 365 / Google Workspace Dashboard.
Refer to Manage Domains article for instructions on how to manage the added domain.
Rebrand Management Console and Dashboard
Refer to the following article, if you want to rebrand Microsoft 365 / Google Workspace Dashboard using your corporate identity elements.
Sign in to Microsoft 365
The first login should be performed with domain administrator privileges to grant the required permissions. After that, the provider account can be used for login. Note that the provider has full access to backup management but not to the backup data. To access the backup data, sign out and then sign in using an account with the necessary administrative permissions in the domain.
- In the M365/Google Backup menu.
- Click dashboard button in the Dashboard column in the required domain entry
- Confirm the transition to Dashboard.
- Select the required Microsoft 365 edition (business or personal).
- Enter your Microsoft 365 credentials.
- Grant the required permissions for apps.mspbackups.com requested by Microsoft, select the Consent on Behalf of your Organization checkbox, then click Accept.
- The dashboard will be accessed. Use the Configure Backup button to turn on the services you wish to back up.
- Click Save. By default, backups are scheduled to run at least twice a day.

You can check the domain name in the Account menu. The domain name is displayed in case of the provider access.
Refer to Microsoft 365 backup section for instructions on managing your Microsoft 365 backup.
Sign in to Google
The first login should be performed with domain administrator privileges (Super Administrator) to grant the required permissions. After that, the provider account can be used for login. Note that the provider has full access to backup management but not to the backup data. To access the backup data, sign out and then sign in using an account with the necessary administrative permissions in the domain.
Configure Trusts
To configure trusts for for apps.mspbackups.com requested by Google:
Sign in to https://admin.google.com/ with your super administrator.
Click Main Menu > Security > Access and data control > API Controls > Manage Third-Party App Access
Add two MSP Google Apps Backup web applications with the following OAuth Client IDs to the trusted applications::
- 101545705208641292657
- 76254656058-ue8d5fkuicrfjjhd8c1qngd2goaq3ngs.apps.googleusercontent.com
Select the following access type for both applications:: Trusted: Can access all Google Services
After adding both applications, they will appear in the Connected apps grid with Trusted status
Install MSPBackups Application from GoogleApps Marketplace
When you first log in to the Service Dashboard, you will be redirected to GoogleApps Marketplace to install the MSPBackups Application to your domain.
- Find MSPBackups application.
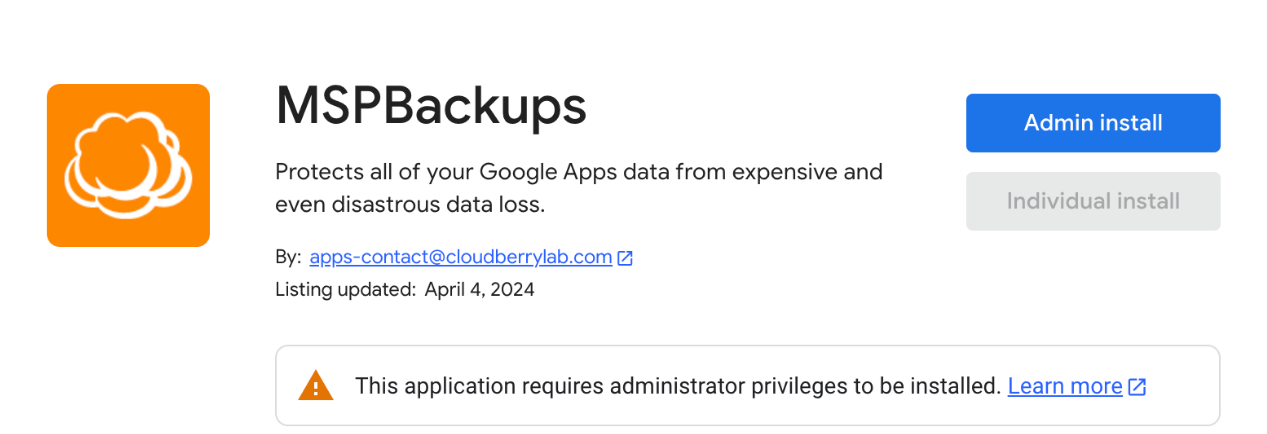
- Install MSPBackups Application as domain administrator.
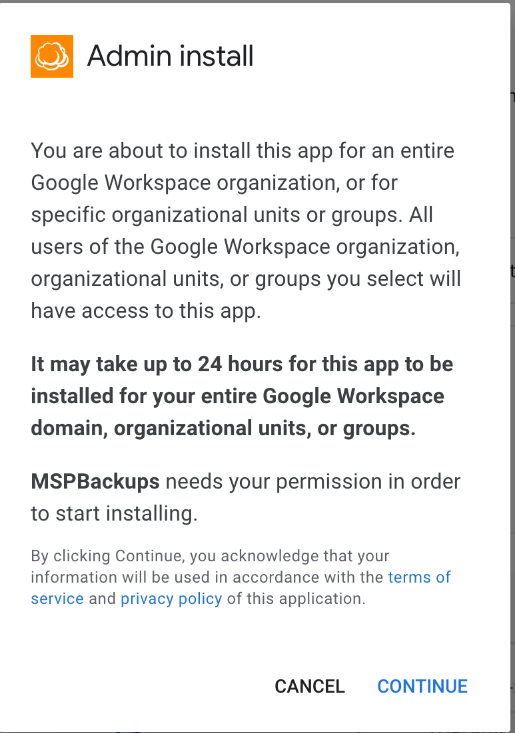
- Grant the required permissions.
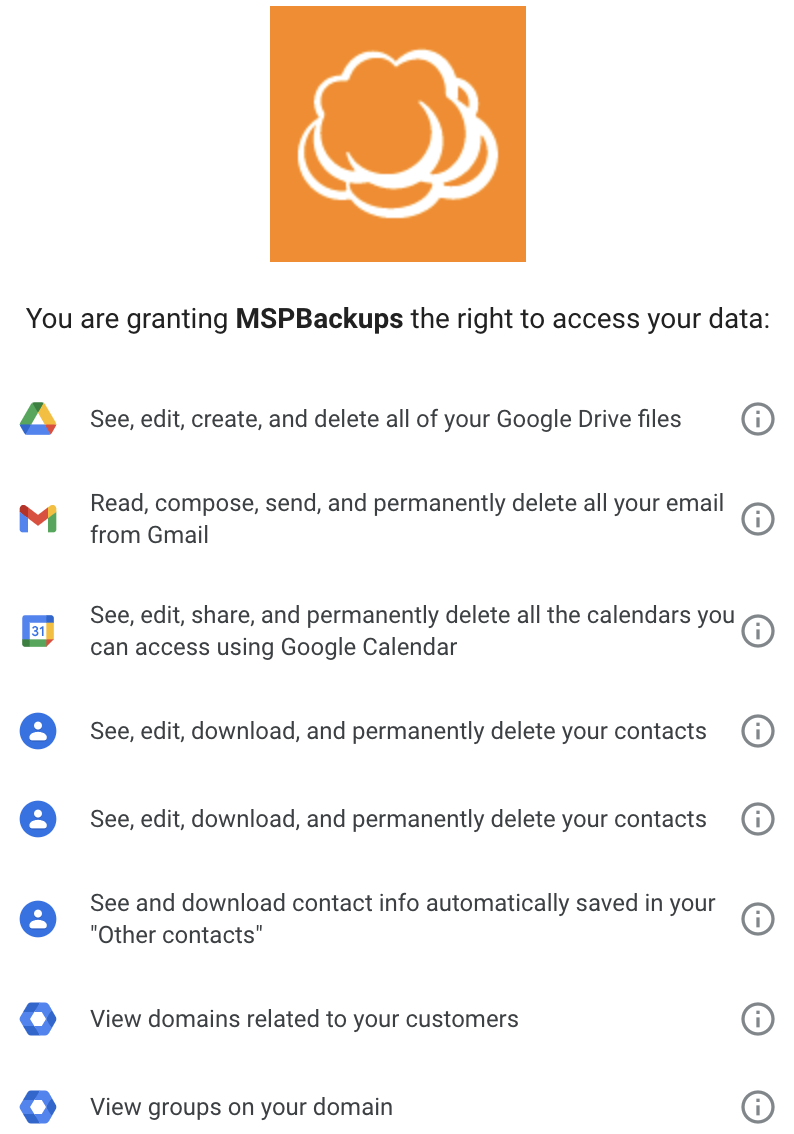
- Finish the installation.
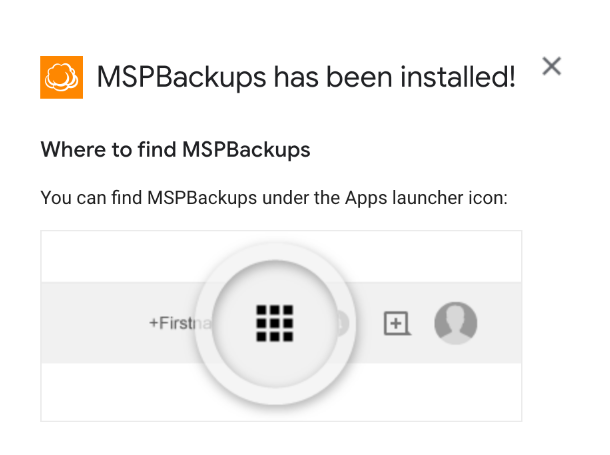
- In the M365/Google menu, switch to the Domains
- Click dashboard button in the Dashboard column of the required domain entry
- Confirm the transition to Dashboard. Note that the provider has full access to backup management but not to the backup data. To access the backup data, sign out and then sign in using an account with the necessary administrative permissions in the domain.
- Click Google Workspace.
- Enter your Google credentials.
- The dashboard will be accessed. Use Configure Backup button to turn on the services you wish to back up.
- Click Save. By default, backups are scheduled to run at least twice a day. You can check the domain name in the Account menu. The domain name will be displayed if accessed by the provider.
Refer to Google backup section for instructions on managing your Google backup.