Restore to Hyper-V in Management Console
With MSP360 Managed Backup, you can restore image-based backups to Hyper-V via the Management Console.
Create a New Restore Plan
To create a new restore plan, proceed as follows:
- Open the Management Console.
- Open the Backup > Computers page in the main menu.
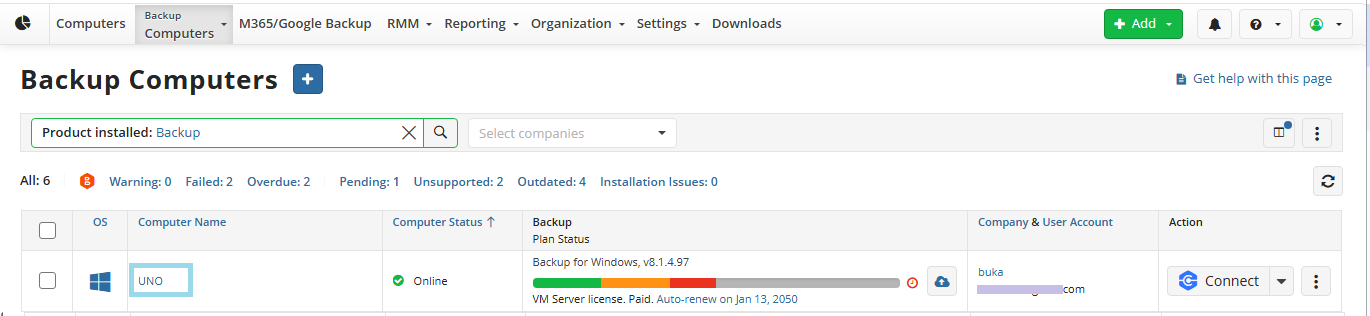
- Locate the computer whose backup dataset you want to restore, then click the Configure icon in the Backup Plan Status column.

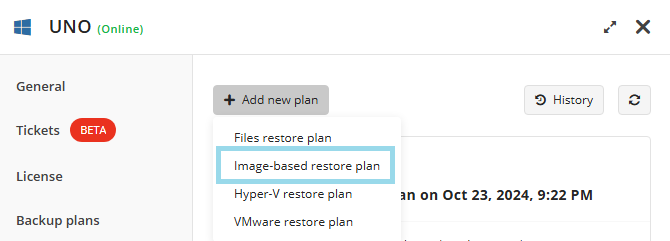
- Switch to the Restore Plans tab of the side panel, and then click +Add New Plan.

- Select Image-based restore plan.
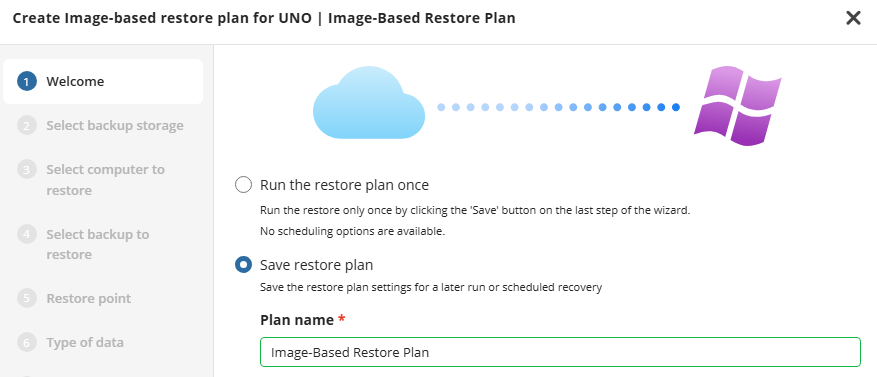
- The first step when making a restore plan is to select whether it should run only once or be saved for future or scheduled use. The latter will allow you to name the plan.
- Next, you will need to select the restore source. Select the backup destination that contains the required backup from the list.
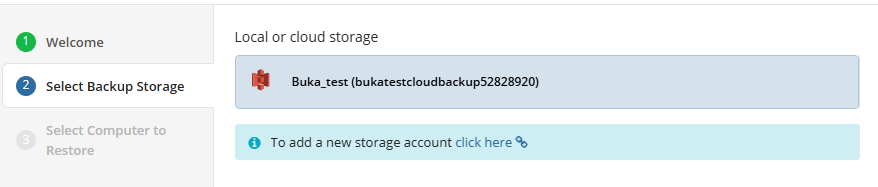
Note that item-level restore from long-term (cold) backup storages is not currently supported.
- Next, you will need to select the computer to be restored. This restore wizard step appears only if the specified backup destination contains several backups from different computers.
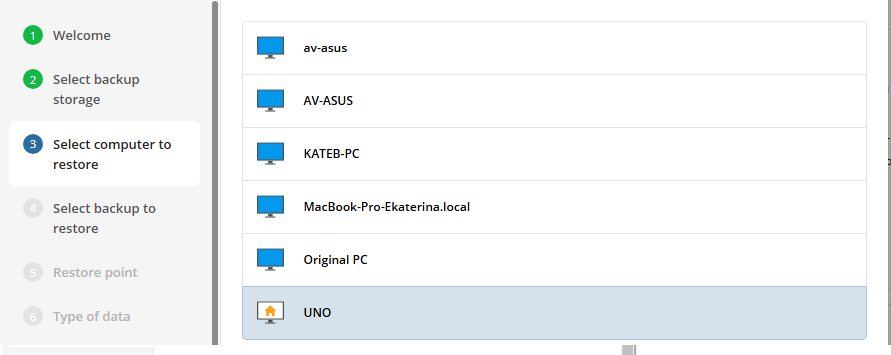
- Next, you will need to select the backup plan that contains the desired restore point. Select the backup to restore from the list of available backups.
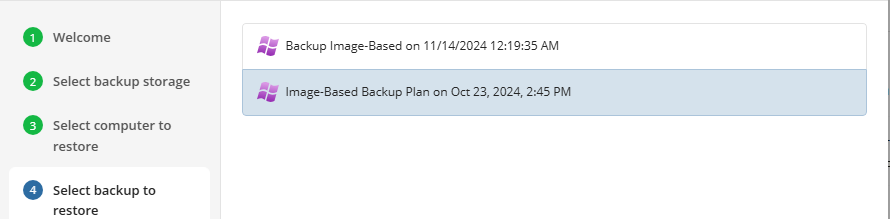
- The next step is to select the desired point in time to restore to. For backups made in the new backup format, select the latest version or a specific restore point from the list below.
- Latest version: Automatically restores the newest version of each file in the source regardless of which restore point it belongs to.
- Select the Restore Point: Restores the image as it existed at the specified restore point.
Note that the time must be specified in the provider time zone. Point the mouse to the hint icon to see the provider time zone.
Type of Data
Select the desired target format for the restored data. To restore the image to Hyper-V, select the Restore to Hyper-V option in the Restore to virtualization platforms block.
- To restore the image to physical hardware, select the Restore as physical disk option.
- To restore the image as a virtual disk file, select the Restore as virtual disk option, then select the virtual disk format from the list of available formats.
- Restore to virtualization platform. Expand this option to restore the virtual machine configuration as well as the virtual disks to Hyper-V as a VM. This option was selected for this example.
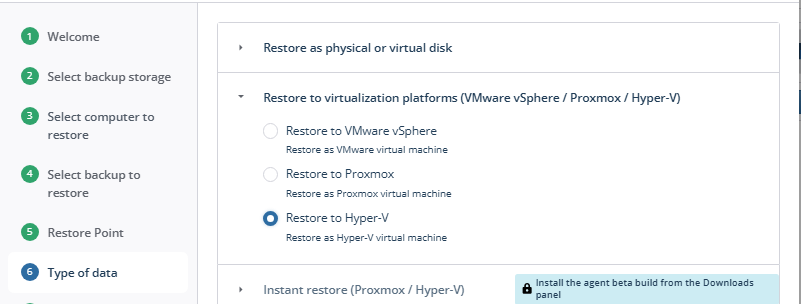
- Instant restore is available only if you install the private beta package. Click Request beta functionality to receive a private beta installation package for temporary testing. For details, refer to the Instant Restore to Hyper-V in Management Console (BETA) and Instant Restore to Proxmox in Management Console (BETA) articles.
Click Next.
Select Partitions
Select the partitions to restore.
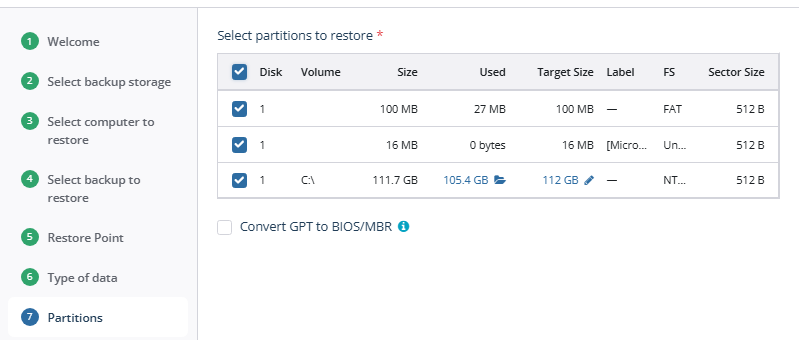
Note that the selected partitions must include system volumes, as they contain data required to boot the operating system.
To exclude some files and folders from the restore, click the partition size value in the Used column, then select the objects to exclude.
To specify a custom partition size, click the value in the Target size column.
An attempt to restore to smaller partitions can succeed only if no blocks in the backup image are used beyond the size of the new partition. If such blocks exist, the restore plan will fail with a 'block intersection exists' error. If restoring to a smaller partition is inevitable, make this partition as large as possible.
If you need a BIOS boot partition, select the Convert GPT to MBR checkbox. Read more about this option in the Convert GPT Disks to MBR chapter.
Click Next.
Encryption Options (optional)
Enter the encryption password if your backup is encrypted.

Click Next.
Hyper-V Machine Configuration
Configure the virtual machine to restore. First, select an existing virtual machine or create a new one using the Edit icon.
If you select an existing virtual machine, choose whether to overwrite it or create a new virtual machine by specifying a different virtual machine name.
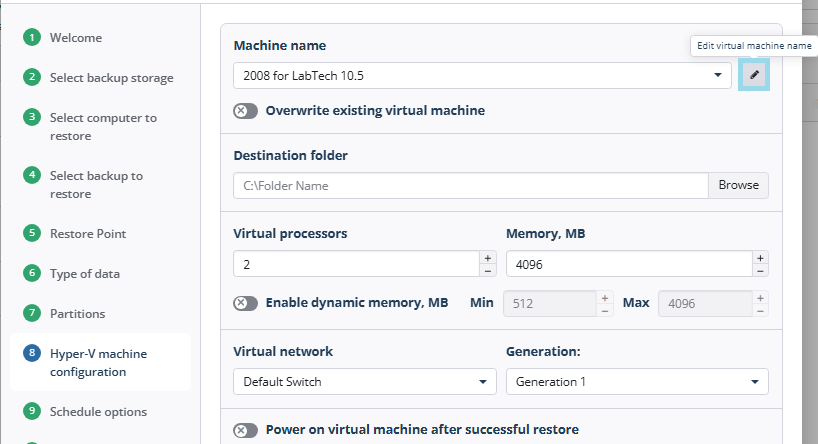
Then configure the restore settings, including the datastore, disk provisioning type, number of virtual processors, memory settings (sufficient for the restored virtual machine), virtual network, and generation.
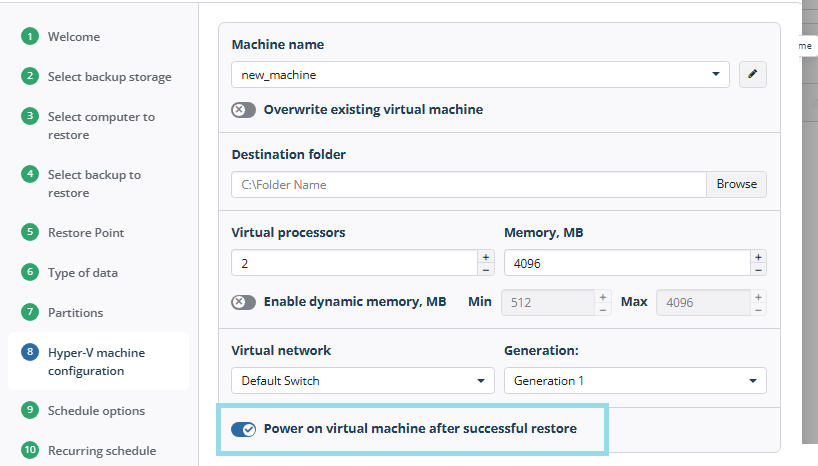
To power on the restored virtual machine automatically after the restore is complete, enable the corresponding option.
Schedule (optional)
If you choose to save the restore plan, select the restore schedule options.
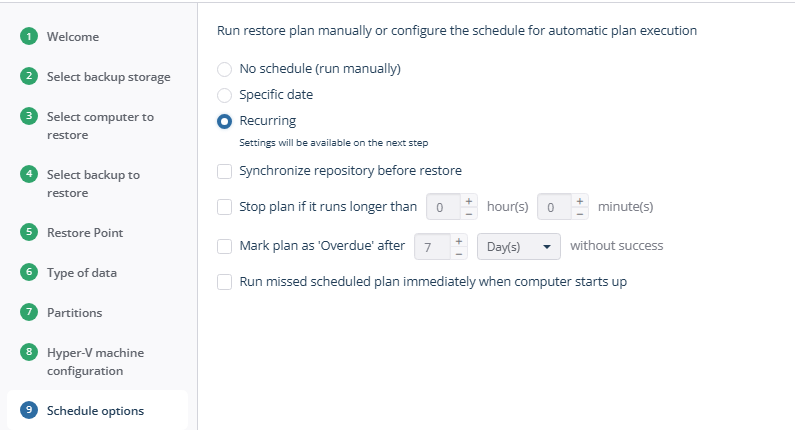
- No schedule (run manually): Use this option only when you wish to execute the restore manually.
- Specific date: Use this to schedule a one-time restore at the specified date and time.
- Recurring: This option enables you to schedule recurring restorations based on the criteria in the fields below.
Do not use the “Stop the plan if it runs for:” option if you have a slow or unstable internet connection.
Enabling the “Run missed scheduled restore immediately when computer starts up” option will ensure that the restore plan will begin automatically after the computer starts up if it was unable to run at the scheduled time. This is only recommended for desktops and laptops. For servers, it is recommended that you run the restore plan manually when all maintenance works are completed to avoid adversely affecting server performance and internet bandwidth during working hours
Recurring Schedule (optional)
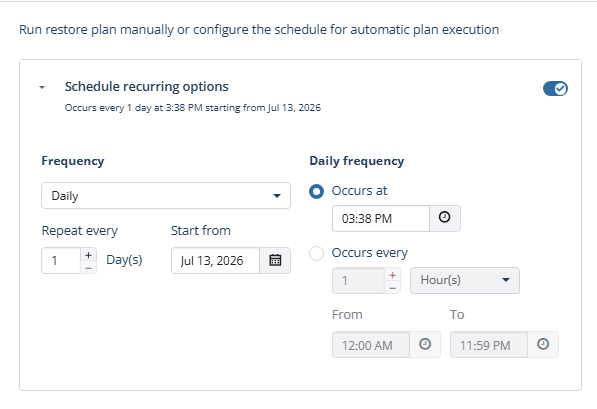
If a recurring schedule was selected, now you can set up the frequency for the restore plan to be executed.
Enable the recurring schedule.
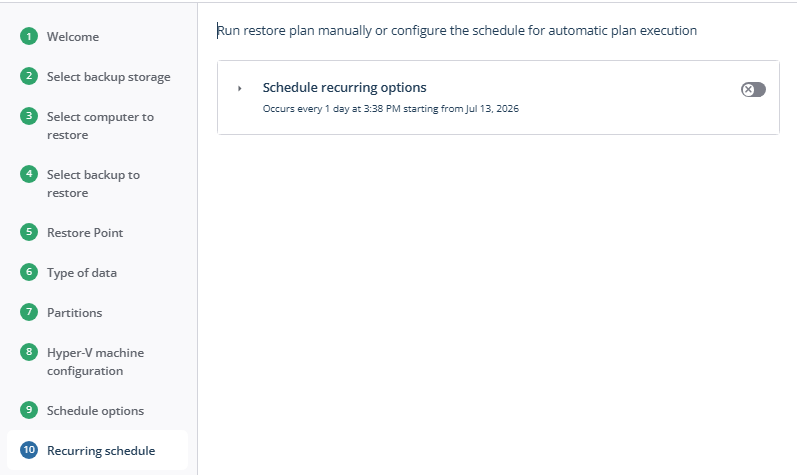
Configure the recurring schedule settings.
Pre/Post Actions
Next, specify the pre/post actions, if needed.
Specify the actions before and/or after the restore plan. Usually, these are scripts that perform particular jobs before or after the plan is executed. The following settings are available:
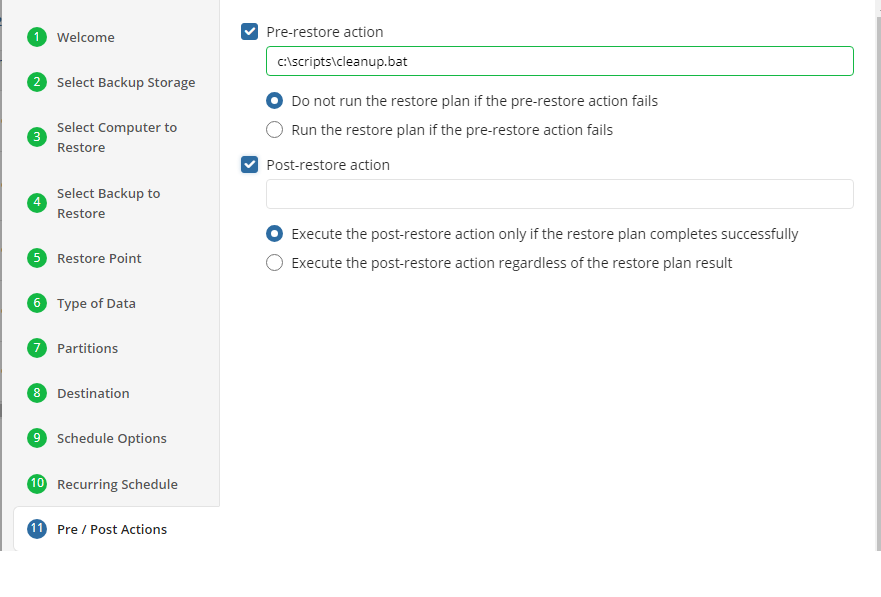
- To specify the action that must be performed before the restore plan starts, select the Pre-restore action checkbox.
- Specify the path to the script to run before the restore plan.
- Specify the conditions for pre-action execution:
- Select the Do not run the restore plan if the pre-restore action fails option to suspend the restore plan execution in case the pre-action fails.
- Select the Run the restore plan if the pre-restore action fails option if you want the restore plan to run regardless of the pre-action execution result.
- To specify the action that will be performed after the restore plan completes, select the Post-restore action checkbox.
- Select the Execute the post-restore action only if the restore plan completes successfully option if you want to run it only if the restore plan was executed without any errors or warnings.
- Select the Execute post-restore action regardless of the restore plan result option if you want the post-action to be executed regardless of the restore plan result.
Click Next.
Notifications
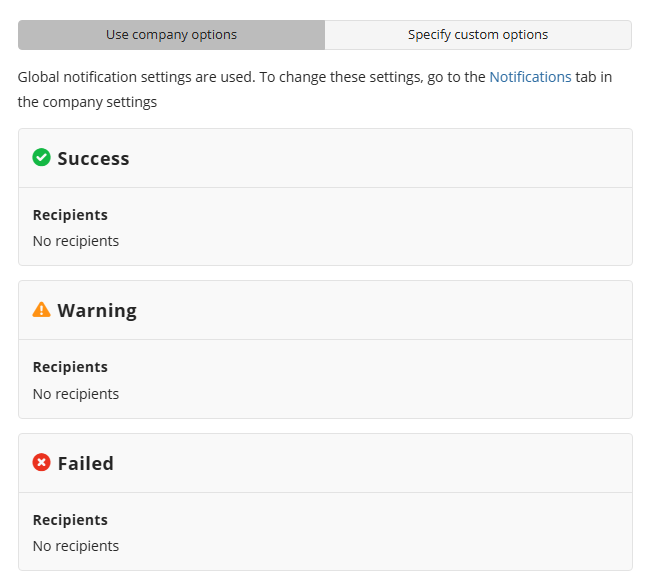
Specify notification settings for restore plan results. You can use the company notification settings or customize them as needed: specify the required recipients and customize the notifications for different restore plan results:
- Success
- Failed
- Warning
Select the I want to receive a notification email checkbox to enable notifications.
- Select the When the restore plan fails or finished with warnings option if you want to receive the notification message in case the restore plan terminates with errors or warnings.
- Select the In all cases option if you want the notification to be delivered in all cases.
If you want the restore plan results to be added to Windows Event Log, select the Add entry to Windows Event Log checkbox.
- Select the When the restore plan fails or finished with warnings option if you want to receive the notification message in case the restore plan terminates with errors or warnings.
- Select the In all cases option if you want the entry to be put in Windows Event Log in any case.
Click Next, then click Save to finish the wizard.
Save Plan
Click Save when you are happy with your selections. If the plan is set to run only a single time and has no set schedule, it will automatically start. Otherwise, if it is set to run only once and is scheduled, it will display in the list of plans until the scheduled time. If it is only set to run once, when it completes successfully, it will remove itself from the list of plans. Only restore plans that are saved will remain in the list for future use.
| Top |
Manage Plan
Refer to Manage Plans for details on how to run, edit, clone, or delete the plan.
| Top |