Add Amazon S3 Account via AWS IAM roles
Introduction
As per recommendations of Amazon, we now shift toward using the so-called IAM roles. An IAM role is similar to an IAM user, in that it is an AWS identity with permission policies that determine what the identity can and cannot do in AWS. Also, a role does not have any credentials (password or access keys) associated with it. Instead, if a user is assigned to a role, access keys are created dynamically and provided to the user. Essentially, instead of using your keys, our service account will assume that role (generated automatically via the MBS Management Console). Alternatively, you can generate a role via CloudBerry Explorer and then just import it to the Management Console.
In this article we explain how to create IAM Role:
Generate an IAM Role using Management Console
Let’s get started. Go to the Management Console. Under Storage, click Storage Accounts.

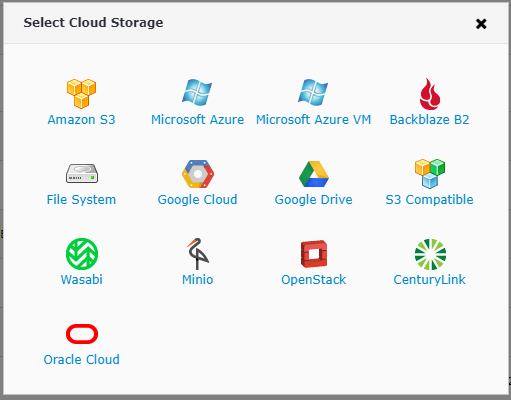
Click Add Account and select Amazon S3.
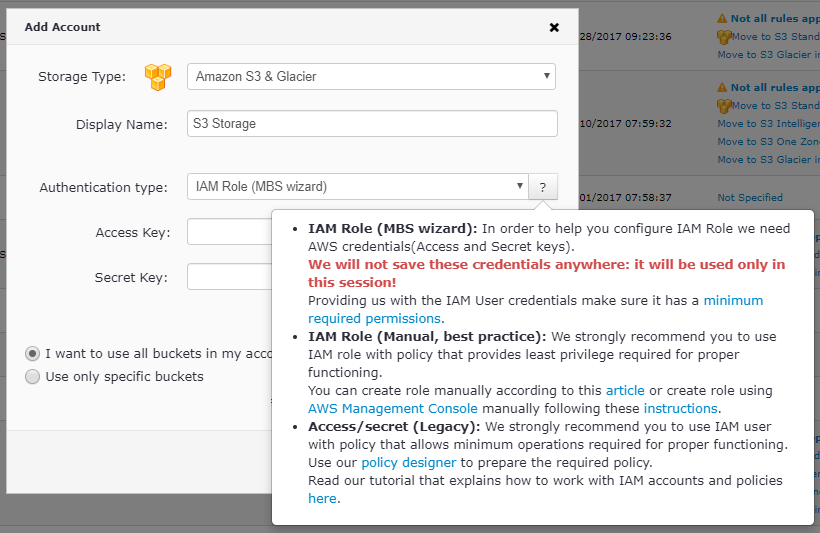
Enter the preferred display name. For the Authentication type, let's select IAM Role (MBS Wizard) — we'll explore the second option a bit later. Now enter the Access & Secret key. Again, they will only be used for the policy creation session and subsequently not be stored in any of our databases. Proceed to specify the required buckets — either all of them or a select few. Click Save.
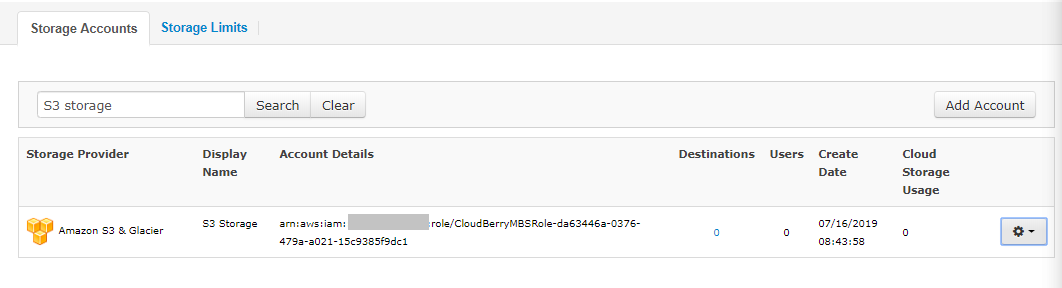
The IAM Role account will be automatically created and finally you will be able to find it in the list of Storage Accounts:
Generate an IAM Role using CloudBerry Explorer
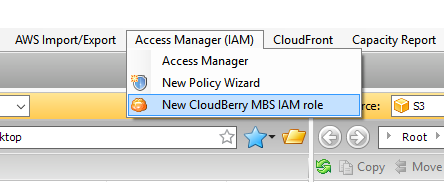
Alternatively you can go ahead and create a role via CloudBerry Explorer. That in turn gives you greater flexibility in configuring the proper policy. Launch the app and under Access Manager (IAM), click New CloudBerry MBS IAM role.
Select the required Amazon S3 account. If you haven't added one yet, go ahead and do that in the settings.

Select the required buckets.

Now you need to copy the Provider ID from the Management Console and paste it into the text field in Explorer.
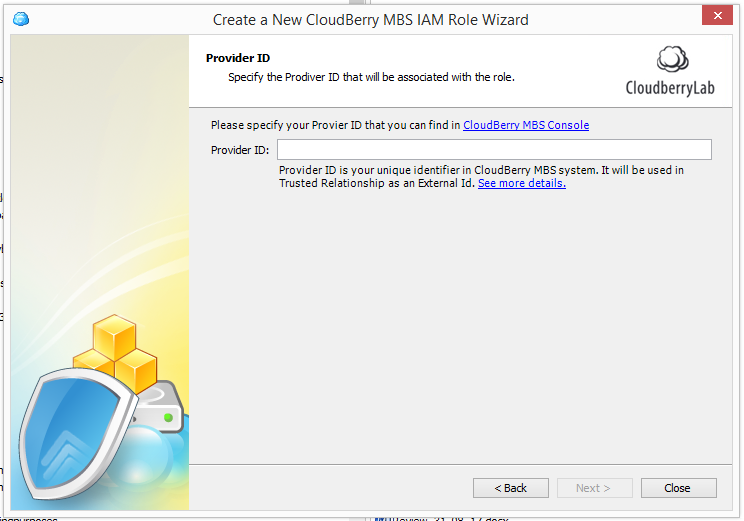
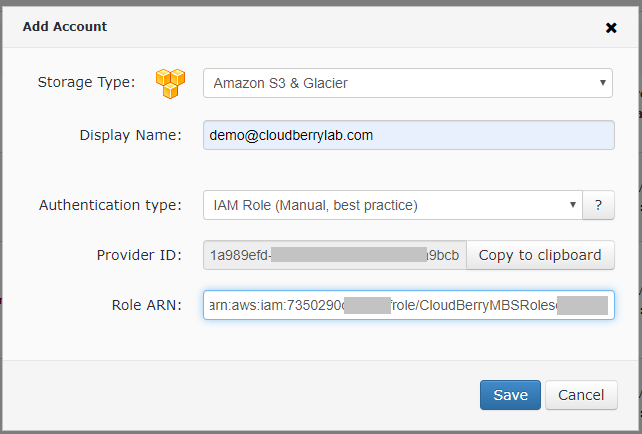
To get the Provider ID, go to the Management Console, click Storage Accounts then click Add Storage and choose Amazon S3 with Authentication type "IAM Role (Manual, best practice)":

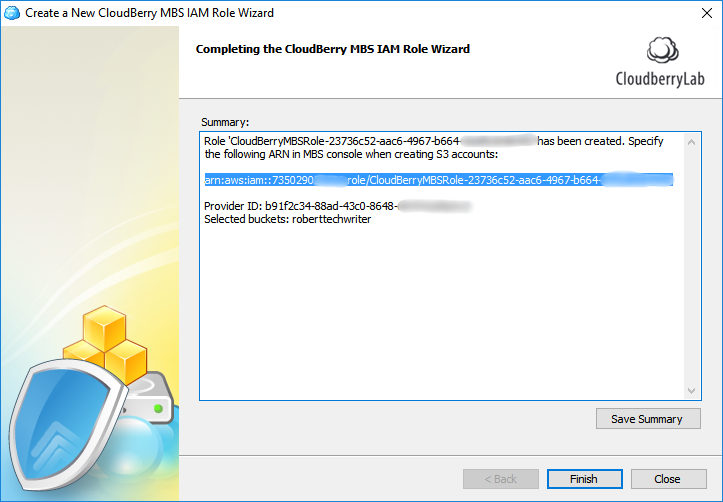
Set the required permissions during the next few steps.

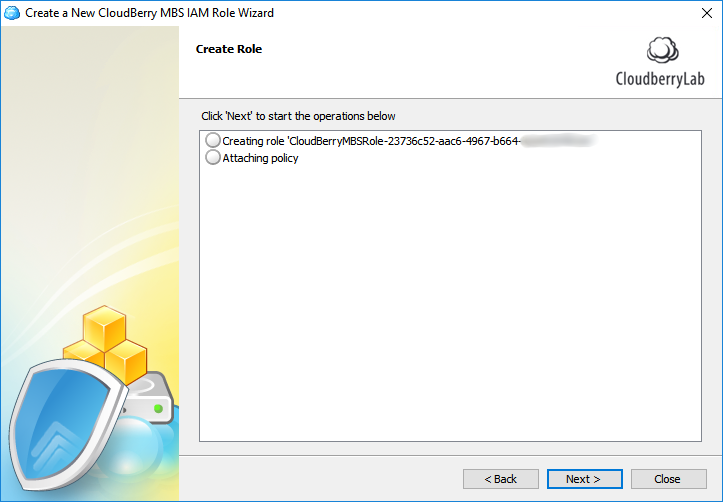
In the last step, copy the ARN role and paste it into the Management Console. Click Save.
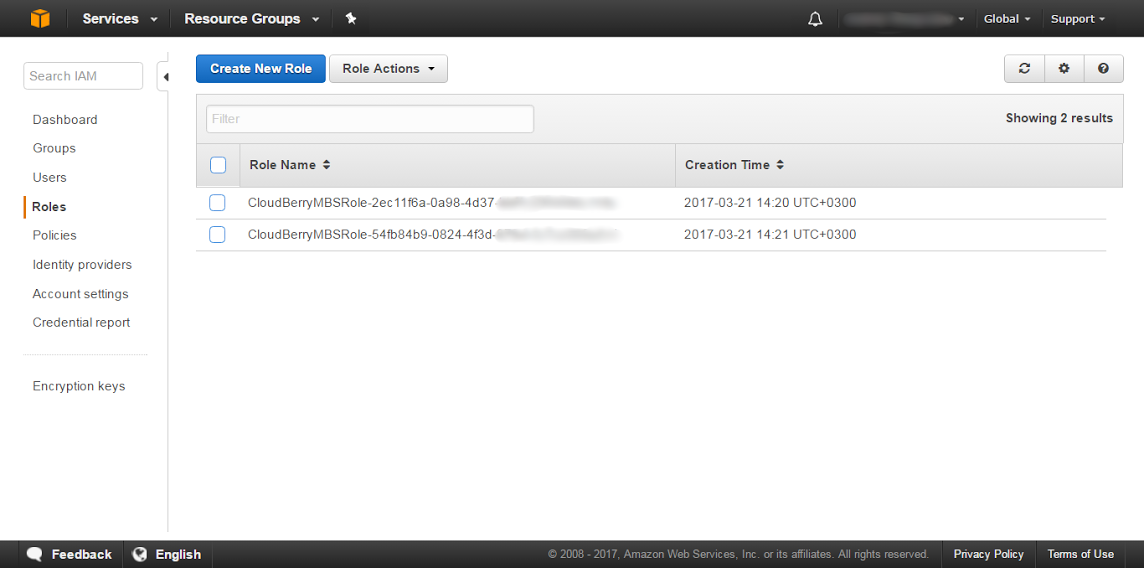
If you ever need to get the list of all your roles — they're always accessible in your Amazon AWS Console.
Everything is set and done. Now you can proceed to give your users access to the storage. As you can see, the essentials haven’t really changed that much. However, we aim to stay up-to-date with Amazon’s guidelines and have therefore altered the authentication mechanism behind the scenes.
Generate an IAM Role using AWS Management Console
Alternatively you can go ahead and create a role via AWS Management Console. Then entering IAM Role identifier into the Add Account dialog of Management Console for Managed Backup Service.
- Go to the AWS console to add a role. Click Create Role.

Enter 626709717326 in the account ID info.
Enable the Require external ID (Best practice when a third party will assume this role) checkbox.
Paste the Provider ID into the External ID text field. Click Next: Permissions
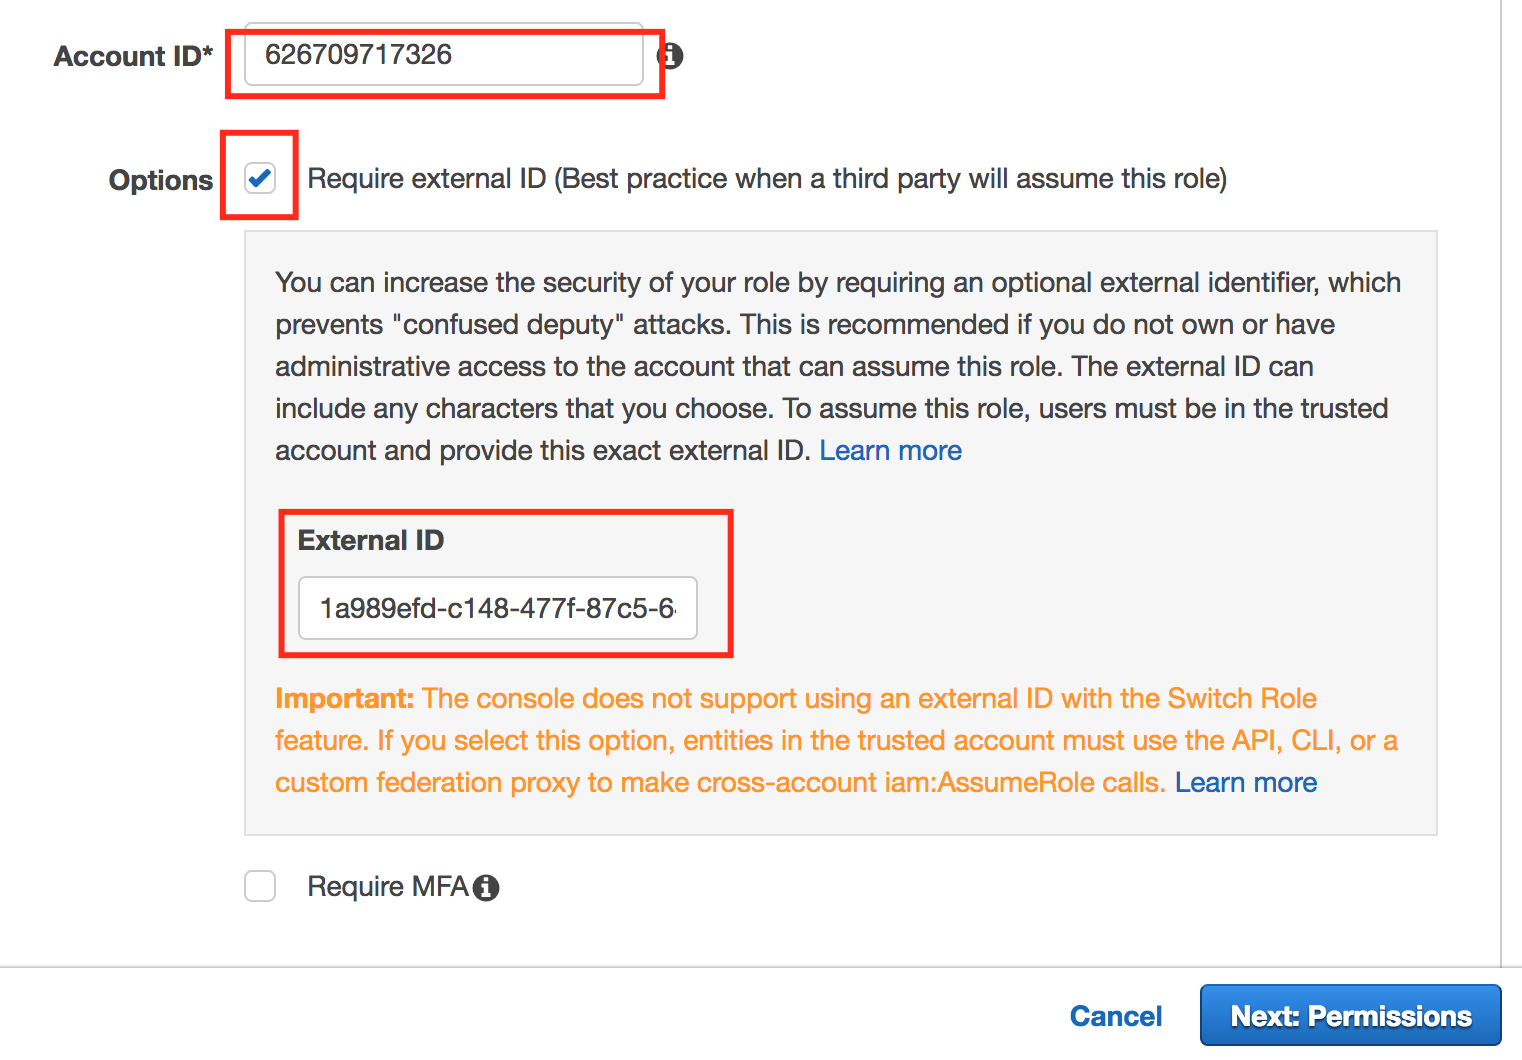
To get the Provider ID, go to the Management Console, click Storage Accounts then click Add Storage and choose Amazon S3 with Authentication type "IAM Role (Manual, best practice)":
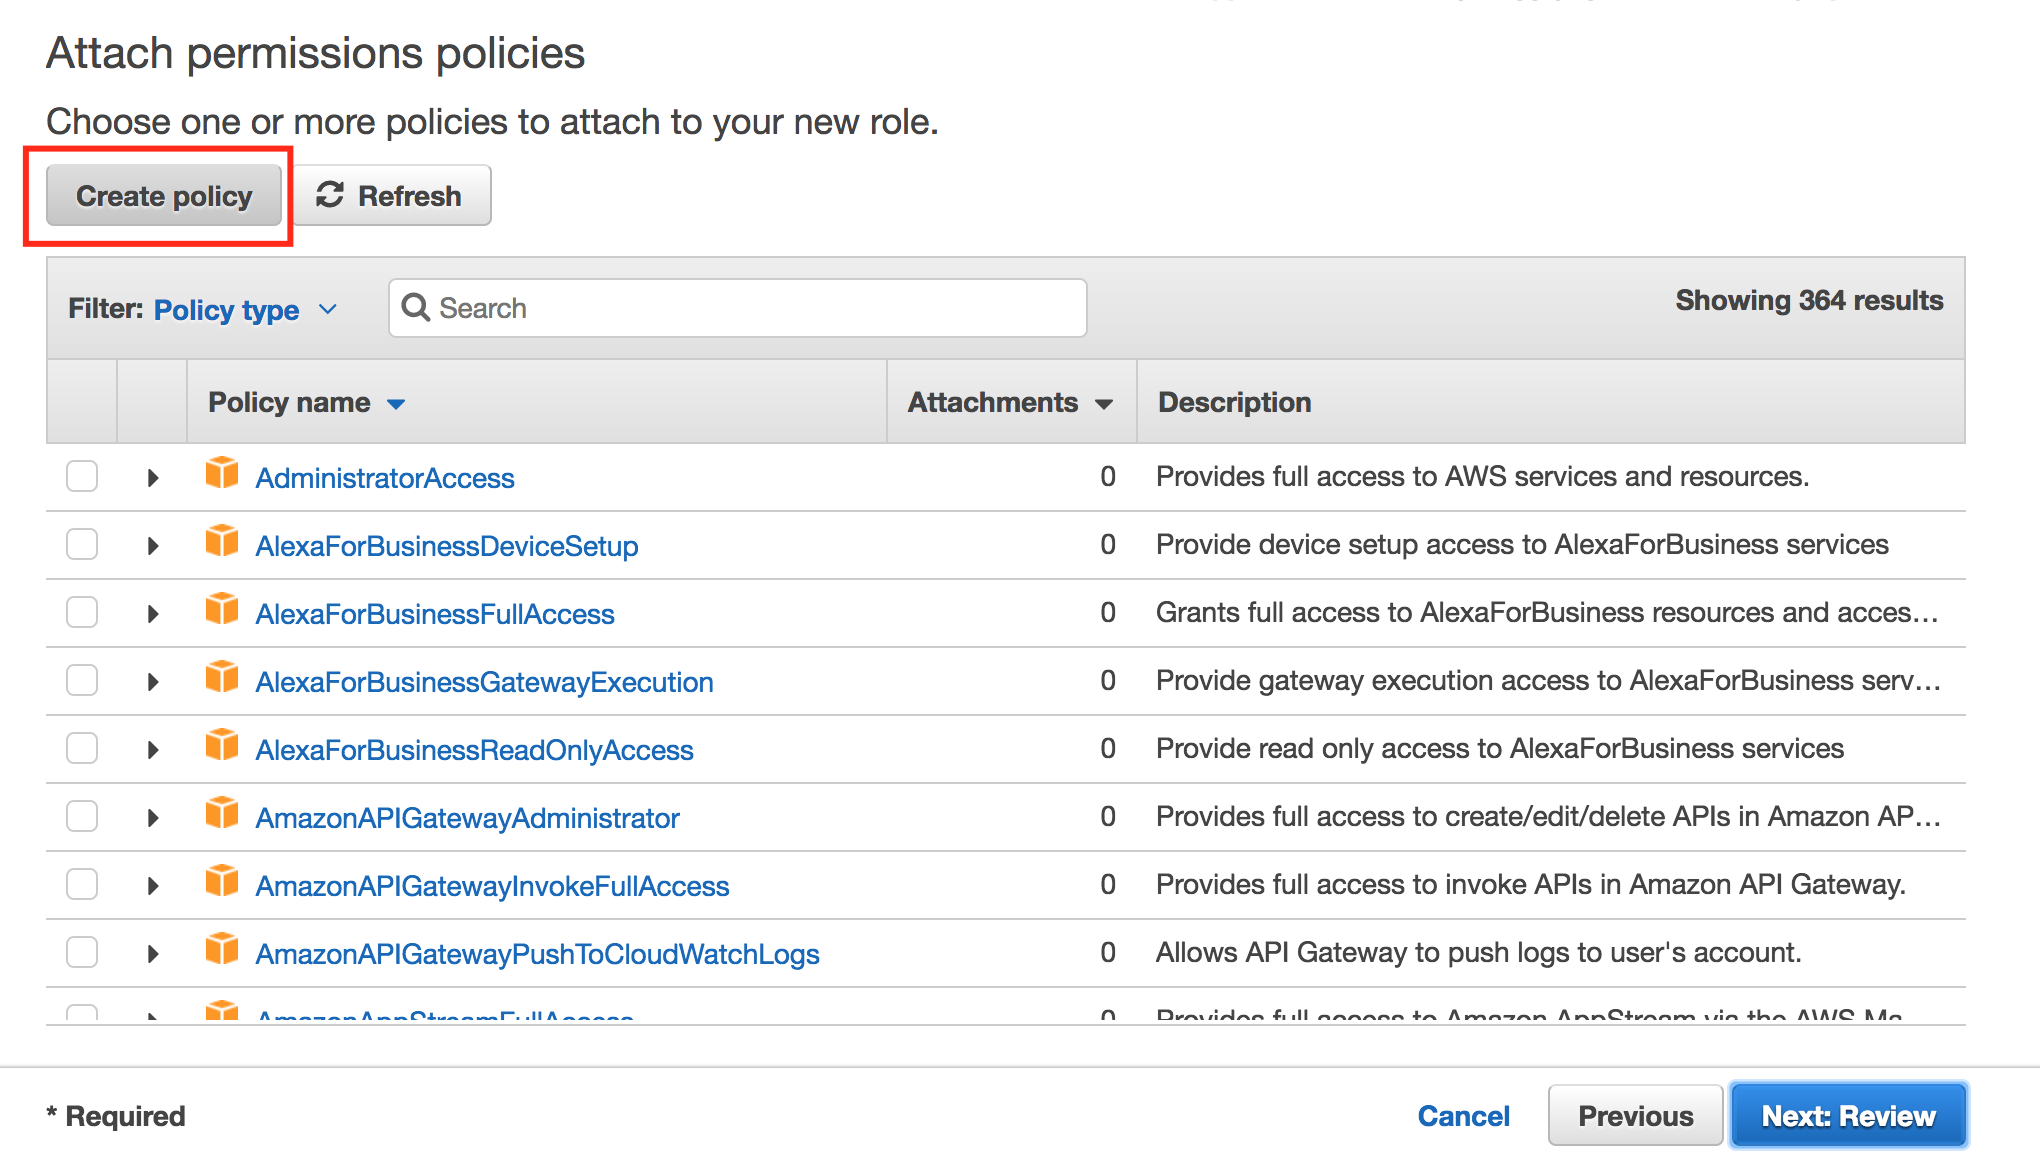
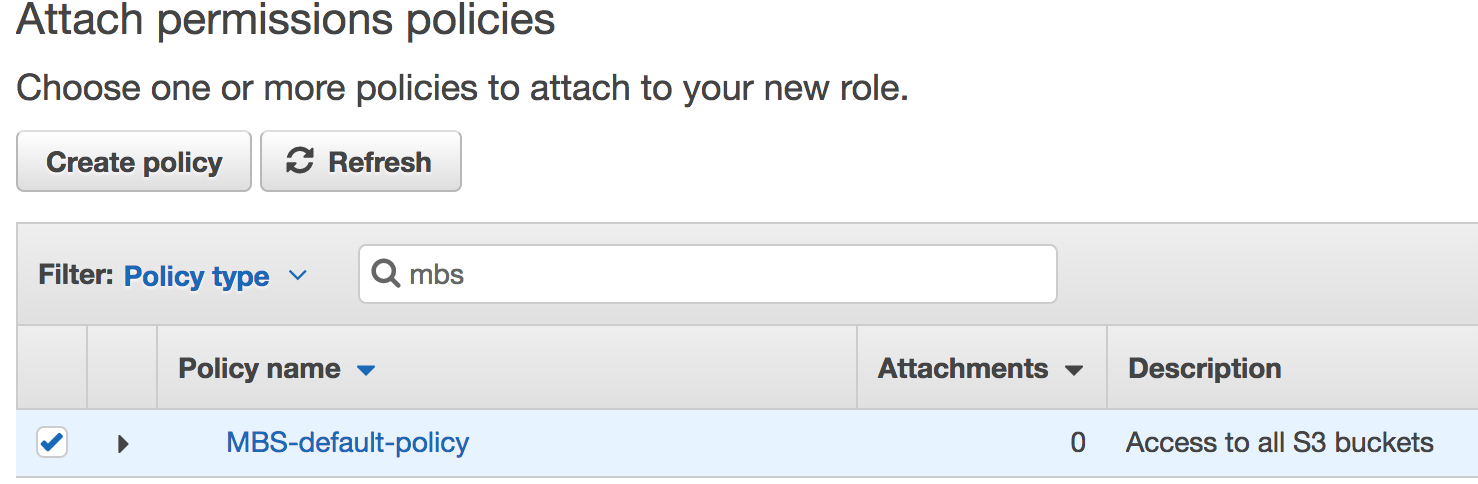
- Click Create Policy.
- Click JSON and insert the following policy:
{
"Version": "2012-10-17",
"Statement": [
{
"Effect": "Deny",
"Action": "s3:DeleteBucket",
"Resource": "*",
"Condition": {}
},
{
"Effect": "Allow",
"Action": "s3:*",
"Resource": "*",
"Condition": {}
},
{
"Effect": "Allow",
"Action": "iam:SimulatePrincipalPolicy",
"Resource": "*",
"Condition": {}
},
{
"Effect": "Allow",
"Action": "s3:ListAllMyBuckets",
"Resource": "*",
"Condition": {}
},
{
"Effect": "Allow",
"Action": "ses:*",
"Resource": "*",
"Condition": {}
},
{
"Effect": "Allow",
"Action": "sns:*",
"Resource": "*",
"Condition": {}
},
{
"Effect": "Allow",
"Action": [
"ec2:ImportInstance",
"ec2:ImportImage",
"ec2:DescribeInstances",
"ec2:MonitorInstances",
"ec2:RequestSpotInstances",
"ec2:RunInstances",
"ec2:StartInstances",
"ec2:TerminateInstances",
"ec2:ModifyInstanceAttribute",
"ec2:CreateTags",
"ec2:CancelImportTask",
"ec2:StartInstances",
"ec2:DescribeConversionTasks",
"ec2:DescribeImportImageTasks",
"ec2:ImportVolume",
"ec2:DescribeAvailabilityZones",
"ec2:DescribeSecurityGroups",
"ec2:DescribeSubnets",
"ec2:StopInstances",
"ec2:DescribeKeyPairs",
"ec2:DescribeImages",
"ec2:ImportSnapshot",
"ec2:DescribeImportSnapshotTasks",
"ec2:CreateVolume",
"ec2:CreateImage",
"ec2:DescribeVolumes",
"ec2:DescribeSnapshots",
"ec2:DeleteSnapshot",
"ec2:CreateSnapshot",
"ec2:AttachVolume",
"ec2:DeregisterImage"
],
"Resource": "*",
"Condition": {}
}
]
}
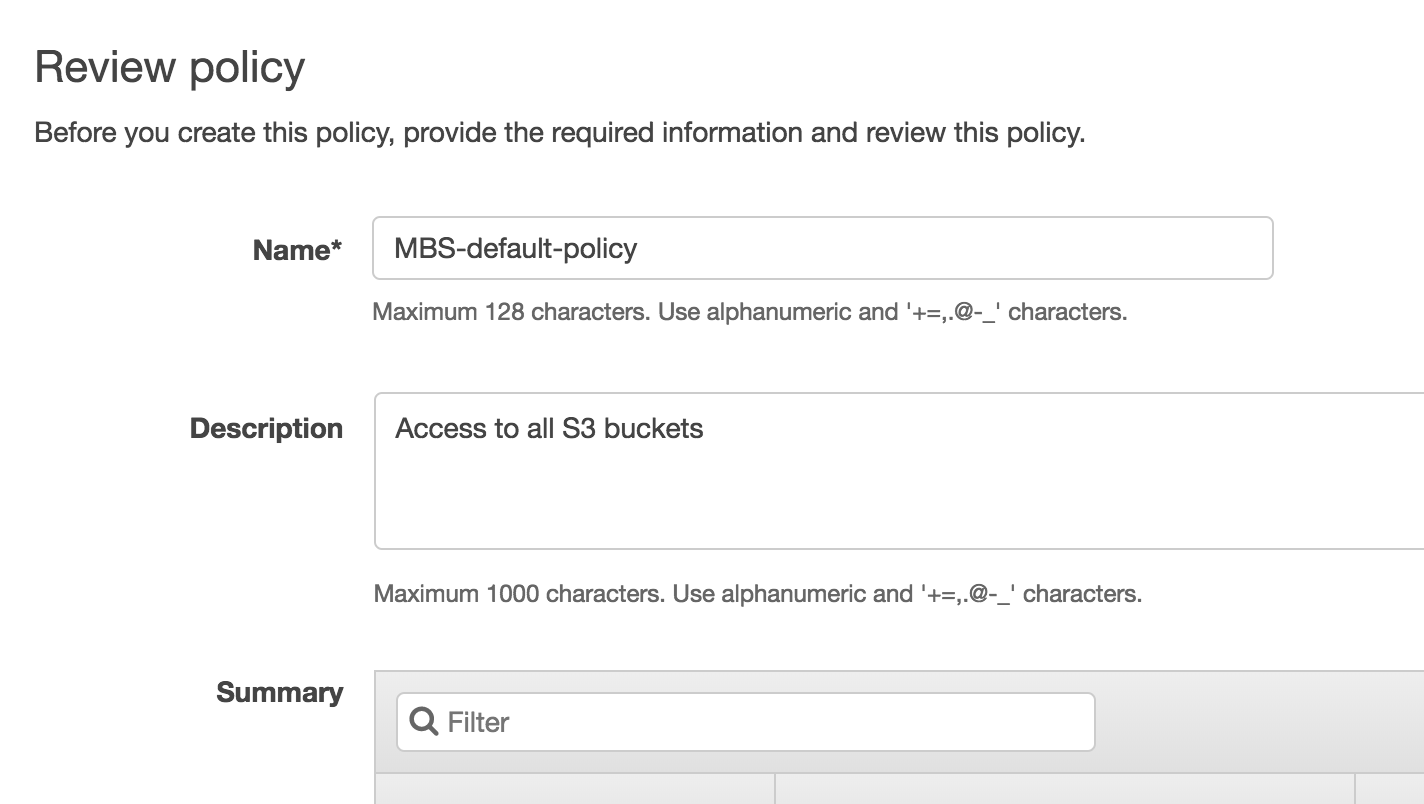
- Review the policy and click Create Policy.
- Go to the previous tab and click Refresh and start typing policy name that you created:
Select it and click Review.
Enter the role name (no spaces) and click Create.
Open the role you've just created and copy its ARN.
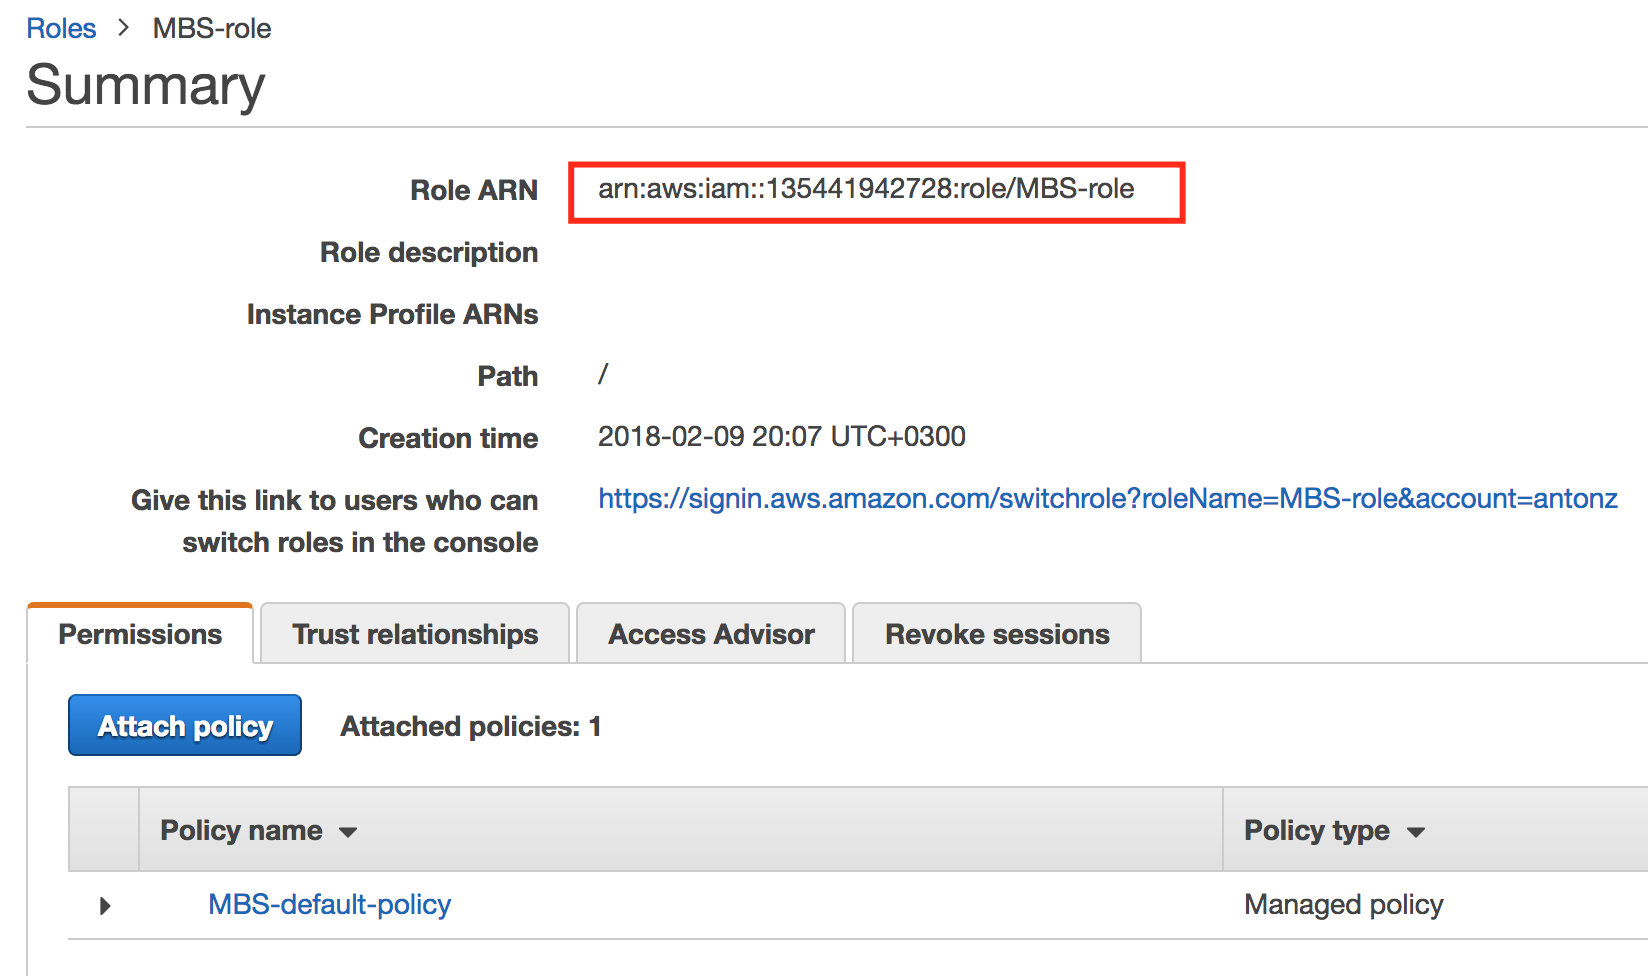
Head back to the MBS Management Console and the paste the ARN into the bottom field.
On the next step you can select S3 buckets that will contain the backup data.