Using Amazon IAM account
Managed Backup service allows using Amazon Identity and Access Management service to create an account with limited permissions. Such an IAM user account can be used when an Amazon S3 account contains sensitive information that can be accessed only by the account owner.
With Amazon Identity and Access Management you can use all of the Managed Backup features without any risk of unauthorized access to your sensitive data. This manual will help you to create and configure an Amazon IAM account with limited permissions and explain how to use it with Managed Backup.
How to create an Amazon IAM account
To create an Amazon IAM account you will need CloudBerry Explorer PRO. If you do not have Explorer PRO installed on your computer, you can download it here. Fully functional 15-days trial version of the program is available.
If you do not have your Amazon Web Services account in Explorer PRO, you will have to create it. This video tutorial will help you.
Once you have an AWS account in Explorer, you can start creating an Identity and Access Management account with limited permissions. Follow the instructions below to do this:
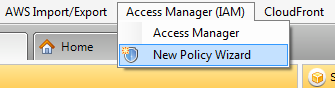
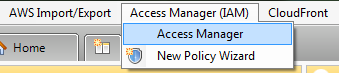
Step 1. Go to “Access Manager” and click on New Policy Wizard.
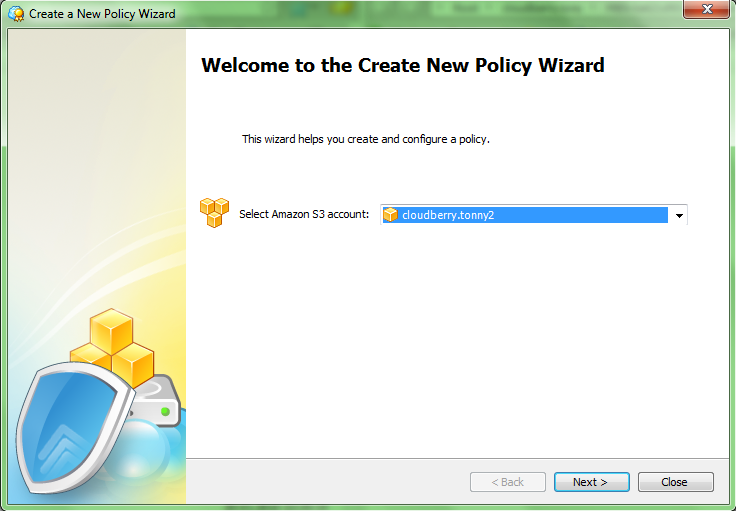
Step 2. Here you have to choose your AWS account and click Next.
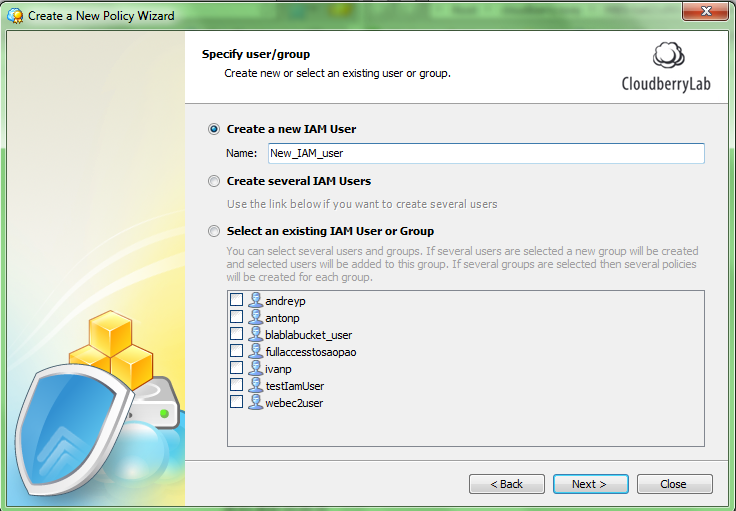
Step 3. Now you have to create a new IAM user and specify the name.
Step 4. On the next screen you can specify permissions for selected users. If you have Explorer PRO version 3.8.1.11 or higher, choose the Create IAM user for CloudBerry MBS option, which automates most of the tasks.
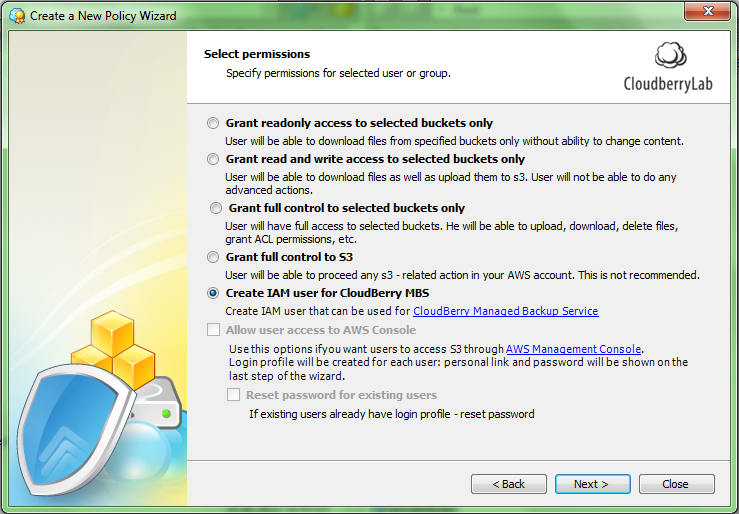
Note: If you use Explorer PRO earlier version, you can upgrade your application. Just download the latest version from here. If you do not have an ability to upgrade, you can create access permissions manually as shown in the “Using IAM Account with Restricted Privileges” video.
Step 5. At the next step you have to select buckets to be used in this policy. Check proper boxes and click Next.

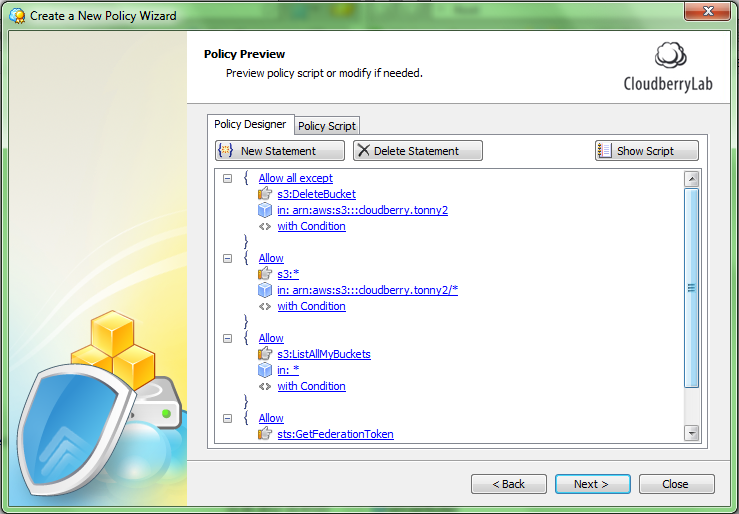
Step 6. The next screen allows you to preview or modify the created policy script. If you want to specify some additional rules you can do it with Policy Designer.
Step 7. At this step you need to allow your user access to Amazon SES for email notifications. Click "Policy Script" tab for that and manually paste the following statement:
{
"Effect": "Allow",
"Action": "ses:*",
"Resource": "*",
"Condition": {}
}
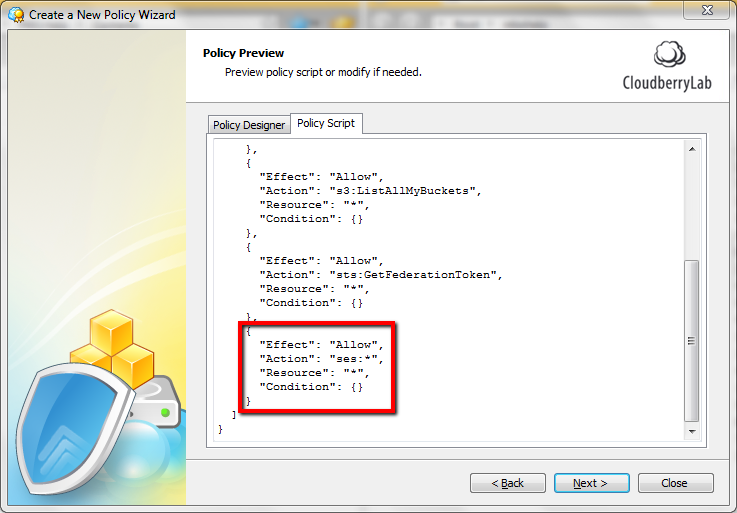
When you're finished with this step, click “Next”.
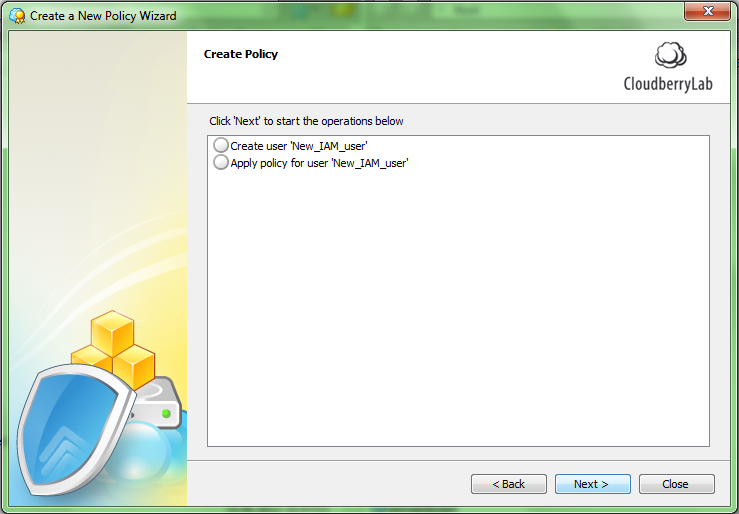
Step 8. Next is the preview screen where you can overview the list of your operations before the actual start. Click Next to proceed.
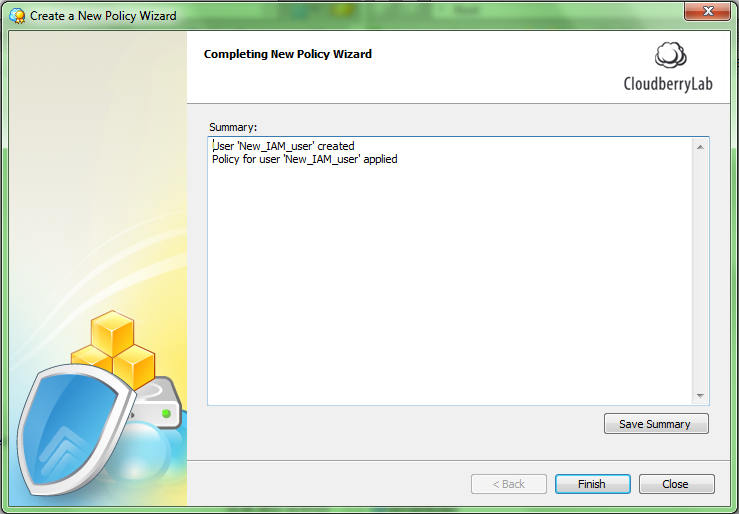
Step 9. It may take several minutes to create the policy. When the procedure is completed you will see the summary screen like below. You can save your summary in a text file by clicking on the “Save Summary” button. Click Finish.
Note. If you want to use AWS Console, CloudBerry Explorer freeware or another Amazon S3 client, you can use the generated policy script. It can be generated by Policy Designer in the Management Console.
Creating Access Keys
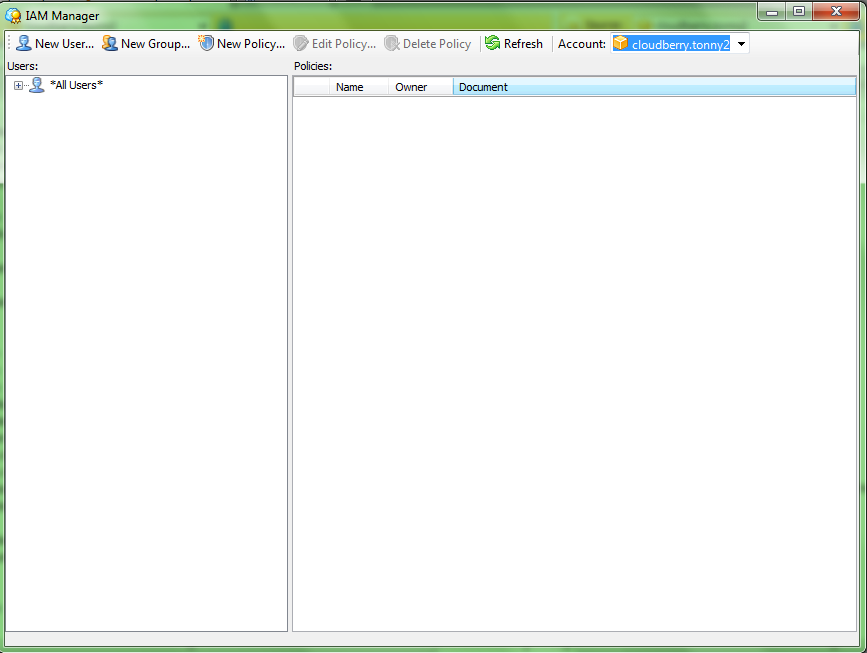
Step 1. Go to “Access Manager” in Explorer PRO.
Step 2. In the opened window choose your Amazon Web Service account.
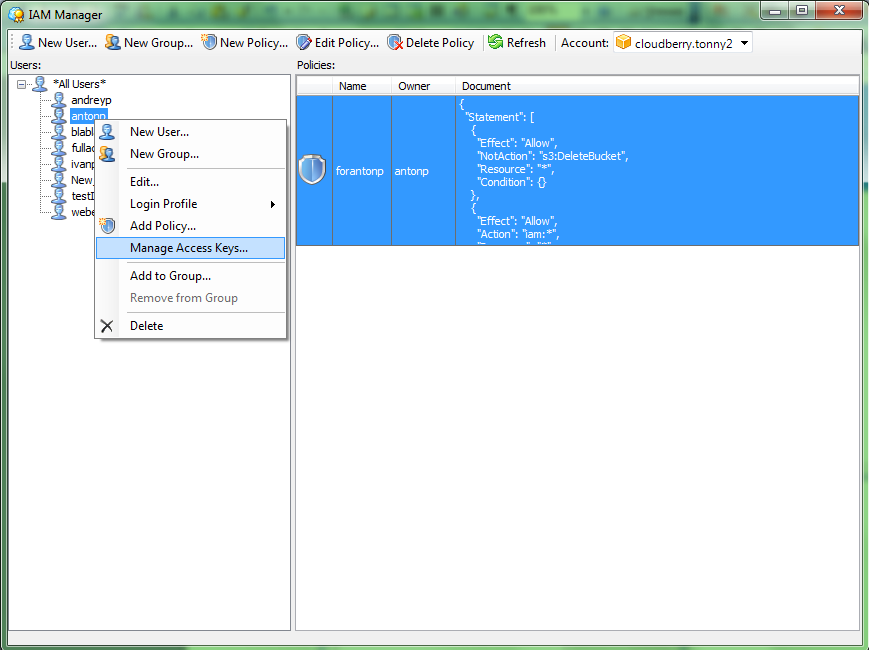
Step 3. Right click on your previously created IAM user and click Manage Access Keys.
Step 4. In the opened “Security Credentials” screen click “Create” button to generate Access Key and Secret Key for your IAM user.
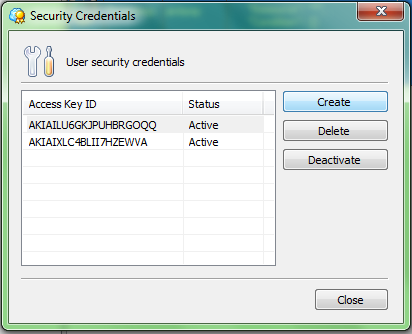
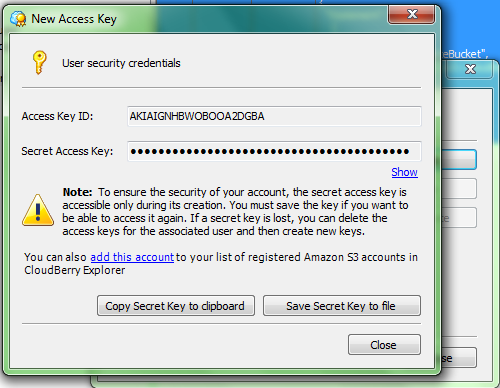
Step 5. Now you should see your new IAM user security credentials. You can copy your Secret Key to clipboard or save it to a file.
Add an Amazon S3 account
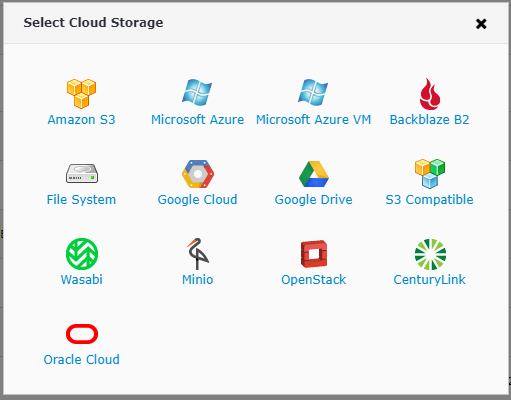
- Go to the Backup > Storage Accounts page. To add a new storage, click Add Account.

- Select Amazon S3 storage.
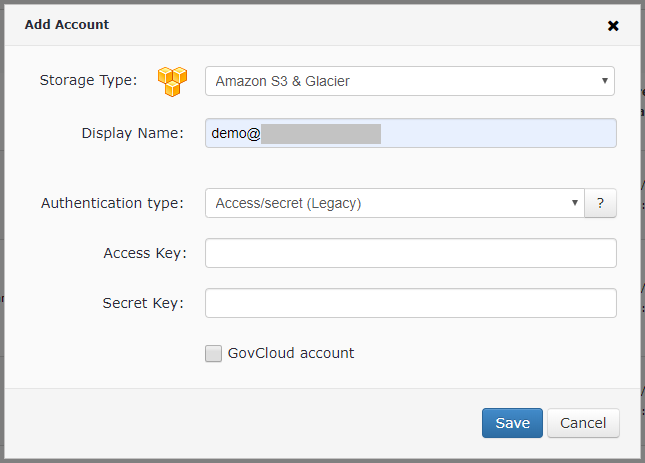
- Enter the Access Key and the Secret Key and Click Save button.
Now you are ready to use Managed Backup service with the IAM account with restricted privileges while protecting your master AWS account.
You can also familiarize yourself with Amazon's comprehensive articles on the matter here and here.