Install RMM Agent for macOS
Download RMM Agent
First, make sure you have the latest public RMM Agent version available for installation. To do this, proceed as follows:
- Open the Management Console.
- Select Downloads and open the RMM tab.
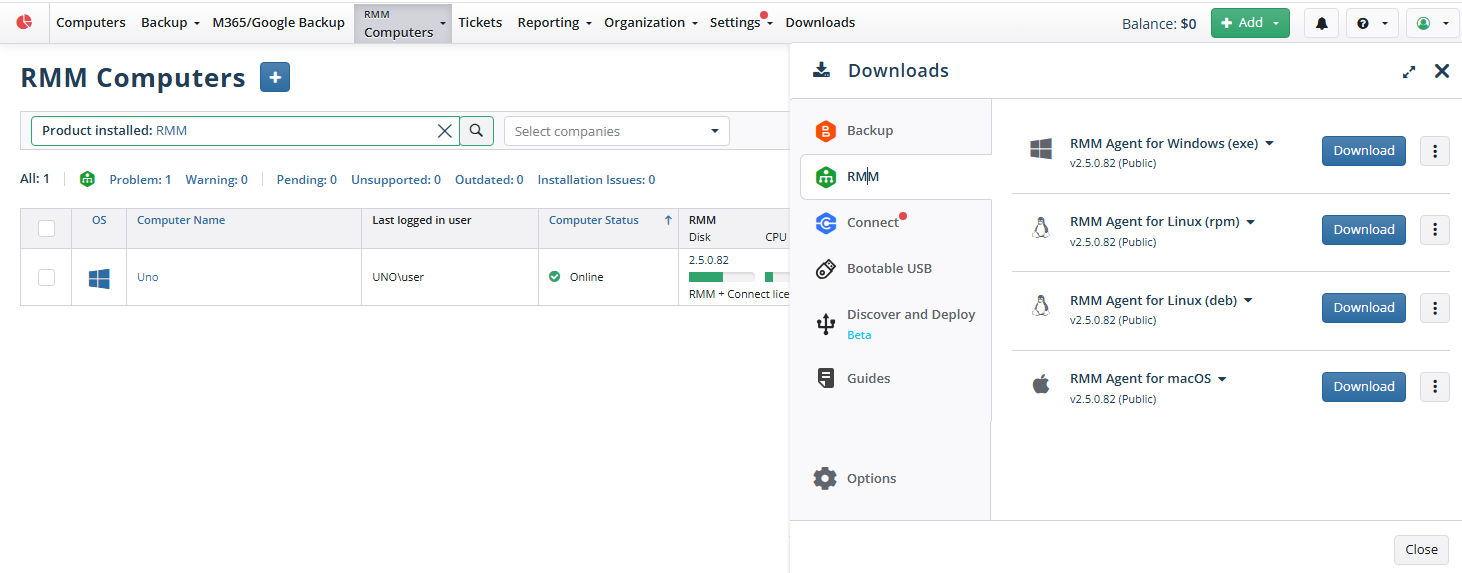
- Click the download icon to download the RMM Agent installation package or expand the actions control next to it to select one of the appropriate options:
- Copy link to copy the download link to the clipboard
- Copy installation package to copy the installation script to the clipboard
- Delete installation package to remove the installation package
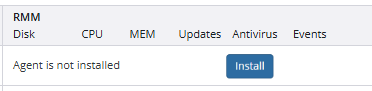
Note that if a target computer has Backup Agent installed, you can install the RMM Agent directly from the Management Console. To do this, click Install in the RMM column on the Remote Management page.
RMM Agent Supported OS
View the list of macOS versions that are currently supported:
- macOS 13.0 "Ventura"
- macOS 14.0 "Sonoma"
- macOS 15.0 "Sequoia"
- macOS 26.0 "Tahoe"
Local RMM Agent Installation
To install the RMM agent on the local computer only, go to the Downloads menu in the Management Console.
- Open the Management Console.
- Select Downloads and open the RMM tab.
- On the RMM tab, select the build that matches the operating system of the local computer. To view the list of operating systems supported by a specific Agent, expand the control next to the Agent version.
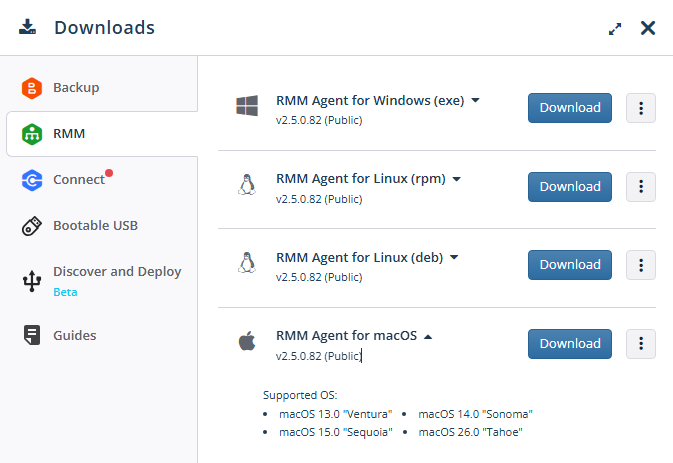
- Click the Download button next to the Agent version.
- Run the installation file.
- Follow the setup wizard steps.
Once installed, the RMM Agent icon appears in Applications. You do not need to run the Agent: as soon as the application is installed, the gathering of monitoring data starts.
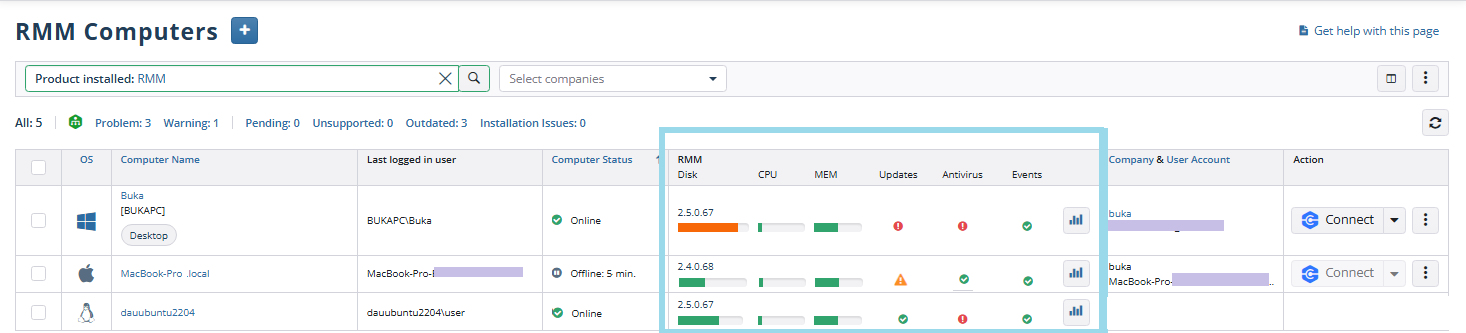
Information collected by the RMM Agent is displayed in the RMM column on the Remote Management page.
Authorize Computer (optional) and Assign a License
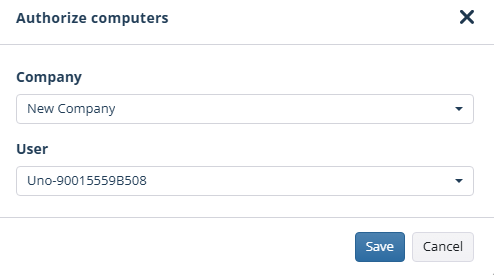
If the RMM Agent is the first installed Agent on the computer, the computer appears on the Computers page, and you will be prompted to authorize the computer and then to assign an RMM + Connect license to it.
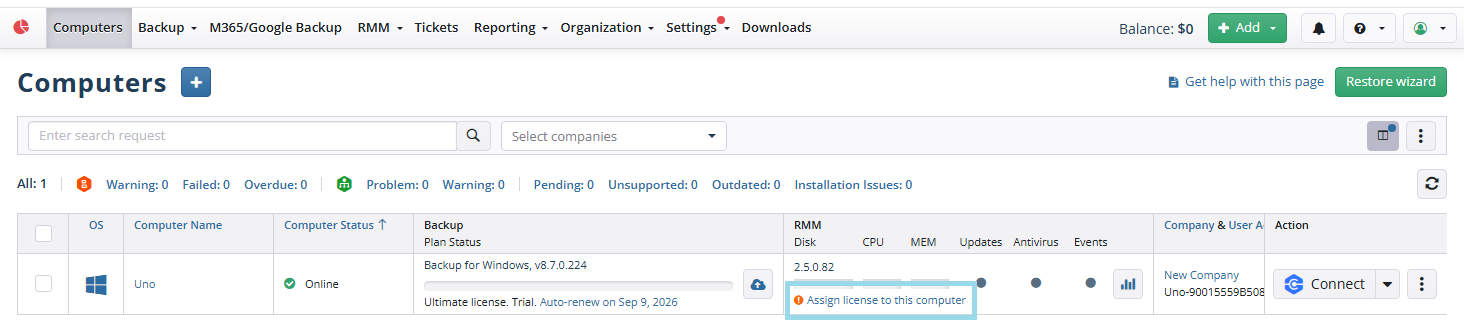
Click the Assign license to this computer link.
The trial RMM + Connect license will be assigned to this endpoint. The trial license will automatically convert to a paid license on its expiration date. You will be charged on the specified day for the remaining days of the billing period. If you do not want to convert to a paid license, release the license.
Manage RMM + Connect Licenses
To manage RMM + Connect licenses navigate to RMM > Computers and open the License tab.
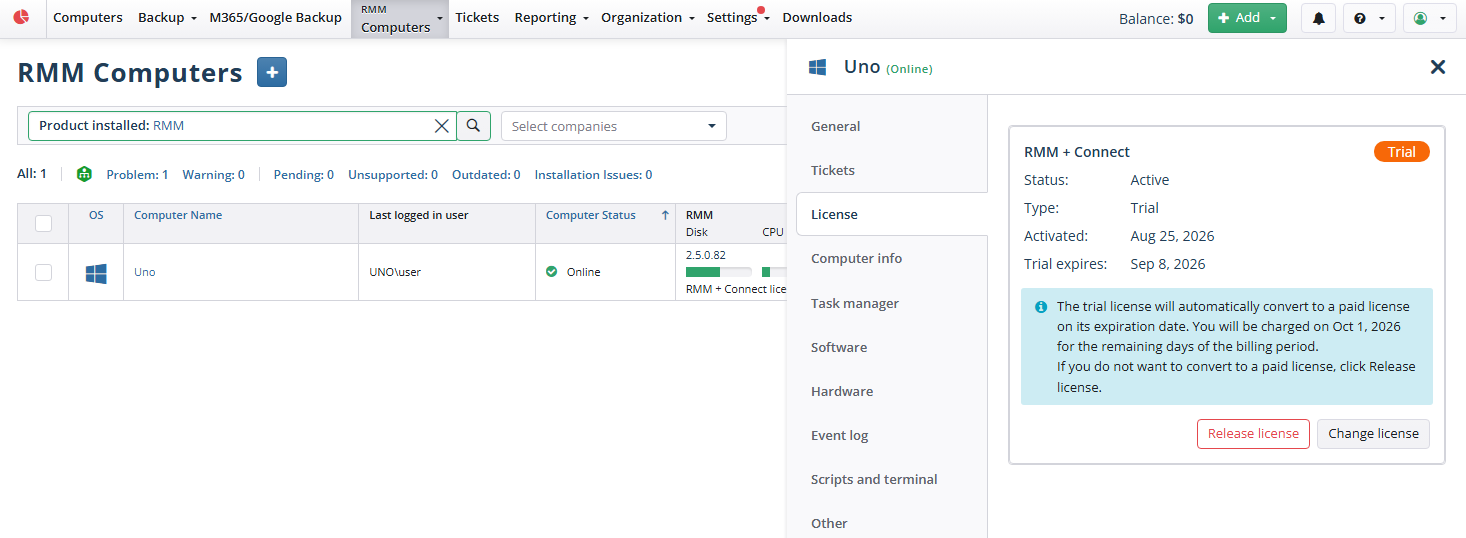
You can release the license or change the license here.
RMM Agent Installation on Multiple Computers
To install the RMM Agent on multiple computers, proceed as follows:
- Open the Management Console.
- Select the online computers you want to install RMM Agent on, then expand Install and select RMM to start the installation.
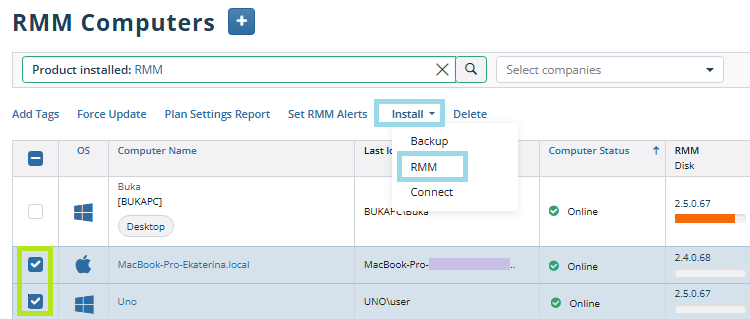
After the installation is complete, information collected by the RMM Agent is displayed in the RMM column on the Remote Management page.
Using RMM Agent on Local Computer
The following RMM Agent options are available:
- Save logs. Select a location to save the RMM Agent logs
- Stop/Start RMM Agent Service. Stops or starts the RMM Agent service
- Diagnostic. Report an issue to the MSP360 technical support team or open the logs folder
- About. Displays the RMM Agent version installed
- Exit. Exits the tray application. Note that this action does not stop the RMM Agent service