File Transfer
Managed Connect features outgoing and incoming file transfer during the remote connection sessions, meaning that you can initiate file transfer on either computer to provide more powerful interaction between the computers.
File transfer is primarily aimed at transferring documents, pictures, and installation packages, whereas transferring sizeable media files is not recommended. For received files, the file size is limited by 2GB. For outgoing file transfers there are no size limitations. There are no restrictions as to what file can be transferred, so you can share just about any file necessary.
To initiate a file transfer, click on the file transfer icon on the Connect toolbar.
![]()
Then click Receive Files or Send files, as necessary.
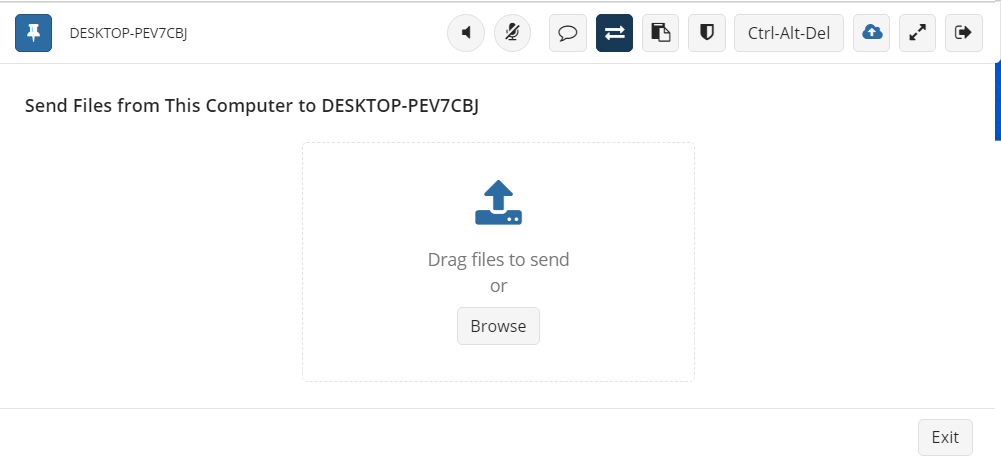
Send Files
Click the file transfer icon and select Send files.
![]()
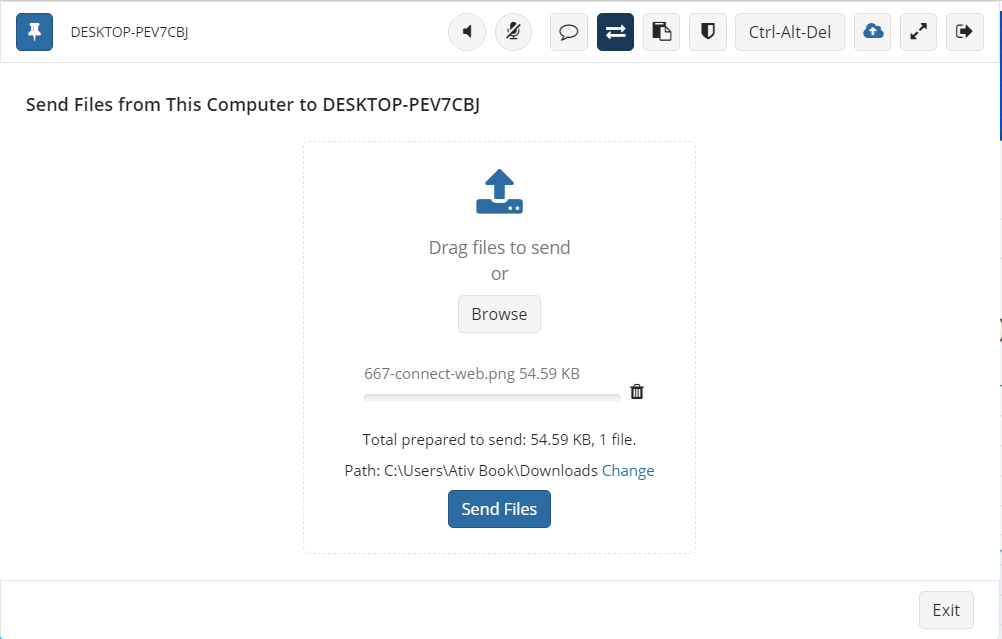
Drag and drop the required files or select Browse to find files to transfer.
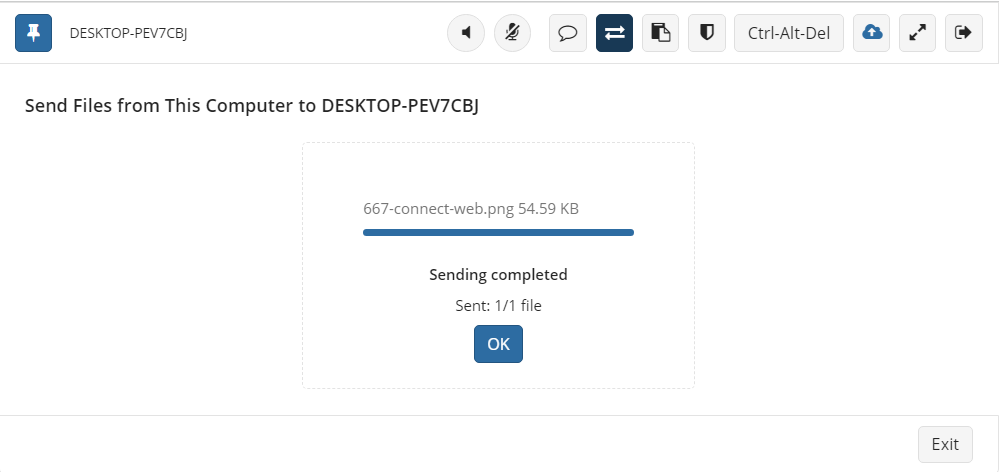
Files will be prepared to transfer. You can see the location to which files will be transferred and can change it, if necessary. If everything is OK, click Send Files. The file transfer will start. This process can work in background. To check the result, click the file transfer icon again.
The upload result will be reported after the selected transfer is complete.
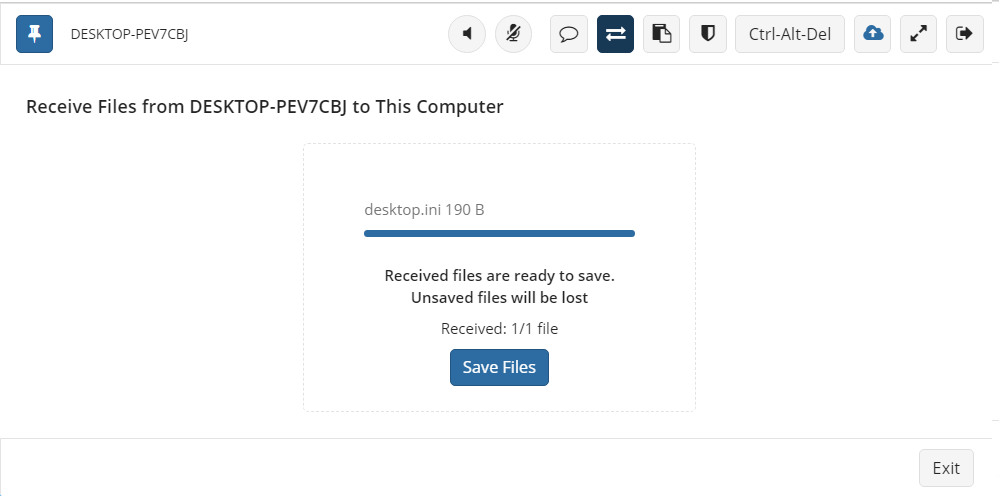
Receive Files
Click the file transfer icon and select Receive files.
![]()
Drag and drop the required files or select Browse to find files to transfer.
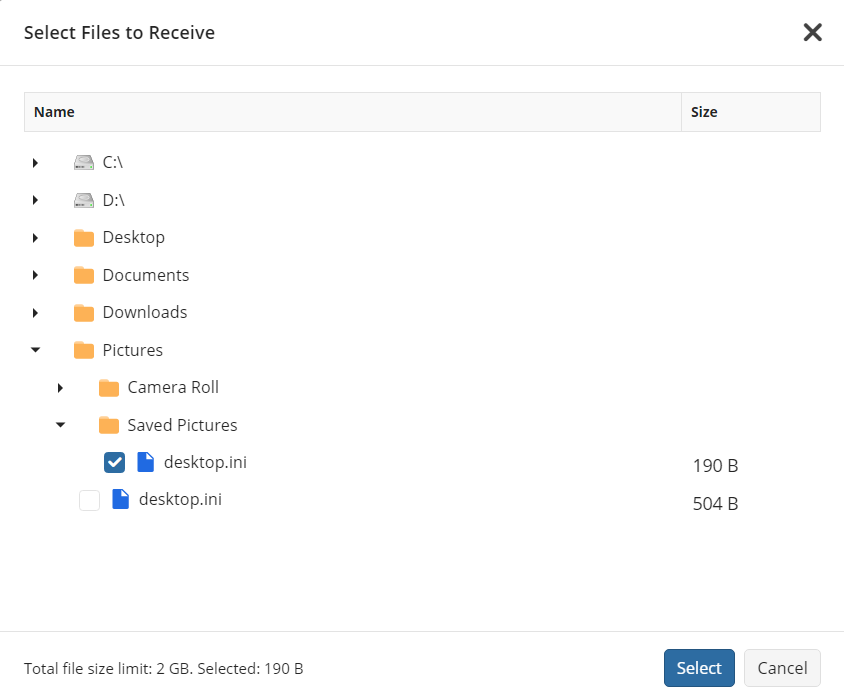
Files will be prepared to transfer. If everything is OK, click Receive Files. The file transfer will start. This process can work in background. To check the result, click the file transfer icon again.
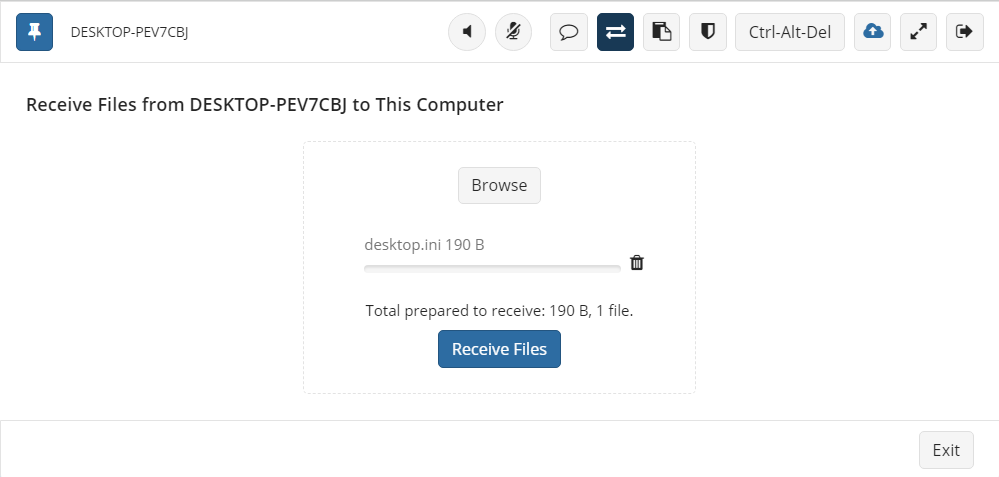
The upload result will be reported after the selected transfer is complete. Save the received files, otherwise these files will be lost.