Retention Policy in Google Backup
A data retention policy is an agreement on retaining data for operational or regulatory compliance needs.
A data retention policy appears as a part of an overall data management and plays a significant role since the definition of the terms of keeping a company's data is crucial. Data retention on longer periods than needed produces unnecessary storage usage and increases storage costs.
If user data is modified or deleted during the retention period, a copy of the original content can be always found using Google Workspace Backup Interface.
Objects in backup storage whose retention period has expired, are deleted automatically, according to a retention policy settings, so this keeps the backup storage size under control. The duration of data retention policy can be ranged from days to years. Objects that were created/modified before the retention period starts will be skipped during backup even if these objects were included in the backup scope.
You can create a custom retention policy or default retention policy, that can be assigned to all users without a custom retention policy. Also you can assign a default retention policy for all users. If no default retention policy is assigned for some users, the backup data of these users will be stored forever.
If Object Lock (Immutability) is enabled for storage accounst, all backups with configured retention policy become immutable and will be kept for the period specified in the retention policy settings applied at the moment these data was backed up.
Retention Policy and Object Lock (Immutability) Support
The Object Lock (Immutability) feature support depends on the retention policy assigned. If the Immutability is applied along with retention policy settings, backups that are subject to the retention policy become immutable for the period specified by retention policy. Refer to the table below for details on how it works.
| Object Lock on Backup Destination | Default Retention Policy | Custom Retention Policy | RESULT | Comment |
|---|---|---|---|---|
| ✔️ | ✔️ | ✔️ | Backup locked | Unable to delete backup data until the period set by custom retention policy expires |
| ✔️ | ✔️ | ❌ | Backup locked | Unable to delete backup data until the period set by default retention policy expires |
| ✔️ | ❌ | ✔️ | Backup locked | Unable to delete backup data until the period set by custom retention policy expires |
| ✔️ | ❌ | ❌ | Backup NOT locked | Backup data can be deleted |
| ❌ | ✔️ | ✔️ | Backup NOT locked | Backup data can be deleted |
If you change the default or custom retention policy, all backup data locked with the Object Lock (Immutability) will be kept for the period specified in the retention policy settings applied at the moment this data was backed up.
Create Retention Policy
Retention policies are set per tenant and must be applied individually to users.
Sign in Google Workspace Backup as an administrator.
Open the Users page, then select users the retention policy to be assigned to.
Click Retention Policy.
Click Go to list and click Create Retention Policy to create a new retention policy
Specify the name for the new retention policy and the service the policy will be applied to. You can create the retention policy for the following services:
Mail
Drive*
Contacts
Calendar
Shared Drives*
Exported PST files
*The backup storage for these services is checked once a week to see if the retention period expires for some data related to these services, and if it has expired, the data is purged.
Specify the retention policy settings. There are two options to retain backed up objects:
- Delete Older Than. This option allows you to delete all objects that were modified or created before the specified date (day, week, month, and year periods are available). Select period before backed up or modified objects will be deleted in the backup storage for the selected backup service. Select whether the last revision can be deleted. This setting is intended for securing actual versions to protect data from occasional purge.
It is generally recommended to have "Always Keep the Latest Revision" option enabled in order to prevent unintended full purge of backed-up data older than the specified age. This option ensures that chronologically latest revision of each backed-up object will always be preserved on the storage regardless of other data retention parameters, unless deliberately removed from the backup manually.
Consider the following example. Let’s assume that your company requires you to store all revised financial documents created less than three months ago. In this case, to ensure data is in the backup storage, select 3 months value for the Delete older than option. With this value selected, backup data will be automatically deleted from the backup storage.
- Purge Delay. Set the purge delays for regular retention policy. This setting allows you to secure your backup storage by keeping backups that have to be deleted due to a retention policy for some more days. This setting does not affect the Object Lock (Immutability) period.
To temporarily disable the retention policy execution, select the Disable checkbox. The retention policy will be temporarily disabled. This does not affect other retention policies. The backup data can be still removed manually. To start this retention policy execution, clear the Disable checkbox.
Click Create to save the created retention policy. This retention policy appears in the retention policy list.
Retention policy runs automatically once a week. The new retention policy is saved and can be now assigned to selected users for the service specified in retention policy settings.
If Object Lock (Immutability) is allowed for the storage account used for Microsoft 365/Google Workspace backup, the backups created for service with configured retention policy become immutable and cannot be modified or deleted before the retention period expires.
Object Lock (Immutability) is supported by the following storage providers:
Assign Retention Policy
Sign in Microsoft 365 / Google Workspace Backup as an administrator.
Open the Users page, then select users the retention policy to be assigned to.
Click Retention Policy.
Select the existing retention policies for the backup services in the list.
Click Save to assign selected retention policies to selected users.
Configure Default Retention Policy
You can set a default retention policy across all your domains if these domains are included in the same tenant.
- To create a default retention policy, in the Account menu to the right of the horizontal menu bar click Retention Policies.
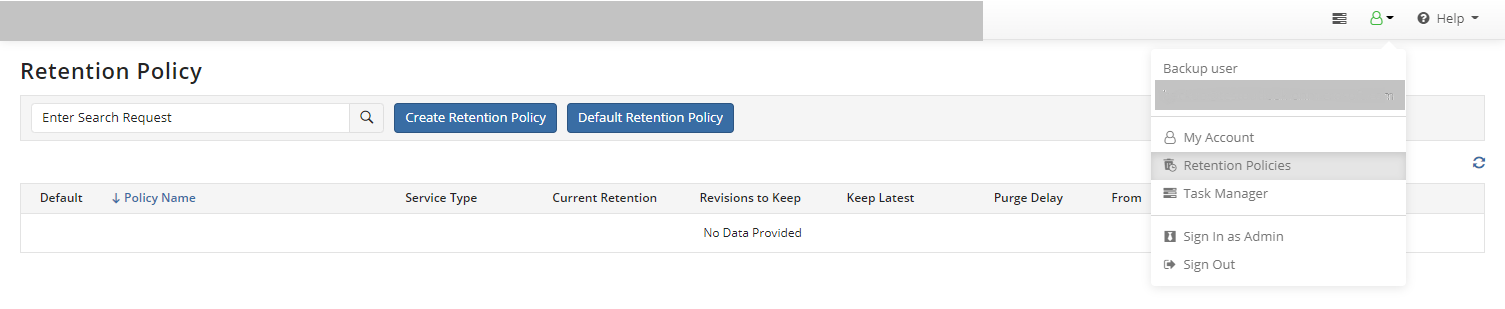
- Click Default Retention Policy.
- Select existing retention policies for the services to set them as default. This default retention policy will be applied to existing users without configured retention settings and for all new users. Users with configured retention settings will not be affected. To apply this retention policy to all users (including users with configured retention settings), select Apply to all users checkbox.
- Click Save.
Edit Retention Policy
Open the Users page, then select users the retention policy to be assigned to.
Click Retention Policy.
In the pane to the right click Go To List.
Click the retention policy you want to change, then select Edit Retention Policy in actions.
Once you are done with the retention policy parameters, click Create. The new retention policy is created
Click Back to proceed with retention policy assignment.
-OR-
- In the account menu click Retention Policies
- In the retention policy list select the retention policy you want to edit and click Edit Retention Policy.

- Change the retention policy settings and click Save.
If you change the retention policy, change storage account, or disable the Object Lock (Immutability) for storage account, all backups locked with the Object Lock (Immutability) will be kept for the period specified in the retention policy settings applied at the moment these data was backed up.
Delete Retention Policy
- In the account menu click Retention Policy
- In the retention policy grid select the retention policy you want to delete and click Delete Retention Policy.
- Confirm the deletion of retention policy. The default retention policy will be assigned instead of the custom one. In case of no default retention policy is configured, the backups will be stored until you delete them manually.
If Object Lock (Immutability) is allowed for the storage account used for Microsoft 365/Google Workspace backup, the backups created for service with configured retention policy become immutable and cannot be modified or deleted before the retention period expires. If you delete the retention policy, all backups locked with the Object Lock (Immutability) will be kept for the period specified in the retention policy settings applied at the moment these data was backed up.