Best Practices for Backups and Restores
Conventions
Notes and useful comments
User scenarios or useful hints
Caveats or warning information.
Danger block. These blocks are used for extremely important notifications in documentation
Files Backup Plans
Files Backup Plan in Backup Agent for Windows
View the latest version of the article in the Online Help
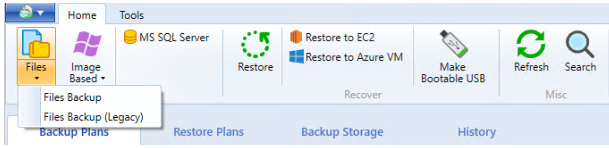
Step 1
To create a new file backup plan, click the Files icon in the horizontal menu bar.
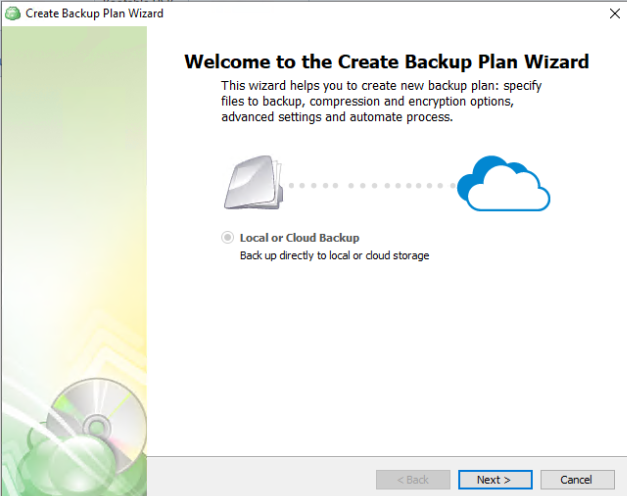
Step 2
Only “Local or Cloud Backup” is currently supported for this backup type, click “Next” to continue.
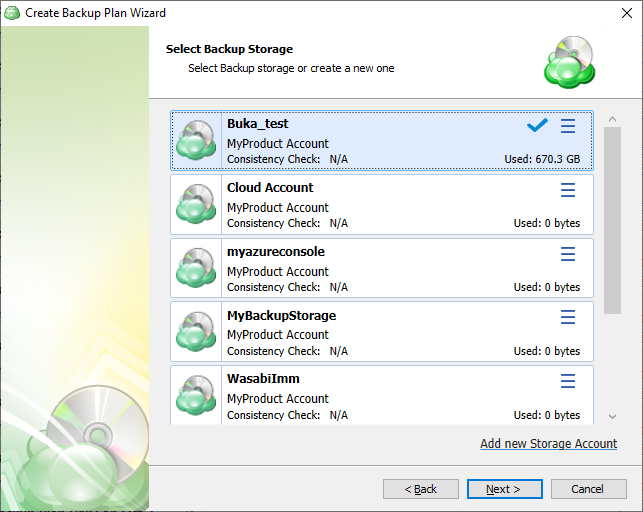
Step 3
The next step will prompt you to select the destination for the backup. Select a storage account for the backup plan from the list of available backup storage. * If the desired destination is not in the list, you can click “Add new Storage Account” to add it.
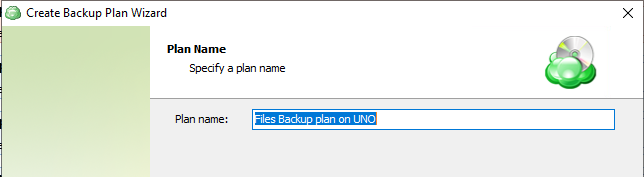
Step 4
Name the backup plan. It is recommended that you select a name which helps you clearly identify the computer as well as the type of backup.
Step 5
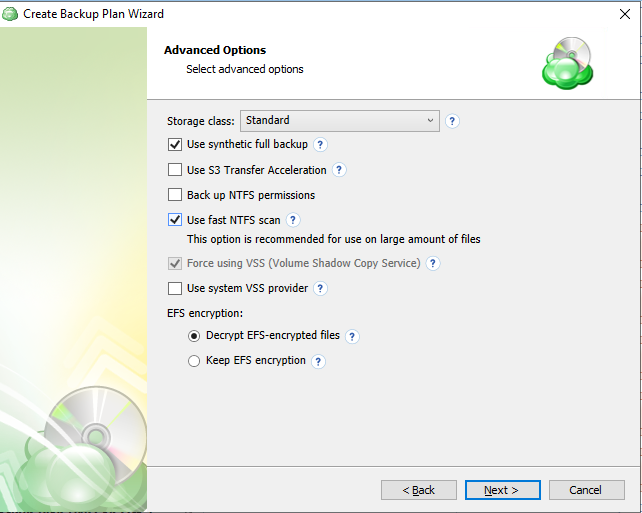
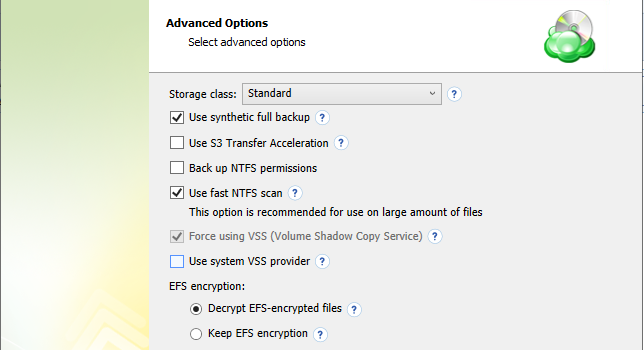
Specify advanced options for the backup plan. Advanced option set depends on the selected backup storage.
- Use synthetic full backup: This option is available only for backups to cloud destinations and improves performance of Full Backups by enabling the use of synthetic full backup technology. If a long-term storage class is selected as the backup destination, this will result in high storage costs.
- Backup NTFS permissions: Enable this option to retain all NTFS permissions assigned to your files, folders, and network shares. You may still choose whether or not to include these when restoring the files.
- Use fast NTFS scan: Enabling this allows the application to more quickly scan the NTFS file system for changes by using a low-level API, at the expense of increased local resource usage. The performance increase will likely only be noticeable when backing up a considerably large number of files and is also dependent on the type of device being backed up. The setting will not impact the speed of the initial full backup and will only be noticeable on subsequent backups.
- Force using Volume Shadow Copy Service (VSS): Select this check box to back up objects from a snapshot created by the VSS service in order to avoid any access conflicts. This option is enabled by default.
- Use system VSS provider: Using this option will force the application to use the native Windows VSS provider. If an error occurs while using the native provider, this option can be deselected to allow the application to scan for and use other 3rd party VSS providers. It is recommended that this option is selected by default.
- EFS encryption: Choose whether to keep EFS encryption intact or to decrypt the data during the backup plan execution then re-enabling it.
To learn more about NTFS permissions, refer to the NTFS permissions article
Note that the Force Using VSS option is mandatory for fast NTFS scanning and is selected automatically
To learn more about VSS, refer to the Volume Shadow Copy Service (VSS) article
Consider the following restrictions which apply to VSS:
- VSS cannot be used to back up network files, such as network shares and mapped network drives
- VSS cannot make snapshots of data stored in FAT32-partitioned volumes.
Additional Advanced Options for Amazon S3
- If your backup storage destination is Amazon S3, select the S3 storage class for the backup plan:
- Standard
- Intelligent-Tiering
- Standard-IA
- One Zone-IA
- Glacier Instant Retrieval
- Glacier Flexible Retrieval (formerly S3 Glacier)
- Glacier Deep Archive
Usage of different storage classes for different backups is the subject of optimizing your storage costs.
Learn more about Amazon S3 storage classes here
- Select Use S3 Transfer Acceleration to accelerate file transfer for an extra fee. The target bucket must have this feature enabled. Select this checkbox if you want to use the data transfer acceleration service provided by Amazon. To learn more, refer to the Amazon S3 Transfer Acceleration.
Additional Advanced Options for Microsoft Azure
If your backup storage destination is Microsoft Azure, and you have the General Purpose v2 Azure account, select the required storage class (access tier).
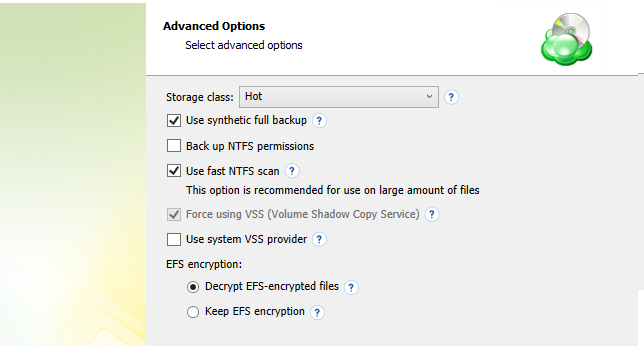
The following options are available:
- Hot tier. An online tier optimized for storing data that is accessed or modified frequently. The hot tier has the highest storage costs, but the lowest access costs.
- Cool tier. An online tier optimized for storing data that is infrequently accessed or modified. Data in the cool tier should be stored for a minimum of 30 days. The cool tier has lower storage costs and higher access costs compared to the hot tier.
- Cold tier.An online tier optimized for storing data that is rarely accessed or modified, but still requires fast retrieval. Data in the cold tier should be stored for a minimum of 90 days. The cold tier has lower storage costs and higher access costs compared to the cool tier.
- Archive tier. An offline tier optimized for storing data that is rarely accessed, and that has flexible latency requirements, on the order of hours. Data in the archive tier should be stored for a minimum of 180 days.
Note that this feature is only supported for General Purpose v2 Azure accounts. If you are using another kind of account, you need to upgrade your account to be able to use this feature
Be aware of the additional charges and increased blob access rates after your Azure account upgrade
To learn more about the difference between Azure storage tiers, refer to the Azure Blob Storage - Hot, cool,cold, and archive storage tiers article at docs.microsoft.com.
Step 6
Specify the files/folders to back up for the backup plan.
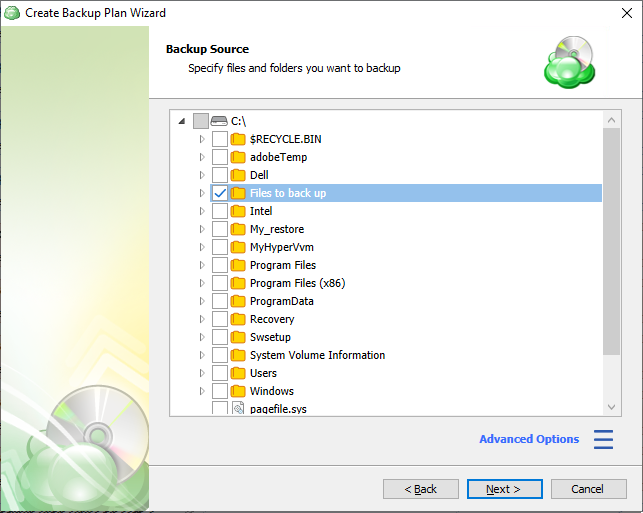
On Windows system partitions it is recommended to only back up \Users\ folder. An Image backup is better suited to back up Windows and any other installed applications
Databases cannot be backed up at the file level while in use. A Pre and Post action to stop and start the database should be used prior to backing up at the file level. MSP360 MS SQL Server edition offers a robust solution for backing up active MS SQL databases
Files and folders which are not accessible to the service account used by the backup plan will not be backed up and may cause the plan to fail. See information for more options.
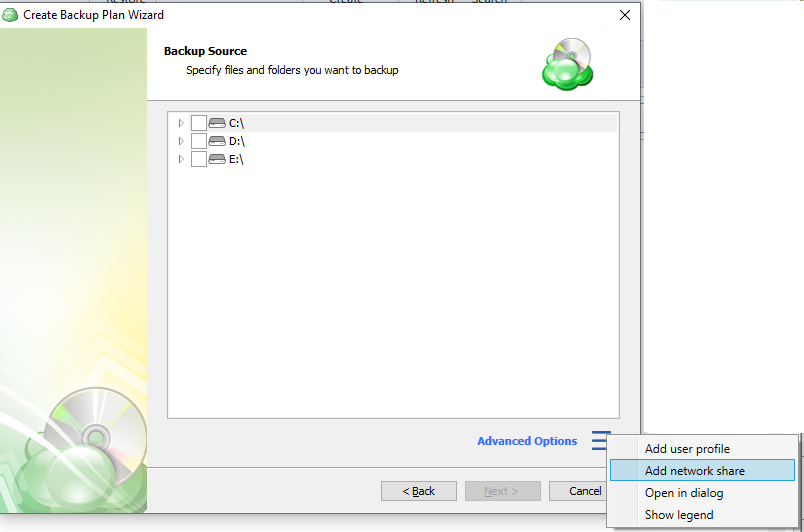
Advanced Options
You can use Advanced options to add a network share to include it's content to backup scope. The following options are available on this menu:
- Add user profile. Use this option to explicitly include user folders in your backup (such as "Documents", "Downloads", or "Favorites").
- Add network share. Opens a dialog window where you can specify the path to a network share containing files that you wish to include in the backup. You may also enter alternate user credentials required to access the network share.
- Open in dialog. Invokes a new dialog window displaying a larger view of the file tree.
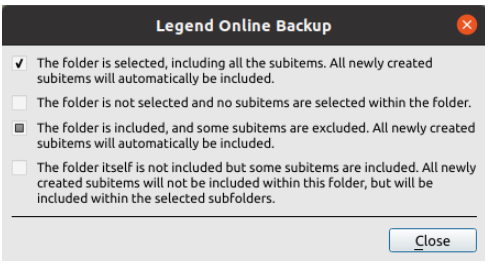
- Show legend. Invokes a dialog window explaining how to interpret the different states of the checkboxes in the file tree, as follows.
To add a network share:
- Expand Advanced options and click Add network share
- Provide the path to the network share in the following format:
\\<server name>\<share name>
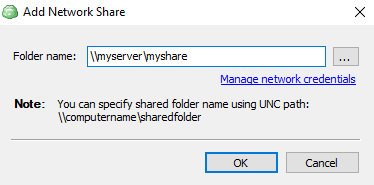
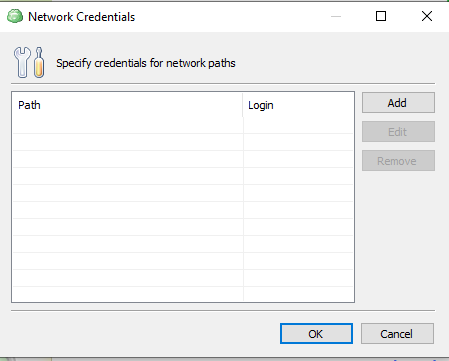
- Click Manage credentials and provide the credentials of account with backup operator permissions on the network share.
- Click Test to check whether the network share is accessible.
- Click Add, and then select files to back up on the added network share.
| Checkbox Appearance | Description |
|---|---|
| This folder with all subitems excluded. All new content will NOT be added | |
 |
This folder with all subitems included. All new content will be added |
 |
Only selected items excluded. New content will NOT be added in excluded folders" |
 |
Only selected items included. New content will be added in selected folders only |
Step 7
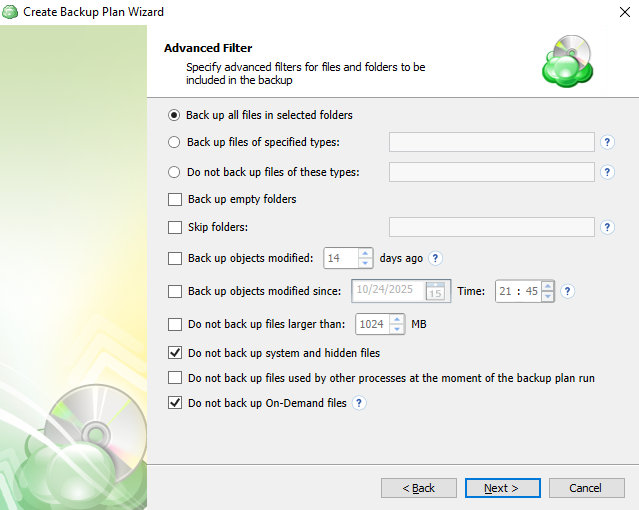
Advanced Filter step. Specify various criteria for files/folders to limit the backup size, if necessary.
- Back up all files in selected folders. Select this option to back up all files in folders, specified on the Backup Source step
- Back up files of these types. Select this option to back up files of certain types. The file type is detected by file extension. In the field to the right, specify the required file extensions. Use a semicolon to separate extensions
- Do not back up files of these types. Select this option to exclude files of certain types from the backup plan. The file type is detected by file extension. In the field to the right, specify file extensions to be excluded from the backup plan. Use a semicolon to separate extensions
- Back up empty folders. Select this check box to include empty folders in the backup plan
- Skip folders. In this field, specify folders to be excluded from the backup plan. Use a semicolon to separate folders
- Back up files modified (days ago). Select this check box, if you want to back up files, modified on a specific day. In the field to the right, specify the number of days from the last modification
- Back up files modified since. Select this check box if you want to include in the backup plan all files that have been modified after a point in time. In the fields to the right, specify the date and the time of file modification
- Do not back up files larger than (MB). Select this check box to limit the size of files for the backup plan. In the field to the right, specify the maximum file size
- Do not back up system and hidden files (selected by default). Select this check box to exclude files that have 'system' and/or 'hidden' attributes from the backup plan
- 'Do not back up files used by other processes at the moment of the backup plan run. Select this check box, if you want to exclude from the backup plan files that will be opened at the moment of the backup plan run
- Do not back up On-Demand files (selected by default). Select this check box to exclude On-Demand files from the backup plan.
Step 8
Specify compression and encryption options for the backup plan.
- Select Enable compression check box to compress backup source contents for optimal backup storage space usage
- To protect your backup contents with encryption, select the Enable encryption check box. MSP360 (CloudBerry) Backup supports AES encryption of 128, 192 and 256 bit key length. Select the appropriate key length in the Algorithm drop-down menu
- Specify the encryption password in the Password field, then confirm the password in the Confirm field. To display the password, select Display password checkbox.
The encryption password cannot begin and/or end with spaces
The encryption password will NOT be stored in the backup plan configuration for security reasons. Keep this password in a safe place to be able to restore the backup contents afterward
Step 9
Specify whether a full consistency check is required for this backup plan. A mandatory consistency check will be completed with every backup plan run regardless of this setting.
To learn more about consistency checks, refer to the Consistency Checks chapter
Step 10
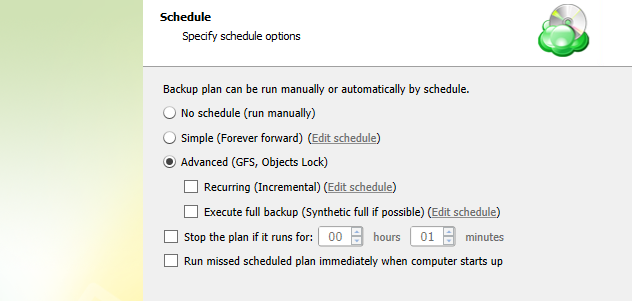
Specify the backup plan schedule settings.
The following options are available:
- Select the No schedule option to run the backup plan manually.
- Select the Simple (Forever Forward) option to apply the Forever Forward Incremental (FFI) schedule.
- Select the **Advanced (GFS, Object Lock) option to apply the recurring schedule and, if necessary, use Grandfather-Father-Son and Object Lock (Immutability).
- To set the time limit for plan execution, select the Stop the plan if it runs for checkbox, then specify the backup plan duration limit.
- To run the backup plan after the computer is on in case the backup plan run has been missed, select the Run missed scheduled backup immediately when computer starts up checkbox.
Click Next.
Simple Schedule
Select the Simple (Forever Forward) option to use the Forever Forward Incremental (FFI). This schedule offers one full backup followed by a limited number of incrementals. Once the limit is exceeded, a new full backup is created using in-cloud copying (synthetic full backup. Once you select this option, specify the FFI schedule for the backup plan. You can select the Daily or Monthly schedule type, depending on how often the incremental backups will be performed.

This schedule is unavailable if the selected storage account does not support synthetic full backups.
Advanced Schedule
Select the Advanced (GFS, Object Lock) option to set up a flexible, recurring schedule with generations. Every generation contains one full backup followed by incrementals.
The advanced schedule allows configuring a flexible schedule according to your requirements. To use this schedule you should add schedules for full and incremental backup runs:
- To create incremental backups by schedule, select the Recurring (Incremental) checkbox, then configure the schedule for incremental backups on a daily or monthly basis.
- To create full backups by schedule, select the Execute full backup (Synthetic full if possible) checkbox, then configure the schedule for full backups on a daily or monthly basis.
It is recommended to schedule full backup at least once every 3 months for selected schedule
Step 11
Specify the retention policy settings for the backup plan. The retention policy depends on the schedule selected on the previous step.
Retention Policy with Simple Schedule
If you selected the Simple (Forever Forward Incremental) schedule, the Retention Policy step offers the following settings:
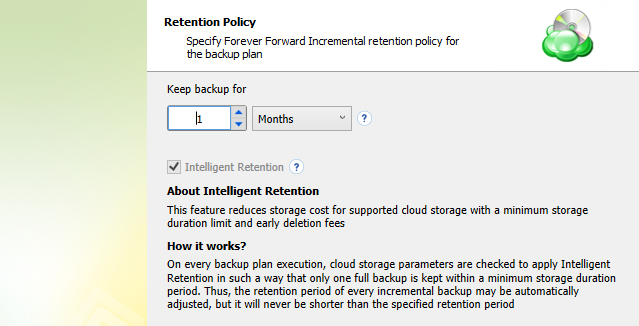
- Keep backup for. Select this option to limit the number of restore points. The Keep backup for value defines the period Restore Points with the Forever Forward Incremental schedule are kept. If their retention period expires, these restore points are merged into a full backup (with Forever Forward Incremental only one full backup is kept on the backup storage).
For backup storages with a minimum storage duration limit and early deletion fees, this value can be exceeded to avoid the fees
- Intelligent Retention: Each time the backup plan is executed, the backup storage parameters are analyzed automatically, setting the retention period based on storage provider data deletion conditions. This feature is enabled by default.
Learn more about the retention policy in the Retention Policy chapter chapter
Retention Policy with Advanced Schedule / No Schedule
If you selected the Advanced (GFS, Object Lock) schedule or to run backup manually without the schedule, the Retention Policy step offers the following settings:
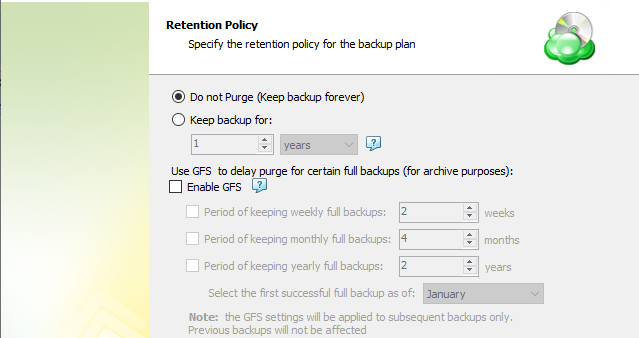
- Do not purge (Keep backup forever). Select this option to keep all your backup runs.
- Keep backup for. Select this option to limit the period while backup contents are kept in the backup storage, then specify the period.
Learn more about the retention policy in the Retention Policy chapter chapter
To apply the GFS retention policy for the backup plan, select the Enable GFS checkbox, then customize the GFS retention policy by enabling the required keeping periods (weekly, monthly and yearly purge delays).
To learn more about the GFS retention policy, refer to the About GFS chapter
If backup data is required to be locked, enable the Object Lock (Immutability) checkbox. Before enabling Object Lock, you need to allow this feature for the backup destination.

To learn more about the Object Lock (Immutability) feature, refer to the Object Lock (Immutability) chapter
Step 12
Specify Pre / Post Actions in this is allowed for your account.
As of from Management Console 5.0, pre- or post- actions for Backup Agent can be restricted by provider. To learn more about the pre-/post action settings, refer to the Global Agent Options and Companies chapters
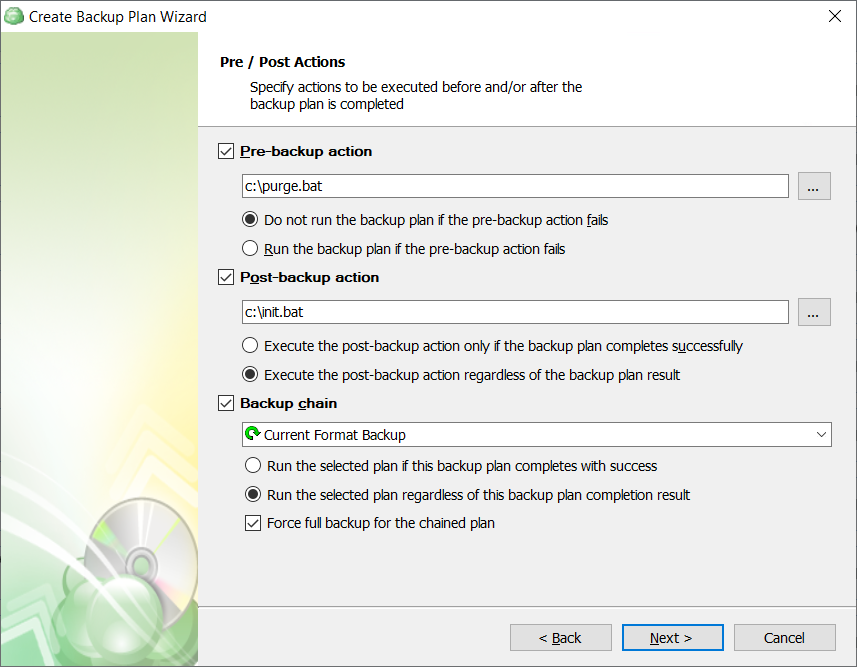
Customize actions before and/or after the backup plan runs.
Custom Scripts
You can execute custom scripts before or after running the backup plan.
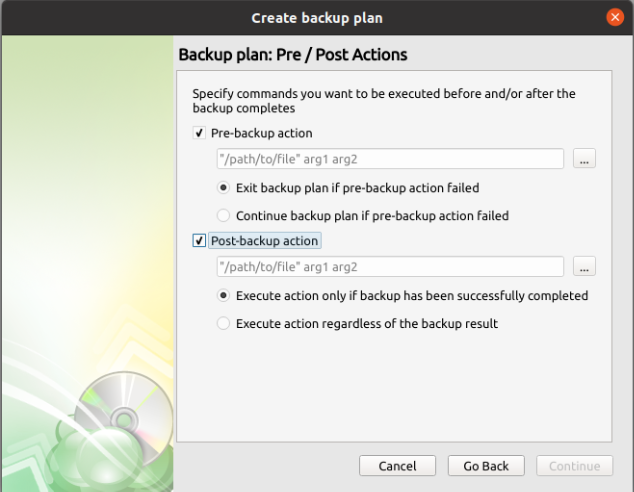
- To specify the script execution before the backup plan starts, select the Pre-backup action checkbox, then specify the path to the script in the field below. To open a standard Windows dialog box, click the ... button
- Select the pre-backup script execution options:
- Exit backup plan if pre-backup action failed. Select this option to cancel the backup plan in case the specified script fails
- Continue backup plan if pre-backup action failed. Select this option to run the backup plan regardless of the specified script execution results
- To specify the script execution after the backup plan terminates, select the Post-backup action checkbox, then specify the path to the script in the field below. To open a standard Windows dialog box, click the ... button
- Select the post-backup script execution options:
- Execute post-backup action only if backup plan has been successfully completed. Select this option to execute the post-backup script only in case of a backup plan success
- Execute post-backup action regardless of the backup result. Select this option to execute the post-backup script in any case
Note that an absolute path to a script is required, i.e. if you specify the path to a script, it should be as follows:
c:\scripts\prebackup-script.bat
In case the absolute path to a script file is not specified, the default directory for script is "C:\Windows\System32"
The following script formats are supported: EXE, COM, BAT, CMD, or PIF
Mind that Backup Service supports EXE files have several restrictions: EXE files must not use GUI and must close automatically upon termination.
For example, the following script will not succeed:
cmd.exe /F:ON
In this case, this command must be used with the /C parameter, as shown below:
cmd.exe /F:ON /C
The same restriction applies to applications executed by PowerShell scripts:
PowerShell.exe Start-Process cmd.exe exit
It is highly recommended to perform a test run for the created backup plan to ensure that Backup Agent properly executes specified scripts
Backup Plan Chains
In case you need to run another backup or restore plan once the backup plan is finished, use the Backup Chain feature. To create a backup chain, select the Backup chain checkbox, then select a backup or restore plan to be chained.
- Execute the specified backup plan only if backup plan has been successfully completed. Select this option to execute the chained backup plan only in case of a backup plan success
- Execute the specified backup plan regardless of the backup result. Select this option to execute the chained backup plan in any case
- In case you chained a backup plan, you can enable the full backup for it regardless of the contents in the backup storage. To do this, select the Force full backup for the chained plan. By default, full or incremental backups will be started according to the schedule of this backup plan.
Step 13
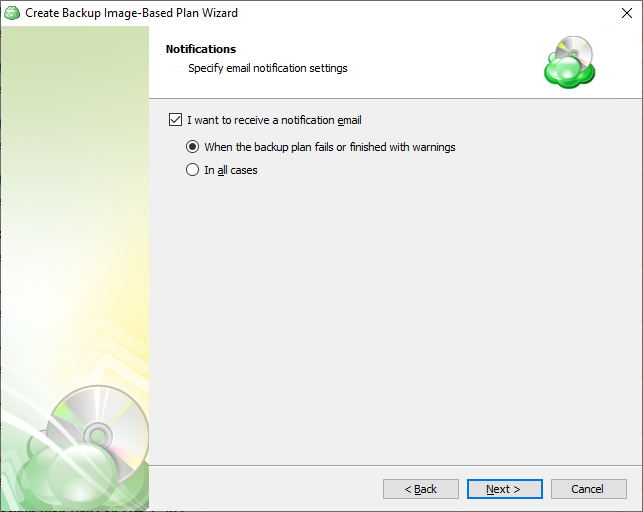
You can configure email notifications informing about the backup process results, and maintain logging.
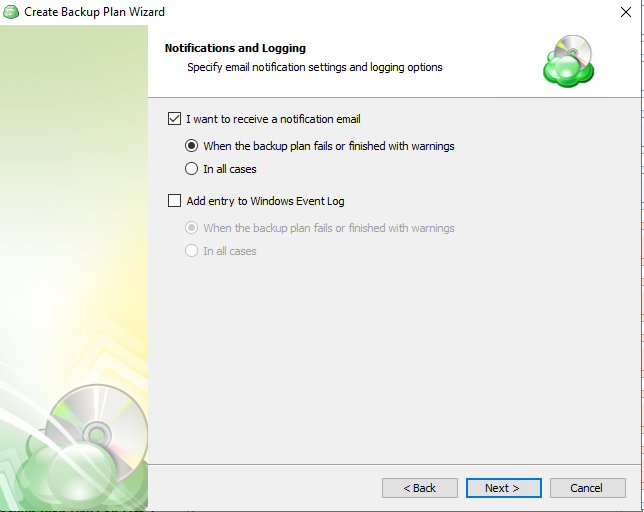
You can receive email notifications after each run of the backup plan or only in case if it fails for some reason.
In addition, you can register the activity related to the backup routine in the Windows Event Log. You can choose whether to log all activity, or add new entries to the log only when a backup routine fails.
Step 14
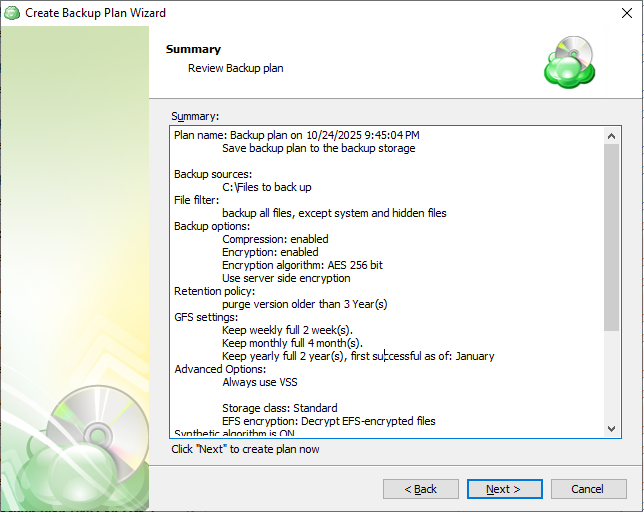
Review the configuration of the backup plan.
Step 15
Select the Run backup now check box to execute the backup plan immediately.
If you want to run the backup plan later, click Finish.

File Backup in Backup Agents for macOS/Linux (BETA)
View the latest version of the articles in the Online Help
Step 1
After launching Online Backup, you can start the Backup Wizard by clicking Backup in the horizontal menu bar or pressing CMD+B.
Step 2
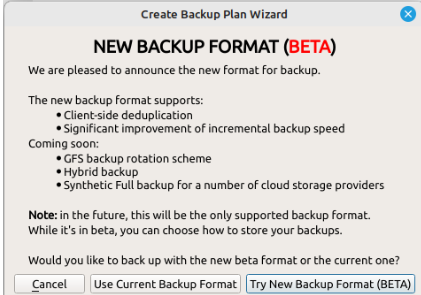
After clicking on the Backup button, you will be prompted to choose between the new backup format, and the legacy (current) backup format. Click on “Try New Backup Format (BETA)” to continue.
- Client-Side Deduplication
- Consistency Checks
- Restore on Restore Points
- Optimized operations with storage, resulting in fewer requests, faster synchronization, and faster purge
- Continued data upload in case of network issues
- Object size up to 256TB to any storage destination
- Optimized performance and storage usage for a large number of small files
- Improved incremental backup performance.
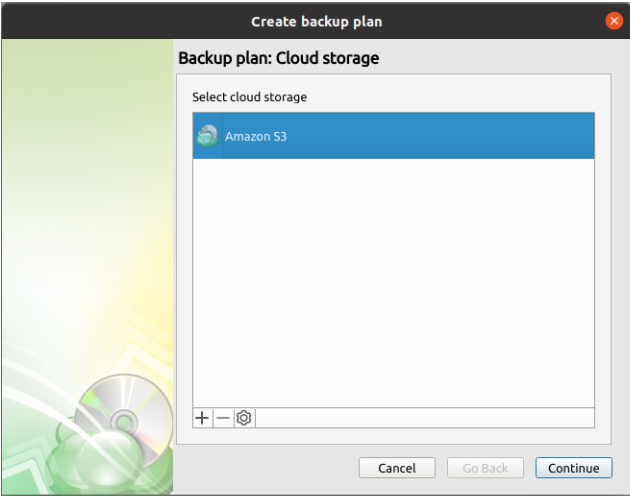
Step 3
At the "Cloud Storage" step, select the storage destination for the backup.
Step 4
Once the destination has been selected, the next screen will prompt you for a plan name.
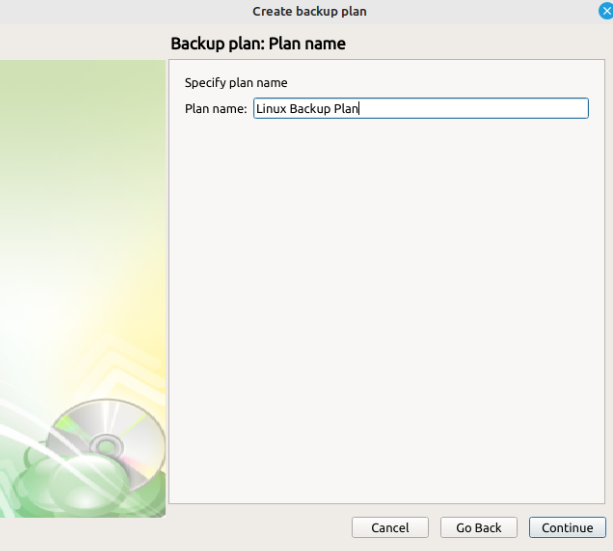
It is recommended that you select a name which helps you clearly identify the computer as well as the type of backup
Step 5
At the "Backup Source" step, select all the files and folders that are required to be backed up.
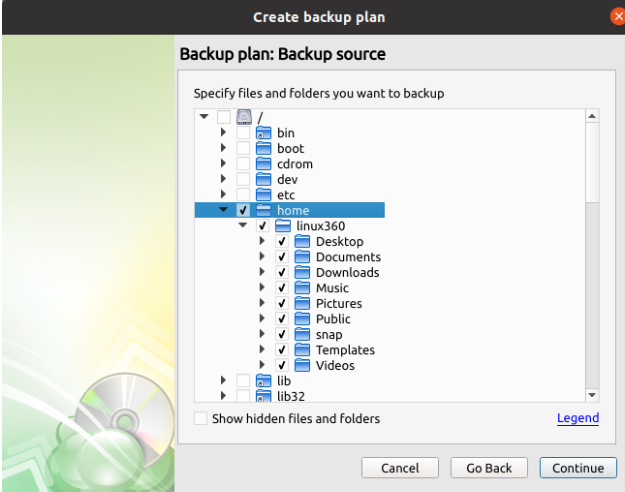
We generally recommend backing up the contents of: /home (user files) /etc (daemons configuration files) /var/* (only the subdirectories that are needed, like /var/mail, /var/mysql, /var/www etc.)
In some cases, you might also need to backup data from: /media or /mnt (if there's a mount point containing important info) /root (if there is any important information or settings stored in the home directory of the root user)
macOS only:
It is essential that these locations should not be included in the backup: /boot /dev /var/run /tmp /sys /Applications \ /Library \
Databases cannot be backed up at the file level while in use. A Pre and Post action to stop and start the database should be used prior to backing up at the file level
Files and folders which are not accessible to the service account used by the backup plan will not be backed up and may cause the plan to fail. Ensure all necessary rights are granted prior to starting the backup.
Legend. Invokes a dialog window explaining how to interpret the different states of the checkboxes in the file tree, as follows.
Step 6
Next you will be prompted with the "Advanced Filter" selections, which will allow you specify which files or folders in the selection locations should be skipped.

When using the Advanced Filters, the number of files actually uploaded can differ from the number of files that are calculated in the local folder Properties
“Skip Folders” will exclude any folders that contain the specified partial name. For example, “temp” will exclude all folders with “temp” in the name in all sources.
Step 7
Once all data to backup has been selected, the next step is to determine whether compression or encryption should be applied. Other options in this step may change depending on the capabilities of the selected Backup Destination.
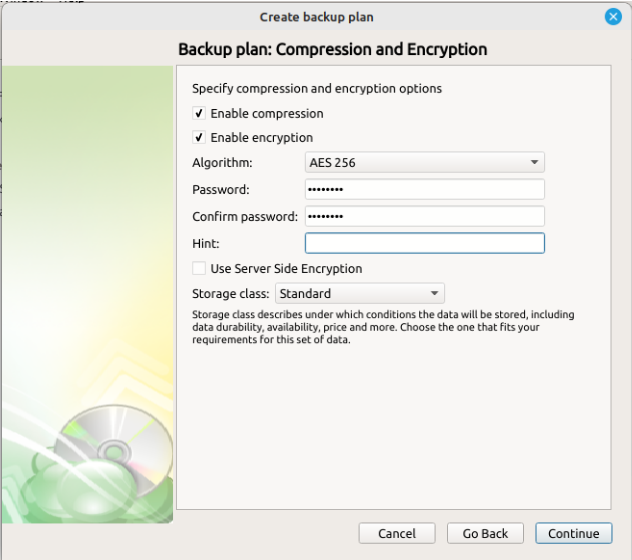
Enabling compression will reduce the size of the backup, reduce the time to upload it, both of which may decrease the cost of the backup
Encrypting the backup adds an additional layer of security to the data at the expense of increased processing resources during the backup process. Several types of encryption are available, with the most secure are selected by default
“Server Side Encryption” is only available on certain cloud providers and is separate from the Managed Backup0 encryption. The native encryption applies only to the data the application backs up, while the server side encryption refers to encrypting the bucket on the cloud service itself
It is important to remember that our Support team is not able to retrieve or reset the encryption password. It is recommended that you store the password in a secure place
Step 8
Next you are presented with an option for the type of Backup Consistency Check to use with the plan. It is recommended that you leave “Enable Full Consistency Check” enabled.
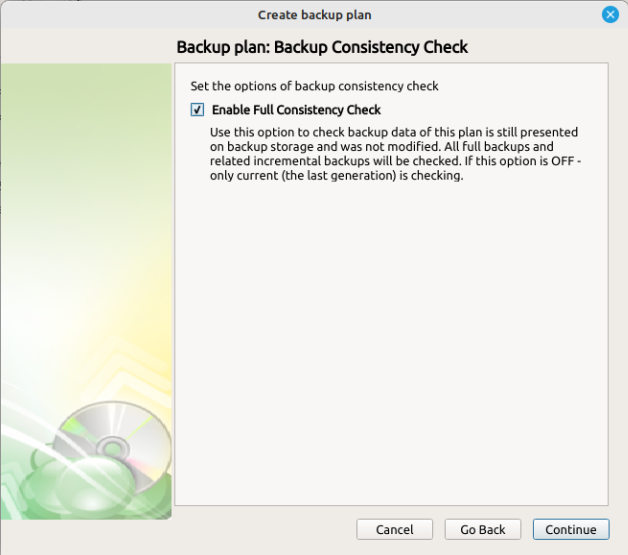
We strongly recommend leaving the Full Consistency Check enabled. This feature checks all full backups and their related incremental backups, instead of only the last backup generation
Step 9
Next, you can configure the frequency which Incremental Backups will run, or choose not to create a schedule and instead run the plan manually.
- The “Run missed scheduled backup immediately upon boot-up” option ensures that the backup process will begin automatically after your computer starts up if the last backup was not able to start at the scheduled time for any reason. This is the recommended option for Desktops and Laptops.
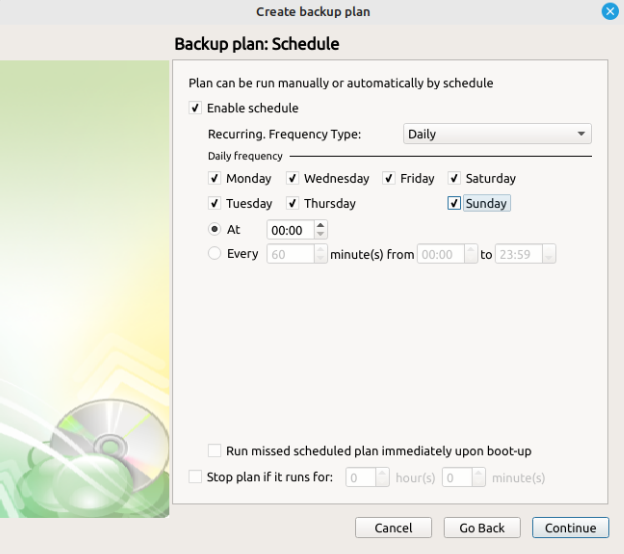
Do not use the “Stop the plan if it runs for:” option if you have a slow or unstable internet connection. The first full backup can take a long time to upload, and it can be unexpectedly interrupted if this option is enabled
Step 10
After scheduling the Incremental Backups, the next step is to schedule how often a Full Backup will run. Full Backups are required to create backup generations and for the Retention rules to apply.
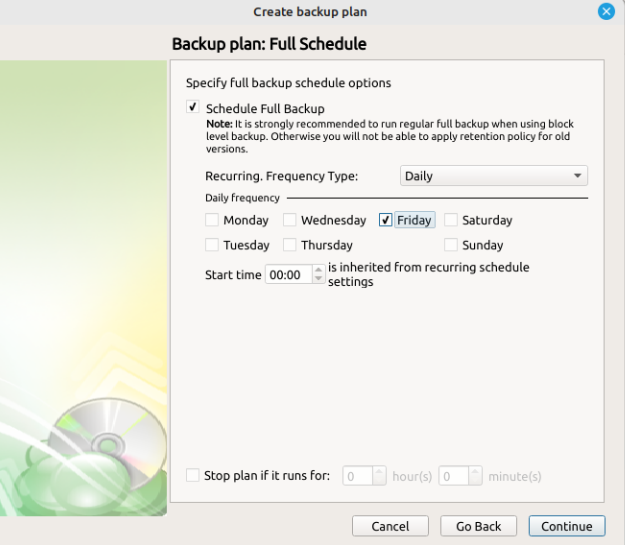
Schedule a “Full Backup” at regular periods, once a week will be suitable in most circumstances
Failure to schedule Full backups will prevent the retention rules from applying. This will result in high storage costs and slower restorations
Step 11
Next, you can specify the retention policy - these are the rules that specify how data is deleted from the cloud. The process is automatically performed at the end of every successful run of the backup plan.
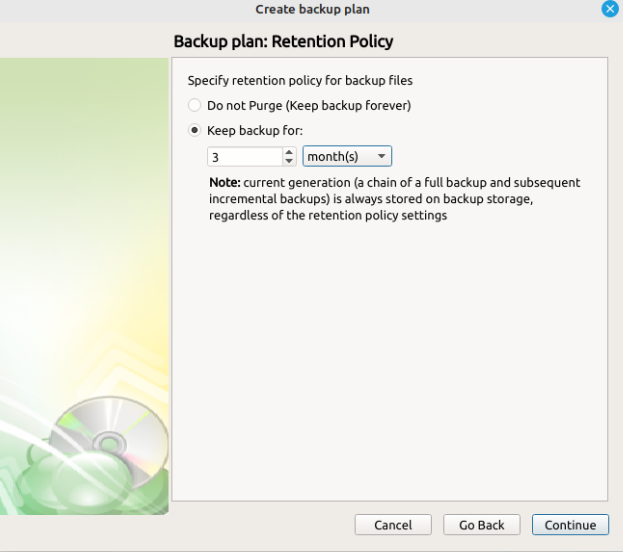
- Keep backup for. Determines the minimum age a restore point will be before deletion. Full Backups cannot be purged until the youngest dependent Incremental Backup has reached this age.
The retention policy will only perform with regular scheduled full backups
Step 12
The “Pre/Post Actions” page allows the execution of custom scripts before and/or after the running of a backup task.
Step 13
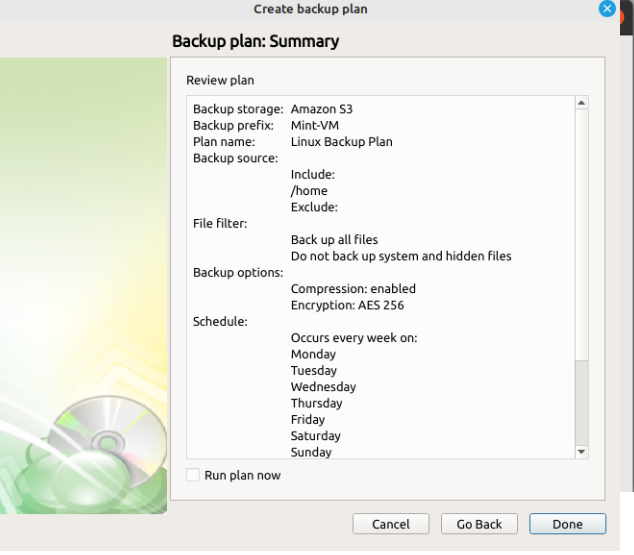
The next step of the Wizard displays a summary of the selections made throughout the process. Once you have reviewed your selections, click “Done”. If you select “Run plan now” the backup will start immediately, otherwise it will start at the next scheduled time.
Files Backup Plan in Management Console
View the latest version of the article in the Online Help
Create a Backup Plan from Scratch
Open the Management Console.
Open Backup > Computers page in the new main menu.
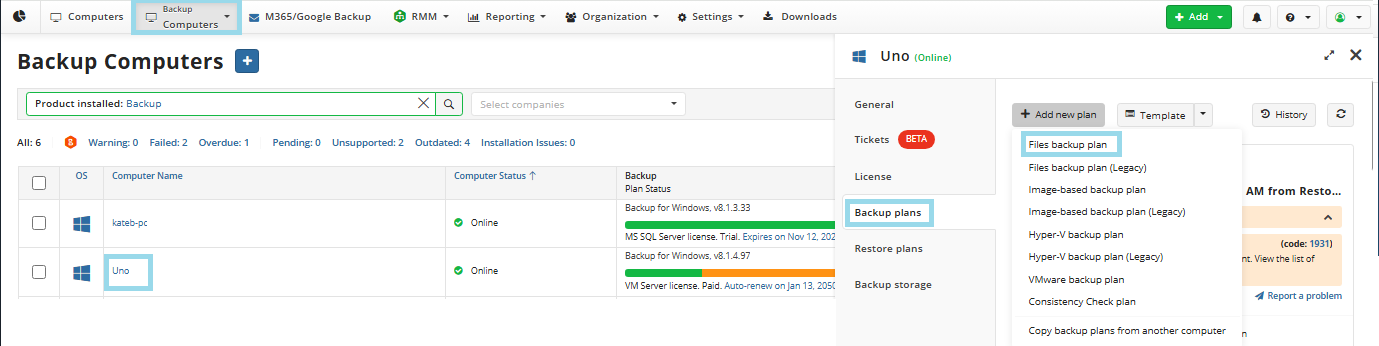
Find the required computer, then click the Configure icon in the Backup Plan Status column.
On the Backup Plans tab of the side panel, click + or +Add New Plan.
In the drop-down menu, select Files backup plan.
Welcome
The step in creating a new backup plan is to give it a name. Once you have entered a name, click “Next”
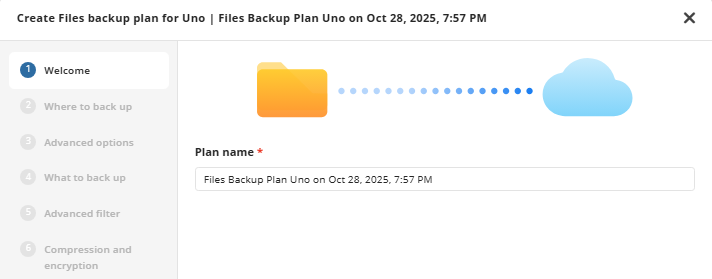
It is recommended that you select a name which helps you clearly identify the computer as well as the type of backup
In the new backup format, a backup plan configuration is always saved in a backup storage
Where to Back Up
Select a target backup storage for the backup plan. If no storage accounts are available, create a new one.
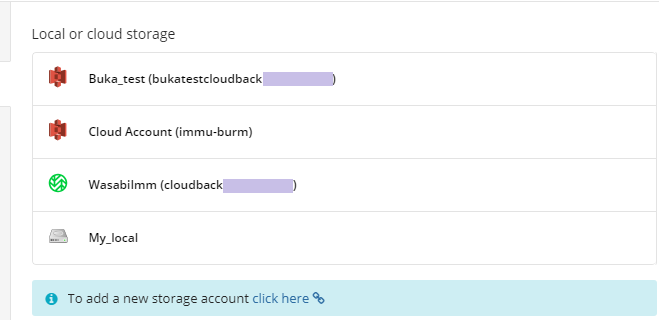
Once you select the backup storage, click Next.
Advanced Options
By default advanced options are skipped for the backup plan. You should enable them, if necessary (not recommended).
On this step you can specify the advanced options for the backup plan, exclude unnecessary contents.
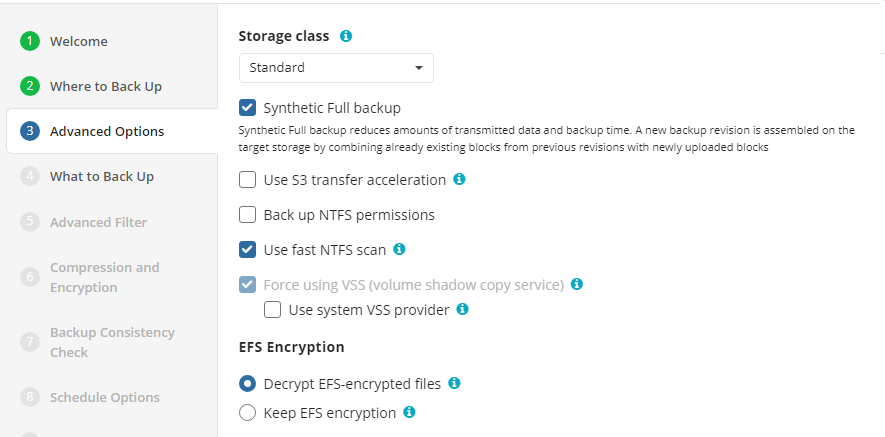
- Synthetic Full backup. Select this option to enable Synthetic Full for selected backup storage. Consider, in case you enable this option for long-term backup storage, this can result in increased storage costs. Refer to your cloud storage provider documentation to check the prices of in-cloud copy creation for selected storage classes.
- Back up NTFS permissions. Select this checkbox to back up NTFS permissions assigned to your files, folders, and network shares in the backup plan at the moment of the backup plan execution
To learn more about NTFS permissions, refer to the NTFS permissions article
- Use fast NTFS scan. Enabling this allows the application to more quickly scan the NTFS file system for changes by using a low-level API, at the expense of increased local resource usage. The performance increase will likely only be noticeable when backing up a considerably large number of files and is also dependent on the type of device being backed up. The setting will not impact the speed of the initial full backup and will only be noticeable on subsequent backups.
Note that the Force Using VSS option is mandatory for fast NTFS scanning and will be enabled automatically
- Force using VSS. Select this checkbox to back up objects from a snapshot in order to avoid any access conflicts. This option is useful to back up files that are used by other processes at the moment of the backup plan execution
To learn more about VSS, refer to the Volume Shadow Copy Service (VSS) article
Consider the following restrictions that apply to VSS:
- VSS cannot be used to back up network files, such as network shares and mapped network drives.
- VSS cannot make snapshots of data stored in volumes with FAT32-partition.
Use system VSS provider. Select this checkbox in case you experience issues with a third-party VSS provider. Once the backup plan is run, the Backup Agent will use the system VSS provider forcibly
EFS Encryption
- Decrypt EFS-encrypted files. This option is selected by default: when selected, EFS-encrypted files are backed up in a decrypted state
- Keep EFS encryption. Select this option to back up EFS-encrypted files 'as is', in the encrypted state. Note that this option requires special attention since some issues decryption issues upon restore to a location other than the source computer may occur
Read more about backups of EFS-encrypted objects in the EFS-encrypted File Backup
Additional Advanced Options for Amazon S3
If your backup destination is Amazon S3, the following custom options are available in this step.
- Use S3 Transfer Acceleration. Use this option to accelerate file transfer for an extra fee. The target bucket must have this feature enabled
- Select the S3 storage class for the backup plan:
Using different storage classes for different backup purposes helps you to optimize the storage costs.
Learn more about Amazon S3 storage classes here
Additional Advanced Options for Microsoft Azure
If your backup storage destination is Microsoft Azure, and you have the General Purpose v2 Azure account, select the required storage class (access tier).
The following options are available:
- Hot tier. An online tier optimized for storing data that is accessed or modified frequently. The hot tier has the highest storage costs, but the lowest access costs.
- Cool tier. An online tier optimized for storing data that is infrequently accessed or modified. Data in the cool tier should be stored for a minimum of 30 days. The cool tier has lower storage costs and higher access costs compared to the hot tier.
- Cold tier.An online tier optimized for storing data that is rarely accessed or modified, but still requires fast retrieval. Data in the cold tier should be stored for a minimum of 90 days. The cold tier has lower storage costs and higher access costs compared to the cool tier.
- Archive tier. An offline tier optimized for storing data that is rarely accessed, and that has flexible latency requirements, on the order of hours. Data in the archive tier should be stored for a minimum of 180 days.
Note that this feature is only supported for General Purpose v2 Azure accounts. If you are using another kind of account, you need to upgrade your account to be able to use this feature
Be aware of the additional charges and increased blob access rates after your Azure account upgrade
To learn more about the difference between Azure storage tiers, refer to the Azure Blob Storage - Hot, cool,cold, and archive storage tiers article at docs.microsoft.com.
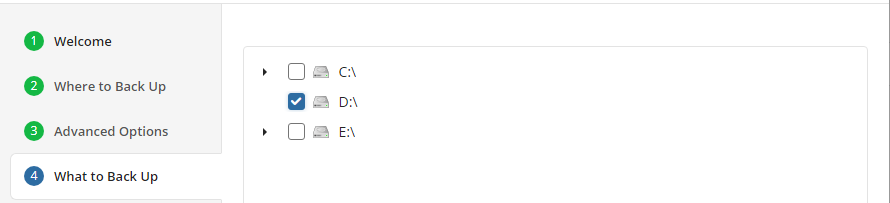
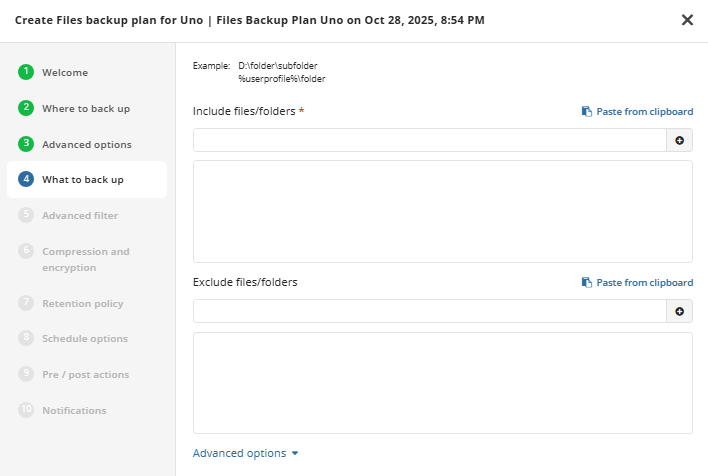
What to Back Up
Specify files and folders to be backed up.
| Checkbox Appearance | Description |
|---|---|
| This folder with all sub items excluded. All new content will NOT be added | |
|
This folder with all sub items included. All new content will be added |
|
Only selected items excluded. All new content in excluded folders will NOT be added |
|
Only selected items included. New content will be added in selected folders only |
You can use Advanced options to add a network share to include it's content to backup scope:
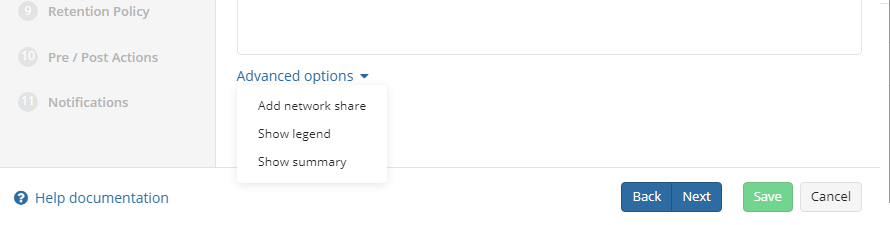
- Expand Advanced options and click Add network share
- Provide the path to the network share in the following format:
\\<server name>\<share name>
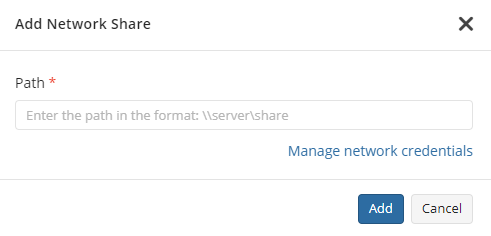
- Click Manage credentials and provide the credentials of the account with backup operator permissions on the network share.
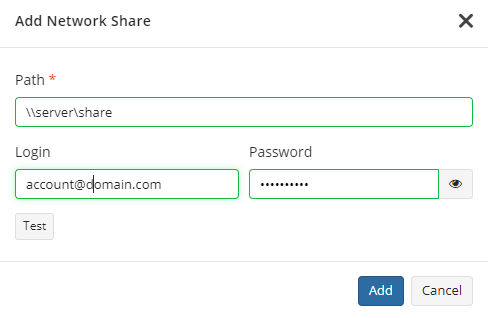
- Click Test to check whether the network share is accessible.
- Click Add
- Select files to back up on the added network share.
Consider that Managed Backup does not detect file changes based on content. Instead, it detects file changes by checking the modification date and uses this to determine whether a new copy of the file needs to be backed up.
On Windows system partitions it is recommended to only back up \Users\ folder. An Image backup is better suited to back up Windows and any other installed applications.
Databases cannot be backed up at the file level while in use. MSP360 MS SQL Server edition offers a robust solution for backing up active MS SQL databases.
Files and folders which are not accessible to the service account used by the backup plan will not be backed up and may cause the plan to fail.
For more advanced selection or the inclusion of a network share in the backup plan, click on the “Show summary” in Advanced options in the bottom. This will change the file browser window to a format which allows specific paths to be included or excluded by typing or pasting in the full path:
Advanced Filter
You can configure the criteria to include or exclude files/folders to backup.
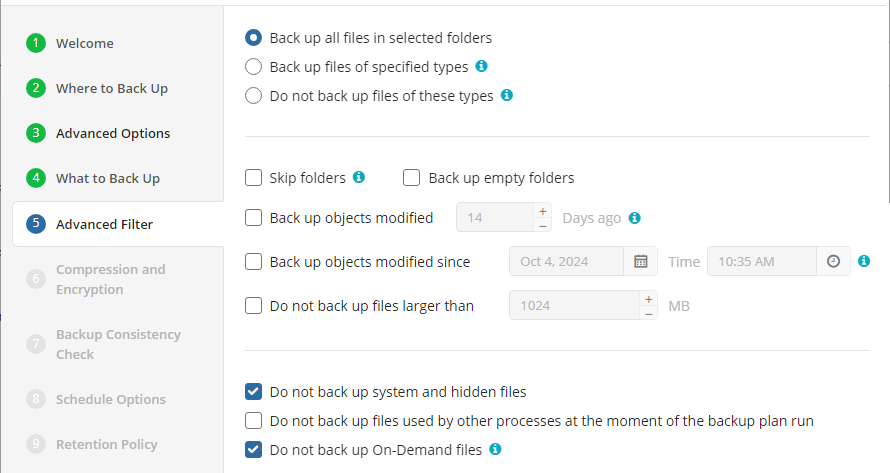
- Back up all files in selected folders. Select this option to back all files in folders, specified in the Backup Source section
- Back up files of specified types. Select this option to back up files of certain types. The file type is detected by file extension. In the field below, specify the required file extensions
- Do not backup files of these types. Select this option to exclude files of certain types from the backup plan. The file type is detected by file extension. In the field below, specify the required file extensions
- Skip folders. In this field, specify folders to be excluded from the backup plan. Separate them with semicolons
- Back up empty folders. Select this checkbox to include empty folders in the backup plan
- Back up objects modified. Select this checkbox, if you want to back up files, modified on a specific day. In the field below, specify the number of days from the last modification
- Back up objects modified since. Select this checkbox if you want to include in the backup plan all files that have been modified after a point in time. In the fields below, specify the date and the time of files modification
- Do not back up files larger than (MB). Select this checkbox to limit the size of files for the backup plan. In the field below, specify the maximum file size
- Do not back up system and hidden files. Select this option to exclude files that have 'system' and/or 'hidden' attributes from the backup plan. Refer to System and Hidden Files Backup for details
- Do not back up files used by other processes at the moment of the backup plan run. Select this checkbox, if you want to exclude from the backup plan files that will be opened at the moment of the backup plan run
- Do not back up On-Demand files (selected by default). Select this checkbox to exclude On-Demand files from the backup plan. Refer to OneDrive Backup in case you want to add this type of On-Demand files to backup
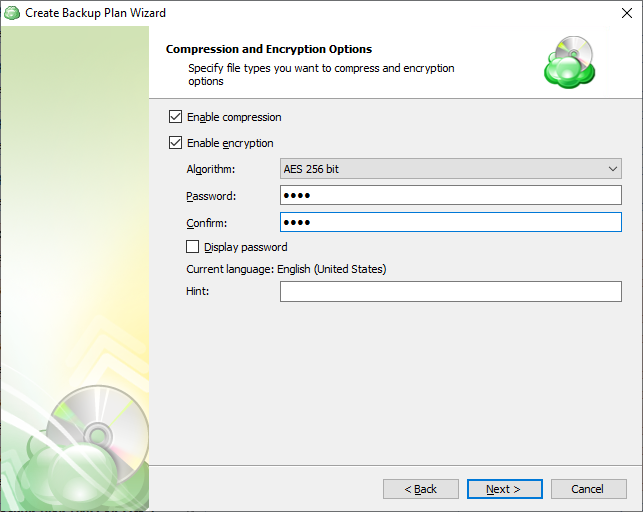
Compression and Encryption Options
Specify compression and encryption options for the backup plan.
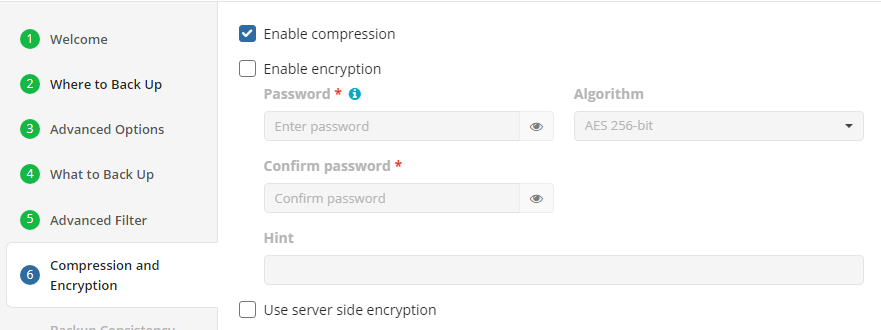
The following options are available:
- Select the Enable compression checkbox to compress backup contents to reduce the backup size on storage
- To protect your backup contents with encryption, select the Enable encryption checkbox. The following AES encryption bite key lengths are supported: 128, 192, and 256. Select the appropriate key length in the Algorithm drop-down menu
- Specify the encryption password in the Password field, then confirm the password in the Confirm field. Mind keeping the encryption password in a safe place. Pay attention, if Password Recovery Service is not enabled in the Management Console, then if the encryption password is lost or forgotten, the encrypted backup cannot be restored.
- In the Hint field, specify some information that could help to recall the password in case you forget it.
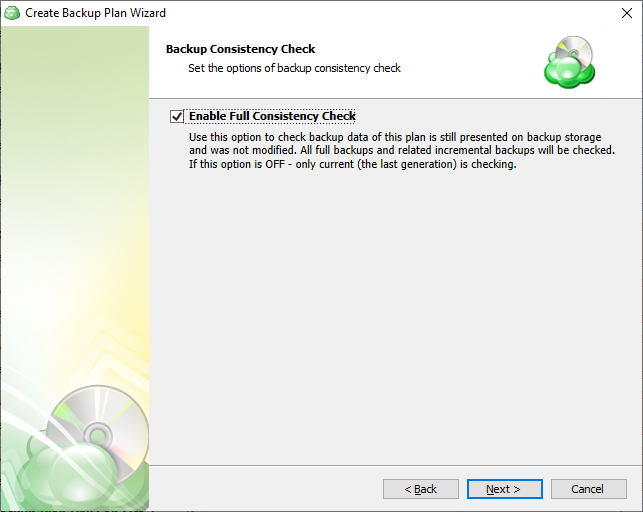
Backup Consistency Check
Specify whether a full consistency check is required for this backup plan. A mandatory consistency check will be completed with every backup plan run regardless of this setting.
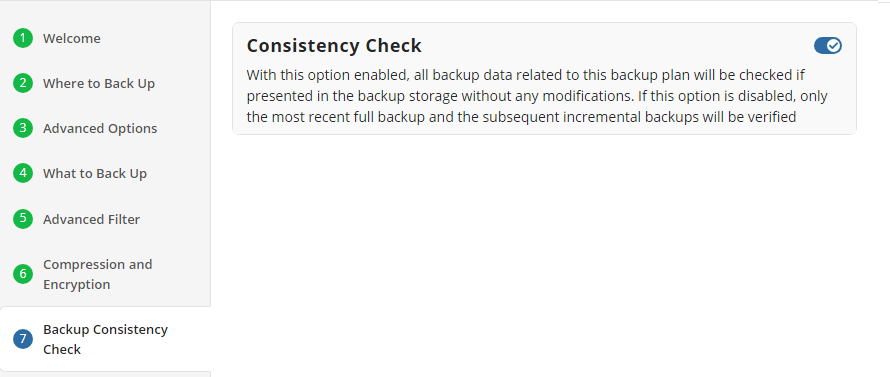
Full consistency check implements checks of data integrity for all generations (full and incremental backup sequences) except for the current generation check, which is the subject of a mandatory consistency check. A mandatory consistency check is performed at each backup plan run.
After the successful full consistency check, the backup data can be guaranteed to be restored.
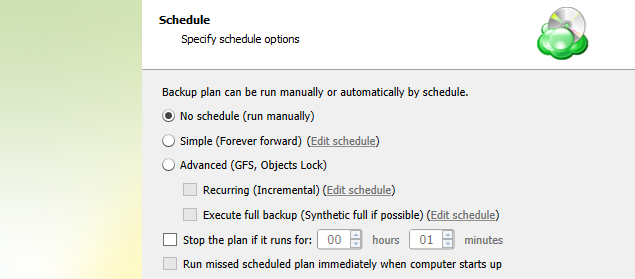
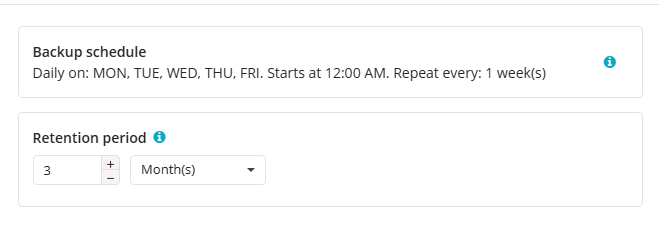
Schedule Options
Specify the backup plan schedule settings.
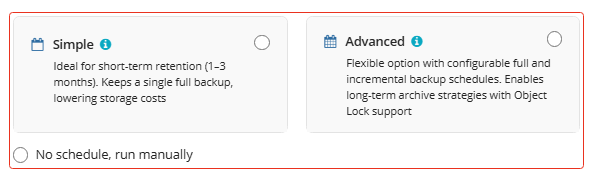
The following options are available:
- Select the Simple option to apply the Forever Forward Incremental (FFI) schedule.
- Select the Advanced option to apply the recurring schedule and, if necessary, use Grandfather-Father-Son and Object Lock (Immutability).
- Select the No schedule, run manually option to run the backup plan manually. Retention policy will not work for this option.
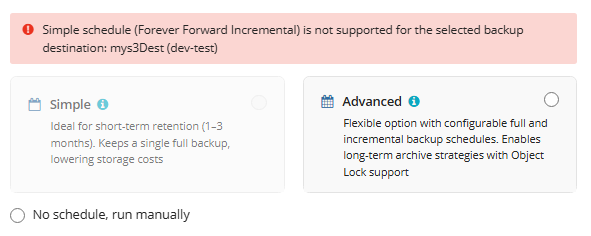
The simple schedule is unavailable if the selected storage account does not support synthetic full backups.
For more guidelines on schedule selection, refer to the following article.
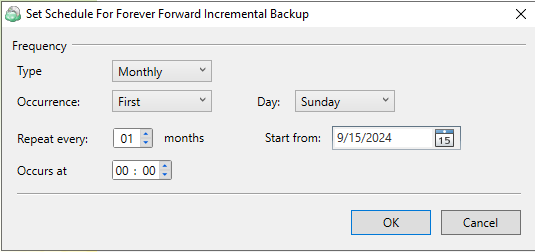
Simple Schedule
Select the Simple option to use the Forever Forward Incremental (FFI). This schedule offers one full backup followed by a limited number of incrementals. Once the limit is exceeded, a new full backup is created using in-cloud copying (synthetic full backup.
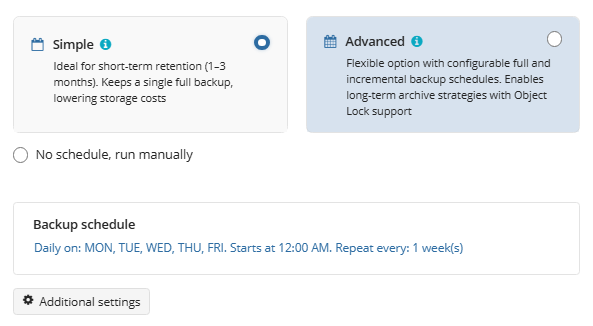
Once you select this option, the predefined schedule will appear. You can edit this schedule, if necessary. You can select the Daily or Monthly schedule type, depending on how often the incremental backups will be performed.
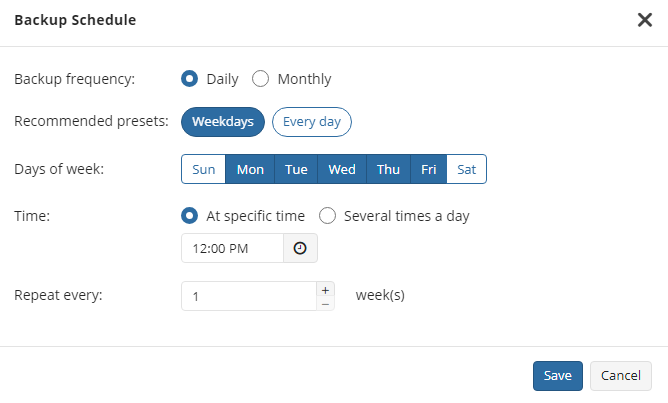
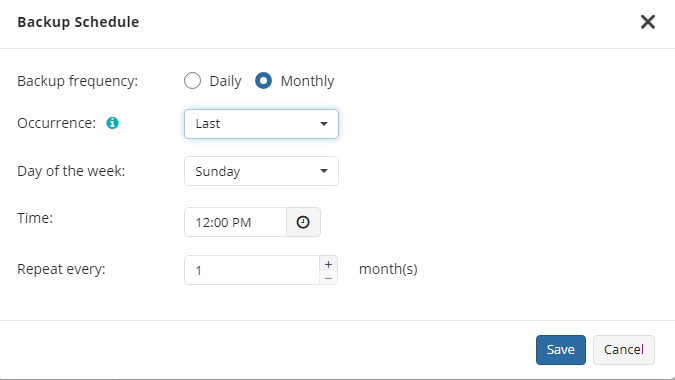
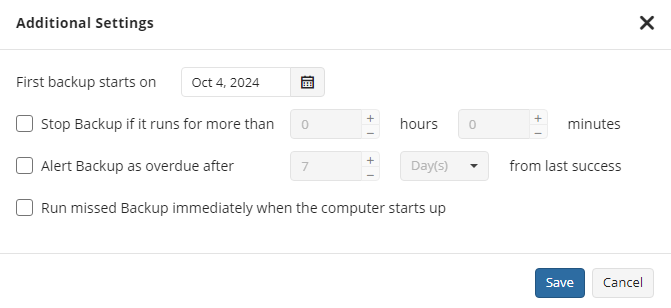
Use the Additional Settings to configure the following:
- First backup start date
- Stop condition for the long backup
- Overdue alert condition
- Missed backup handling
Advanced Schedule
Select the Advanced option to set up a flexible, recurring schedule with generations. Every generation contains one full backup followed by incrementals.
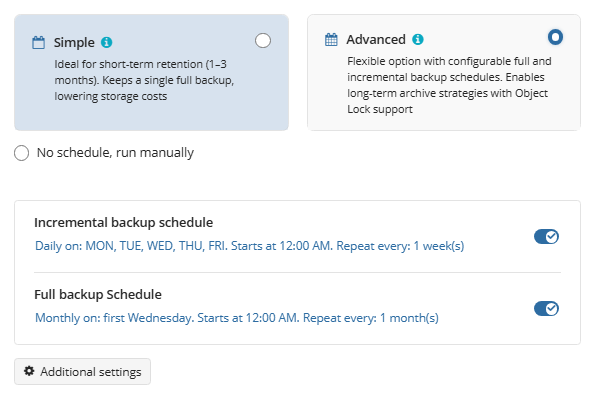
Once you select this option, the predefined schedule for full and incremental backup will appear. You can edit this schedule, if necessary.
The advanced schedule allows you to configure a flexible backup plan according to your requirements. To modify the schedule, use the edit icon next to the selected schedule. If needed, you can disable the incremental backup schedule to run only full backups.
You can select the Daily or Monthly schedule type, depending on how often the incremental backups will be performed.
Use the Additional Settings to configure the following:
- First backup start date
- Stop condition for the long backup
- Overdue alert condition
- Missed backup handling
It is recommended to schedule full backup at least once every 3 months for selected schedule
Retention Policy for Advanced Schedule, GFS, and Object Lock (Immutability)
If the Advanced schedule was selected, specify the retention period for the backup plan.
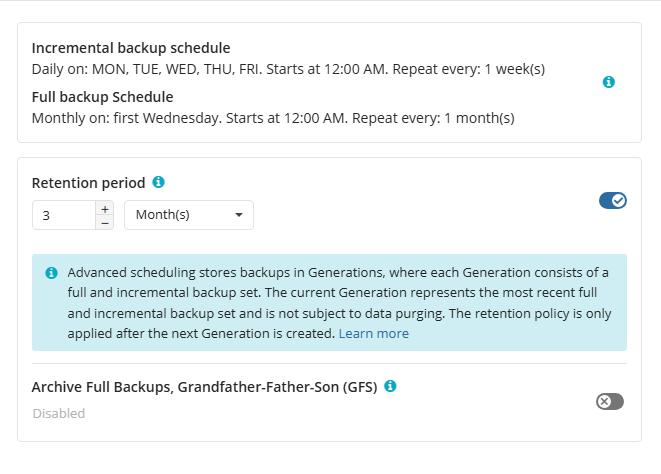
GFS Settings
To apply the GFS retention policy, enable the Archive Full Backups, Grandfather-Father-Son (GFS) feature, then specify the GFS retention settings.
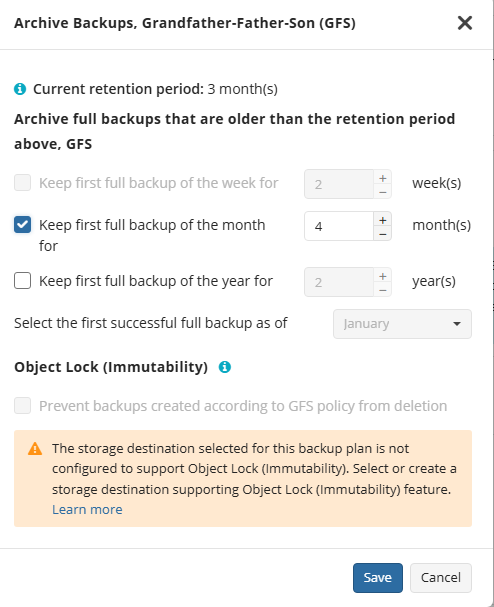
Learn more about GFS retention settings in the GFS Examples chapter
Object Lock (Immutability)
Object Lock (Immutability) is linked to the GFS retention policy. If the Object Lock (Immutability) is applied along with GFS settings, full backups that are subject to the GFS retention policy become immutable for the GFS keeping period.
Select the Prevent backups created according to GFS policy from deletion checkbox, then confirm the use of this feature.

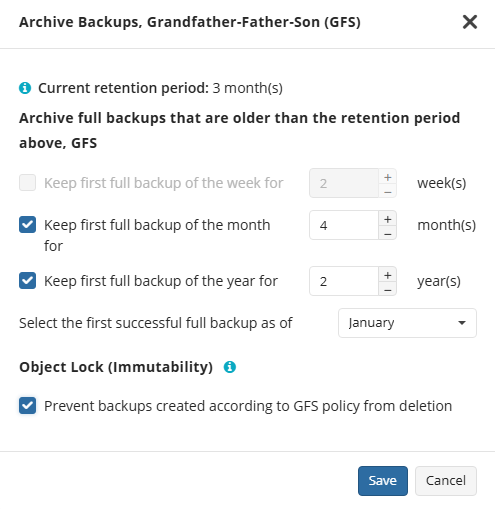
Use the Immutability feature with extreme caution. Once a backup data becomes immutable in Compliance mode, there is no way to delete them from the storage until the specified GFS keeping period expires except for the storage account termination. Incorrect settings can cause high storage bills.
To find more information about the Object Lock feature, supported storage providers, and required permissions, refer to this article.
Retention Policy for Simple Schedule
If on the Schedule options step you selected the Simple schedule, the Retention Policy step has different settings.
The Retention period value defines how long restore points are kept. Restore points with an expired retention period are merged into a full backup. (With Forever Forward Incremental, only one full backup is kept on the backup storage). If your storage has a minimum retention period, the creation of a new full backup will be postponed to avoid early deletion fees.
Pre / Post Actions
Specify pre and post-actions for your backup plan. Usually, these are scripts that perform particular jobs before or after your data is backed up. The following settings are available:
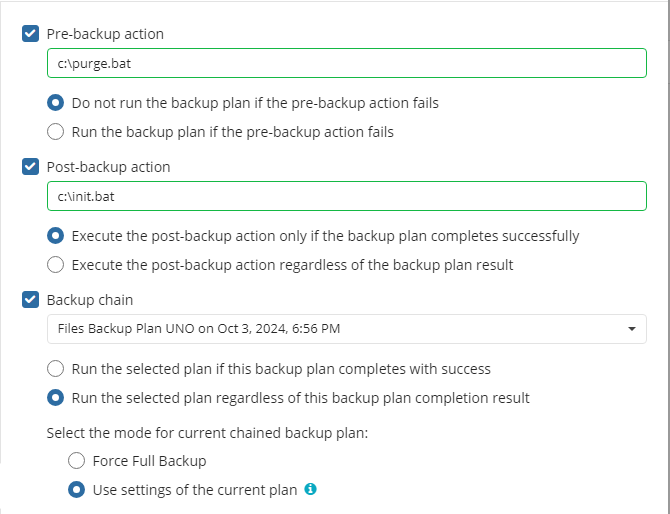
- To specify the action that will be performed before the backup plan starts, select the Pre-backup action checkbox.
- Specify the path to the script to be run as a pre-backup action.
- Specify the conditions of pre-action run:
- Select the Do not run the backup plan if the pre-backup action fails option if you do not want the backup plan to be launched if the pre-backup action fails.
- Select the Run the backup plan if the pre-backup action fails option if you want the backup plan to launch regardless of the pre-backup action result.
- To specify the action that will be performed after the backup is completed, select the Post-backup action checkbox.
- Select the Execute the post-backup action only if the backup plan completes successfully option if you want to run it only if the backup was executed without any errors or warnings.
- Select the Execute the post-backup action regardless of the backup plan result option if you want the post-action to be launched regardless of the backup termination results.
- To chain the backup plan with another plan, select Backup chain checkbox, then select the backup or restore plan name in the drop-down menu.
- Select the Run the selected plan if this backup plan completes with success option if you want to run the specified plan only if the backup plan was executed without any errors or warnings.
- Select the Run the selected plan regardless of this backup plan completion result option if you want the chained backup plan to be launched regardless of the backup termination results. Select the mode for the current chained backup plan:
- Force full backup. Full backup will be forced for the chained backup plan.
- Use settings of the current backup plan. Chained backup plan will be run as full or incremental, according to this backup plan run.
Notifications
Specify notification settings for backup plan results. You can use the company notification settings or customize them as needed. You can specify the required recipients and customize the notifications on different backup plan results:
- Success
- Warning
- Failed
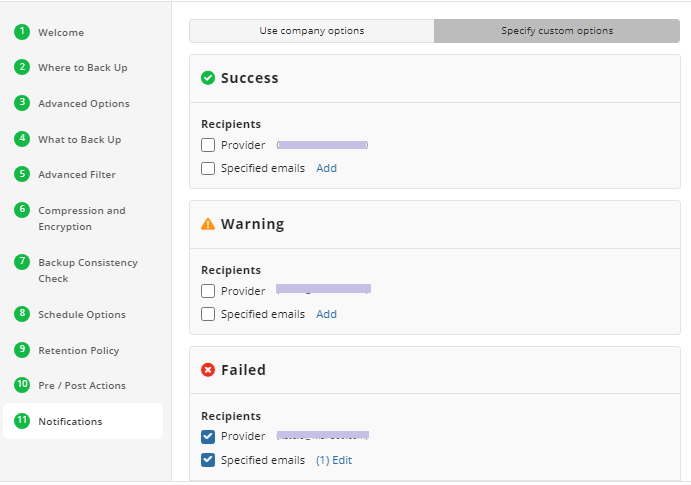
You can configure a notification threshold for Managed Backup alerts, so that notifications are sent only after a specified number of consecutive plan failures
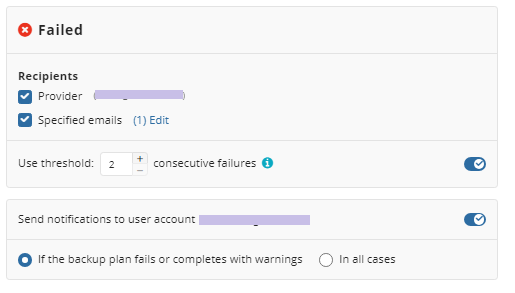
In case you select to customize notifications, select the recipients for different events.
- Select Send notifications to user account... if you want to notify the associated user about the backup process.
- Select If the backup plan fails or completes with warnings option if you want to receive the notification message in case of the backup plan failure
- Select In all cases option if you want the entry to be put in Windows Event Log in any case.
Click the Next, then click Save to finish the wizard.
Files Restore Plans
Files Restore Plan in Backup Agent for Windows
Step 1
After launching the Online Backup, you can run the Restore Wizard by clicking on Restore on the Home tab if the horizontal menu.

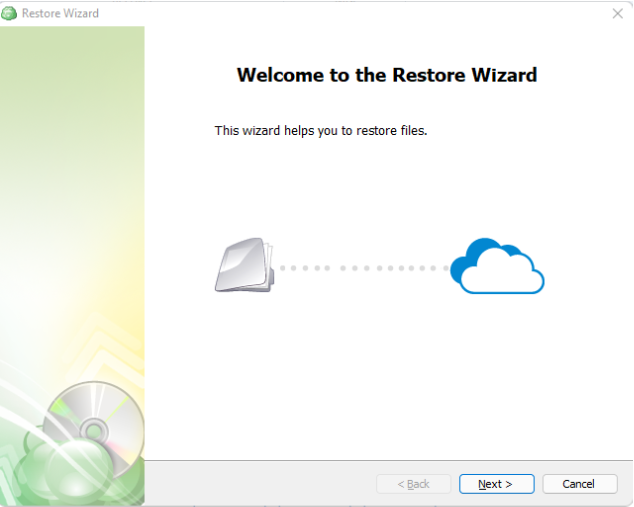
Step 2
Click on “Next” to advance past the welcome screen for the wizard
Step 3
The next step will prompt you to select the source for the restore.
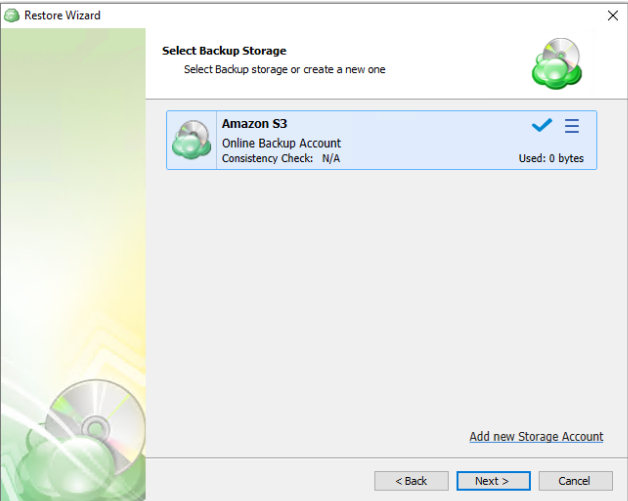
If the desired source is not in the list, you can click “Add new Storage Account” to add it.
- The backup storage is the one that contains the backup data
- The required backup prefix is set for storage account
If necessary, switch the backup prefix.
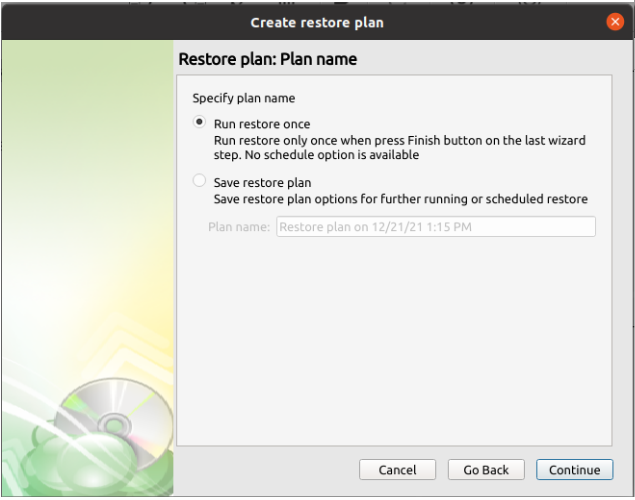
Step 4
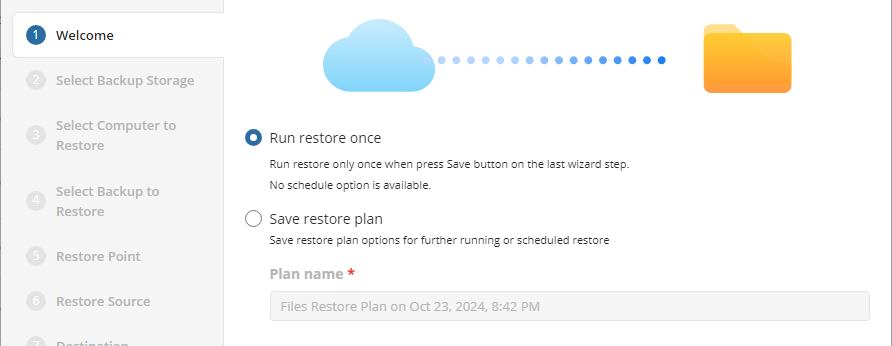
Once the source has been selected, the next screen allows you to choose between running the plan a single time or saving it for later use.
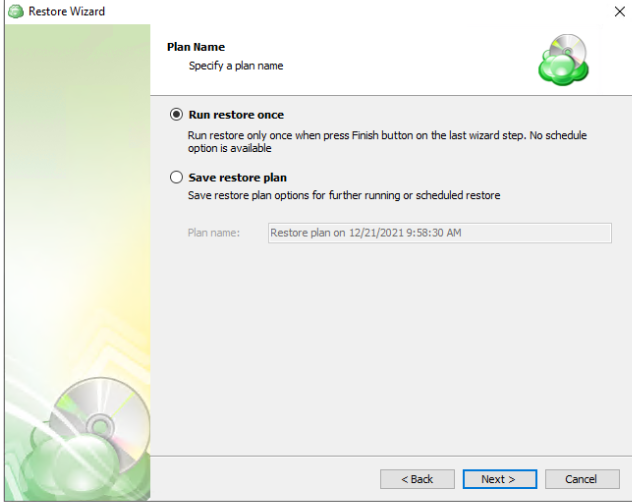
Run restore once will execute the restore immediately upon completing the wizard. There is no option to schedule this type of restore
Save restore plan will allow you to schedule the plan to run at a later time and also schedule repeating restorations if needed
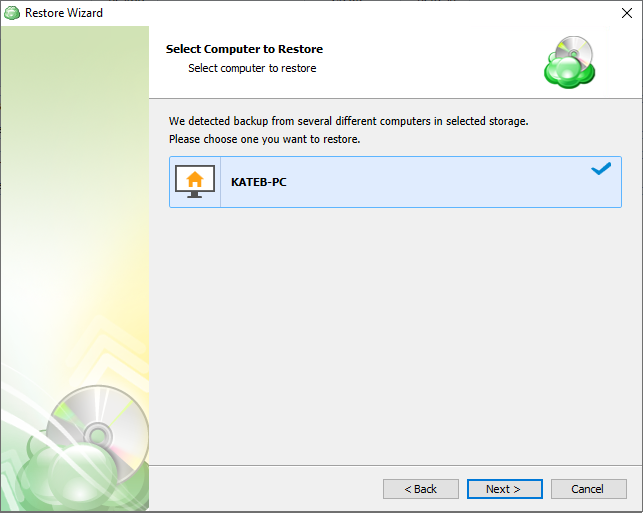
Step 5
The next step is to select the correct computer to be restored.
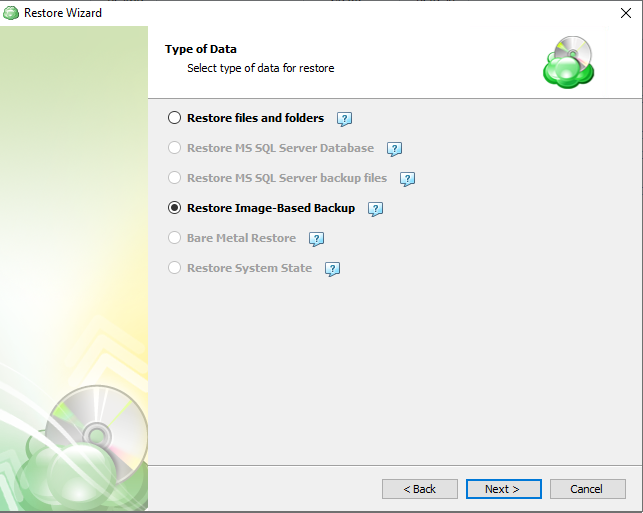
Step 6
Next, you will be presented with a list of available backup types for the selected host. Select the “Restore files and folders” option to continue.
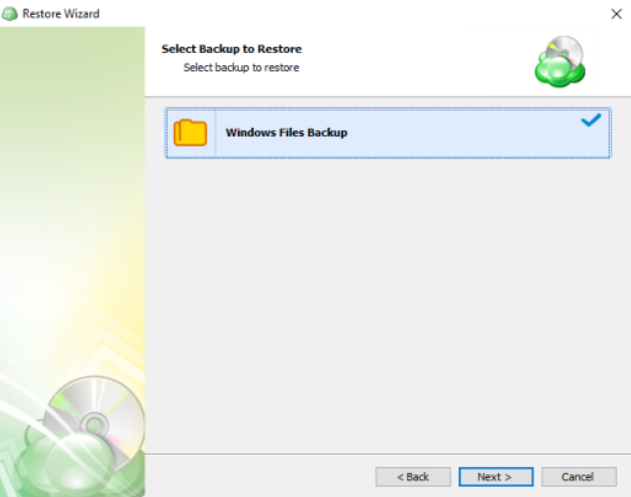
Step 7
With the correct type of restore selected, the application will generate a list of available backup plans.
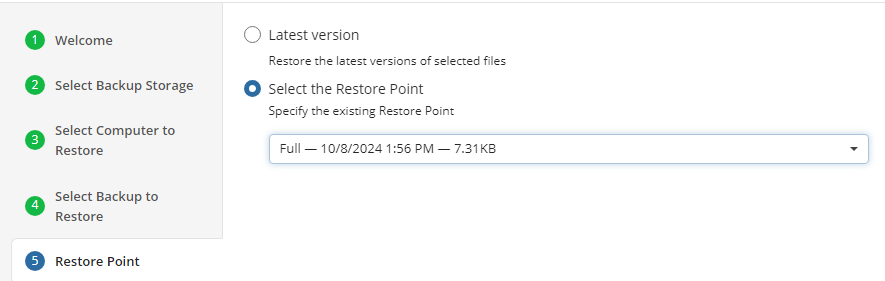
Step 8. Next you will be given a choice for what point in time you would like to restore the files to.
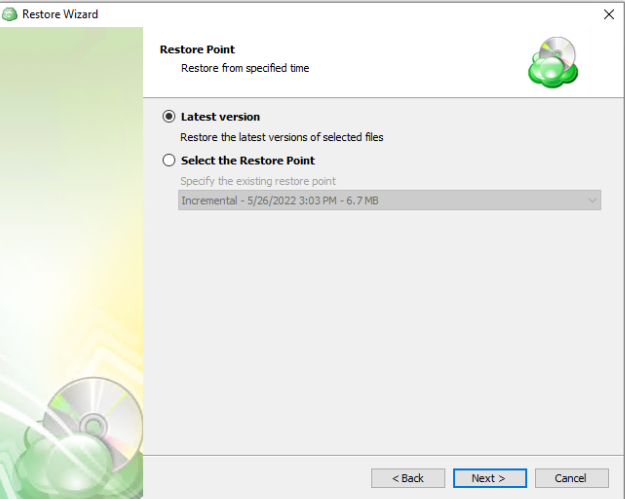
- Latest Version: Automatically restores the newest version of each file in the source regardless of which restore point it belongs to.
- Select the Restore Point: Restores the files as they existed at the specified restore point.
If there is no copy of a specific file at the selected restore point, the application will automatically select the newest version from previous restore points
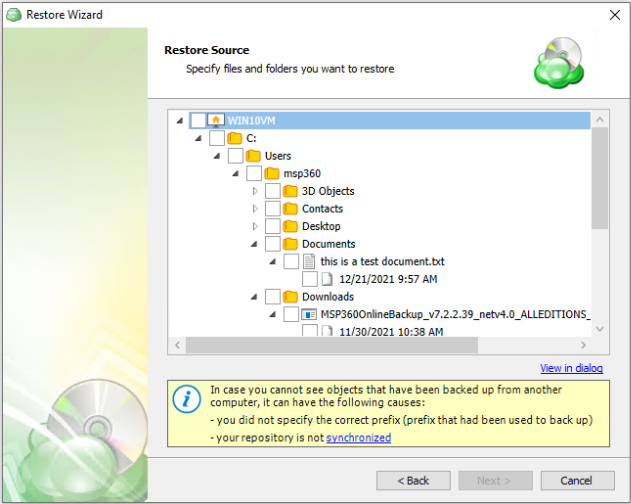
Step 9
Next, you will be able to expand the restore source and browse through the available files and folders. If “Manually” was selected on the previous step you will also be able to expand each individual file to select which version to restore.
Step 10
After selecting the files or folders to restore, you are able to select the location they should be restored to.
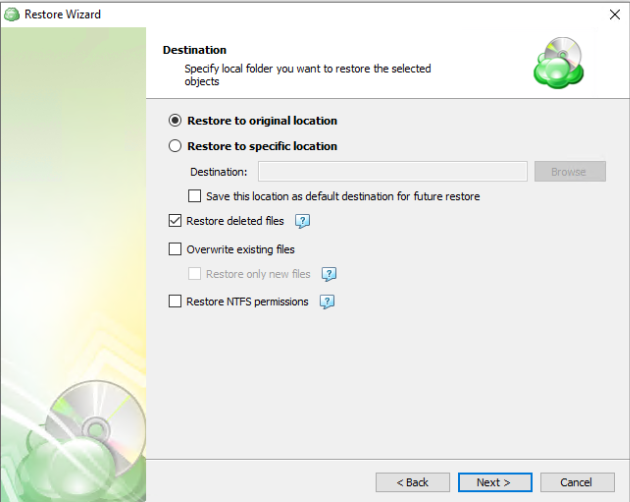
- Restore to original location: Automatically restores all files to their original location but does not overwrite existing files unless otherwise specified.
- Restore to specific location: Allows you to choose the path to where the files should be restored. Any files or folder structure needed will be created within the designated path.
- Restore deleted files: The application will restore files currently marked as having been deleted in the source but which were present at the point in time selected for the restore. Only applies if the backup plan was configured to track deleted files.
- Overwrite existing files: Allows existing files to be overwritten by the restore process.
- Restore only new files: The plan will intelligently detect the files currently in the destination and only files for which the version in the backup is newer than the destination.
- Restore NTFS permissions: Any NTFS permissions will be reapplied to the restored files. If this is left unchecked the restored files will inherit the permissions of the parent folder. Only applies if the backup plan was configured to backup the NTFS permissions.
Step 11
If “Save restore plan” was selected at the start of the wizard then the next step is to set the schedule for the restore plan. Otherwise this step will be omitted.
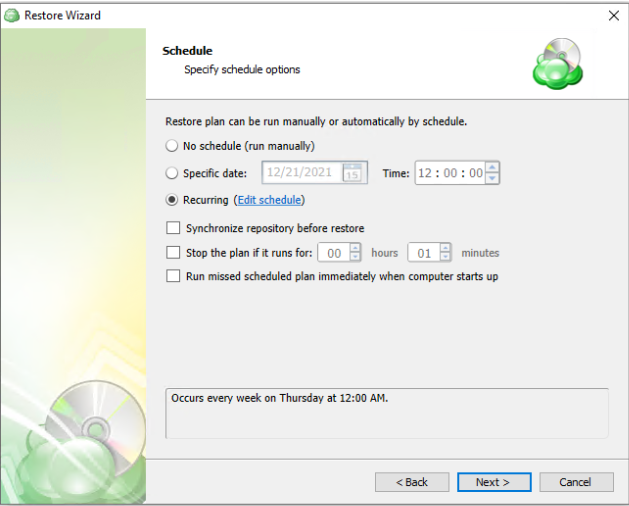
- No schedule (run manually): Use this option only when you wish to execute the Restore manually.
- Specific date: Use this to schedule a one-time Restore at the specified date and time.
- Recurring: Using this option enables you to schedule recurring Restorations based on the criteria in the fields below.
- Synchronize Repository Before Run: Enable this option to ensure the file tree reflects the latest modifications made to your storage. It is a good practice to use it when you restore to a different computer
Do not use the “Stop the plan if it runs for:” option if you have a slow or unstable internet connection
Enabling the “Run missed scheduled restore immediately when computer starts up” option will ensure that the restore plan will begin automatically after the computer starts up if it was unable to run at the scheduled time. This is only recommended for desktops and laptops. For servers, it is recommended that you run the restore plan manually when all maintenance works are completed to avoid adversely affecting server performance and internet bandwidth during working hours
Step 12
The next step is to set any custom scripts which should execute before and/or after the restore plan runs (optional).
Step 13
Specify the notifications options, then click Next.
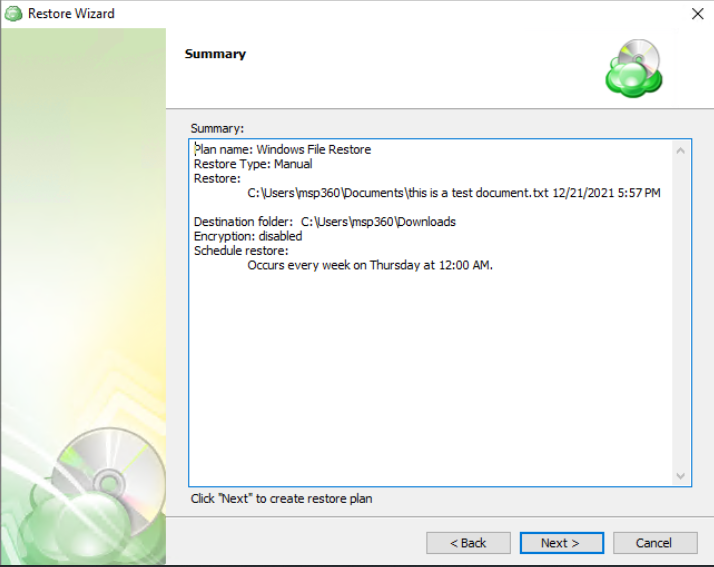
Step 14
The next step of the Wizard displays a summary of the selections made throughout the process. Once you have reviewed your selections, click “Next”.
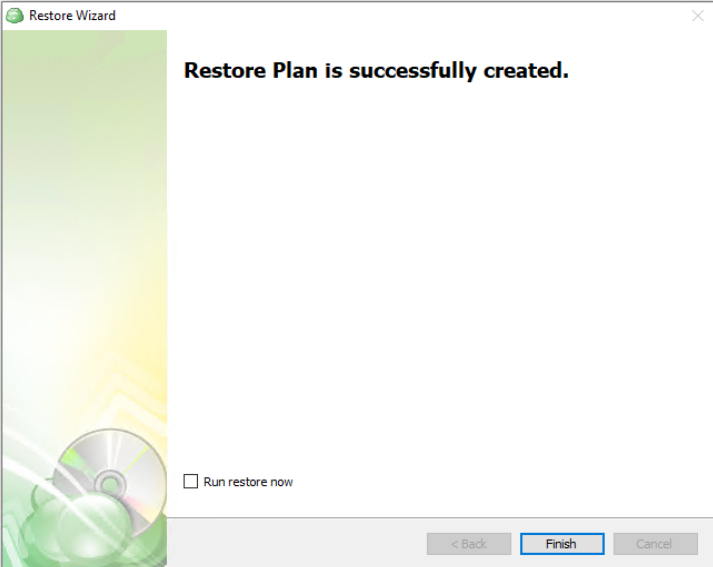
Step 15
The final step in the wizard will confirm that the Restore Plan has been created successfully. If the plan was scheduled, you can opt to run it immediately by checking the Run restore now checkbox and clicking Finish. Otherwise, the plan will be set to run at the next scheduled time.
Restore Plan in Backup Agent for macOS/Linux
Step 1
After launching the Online Backup, you can run the Restore Wizard by clicking on “Restore” main toolbar.

Step 2
The next step will prompt you to select the source storage for the restore. If the desired storage is not in the list, you can click on the “plus” to add it.

Step 3
Once the storage has been selected, the next screen allows you to choose between running the plan a single time or saving it for later use.
- Run restore once will execute the restore immediately upon completing the wizard. There is no option to schedule this type of restore.
- Save restore plan will allow you to schedule the plan to run at a later time and also schedule repeating restorations if needed.
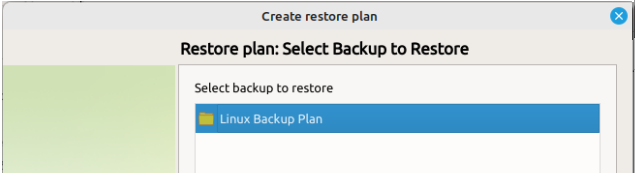
Step 4
Next you will have to select which backup you are going to restore.
Step 5
Next you will be given a choice for what point in time you would like to restore the endpoint to. * Latest Version: Automatically restores the newest version of each file in the source regardless of which restore point it belongs to. * Point in time: Restores the files as they existed at the specified time.
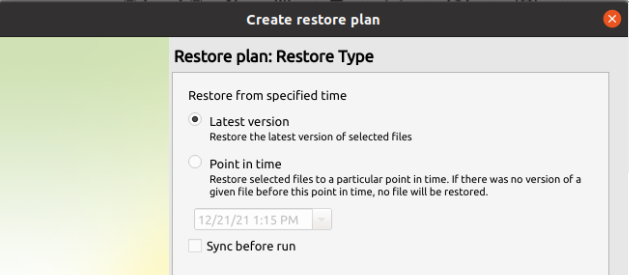
If there is no exact match for the point in time selected, the application will automatically select the closest previous restore point
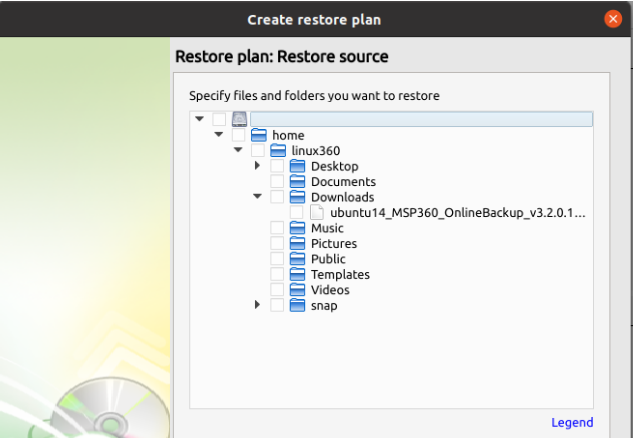
Step 6
Next, you will be able to expand the restore source and browse through the available files and folders.
Step 7
After selecting the files or folders to restore, you are able to select the location they should be restored to. * Restore to original location: Automatically restores all files to their original location but does not overwrite existing files unless otherwise specified. * Restore to specific location: Allows you to choose the path to where the files should be restored. Any files or folder structure needed will be created within the designated path. * Overwrite existing files: Allows existing files to be overwritten by the restore process. * Restore only new files: The plan will intelligently detect the files currently in the destination and only files for which the version in the backup is newer than the destination.
Step 8
After selecting the destination and any associated options, you will be prompted to provide the password to decrypt the restored data.
Step 9
If Save restore plan was selected at the start of the wizard then the next step is to set the schedule for the restore plan. Otherwise this step will be omitted. * Enable schedule: Leave this unchecked if you want to execute the Restore manually. Otherwise check it to enable the scheduling options. * Specific date: Use this to schedule a one-time Restore at the specified date and time. * Recurring: Using this option enables you to schedule recurring restorations based on the criteria in the fields below.
Do not use the Stop the plan if it runs for: option if you have a slow or unstable internet connection
Enabling the Run missed scheduled restore immediately when computer starts up option will ensure that the restore plan will begin automatically after the computer starts up if it was unable to run at the scheduled time. This is only recommended for desktops and laptops. For servers, it is recommended that you run the restore plan manually when all maintenance works are completed to avoid adversely affecting server performance and internet bandwidth during working hours
Step 10
The final step in the wizard will provide you with a summary of all previously selected options. If the plan was scheduled, you can opt to run it immediately by checking the “Run plan now” box and clicking “Done”. Otherwise, the plan will be set to run at the next scheduled time.
Files Restore Plan In Management Console
With Managed Backup you can restore files directly to users' computers using Management Console.
In case you need several files only, it is reasonαble to use Quick Restore application. Navigate to backup storage browser in Management Console. You can use this functionality for restore to Downloads folder on your computer. You may be prompted to install the Quick Restore Application in case of it is not yet installed
Create New File Restore Plan
- On Computers select Remote Management if you use legacy main menu, or open Backup > Computers page in the new main menu.
- Find the required computer, then click the Configure icon in the Backup Plan Status column.
- On the side panel, click + or +Add new plan

- In the Restore plans tab, select Files restore plan.
Welcome
Select the restore plan mode:
- Select the Run restore once option to restore files only once
- Select the Save Restore Plan option to save the plan configuration for future use. Specify the name of the plan
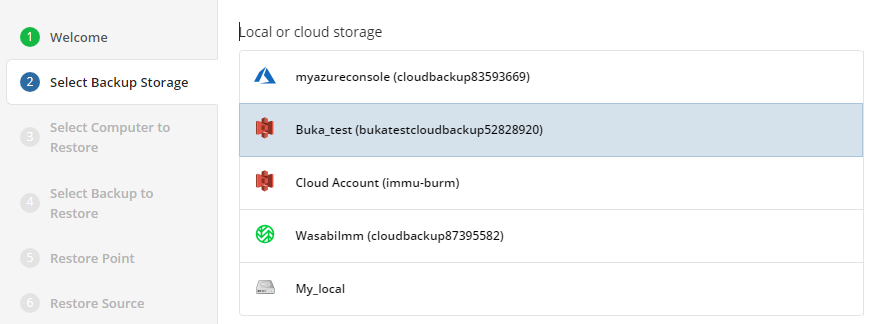
Select Backup Storage
Select the backup destination that contains the required backup from the list.
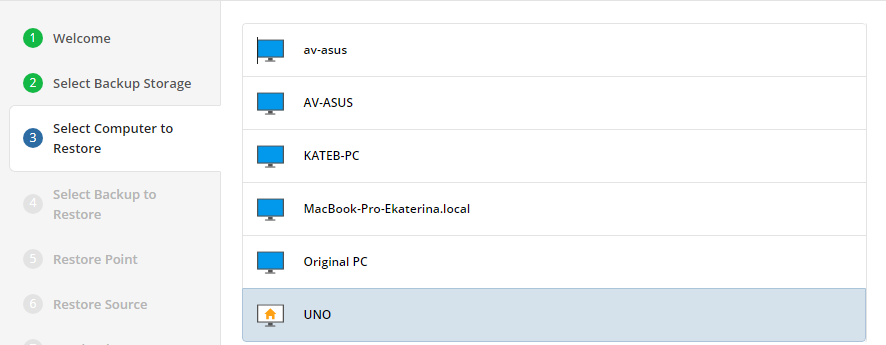
Select Computer (optional)
This restore wizard step appears only if the specified backup destination contains several backups from different computers.
Select the required computer.
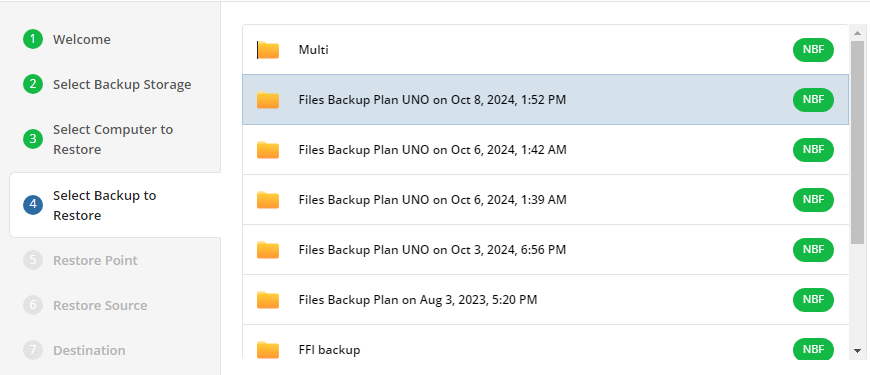
Select Backup
Select the backup to restore from the list of available backups.
Select Restore Point
Select what to restore.
For backups made in the new backup format, select the latest version or a specific restore point from the list below:
For backup made in the legacy backup format, select one of the available options:
- Select the Latest Version option to restore the latest image version of the selected backup
- Select the Point in Time option to restore the image version for the specified date and time
- Select the Modified Period option to restore the image version based on the modification period, then specify the period
- Select the Backup Period option to restore the image version based on the backup period, then specify the period
- Select the Manually option to proceed to manual image version selection
Note that the time must be specified in the provider time zone. Point the mouse to the hint icon to see the provider time zone
If there is no copy of a specific file at the selected restore point, the application will automatically select the newest version from previous restore points
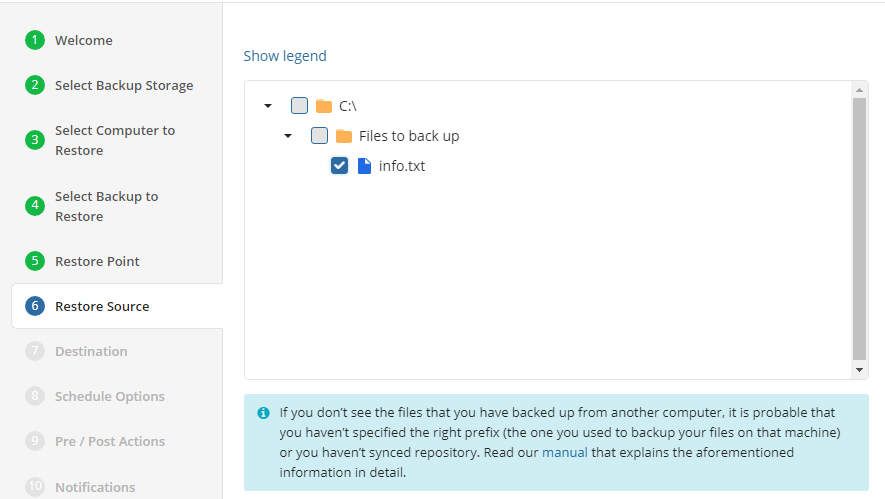
Restore Source
Next, select the files and folders to restore from the selected restore point.
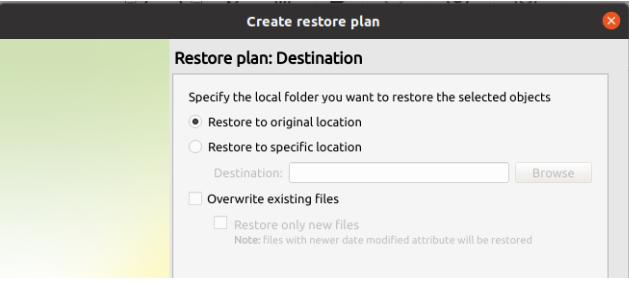
Select Destination
Select the destination to restore files.
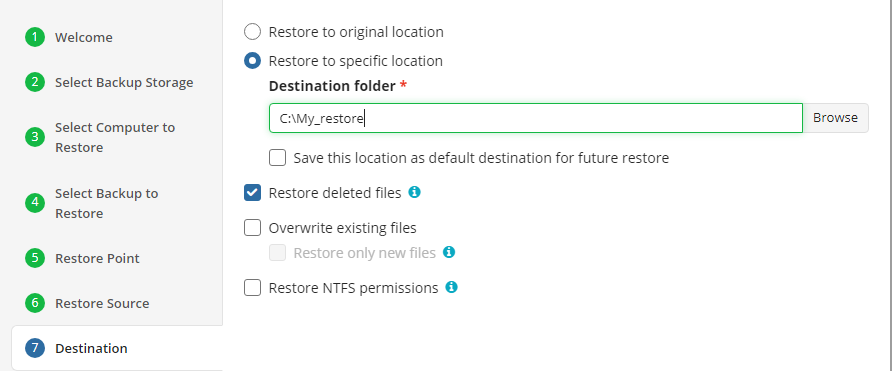
To restore files and folders to their original location, select the Restore to original location option. To restore files and folders to specific location, select the Restore to specific location option, then speciy it in the field below. You can save the specified path for future restores. To do this, select the Save this location as default destination for future restores checkbox.
Additionally, the following options are available:
- Restore deleted files. This option allows to restore locally deleted files that had been deleted prior to restore
- Overwrite existing files. This option specifies whether to replace the existing files in the destination folder with their newer versions or keep the older files and do not restore their newer versions. Different file versions are attributed to the same file only if their names are identical to that of the original file. This is why a file that has been renamed in local storage will not be considered to be a new version of the previously named file. When this option is enabled, you can also specify whether to restore only newer file versions or all files regardless of their modification time
- Restore only new files. This option can be enable only with the Overwrite existing files option. With this option enabled, only files with modification date and time newer than the ones at the restore destination are restored
- Restore NTFS permissions. If a backup contains NTFS permissions of files and folders backed up, you can enable this option to restore these permissions along with the selected files
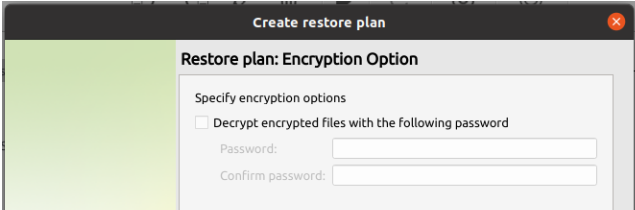
Encryption Options (optional)
Enter the encryption password if your backup is encrypted.

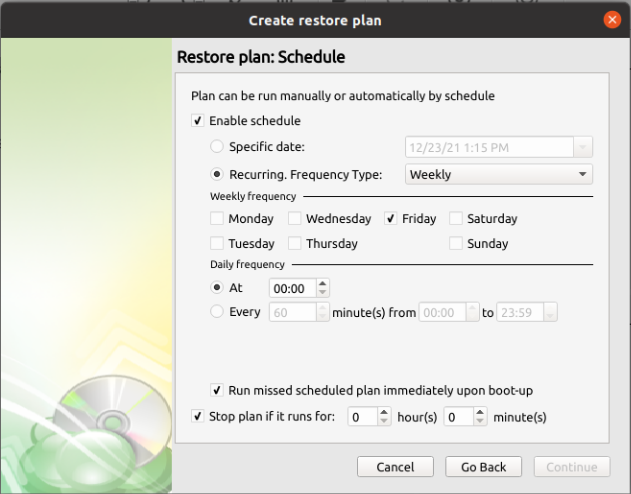
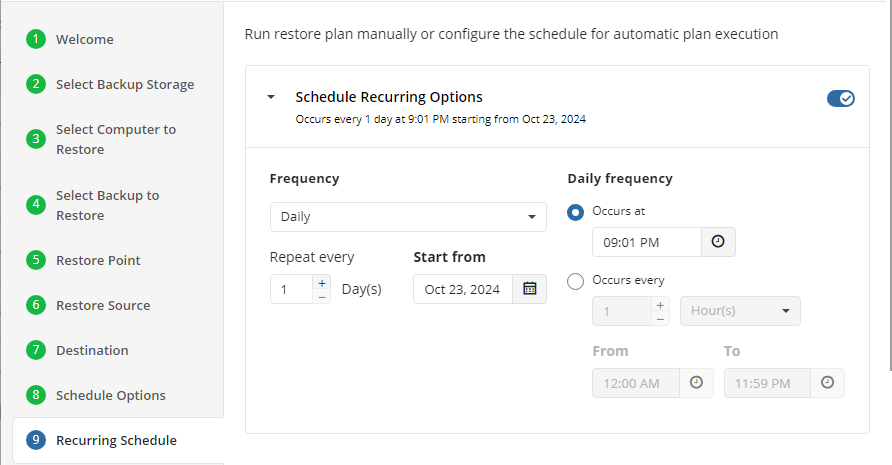
Schedule Options
Specify the schedule for the restore plan.

The following options are available:
- No schedule (run manually). Select this option to run the restore plan manually, only when it is required
- Specific date. Select this option to specify the date and time the restore plan is to be executed
- Recurring. Select this option to run the restore plan on a periodic basis, then configure the schedule
- Stop the plan if it runs for. Select this option if you want to stop the restore plan if it runs longer than the time you specified. Use this option with care since sometimes it is hard to predict the restore time due to many factors
- Alert the plan as Overdue. Select this option to monitor the plan execution. If the restore plan fails or is finished with warnings for the specified period of time, it will be assigned with the Overdue status that will appear on the Monitoring/History page
- Run missed scheduled plan immediately when computer starts up. Select this option if you want the restore plan would run as the computer boots in case it was down at the moment of the scheduled run
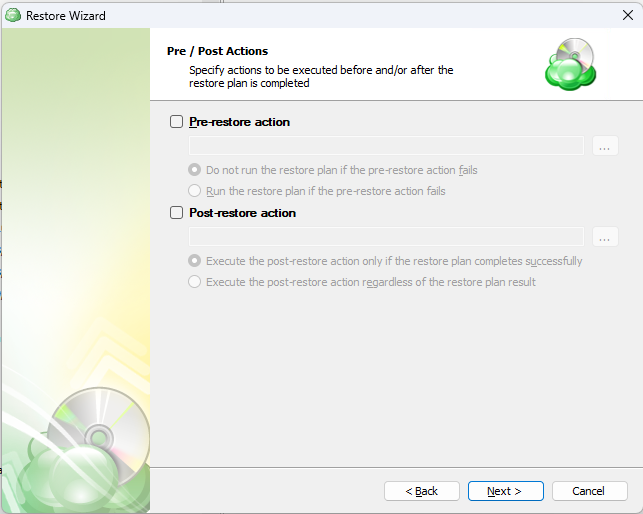
Pre / Post Actions
Specify the actions before and/or after the restore plan. Usually, these are scripts that perform particular jobs before or after the plan is executed. The following settings are available:
!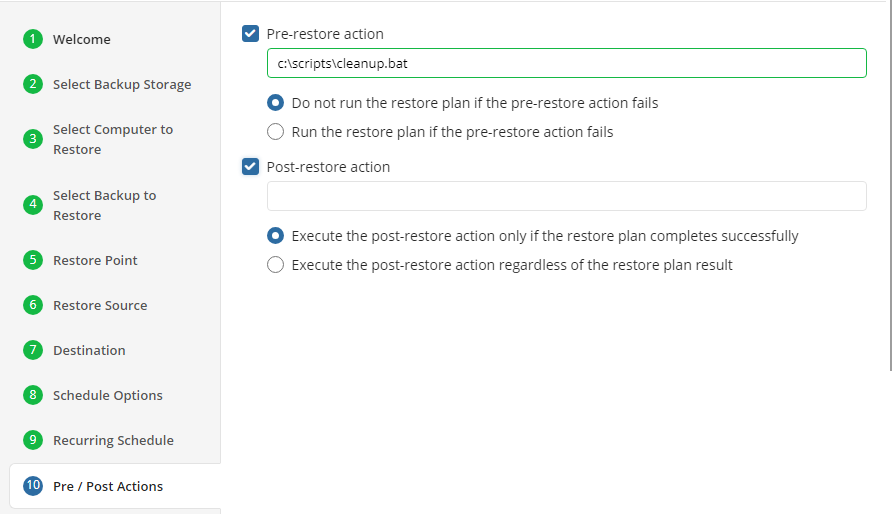
- To specify the action that must be performed before the restore plan starts, select the Pre-restore action checkbox
- Specify the path to the script before the restore plan
- Specify the conditions for pre-action execution:
- Select the Do not run the restore plan if the pre-restore action fails option to suspend the restore plan execution in case the pre-action fails
- Select the Run the restore plan if the pre-restore action fails option if you want the restore plan to run regardless of the pre-action execution result
- To specify the action that will be performed after the restore plan completes, select the Post-restore action checkbox
- Select the Execute the post-restore action only if the restore plan completes successfully option if you want to run it only if the backup was executed without any errors or warnings.
- Select the Execute post-restore action regardless of the restore plan result option if you want the post-action to be executed regardless of the restore plan result
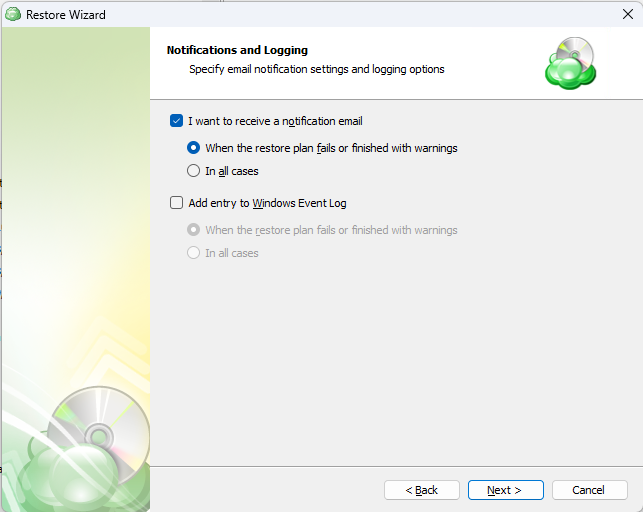
Notifications
Specify notification settings for restore plan results. You can use the company notification settings or customize them as needed: specify the required recipients and customize the notifications for different restore plan results:
- Success
- Failed
- Warning
!
Select the I want to receive a notification email to enable notifications.
- Select When the restore plan fails or finished with warnings option if you want to receive the notification message in case the restore plan terminates with errors or warnings
- Select the In all cases option if you want the notification to be delivered in all cases
If you want the restore plan results to be added to Windows Event Log, select the Add entry to Windows Event Log checkbox
- Select When the restore plan fails or finished with warnings option if you want to receive the notification message in case the restore plan terminates with errors or warnings
- Select the In all cases option if you want the entry to be put in Windows Event Log in any case.
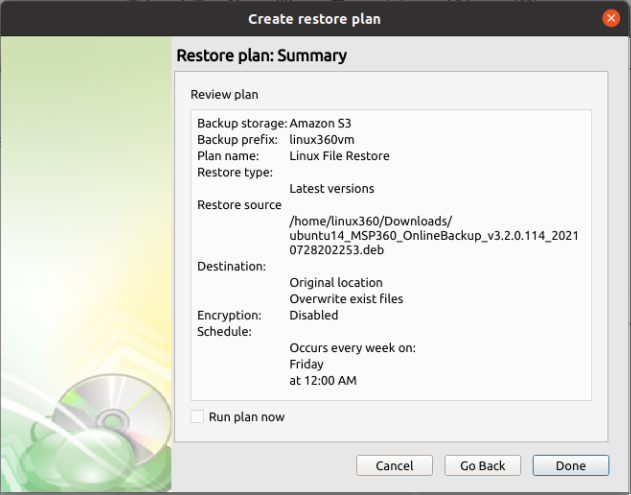
Click on Save when you are happy with your selections. If the plan is set to run only a single time and has no set schedule, it will automatically start. Otherwise, if it is set to run only once and is scheduled, it will display in the list of plans until the scheduled time. If it is only set to run once, then when it completes successfully it will remove itself from the list of plans. Only Restore Plans which are saved will remain in the list for future use.
Image-Based Backup Plans
Image-Based Backup Plan in Backup Agent
Objects Excluded from Backup by Default
To reduce the backup size, the following objects are excluded by default from the backup:
| Path | |
|---|---|
| \System Volume Information*{3808876B-C176-4e48-B7AE-04046E6CC752} | ❌ |
| \Pagefile.sys | ❌ |
| \hiberfil.sys | ❌ |
| \swapfile.sys | ❌ |
| \Windows\Temp | ❌ |
| \Windows\ServiceProfiles\NetworkService\AppData\Local\Microsoft\Windows\DeliveryOptimization\Cache | ❌ |
| \Users*\AppData\Local\Temp | ❌ |
| Data folder of MSP360 backup (mbs or standalone data folder) | ❌ |
| \Windows\SoftwareDistribution\Download | ❌ |
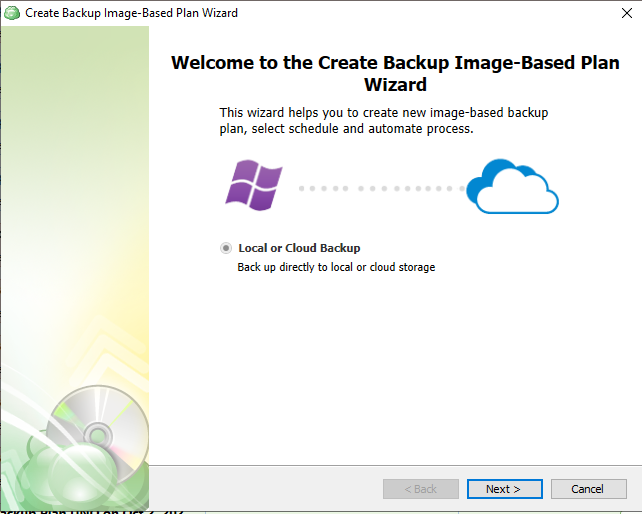
Step 1
After launching Backup Agent, you can run the Backup Plan wizard by clicking Image-Based Backup on the Home tab of the application's horizontal menu.

Step 2
Select the desired type of backup, local or cloud.
Step 3
The next step will prompt you to select the destination for the backup.
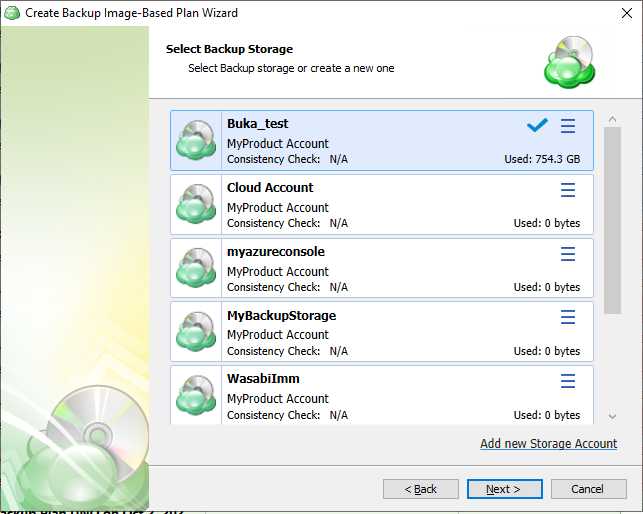
If the desired destination is not in the list, you can click Add new storage account to add it.
Step 4
Once the destination has been selected, the next screen will prompt you for a plan name.
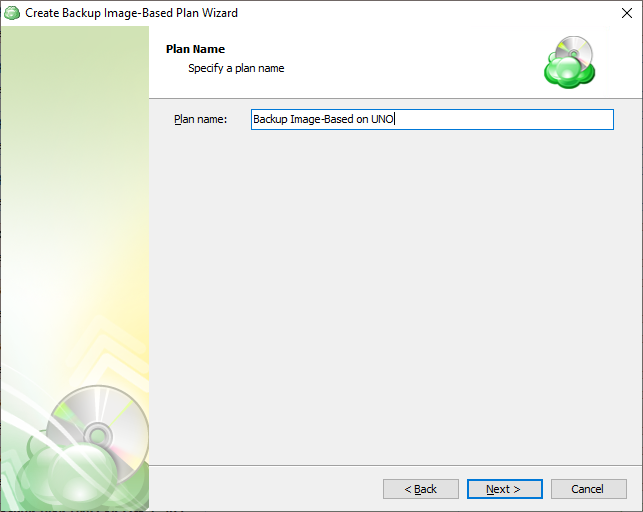
It is recommended that you select a name which helps you clearly identify the computer as well as the type of backup
Step 5
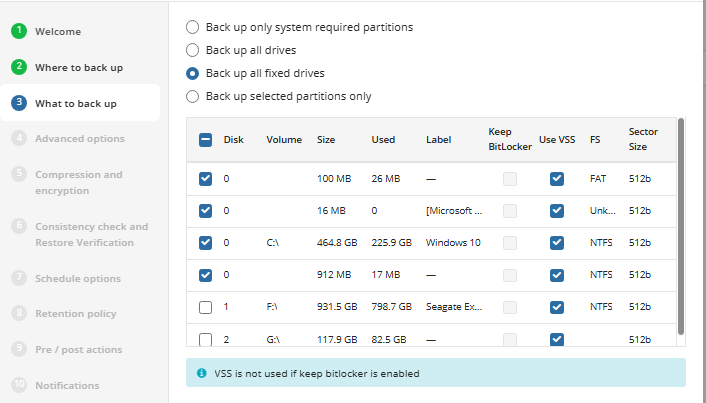
On the next step, you will be able to select which partitions should be included in this plan.
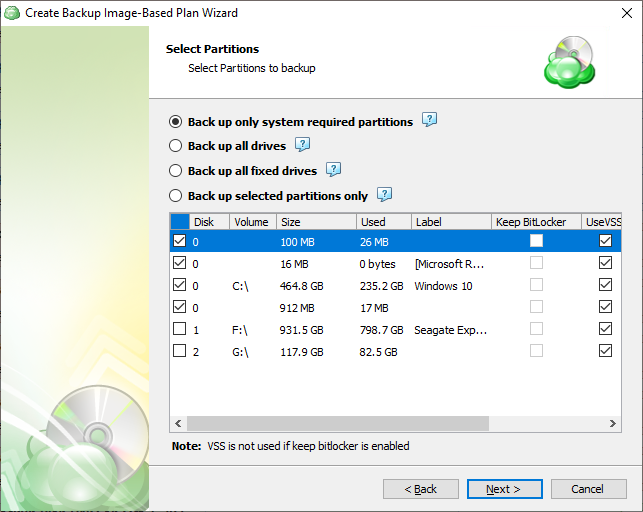
- Back up only system required partitions: This will automatically select only those partitions required to launch the operating system.
- Back up all drives: Selects all available partitions.
- Back up all fixed drives: Selects all partitions on non-removable media (internal drives only).
- Back up selected partitions only: Allows you to select only the partitions you would like to back up.
- Keep BitLocker: Enabling this will instruct the application to backup the data in the current encrypted state. This will prevent the Incremental backups from functioning as intended.
It is strongly recommended to leave the Keep BitLocker option disabled. The application will automatically disable BitLocker for the duration of the backup process and then re-enable it afterwards. This will ensure the integrity of the backup cannot be compromised from changes in the BitLocker encrypted data
Enabling Keep BitLocker will prevent Incremental backups from functioning as intended, thus each backup will be considered a full backup
- UseVSS: Enabled by default, this allows the system to be fully backed up including any files or partitions which are currently locked in use by another process.
Use VSS will automatically be disabled if Keep BitLocker is enabled
Step 6
The next step shows Advanced Options which can be used to control what data within the selected partitions is excluded as well as some additional control over backup parameters.

- Use synthetic full backup: A synthetic full backup is a type of backup that creates a full backup using in-cloud data copying, significantly improving speed and efficiency by saving time and reducing network traffic.
Synthetic Full Backups greatly reduce the time and bandwidth needed to perform full backups after the initial full
Synthetic full backup usage for long-term (cold) storage tiers can result in high storage costs. You can find more information about the supported cloud providers and storage classes in this article
- Exclude files/folders: Selecting this will open a file browser similar to the one used in the File-Based Backup which will allow you to select specific paths or files to be excluded from the image backup.
On Windows system partitions it is recommended to exclude the \Users\ folder from the image, and set up a separate File backup for that folder
- Ignore bad sectors: Enabled by default, this allows the backup to skip any bad sectors found on the disk. It is recommended to leave this enabled unless there is a specific requirement to backup the bad sectors.
- Disable VSS, use direct access to NTFS volume: Disabled by default, this option should only be enabled in the event that VSS continues to fail after using the “Use system VSS provider” option.
- Use system VSS provider: Disabled by default, this will force the application to use the native VSS provider for the operating system in the event that another provider has been installed by another application which is causing the backup to fail.
If VSS is failing continuously, consider enabling the “Disable VSS, use direct access to NTFS volume” option
- Prefetch block count: Determines the number of individual blocks the application will simultaneously cache for uploading.
Changing the prefetch block count is not recommended except as a reaction to extreme system performance degradation during backup
Step 7
Next, you will choose whether to enable compression and encryption of the backup, as well as the storage class. Other options may appear depending on the features supported by your selected backup destination.
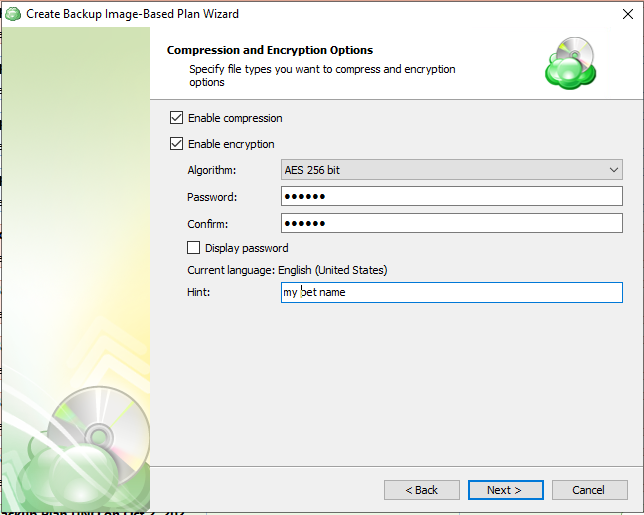
Enabling compression will reduce the size of the backup and reduce the time to upload it, both of which may decrease the cost of the backup
Encrypting the backup adds an additional layer of security to the data at the expense of increased processing resources during the backup process. Several types of encryption are available, with the most secure selected by default
It is important to remember that MSP360 Support is not able to retrieve or reset the encryption password. It is recommended that you store the password in a secure place and enable the Password Recovery Service
Step 8
Next you are presented with the Consistency Check and Restore Verification options.
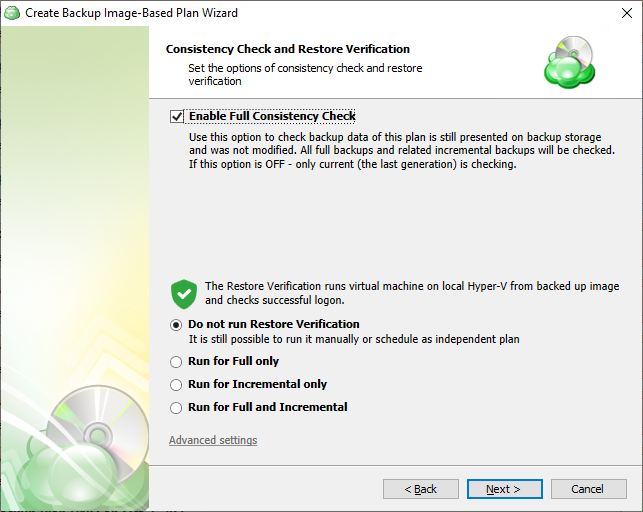
It is recommended that you leave Enable Full Consistency Check enabled
Although a successful Consistency Check ensures the backup integrity, an additional Restore Verification process can be executed as well.
This process uses a temporary Hyper-V virtual machine on the source endpoint to test Windows startup. It only retrieves the necessary backup parts from storage without the need to download the entire backup.
Hyper-V is required on any endpoint utilizing Restore Verification. For more information refer to this article: Restore Verification for Image-Based Backups
You can run the Restore Verification for incremental backups only, full backups only, for every backup, or do not run it at all.
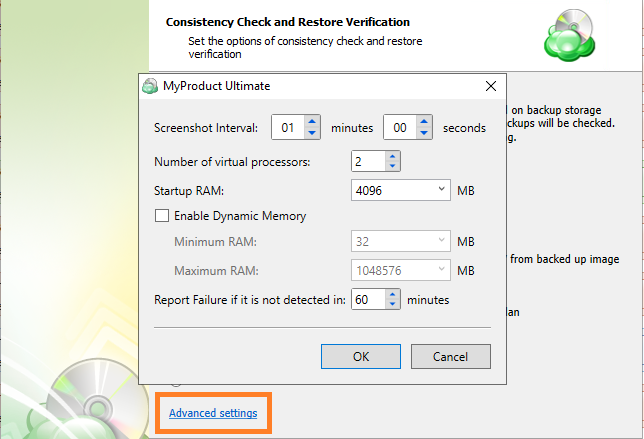
Along with the Restore Verification running mode, customize the Hyper-V auxiliary virtual machine configuration to run the Restore Verification (number of virtual processors, RAM) by clicking on Advanced Settings.
Step 9
Next you are prompted to set the schedule for your backup plan which will allow it to run autonomously, or you are able to select “No Schedule” for it to remain a manual process.
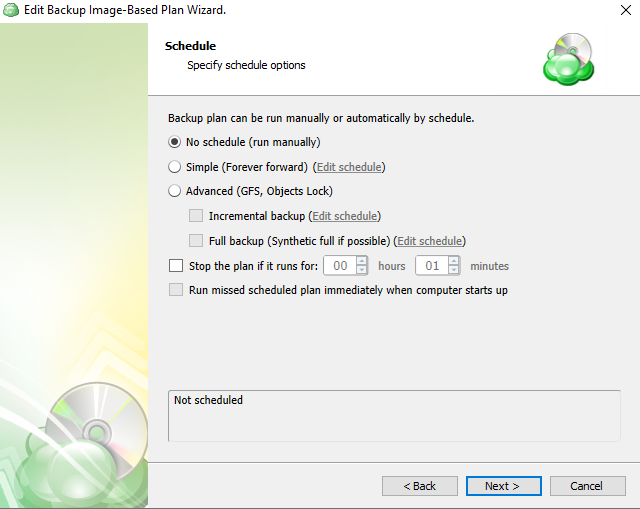
- Simple (Forever forward): Select the Simple (Forever Forward) option to use the Forever Forward Incremental (FFI). This schedule offers one full backup followed by a limited number of incrementals. Once the limit is exceeded, a new full backup is created using the synthetic full capabilities.
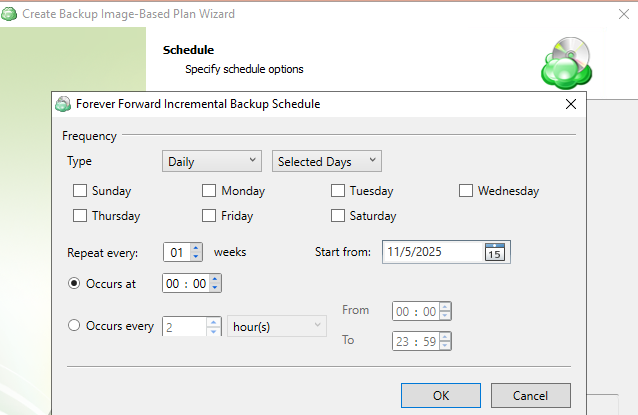
Forever Forward backups are only supported by a limited number of cloud storage providers. For more information, refer to [Forever Forward Incremental.](https://help.mspbackups.com/backup/about/ffi/ffi
The Simple (Forever forward) schedule is recommended for retention up to 100 restore points which do not require Object Lock for legal compliance
It is not recommended to select the Simple (Forever forward) schedule for long-term storage and archival purposes. The Advanced Schedule is recommended for all storage needs over 100 restore points
- Advanced (GFS, Object Lock): Select the Advanced option to set up a flexible, recurring schedule with generations. Every generation contains one full backup followed by incrementals.
- Clicking on Edit Schedule next to Incremental and Full backups allow you to configure the frequency they will be created. If both a Full and Incremental are scheduled for the same day, the application will perform the Full only.
It is recommended to use the Advanced (GFS, Object Lock) option and regularly scheduled full backups for long-term storage (longer than 6 months) or backups that must comply with legal or industry requirements
Enabling the Run missed scheduled backup immediately when computer starts up option will ensure that the backup process begins automatically upon startup if the last backup was not able to start at the scheduled time for any reason. This option is recommended for Desktops and Laptops
Do not use the Stop the plan if it runs for: option if you have a slow or unstable internet connection. The first full backup can take a long time to upload, and it can be unexpectedly interrupted if this option is enabled
Synthetic Full Backups allow the system to merge a series of incremental backups together to form a new full backup, greatly reducing the time and bandwidth needed to perform full backups after the initial full. If the backup destination does not support Synthetic full, then a traditional full will be made instead
The Advanced Schedule and GFS retention policies will only perform properly with regularly scheduled full backups
Step 10
On the “Retention Policy'' step, you can set the policies the application will use to determine which data to purge at regular intervals.
If you have selected the Simple (Forever forward) schedule you will be presented with the following options:
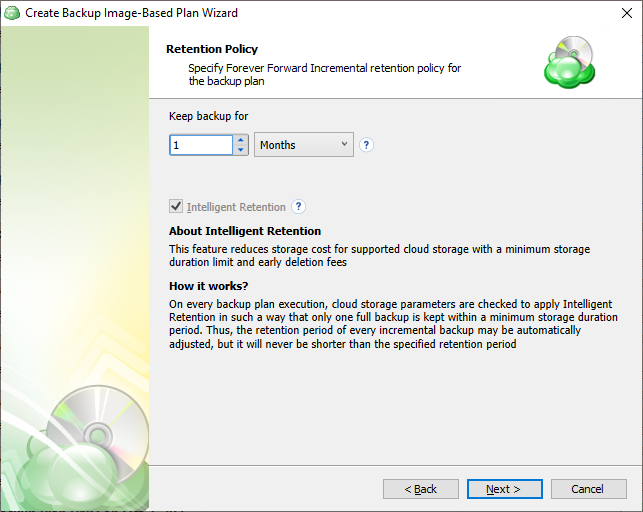
- Keep backup for: Determines the minimum age a restore point will be before deletion. Full Backups cannot be purged until the youngest dependent Incremental Backup has reached this age.
If you have selected the Advanced (GFS, Object Lock) schedule, you will also have an option to define the multigenerational Grandfather-Father-Son (GFS) parameters if required.
This allows you to retain full backups for longer periods while purging the incremental backups after a shorter period.

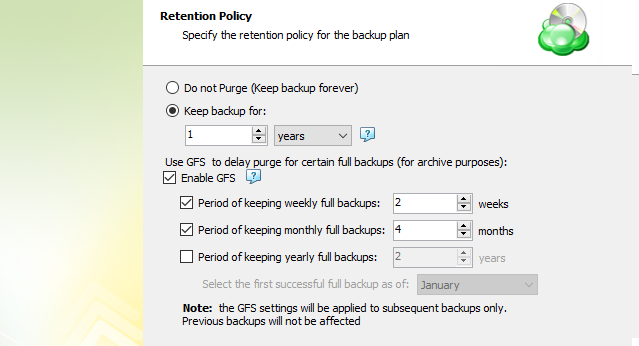
- Enable GFS: Select this option if you want to keep Full Backups for archival purposes at the selected intervals.
- Period of keeping weekly full backups: Set the number of Weekly Full Backups to retain. This is determined separately from the “Keep backup for” value and relies on Full Backups to be scheduled on at least a weekly basis in the previous step.
- Period of keeping monthly full backups: Number of Monthly Full Backups to retain. A Full Backup can be flagged as both a Weekly and Monthly backup, but once the number of Weekly Full Backups has exceeded their retention setting, only those also flagged as a Monthly will be retained.
- Period of keeping yearly full backups: Set the number of Yearly Full Backups to retain. A Full Backup can be flagged as a Weekly, Monthly, and Yearly Backup. Once the number of Monthly Full Backups has exceeded their retention setting, only those also flagged as a Yearly will be retained.
- Select the first successful full backup as of: Select the first Monthly Full Backup you would like to flag and retain as the first Yearly Full Backup.
Generations will not be deleted until the youngest point in the chain has met the retention criteria
GFS Retention provides an excellent way to efficiently archive data for compliance. Additional information can be found in GFS Policy topics in the Managed Backup Documentation
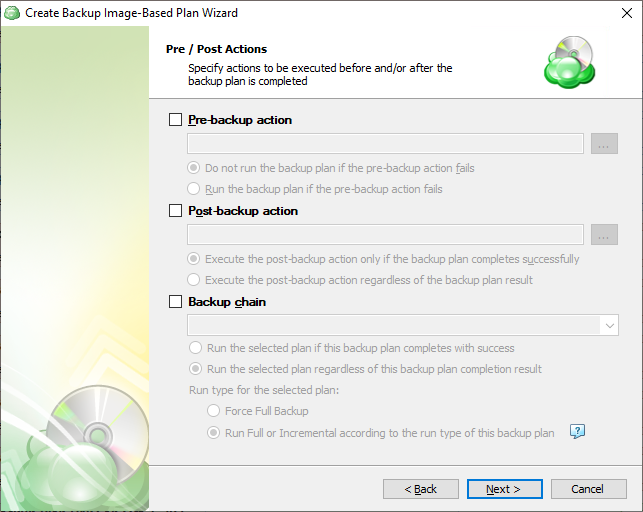
Step 11
The “Pre/Post Actions” step allows the execution of custom scripts before and/or after the running of a backup task, and can chain multiple backup tasks together for sequential execution.
Step 12
This step allows you to enable notifications.
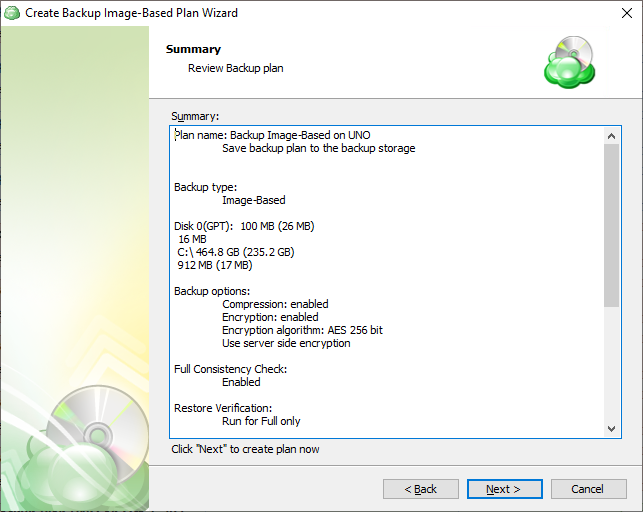
Step 13
The next step of the Wizard displays a summary of the selections made throughout the process. Once you have reviewed your selections, click “Next”.
Step 14
After clicking next on the previous step, the Backup Plan is created. The final step is to acknowledge this and determine whether to run the backup immediately or for it to wait until the next scheduled occurrence.
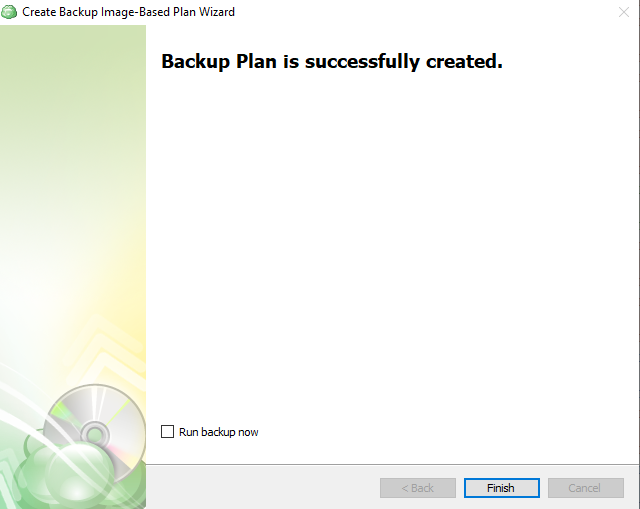
Image-Based Backup Plan in Management Console
Objects Excluded from Backup by Default
To reduce the backup size, the following objects are excluded by default from the backup:
| Path | |
|---|---|
| \System Volume Information*{3808876B-C176-4e48-B7AE-04046E6CC752} | ❌ |
| \Pagefile.sys | ❌ |
| \hiberfil.sys | ❌ |
| \swapfile.sys | ❌ |
| \Windows\Temp | ❌ |
| \Windows\ServiceProfiles\NetworkService\AppData\Local\Microsoft\Windows\DeliveryOptimization\Cache | ❌ |
| \Users*\AppData\Local\Temp | ❌ |
| Data folder of MSP360 backup (mbs or standalone data folder) | ❌ |
| \Windows\SoftwareDistribution\Download | ❌ |
Step 1
Open the Backup > Computers page in the Management Console.

Step 2
Find the required computer, then click the computer name or the Configure icon in the Backup Plan Status column.

Step 3
On the Backup plans tab of the side panel, click + or +Add New Plan. In the drop-down menu, select Image-Based Backup Plan. Follow the backup wizards steps.

Step 4
Name the backup plan. Click Next to proceed.
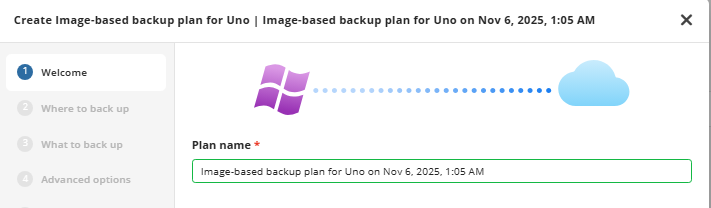
It is recommended that you select a name which helps you clearly identify the computer, company, as well as the type of backup
Step 5
Select the target backup storage for the backup plan. If no storage accounts are available, add a new one.

It is not recommended to keep image-based backups in long-term storage. Note that long-term storages have several limitations: in the case of a restore, data retrieval can take up to several hours and retrieval charges may apply. Also, keep in mind that in some cases your backup data can be moved to long-term storage according to lifecycle policies. Learn more about lifecycle policies:
Step 6
Select partitions to back up.
The following options are available:
- Back up only system-required partitions. Select this option to back up only partitions with operating system files and boot sectors
- Back up all drives. Select this option to include all available drives at the moment of backup
- Back up all fixed drives. Select this option to include all fixed drives at the moment of the backup plan execution. All drives except for removable media are to back up
- Back up selected partitions only. Select this option to configure the partition list manually
If the Back up all fixed drives option is selected, all connected fixed drives (e.g., physical drives attached to the mainboard, iSCSI LUN, virtual machine disks (inside the guest OS), virtual disk files (.vhd/.vhdx) mounted/attached to the OS at the moment of the backup plan execution will be backed up with success status reported. Thus, if some drives are disconnected for some reason or some drives are added, they all will be backed up 'as is'.
All removable drives (i.e USB flash drives, USB-connected portable HDDs) are not included in the backup plan
In case you intend to restore the backup dataset along with the operating system, note that selected partitions must include all system volumes as they contain the information which is necessary for loading the operating system. Without backing up these volumes, you will not be able to restore your disk image and load the operating system
For each partition you can configure the following options:
- Use VSS. With this option enabled, a Volume Shadow Copy Service is applied for the volume at the moment of backup plan execution. This option will automatically be disabled if keeping BitLocker.
- Keep BitLocker. For BitLocker-encrypted volumes, the Keep BitLocker option is selected by default. This means that the BitLocker-encrypted volumes will be backed up 'as is'. With the Keep BitLocker option disabled, volumes will be backed up encrypted with the proprietary encryption
- It is strongly recommended to leave the “Keep BitLocker” option disabled. The application will automatically disable BitLocker for the duration of the backup process and then re-enable it afterwards. This will ensure the integrity of the backup cannot be compromised from changes in the BitLocker encrypted data
- Enabling “Keep BitLocker” will prevent Incremental backups from functioning as intended, thus each backup will be considered a full backup
Consider that Managed Backup does not detect file changes based on content. Instead, it detects file changes by checking the modification date and uses this to determine whether a new copy of the file needs to be backed up.
Step 7
By default advanced options are skipped for the backup plan. You should enable them, if necessary (not recommended).
On this step you can specify the advanced options for the backup plan, excluding unnecessary contents.

To exclude specific files and folders, select the Exclude files/folders checkbox, then specify the path to the object to exclude. Note that the disk labels must be capitalized (Example: C:\trash).
On Windows system partitions it is recommended to exclude the \Users\ folder from the image, and create a separate Files backup plan for that folder.
Available advanced options depend on selected backup storage
- Synthetic Full backup. Select this option to enable Synthetic Full for selected backup storage. Consider, in case you enable this option for long-term backup storage, this can result in increased storage costs. Refer to your cloud storage provider documentation to check the prices of in-cloud copy creation for selected storage classes.
- Use S3 transfer acceleration (available only for Amazon S3). Use this option to accelerate file transfer for an extra fee. The target bucket must have this feature enabled. Select this checkbox if you want to use the data transfer acceleration service provided by Amazon. To learn more, refer to the Amazon S3 Transfer Acceleration documentation.
- Ignore bad sectors. Select this checkbox to bypass any damaged/corrupted sectors on backup source disks. Even in case the volume with bad sectors is restored, these sectors will become empty sectors, and you will not be able to read any files that were allocated in these sectors.
- Disable VSS, use direct access to NTFS volume. Select this checkbox to disable Volume Shadow Copy Service (VSS). This option may be required when a disk is not used for writing operations and does not have sufficient space to create a VSS snapshot. Basically, this applies to system volumes
Note that the enabled Disable VSS, use direct access to NTFS volume option overrides the Use VSS settings made on the What To Back Up step
Use system VSS provider. Select this checkbox to use the system default VSS provider. It is recommended to use it in case of the presence of any third-party VSS providers installed that may interfere with the proper processing of VSS snapshots made by MSP360 (CloudBerry) Backup
Prefetch block count (0 without prefetch. Specify the maximum block number stored in memory for each disk volume (cache). Consider, by default you will see the recommended optimal value in this field. It is not recommended to change it. You can only use this field for testing purposes, if this is recommended by technical support.
A block is a minimum unit of information that can be processed at a time when preparing a backup.
When you need to perform a backup over a disk containing several terabytes of data, you can speed up the backup processing by increasing the block size (see below).
Additional Advanced Options for Amazon S3
If your backup destination is Amazon S3, the following custom options are available in this step.
- Use S3 Transfer Acceleration. Use this option to accelerate file transfer for an extra fee. The target bucket must have this feature enabled
- Select the S3 storage class for the backup plan:
Using different storage classes for different backup purposes helps you to optimize the storage costs.
Learn more about Amazon S3 storage classes here
Additional Advanced Options for Microsoft Azure
If your backup storage destination is Microsoft Azure, and you have the General Purpose v2 Azure account, select the required storage class (access tier).
The following options are available:
- Hot tier. An online tier optimized for storing data that is accessed or modified frequently. The hot tier has the highest storage costs, but the lowest access costs.
- Cool tier. An online tier optimized for storing data that is infrequently accessed or modified. Data in the cool tier should be stored for a minimum of 30 days. The cool tier has lower storage costs and higher access costs compared to the hot tier.
- Cold tier.An online tier optimized for storing data that is rarely accessed or modified, but still requires fast retrieval. Data in the cold tier should be stored for a minimum of 90 days. The cold tier has lower storage costs and higher access costs compared to the cool tier.
- Archive tier. An offline tier optimized for storing data that is rarely accessed, and that has flexible latency requirements, on the order of hours. Data in the archive tier should be stored for a minimum of 180 days.
Note that this feature is only supported for General Purpose v2 Azure accounts. If you are using another kind of account, you need to upgrade your account to be able to use this feature
Be aware of the additional charges and increased blob access rates after your Azure account upgrade
To learn more about the difference between Azure storage tiers, refer to the Azure Blob Storage - Hot, cool,cold, and archive storage tiers article at docs.microsoft.com.
Step 8
Compression
Managed Backup offers compression to reduce the storage space required for your backup and to speed up the upload process to the target storage.
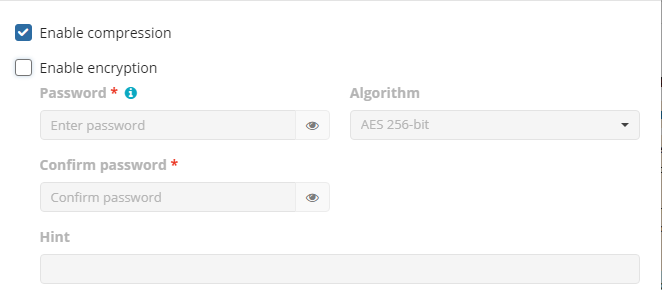
Enabling compression will reduce the size of the backup and reduce the time to upload it, both of which may decrease the cost of the backup
Encryption
You can protect your backup by encrypting its contents. Managed Backup supports AES encryption with key sizes of 128, 192, and 256 bits. A larger key size provides stronger encryption but may increase the time required for processing your backup. For more details on AES encryption, refer to the Advanced Encryption Standard.
To protect your backup contents with encryption, select the Enable encryption checkbox. The application supports AES encryption of 128, 192 and 256 bit key length. Select the appropriate key length in the Algorithm drop-down menu
- Specify the encryption password in the Password field, then confirm the password in the Confirm field. Mind to keep the encryption password in a safe place. Pay attention, if Password Recovery Service is not enabled in the Management Console, then if the encryption password is lost or forgotten, the encrypted backup cannot be restored. Password recovery Service requires the Two-factor Authentication (2FA) enabled.
- In the Hint field, specify some information that could help to recall the password in case you forget it.
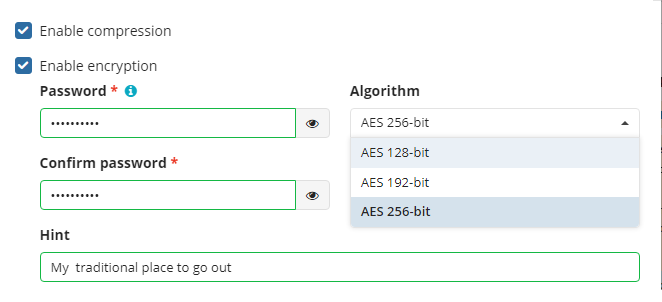
If you change any encryption settings (algorithm or password) for an existing backup plan, a full backup will be executed the next time the backup plan runs.
Note that the encryption password will NOT be stored in the backup plan configuration for security reasons. Keep this password in a safe place to be able to restore the backup contents afterwards. It is important to remember that Support team is not able to retrieve or reset the encryption password. It is recommended that you store the password in a secure place and enable the Password Recovery Service
Step 9
Enable or disable the full consistency check and restore verification for the backup plan. A mandatory consistency check will be completed with every backup plan run regardless of this setting.
Full consistency check implements checks of data integrity for all generations (full and incremental backup sequences) with the exception of the current generation check, which is the subject of a mandatory consistency check. A mandatory consistency check is performed at each backup plan run.
After the successful full consistency check, a user can be sure that backed up data is ready to be restored.
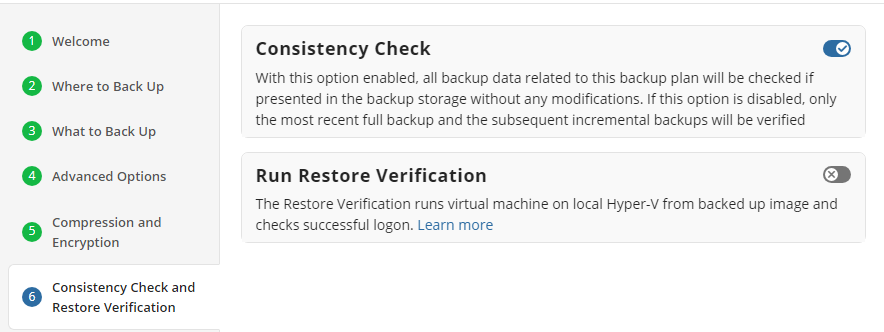
It is recommended that you leave “Enable Full Consistency Check” enabled
Although a successful Consistency Check ensures the backup integrity, an additional Restore Verification process can be executed as well.
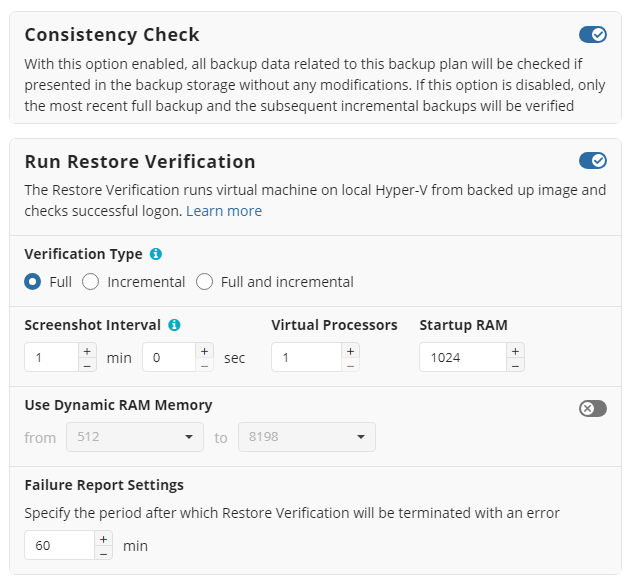
This process uses a temporary Hyper-V virtual machine on the source endpoint to test Windows startup. It only retrieves the necessary backup parts from storage without the need to download the entire backup.
Since the Restore Verification feature is based on Hyper-V mechanisms, a Hyper-V environment is required on your operating system
You can run the Restore Verification for incremental backups only, full backups only, for every backup, or do not run it at all.
Along with the Restore Verification running mode, customize the Hyper-V auxiliary virtual machine configuration to run the Restore Verification (number of virtual processors, RAM).
Step 10
Specify the backup plan schedule options.
The following options are available:
- Select the Simple option to apply the Forever Forward Incremental (FFI) schedule.
- Select the Advanced option to apply the recurring schedule and, if necessary, use Grandfather-Father-Son and Object Lock (Immutability).
- Select the No schedule, run manually option to run the backup plan manually. The retention policy will not work for this option.
The simple schedule is unavailable if the selected storage account does not support synthetic full backups.
The Simple (Forever forward) schedule is a good option to use for the short-term retention policy such as 30 days (1 months) or 90 days (3 months).
- It is not recommended to select the Simple (Forever forward) schedule for long-term storage and archival purposes.
- If you plan to retain more than 100 restore points (days), please consider using the Advanced schedule.
For more guidelines on schedule selection, refer to the following article.
Simple Schedule
Select the Simple (Forever Forward) option to use the Forever Forward Incremental (FFI). This schedule offers one full backup followed by a limited number of incrementals. Once the limit is exceeded, a new full backup is created using in-cloud copying (synthetic full backup.
Once you select this option, the predefined schedule will appear. You can edit this schedule, if necessary. You can select the Daily or Monthly schedule type, depending on how often the incremental backups will be performed.
Use the Additional Settings to configure the following:
- First backup start date
- Stop condition for the long backup
- Overdue alert condition
- Missed backup handling
Advanced Schedule
Select the Advanced option to set up a flexible, recurring schedule with generations. Every generation contains one full backup followed by incrementals.
Once you select this option, the predefined schedule for full and incremental backup will appear. You can edit this schedule, if necessary.
The advanced schedule allows you to configure a flexible backup plan according to your requirements. To modify the schedule, use the edit icon next to the selected schedule. If needed, you can disable the incremental backup schedule to run only full backups.
You can select the Daily or Monthly schedule type, depending on how often the incremental backups will be performed.
Use the Additional Settings to configure the following:
- First backup start date
- Stop condition for the long backup
- Overdue alert condition
- Missed backup handling
It is recommended to schedule full backup at least once every 3 months for selected schedule
Step 11
Retention Policy for Advanced Schedule, GFS, and Object Lock (Immutability)
If the Advanced schedule was selected, specify the retention period for the backup plan.
GFS Settings
To apply the GFS retention policy, enable the Archive Full Backups, Grandfather-Father-Son (GFS) feature, then specify the GFS retention settings.
Learn more about GFS retention settings in the GFS Examples chapter
Object Lock (Immutability)
Object Lock (Immutability) is linked to the GFS retention policy. If the Object Lock (Immutability) is applied along with GFS settings, full backups that are subject to the GFS retention policy become immutable for the GFS keeping period.
Select the Prevent backups created according to GFS policy from deletion checkbox, then confirm the use of this feature.
Use the Immutability feature with extreme caution. Once a backup data becomes immutable in Compliance mode, there is no way to delete them from the storage until the specified GFS keeping period expires except for the storage account termination. Incorrect settings can cause high storage bills.
To find more information about the Object Lock feature, supported storage providers, and required permissions, refer to this article.
Retention Policy for Simple Schedule
If on the Schedule options step you selected the Simple schedule, the Retention Policy step has different settings.
The Retention period value defines how long restore points are kept. Restore points with an expired retention period are merged into a full backup. (With Forever Forward Incremental, only one full backup is kept on the backup storage). If your storage has a minimum retention period, the creation of a new full backup will be postponed to avoid early deletion fees.
Step 12
Specify pre and post-actions for your backup plan. Usually, these are scripts that perform particular jobs before or after your data is backed up. The following settings are available:
- To specify the action that will be performed before the backup plan starts, select the Pre-backup action checkbox.
- Specify the path to the script to be run as a pre-backup action.
- Specify the conditions of pre-action run:
- Select the Do not run the backup plan if the pre-backup action fails option if you do not want the backup plan to be launched if the pre-backup action fails.
- Select the Run the backup plan if the pre-backup action fails option if you want the backup plan to launch regardless of the pre-backup action result.
- To specify the action that will be performed after the backup is completed, select the Post-backup action checkbox.
- Select the Execute the post-backup action only if the backup plan completes successfully option if you want to run it only if the backup was executed without any errors or warnings.
- Select the Execute the post-backup action regardless of the backup plan result option if you want the post-action to be launched regardless of the backup termination results.
- To chain the backup plan with another plan, select Backup chain checkbox, then select the backup or restore plan name in the drop-down menu.
- Select the Run the selected plan if this backup plan completes with success option if you want to run the specified plan only if the backup plan was executed without any errors or warnings.
- Select the Run the selected plan regardless of this backup plan completion result option if you want the chained backup plan to be launched regardless of the backup termination results. Select the mode for the current chained backup plan:
- Force full backup. Full backup will be forced for the chained backup plan.
- Use settings of the current backup plan. Chained backup plan will be run as full or incremental, according to this backup plan run.
Step 13
Specify notification settings for backup plan results. You can use the company notification settings or customize them, if needed. You can specify the required recipients and customize the notifications on different backup plan results:
- Success
- Warning
- Failed
You can configure a notification threshold for Managed Backup alerts, so that notifications are sent only after a specified number of consecutive plan failures

In case you select to customize notifications, select the recipients for different events.
- Select Send notifications to user account... if you want to notify the user associated with the computer to back up about the backup process.
- Select If the backup plan fails or completes with warnings option if you want to receive the notification message in case of the backup plan failure
- Select In all cases option if you want the entry to be put in Windows Event Log in any case.
Click the Next, then click Save to finish the wizard.
Image-Based Restore Plans
Restore to Physical Disk in Backup Agent
If you keep your disk images backed up, read this chapter to learn how to restore them. In case you need to restore some files or folders from this disk image refer to Item-Level Restore from Image-Based backups
Create Image-Based Restore Plan
In the Backup Agent, click Restore to proceed with a restore plan.
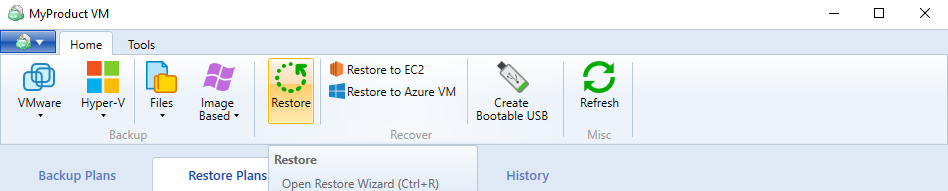
Select Backup Storage
Select a source cloud or local storage containing the backup to restore.
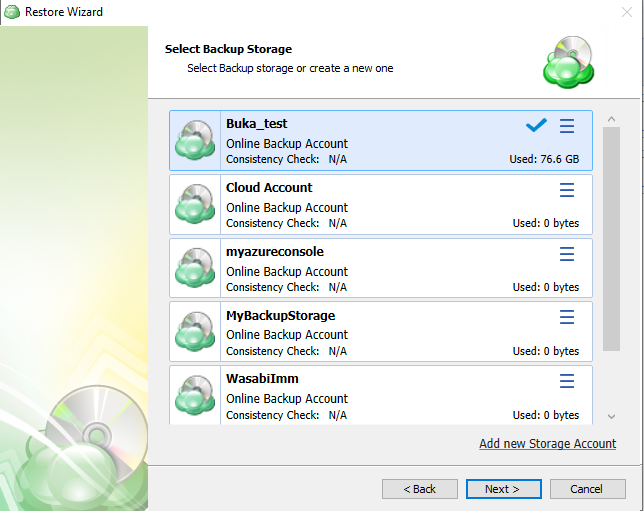
To add a new storage account, click Add new storage account. Click Next.
Plan Name
Specify whether you need to save the restore plan after completing the wizard, or run the restore procedure only once (without saving this plan and running it automatically on schedule).
You can change the default plan name, if needed.
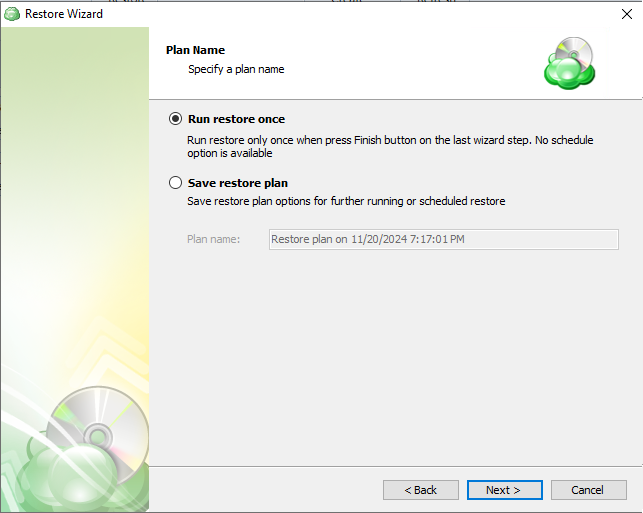
Click Next.
Select Computer to Restore (Optional)
If a selected backup storage contains backup data from several computers, you will be prompted to select the computer which backup you are planning to use.
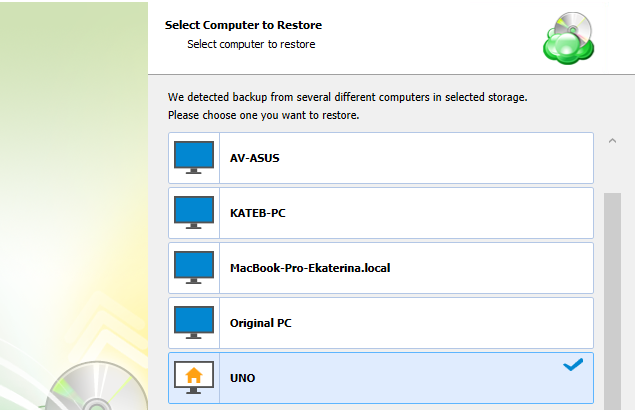
Click Next.
Type of Data
On this wizard page, you choose what kind of data you need to restore.
Consider, item-level restore from long-term (cold) backup storages is not currently supported
Type of data depends also on the license type you are using.
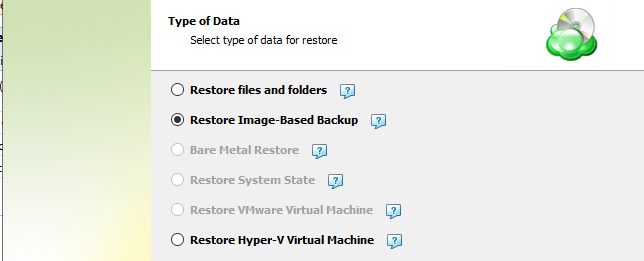
All available restore options are active. To proceed with restoring an image-based backup, select the Restore Image-Based Backup option.
Click Next.
Select Backup to Restore
On this wizard page, you choose what backup plan you want to restore.

Click Next.
Restore Point
On this wizard page, you can select whether you need to restore specific file versions, or restore to a specific point in time
.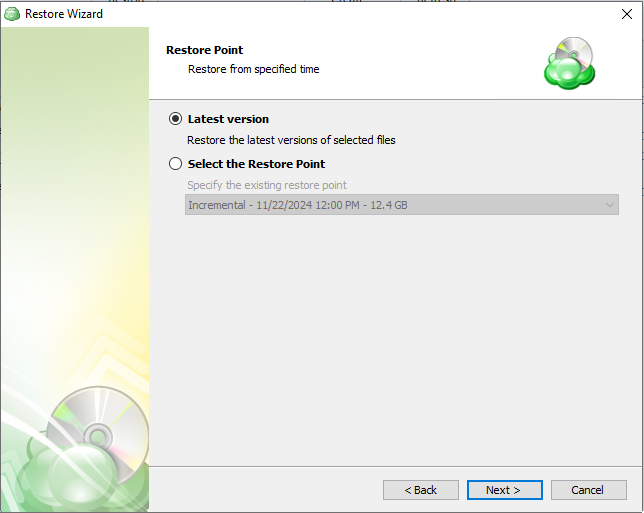
The following options are available in the wizard:
- Latest version
Enables you to restore the latest versions of your images available in a backup. Selecting this option will restore only those image versions that were modified before the most recent backup. - Select the Restore Point
Enables you to restore image versions available in your backup storage at the specified date and time. Selecting this option will restore only those image versions that were modified before the most recent backup and are not yet available in the destination folder. If earlier versions of the corresponding images already exist in the destination folder, they will not be restored unless you explicitly enable their overwriting further in this wizard. - Manually (This option can appear if you are restoring legacy backups)
Enables you to select which versions of each image to restore. You can specify which versions to restore on the next wizard page.
When restoring a backup that was made on another computer, you may need to synchronize the repository to refresh the file tree.
Click Next.
Restore Type
On this wizard page, you need to choose how to restore your data.
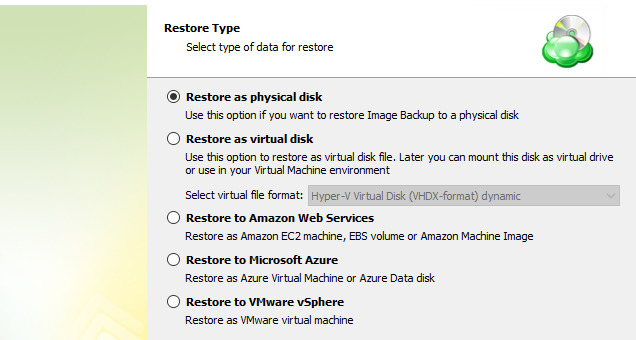
The following options are available:
- Restore as physical disk
- Restore as virtual disk. You will need to specify the virtual disk format
- Restore to Amazon Web Services (optional)
- Restore to Microsift Azure (optional)
- Restore to Vmware vSphere
Click Next.
Temporary Instance (Optional)
On this wizard page, you can select whether you need to use a temporary instance when restoring an image-based backup.
Refer to the Specify Temporary Instance article for details.
Click Next.
Select Partitions
On this wizard step, select partitions to restore.

In case you need to restore some files or folders from this disk image refer to Item-Level Restore from Image-Based Backups article for details.
You can resize selected partitions on the Select Partitions step and restore them to several virtual disks. Click on the target size of the partition to perform resizing.
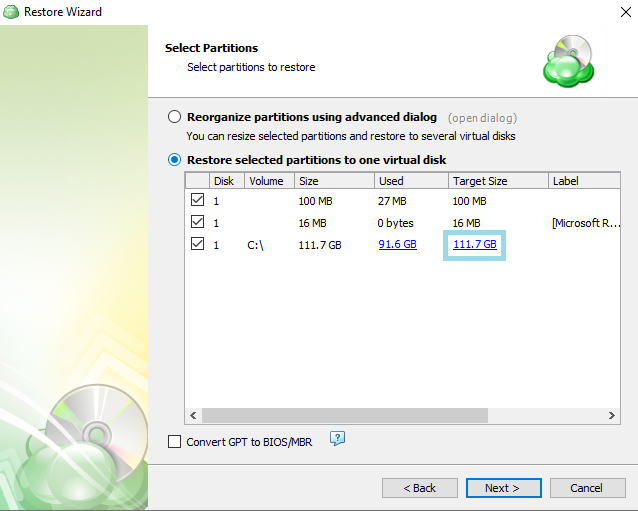
Click Next.
Destination
Specify the destination disk for restore of the image-based backup
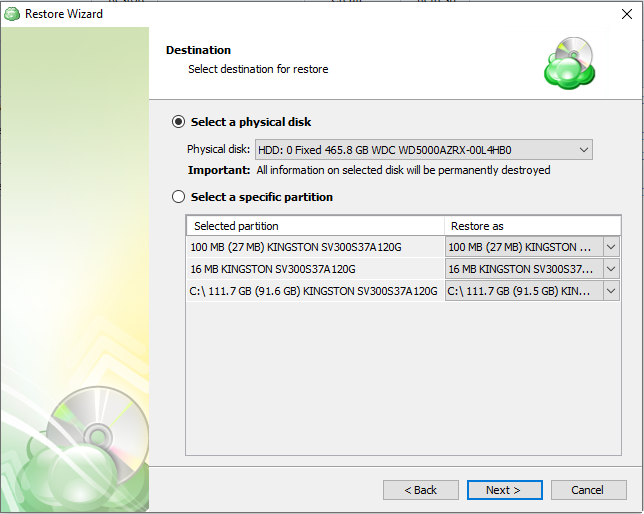
All existing information on the selected disk will be permanently deleted.
Click Next.
Encryption Password (Optional)
Specify the encryption password to decrypt the encrypted backup.
Click Next.
Glacier Smart Restore (Optional)
If you restore data from the S3 Glacier Flexible Retrieval or Glacier Deep Archive storage classes, specify Smart Restore options.
The following option are available:
- Skip files located in Glacier. Select this option to bypass object located in Glacier. Usually, the restore from Glacier takes up to several hours and may be a subject of significant expenses.
- Restore files located in Glacier. Select this option to restore objects stored in S3 Glacier storage clasn, then specify a retrieval type. The following types are available: Expedited, Bulk and Standard.
To learn about retrieval rates, refer to the Amazon S3 Glacier pricing chapter at docs.aws.amazon.com.
Click Next.
Schedule Your Restore Plan (Optional)
If you selected to save a created restore plan for further use, select schedule options.
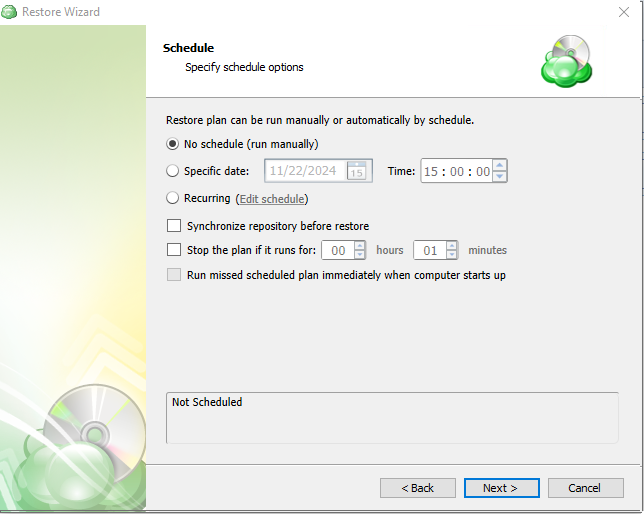
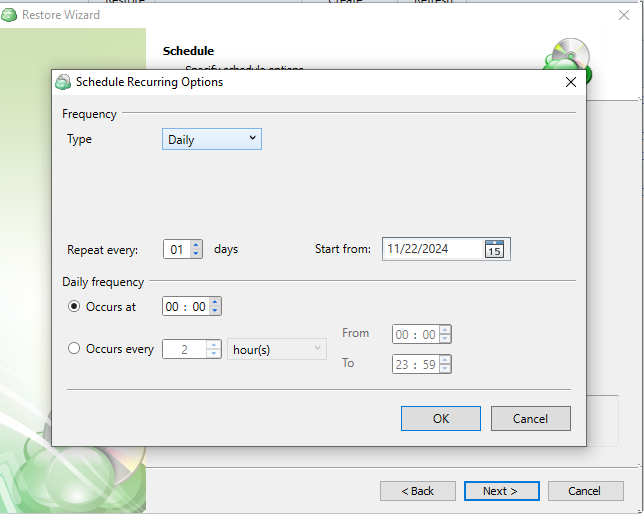
Click Next.
Pre-/Post Actions (Optional)
Specify actions to be executed before or after the restore plan completion.
Starting from Management Console version 5.0, pre- or post- actions for Backup Agents can be restricted by provider. To learn more about the pre-/post action settings, refer to the Global Agent Options and Companies chapters
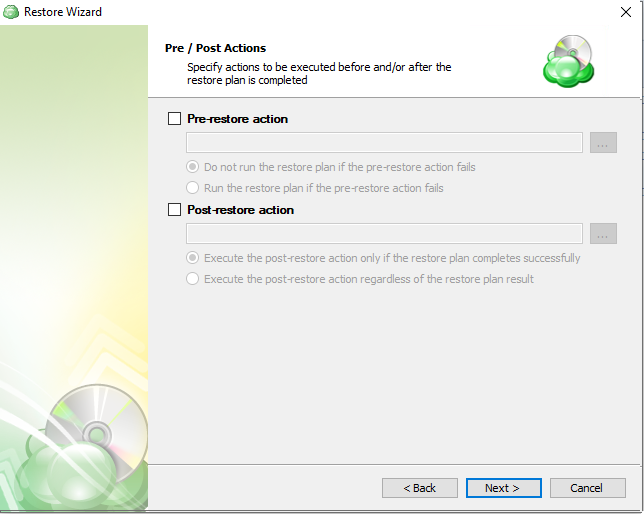
Click Next.
Notifications and Logging
Specify email notification settings and options to add records to Windows Event Log.
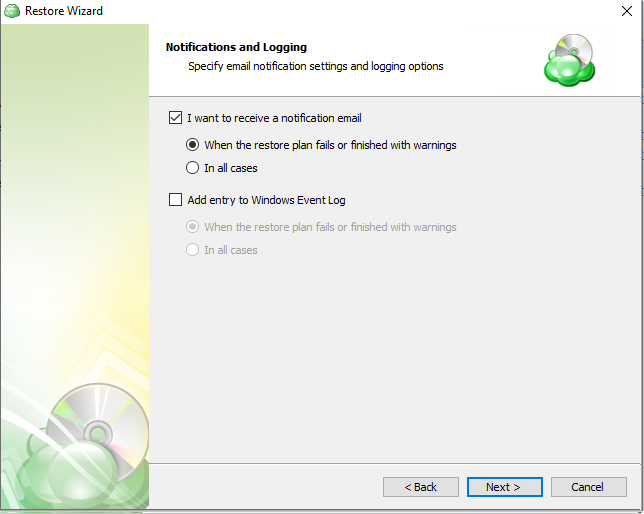
Click Next.
Check Network Shares (Optional)
If you specified one or more network locations on the previous wizard pages, you can make the wizard will verify access to these locations.
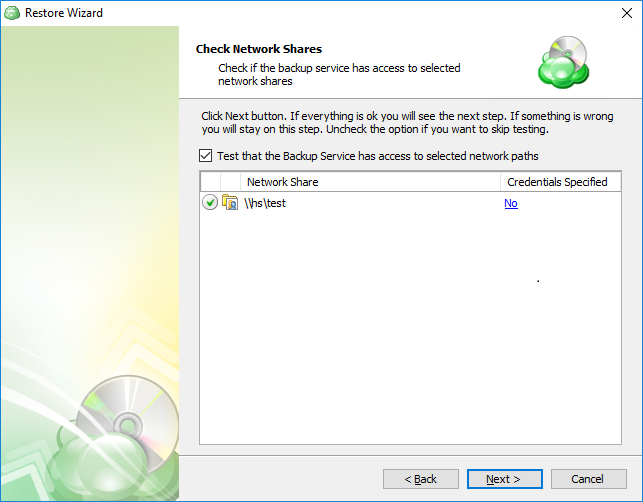
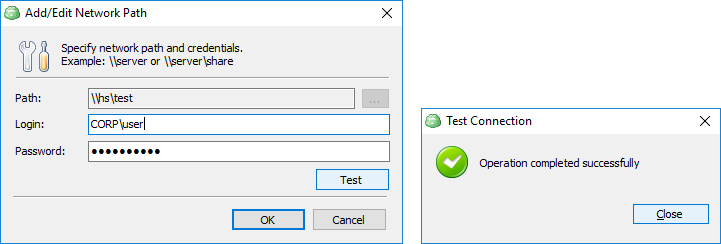
Click Next.
Summary
Check and manage your restore plan
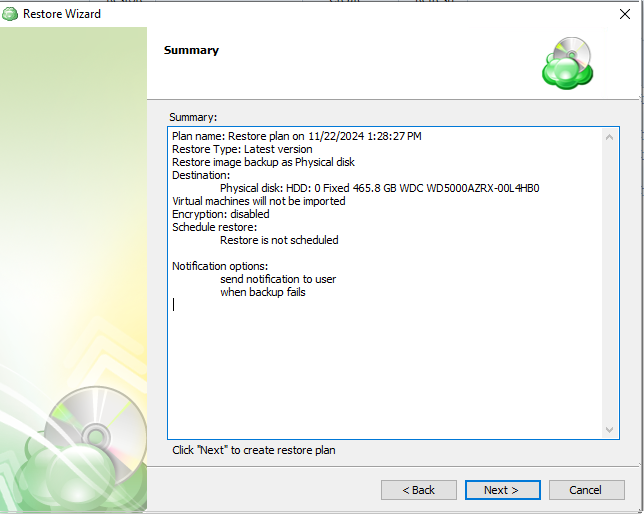
Click Save to create the restore plan.
Restore to Physical Disk in Management Console
With MSP360 Managed Backup you can restore image-based directly to users' computers via Management Console. Both backup formats (new backup format and legacy backup format) are supported. In case you need to restore some files or folders from this disk image refer to Item-Level Restore from Image-Based backups.
Create a New Restore Plan
To create a new restore plan, proceed as follows:
- Open the Management Console.
- Open the Backup > Computers page in the main menu.
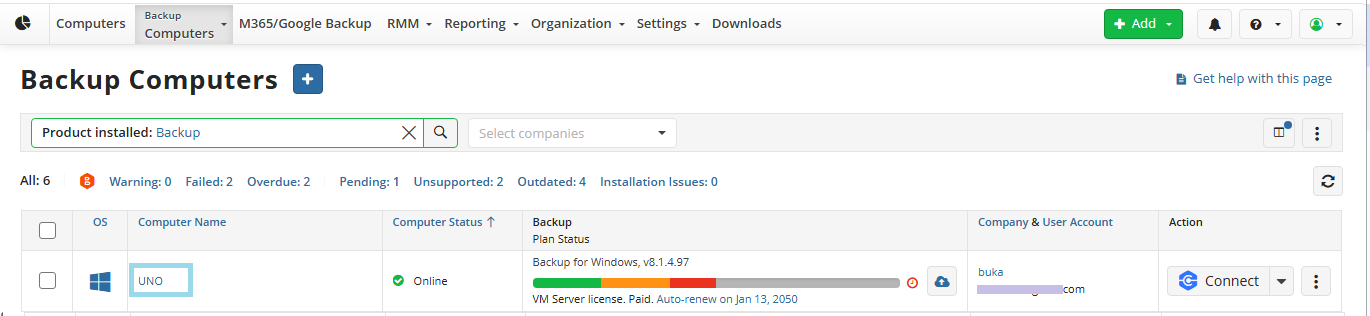
- Find the required computer, then click the Configure icon in the Backup Plan Status column.

- On the Restore plans tab of the side panel, click + or +Add New Plan

- Select Image-based restore plan.
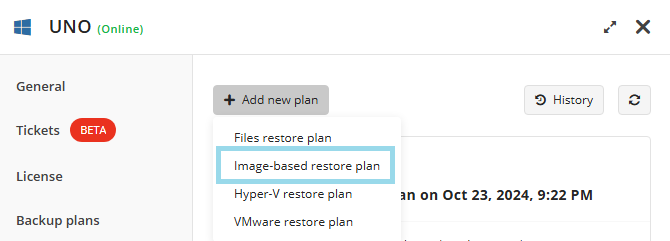
Restore Wizard Steps
Plan Name
Select the restore plan mode: * Select the Run restore once option to restore an image-based backup only once * Select the Save Restore Plan option to save the plan configuration for future use. * Specify the name of the plan, or use the default one.
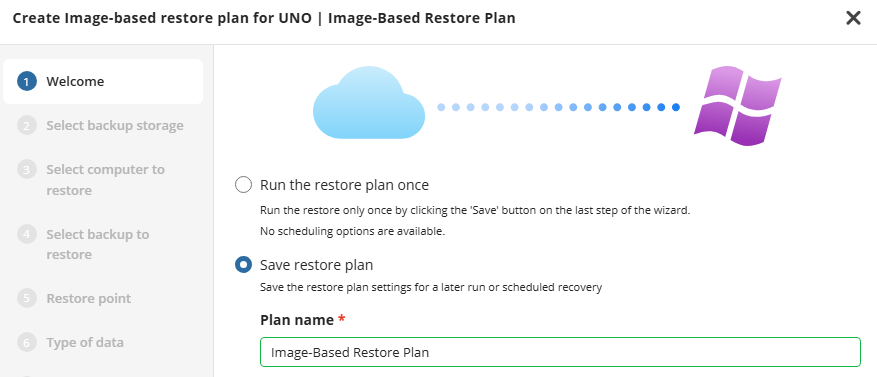
Click Next.
Select Backup Storage
Select the backup destination that contains the required backup from the list.
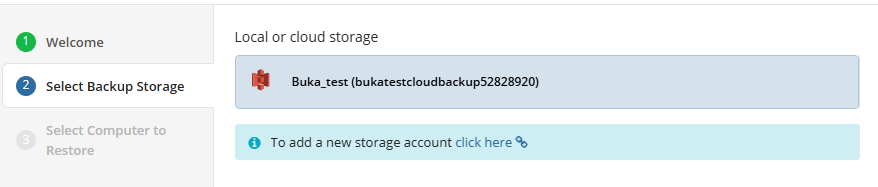
Consider, item-level restore from long-term (cold) backup storages is not currently supported
Click Next.
Select Computer to Restore (optional)
This restore wizard step appears only if the specified backup destination contains several backups from different computers.
Select the required computer.
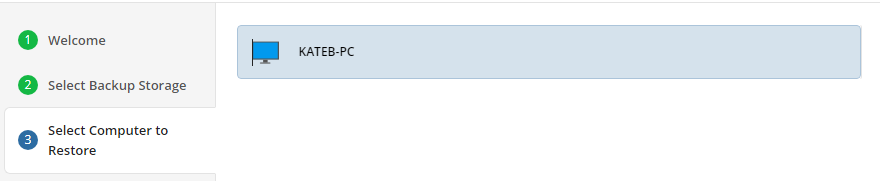
Click Next.
Select Backup
Select the backup to restore from the list of available backups.
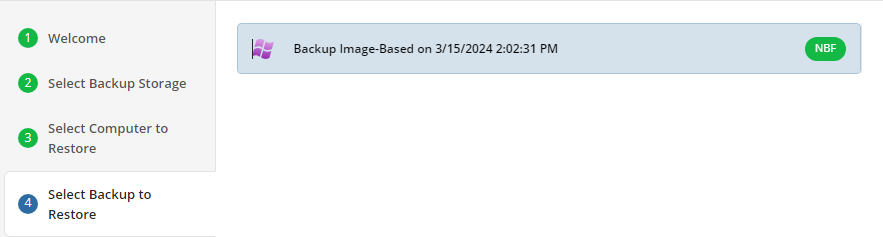
Click Next.
Select Restore Point
Select what to restore.
For backups made in the new backup format, select the latest version or the specific restore point from the list below.
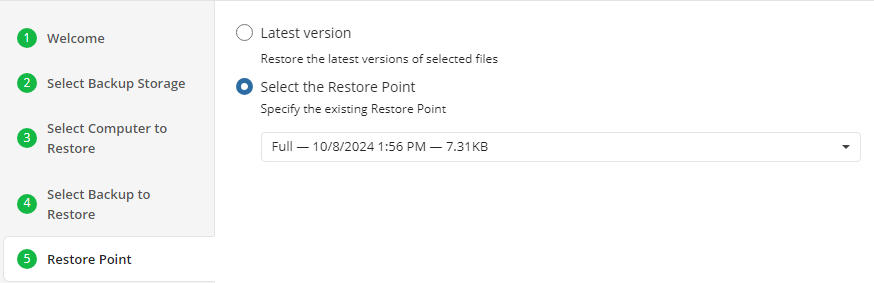
For backup made in the legacy backup format, select one of the available options:
- Select the Latest Version option to restore the latest image version of the selected backup
- Select the Point in Time option to restore the image version for the specified date and time
- Select the Modified Period option to restore the image version based on the modification period, then specify the period
- Select the Backup Period option to restore the image version based on the backup period, then specify the period
- Select the Manually** option to proceed to manual image version selection
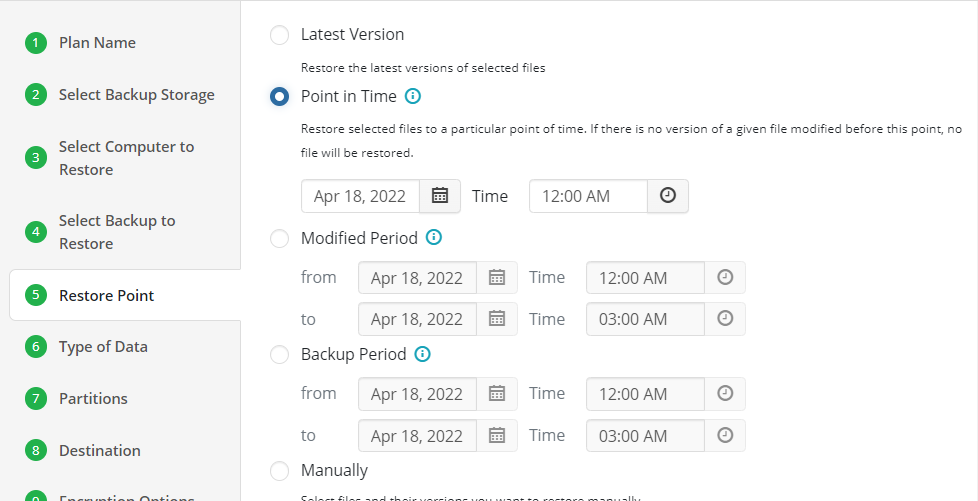
Note that the time must be specified in the provider time zone. Point the mouse to the hint icon to see the provider time zone
Click Next.
Type of Data
Select the type of the image restore:
- To restore the image to physical hardware, select the Restore as Physical Disk option
- To restore the image as a virtual disk file, select the Restore as Virtual Disk option, then select the virtual disk format from the list of available formats
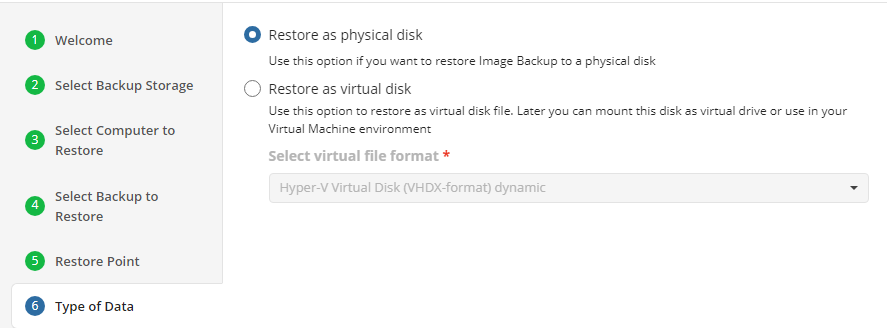
Click Next.
Select Partitions
Select partitions to restore.
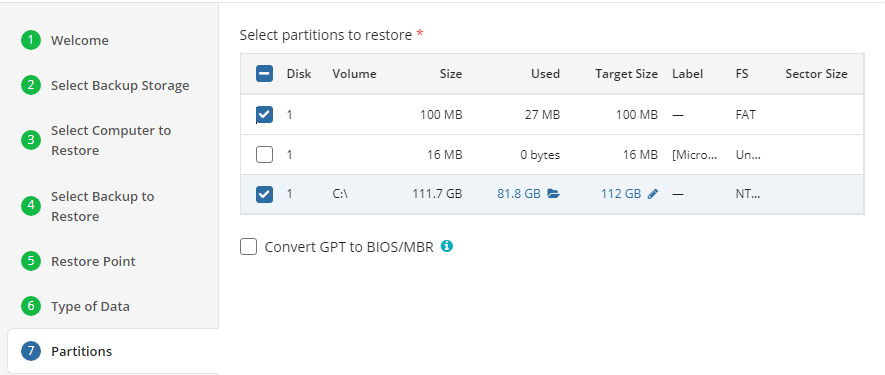
Note that selected partitions must include system volumes as they contain data required to boot the operating system
To exclude some files and folders from restore, click the partition size value in the Used column, then make an object selection to exclude from a restore.
To specify a custom partition size, click the value in the Target size column.
Attempt to restore to smaller partitions can succeed only if no blocks in the backup image are used beyond the size of a new partition. If such blocks exist, the restore plan will fail with a 'block intersection exists' error'. If restoring to a smaller partition is inevitable, make this partition as large as possible
In case you need a BIOS boot partition, select the Convert GPT to MBR checkbox. Read more about this option in the Convert GPT Disks to MBR chapter.
Click Next.
Select Destination
Select the destination to restore the disk image. Select the disk or specific partition.

Click Next.
Encryption Options (optional)
Enter the encryption password if your backup is encrypted.
Click Next.
Schedule Options
Specify the schedule for the restore plan.
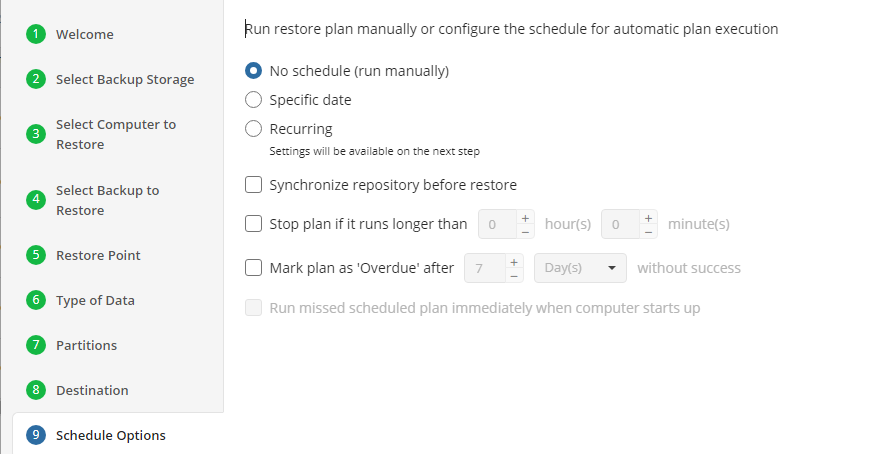
The following options are available:
- No schedule (run manually). Select this option to run the restore plan manually, only when it is required
- Specific date. Select this option to specify the date and time the restore plan is to be executed
- Recurring. Select this option to run the restore plan on a periodic basis, then configure the schedule
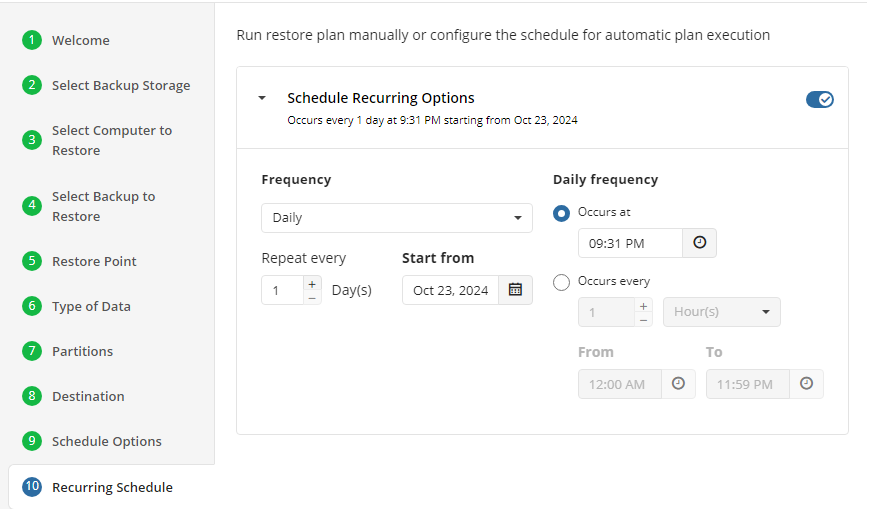
- Stop the plan if it runs for. Select this option if you want to stop the restore plan if it runs longer than the time you specified. Use this option with care since sometimes it is hard to predict the restore time due to many factors
- Mark plan as Overdue after. Select this option to monitor the plan execution. If the restore plan fails or is finished with warnings for the specified period of time, it will be assigned with the Overdue status that will appear on the Monitoring/History page
- Run missed scheduled plan immediately when computer starts up. Select this option if you want the restore plan would run as the computer boots in case it was down at the moment of the scheduled run
Click Next.
Pre / Post Actions
Specify the actions before and/or after the restore plan. Usually, these are scripts that perform particular jobs before or after the plan is executed. The following settings are available:
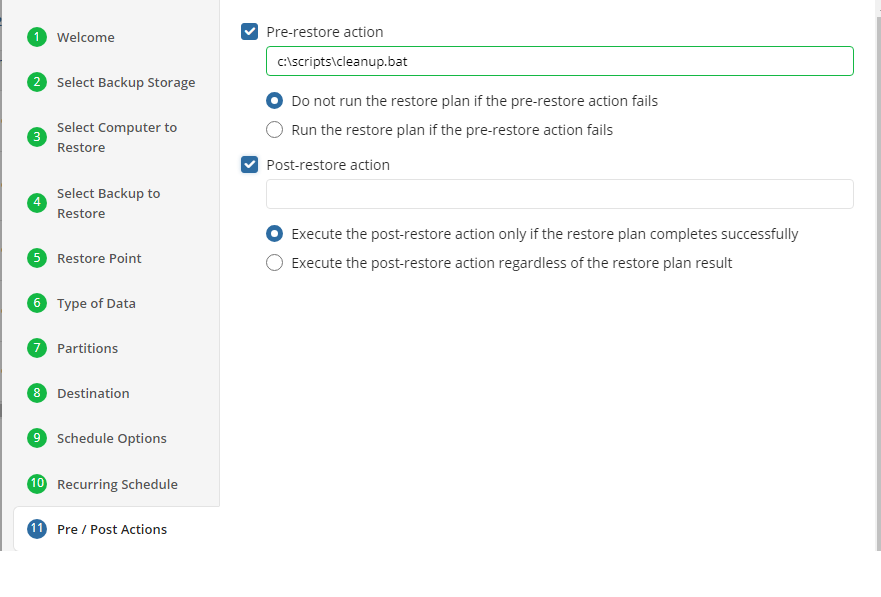
- To specify the action that must be performed before the restore plan starts, select the Pre-restore action checkbox
- Specify the path to the script before the restore plan
- Specify the conditions for pre-action execution:
- Select the Do not run the restore plan if the pre-restore action fails option to suspend the restore plan execution in case the pre-action fails
- Select the Run the restore plan if the pre-restore action fails option if you want the restore plan to run regardless of the pre-action execution result
- To specify the action that will be performed after the restore plan completes, select the Post-restore action checkbox
- Select the Execute the post-restore action only if the restore plan completes successfully option if you want to run it only if the backup was executed without any errors or warnings.
- Select the Execute post-restore action regardless of the restore plan result option if you want the post-action to be executed regardless of the restore plan result
Click Next.
Notifications
Specify notification settings for restore plan results. You can use the company notification settings or customize them as needed: specify the required recipients and customize the notifications for different restore plan results:
- Success
- Failed
- Warning
!
Select the I want to receive a notification email to enable notifications.
- Select When the restore plan fails or finished with warnings option if you want to receive the notification message in case the restore plan terminates with errors or warnings
- Select the In all cases option if you want the notification to be delivered in all cases
If you want the restore plan results to be added to Windows Event Log, select the Add entry to Windows Event Log checkbox
- Select When the restore plan fails or finished with warnings option if you want to receive the notification message in case the restore plan terminates with errors or warnings
- Select the In all cases option if you want the entry to be put in Windows Event Log in any case.
Click the Next, then click Save to finish the wizard.
Restore to Virtual Disk in Backup Agent
- In the Backup Agent, click Restore to proceed with a restore plan.
Select Backup Storage
Select a source cloud or local storage containing the backup to restore.
To add a new storage account, click Add new storage account. Click Next.
Plan Name
Specify whether you need to save the restore plan after completing the wizard, or run the restore procedure only once (without saving this plan and running it automatically on schedule).
You can change the default plan name, if needed.
Click Next.
Select Computer to Restore (Optional)
If a selected backup storage contains backup data from several computers, you will be prompted to select the computer which backup you are planning to use.
Click Next.
Type of Data
On this wizard page, you choose what kind of data you need to restore.
Consider, item-level restore from long-term (cold) backup storages is not currently supported
Type of data depends also on the license type you are using.
All available restore options are active. To proceed with restoring an image-based backup, select the Restore Image-Based Backup option.
Click Next.
Select Backup to Restore
On this wizard page, you choose what backup plan you want to restore.
Click Next.
Restore Point
On this wizard page, you can select whether you need to restore specific file versions, or restore to a specific point in time
.
The following options are available in the wizard:
- Latest version
Enables you to restore the latest versions of your images available in a backup. Selecting this option will restore only those image versions that were modified before the most recent backup. - Select the Restore Point
Enables you to restore image versions available in your backup storage at the specified date and time. Selecting this option will restore only those image versions that were modified before the most recent backup and are not yet available in the destination folder. If earlier versions of the corresponding images already exist in the destination folder, they will not be restored unless you explicitly enable their overwriting further in this wizard. - Manually (This option can appear if you are restoring legacy backups)
Enables you to select which versions of each image to restore. You can specify which versions to restore on the next wizard page.
When restoring a backup that was made on another computer, you may need to synchronize the repository to refresh the file tree.
Click Next.
- On the Restore Type step, select Restore as virtual disk, then select the format of a virtual disk file.
- Restore as physical disk: Restores the partitions selected later to a physical disk.
- Restore as virtual disk: Restores the data as a virtual disk in multiple supported formats.
- Restore to Amazon Web Services: Restores the data as either an EC2 machine, EBS volume, or Amazon Machine Image.
- Restore to Microsoft Azure: Restores the image to either an Azure Virtual Machine or Azure Data Disk.
- Restore to VMware vSphere: Restores the image as a new virtual machine in vSphere.
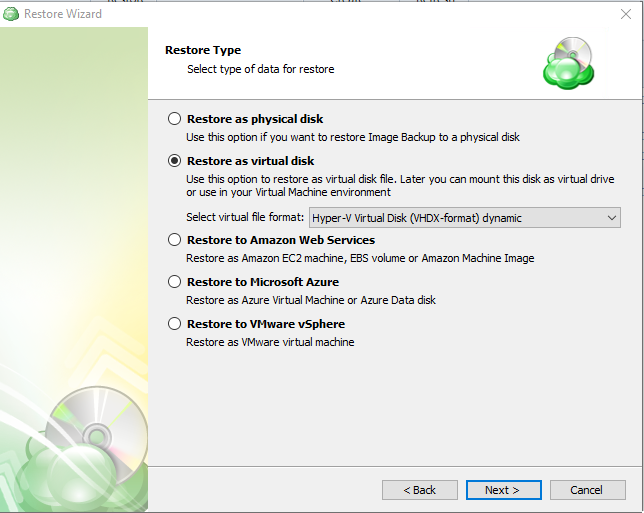
For AWS and Azure destinations, a storage account must already be added in Management Console
- Select the Reorganize partitions using advanced dialog option.
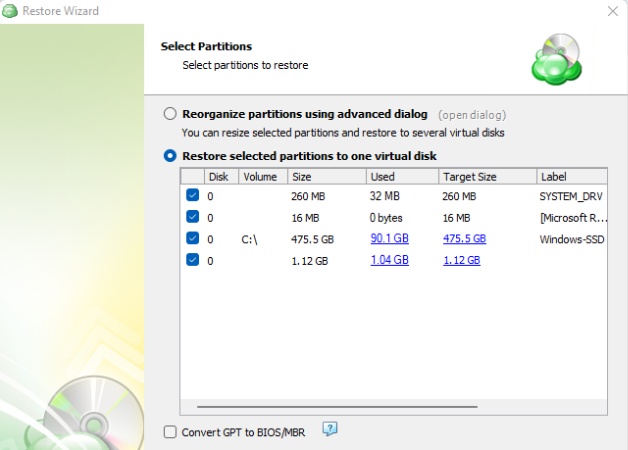
- Configure virtual partitions in the dialog window.
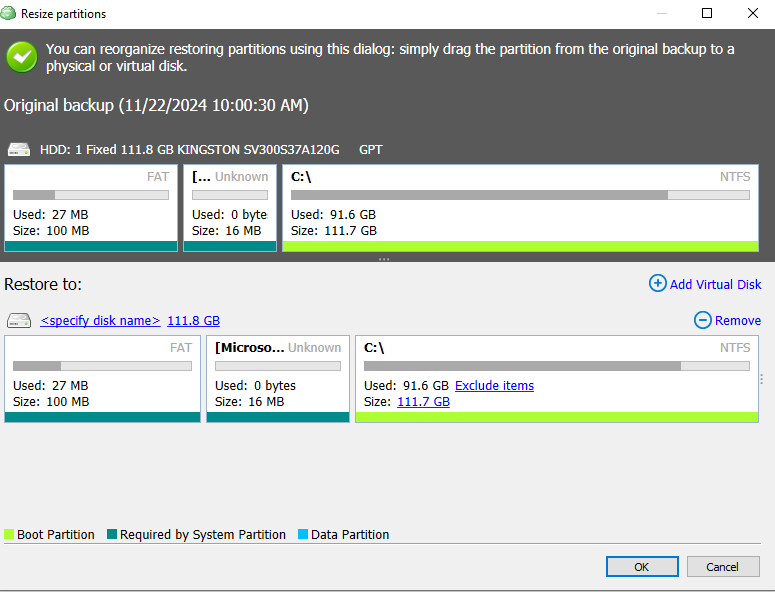
5. Destination
Specify the destination disk for restore of the image-based backup
All existing information on the selected disk will be permanently deleted.
Click Next.
Encryption Password (Optional)
Specify the encryption password to decrypt the encrypted backup.
Click Next.
Glacier Smart Restore (Optional)
If you restore data from the S3 Glacier Flexible Retrieval or Glacier Deep Archive storage classes, specify Smart Restore options.
The following option are available:
- Skip files located in Glacier. Select this option to bypass object located in Glacier. Usually, the restore from Glacier takes up to several hours and may be a subject of significant expenses.
- Restore files located in Glacier. Select this option to restore objects stored in S3 Glacier storage clasn, then specify a retrieval type. The following types are available: Expedited, Bulk and Standard.
To learn about retrieval rates, refer to the Amazon S3 Glacier pricing chapter at docs.aws.amazon.com.
Click Next.
Schedule Your Restore Plan (Optional)
If you selected to save a created restore plan for further use, select schedule options.
Click Next.
Pre-/Post Actions (Optional)
Specify actions to be executed before or after the restore plan completion.
Starting from Management Console version 5.0, pre- or post- actions for Backup Agents can be restricted by provider. To learn more about the pre-/post action settings, refer to the Global Agent Options and Companies chapters
Click Next.
Notifications and Logging
Specify email notification settings and options to add records to Windows Event Log.
Refer to the Notifications and Logging article for details.
Click Next.
Check Network Shares (Optional)
If you specified one or more network locations on the previous wizard pages, you can make the wizard will verify access to these locations.
Click Next.
Summary
Check and manage your restore plan
Click Save to create the restore plan.
Restore to Virtual Disk in Management Console
To create a new restore plan, proceed as follows:
Step 1
Open the Management Console.
Step 2
Open the Backup > Computers page in the main menu.
Step 3
Locate the required computer which backup dataset you want to restore, then click the Configure icon in the Backup Plan Status column.
Step 4
Switch to the Restore Plans tab of the side panel, and then click +Add New Plan
Step 5
Select Image-based restore plan.
Step 6
The first step when making a Restore Plan is to select if it should run only once, or if it should be saved for future or scheduled use. The latter will allow you to name the plan.
Step 7
Next you will need to select the restore source. Select the backup destination that contains the required backup from the list.
Consider, item-level restore from long-term (cold) backup storages is not currently supported
Step 8
Next you will need to select the computer to be restored. This restore wizard step appears only if the specified backup destination contains several backups from different computers.
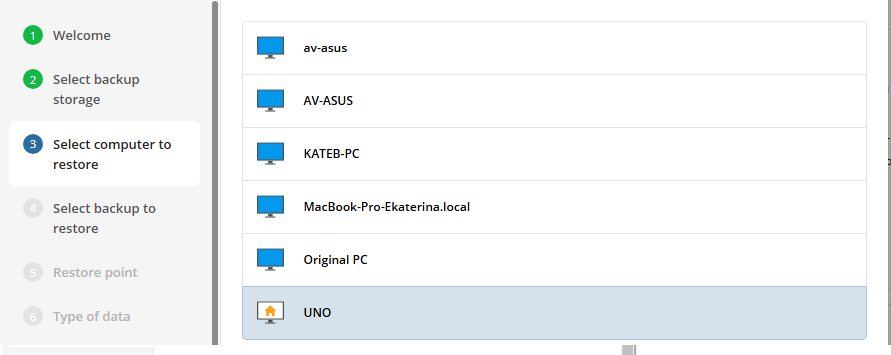
Step 9
Next you will need to select the backup plan which contains the desired restore point. Select the backup to restore from the list of available backups.
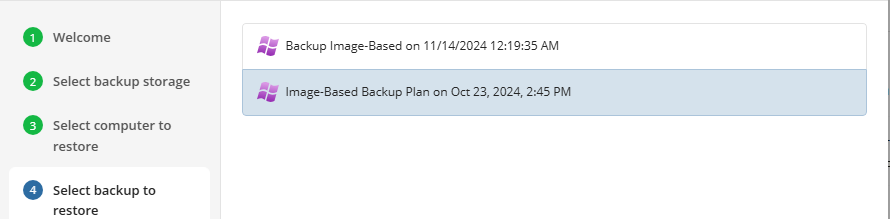
Step 10
The next step is to select the desired point in time to restore to. For backups made in the new backup format, select the latest version or the specific restore point from the list below.
- Latest version: Automatically restores the newest version of each file in the source regardless of which restore point it belongs to.
- Select the Restore Point: Restores the image as it existed at the specified restore point
- (legacy) Select the Point in Time option to restore the image version for the specified date and time
- (legacy) Select the Modified Period option to restore the image version based on the modification period, then specify the period
- (legacy) Select the Backup Period option to restore the image version based on the backup period, then specify the period
- (legacy) Select the Manually** option to proceed to manual image version selection
Note that the time must be specified in the provider time zone. Point the mouse to the hint icon to see the provider time zone
Step 11
Select select the desired target format for the restored data. To restore the image as a virtual disk file, select the Restore as Virtual Disk option, then select the virtual disk format from the list of available formats
- Restore as physical disk: Restores the partitions selected later to a physical disk.
- Restore as virtual disk: Restores the data as a virtual disk in multiple popular formats.
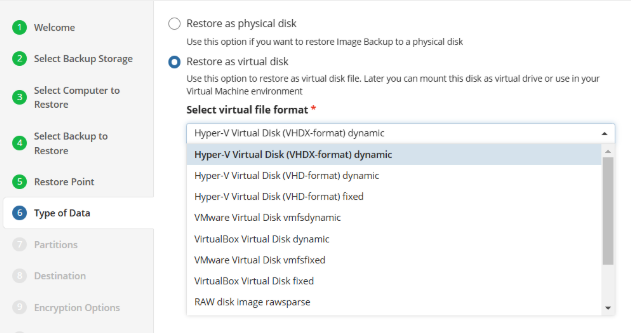
Step 12
After selecting the type of restore target in the previous step, you now need to select which partitions to restore. You can also select to convert GPT to MBR if needed.
- Convert GPT to BIOS/MBR: Select this checkbox if the target instance or the target OS does not support UEFI boot and requires BIOS boot.
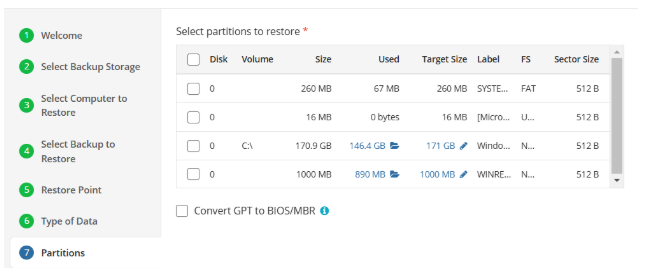
- If you click on the highlighted in blue used space or folder icon, it will open an exclusion menu:
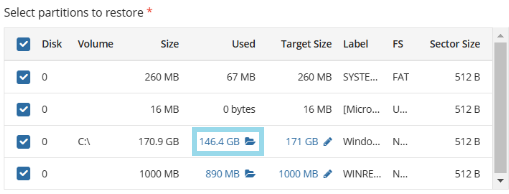
- Using this menu, you can select folders you want to exclude from the restore job:
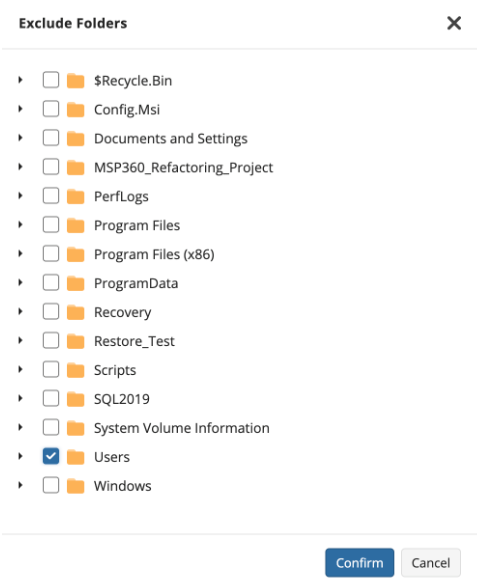
- If you click on highlighted in blue target size or pen icon, it will open the partition size menu:
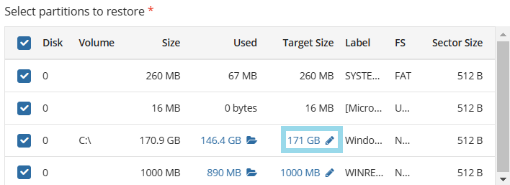
- Using the partition size menu, you can extend your target partition:

Attempts to restore to a smaller partition can succeed if no blocks in the backup image are used beyond the size of a new. If such blocks exist, the restore plan will fail with a “block intersection exists” error
Step 13
After selecting the partitions to be restored, next you will be prompted to select the destination disk or partitions.
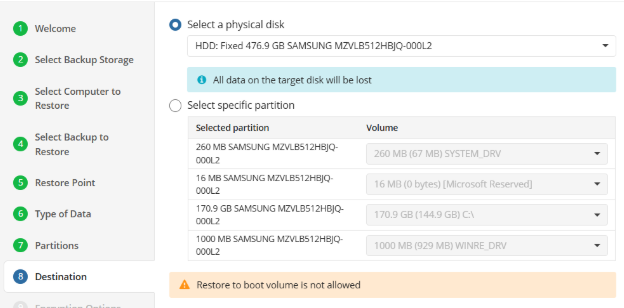
Be careful to select the correct target disk(s) and partition(s). All data in the selected targets will be permanently destroyed.
The application will now allow you to restore to the boot volume of the target computer from Windows or MBS. To restore the boot volume, use the Bare Metal Restore bootable USB.
Step 14
If the image backup dataset was encrypted, the restore plan will prompt you to enter the password.
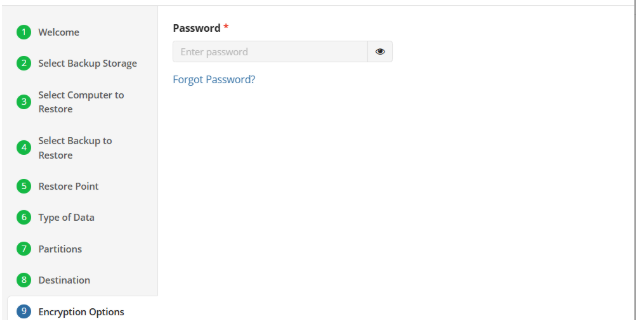
Step 15
If the restore plan is saved for later, next you will set the schedule for the plan, otherwise proceed to the next step.
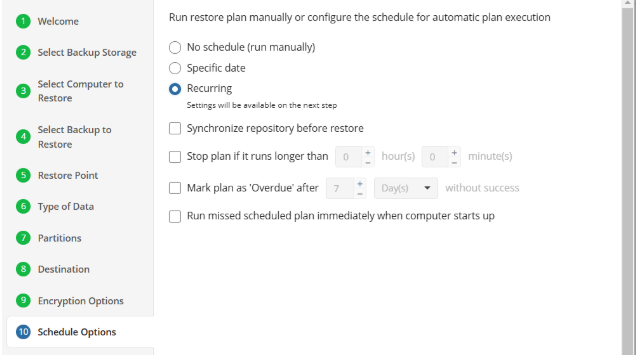
The following options are available:
- No schedule (run manually). Select this option to run the restore plan manually, only when it is required
- Specific date. Select this option to specify the date and time the restore plan is to be executed
- Recurring. Select this option to run the restore plan on a periodic basis, then configure the schedule
- Stop the plan if it runs for. Select this option if you want to stop the restore plan if it runs longer than the time you specified. Use this option with care since sometimes it is hard to predict the restore time due to many factors
- Mark plan as Overdue after. Select this option to monitor the plan execution. If the restore plan fails or is finished with warnings for the specified period of time, it will be assigned with the Overdue status that will appear on the Monitoring/History page
- Run missed scheduled plan immediately when computer starts up. Select this option if you want the restore plan would run as the computer boots in case it was down at the moment of the scheduled run
It is recommended to Synchronize repository before restore if you are restoring a backup dataset for a computer different from the original or if you are signed in with a different backup user.
Do not use the Stop the plan if it runs for option if you have a slow or unstable internet connection
Enabling the *Run missed scheduled restore immediately when computer starts up option will ensure that the restore plan will begin automatically after the computer starts up if it was unable to run at the scheduled time. This is only recommended for desktops and laptops. For servers, it is recommended that you run the restore plan manually when all maintenance works are completed to avoid adversely affecting server performance and internet bandwidth during working hours.
Step 16
The next step is to specify any Pre or Post Actions which should be triggered by the Restore Plan (optional).
Step 17
Specify notification settings for restore plan results. You can use the company notification settings or customize them as needed: specify the required recipients and customize the notifications for different restore plan results:
- Success
- Failed
- Warning
!
Select the I want to receive a notification email to enable notifications.
- Select When the restore plan fails or finished with warnings option if you want to receive the notification message in case the restore plan terminates with errors or warnings
- Select the In all cases option if you want the notification to be delivered in all cases
If you want the restore plan results to be added to Windows Event Log, select the Add entry to Windows Event Log checkbox
- Select When the restore plan fails or finished with warnings option if you want to receive the notification message in case the restore plan terminates with errors or warnings
- Select the In all cases option if you want the entry to be put in Windows Event Log in any case.
Step 18
Click on Save when you are happy with your selections. If the plan is set to run only a single time and has no set schedule, it will automatically start. Otherwise, if it is set to run only once and is scheduled, it will display in the list of plans until the scheduled time. If it is only set to run once, then when it completes successfully it will remove itself from the list of plans. Only Restore Plans which are saved will remain in the list for future use.
VMware Backup Plans
VMware Backup Plan in Backup Agent
Backup Agent virtual edition supports vSphere ESXi virtual machine backup and restore.
To perform VMware backups and, you need a special license. Learn more about license in the Licenses section
The following requirements apply to vSphere ESXi:
| Component | Requirement |
|---|---|
| Operating System | 64-bit, Windows 10/11, Windows Server 2008/2008R2/2012/2012R2/2016/2019/2022 |
| vSphere version | 6.0 to 8.0 |
Step 1
To create a new VMware backup plan , click the VMware icon in the horizontal menu bar. To create a plan in the new backup format, select VMware Backup. To continue using the current backup format, select VMware Backup (Legacy).

The Backup Wizard starts.
Step 2.
You will then be prompted with a list of available backup types.
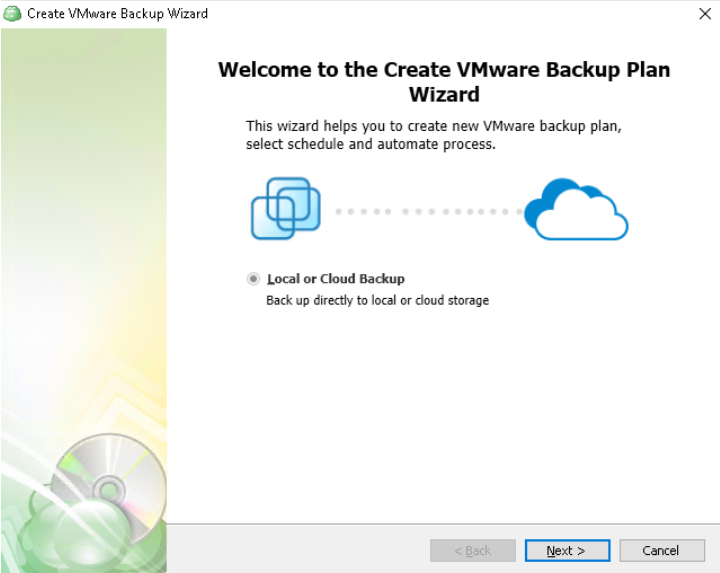
Step 3
The next step will prompt you to select the destination for the backup.
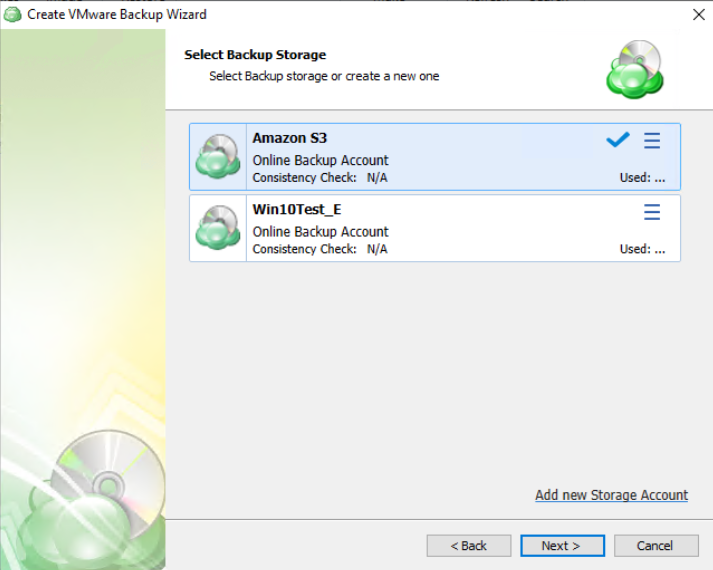
If the desired destination is not in the list, you can click “Add new Storage Account” to add it.
Step 4
Next, you will be prompted to name the plan.
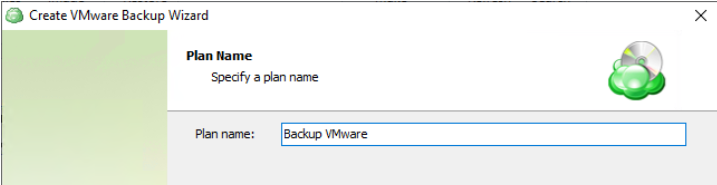
It is recommended to use a descriptive name which will distinguish the backup from others
Step 5
The next step will give you a list of available Advanced Options. It is recommended to leave these in their default configuration.
The following options are available:
- Use synthetic full backup. Select this option for cloud storages to enable the synthetic full backup usage for the backup plan. If a long-term storage class is selected as the bsckup destination, this will result in high storage costs.
Additional Advanced Options for Amazon S3
- If your backup storage destination is Amazon S3, select the S3 storage class for the backup plan:
- Standard
- Intelligent-Tiering
- Standard-IA
- One Zone-IA
- Glacier Instant Retrieval
- Glacier Flexible Retrieval (formerly S3 Glacier)
- Glacier Deep Archive
Usage of different storage classes for different backups is the subject of optimizing your storage costs.
Learn more about Amazon S3 storage classes here
- Select Use S3 Transfer Acceleration to accelerate file transfer for an extra fee. The target bucket must have this feature enabled. Select this checkbox if you want to use the data transfer acceleration service provided by Amazon. To learn more, refer to the Amazon S3 Transfer Acceleration.
Additional Advanced Options for Microsoft Azure
If your backup storage destination is Microsoft Azure, and you have the General Purpose v2 Azure account, select the required storage class (access tier).
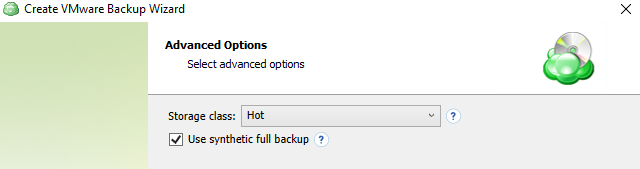
The following options are available:
- Hot tier. An online tier optimized for storing data that is accessed or modified frequently. The hot tier has the highest storage costs, but the lowest access costs.
- Cool tier. An online tier optimized for storing data that is infrequently accessed or modified. Data in the cool tier should be stored for a minimum of 30 days. The cool tier has lower storage costs and higher access costs compared to the hot tier.
- Cold tier.An online tier optimized for storing data that is rarely accessed or modified, but still requires fast retrieval. Data in the cold tier should be stored for a minimum of 90 days. The cold tier has lower storage costs and higher access costs compared to the cool tier.
- Archive tier. An offline tier optimized for storing data that is rarely accessed, and that has flexible latency requirements, on the order of hours. Data in the archive tier should be stored for a minimum of 180 days.
Note that this feature is only supported for General Purpose v2 Azure accounts. If you are using another kind of account, you need to upgrade your account to be able to use this feature
Be aware of the additional charges and increased blob access rates after your Azure account upgrade
To learn more about the difference between Azure storage tiers, refer to the Azure Blob Storage - Hot, cool,cold, and archive storage tiers article at docs.microsoft.com.
Step 6
Connect to the vCenter or ESXi by using the FQDN or IP address.
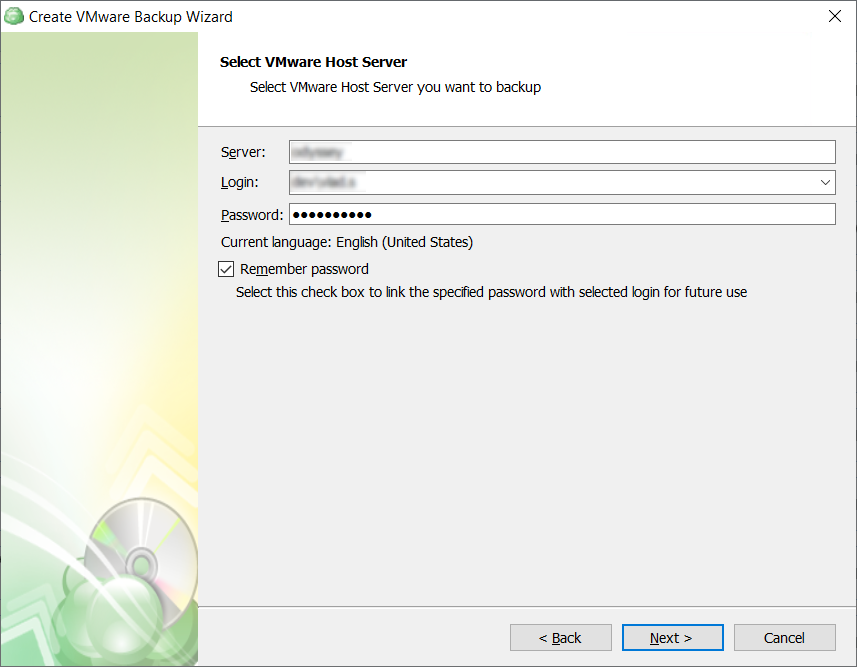
It is important to determine whether FQDN or IP addresses will be used for all future plan configurations. The application will consider each to be unique hosts, even if the target machine is the same
In case credentials are invalid or the VMware server cannot be accessed, you will not be able to proceed to the next Backup Wizard step
Step 7
Next, select the Virtual Machines you wish to back up.
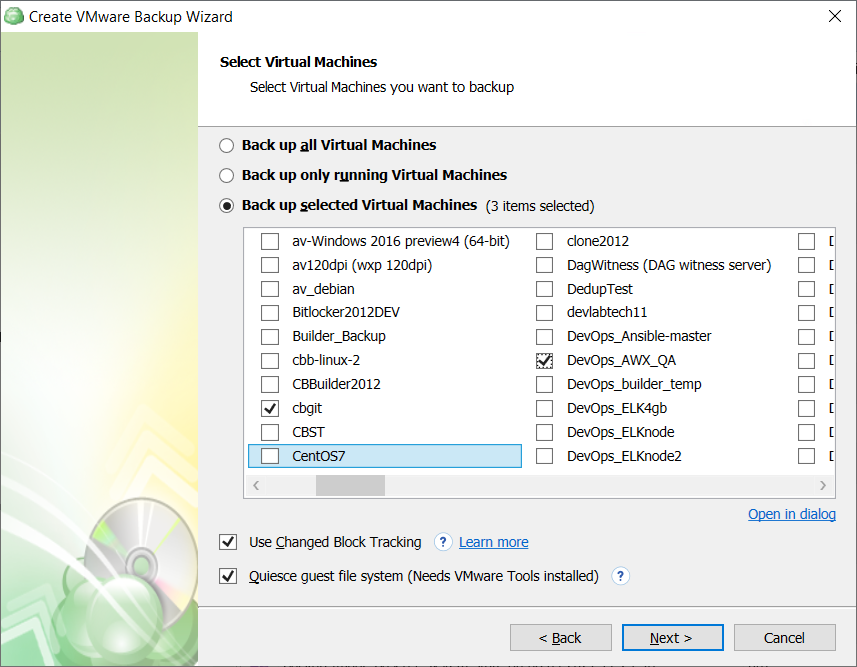
- Back up all Virtual Machines: will backup all VMs regardless of current state. This is recommended only for small environments.
- Back up only running Virtual Machines: Only backs up VMs currently in “Running” status and is recommended for clustered environments where backup servers planned for failover procedures are not required to be selected.
- Backup up selected Virtual Machines: Allows you to backup a group of VMs by selecting them from the list below. This allows for greater control of mixed status VMs and for larger environments where it is beneficial to split the backup into multiple plans.
Note that if you switch the backup option from the Back up selected Virtual Machines to any other, the previously made selection is kept for the case if you change your mind and select back the Back up selected Virtual Machines option, but the selected option will be applied regardless the VM selection
Step 8
Select the application processing mode. You can configure the Application processing options after the Select Virtual Machines step of the VMware backup wizard. These options can be configured separately for each virtual machine.
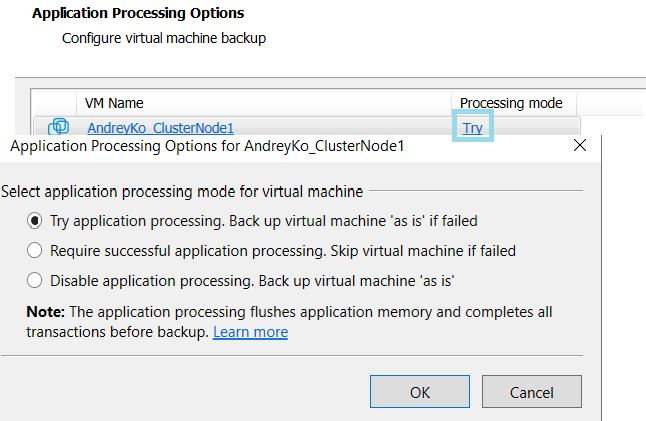
By default, the Try application processing setting is set. You can change it, if necessary.
- Try application processing. Backup will perform whether or not the application-concistent process fails. If the processing fails, the backup will be done “as is”, but data consistency is not guaranteed.
- Require successful application processing. Skip virtual the machine if processing fails. If processing is successful, it ensures that applications running in the VM, such as databases, are taken into consideration and the backup will ensure data consistency is maintained.
- Disable application processing. Backup virtual machine “as is” and does not perform any application processing. The VM is backed up in its current state, which may cause data inconsistencies.
Step 9
Once you have selected which VMs to backup, the application allows you to then choose whether to backup all virtual disks on the selected VMs or to only backup selected virtual disks.

Step 10
After you have selected which VMs and disks to backup, the next step is to set the compression or encryption options.
Compression
Managed Backup offers compression to reduce the storage space required for your backup and to speed up the upload process to the target storage.
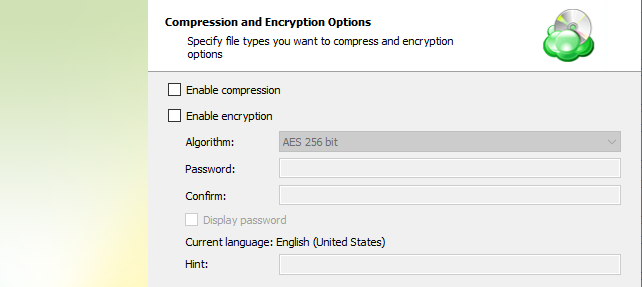
If you change any encryption settings (algorithm or password) for an existing backup plan, a full backup will be executed the next time the backup plan runs.
Encryption
You can protect your backup by encrypting its contents. Managed Backup supports AES encryption with key sizes of 128, 192, and 256 bits. A larger key size provides stronger encryption but may increase the time required for processing your backup. For more details on AES encryption, refer to the Advanced Encryption Standard.
If you choose to save your backup plan configuration to the destination storage, be aware that the encryption password is not stored in the configuration file for security reasons. Ensure that you save this password securely, as it will be required to restore the backup's contents.
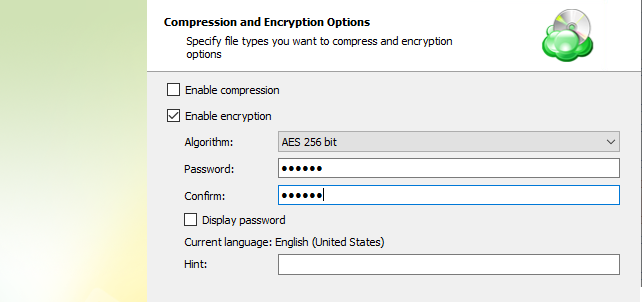
Note that the encryption password will NOT be stored in the backup plan configuration for security reasons. Keep this password in a safe place to be able to restore the backup contents afterwards
Enabling compression will reduce the size of the backup, reduce the time to upload it, both of which may decrease the cost of the backup
Encrypting the backup adds an additional layer of security to the data at the expense of increased processing resources during the backup process. Several types of encryption are available, with the most secure selected by default
Step 11
Next you are able to choose whether or not to enable the Full Consistency Check.
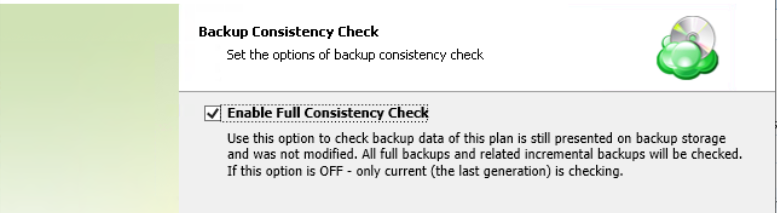
It is recommended that you leave “Enable Full Consistency Check” enabled
Step 12
Specify the backup plan schedule settings.
The following options are available:
- Select the No schedule option to run the backup plan manually.
- Select the Simple (Forever Forward) option to apply the Forever Forward Incremental (FFI) schedule.
- Select the **Advanced (GFS, Object Lock) option to apply the recurring schedule and, if necessary, use Grandfather-Father-Son and Object Lock (Immutability).
- To set the time limit for plan execution, select the Stop the plan if it runs for checkbox, then specify the backup plan duration limit.
- To run the backup plan after the computer is on in case the backup plan run has been missed, select the Run missed scheduled backup immediately when computer starts up checkbox.
Simple Schedule
Select the Simple (Forever Forward) option to use the Forever Forward Incremental (FFI). This schedule offers one full backup followed by a limited number of incrementals. Once the limit is exceeded, a new full backup is created using in-cloud copying (synthetic full backup. Once you select this option, specify the FFI schedule for the backup plan. You can select the Daily or Monthly schedule type, depending on how often the incremental backups will be performed.
This schedule is unavailable if the selected storage account does not support synthetic full backups.
It is recommended to schedule full backup at least once every 3 months for selected schedule
Forever Forward backups are only supported by a limited number of cloud storage providers. For more information, refer to Forever Forward Incremental
The Simple (Forever forward) schedule is recommended for retention up to 100 restore points which do not require Object Lock for legal compliance
It is not recommended to select the Simple (Forever forward) schedule for long-term storage and archival purposes. The Advanced Schedule is recommended for all storage needs over 100 restore points
Advanced Schedule
Select the Advanced (GFS, Object Lock) option to set up a flexible, recurring schedule with generations. Every generation contains one full backup followed by incrementals.
The advanced schedule allows configuring a flexible schedule according to your requirements. To use this schedule you should add schedules for full and incremental backup runs:
- To create incremental backups by schedule, select the Recurring (Incremental) checkbox, then configure the schedule for incremental backups on a daily or monthly basis.
- To create full backups by schedule, select the Execute full backup (Synthetic full if possible) checkbox, then configure the schedule for full backups on a daily or monthly basis.
Select the Advanced option to set up a flexible, recurring schedule with generations. Every generation contains one full backup followed by incrementals.
Clicking on Edit Schedule next to Incremental and Full backups allow you to configure the frequency they will be created. If both a Full and Incremental are scheduled for the same day, the application will perform the Full only.
It is recommended to use the Advanced (GFS, Object Lock) option and regularly scheduled full backups for long-term storage (longer than 6 months) or backups that must comply with legal or industry requirements
Enabling the Run missed scheduled backup immediately when computer starts up option will ensure that the backup process begins automatically upon startup if the last backup was not able to start at the scheduled time for any reason. This option is recommended for Desktops and Laptops
Do not use the “Stop the plan if it runs for:” option if you have a slow or unstable internet connection. The first full backup can take a long time to upload, and it can be unexpectedly interrupted if this option is enabled
Synthetic Full Backups allow the system to merge a series of incremental backups together to form a new full backup, greatly reducing the time and bandwidth needed to perform full backups after the initial full. If the storage destination does not support Synthetic full, then a traditional full will be made instead
The Advanced Schedule and GFS retention policies will only perform properly with regularly scheduled full backups
Step 13
Specify the retention policy settings for the backup plan. The retention policy depends on the schedule selected on the previous step.
Retention Policy with Simple Schedule
If you selected the Simple (Forever Forward Incremental) schedule, the Retention Policy step offers the following settings:
- Keep backup for. Select this option to limit the number of restore points. The Keep backup for value defines the period Restore Points with the Forever Forward Incremental schedule are kept. If their retention period expires, these restore points are merged into a full backup (with Forever Forward Incremental only one full backup is kept on the backup storage).
For backup storages with a minimum storage duration limit and early deletion fees, this value can be exceeded to avoid the fees
- Intelligent Retention: Each time the backup plan is executed, the backup storage parameters are analyzed automatically, setting the retention period based on storage provider data deletion conditions. This feature is enabled by default.
Learn more about the retention policy in the Retention Policy chapter chapter
Retention Policy with Advanced Schedule
If you selected the Advanced (GFS, Object Lock) schedule or to run backup manually without the schedule, the Retention Policy step offers the following settings:
- Do not purge (Keep backup forever). Select this option to keep all your backup runs.
- Keep backup for. Select this option to limit the period while backup contents are kept in the backup storage, then specify the period.
Learn more about the retention policy in the Retention Policy chapter chapter
To apply the GFS retention policy for the backup plan, select the Enable GFS checkbox, then customize the GFS retention policy by enabling the required keeping periods (weekly, monthly and yearly purge delays).
To learn more about the GFS retention policy, refer to the About GFS chapter
If backup data is required to be locked, enable the Object Lock (Immutability) checkbox. Before enabling Object Lock, you need to allow this feature for the backup destination.
To learn more about the Object Lock (Immutability) feature, refer to the Object Lock (Immutability) chapter
Generations will not be deleted until the youngest point in the chain has met the retention criteria
GFS Retention provides an excellent way to efficiently archive data for compliance. Additional information can be found in GFS Policy topics in the MBS Documentation
Step 14
After the schedule is set, the next section is used to set the “Pre” and “Post” Actions
Step 15
Specify notification settings.
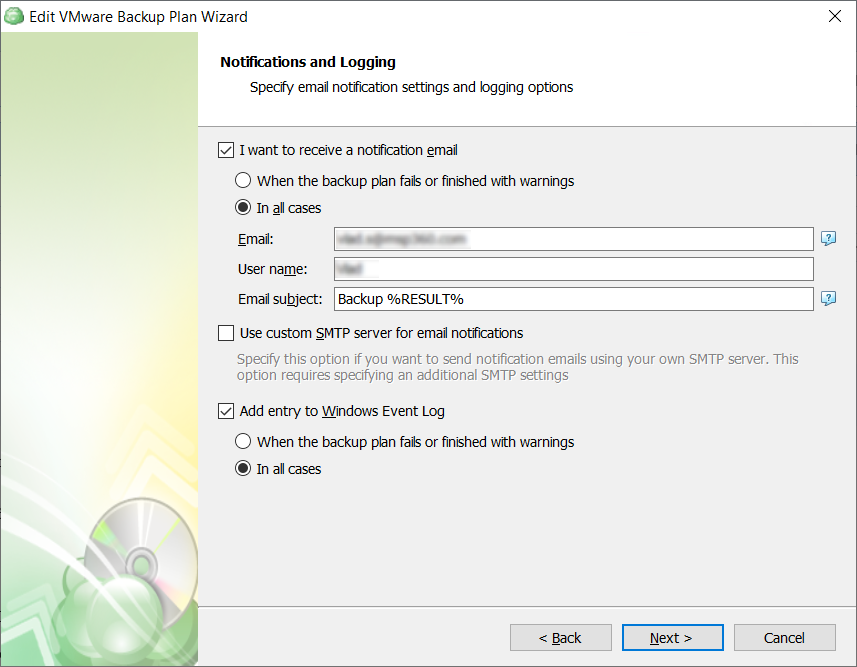
- To receive the notification after the backup plan completion, select the I want to receive notification email when backup completes check box.
- Select When backup fails option if you want to receive the notification message only in case of the backup plan failure
- Select In all cases option if you want to receive the notification message in any case.
- In the fields Username, Email, Email subject specify the notification email details. You can specify one or more email recipients. Separate them by semicolon or comma, the recipient name (one for all of them). The email subject can also contain any of the following variables:
- %COMPUTER_NAME% Indicates the name of a computer on which the routine was running
- %RESULT% Indicates whether the routine was finished successfully or failed
%RESULT% variable has the following values:
- Completed. This value is assigned when the plan is terminated with success
- Completed with warnings. This value is assigned when the plan is terminated with errors, warnings or has been interrupted
- %PLAN_NAME% Indicates the backup plan's name.
- If you want to use own SMTP server for notification emails, select the I want to use my SMTP server for email notifications check box, then specify the settings for the SMTP server
- If you want the backup plan record to be added to Windows Event Log, select on Add entry to Windows Event Log when backup completes check box
- Select When backup fails option if you want to receive the notification message only in case of the backup plan failure
- Select In all cases option if you want the entry to be put in Windows Event Log in any case.
Step 16
Check a summary of the selected options.
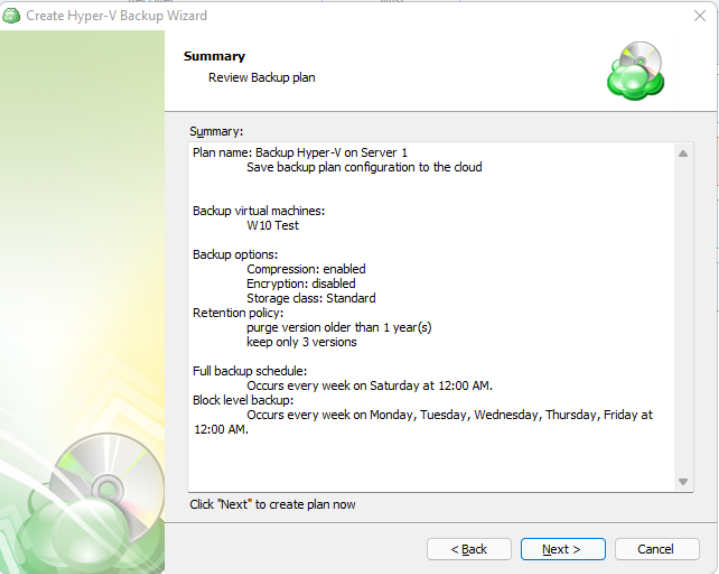
Step 17
The final step of the wizard will confirm that the Backup Plan was successfully created. If you select the “Run backup now” box, the application will initiate it immediately upon exiting the wizard, otherwise it will run at the next scheduled time.
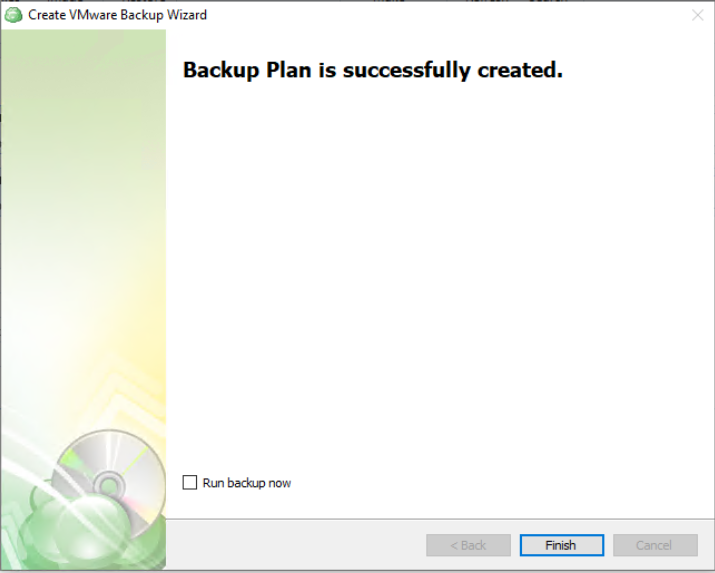
VMware Backup Plan in Management Console
Step 1
Open Backup > Computers in the Management Console.

Step 2
Locate the computer you wish to backup from the list and open the current list of plans by either clicking on the name of the computer, or the Configure icon in the Backup Plan Status column.
To create a new VMWare Backup Plan, click on “Add New Plan” then click on “VMWare backup plan”
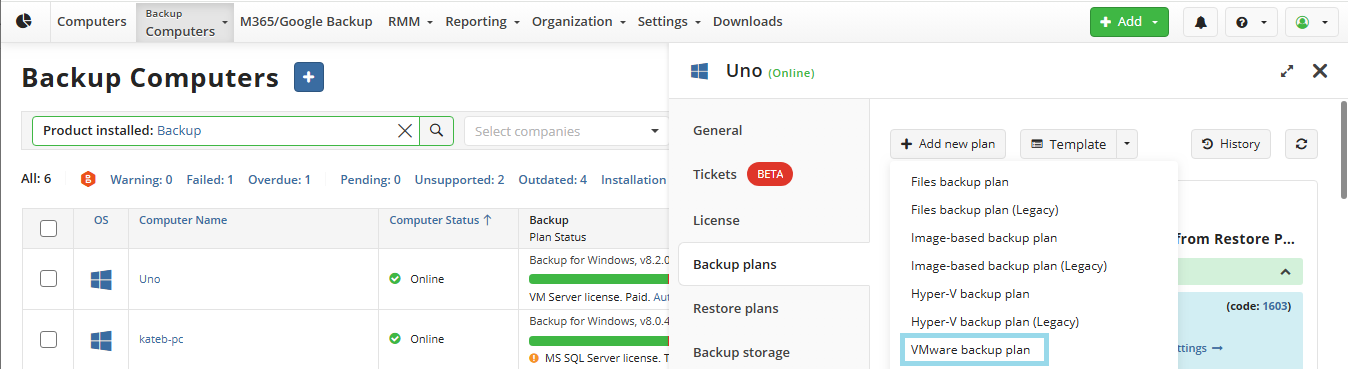
Step 3
The first step when creating a new VMware backup plan is to give the plan a name.
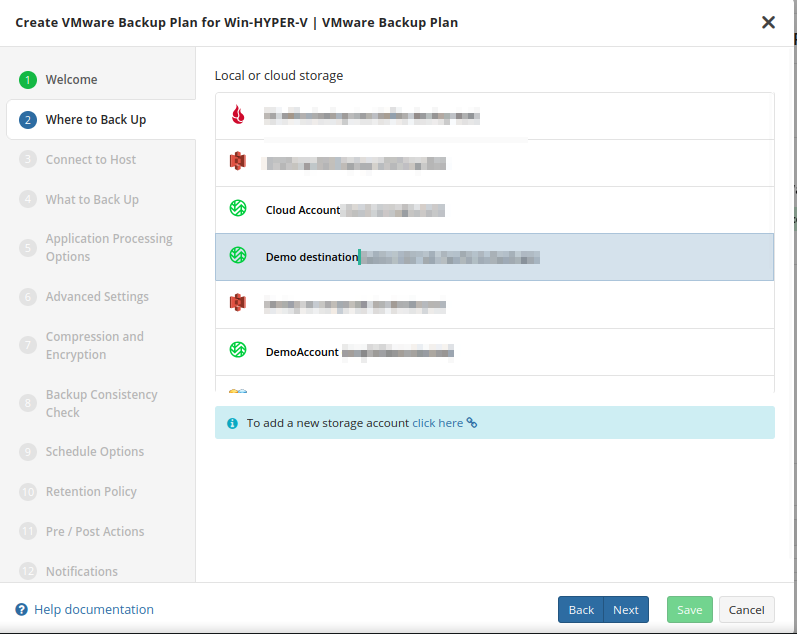
It is recommended to use a descriptive name which will distinguish the backup from others
Step 4
In the next section, you are prompted to select the backup destination.
Step 5
Connect to the vCenter or ESXi by using the FQDN or IP address.
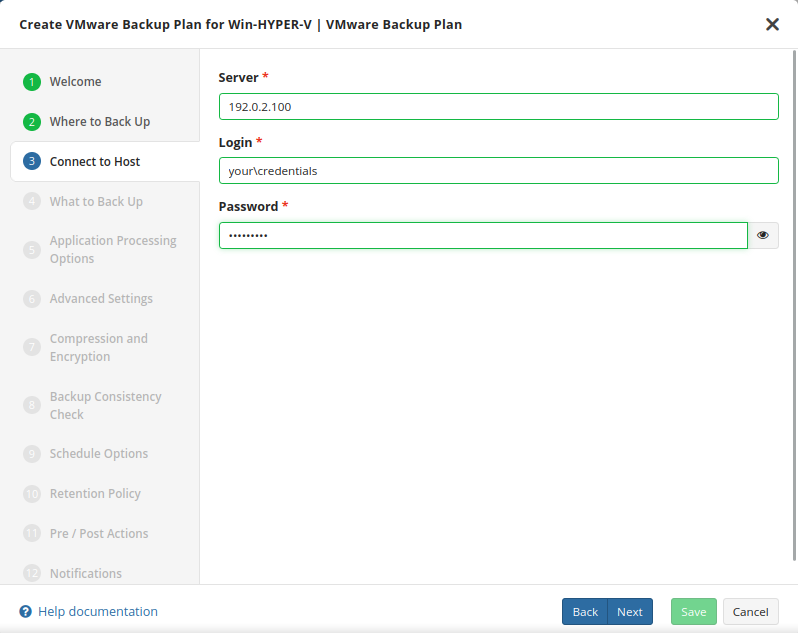
It is important to determine whether FQDN or IP addresses will be used for all future plan configurations. The application will consider each to be unique hosts, even if the target machine is the same
Step 6
Next, select the virtual machines you wish to back up.
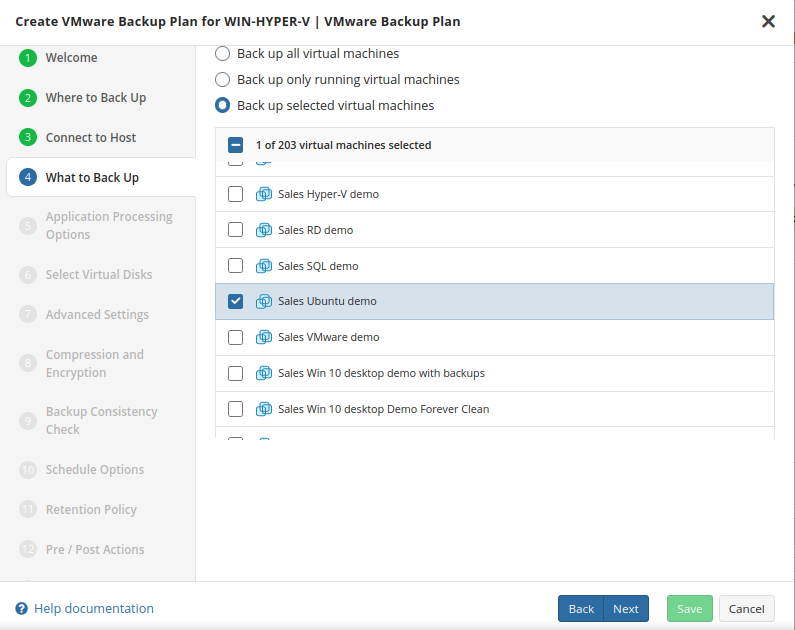
- Back up all Virtual Machines: will backup all VMs regardless of current state. This is recommended only for small environments.
- Back up only running Virtual Machines: Only backs up VMs currently in “Running” status and is recommended for clustered environments where backup servers planned for failover procedures are not required to be selected.
- Backup up selected Virtual Machines: Select which VMs to include with this plan. This allows for greater control of mixed status VMs and for larger environments where it is beneficial to split the backup into multiple plans.
Step 7
You can configure the Application processing options after the Select Virtual Machines step of the VMware backup wizard. These options can be configured separately for each virtual machine.
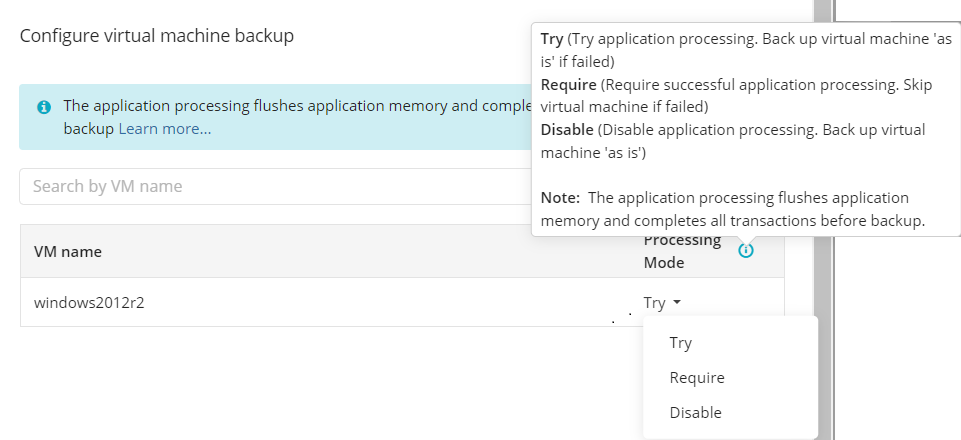
By default, the Try application processing setting is set. you can change it, if necessary.
The following options are available:
- Try application processing. Back up virtual machines 'as is' if failed. Once this option is selected, virtual machines are backed up one by one. Using the installed VMware Tools, the state of applications running on virtual machines is checked, then a snapshot is made and an application-consistent backup is performed. In case an application-consistent snapshot is not made for some reason, a regular snapshot is done for this virtual machine.
- Require successful application processing. Skip virtual machines if failed. Once this option is selected, virtual machines with applications that did not flush pending I/O operations from memory to disks, are skipped and an appropriate warning is displayed for a user.
- Disable application processing. Back up virtual machines 'as is'. Once this option is selected, regular VM snapshots are done without quiescing.
Step 8
Next you are prompted to select which virtual disks should be backed up in each VM.
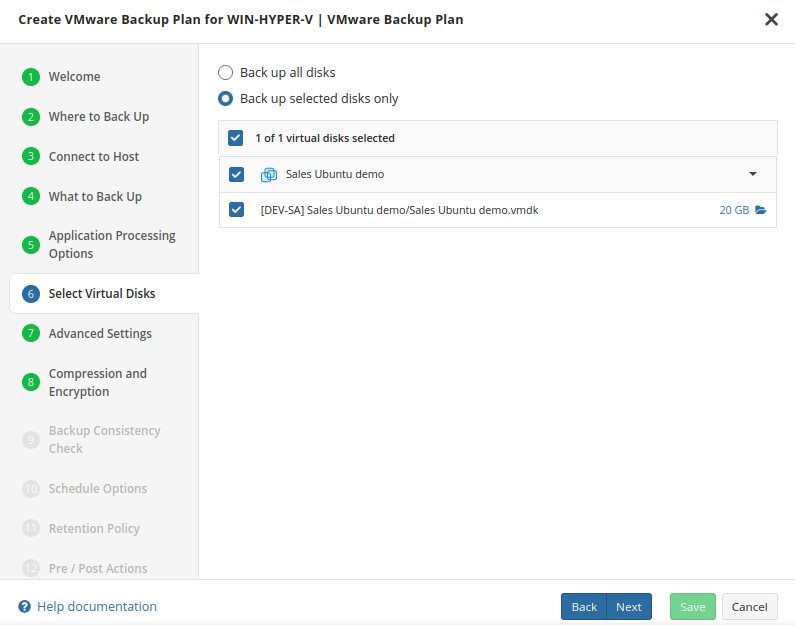
Step 9
After configuring the parameters for what and how to perform the backup, you are able to set the encryption and compression options.
Compression
Managed Backup offers compression to reduce the storage space required for your backup and to speed up the upload process to the target storage.
Enabling compression will reduce the size of the backup, reduce the time to upload it, both of which may decrease the cost of the backup
Encryption
You can protect your backup by encrypting its contents. Managed Backup supports AES encryption with key sizes of 128, 192, and 256 bits. A larger key size provides stronger encryption but may increase the time required for processing your backup. For more details on AES encryption, refer to the Advanced Encryption Standard.
To protect your backup contents with encryption, select the Enable encryption checkbox. Application supports AES encryption of 128, 192 and 256 bit key length. Select the appropriate key length in the Algorithm drop-down menu
- Specify the encryption password in the Password field, then confirm the password in the Confirm field. Mind to keep the encryption password in a safe place. Pay attention, if Password Recovery Service is not enabled in the Management Console, then if the encryption password is lost or forgotten, the encrypted backup cannot be restored. Password recovery Service requires the Two-factor Authentication (2FA) enabled.
- In the Hint field, specify some information that could help to recall the password in case you forget it.
If you change any encryption settings (algorithm or password) for an existing backup plan, a full backup will be executed the next time the backup plan runs.
Note that the encryption password will NOT be stored in the backup plan configuration for security reasons. Keep this password in a safe place to be able to restore the backup contents afterwards
Encrypting the backup adds an additional layer of security to the data at the expense of increased processing resources during the backup process. Several types of encryption are available, with the most secure selected by default
It is important to remember that MSP360 Support is not able to retrieve or reset the encryption password. It is recommended that you store the password in a secure place and enable the Password Recovery Service
Step 10
Select if you’re going to use the full consistency check

It is recommended that you leave Enable Full Consistency Check enabled
Step 11
Specify the backup plan schedule settings.
The following options are available:
- Select the Simple option to apply the Forever Forward Incremental (FFI) schedule.
- Select the Advanced option to apply the recurring schedule and, if necessary, use Grandfather-Father-Son and Object Lock (Immutability).
- Select the No schedule, run manually option to run the backup plan manually. Retention policy will not work for this option.
The simple schedule is unavailable if the selected storage account does not support synthetic full backups.
For more quidelines on schedule selection, refer to the following article.
Simple Schedule
Select the Simple (Forever Forward) option to use the Forever Forward Incremental (FFI). This schedule offers one full backup followed by a limited number of incrementals. Once the limit is exceeded, a new full backup is created using in-cloud copying (synthetic full backup.
Once you select this option, the predefined schedule will appear. You can edit this schedule, if necessary. You can select the Daily or Monthly schedule type, depending on how often the incremental backups will be performed.
Use the Additional Settings to configure the following:
- First backup start date
- Stop condition for the long backup
- Overdue alert condition
- Missed backup handling
Advanced Schedule
Select the Advanced option to set up a flexible, recurring schedule with generations. Every generation contains one full backup followed by incrementals.
Once you select this option, the predefined schedule for full and incremental backup will appear. You can edit this schedule, if necessary.
The advanced schedule allows you to configure a flexible backup plan according to your requirements. To modify the schedule, use the edit icon next to the selected schedule. If needed, you can disable the incremental backup schedule to run only full backups.
You can select the Daily or Monthly schedule type, depending on how often the incremental backups will be performed.
It is recommended to schedule full backup at least once every 3 months for selected schedule
It is recommended to use the Advanced (GFS, Object Lock) option and regularly scheduled full backups for long-term storage (longer than 6 months), archival, and legal purposes
The most common setup for the Advanced Schedule is daily Incremental backups with either weekly or monthly Full backups
The retention policy will only perform properly with regular scheduled full backups
Use the Additional Settings to configure the following:
- Stop condition for the long backup
- Overdue alert condition
- Missed backup handling
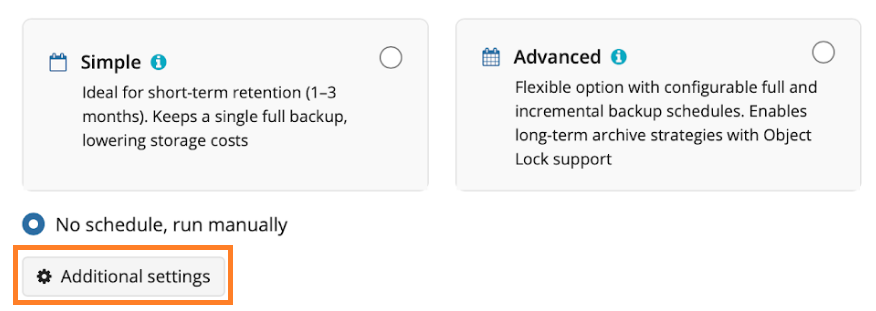
Enabling the Run missed scheduled backup immediately when computer starts up option will ensure that the backup process begins automatically upon startup if the last backup was not able to start at the scheduled time for any reason. This option is recommended for Desktops and Laptops
Do not use the Stop the plan if it runs for: option if you have a slow or unstable internet connection. The first full backup can take a long time to upload, and it can be unexpectedly interrupted if this option is enabled
Step 12
Retention Policy for Advanced Schedule, GFS, and Object Lock (Immutability)
If the Advanced schedule was selected, specify the retention period for the backup plan.
GFS Settings
To apply the GFS retention policy, enable the Archive Full Backups, Grandfather-Father-Son (GFS) feature, then specify the GFS retention settings.
Learn more about GFS retention settings in the GFS Examples chapter
Object Lock (Immutability)
Object Lock (Immutability) is linked to the GFS retention policy. If the Object Lock (Immutability) is applied along with GFS settings, full backups that are subject to the GFS retention policy become immutable for the GFS keeping period.
Select the Prevent backups created according to GFS policy from deletion checkbox, then confirm the use of this feature.
Use the Immutability feature with extreme caution. Once a backup data becomes immutable in Compliance mode, there is no way to delete them from the storage until the specified GFS keeping period expires except for the storage account termination. Incorrect settings can cause high storage bills.
To find more information about the Object Lock feature, supported storage providers, and required permissions, refer to this article.
Retention Policy for Simple Schedule
If on the Schedule options step you selected the Simple schedule, the Retention Policy step has different settings.
The Retention period value defines how long restore points are kept. Restore points with an expired retention period are merged into a full backup. (With Forever Forward Incremental, only one full backup is kept on the backup storage). If your storage has a minimum retention period, the creation of a new full backup will be postponed to avoid early deletion fees.
Step 13
Next you are prompted to set pre and post actions (optional).
Specify pre and post-actions for your backup plan. Usually, these are scripts that perform particular jobs before or after your data is backed up. The following settings are available:
- To specify the action that will be performed before the backup plan starts, select the Pre-backup action checkbox.
- Specify the path to the script to be run as a pre-backup action.
- Specify the conditions of pre-action run:
- Select the Do not run the backup plan if the pre-backup action fails option if you do not want the backup plan to be launched if the pre-backup action fails.
- Select the Run the backup plan if the pre-backup action fails option if you want the backup plan to launch regardless of the pre-backup action result.
- To specify the action that will be performed after the backup is completed, select the Post-backup action checkbox.
- Select the Execute the post-backup action only if the backup plan completes successfully option if you want to run it only if the backup was executed without any errors or warnings.
- Select the Execute the post-backup action regardless of the backup plan result option if you want the post-action to be launched regardless of the backup termination results.
- To chain the backup plan with another plan, select Backup chain checkbox, then select the backup or restore plan name in the drop-down menu.
- Select the Run the selected plan if this backup plan completes with success option if you want to run the specified plan only if the backup plan was executed without any errors or warnings.
- Select the Run the selected plan regardless of this backup plan completion result option if you want the chained backup plan to be launched regardless of the backup termination results. Select the mode for the current chained backup plan:
- Force full backup. Full backup will be forced for the chained backup plan.
- Use settings of the current backup plan. Chained backup plan will be run as full or incremental, according to this backup plan run.
Step 14
Specify notification settings for backup plan results. You can use the company notification settings or customize them as needed. You can specify the required recipients and customize the notifications on different backup plan results:
- Success
- Warning
- Failed
You can configure a notification threshold for Managed Backup alerts, so that notifications are sent only after a specified number of consecutive plan failures
In case you select to customize notifications, select the recipients for different events.
- Select Send notifications to user account... if you want to notify the associated user about the backup process.
- Select If the backup plan fails or completes with warnings option if you want to receive the notification message in case of the backup plan failure
- Select In all cases option if you want the entry to be put in Windows Event Log in any case.
Step 15
Once you are satisfied with the plan configuration, click on “Save” to finish.
VMware Restore Plans
Restore to Virtual Machine in Backup Agent
Managed Backup supports restoring virtual machines to an ESXi server as part of the VMware vSphere product. This functionality allows you to restore virtual machines directly to the server or as virtual disks for further use.
Consider, item-level restore from long-term (cold) backup storages is not currently supported
Step 1
After launching the Online Backup, you can run the Restore Wizard by clicking on Restore on the Home tab if the horizontal menu.
Step 2
Click on “Next” to advance past the welcome screen for the wizard
Step 3
The next step will prompt you to select the source for the restore.
If the desired source is not in the list, you can click “Add new Storage Account” to add it.
- The backup storage is the one that contains the backup data
- The required backup prefix is set for storage account
If necessary, switch the backup prefix.
Step 4
Once the source has been selected, the next screen allows you to choose between running the plan a single time or saving it for later use.
Run restore once will execute the restore immediately upon completing the wizard. There is no option to schedule this type of restore
Save restore plan will allow you to schedule the plan to run at a later time and also schedule repeating restorations if needed
Step 5
With the type of restore selected, the next step is to select the correct Host server which the VM resides on.
Step 6
Next, you will be presented with a list of available backup types for the selected host. Select the Restore VMware Virtual Machine option to continue.
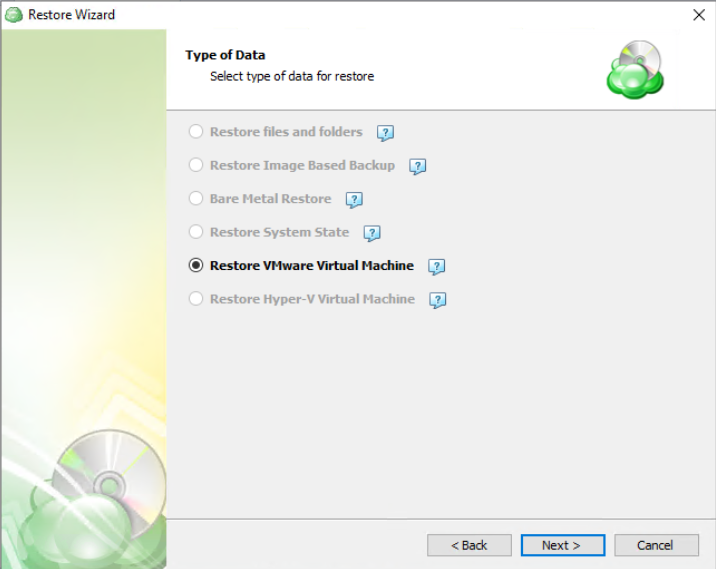
Step 7
With the correct type of restore selected, the application will generate a list of available backup plans to restore from.

Step 8
Next you will be given a choice for what point in time you would like to restore the VM to.
- Latest Version: Automatically restores the newest version of each file in the source regardless of which restore point it belongs to.
- Select the Restore Point: Restores the files as they existed at the specified restore point.
If there is no exact match for the point in time selected, the application will automatically select the closest previous restore point
Step 9
Next, you will be able to expand the list of VM backups on the selected host and choose which to restore.

Step 10
After selecting the files or folders to restore, you are able to select the location they should be restored to.
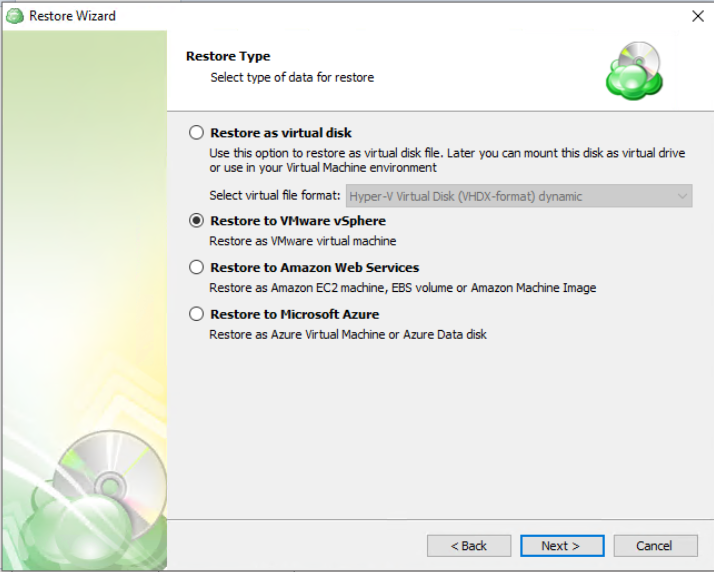
- Restore as virtual disk: Restores the virtual disks in the backup as a file which can later be mounted to a VM. No configuration files are included. Several formats are available:

- Restore to VMware vSphere: Selecting this option restores the virtual machine configuration as well as the virtual disks to vSphere as a VM.
- Restore to Amazon Web Services: If enabled, this will restore the selected VM directly to AWS Cloud either as an EC2 instance, EBS volume, or AMI.
- Restore to Microsoft Azure: This will restore the VM directly to Azure as either an Azure Virtual Machine or Azure Data disk.
Step 11
The next step is to select the disks to be restored.
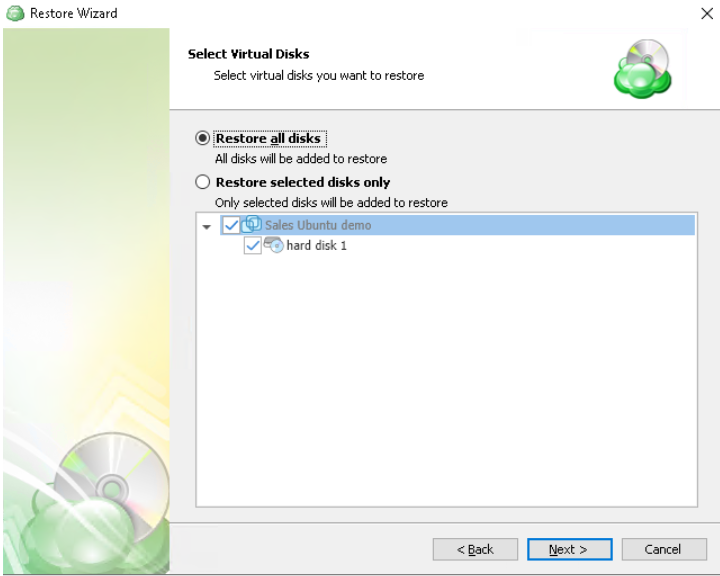
Step 12
The next step is to choose a destination for the restored VM or virtual disk.
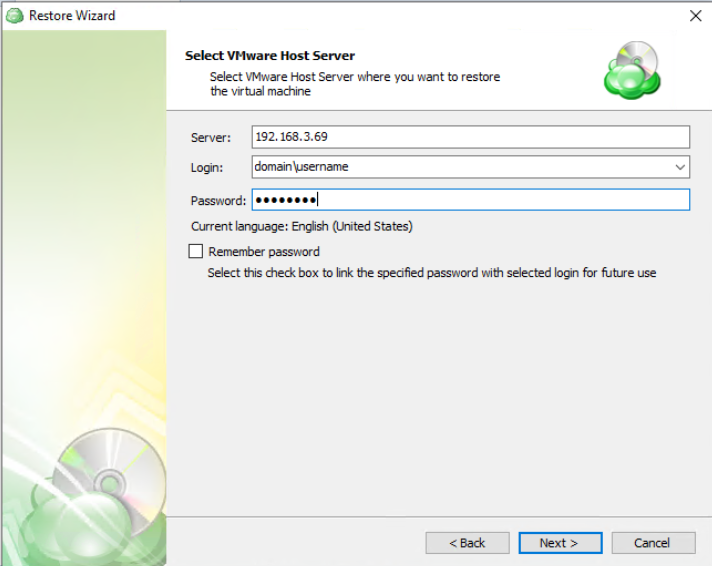
Step 13
Once the destination is selected, you are presented with additional options for importing the restored VM.

- Specify datastore…: Select the destination disk on the VMware host where the VM should be restored to.
- Specify the behavior…: Choose the action to take if the target VM being overwritten is currently powered on. If you select Skip then any powered on VMs will be ignored during the restore process.
Step 14
Next, you will be prompted to select which VM you would like to overwrite. If you wish to restore it as a different name or target VM, select or type over the value in the Restore as list.
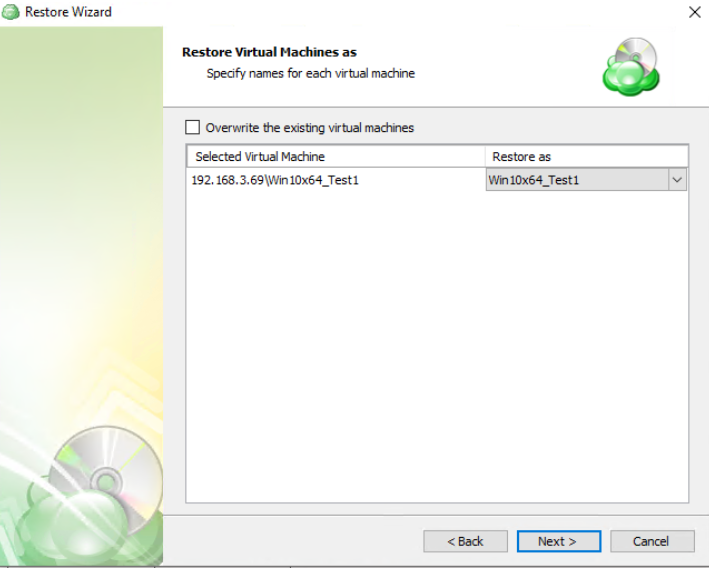
- Restore As: Enter a new name in this field to restore the VM with a new or different name.
Step 15
After selecting the destination and any associated options, you will be prompted to provide the password to decrypt the VM backup data, if encrypted

Step 16
If Save restore plan was selected at the start of the wizard then the next step is to set the schedule for the restore plan. Otherwise this step will be omitted.
- No schedule (run manually): Use this option only when you wish to execute the Restore manually.
- Specific date: Use this to schedule a one-time Restore at the specified date and time.
- Recurring: Using this option enables you to schedule recurring Restorations based on the criteria in the fields below.
- Synchronize repository before run: Enable this option to ensure the file tree reflects the latest modifications made to your storage. It is a good practice to use it when you restore to a different computer
Do not use the Stop the plan if it runs for: option if you have a slow or unstable internet connection
Enabling the Run missed scheduled restore immediately when computer starts up option will ensure that the restore plan will begin automatically after the computer starts up if it was unable to run at the scheduled time. This is only recommended for desktops and laptops. For servers, it is recommended that you run the restore plan manually when all maintenance works are completed to avoid adversely affecting server performance and internet bandwidth during working hours
Step 17
The next step is to set any custom scripts which should execute before and/or after the restore plan runs.
Step 18
Specify the notifications options, then click Next.
Step 19
The next step of the Wizard displays a summary of the selections made throughout the process. Once you have reviewed your selections, click “Next”.
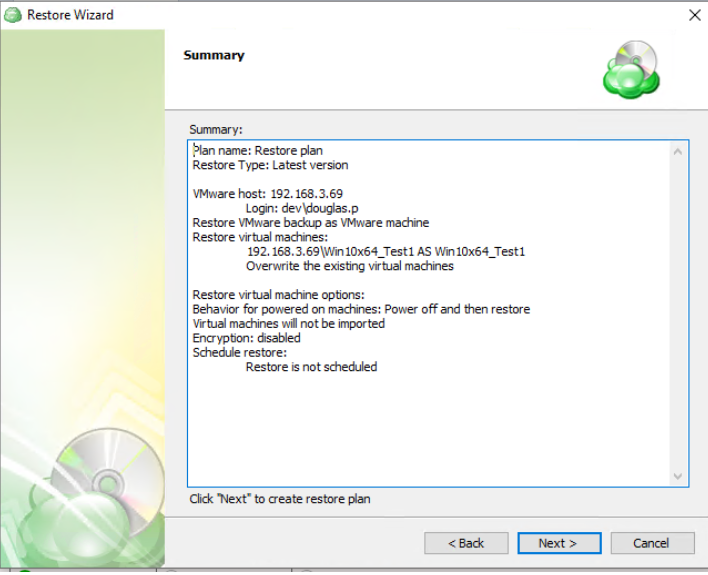
You can see the saved plan on the Restore Plans tab. If Run restore once was selected at the beginning of the wizard, the plan will immediately execute once you click Next.
VMware VM Restore in Management Console
Managed Backup supports restoring virtual machines to an ESXi server as part of the VMware vSphere product. This functionality allows you to restore virtual machines directly to the server or as virtual disks for further use.
Consider, item-level restore from long-term (cold) backup storages is not currently supported
Step 1
Open Backup > Computers in the Management Console.
Step 2
Locate the computer you wish to backup from the list and open the current list of plans by either clicking on the name of the computer, or the Configure icon in the Backup Plan Status column.
To create a new VMWare Restore Plan, click on “+ Add new plan” on the Restore Plans tan of the side panel, then click on “VMWare restore plan”
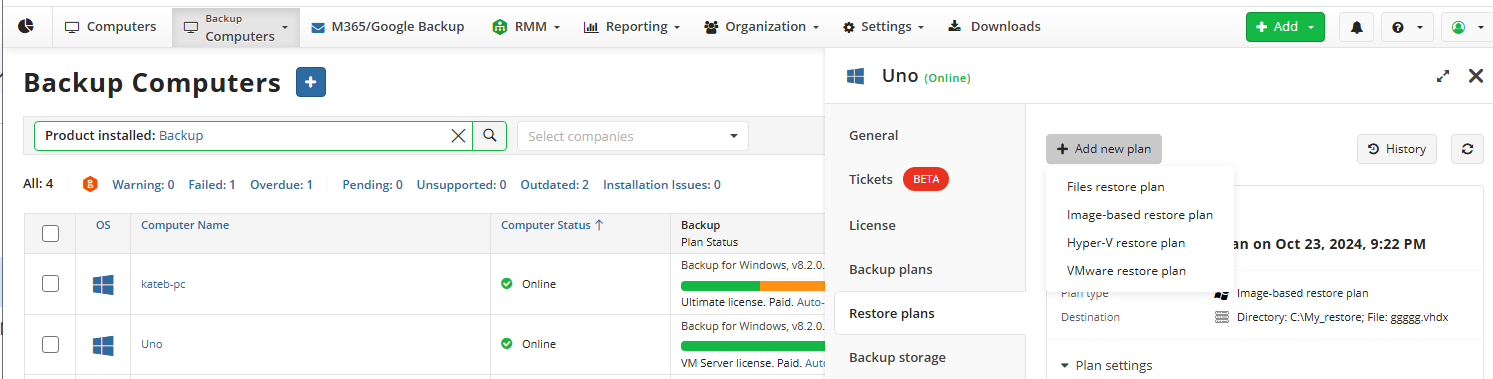
Step 4
The first step when making a Restore Plan is to select if it should run only once, or if it should be saved for future or scheduled use. The latter will allow you to name the plan.
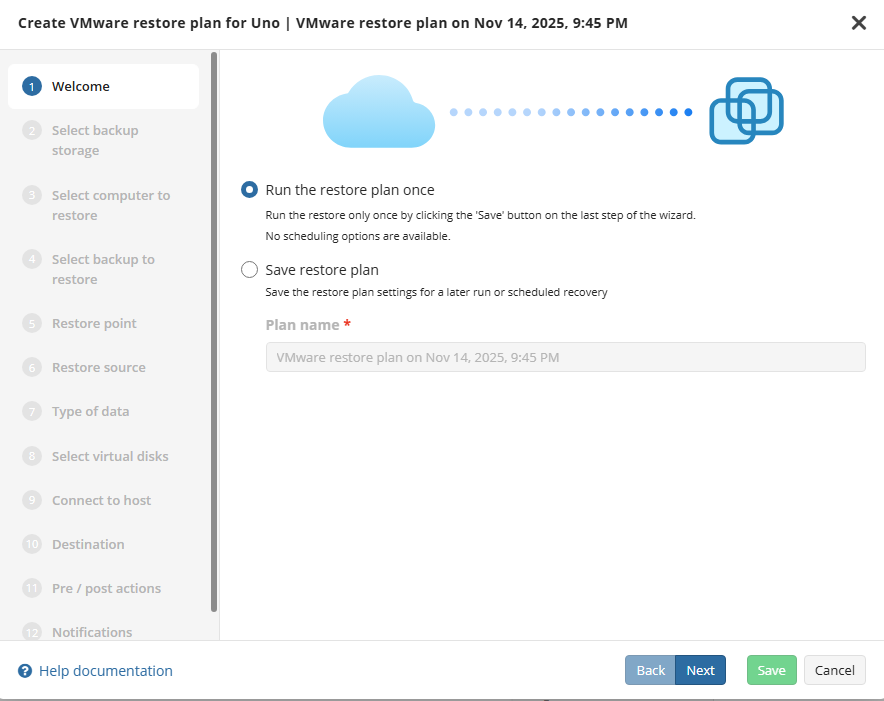
Step 5
Now we have to select the storage source to restore the backup.
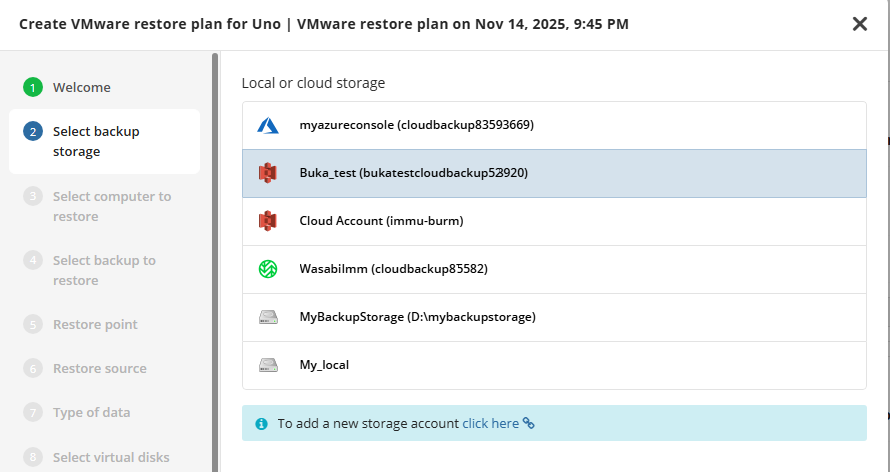
Step 6
Select the host you want to get the VM backup from
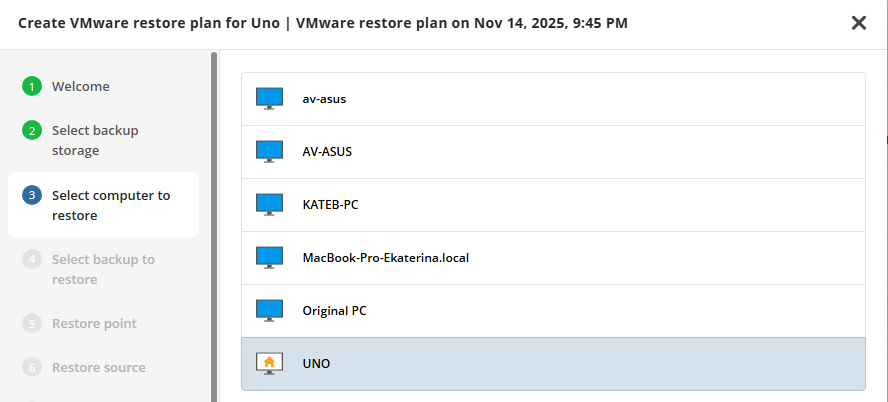
Step 7
Next, select the Backup Plan you want to restore
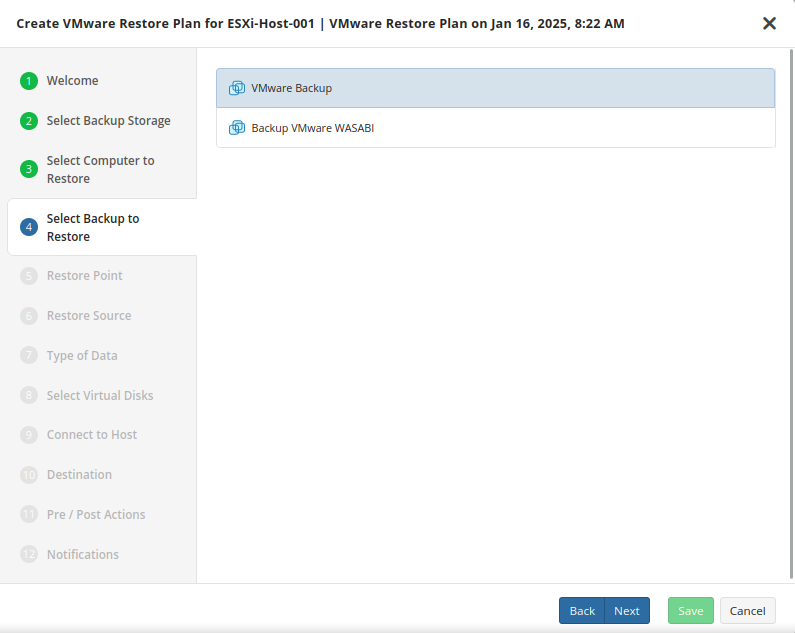
Step 8
Next you will be given a choice for what point in time you would like to restore the VM to.
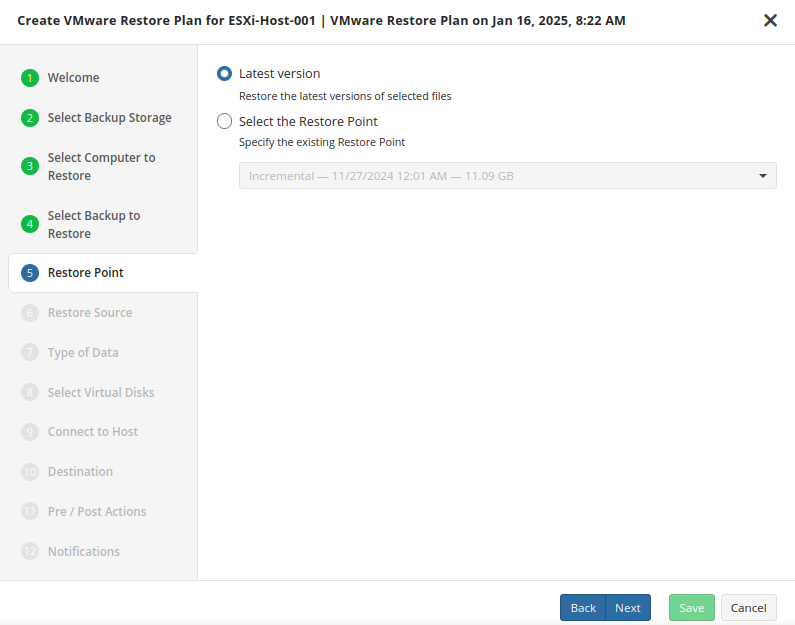
Step 9
Next, you will be able to expand the list of VM backups on the selected host and choose which VM to restore.
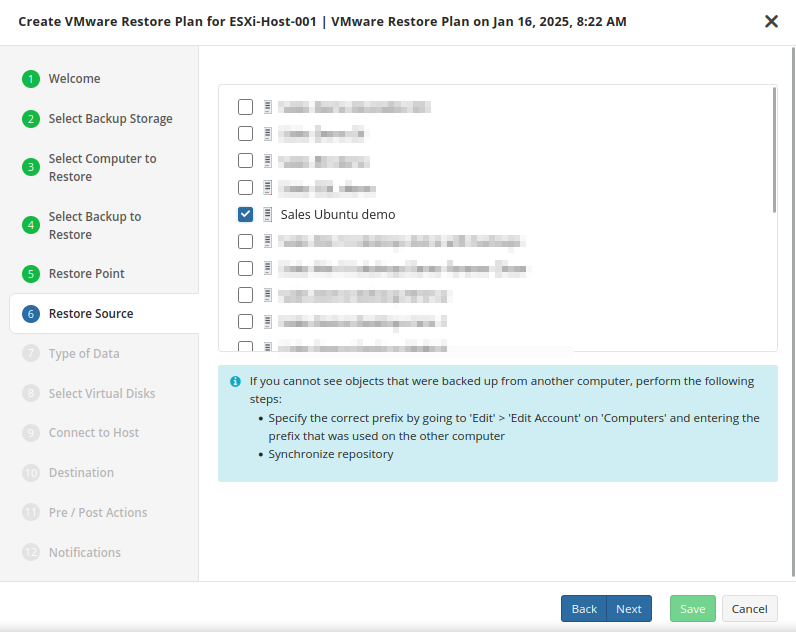
If backed-up objects are missing, ensure the correct prefix is specified (the same one used for backup) and verify that the repository is synchronized to update available backups
Step 10
The next step of the wizard allows you to choose how the VM data should be restored.

- Restore to VMware vSphere: Selecting this option restores the virtual machine configuration as well as the virtual disks to vSphere as a VM.
- Restore as virtual disk: Restores the virtual disks in the backup as a file which can later be mounted to a VM. No configuration files are included. Several formats are available:
Step 11
The next step of the wizard allows you to choose the disks to be restored.
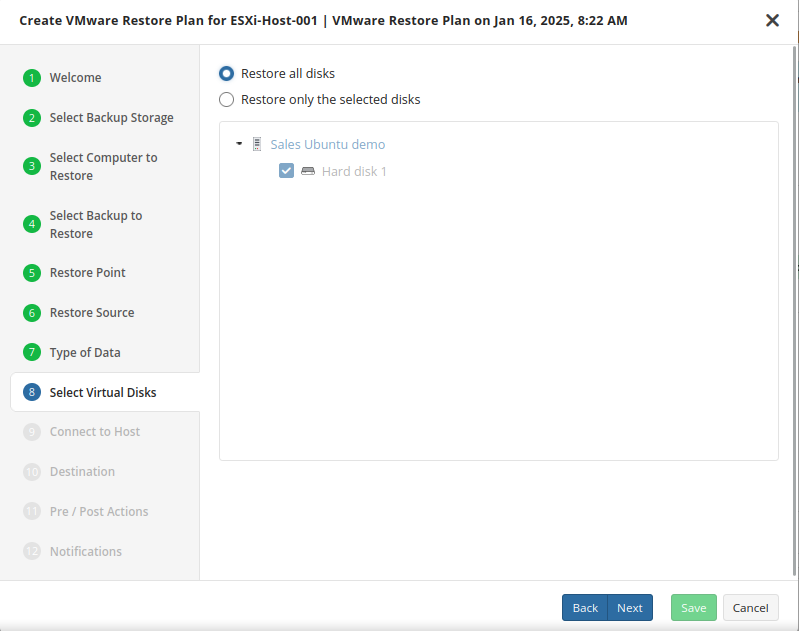
Step 12
Now you’ll have to connect to the host by either using its IP address or FQDN.
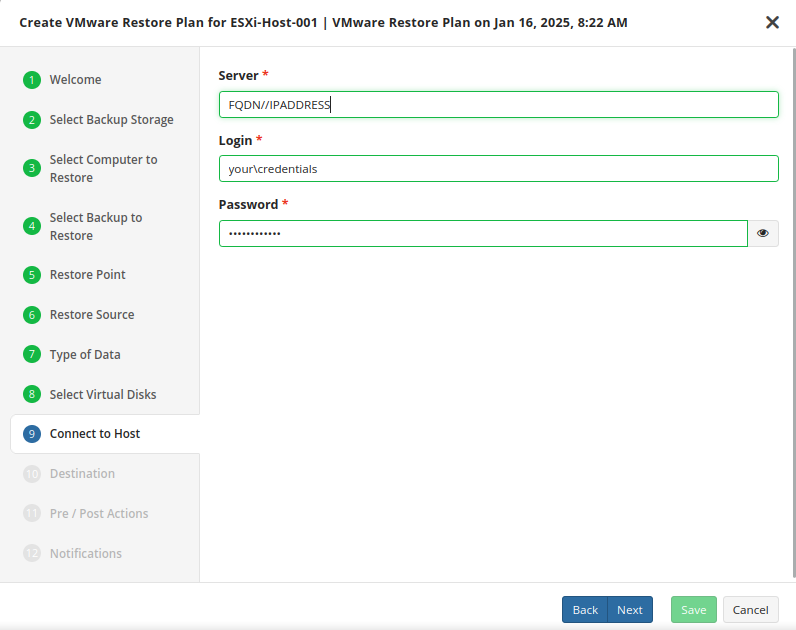
It is important to determine whether FQDN or IP addresses will be used for all future plan configurations. The application will consider each to be unique hosts, even if the target machine is the same
Step 13
In this step of the Restore Wizard, you configure where and how the virtual machine (VM) will be restored.
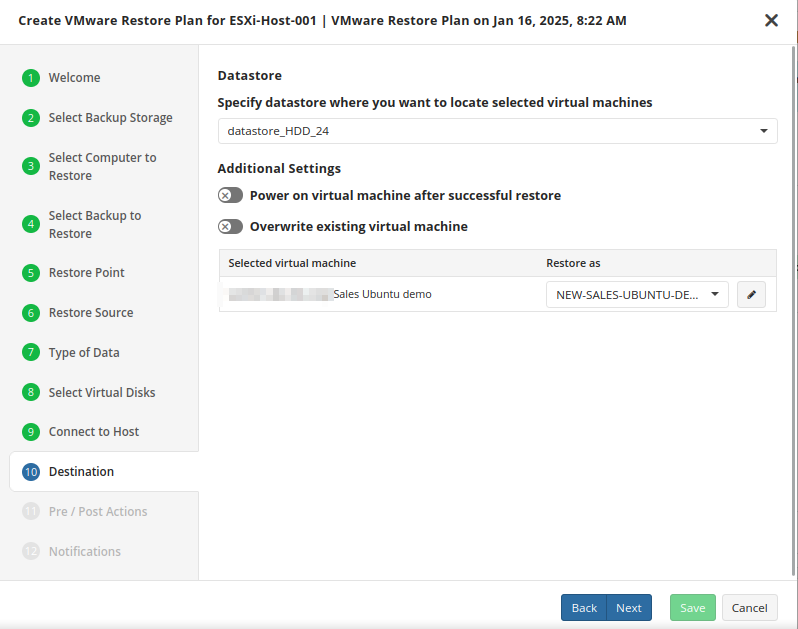
- Specify datastore: Select the destination disk on the VMware host where the VM should be restored to.
- Additional Settings: Choose the action to take if the target VM being overwritten is currently powered on. If you select “Skip” then any power on VMs will be ignored during the restore process.
If you wish to restore it as a different name or target VM, select or type over the value in the “Restore as” list
Step 14
If you choose to save the restore plan, the schedule is configured during steps 11 and 12 of the wizard.
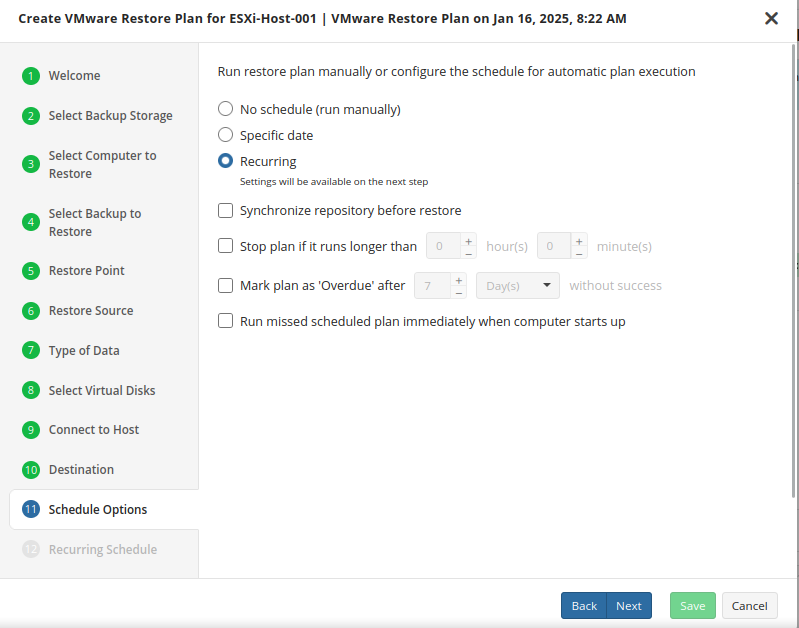
- No schedule (run manually): Use this option only when you wish to execute the Restore manually.
- Specific date: Use this to schedule a one-time Restore at the specified date and time.
- Recurring: Using this option enables you to schedule recurring Restorations based on the criteria in the fields below.
Do not use the “Stop the plan if it runs for:” option if you have a slow or unstable internet connection
Enabling the “Run missed scheduled restore immediately when computer starts up” option will ensure that the restore plan will begin automatically after the computer starts up if it was unable to run at the scheduled time. This is only recommended for desktops and laptops. For servers, it is recommended that you run the restore plan manually when all maintenance works are completed to avoid adversely affecting server performance and internet bandwidth during working hours
Step 15
If a recurring schedule was selected, now you can set up the frequency for the restore plan to be executed.
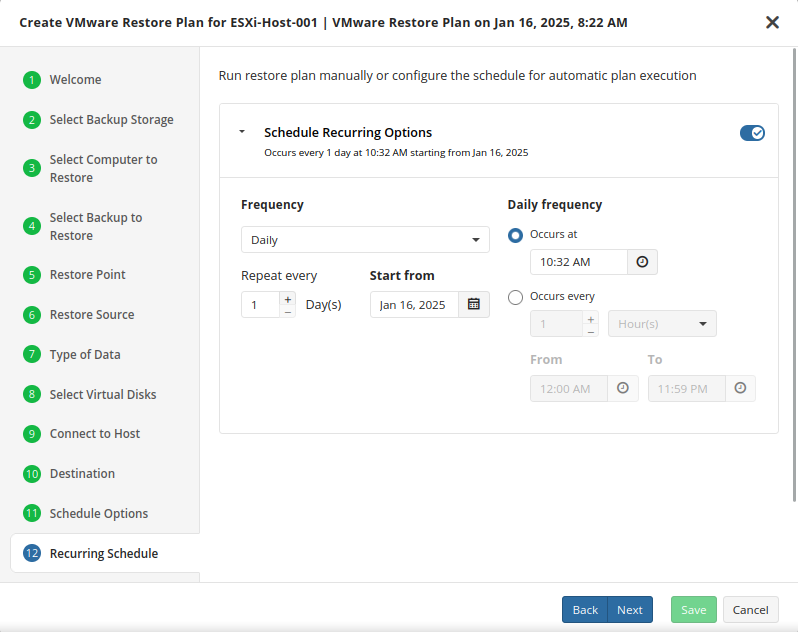
Step 16
Next, specify the pre/post actions if required.

Step 17
Next, you can configure the notifications for this restore plan.
Step 18
Click on Save when you are happy with your selections. If the plan is set to run only a single time and has no set schedule, it will automatically start. Otherwise, if it is set to run only once and is scheduled, it will display in the list of plans until the scheduled time. If it is only set to run once, then when it completes successfully it will remove itself from the list of plans. Only Restore Plans which are saved will remain in the list for future use.
Restore VM as a Virtual Disk in Backup Agent
Managed Backup supports restoring virtual machines as virtual disks for further use.
Consider, item-level restore from long-term (cold) backup storages is not currently supported
Step 1
After launching the Online Backup, you can run the Restore Wizard by clicking on Restore on the Home tab if the horizontal menu.
Step 2
Click on “Next” to advance past the welcome screen for the wizard
Step 3
The next step will prompt you to select the source for the restore.
If the desired source is not in the list, you can click “Add new Storage Account” to add it.
- The backup storage is the one that contains the backup data
- The required backup prefix is set for storage account
If necessary, switch the backup prefix.
Step 4
Once the source has been selected, the next screen allows you to choose between running the plan a single time or saving it for later use.
Run restore once will execute the restore immediately upon completing the wizard. There is no option to schedule this type of restore
Save restore plan will allow you to schedule the plan to run at a later time and also schedule repeating restorations if needed
Step 5
With the type of restore selected, the next step is to select the correct Host server which the VM resides on.
Step 6
Next, you will be presented with a list of available backup types for the selected host. Select the Restore VMware Virtual Machine option to continue.
Step 7
With the correct type of restore selected, the application will generate a list of available backup plans to restore from.
Step 8
Next you will be given a choice for what point in time you would like to restore the VM to.
- Latest Version: Automatically restores the newest version of each file in the source regardless of which restore point it belongs to.
- Select the Restore Point: Restores the files as they existed at the specified restore point.
If there is no exact match for the point in time selected, the application will automatically select the closest previous restore point
Step 9
Next, you will be able to expand the list of VM backups on the selected host and choose which to restore.
Step 10
The next step of the wizard allows you to choose how the VM data should be restored.
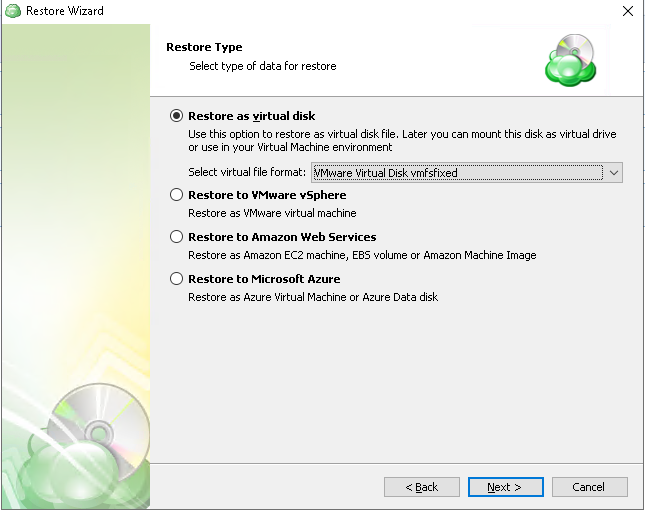
- Restore as virtual disk: Restores the virtual disks in the backup as a file which can later be mounted to a VM. No configuration files are included. Several formats are available:
- Restore to VMware vSphere: Selecting this option restores the virtual machine configuration as well as the virtual disks to vSphere as a VM.
- Restore to Amazon Web Services: If enabled, this will restore the selected VM directly to AWS Cloud either as an EC2 instance, EBS volume, or AMI.
- Restore to Microsoft Azure: This will restore the VM directly to Azure as either an Azure Virtual Machine or Azure Data disk.
Step 11
With the checkpoint selected, you can now specify a destination folder for the virtual disk file.

Step 12
After selecting the destination and any associated options, you will be prompted to provide the password to decrypt the VM backup, if encrypted.
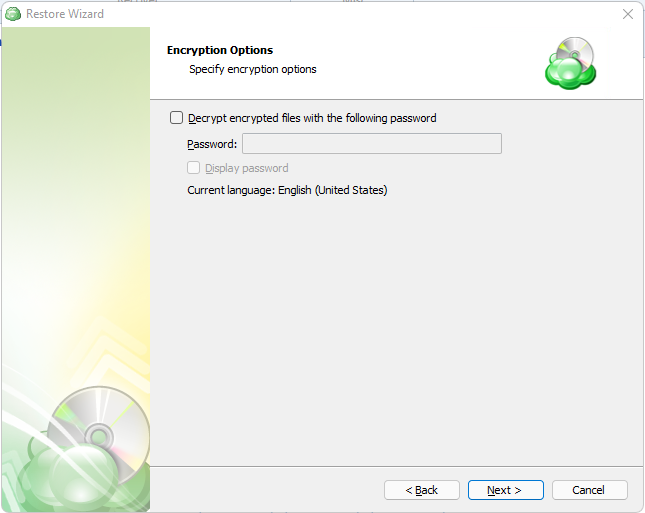
Step 13
If Save restore plan was selected at the start of the wizard then the next step is to set the schedule for the restore plan. Otherwise this step will be omitted.
- No schedule (run manually): Use this option only when you wish to execute the Restore manually.
- Specific date: Use this to schedule a one-time Restore at the specified date and time.
- Recurring: Using this option enables you to schedule recurring Restorations based on the criteria in the fields below.
- Synchronize repository before run: Enable this option to ensure the file tree reflects the latest modifications made to your storage. It is a good practice to use it when you restore to a different computer
Do not use the Stop the plan if it runs for: option if you have a slow or unstable internet connection
Enabling the Run missed scheduled restore immediately when computer starts up option will ensure that the restore plan will begin automatically after the computer starts up if it was unable to run at the scheduled time. This is only recommended for desktops and laptops. For servers, it is recommended that you run the restore plan manually when all maintenance works are completed to avoid adversely affecting server performance and internet bandwidth during working hours
Step 14
The next step is to set any custom scripts which should execute before and/or after the restore plan runs.
Step 15
Specify the notifications options, then click Next.
Step 16
The next step of the Wizard displays a summary of the selections made throughout the process. Once you have reviewed your selections, click “Next”.
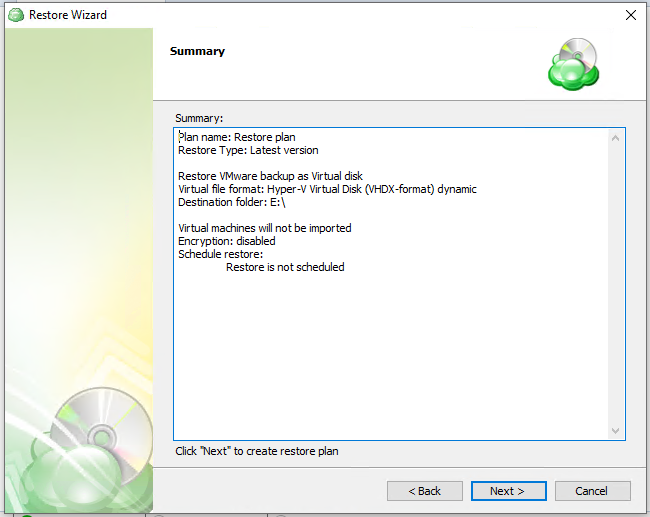
You can see the saved plan on the Restore Plans tab. If Run restore once was selected at the beginning of the wizard, the plan will immediately execute once you click Next.
Hyper-V Backup Plans
Hyper-V Backup in Backup Agent (new backup format)
Backup Agent supports Hyper-V virtual machine backup and restore.
To perform Hyper-V machines backups and, you need a special license. Learn more about license in the Licenses section
Step 1
Within the Backup Agent, click on Hyper-V, then select Hyper-V Backup.
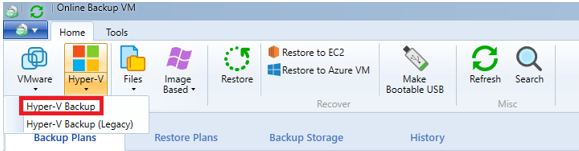
Step 2
You will then be prompted to start the backup wizard.
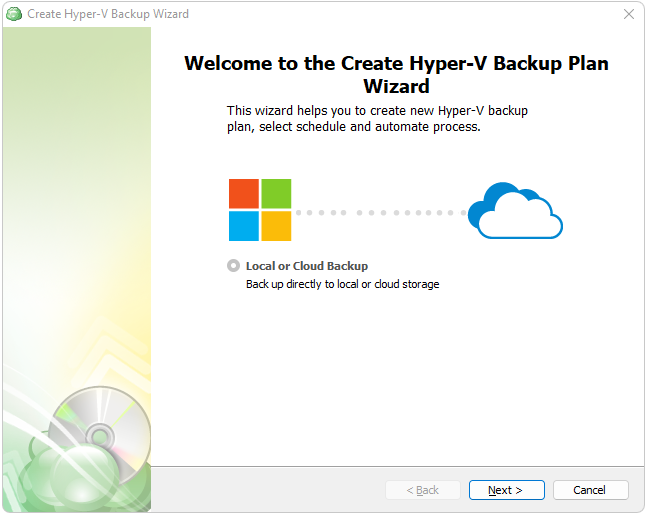
Step 3
The next step will prompt you to select the destination for the backup.
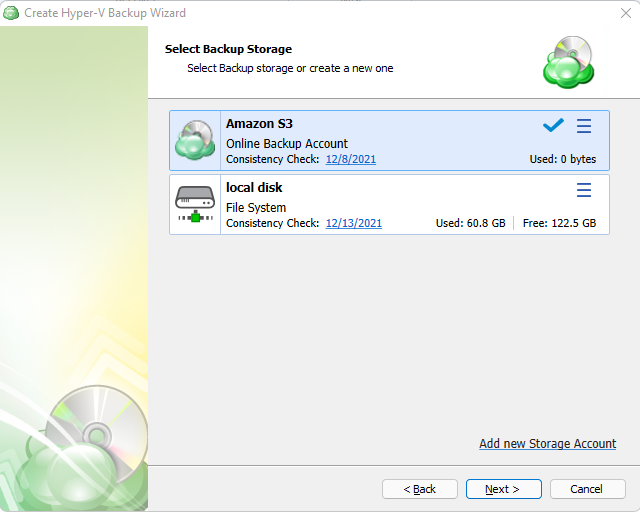
If the desired destination is not in the list, you can click “Add new Storage Account” to add it.
Step 4
Next, you will be prompted to name the plan.
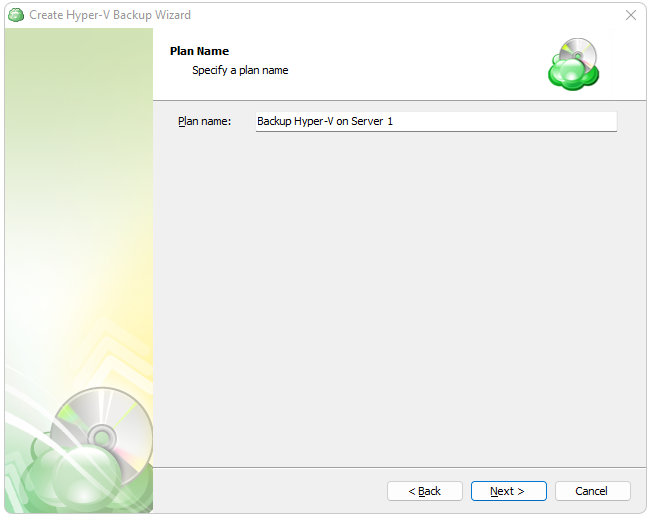
It is recommended to use a descriptive name which will distinguish the backup from others
Connect to a Hyper-V Cluster (optional)
If there is one of the hosts of Hyper-V cluster< you will be prompted to connect the cluster. As a minimum requirement, the backup user should be a member of the following groups on every Hyper-V cluster node: the "Domain Users" group and the local "Administrators" group.
This step appears in the backup wizard only if a Hyper-V cluster is present and detected
Select to back up: a local Hyper-V host only or a Hyper-V cluster.
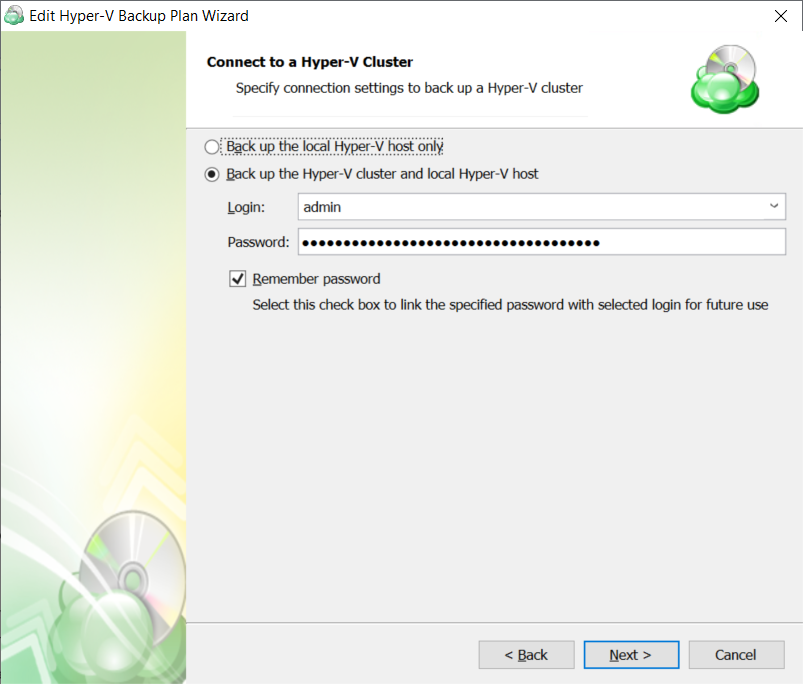
The following options are available:
- Select the Back up the local Hyper-V host only option to back up a local Hyper-V host
- Select the Back up the Hyper-V cluster and local Hyper-V host option to back up VMs of a Hyper-V Failover Cluster, then specify the cluster access credentials
Step 5
Next, you are presented with the Advanced Options. Specify advanced options for the backup plan. Advanced option set depends on the selected backup storage.
The following options are available:
- Use synthetic full backup. Select this option for cloud storages to enable the synthetic full backup usage for the backup plan. If a long-term storage class is selected as the bsckup destination, this will result in high storage costs.
Additional Advanced Options for Amazon S3
- If your backup storage destination is Amazon S3, select the S3 storage class for the backup plan:
- Standard
- Intelligent-Tiering
- Standard-IA
- One Zone-IA
- Glacier Instant Retrieval
- Glacier Flexible Retrieval (formerly S3 Glacier)
- Glacier Deep Archive
Usage of different storage classes for different backups is the subject of optimizing your storage costs.
Learn more about Amazon S3 storage classes here
- Select Use S3 Transfer Acceleration to accelerate file transfer for an extra fee. The target bucket must have this feature enabled. Select this checkbox if you want to use the data transfer acceleration service provided by Amazon. To learn more, refer to the Amazon S3 Transfer Acceleration.
Additional Advanced Options for Microsoft Azure
If your backup storage destination is Microsoft Azure, and you have the General Purpose v2 Azure account, select the required storage class (access tier).
The following options are available:
- Hot tier. An online tier optimized for storing data that is accessed or modified frequently. The hot tier has the highest storage costs, but the lowest access costs.
- Cool tier. An online tier optimized for storing data that is infrequently accessed or modified. Data in the cool tier should be stored for a minimum of 30 days. The cool tier has lower storage costs and higher access costs compared to the hot tier.
- Cold tier.An online tier optimized for storing data that is rarely accessed or modified, but still requires fast retrieval. Data in the cold tier should be stored for a minimum of 90 days. The cold tier has lower storage costs and higher access costs compared to the cool tier.
- Archive tier. An offline tier optimized for storing data that is rarely accessed, and that has flexible latency requirements, on the order of hours. Data in the archive tier should be stored for a minimum of 180 days.
Note that this feature is only supported for General Purpose v2 Azure accounts. If you are using another kind of account, you need to upgrade your account to be able to use this feature
Be aware of the additional charges and increased blob access rates after your Azure account upgrade
To learn more about the difference between Azure storage tiers, refer to the Azure Blob Storage - Hot, cool,cold, and archive storage tiers article at docs.microsoft.com.
Step 6
Next, select the Virtual Machines you wish to back up.
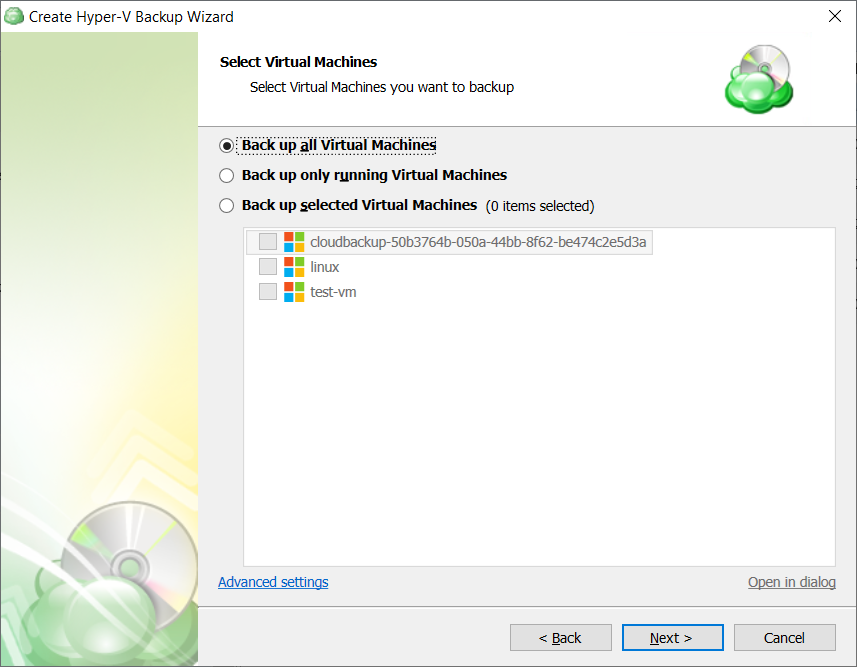
The following options are available:
- Back up all Virtual Machines. Select this option to include all virtual machines of the Hyper-V server to the backup plan
- Back up only running Virtual Machines. Select this option to include running virtual machines of the Hyper-V server to the backup plan
- Back up selected Virtual Machines. Select this option to include specified virtual machines of the Hyper-V server to the backup plan
Note that if you switch the backup option from the Back up selected Virtual Machines to any other, the previously made selection is kept for the case if you change your mind and select back the Back up selected Virtual Machines option, but the selected option will be applied regardless the virtual machine selection.
As of version 7.4, you can customize checkpoints to back up. To configure the checkpoint backup, click Advanced Settings. Select Back up current Hyper-V checkpoint only check box to back up the latest checkpoint only. Otherwise all existing checkpoints for the selected virtual machines will be backed up.
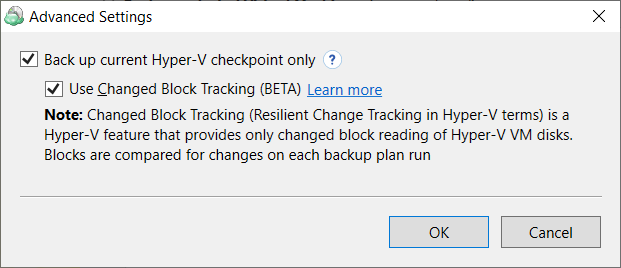
Along with the Back up current Hyper-V checkpoint only option, you can enable the Changed Block Tracking (Resilient Change Tracking) feature. Read more about the Changed Block Tracking in the Changed Block Tracking for Hyper-V paragraph.
Step 7
Now you’ll need to select the application processing options
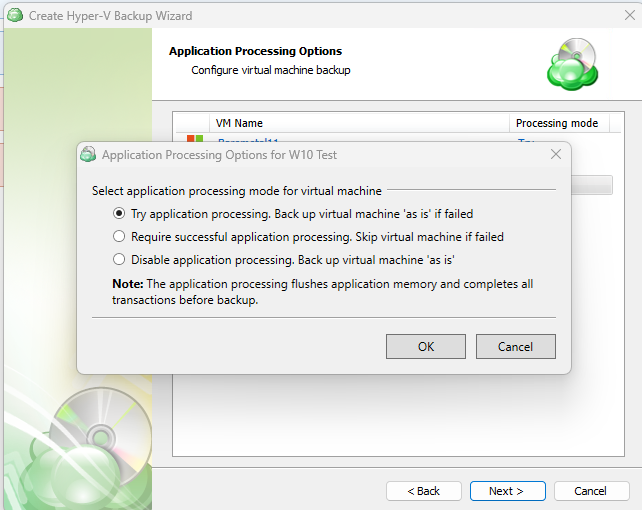
- Try application processing. Backup will perform whether or not the application-concistent process fails. If the processing fails, the backup will be done “as is”, but data consistency is not guaranteed.
- Require successful application processing. Skip the virtual machine if processing fails. If processing is successful, it ensures that applications running in the VM, such as databases, are taken into consideration and the backup will ensure data consistency is maintained.
- Disable application processing. Backup virtual machine “as is” and does not perform any application processing. The VM is backed up in its current state, which may cause data inconsistencies.
Step 8
Once you have selected which VMs to backup, the application allows you to then choose whether to backup all virtual disks on the selected VMs or to only backup selected virtual disks.
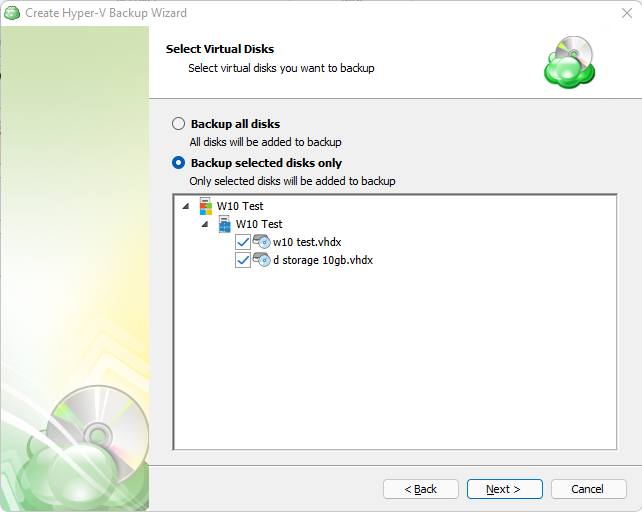
Step 9
After you have selected which VMs and disks to backup, the next step is to set the compression or encryption options.
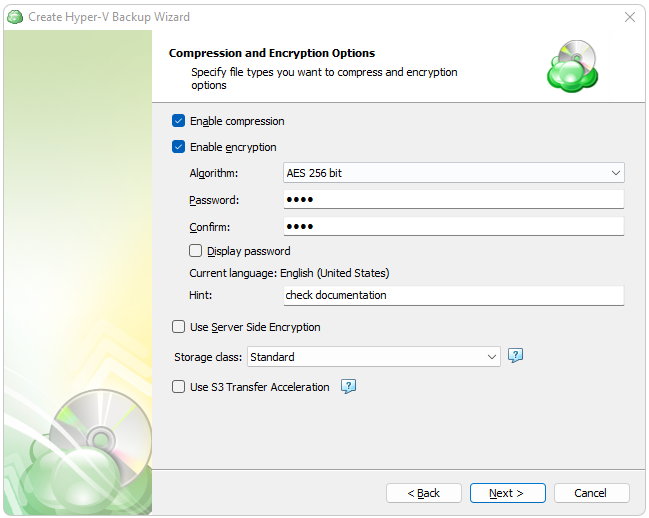
Other features may appear here which are specific to the selected backup destination. Some of these options may incur additional costs with the storage provider.
Enabling compression will reduce the size of the backup, reduce the time to upload it, both of which may decrease the cost of the backup
Encrypting the backup adds an additional layer of security to the data at the expense of increased processing resources during the backup process. Several types of encryption are available, with the most secure selected by default
It is important to remember that MSP360 Support is not able to retrieve or reset the encryption password. It is recommended that you store the password in a secure place and enable the Password Recovery Service
Step 10
Next you are presented with an option for the type of Backup Consistency Check to use with the plan. It is recommended that you leave “Enable Full Consistency Check” enabled.
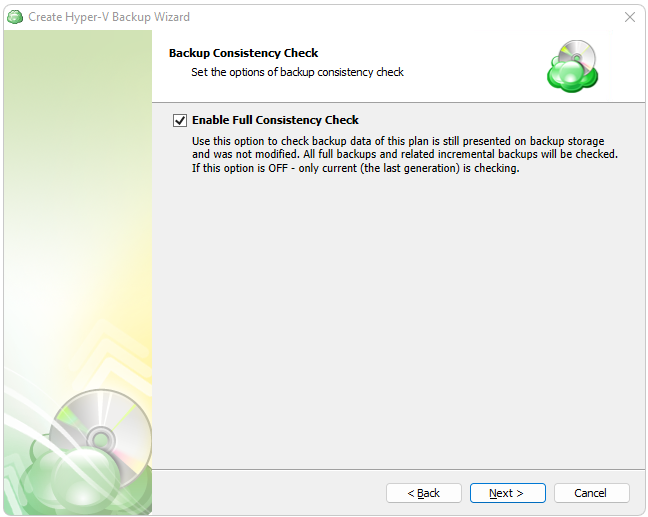
It is recommended to leave the Consistency Check enabled to ensure the integrity of your backed up data
Step 11
Specify the backup plan schedule settings.
The following options are available:
- Select the No schedule option to run the backup plan manually.
- Select the Simple (Forever Forward) option to apply the Forever Forward Incremental (FFI) schedule.
- Select the **Advanced (GFS, Object Lock) option to apply the recurring schedule and, if necessary, use Grandfather-Father-Son and Object Lock (Immutability).
- To set the time limit for plan execution, select the Stop the plan if it runs for checkbox, then specify the backup plan duration limit.
- To run the backup plan after the computer is on in case the backup plan run has been missed, select the Run missed scheduled backup immediately when computer starts up checkbox.
Simple Schedule
Select the Simple (Forever Forward) option to use the Forever Forward Incremental (FFI). This schedule offers one full backup followed by a limited number of incrementals. Once the limit is exceeded, a new full backup is created using in-cloud copying (synthetic full backup. Once you select this option, specify the FFI schedule for the backup plan. You can select the Daily or Monthly schedule type, depending on how often the incremental backups will be performed.
This schedule is unavailable if the selected storage account does not support synthetic full backups.
It is recommended to schedule full backup at least once every 3 months for selected schedule
Forever Forward backups are only supported by a limited number of cloud storage providers. For more information, refer to Forever Forward Incremental
The Simple (Forever forward) schedule is recommended for retention up to 100 restore points which do not require Object Lock for legal compliance
It is not recommended to select the Simple (Forever forward) schedule for long-term storage and archival purposes. The Advanced Schedule is recommended for all storage needs over 100 restore points
Advanced Schedule
Select the Advanced (GFS, Object Lock) option to set up a flexible, recurring schedule with generations. Every generation contains one full backup followed by incrementals.
The advanced schedule allows configuring a flexible schedule according to your requirements. To use this schedule you should add schedules for full and incremental backup runs:
- To create incremental backups by schedule, select the Recurring (Incremental) checkbox, then configure the schedule for incremental backups on a daily or monthly basis.
- To create full backups by schedule, select the Execute full backup (Synthetic full if possible) checkbox, then configure the schedule for full backups on a daily or monthly basis.
Select the Advanced option to set up a flexible, recurring schedule with generations. Every generation contains one full backup followed by incrementals.
Clicking on Edit Schedule next to Incremental and Full backups allow you to configure the frequency they will be created. If both a Full and Incremental are scheduled for the same day, the application will perform the Full only.
It is recommended to use the Advanced (GFS, Object Lock) option and regularly scheduled full backups for long-term storage (longer than 6 months) or backups that must comply with legal or industry requirements
Enabling the Run missed scheduled backup immediately when computer starts up option will ensure that the backup process begins automatically upon startup if the last backup was not able to start at the scheduled time for any reason. This option is recommended for Desktops and Laptops
Do not use the “Stop the plan if it runs for:” option if you have a slow or unstable internet connection. The first full backup can take a long time to upload, and it can be unexpectedly interrupted if this option is enabled
Synthetic Full Backups allow the system to merge a series of incremental backups together to form a new full backup, greatly reducing the time and bandwidth needed to perform full backups after the initial full. If the storage destination does not support Synthetic full, then a traditional full will be made instead
The Advanced Schedule and GFS retention policies will only perform properly with regularly scheduled full backups
Step 12
Specify the retention policy settings for the backup plan. The retention policy depends on the schedule selected on the previous step.
Retention Policy with Simple Schedule
If you selected the Simple (Forever Forward Incremental) schedule, the Retention Policy step offers the following settings:
- Keep backup for. Select this option to limit the number of restore points. The Keep backup for value defines the period Restore Points with the Forever Forward Incremental schedule are kept. If their retention period expires, these restore points are merged into a full backup (with Forever Forward Incremental only one full backup is kept on the backup storage).
For backup storages with a minimum storage duration limit and early deletion fees, this value can be exceeded to avoid the fees
- Intelligent Retention: Each time the backup plan is executed, the backup storage parameters are analyzed automatically, setting the retention period based on storage provider data deletion conditions. This feature is enabled by default.
Learn more about the retention policy in the Retention Policy chapter chapter
Retention Policy with Advanced Schedule
If you selected the Advanced (GFS, Object Lock) schedule or to run backup manually without the schedule, the Retention Policy step offers the following settings:
- Do not purge (Keep backup forever). Select this option to keep all your backup runs.
- Keep backup for. Select this option to limit the period while backup contents are kept in the backup storage, then specify the period.
Learn more about the retention policy in the Retention Policy chapter chapter
To apply the GFS retention policy for the backup plan, select the Enable GFS checkbox, then customize the GFS retention policy by enabling the required keeping periods (weekly, monthly and yearly purge delays).
To learn more about the GFS retention policy, refer to the About GFS chapter
If backup data is required to be locked, enable the Object Lock (Immutability) checkbox. Before enabling Object Lock, you need to allow this feature for the backup destination.
To learn more about the Object Lock (Immutability) feature, refer to the Object Lock (Immutability) chapter
Generations will not be deleted until the youngest point in the chain has met the retention criteria
GFS Retention provides an excellent way to efficiently archive data for compliance. Additional information can be found in GFS Policy topics in the MBS Documentation
Restore Points will not be deleted until the youngest point in the chain has met the retention criteria
GFS retention provides an excellent way to efficiently archive data for compliance. Additional information can be found in GFS Policy topics in the MBS Documentation
Step 13
Next, you can specify Pre- and Post- backup actions (optional)
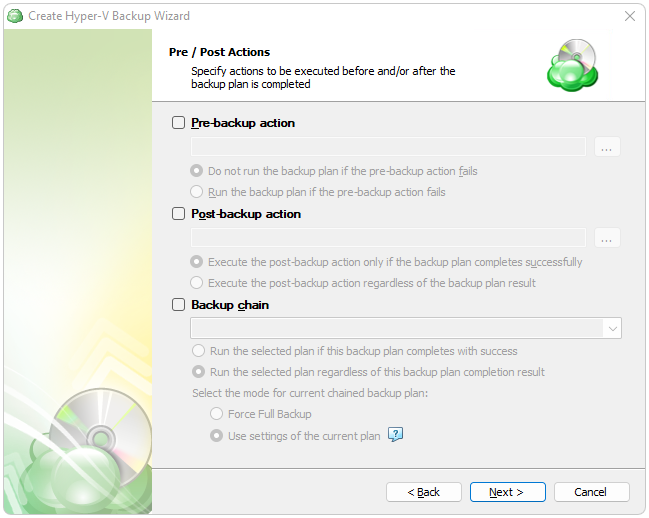
Step 14
Specify notification settings.
- To receive the notification after the backup plan completion, select the I want to receive notification email when backup completes check box.
- Select When backup fails option if you want to receive the notification message only in case of the backup plan failure
- Select In all cases option if you want to receive the notification message in any case.
- In the fields Username, Email, Email subject specify the notification email details. You can specify one or more email recipients. Separate them by semicolon or comma, the recipient name (one for all of them). The email subject can also contain any of the following variables:
- %COMPUTER_NAME% Indicates the name of a computer on which the routine was running
- %RESULT% Indicates whether the routine was finished successfully or failed
%RESULT% variable has the following values:
- Completed. This value is assigned when the plan is terminated with success
- Completed with warnings. This value is assigned when the plan is terminated with errors, warnings or has been interrupted
- %PLAN_NAME% Indicates the backup plan's name.
- If you want to use own SMTP server for notification emails, select the I want to use my SMTP server for email notifications check box, then specify the settings for the SMTP server
- If you want the backup plan record to be added to Windows Event Log, select on Add entry to Windows Event Log when backup completes check box
- Select When backup fails option if you want to receive the notification message only in case of the backup plan failure
- Select In all cases option if you want the entry to be put in Windows Event Log in any case.
Step 15
Check a summary of the selected options.
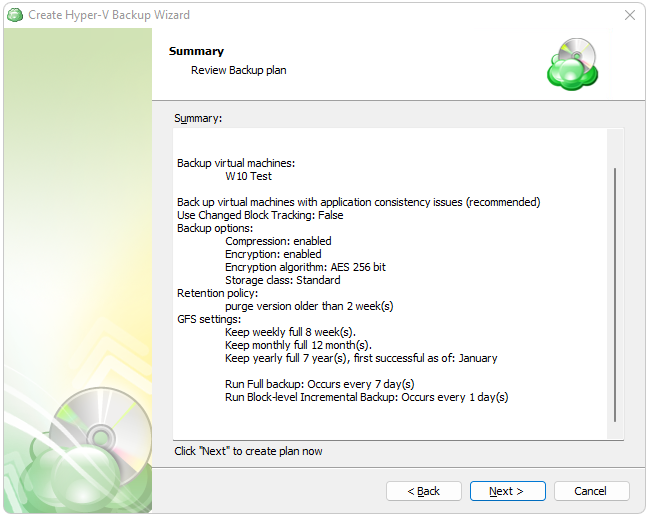
Step 15
The final step of the wizard will confirm that the Backup Plan was successfully created. If you select the “Run backup now” box, the application will initiate it immediately upon exiting the wizard, otherwise it will run at the next scheduled time.
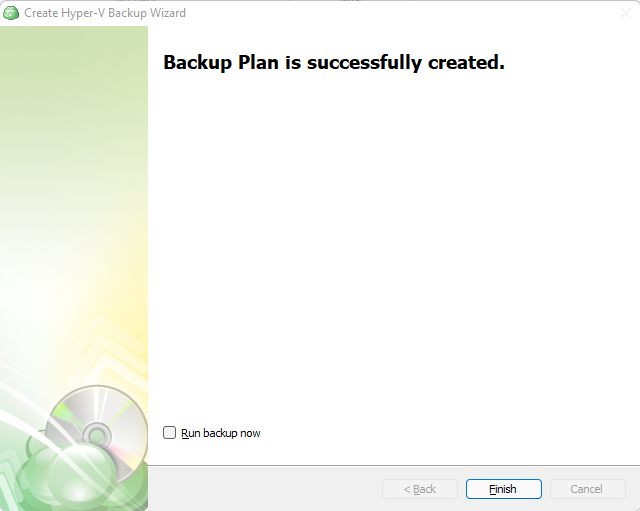
Hyper-V Backup Plan in Management Console (NBF)
Create Hyper-V Backup Plan
This feature requires the VM Server license.
- Open the Management Console.
- Open Backup > Computers.
- Find the required computer, then click the Configure icon in the Backup Plan Status column.
- On the side panel, click + or +Add New Plan, then select the Hyper-V Backup Plan item.
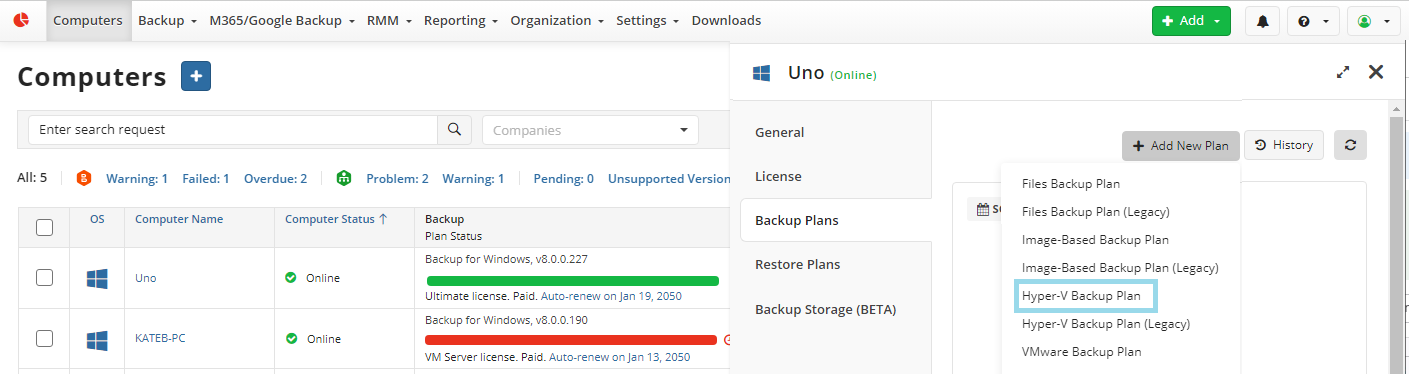
Welcome
Name the backup plan.
Where to Back Up
Select the target backup storage for the backup plan. If no storage accounts are available, create a new one. Refer to Add New Storage Account to learn how to do it.
What to Back Up
Configure the backup dataset for the plan and select the virtual machines to back up.
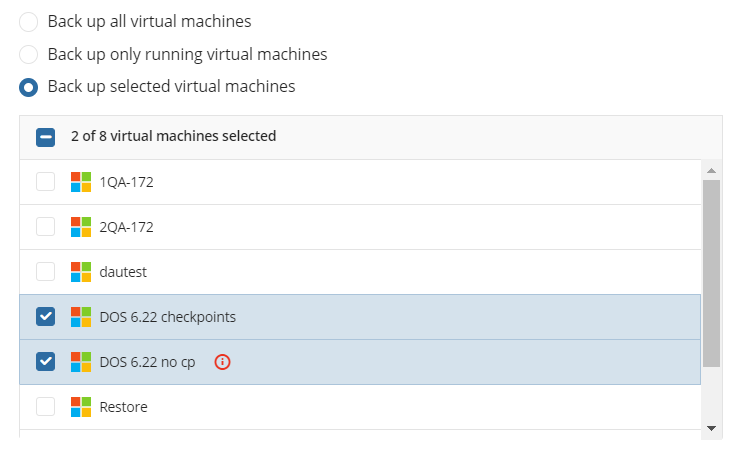
The following options are available:
- Back up all virtual machines. Select this option to include all virtual machines of the Hyper-V server in the backup plan
- Back up only running virtual machines. Select this option to include running virtual machines of the Hyper-V server to the backup plan
- Back up selected virtual machines. Select virtual machines to include in the backup plan manually
If the Backup Agent instance is installed on the computer with the Hyper-V Failover Cluster, you will be prompted to enter the Failover Cluster access credentials on the separate backup wizard step
As a minimum requirement, the backup user should be a member of the following groups on every Hyper-V cluster node: the "Domain Users" group and the local "Administrators" group.
Consider that Managed Backup does not detect file changes based on content. Instead, it detects file changes by checking the modification date and uses this to determine whether a new copy of the file needs to be backed up.
Configure Application-Consistent Backups
You can configure the Application processing options after the Select Virtual Machines step of the Hyper-V backup wizard. These options can be configured separately for each virtual machine.
By default, the Try application processing setting is set. you can change it, if necessary.
The following options are available:
- Try application processing. Back up virtual machines 'as is' if failed. Once this option is selected, virtual machines are backed up one by one. The state of applications running on virtual machines is checked, then a recovery consistent checkpoint is made and an application-consistent backup is performed. In case an recovery consistent checkpoint cannot be not made for some reason, this virtual machine will be backed up 'as is'.
- Require successful application processing. Skip virtual machines if failed. Once this option is selected, virtual machines with applications that did not flush pending I/O operations from memory to disks, are skipped and an appropriate warning is displayed for a user.
- Disable application processing. Back up virtual machines 'as is'. Once this option is selected, regular VM snapshots are done without quiescing.
Advanced Settings
By default advanced settings are skipped for the backup plan. You should enable them, if necessary (not recommended).
Available advanced settings depend on selected backup storage
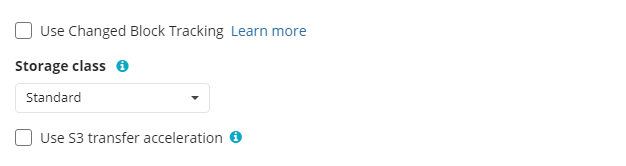
The Hyper-V backup wizard supports backup of current VM checkpoints only. To back up the checkpoint tree, use the legacy Hyper-V backup wizard
Enable the Changed Block Tracking for Hyper-V backup. To do this, select the Use Changed Block Tracking checkbox.
Read more about the Changed Block Tracking in the Changed Block Tracking for Hyper-V chapter
Additional Advanced Settings for Amazon S3
If your backup destination is Amazon S3, the following custom options are available in this step.
- Use S3 Transfer Acceleration. Use this option to accelerate file transfer for an extra fee. The target bucket must have this feature enabled
- Select the S3 storage class for the backup plan:
Using different storage classes for different backup purposes helps you to optimize the storage costs.
Learn more about Amazon S3 storage classes here
Additional Advanced Settings for Microsoft Azure
If your backup storage destination is Microsoft Azure, and you have the General Purpose v2 Azure account, select the required storage class (access tier).
The following options are available:
- Hot tier. An online tier optimized for storing data that is accessed or modified frequently. The hot tier has the highest storage costs, but the lowest access costs.
- Cool tier. An online tier optimized for storing data that is infrequently accessed or modified. Data in the cool tier should be stored for a minimum of 30 days. The cool tier has lower storage costs and higher access costs compared to the hot tier.
- Cold tier.An online tier optimized for storing data that is rarely accessed or modified, but still requires fast retrieval. Data in the cold tier should be stored for a minimum of 90 days. The cold tier has lower storage costs and higher access costs compared to the cool tier.
- Archive tier. An offline tier optimized for storing data that is rarely accessed, and that has flexible latency requirements, on the order of hours. Data in the archive tier should be stored for a minimum of 180 days.
Note that this feature is only supported for General Purpose v2 Azure accounts. If you are using another kind of account, you need to upgrade your account to be able to use this feature
Be aware of the additional charges and increased blob access rates after your Azure account upgrade
To learn more about the difference between Azure storage tiers, refer to the Azure Blob Storage - Hot, cool,cold, and archive storage tiers article at docs.microsoft.com.
Select Virtual Disks
Select virtual disks to include in the backup plan. You can include all VM disks into the backup plan or select specific ones.
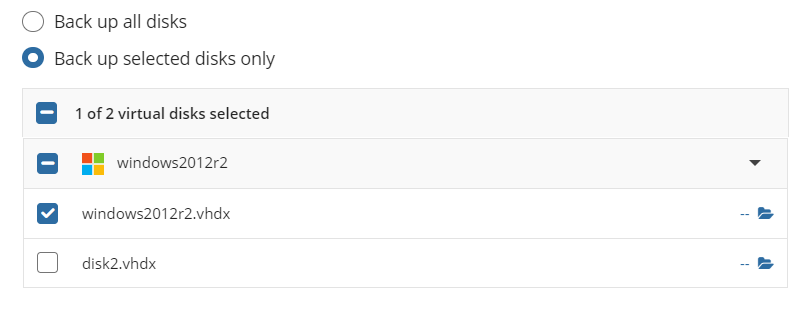
Selected NTFS disks can be expanded to exclude some files or folders from backup. In case the disk cannot be listed, the content cannot be viewed and such disk can be excluded from backup as a whole.
Compression and Encryption Options
Compression
Managed Backup offers compression to reduce the storage space required for your backup and to speed up the upload process to the target storage.
Encryption
You can protect your backup by encrypting its contents. Managed Backup supports AES encryption with key sizes of 128, 192, and 256 bits. A larger key size provides stronger encryption but may increase the time required for processing your backup. For more details on AES encryption, refer to the Advanced Encryption Standard.
To protect your backup contents with encryption, select the Enable encryption checkbox. Application supports AES encryption of 128, 192 and 256 bit key length. Select the appropriate key length in the Algorithm drop-down menu
- Specify the encryption password in the Password field, then confirm the password in the Confirm field. Mind to keep the encryption password in a safe place. Pay attention, if Password Recovery Service is not enabled in the Management Console, then if the encryption password is lost or forgotten, the encrypted backup cannot be restored. Password recovery Service requires the Two-factor Authentication (2FA) enabled.
- In the Hint field, specify some information that could help to recall the password in case you forget it.
If you change any encryption settings (algorithm or password) for an existing backup plan, a full backup will be executed the next time the backup plan runs.
Note that the encryption password will NOT be stored in the backup plan configuration for security reasons. Keep this password in a safe place to be able to restore the backup contents afterwards
Backup Consistency Check
Enable or skip the full consistency check. A mandatory consistency check will be completed with every backup plan run regardless of this setting.
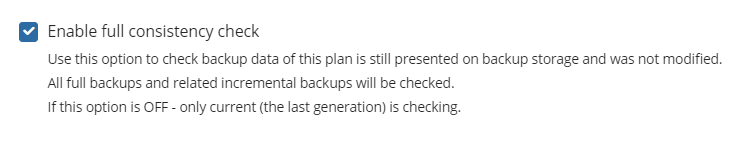
Read more about consistency checks in the Mandatory and Full Consistency Checks chapter
Schedule Options
Specify the backup plan schedule settings.
The following options are available:
- Select the Simple option to apply the Forever Forward Incremental (FFI) schedule.
- Select the Advanced option to apply the recurring schedule and, if necessary, use Grandfather-Father-Son and Object Lock (Immutability).
- Select the No schedule, run manually option to run the backup plan manually. Retention policy will not work for this option.
The simple schedule is unavailable if the selected storage account does not support synthetic full backups.
For more quidelines on schedule selection, refer to the following article.
Simple Schedule
Select the Simple (Forever Forward) option to use the Forever Forward Incremental (FFI). This schedule offers one full backup followed by a limited number of incrementals. Once the limit is exceeded, a new full backup is created using in-cloud copying (synthetic full backup.
Once you select this option, the predefined schedule will appear. You can edit this schedule, if necessary. You can select the Daily or Monthly schedule type, depending on how often the incremental backups will be performed.
Use the Additional Settings to configure the following:
- First backup start date
- Stop condition for the long backup
- Overdue alert condition
- Missed backup handling
Advanced Schedule
Select the Advanced option to set up a flexible, recurring schedule with generations. Every generation contains one full backup followed by incrementals.
Once you select this option, the predefined schedule for full and incremental backup will appear. You can edit this schedule, if necessary.
The advanced schedule allows you to configure a flexible backup plan according to your requirements. To modify the schedule, use the edit icon next to the selected schedule. If needed, you can disable the incremental backup schedule to run only full backups.
You can select the Daily or Monthly schedule type, depending on how often the incremental backups will be performed.
Use the Additional Settings to configure the following:
- First backup start date
- Stop condition for the long backup
- Overdue alert condition
- Missed backup handling
It is recommended to schedule full backup at least once every 3 months for selected schedule
Retention Policy for Advanced Schedule, GFS, and Object Lock (Immutability)
If the Advanced schedule was selected, specify the retention period for the backup plan.
GFS Settings
To apply the GFS retention policy, enable the Archive Full Backups, Grandfather-Father-Son (GFS) feature, then specify the GFS retention settings.
Learn more about GFS retention settings in the GFS Examples chapter
Object Lock (Immutability)
Object Lock (Immutability) is linked to the GFS retention policy. If the Object Lock (Immutability) is applied along with GFS settings, full backups that are subject to the GFS retention policy become immutable for the GFS keeping period.
Select the Prevent backups created according to GFS policy from deletion checkbox, then confirm the use of this feature.
Use the Immutability feature with extreme caution. Once a backup data becomes immutable in Compliance mode, there is no way to delete them from the storage until the specified GFS keeping period expires except for the storage account termination. Incorrect settings can cause high storage bills.
To find more information about the Object Lock feature, supported storage providers, and required permissions, refer to this article.
Retention Policy for Simple Schedule
If on the Schedule options step you selected the Simple schedule, the Retention Policy step has different settings.
The Retention period value defines how long restore points are kept. Restore points with an expired retention period are merged into a full backup. (With Forever Forward Incremental, only one full backup is kept on the backup storage). If your storage has a minimum retention period, the creation of a new full backup will be postponed to avoid early deletion fees.
Pre / Post Actions (optional)
Specify pre and post-actions for your backup plan. Usually, these are scripts that perform particular jobs before or after your data is backed up. The following settings are available:
- To specify the action that will be performed before the backup plan starts, select the Pre-backup action checkbox.
- Specify the path to the script to be run as a pre-backup action.
- Specify the conditions of pre-action run:
- Select the Do not run the backup plan if the pre-backup action fails option if you do not want the backup plan to be launched if the pre-backup action fails.
- Select the Run the backup plan if the pre-backup action fails option if you want the backup plan to launch regardless of the pre-backup action result.
- To specify the action that will be performed after the backup is completed, select the Post-backup action checkbox.
- Select the Execute the post-backup action only if the backup plan completes successfully option if you want to run it only if the backup was executed without any errors or warnings.
- Select the Execute the post-backup action regardless of the backup plan result option if you want the post-action to be launched regardless of the backup termination results.
- To chain the backup plan with another plan, select Backup chain checkbox, then select the backup or restore plan name in the drop-down menu.
- Select the Run the selected plan if this backup plan completes with success option if you want to run the specified plan only if the backup plan was executed without any errors or warnings.
- Select the Run the selected plan regardless of this backup plan completion result option if you want the chained backup plan to be launched regardless of the backup termination results. Select the mode for the current chained backup plan:
- Force full backup. Full backup will be forced for the chained backup plan.
- Use settings of the current backup plan. Chained backup plan will be run as full or incremental, according to this backup plan run.
Notifications
Specify notification settings for backup plan results. You can use the company notification settings or customize them as needed. You can specify the required recipients and customize the notifications on different backup plan results:
- Success
- Warning
- Failed
You can configure a notification threshold for Managed Backup alerts, so that notifications are sent only after a specified number of consecutive plan failures
In case you select to customize notifications, select the recipients for different events.
- Select Send notifications to user account... if you want to notify the associated user about the backup process.
- Select If the backup plan fails or completes with warnings option if you want to receive the notification message in case of the backup plan failure
- Select In all cases option if you want the entry to be put in Windows Event Log in any case.
Click the Next, then click Save to finish the wizard.
Hyper-V Restore Plans
Hyper-V VM Restore in Backup Agent
Managed Backup supports restore of Hyper-V server or Failover Cluster virtual machines:
- Hyper-V Server on Windows Server 2012 or higher
Step 1
After launching the Backup Agent, you can run the Restore Wizard by clicking on Restore on the Home tab if the horizontal menu.
Step 2
Click on “Next” to advance past the welcome screen for the wizard
Step 3
The next step will prompt you to select the source for the restore.
If the desired source is not in the list, you can click “Add new Storage Account” to add it.
- The backup storage is the one that contains the backup data
- The required backup prefix is set for storage account
If necessary, switch the backup prefix.
Step 4
Once the source has been selected, the next screen allows you to choose between running the plan a single time or saving it for later use.
Run restore once will execute the restore immediately upon completing the wizard. There is no option to schedule this type of restore
Save restore plan will allow you to schedule the plan to run at a later time and also schedule repeating restorations if needed
Step 5
With the type of restore selected, the next step is to select the correct Host server which the VM resides on.
Step 6
Next, you will be presented with a list of available backup types for the selected host. Select the Restore Hyper-V Virtual Machine option to continue.
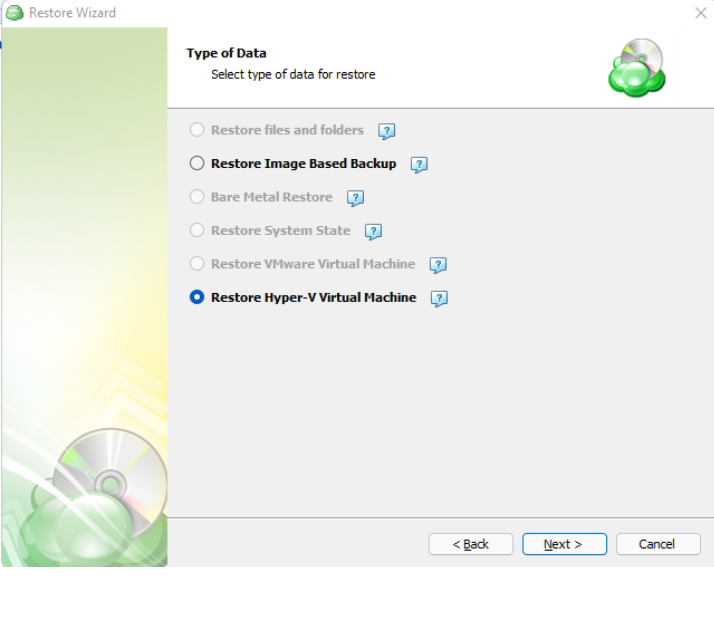
Step 7
With the correct type of restore selected, the application will generate a list of available backup plans to restore from.

Step 8
Next you will be given a choice for what point in time you would like to restore the VM to.
- Latest Version: Automatically restores the newest version of each file in the source regardless of which restore point it belongs to.
- Select the Restore Point: Restores the files as they existed at the specified restore point.
If there is no exact match for the point in time selected, the application will automatically select the closest previous restore point
Step 9
Next, you will be able to expand the list of VM backups on the selected host and choose which to restore.

Step 10
After selecting the files or folders to restore, you are able to select the restore method. In this example we perform restore as a Hyper-V machine.
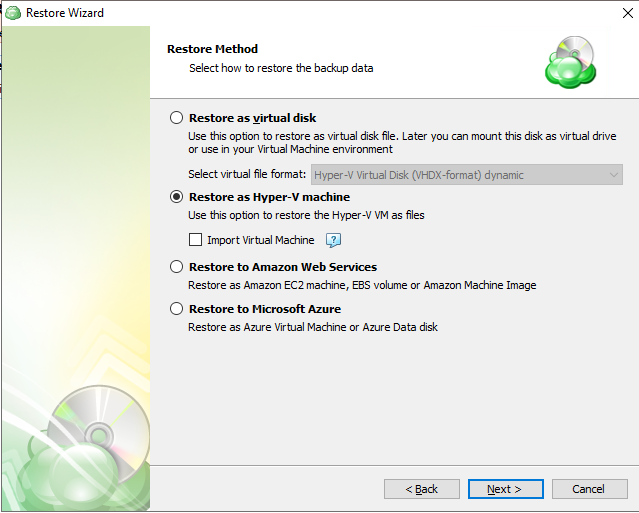
- Restore as virtual disk: Restores the virtual disks in the backup as a file which can later be mounted to a VM. No configuration files are included. Several formats are available:

- Restore as Hyper-V machine: Selecting this option restores the virtual machine configuration as well as the virtual disks as files, but does not import the VM into the hypervisor by default.
- Import Virtual Machine: Use this option to have the VM automatically imported to the hypervisor.
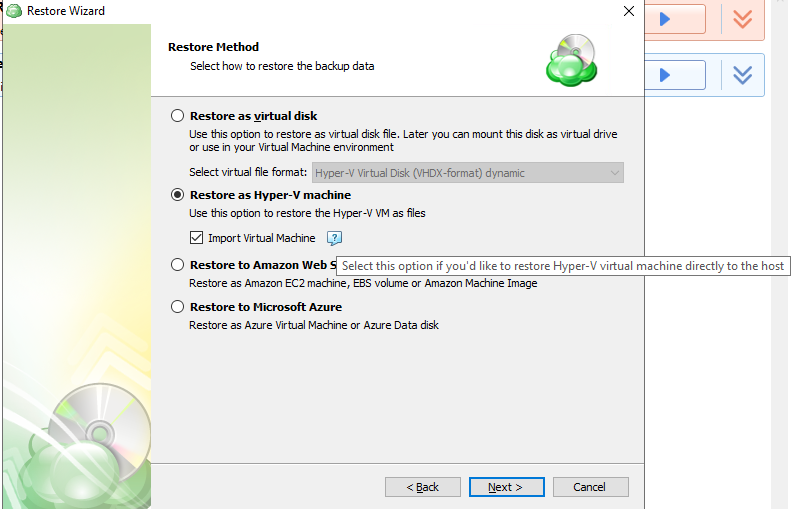
- Restore to Amazon Web Services: If enabled, this will restore the selected VM directly to AWS Cloud either as an EC2 instance, EBS volume, or AMI.
- Restore to Microsoft Azure: This will restore the VM directly to Azure as either an Azure Virtual Machine or Azure Data disk.
Step 11
The next step is to select the disks to be restored.

Here you can choose whether to restore all virtual disks associated with each selected VM or only restore selected disks.
Step 12
The next step is to choose a destination for the restored VM or virtual disk. You will be prompted if you would like to overwrite VM. If you wish to restore it as a different name or target VM, select or type over the value in the Restore as list.
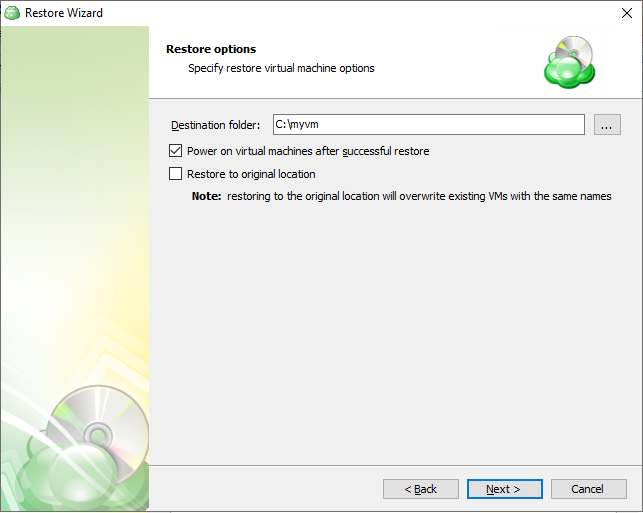
Step 13
After selecting the destination and any associated options, you will be prompted to provide the password to decrypt the VM backup data, if encrypted
Step 14
(Optional) If you restore data from the S3 Glacier Flexible Retrieval or Glacier Deep Archive storage classes, specify Smart Restore options.
Step 15
If Save restore plan was selected at the start of the wizard then the next step is to set the schedule for the restore plan. Otherwise this step will be omitted.
- No schedule (run manually): Use this option only when you wish to execute the Restore manually.
- Specific date: Use this to schedule a one-time Restore at the specified date and time.
- Recurring: Using this option enables you to schedule recurring Restorations based on the criteria in the fields below.
- Synchronize repository before run: Enable this option to ensure the file tree reflects the latest modifications made to your storage. It is a good practice to use it when you restore to a different computer
Do not use the Stop the plan if it runs for: option if you have a slow or unstable internet connection
Enabling the Run missed scheduled restore immediately when computer starts up option will ensure that the restore plan will begin automatically after the computer starts up if it was unable to run at the scheduled time. This is only recommended for desktops and laptops. For servers, it is recommended that you run the restore plan manually when all maintenance works are completed to avoid adversely affecting server performance and internet bandwidth during working hours
Step 16
The next step is to set any custom scripts which should execute before and/or after the restore plan runs.
Step 17
Specify the notifications options, then click Next.
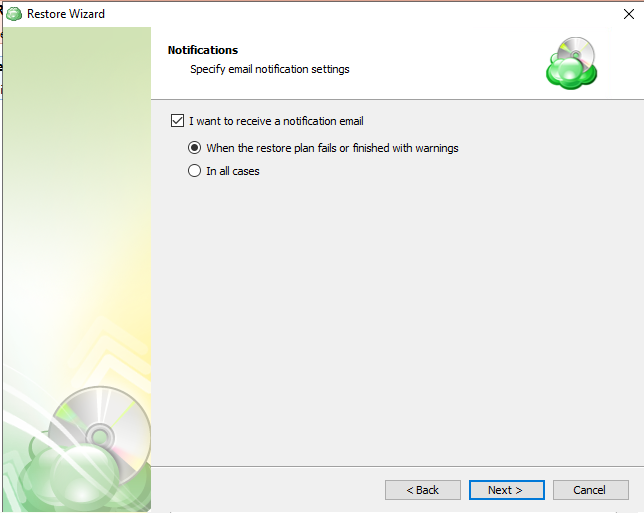
Step 18
The next step of the Wizard displays a summary of the selections made throughout the process. Once you have reviewed your selections, click “Next”.
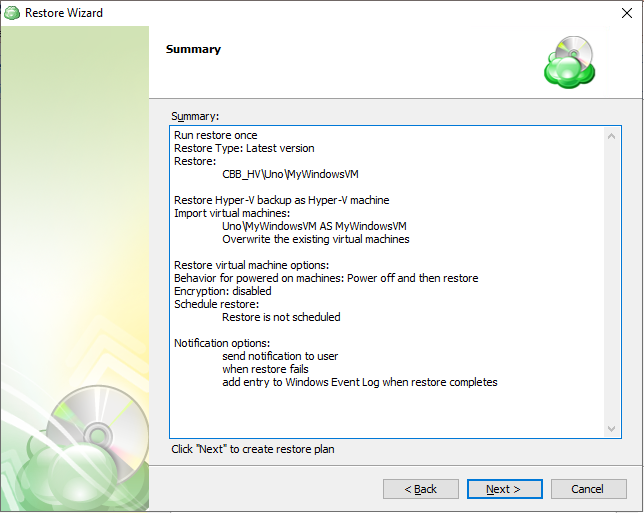
You can see the saved plan on the Restore Plans tab. If Run restore once was selected at the beginning of the wizard, the plan will immediately execute once you click Next.
Hyper-V VM Restore in Management Console
Managed Backup supports restore of Hyper-V Server or Failover Cluster virtual machines. Both backup formats (new backup format and legacy backup format) are supported.
Consider, item-level restore from long-term (cold) backup storages is not currently supported
Create New Restore Plan
To create a new restore plan, proceed as follows:
- Open the Management Console.
- Open Backup > Computers page in the new main menu.
- Find the required computer, then click the Configure icon in the Backup Plan Status column.
- On the side panel, click + or +Add New Plan,
- In the Restore group, select Hyper-V Restore Plan.
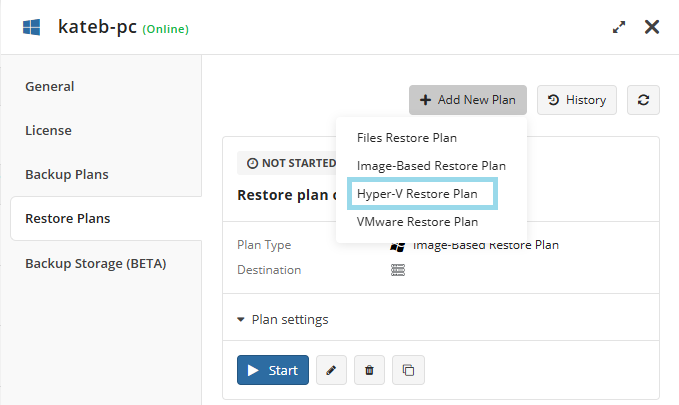
Plan Name
Select the restore plan mode:
- Select the Run restore once option to restore an image-based backup only once
- Select the Save Restore Plan option to save the plan configuration for future use. Specify the name of the plan
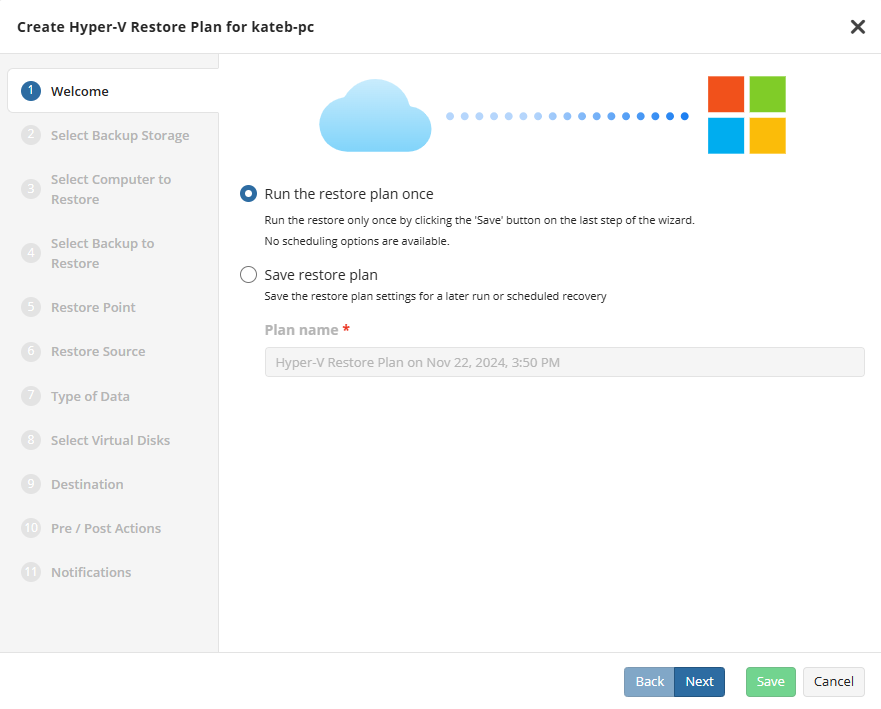
Select Backup Storage
Select the backup destination that contains the required backup from the list.
Select Computer to Restore (optional)
This restore wizard step appears only if the specified backup destination contains several backups from different computers.
Select the required computer (backup prefix).
Select Backup
Select the backup plan you want to restore from..
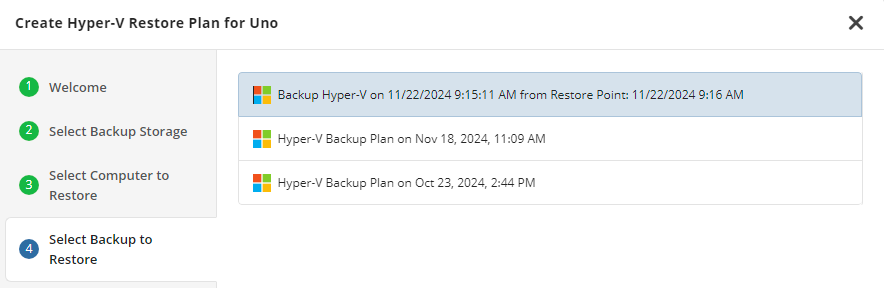
Select Restore Point
Select the restore point you want to restore.
For backups made in the new backup format, select the latest version or the specific restore point from the list below.
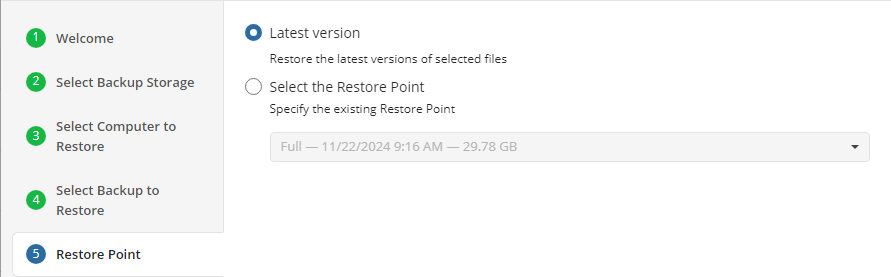
For backup made in the legacy backup format, select one of the available options:
- Select the Latest Version option to restore the latest image version of the selected backup
- Select the Point in Time option to restore the image version for the specified date and time
- Select the Modified Period option to restore the image version based on the modification period, then specify the period
- Select the Backup Period option to restore the image version based on the backup period, then specify the period
- Select the Manually** option to proceed to manual image version selection
Note that the time must be specified in the provider time zone. Point the mouse to the hint icon to see the provider time zone
Select Restore Source
Next, you will be able to expand the list of VM backups on the selected host and choose which VM to restore.
If backed-up objects are missing, ensure the correct prefix is specified (the same one used for backup) and verify that the repository is synchronized to update available backups.
Type of Data
The next step of the wizard allows you to choose how the VM data should be restored.
- To restore the Hyper-V VM as virtual machine, select the Restore and import Hyper-V VM. This feature ensures efficient recovery and seamless integration of VMs into your existing environment** option.
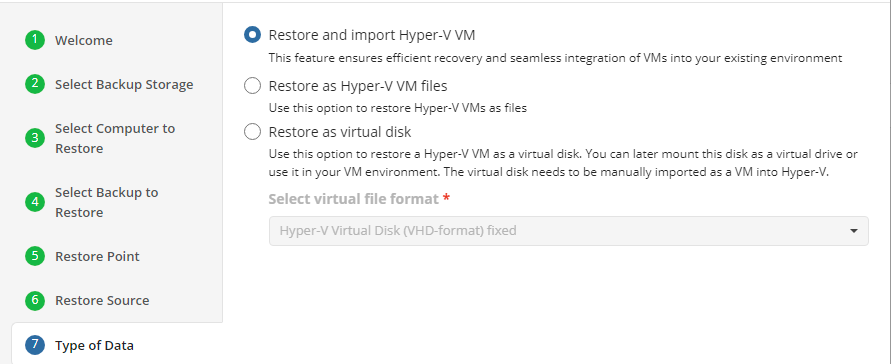
- To restore restore Hyper-V VMs as files, select the Restore as Hyper-V VM files option (vhdx extension).
- To restore Hyper-V VMs as virtual disks, select the Restore as virtual disk option, then select the virtual disk format from the list of available formats. You can later mount this disk as a virtual drive or use it in your VM environment. The virtual disk needs to be manually imported as a VM into Hyper-V.
Select Virtual Disks
Select virtual disks to restore.
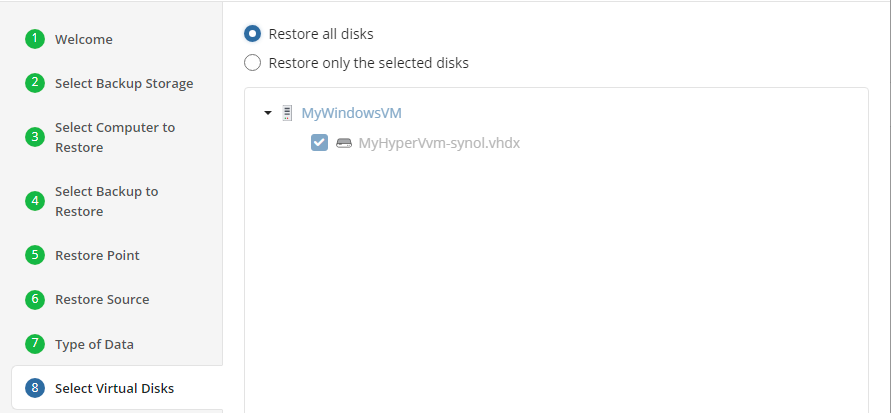
Note that selected disks must include system volumes as they contain data required to boot the operating system
Select Destination
In this step of the Restore Wizard, you configure where and how the virtual machine (VM) will be restored.
Select the disk or specific partition.
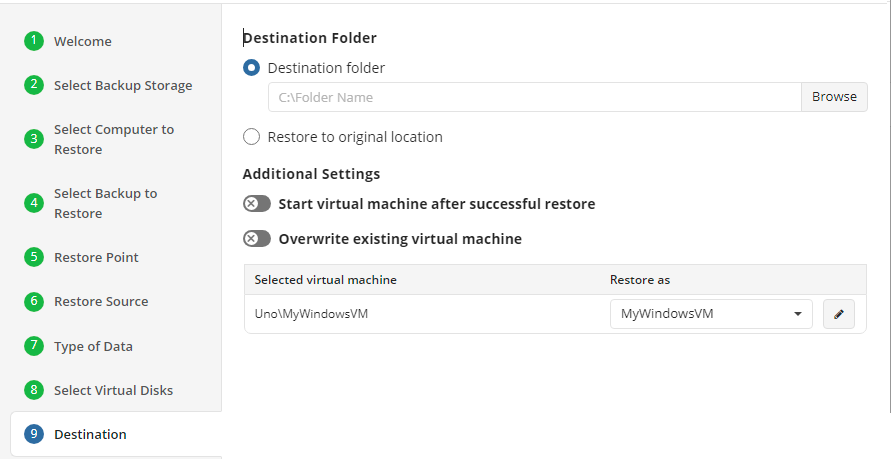
If you want to restore existing machine to the original location, the virtual machine will be overwritten. To start the virtual machine after successful restore, select the appropriate checkbox.
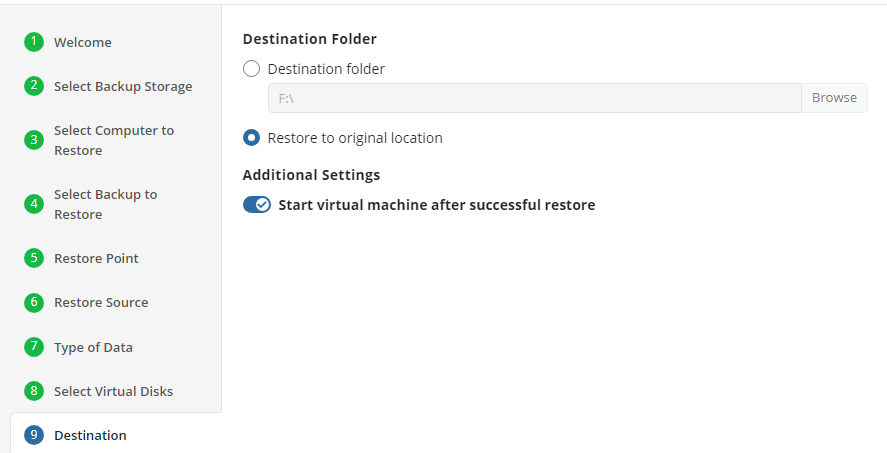
- Destination Folder: Select the destination disk on the VMware host where the VM should be restored to.
- Restore to original location: Restores the virtual disks to the original path specified in the VM configuration.
- Start virtual machine after successful restore: Enabling will start the VM automatically after a successful restore.
- Overwrite existing virtual machine: Enabling this will allow the restore to replace any existing VM files.
If you wish to restore it as a different name or target VM, select or type over the value in the “Restore as” list
Encryption Options (optional)
Enter the encryption password if your backup is encrypted.
Schedule Options
Specify the schedule for the restore plan if you have selected to save it.
The following options are available:
- No schedule (run manually). Select this option to run the restore plan manually, only when it is required
- Specific date. Select this option to specify the date and time the restore plan is to be executed
- Recurring. Select this option to run the restore plan on a periodic basis, then configure the schedule
- Stop the plan if it runs for. Select this option if you want to stop the restore plan if it runs longer than the time you specified. Use this option with care since sometimes it is hard to predict the restore time due to many factors
- Alert the plan as Overdue. Select this option to monitor the plan execution. If the restore plan fails or is finished with warnings for the specified period of time, it will be assigned with the Overdue status that will appear on the Monitoring/History page
- Run missed scheduled plan immediately when computer starts up. Select this option if you want the restore plan would run as the computer boots in case it was down at the moment of the scheduled run
Pre / Post Actions
Specify the actions before and/or after the restore plan. Usually, these are scripts that perform particular jobs before or after the plan is executed. The following settings are available:
!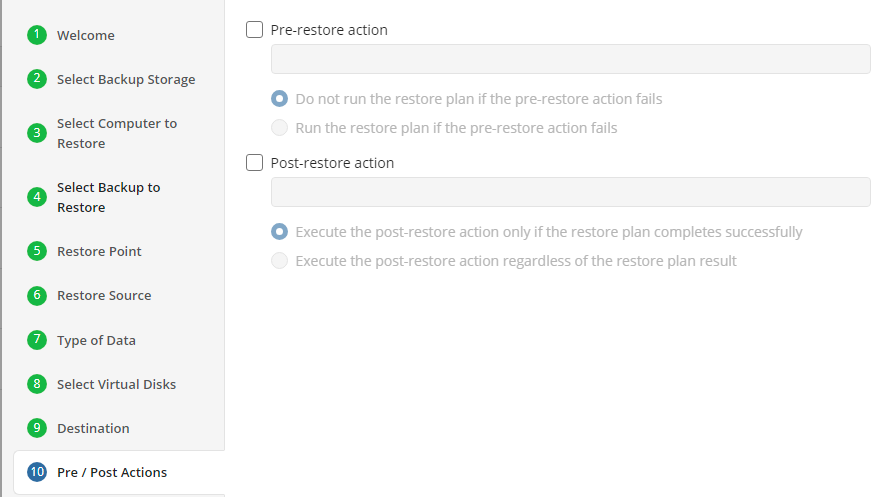
- To specify the action that must be performed before the restore plan starts, select the Pre-restore action checkbox
- Specify the path to the script before the restore plan
- Specify the conditions for pre-action execution:
- Select the Do not run the restore plan if the pre-restore action fails option to suspend the restore plan execution in case the pre-action fails
- Select the Run the restore plan if the pre-restore action fails option if you want the restore plan to run regardless of the pre-action execution result
- To specify the action that will be performed after the restore plan completes, select the Post-restore action checkbox
- Select the Execute the post-restore action only if the restore plan completes successfully option if you want to run it only if the backup was executed without any errors or warnings.
- Select the Execute post-restore action regardless of the restore plan result option if you want the post-action to be executed regardless of the restore plan result
Notifications
Specify notification settings for restore plan results. You can use the company notification settings or customize them as needed: specify the required recipients and customize the notifications for different restore plan results:
- Success
- Failed
- Warning
!
Select the I want to receive a notification email to enable notifications.
- Select When the restore plan fails or finished with warnings option if you want to receive the notification message in case the restore plan terminates with errors or warnings
- Select the In all cases option if you want the notification to be delivered in all cases
If you want the restore plan results to be added to Windows Event Log, select the Add entry to Windows Event Log checkbox
- Select When the restore plan fails or finished with warnings option if you want to receive the notification message in case the restore plan terminates with errors or warnings
- Select the In all cases option if you want the entry to be put in Windows Event Log in any case.
Click the Next, then click Save to finish the wizard.
Hyper-V Restore as Virtual Disk in Backup Agent
Managed Backup supports restore of Hyper-V machine as a virtual disk.
- Hyper-V server on Windows Server 2012 or higher
Step 1
After launching the Backup Agent, you can run the Restore Wizard by clicking on Restore on the Home tab if the horizontal menu.
Step 2
Click on “Next” to advance past the welcome screen for the wizard
Step 3
The next step will prompt you to select the source for the restore.
If the desired source is not in the list, you can click “Add new Storage Account” to add it.
- The backup storage is the one that contains the backup data
- The required backup prefix is set for storage account
If necessary, switch the backup prefix.
Step 4
Once the source has been selected, the next screen allows you to choose between running the plan a single time or saving it for later use.
Run restore once will execute the restore immediately upon completing the wizard. There is no option to schedule this type of restore
Save restore plan will allow you to schedule the plan to run at a later time and also schedule repeating restorations if needed
Step 5
With the type of restore selected, the next step is to select the correct Host server which the VM resides on.
Step 6
Next, you will be presented with a list of available backup types for the selected host. Select the Restore Hyper-V Virtual Machine option to continue.
Step 7
With the correct type of restore selected, the application will generate a list of available backup plans to restore from.
Step 8
Next you will be given a choice for what point in time you would like to restore the VM to.
- Latest Version: Automatically restores the newest version of each file in the source regardless of which restore point it belongs to.
- Select the Restore Point: Restores the files as they existed at the specified restore point.
If there is no exact match for the point in time selected, the application will automatically select the closest previous restore point
Step 9
Next, you will be able to expand the list of VM backups on the selected host and choose which to restore.
Step 10
After selecting the files or folders to restore, you are able to select the restore method. In this example we perform restore as a virtual disk.
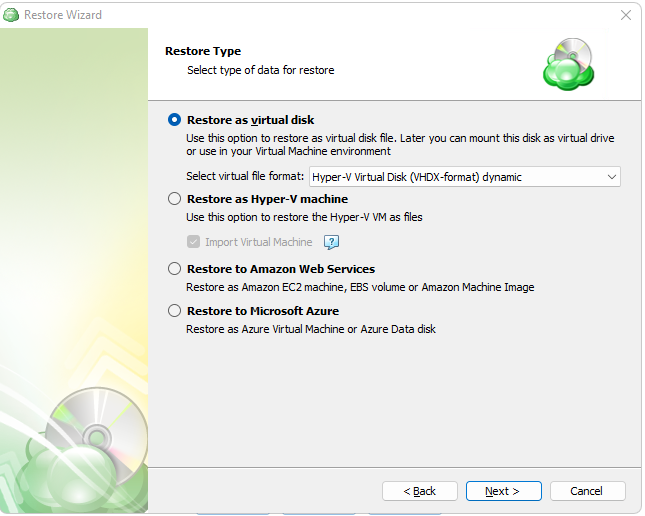
- Restore as virtual disk: Restores the virtual disks in the backup as a file which can later be mounted to a VM. No configuration files are included. Several formats are available:
- Restore as Hyper-V machine: Selecting this option restores the virtual machine configuration as well as the virtual disks as files, but does not import the VM into the hypervisor by default.
- Import Virtual Machine: Use this option to have the VM automatically imported to the hypervisor.
- Restore to Amazon Web Services: If enabled, this will restore the selected VM directly to AWS Cloud either as an EC2 instance, EBS volume, or AMI.
- Restore to Microsoft Azure: This will restore the VM directly to Azure as either an Azure Virtual Machine or Azure Data disk.
Step 11
Next you will need to determine which available checkpoint to restore for the virtual disk..
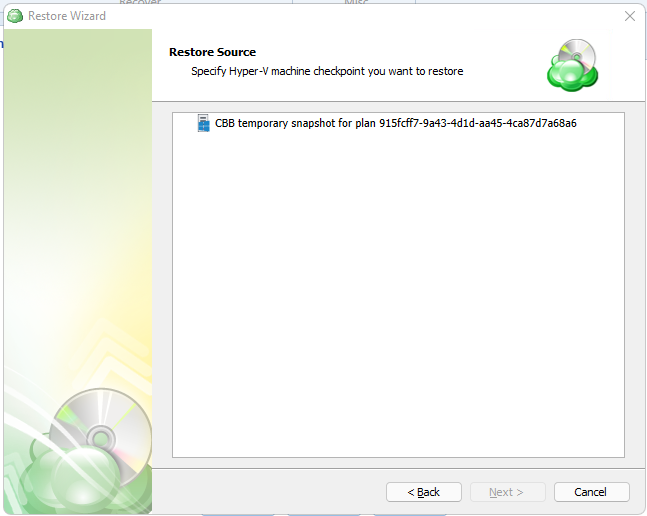
Step 12
The next step is to choose a destination for the restored virtual disk.
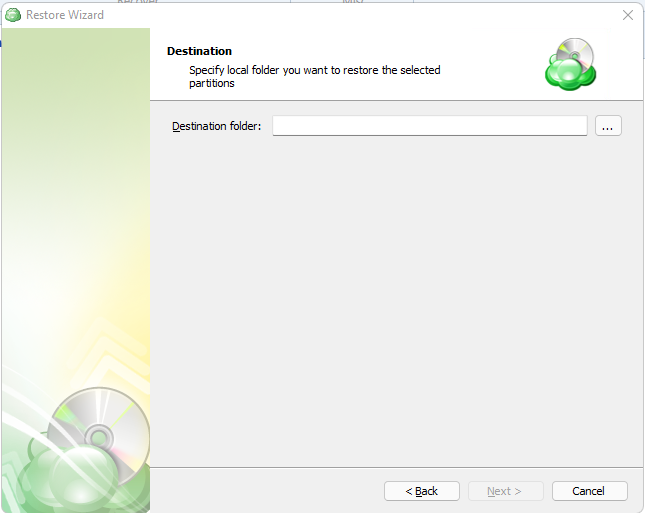
Step 13
After selecting the destination and any associated options, you will be prompted to provide the password to decrypt the VM backup data, if encrypted
Step 14
(Optional) If you restore data from the S3 Glacier Flexible Retrieval or Glacier Deep Archive storage classes, specify Smart Restore options.
Step 15
If Save restore plan was selected at the start of the wizard then the next step is to set the schedule for the restore plan. Otherwise this step will be omitted.
- No schedule (run manually): Use this option only when you wish to execute the Restore manually.
- Specific date: Use this to schedule a one-time Restore at the specified date and time.
- Recurring: Using this option enables you to schedule recurring Restorations based on the criteria in the fields below.
- Synchronize repository before run: Enable this option to ensure the file tree reflects the latest modifications made to your storage. It is a good practice to use it when you restore to a different computer
Do not use the Stop the plan if it runs for: option if you have a slow or unstable internet connection
Enabling the Run missed scheduled restore immediately when computer starts up option will ensure that the restore plan will begin automatically after the computer starts up if it was unable to run at the scheduled time. This is only recommended for desktops and laptops. For servers, it is recommended that you run the restore plan manually when all maintenance works are completed to avoid adversely affecting server performance and internet bandwidth during working hours
Step 16
The next step is to set any custom scripts which should execute before and/or after the restore plan runs.
Step 17
Specify the notifications options, then click Next.
Step 18
The next step of the wizard displays a summary of the selections made throughout the process. Once you have reviewed your selections, click “Next”.
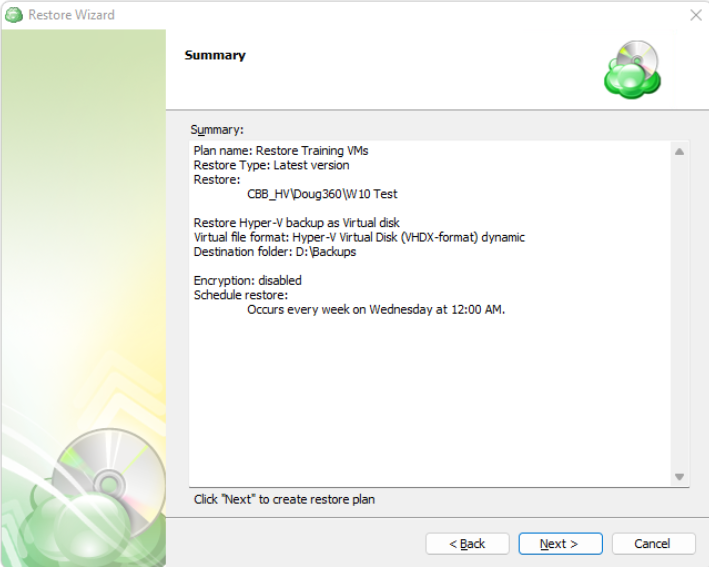
You can see the saved plan on the Restore Plans tab. If Run restore once was selected at the beginning of the wizard, the plan will immediately execute once you click Next.
MS SQL Backup Plans
MS SQL Server Backup in Backup Agent
Backup Agent for Windows enables you to perform backup of Microsoft SQL Server. The backup software uses native SQL Server backup procedures to perform database backup and then moves it directly to the cloud. User doesn't need MS SQL Server administration skills to perform a successful backup every time it's required.
It is recommended to create only one backup plan for every MS SQL Server database to avoid one plan interfering with another. In case you need to back up the SQL Server data to several locations try to select a hybrid backup on welcome screen of the backup wizard.
For minimum permissions required for MS SQL Server backup, refer to the following KB article.
1. Create Backup Plan
Within the Online Backup Agent, click on “MS SQL Server”

2. Select Backup Route
Specify the backup route. The following options are available:
- Local or Cloud Backup (default option). Select this option if you want to back up your data directly to a local or cloud storage.
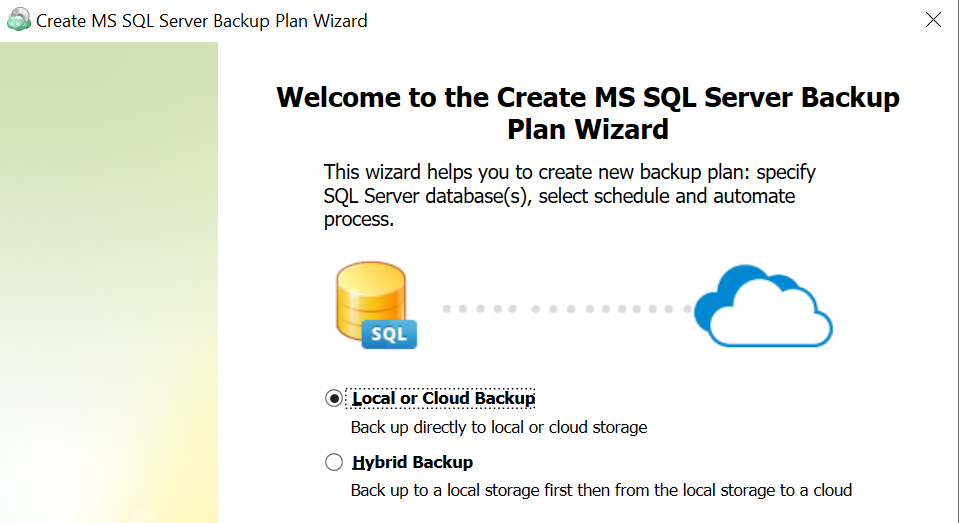
- Hybrid Backup. This option implies an intermediate local storage before backing up your data to a cloud storage. Select this option if you want to back up your data locally first.
With the Hybrid Backup option selected, the backup service first processes your data and moves it to a network-attached storage (NAS) or similar local storage, from where the already processed backup makes its way to a cloud storage.
This allows you to avoid repeated processing of your data when you need it to be compressed and/or encrypted in both target storages, because the backup service performs these operations only once, before the saving the backup to the local storage.
For this reason, when you only need to compress and/or encrypt your backup in a cloud, and not in a local storage, consider creating two separate one-way backup tasks instead of selecting the hybrid backup option.
Mind that you will not be able to convert your existing backup plan from Local/Cloud to a Hybrid mode. To create a Hybrid backup plan, you will need to do it separately using Backup Wizard.
Only common retention policy is available for both the local and cloud storage at the time.
3. Select Backup Storage
Select a storage account for the backup plan from the list of available backup storage accounts. If the desired destination is not in the list, you can click “Add new Storage Account” to add it.
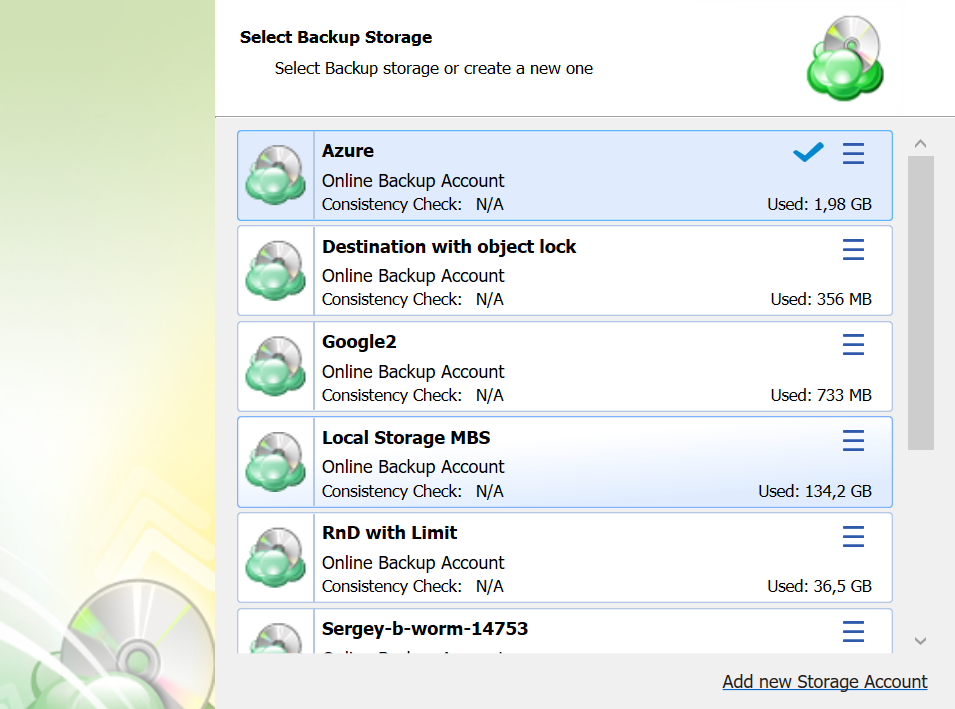
4. Plan Name
Specify the name for the backup plan.
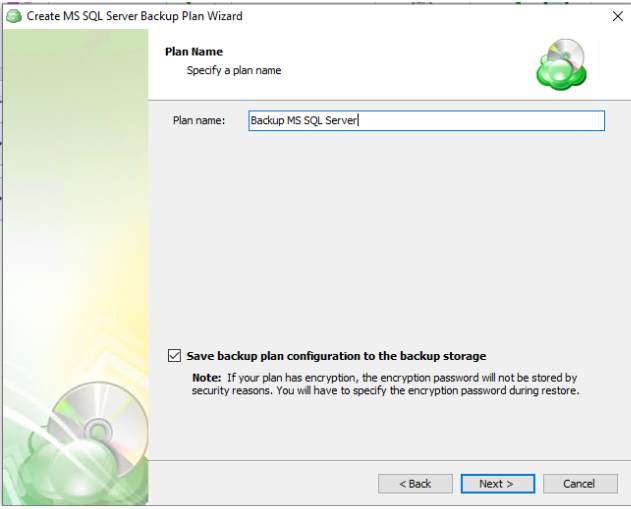
It is recommended to use a descriptive name which will distinguish the backup from others
The Save backup plan configuration to the backup storage option allows you easily restore the backup plan to another destination if necessary.
5. Advanced Options
Specify advanced options for the backup plan. Advanced option set depends on the selected backup storage.
Additional Advanced Options for Amazon S3
- If your backup storage destination is Amazon S3, select the S3 storage class for the backup plan:

- Standard
- Intelligent-Tiering
- Standard-IA
- One Zone-IA
- Glacier Instant Retrieval
- Glacier Flexible Retrieval (formerly S3 Glacier)
- Glacier Deep Archive
Usage of different storage classes for different backups is the subject of optimizing your storage costs.
- Select Use S3 Transfer Acceleration to accelerate file transfer for an extra fee. The target bucket must have this feature enabled. Select this checkbox if you want to use the data transfer acceleration service provided by Amazon. To learn more, refer to the Amazon S3 Transfer Acceleration.
Additional Advanced Options for Microsoft Azure
If your backup storage destination is Microsoft Azure, and you have the General Purpose v2 Azure account, select the required storage class (access tier).

The following options are available:
- Hot tier. An online tier optimized for storing data that is accessed or modified frequently. The hot tier has the highest storage costs, but the lowest access costs.
- Cool tier. An online tier optimized for storing data that is infrequently accessed or modified. Data in the cool tier should be stored for a minimum of 30 days. The cool tier has lower storage costs and higher access costs compared to the hot tier.
- Cold tier.An online tier optimized for storing data that is rarely accessed or modified, but still requires fast retrieval. Data in the cold tier should be stored for a minimum of 90 days. The cold tier has lower storage costs and higher access costs compared to the cool tier.
- Archive tier. An offline tier optimized for storing data that is rarely accessed, and that has flexible latency requirements, on the order of hours. Data in the archive tier should be stored for a minimum of 180 days.
Note that this feature is only supported for General Purpose v2 Azure accounts. If you are using another kind of account, you need to upgrade your account to be able to use this feature
Be aware of the additional charges and increased blob access rates after your Azure account upgrade
To learn more about the difference between Azure storage tiers, refer to the Azure Blob Storage - Hot, cool,cold, and archive storage tiers article at docs.microsoft.com.
6. Select MS SQL Server Instance
Select MS SQL Server instance and the authentication method. You can choose either SQL Server or Windows authentication. After selection of preferable authentication method you will be asked to enter your username and a password.
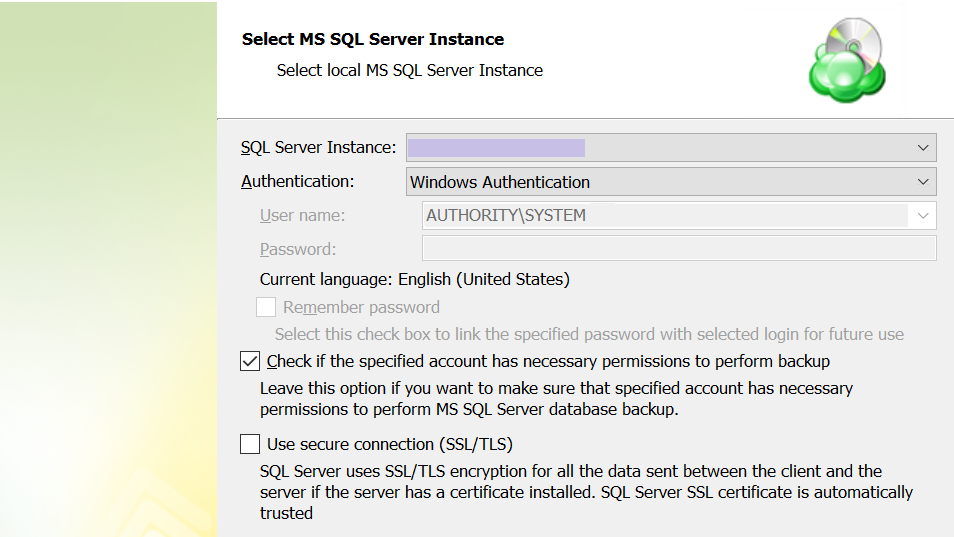
SQL Server Instance: Select the instance containing the database to be backed up from the list. Note that only local instances can be selected. Authentication Type: Choose between Windows or SQL Authentication. If “Windows Authentication” is selected, the application will run the backup as the local service account. User Name: If “SQL Server Authentication” was selected, enter the user name in this field. Password: If “SQL Server Authentication” was selected, enter the password for the specified SQL user here. Check if the specified account has necessary permissions to perform backup: The application will check for the appropriate permissions prior to attempting to backup the database. It is recommended to use this option to prevent unexpected backup failures. Use secure connection (SSL/TLS): Enabling this will allow the application to connect to the SQL instance using encryption, if configured on the database host.
To utilize the Windows Authentication option, the Online Backup service account (typically NT AUTHORITY/SYSTEM by default) must be assigned the “sysadmin” role within the MS SQL instance
Only local databases and instances can be backed up
7. Select Databases
Select databases within the instance which you would like to back up. Option list allows you to choose whether you need to backup all your databases, only user databases or to select a specific database manually.

- Back up all databases: backs up all databases on the selected instance. Includes all user and system databases.
- Back up all user databases only: Will only backup the user databases while excluding the system databases.
- Back up selected databases only: Allows you to choose which database(s) from the list below you wish to include in this backup plan.
- Copy-only: Creates a backup which is independent of the sequence of conventional SQL backups.
“Copy-only” backups cannot serve as a differential backup base or differential backup
8. Compression and Encryption Options
Compression
Managed Backup offers compression to reduce the storage space required for your backup and to speed up the upload process to the target storage. If you use MS SQL Server 2008 or higher, compression will be performed by SQL Server. If not, compression can be performed by the backup software.
Enabling compression will reduce the size of the backup, reduce the time to upload it, both of which may decrease the cost of the backup
Encryption
You can protect your backup by encrypting its contents. Managed Backup supports AES encryption with key sizes of 128, 192, and 256 bits. A larger key size provides stronger encryption but may increase the time required for processing your backup. For more details on AES encryption, refer to the Advanced Encryption Standard.
If you choose to save your backup plan configuration to the destination storage, be aware that the encryption password is not stored in the configuration file for security reasons. Ensure that you save this password securely, as it will be required to restore the backup's contents.
Encrypting the backup adds an additional layer of security to the data at the expense of increased processing resources during the backup process. Several types of encryption are available, with the most secure selected by default
If you change any encryption settings (algorithm or password) for an existing backup plan, a full backup will be executed the next time the backup plan runs.
Note that the encryption password will NOT be stored in the backup plan configuration for security reasons. Keep this password in a safe place to be able to restore the backup contents afterwards
9. Retention Policy
Specify the retention policy settings for the backup plan. To read more about retention, refer to the Retention Policy chapter.
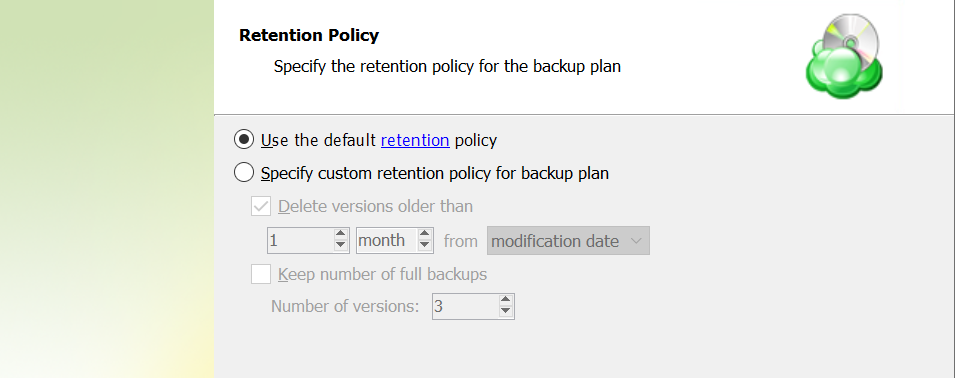
The following settings are available:
- Use the default retention policy. Select this option to use the predefined retention policy settings. To view and edit them, click the retention link in the option.
- Specify custom retention policy for backup plan. Select this option to use custom retention settings for this backup plan
- Delete versions older than. Select this checkbox to delete old file versions in cloud storage, then specify the period and the criteria of this action applying: whether the counting starts from a modification date of an object or the last backup date
- Keep number of full backups. Select this checkbox to specify the number of full backups that are kept in backup storage, then, in the Number of versions field, specify the value.
10. Schedule
Specify the schedule settings for the backup plan.
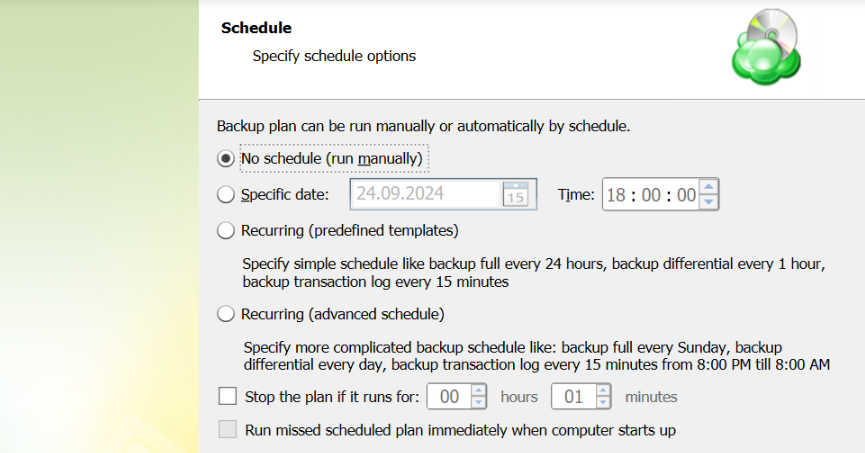
Then you will have to specify schedule options. You can run a backup plan manually or can setup the application to backup your files automatically. Program can be set on automatic backup at a certain time on a schedule or at user-specified intervals. User can choose whether to use predefined templates or configure advanced schedule.
If you have selected **Recurring (predefined templates), on the next step you will need to specify the start date and select simple schedule template.
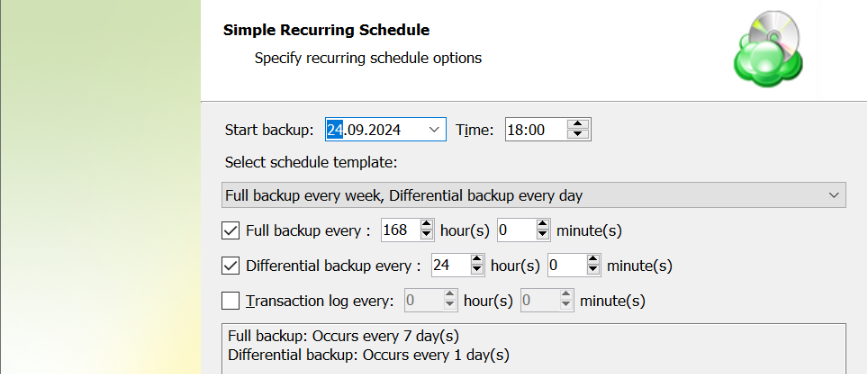
If you have selected **Recurring (advanced schedule), on the next step you will be asked to set options for full backup, differential backup and transaction log backup. Here you can set date, time and frequency for each backup type. Also on this step yo will have to define the start date to run your first backup.
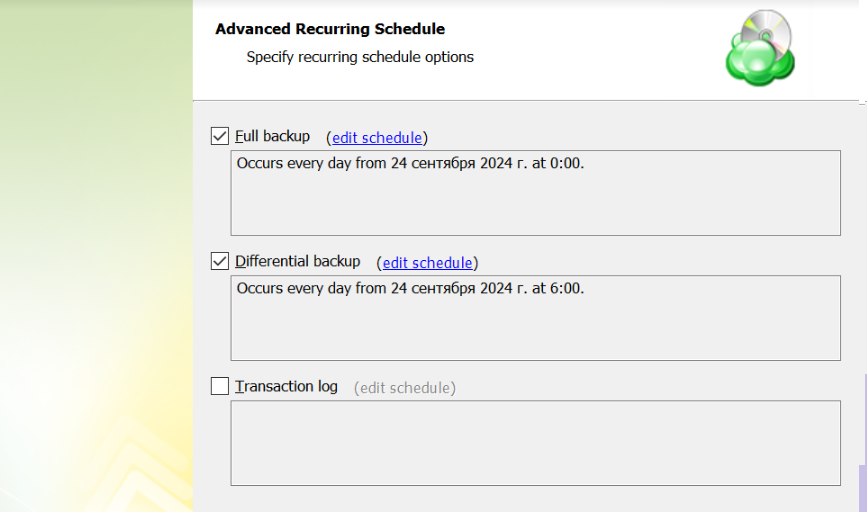
Recurring (advanced schedule) is the recommended selection for most backup plans
Enabling the Run missed scheduled backup immediately when computer starts up option will ensure that the backup process begins automatically upon startup if the last backup was not able to start at the scheduled time for any reason. This option is recommended for Desktops and Laptops
Do not use the Stop the plan if it runs for: option if you have a slow or unstable internet connection
11. Pre / Post Actions
Pre- or post- actions for Backup Agents can be restricted by the provider. To learn more about the pre-/post action settings, refer to the Global Agent Options and Companies chapters
Specify actions to be executed before and/or after the backup plan run.
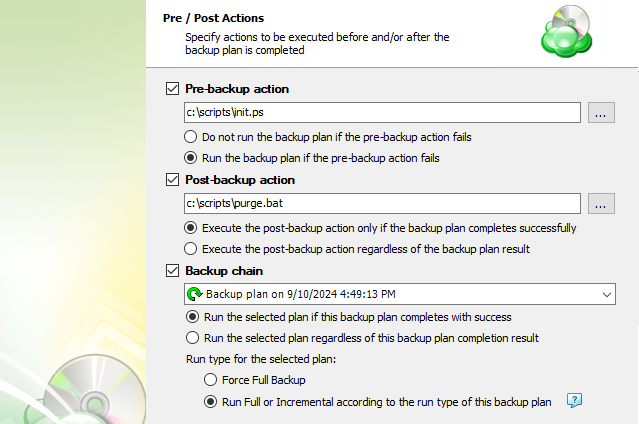
- To specify the action that will be performed before the backup plan starts, select Pre-backup action checkbox, then, in the field below, specify the path to the script to be executed before the backup plan run
- Specify the conditions of the script's execution:
- Do not run the backup plan if pre-backup action fails option if you do not want the backup plan to run if the pre-backup script fails
- Select Run the backup plan if pre-backup action fails option if you want the backup plan to launched regardless of the pre-backup script execution result
- To specify the action that will be performed after the backup plan is completed, select Post-backup action checkbox, then, in the field below, specify the path to the script to be executed after the backup plan terminates
- Select Execute post-backup action if backup plan completes successfully option if you want to run it only if the backup plan is successfully completed
- Select Execute post-backup action regardless of the backup result option if you want the script to execute regardless of the backup plan execution results
- To chain the backup plan with another plan, select Backup chain checkbox, then select the plan name in the drop-down menu
- Select Run the selected plan if this backup plan completes with success option if you want to run the specified plan only if the backup plan has been successfully completed
- Select Run the selected plan regardless of the backup plan completion result option if you want to run the chained backup plan regardless of the current backup plan execution results.
- In case you chained a backup plan, you can enable the full backup for it regardless of the contents in the backup storage. To do this, select the Force full backup for the chained plan. By default, full or incremental backups will be started according to the schedule of this backup plan.
12 Notifications and Logging
You can receive email notifications informing you about the backup process results, and maintain logging.
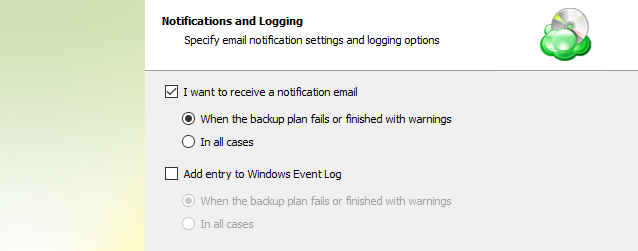
You can receive email notifications after each run of the backup plan or only in case it fails for some reason.
In addition, you can register the activity related to the backup routine in the Windows Event Log. You can choose whether to log all activity, or add new entries to the log only when a backup routine fails.
13. Summary
Review the configuration of the backup plan.
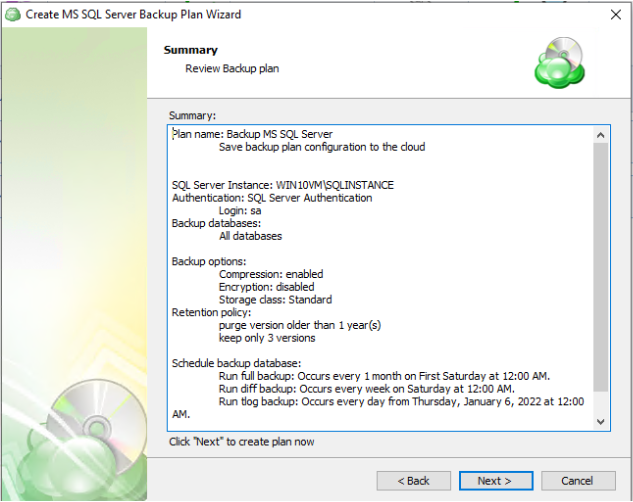
Click Next to proceed to the last wizard page.
Select the Run backup now checkbox to execute the backup plan immediately.
If you want to run the backup plan later, click Finish.
MS SQL Server Backup in Management Console
Consider that Managed Backup does not detect file changes based on content. Instead, it detects file changes by checking the modification date and uses this to determine whether a new copy of the file needs to be backed up.
Required license type: MS SQL Server, MS SQL Server + MS Exchange, Ultimate.
For minimum permissions required for MS SQL Server backup, refer to the following KB article.
Create MS SQL Backup Plan
To create a new MS SQL backup plan, proceed as follows:
- Open the Management Console.
- Open Backup > Computers
- Find the required computer, then click the on its name or on the Configure icon in the Backup Plan Status colimn to access the side panel.

- In the side panel, make sure you are within the “Backup Plans” tab. Click on the “Add New Plan” button and select “MS SQL backup plan” from the drop-down menu.
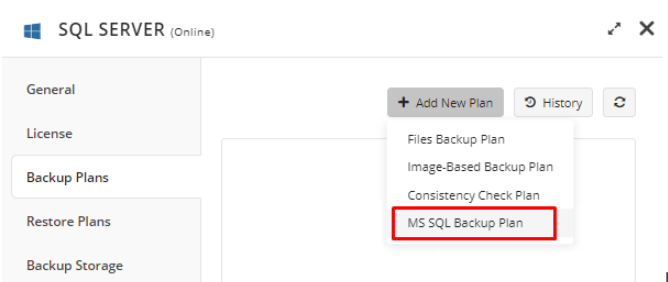
Welcome
Specify the plan name.
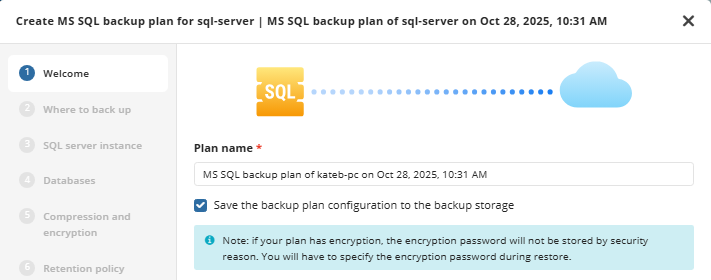
It is recommended to use a descriptive name which will distinguish the backup from others
The Save backup plan configuration to the backup storage checkbox allows you easily restore the backup plan to another destination if necessary.
If you use encryption in the backup plan, mind that for security reasons the encryption password should be kept in a safe place
Where to Back Up
The next step is to select where you would like the backup to be stored and choose what backup you are planning to use, local, cloud or hybrid. If you choose to create a Hybrid backup the wizard will prompt you to select a second location.
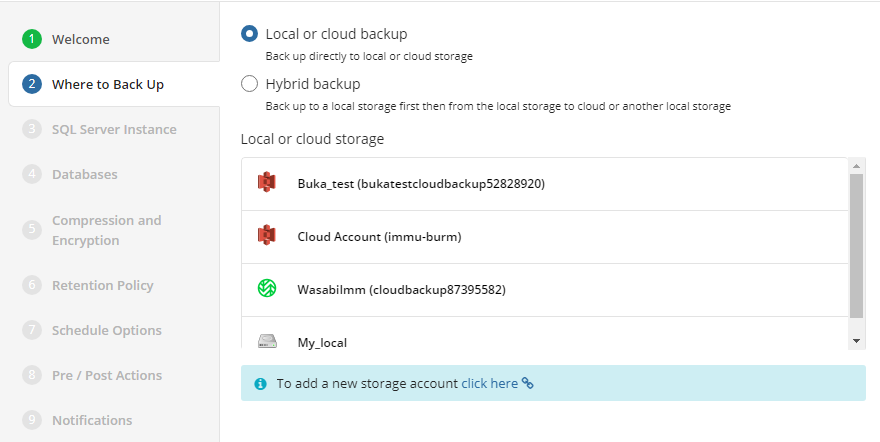
Select SQL Server Instance
Select the SQL server instance to back up:
- In the SQL Server Instance drop-down list, select the instance for the backup plan.
- In the Authentication Type drop-down list, select the authentication method:
- Select the Windows authentication item, if you want to use the Windows principal token.
- Select SQL Server Authentication item, if you want to use proprietary SQL Server authentication. In case you use SQL Server authentication, specify the username and password.
- Select the Check if the specified account has necessary permissions to perform backup checkbox if you want to make sure the specified credentials are granted with sufficient permissions to perform SQL Server database backup. Once you click Next, the credentials will be checked if this account is granted enough permissions.
- To connect to SQL Server instance using SSL, select the Use secure connection (SSL/TLS) checkbox.
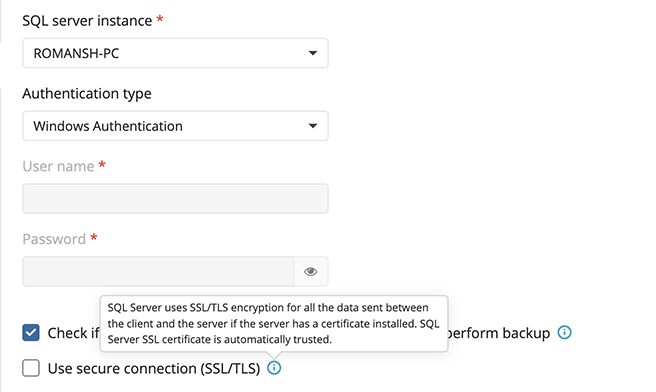
To utilize the Windows Authentication option, the Online Backup service account (typically NT AUTHORITY/SYSTEM by default) must be assigned the “sysadmin” role within the MS SQL instance
Only local databases and instances can be backed up
Databases
Select the databases within the instance which you would like to back up.
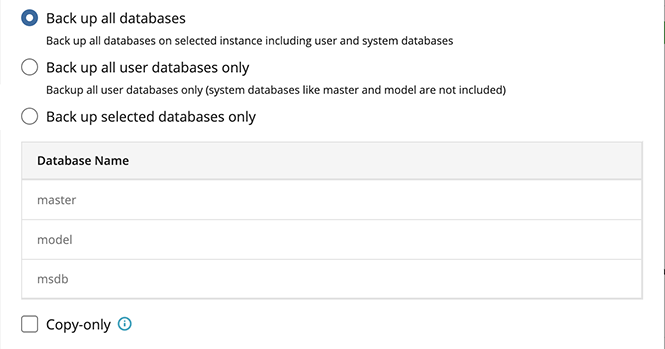
The following options are available:
- Back up all databases. Select this option if you want to back up all databases on the selected instance, including system and user databases
- Back up all user databases only. Select this option to back up only user databases. In this case, system SQL Server databases (master, model, msdb) will not be included in the backup plan.
- Back up selected databases only. Select this option if you want to select databases for the backup plan manually, then select databases from the backup in the table below.
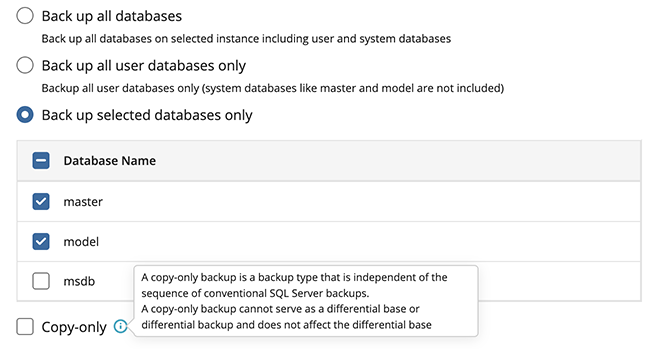
- Select copy-only backup if necessary. If copy-only backup is enabled, the differential backup becomes unavailable.
Compression and Encryption
Compression
Managed Backup offers compression to reduce the storage space required for your backup and to speed up the upload process to the target storage.
Encryption
You can protect your backup by encrypting its contents. Managed Backup supports AES encryption with key sizes of 128, 192, and 256 bits. A larger key size provides stronger encryption but may increase the time required for processing your backup. For more details on AES encryption, refer to the Advanced Encryption Standard.
To protect your backup contents with encryption, select the Enable encryption checkbox. Application supports AES encryption of 128, 192 and 256 bit key length. Select the appropriate key length in the Algorithm drop-down menu
- Specify the encryption password in the Password field, then confirm the password in the Confirm field. Mind to keep the encryption password in a safe place. Pay attention, if Password Recovery Service is not enabled in the Management Console, then if the encryption password is lost or forgotten, the encrypted backup cannot be restored. Password recovery Service requires the Two-factor Authentication (2FA) enabled.
- In the Hint field, specify some information that could help to recall the password in case you forget it.
If you change any encryption settings (algorithm or password) for an existing backup plan, a full backup will be executed the next time the backup plan runs.
Note that the encryption password will NOT be stored in the backup plan configuration for security reasons. Keep this password in a safe place to be able to restore the backup contents afterwards
Retention Policy
Specify the retention policy settings. The following settings are available:
If you want to use the default retention policy for the backup plan, select Use default retention options option
If you want to set the custom retention policy for the backup plan, select Specify custom retention policy for the backup plan option. You can configure a different retention policy for the local backup in case you use the hybrid backup route.
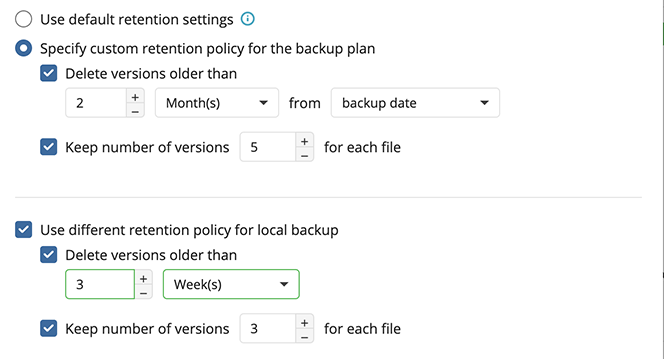
- Select the Delete versions older than checkbox if you want to keep the restricted number of database backup versions in backup storage. In the fields below, specify the criteria for the deletion of old database versions
- Keep number of versions for each file. Select this checkbox if you want to keep selected number of versions in backup storage. It is highly recommended to keep this checkbox selected for backup plans with sensitive data
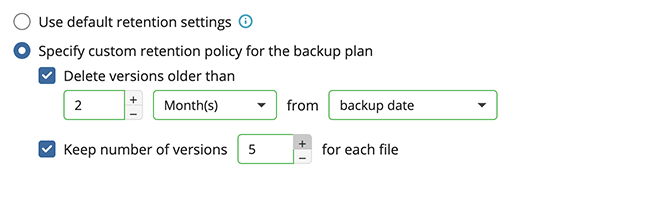
Advanced Options (optional)
The next step displays any advanced options available for the plan storage. Options presented here will depend on the storage destination selected.

Schedule Options
Specify the schedule options for the backup plan.
- If you plan to run the backup plan manually, select the No schedule option.
- If you want your backup plan to run on a particular date and time, select the Specific date option, then specify the date and time you want your backup plan to be run.
- If you intend to execute this backup plan on a constant periodic basis using the built-in templates, select the Recurring (predefined templates) option. Configure these settings on the next step.
- If you intend to execute this backup plan on a constant periodic basis, select the Recurring (advanced) option. Configure these settings on the next step
- To stop the backup plan in case it continues suspiciously long, select Stop the plan if it runs longer than checkbox, then specify the plan run duration.
- If you want to receive an alert in case the backup plan fails to run, select the Mark plan as overdue after checkbox, then specify the alert delay period.
- To run the backup plan after the computer is on in case the backup plan run has been missed, select the Run missed scheduled plan immediately when computer starts up checkbox.
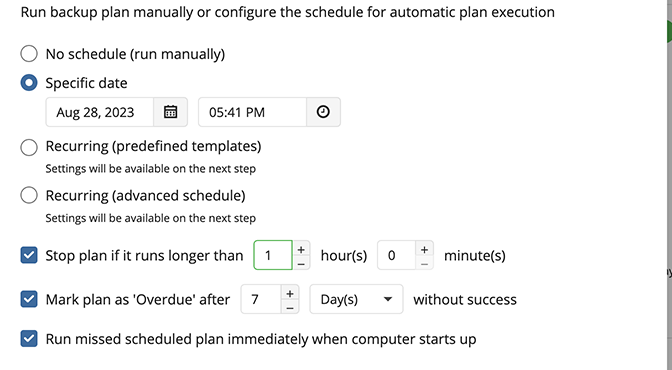
In case you selected one of the recurring schedule options, configure schedule settings.
In case you selected the schedule from the built-in templates, the following options are available:
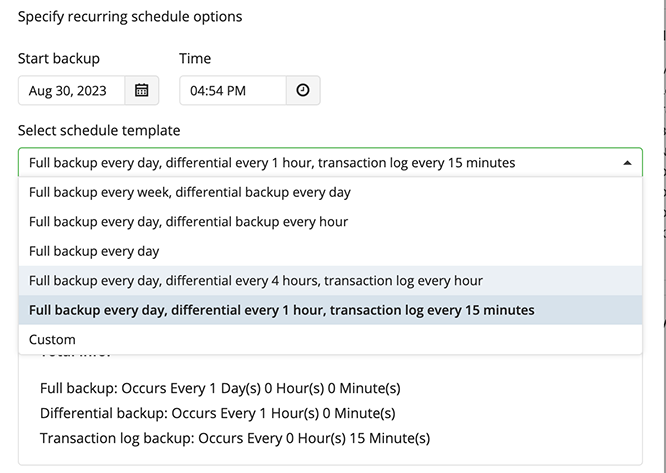
In case you selected the advanced recurring settings, the following options are available:
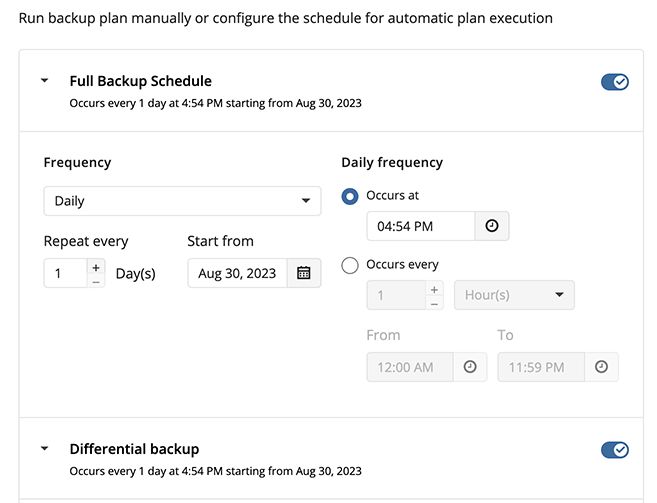
- Full backup: Clicking on this will open up the scheduling options for running a full backup. Full backups are required for the retention policy, Differential Backup, and restore operations to work.
- Differential backup: Clicking on this will open up the scheduling options for running a Differential Backup. A Differential Backup is similar to an incremental backup in that it only backs up new or changed data.
- Transaction log: Enable this to schedule transaction log backups of the selected databases.
Enable the type of backups you would like to run by clicking on the toggle. Each type will have similar scheduling options available.
The retention policy will only perform properly with regular scheduled full backups
Pre / Post Actions
Specify pre and post-actions for your backup plan. Usually, these are scripts that perform particular jobs before or after your data is backed up. The following settings are available:
- To specify the action that will be performed before the backup plan starts, select the Pre-backup action check box.
- Specify the path to the script to be run as a pre-backup action.
- Specify the conditions of pre-action run:
- Select the Do not run the backup plan if the pre-backup action fails option if you do not want the backup plan to be launched if the pre-backup action fails.
- Select the Run the backup plan if the pre-backup action fails option if you want the backup plan to launch regardless of the pre-backup action result.
- To specify the action that will be performed after the backup is completed, select the Post-backup action check box.
- Select the Execute the post-backup action only if the backup plan completes successfully option if you want to run it only if the backup was executed without any errors or warnings.
- Select the Execute the post-backup action regardless of the backup plan result option if you want the post-action to be launched regardless of the backup termination results.
- To chain the backup plan with another plan, select Backup chain check box, then select the backup or restore plan name in the drop-down menu.
- Select the Run the selected plan if this backup plan completes with success option if you want to run the specified plan only if the backup plan was executed without any errors or warnings.
- Select the Run the selected plan regardless of this backup plan completion result option if you want the chained backup plan to be launched regardless of the backup termination results. Select the mode for the current chained backup plan:
- Force full backup. Full backup will be forced for the chained backup plan.
- Use settings of the current backup plan. Chained backup plan will be run as full or incremental, according to this backup plan run.
Backup Chain
This option will be available in case the pre- and post actions are not allowed. Specify the backup chain options.
- To chain the backup plan with another plan, select the plan name in the drop-down menu.
- Select the Run the selected plan if this backup plan completes with success option if you want to run the specified plan only if the backup plan was executed without any errors or warnings.
- Select the Execute regardless of this backup plan completion result option if you want the chained backup plan to be launched regardless of the backup termination results.
Also you can force full backup or use the current plan settings for the chained plan.
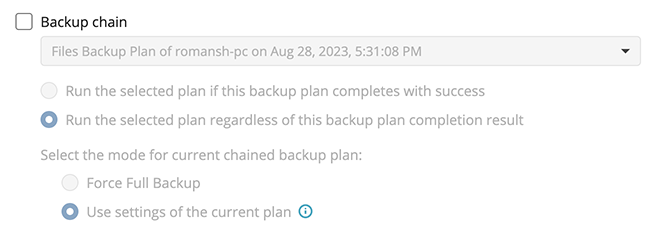
Notifications
Specify notification settings for backup plan results. You can use the company notification settings or customize them as needed. You can specify the required recipients and customize the notifications on different backup plan results:
- Success
- Warning
- Failed
You can configure a notification threshold for Managed Backup alerts, so that notifications are sent only after a specified number of consecutive plan failures
In case you select to customize notifications, select the recipients for different events.
- Select Send notifications to user account... if you want to notify the associated user about the backup process.
- Select If the backup plan fails or completes with warnings option if you want to receive the notification message in case of the backup plan failure
- Select In all cases option if you want the entry to be put in Windows Event Log in any case.
Click the Next, then click Save to finish the wizard.
MS SQL Restore Plans
Restore MS SQL Databases in Backup Agent
- Run your Backup Agent.
- Click Restore.
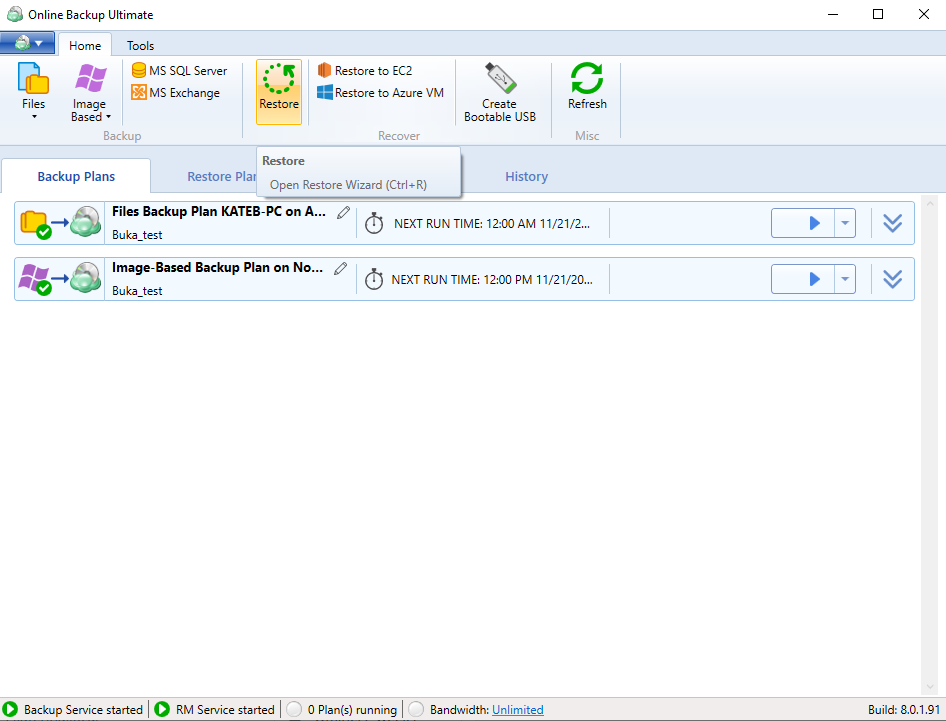
- Once the wizard starts, click on Next to advance to the next step.
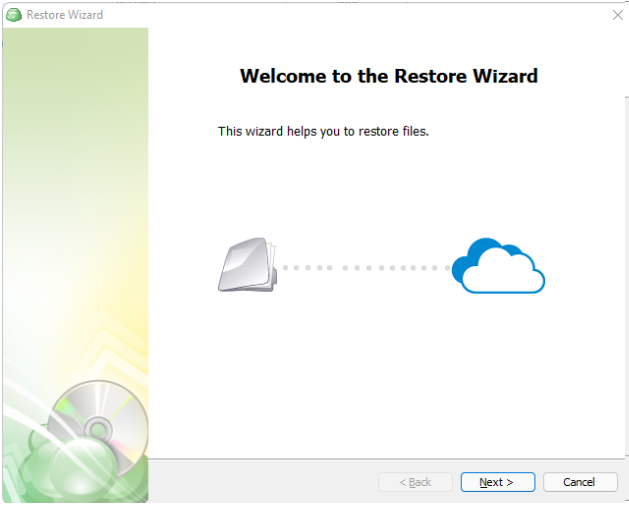
- Use the Restore Wizard to select a backup storage to restore from (restore source). If the desired destination is not in the list, you can click Add new storage account to add it.
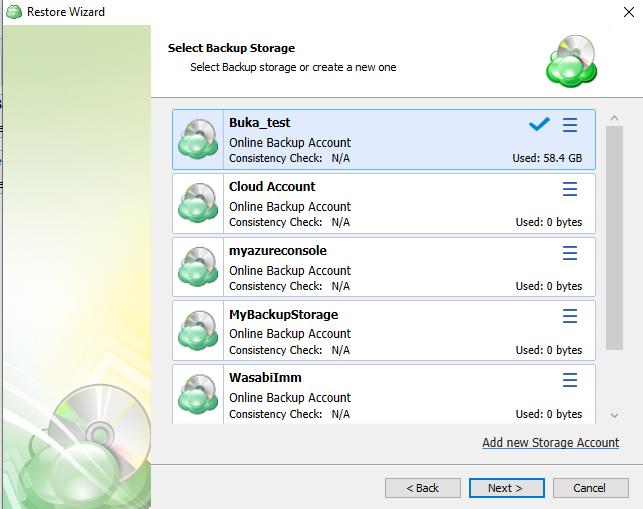
- On the Plan Name screen, select whether to run the restore just once or to save a created restore plan for further use. Click Next.
It is recommended to use a descriptive name which will distinguish the backup from others
- With the type of restore selected, the next step is to select the computer associated with the backup which you would like to restore.
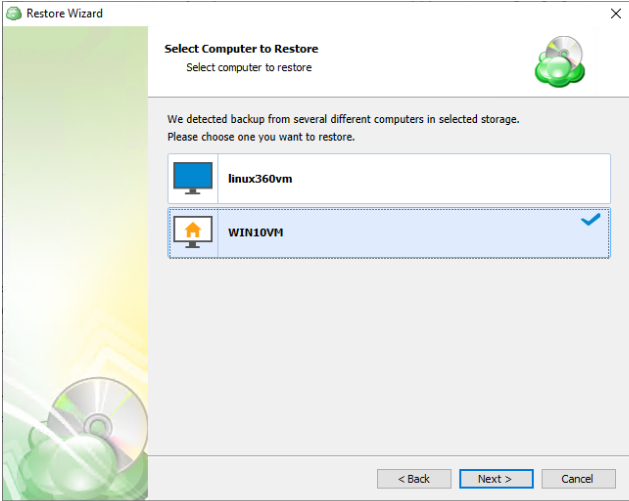
- Select the Restore MS SQL Server Database to restore MS SQL Server database to selected on the next steps an SQL Server instance.
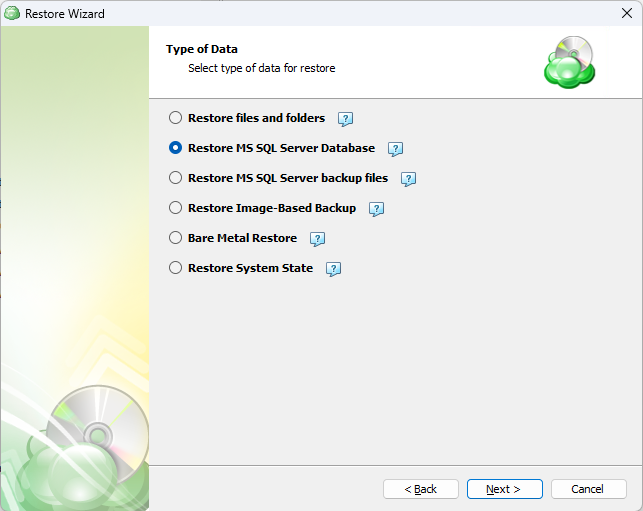
- Select one of the version options for the data to be restored:
- Latest version
- Point in time. If there is no exact match for the point in time selected, the application will automatically select the closest previous restore point.
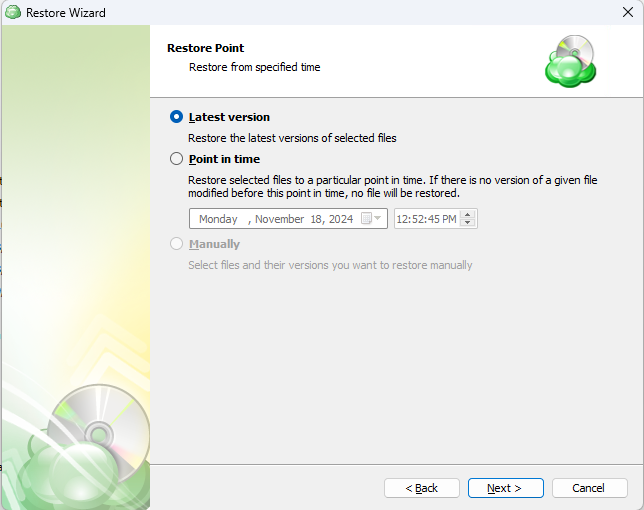
- Select the instance containing the database to be backed up from the list. Note that only local instances can be selected.
- SQL Server Instance: Select the instance containing the database to be backed up from the list. Note that only local instances can be selected.
- Authentication Type: Choose between Windows or SQL Authentication. If “Windows Authentication” is selected, the application will run the backup as the local service account.
- User Name: If “SQL Server Authentication” was selected, enter the user name in this field.
- Password: If “SQL Server Authentication” was selected, enter the password for the specified SQL user here.
- Check if the specified account has necessary permissions to perform backup: The application will check for the appropriate permissions prior to attempting to backup the database. It is recommended to use this option to prevent unexpected backup failures.
- Use secure connection (SSL/TLS): Enabling this will allow the application to connect to the SQL instance using encryption, if configured on the database host.
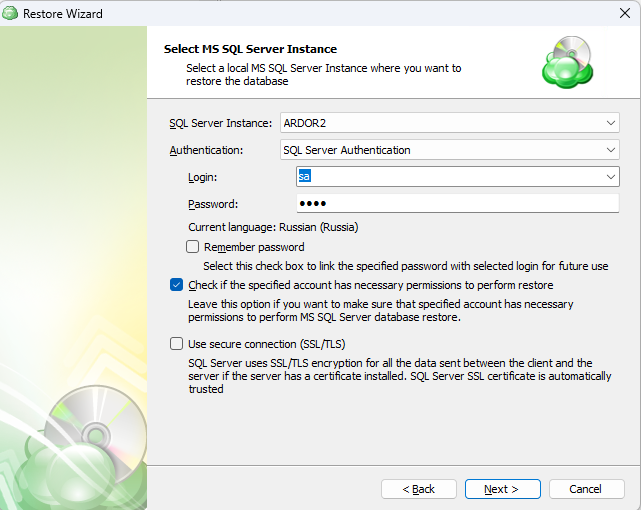
- Select the databases to be restored. After selecting the database(s) to be restored, you will be given options to overwrite an existing database or restore the database with a new name. Click Next.
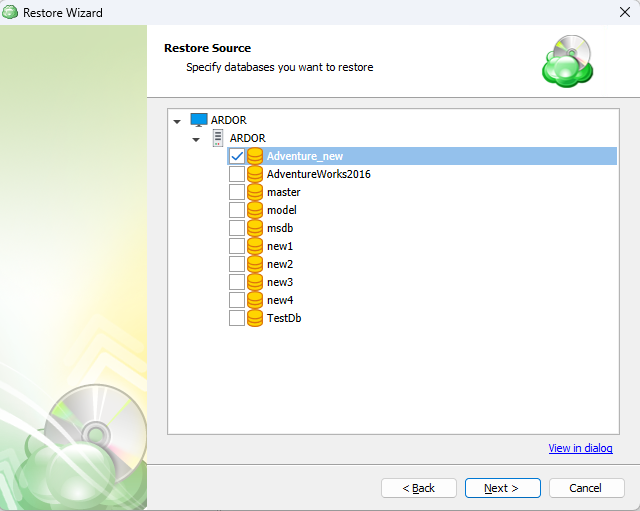
- Select one of the following actions:
- You can change the original database name to restore it under another name,
- You can overwrite the existing database using the Overwrite the existing database option.
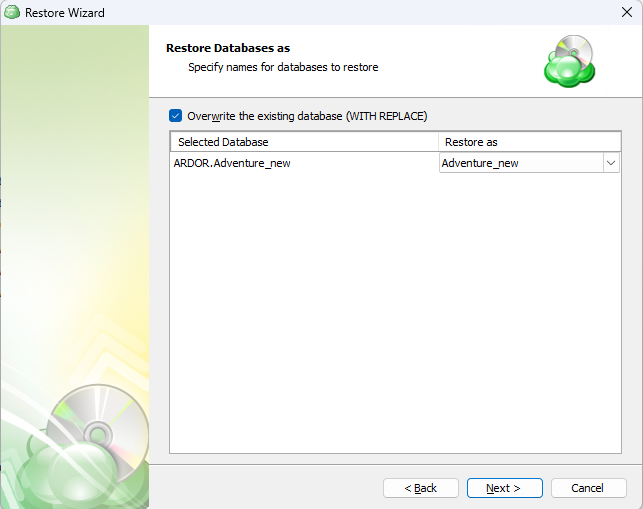
- Select data file folder and Log file folder. Specify a file name template.
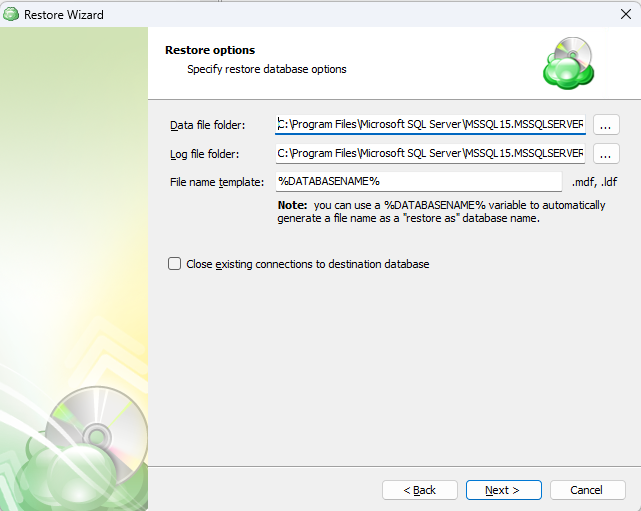
- For the data encrypted on the client side, select the "Decrypt encrypted files with the following password" option. Enter your password and re-enter in to confirm, then click Next.
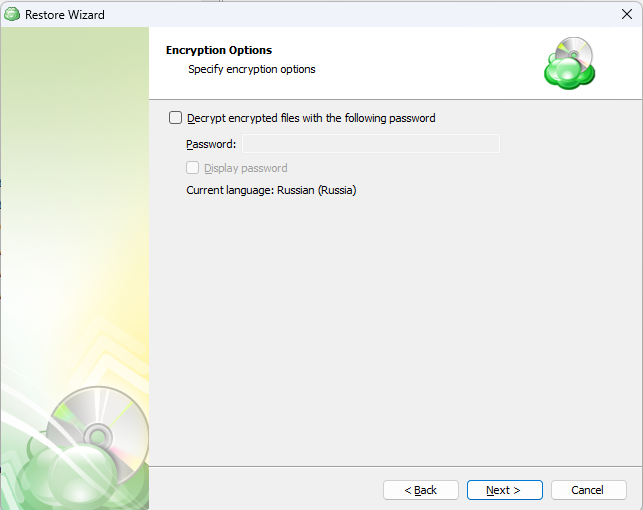
(Optional) If you restore data from the S3 Glacier Flexible Retrieval or Glacier Deep Archive storage classes, specify Smart Restore options.
If you selected to save a created restore plan for further use, select schedule options, then click Next.
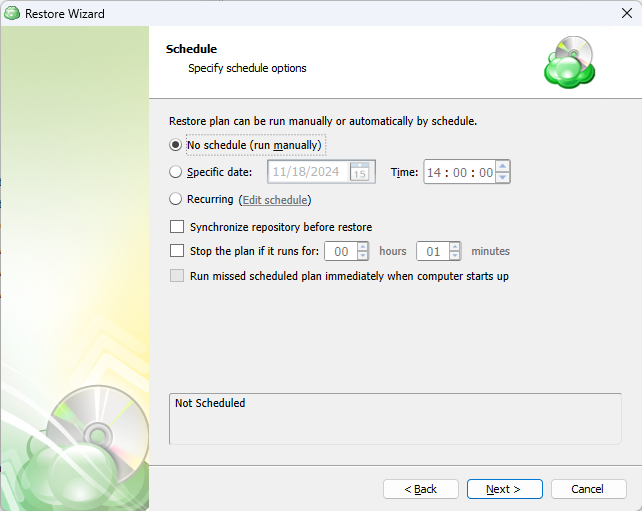
- (Optional) Specify pre-restore and post-restore actions
- Specify the notifications options, then click Next.
- Review the summary. After you are sure that the selected options suit you, click Next to create the restore plan.

Restore MS SQL Databases in Management Console
Step 1
In the Management Console, open Backup > Computers page.
Step 2
Find the computer hosting the MS SQL instance to which you want to restore a previously backed up database or databases, then click the computer name or the Configure icon in the Backup Plan Status column.
Step 3
In the side panel, navigate to the Restore plans tab. Click on the +Add New Plan button and select MS SQL database restore plan from the drop-down menu.

Step 4
The first step when creating a new MS SQL database restore plan is to decide whether to run it a single time immediately after plan creation, or give it a name and save it for later.
- Select the Run restore once option to restore a backup only once
- Select the Save Restore Plan option to save the plan configuration for future use. Specify the name of the plan
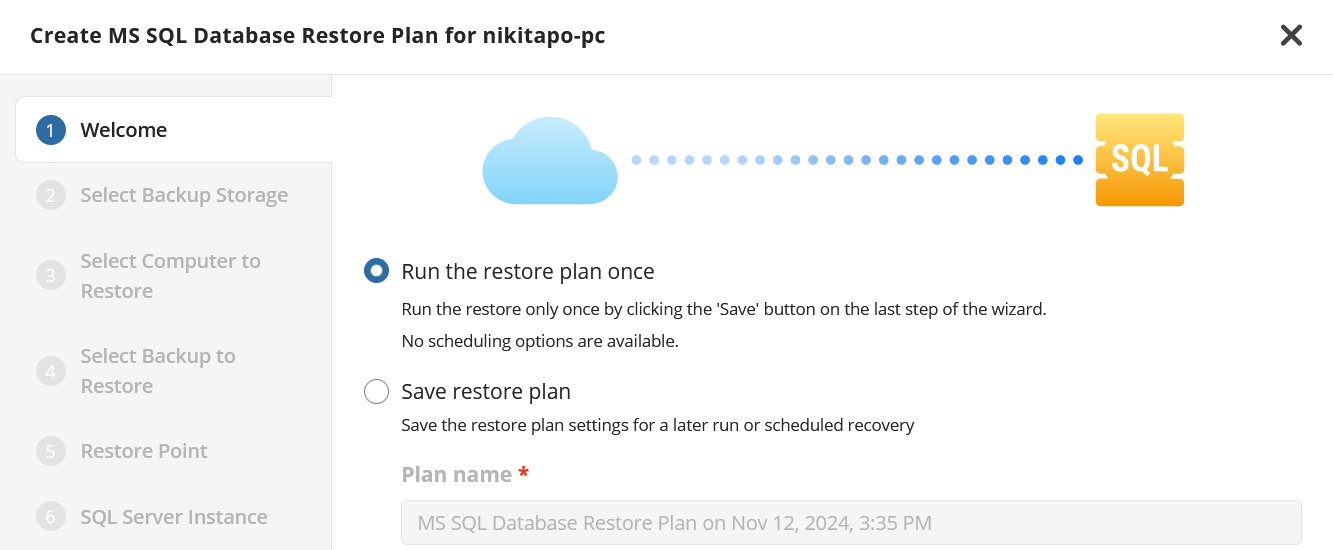
It is recommended to use a descriptive name which will distinguish the plan from others
Step 5
Next, select the storage which contains the desired data.
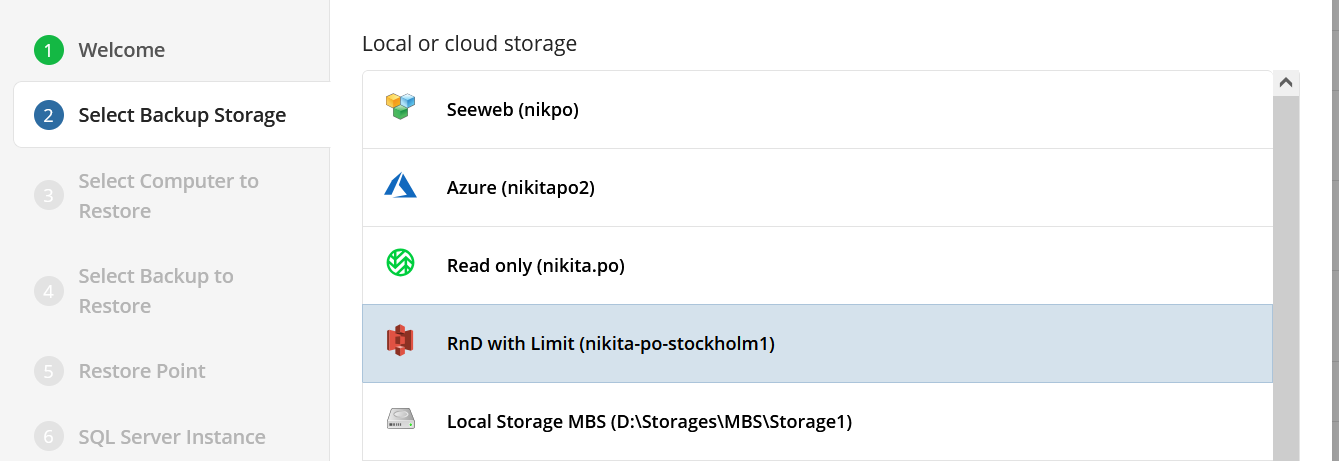
Step 6 (optional)
With the backup storage selected, the next step is to select the computer associated with the backup which you would like to restore.

Step 7
Next, you will be presented with a list of available backup types for the selected host. Select the “SQL Server Instances” option to continue.
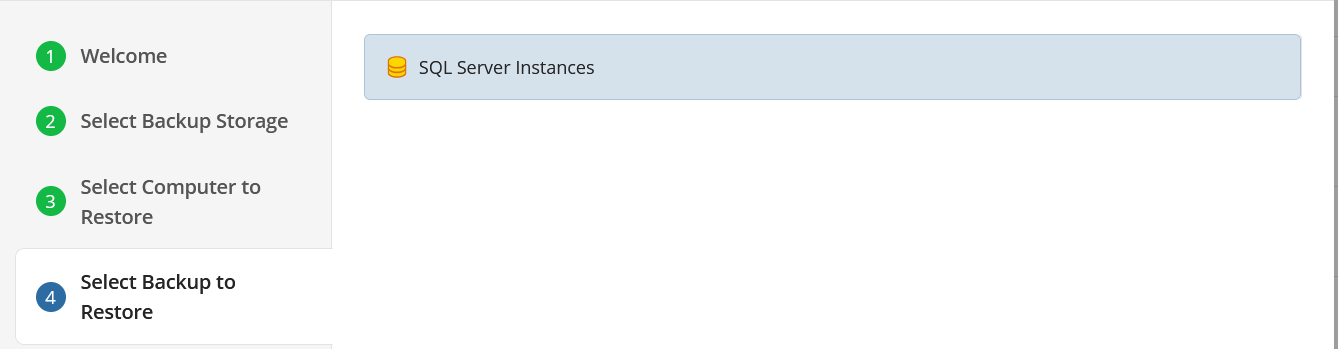
Step 8
The next step is to select the desired point in time to restore to. Select the latest version or the specific restore point from the list below.
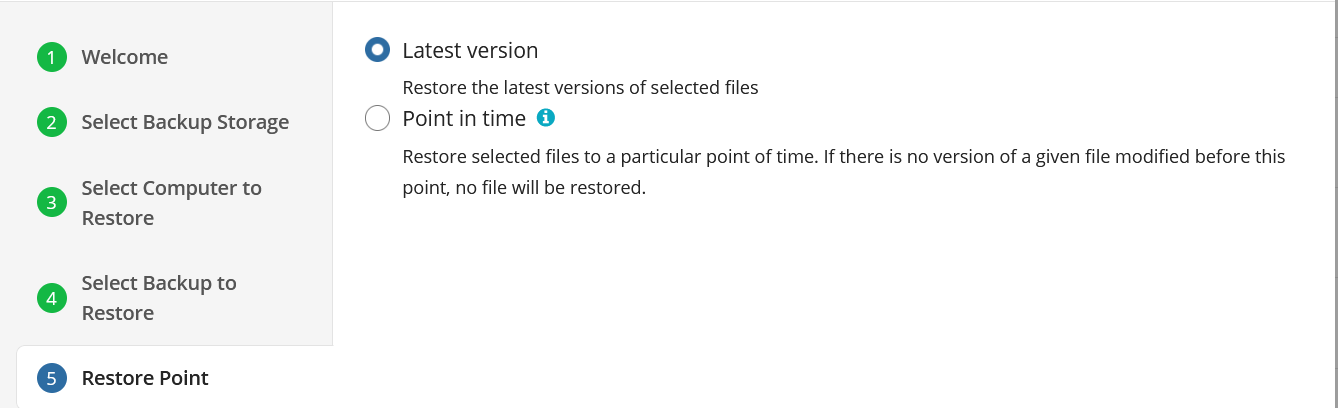
If there is no exact match for the point in time selected, the application will automatically select the closest previous restore point
Step 9
Next you will be prompted to select the SQL Server Instance as well as specify the credentials to be used by the application.
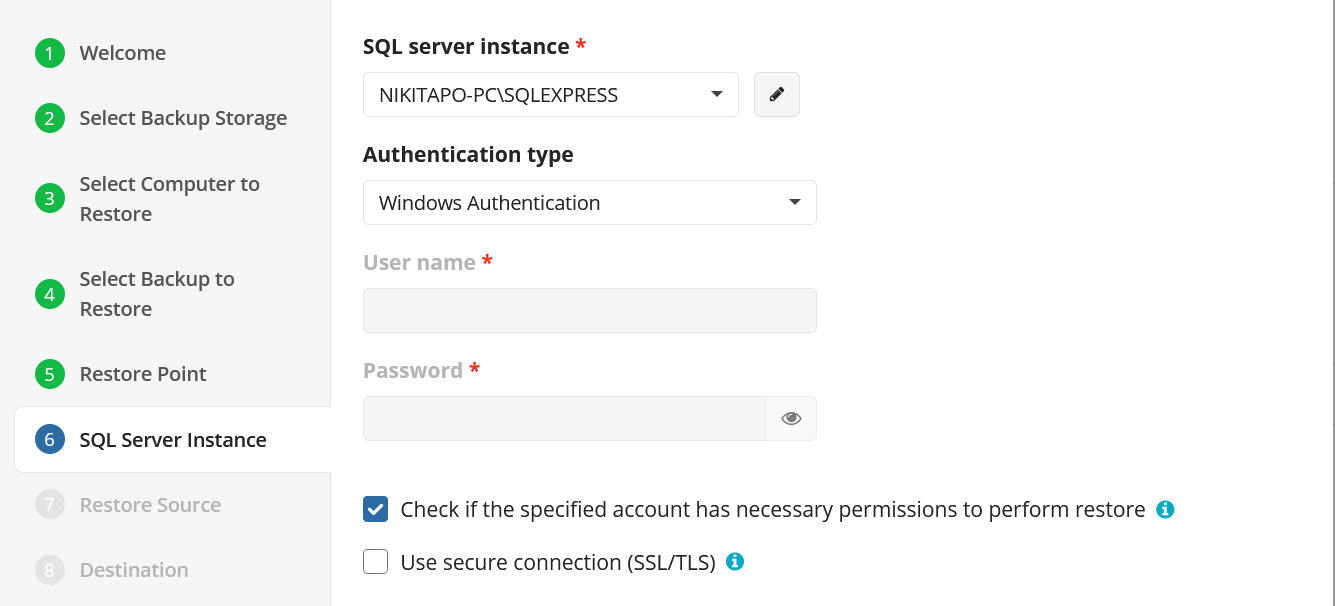
- SQL Server Instance: Select the instance containing the database to be backed up from the list. Note that only local instances can be selected.
- Authentication: Choose between Windows or SQL Authentication. If “Windows Authentication” is selected, the application will run the backup as the local service account.
- User Name: If “SQL Server Authentication” was selected, enter the user name in this field.
- Password: If “SQL Server Authentication” was selected, enter the password for the specified SQL user here.
Only local databases and instances can be restored to
Step 10
Next, select the source of the backup to be restored, then select which databases to restore from the list.
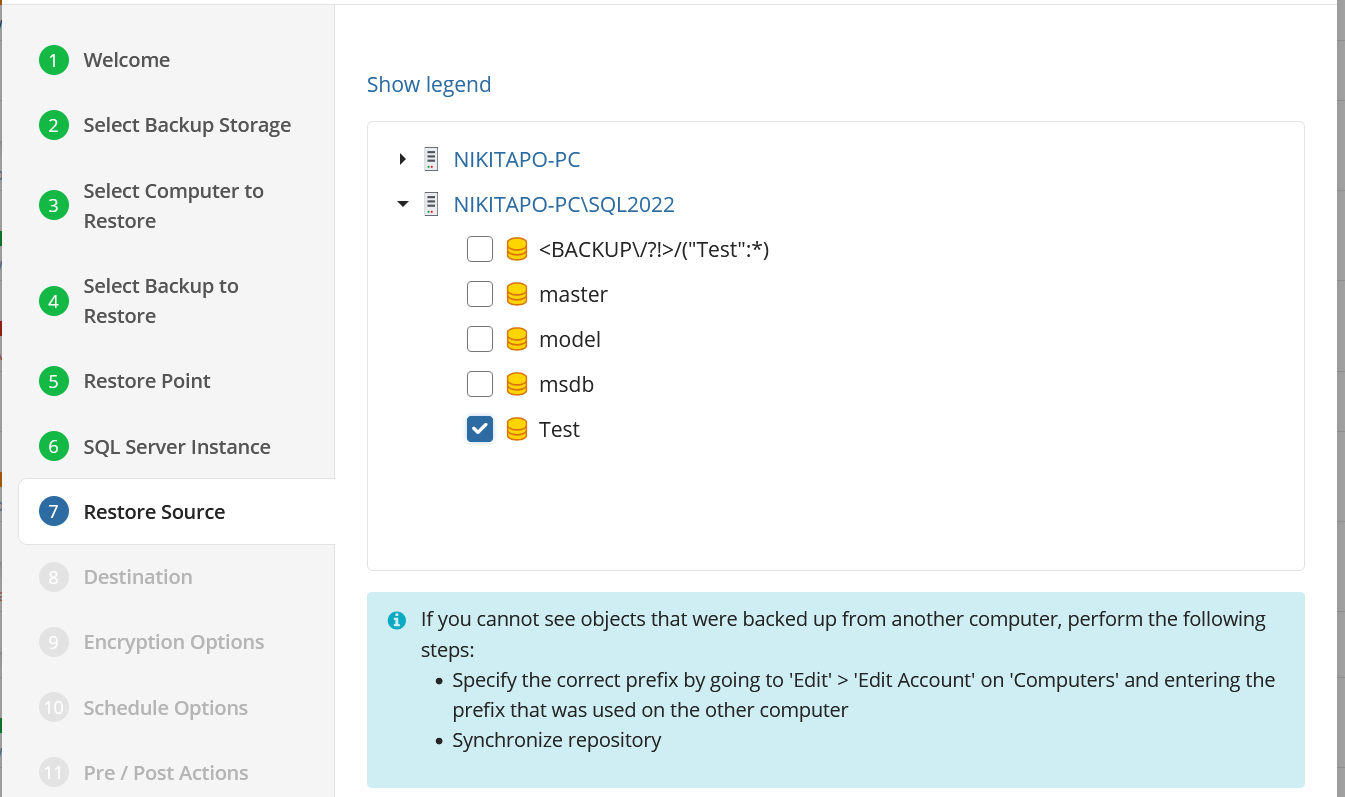
Step 11
The next step asks you to provide the paths the database files will be restored to, and you will be given options to overwrite an existing database or restore the database with a new name.
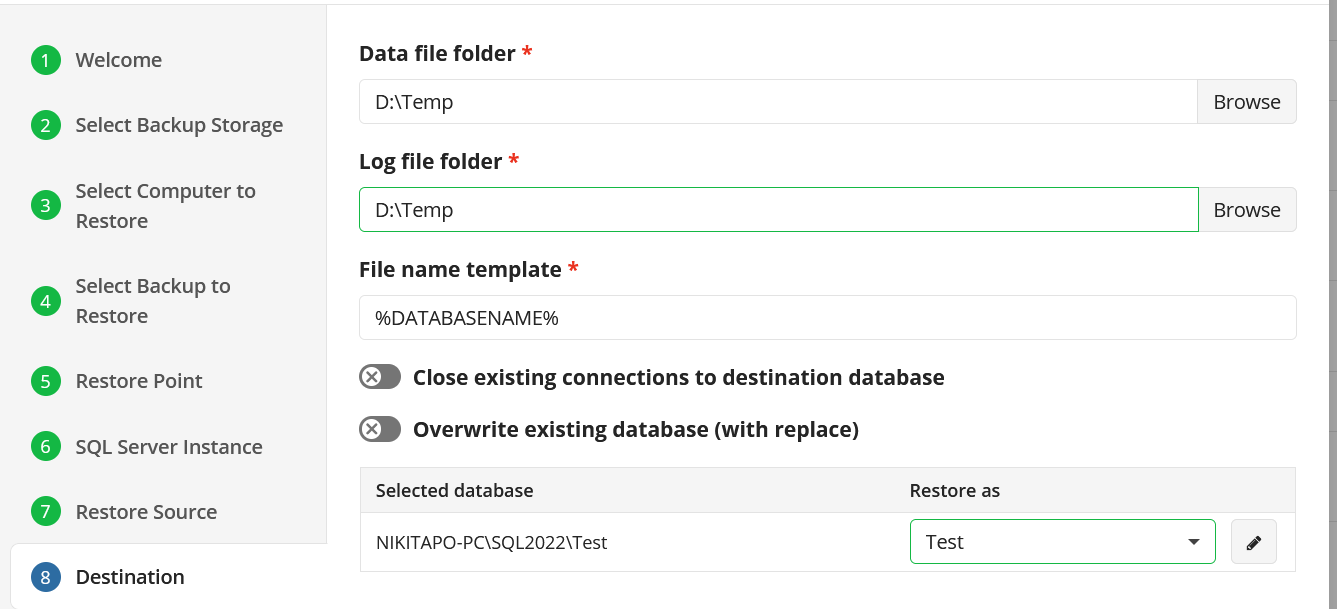
Select one of the following actions:
- You can close existing connections to destination database,
- You can overwrite the existing database using the Overwrite the existing database option.
When selecting the databases from the list they will restore with their existing name by default, but if you would like to restore it as a new or different name, type the new name into the “Restore As” field.
Step 12
If the backed up data was encrypted, the next step will be to enter the encryption password for decryption. If the password is incorrect or missing, the restore plan will fail and you will need to edit the plan to input the correct password.
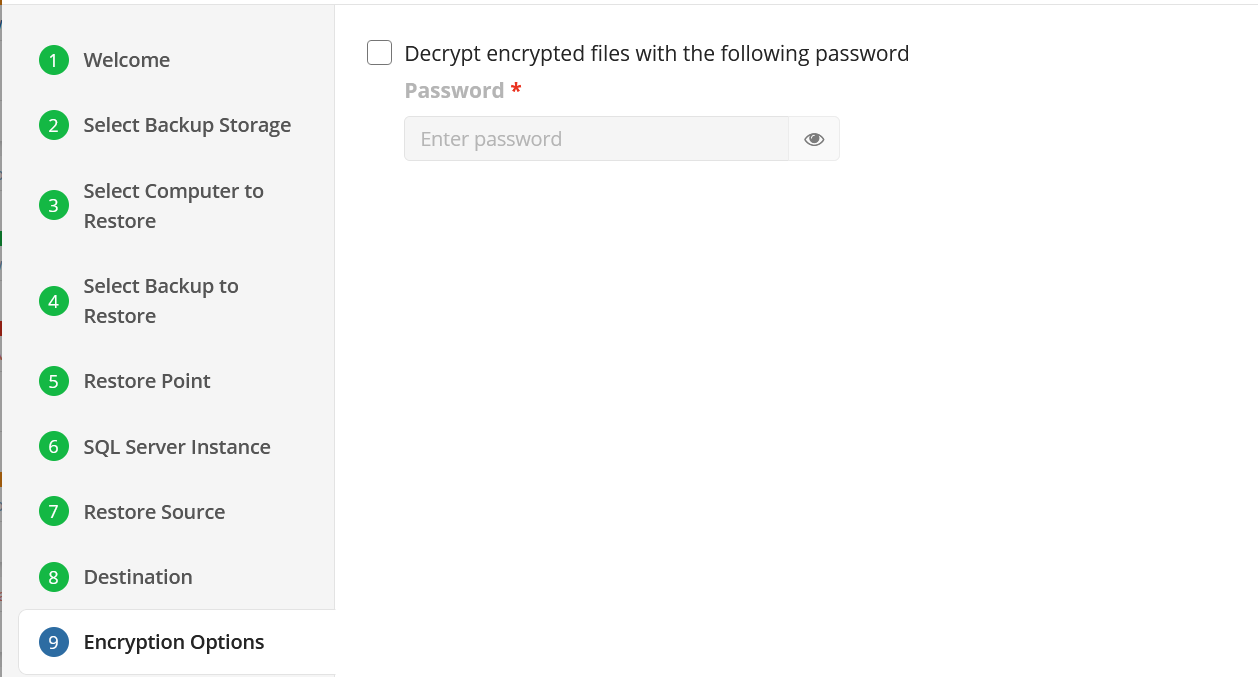
Step 13
If you restore data from the S3 Glacier Flexible Retrieval or Glacier Deep Archive storage classes, specify Smart Restore options.
Step 14
Next, if you opted to save the restore plan, the next step is to specify how the plan should be triggered.
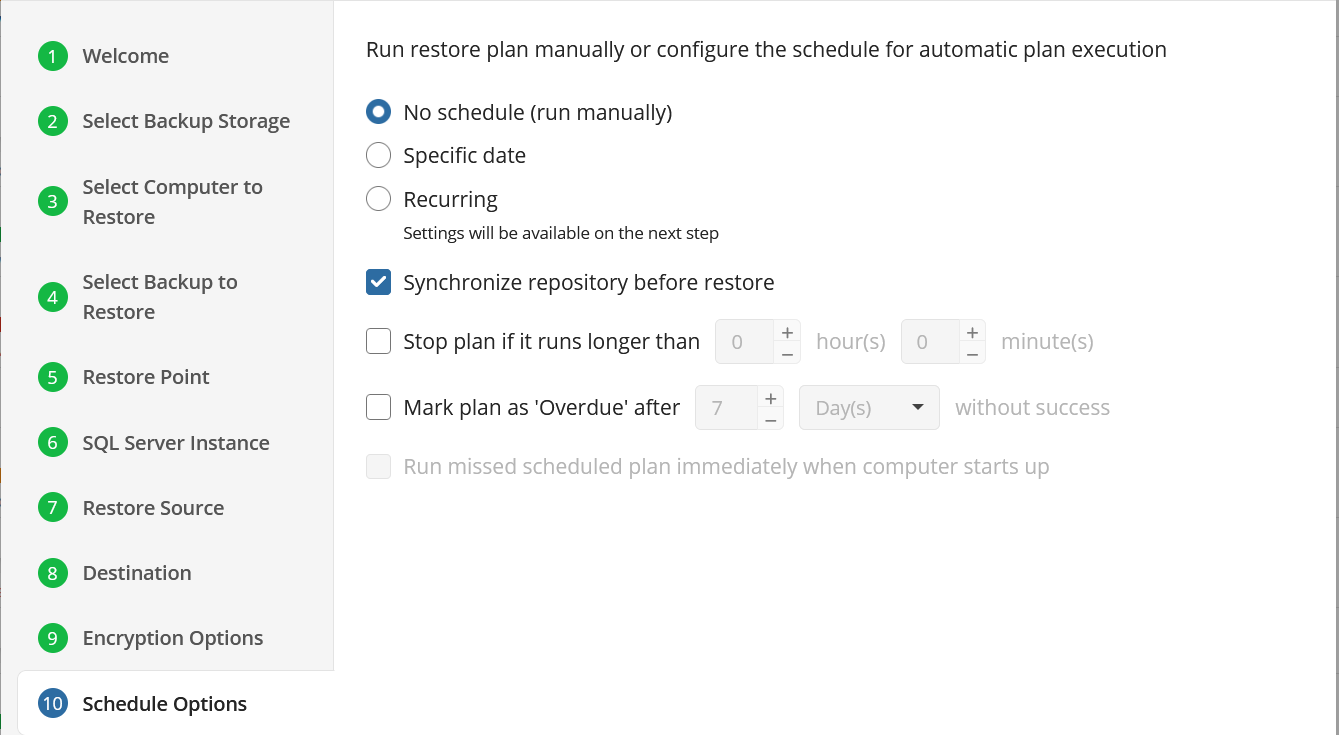
- No schedule (run manually): Use this option only when you wish to execute the Restore manually.
- Specific date: Use this to schedule a one-time Restore at the specified date and time.
- Recurring: Using this option enables you to schedule recurring Restorations based on the criteria in the fields below.
Do not use the 88Stop the plan if it runs for:** option if you have a slow or unstable internet connection
Enabling the Run missed scheduled restore immediately when computer starts up option will ensure that the restore plan will begin automatically after the computer starts up if it was unable to run at the scheduled time. This is only recommended for desktops and laptops. For servers, it is recommended that you run the restore plan manually when all maintenance works are completed to avoid adversely affecting server performance and internet bandwidth during working hours
Step 15
With Recurring selected on the previous step, you are then prompted to define the time and frequency the plan should execute.
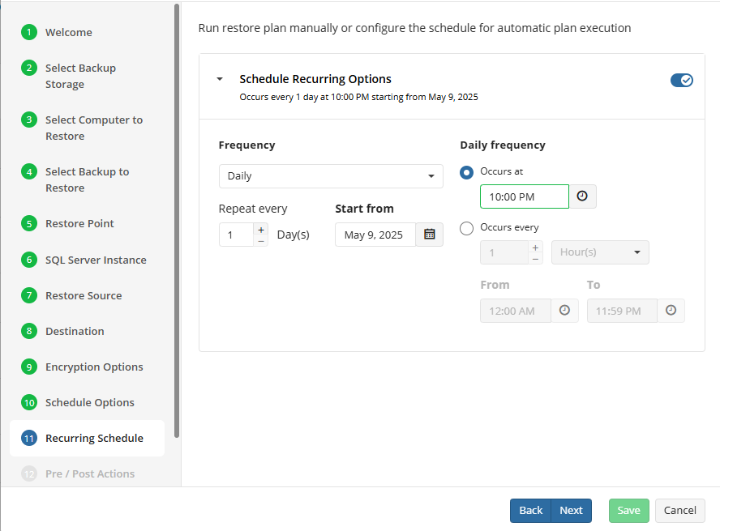
Step 16
The Pre/Post Actions page allows the execution of custom scripts before and/or after the running of a backup task.
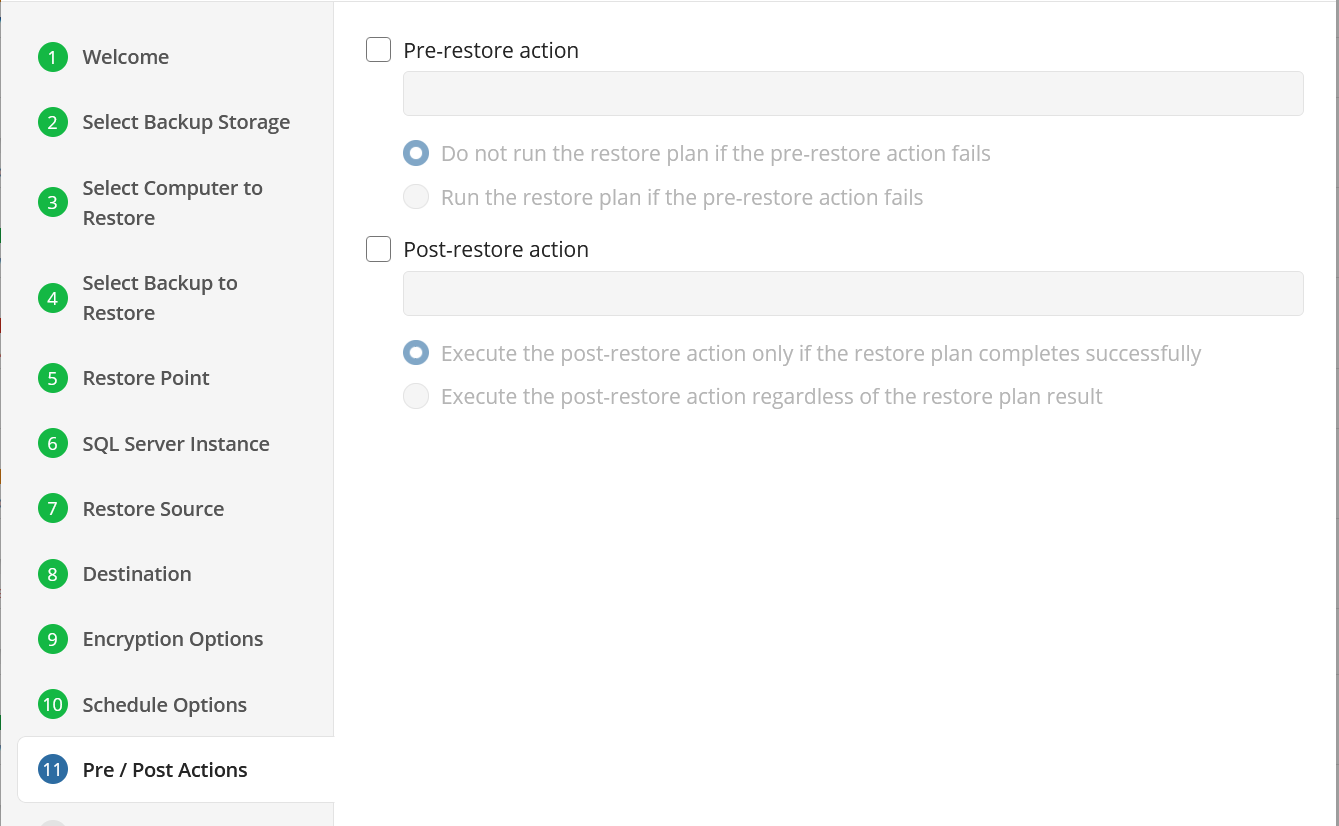
Step 17
The final step is to review notification settings. The default settings applied at the Company level are selected by default, however you are also able to specify custom options per plan.
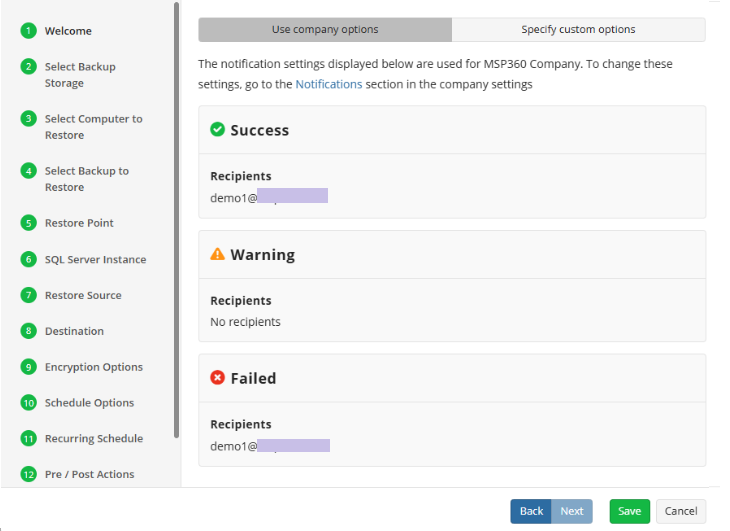
Step 18
Click on Save when you are happy with your selections. If the plan is set to run only a single time and has no set schedule, it will automatically start. Otherwise, if it is set to run only once and is scheduled, it will display in the list of plans until the scheduled time. If it is only set to run once, then when it completes successfully it will remove itself from the list of plans. Only Restore Plans which are saved will remain in the list for future use.
Restore MS SQL Files in Backup Agent
Step 1
Within the Online Backup Agent, click on “Restore”

Step 2
Once the wizard starts, click on Next to advance to the next step.
Step 3
The next step will prompt you to select the source for the restore.
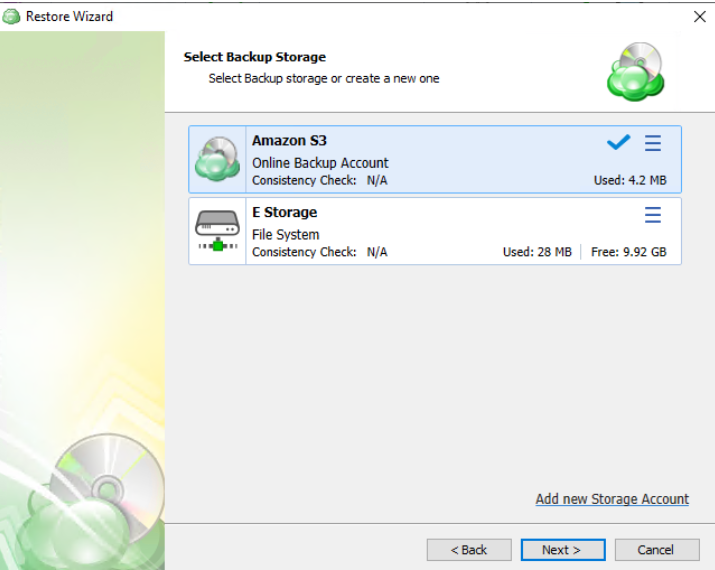
If the desired destination is not in the list, you can click “Add new Storage Account” to add it.
Step 4
Next, you will be given the option to either run the restore once or to save it to run later.
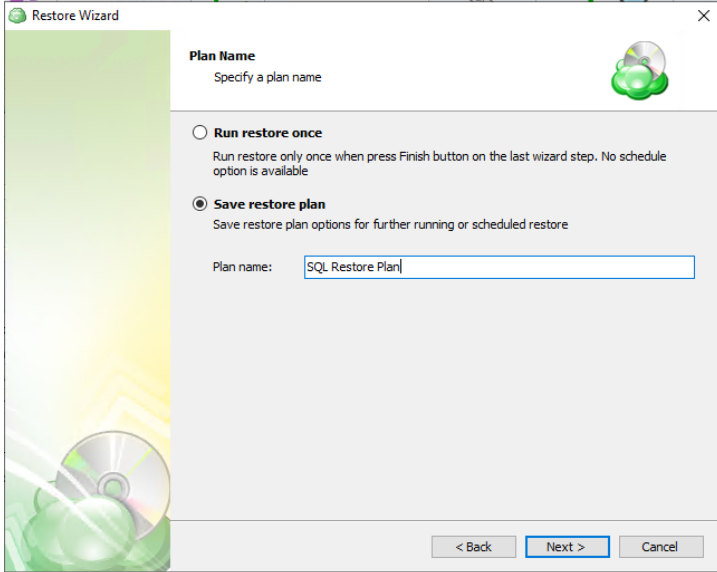
Run restore once will execute the restore immediately upon completing the wizard. There is no option to schedule this type of restore
Save restore plan will allow you to schedule the plan to run at a later time and also schedule repeating restorations if needed
It is recommended to use a descriptive name which will distinguish the backup from others
Step 5
With the type of restore selected, the next step is to select the computer associated with the backup which you would like to restore.
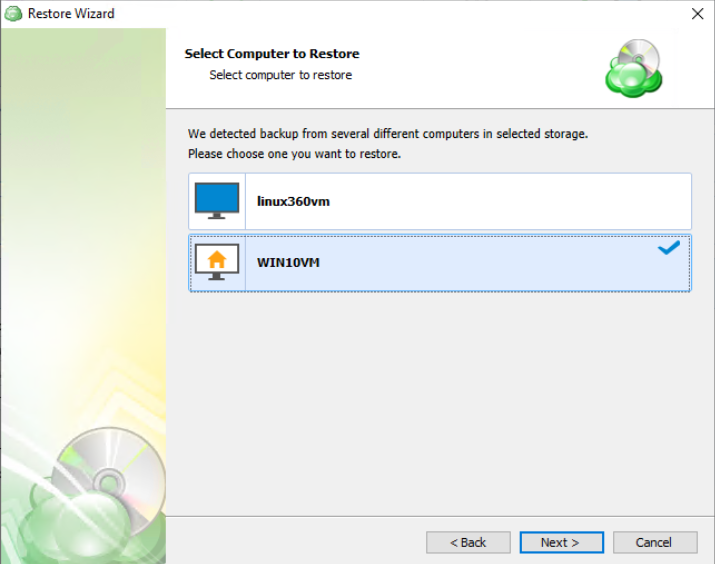
Step 6
Next, you will be presented with a list of available backup types for the selected host. Select the “MS SQL backup files” option to continue.
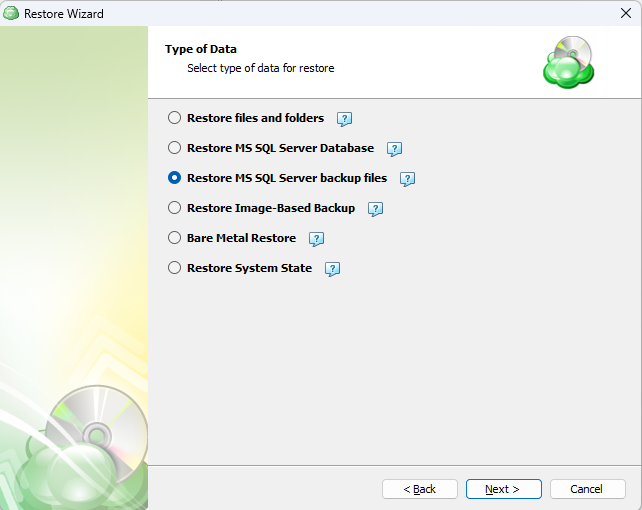
Step 7. Next you will be given a choice for what point in time you would like to restore the VM to.
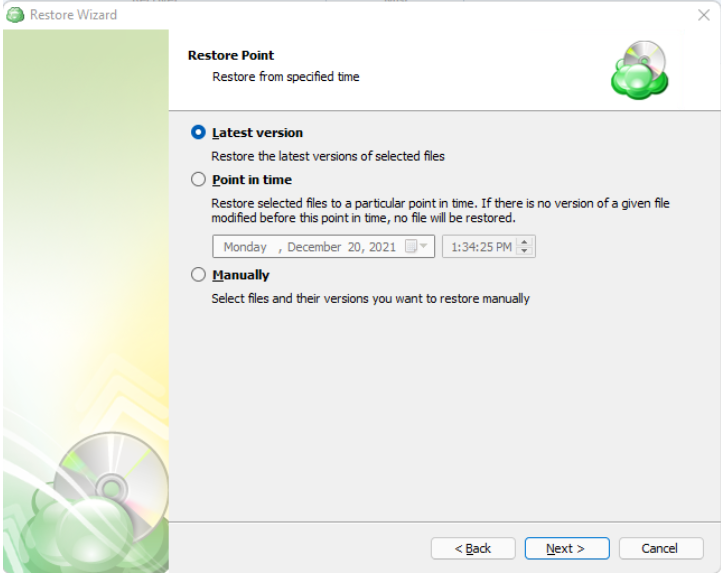
If there is no exact match for the point in time selected, the application will automatically select the closest previous restore point
Step 8
Select the database backup which you would like to restore.
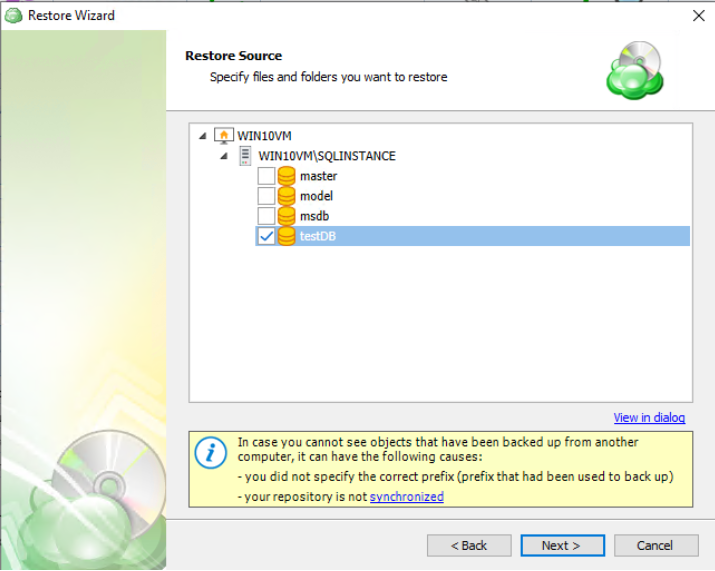
Step 9
The next step asks you to provide the paths the database files will be restored to.
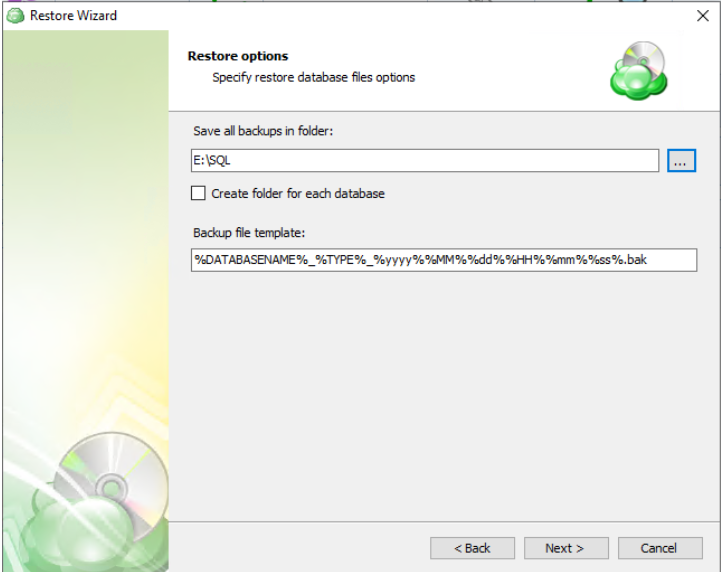
Step 10
Next the application will prompt you to enter the credentials used if the backup was encrypted. If it was not encrypted, simply click “Next”.
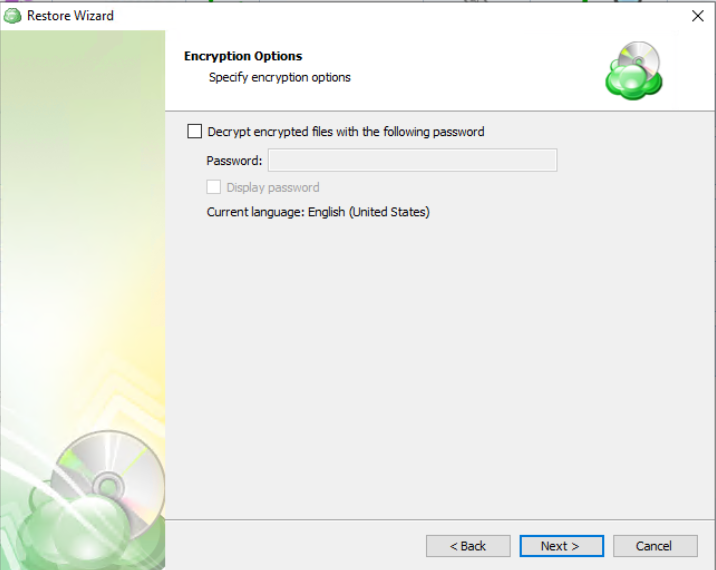
Step 11
Next you are prompted to set the schedule for your restore plan which will allow it to run autonomously, or you are able to select “No Schedule” for it to remain a manual process.
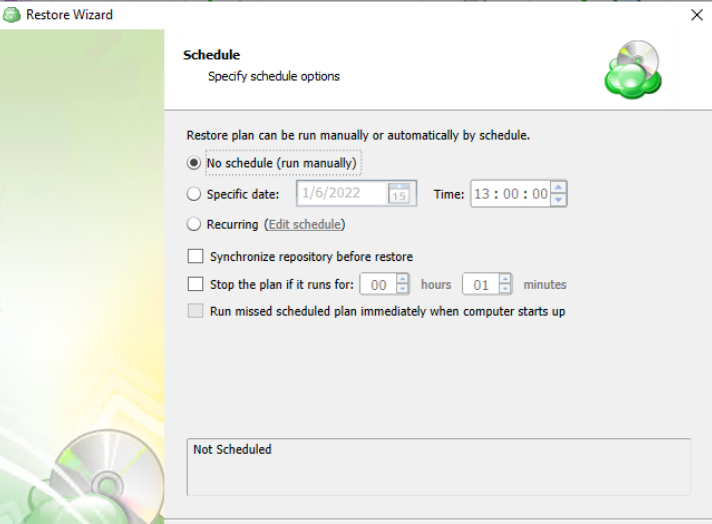
Enabling the Run missed scheduled backup immediately when computer starts up option will ensure that the backup process begins automatically upon startup if the last backup was not able to start at the scheduled time for any reason. This option is recommended for Desktops and Laptops
Do not use the Stop the plan if it runs for: option if you have a slow or unstable internet connection
Step 12
The Pre/Post Actions page allows the execution of custom scripts before and/or after the running of a backup task.
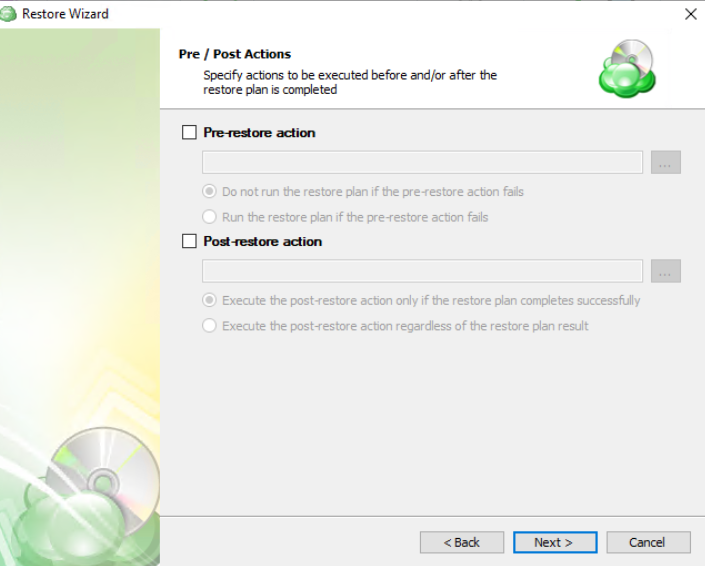
Step 13
Specify notification settings.
Step 14
The next step of the Wizard displays a summary of the selections made throughout the process. Once you have reviewed your selections, click “Next”.
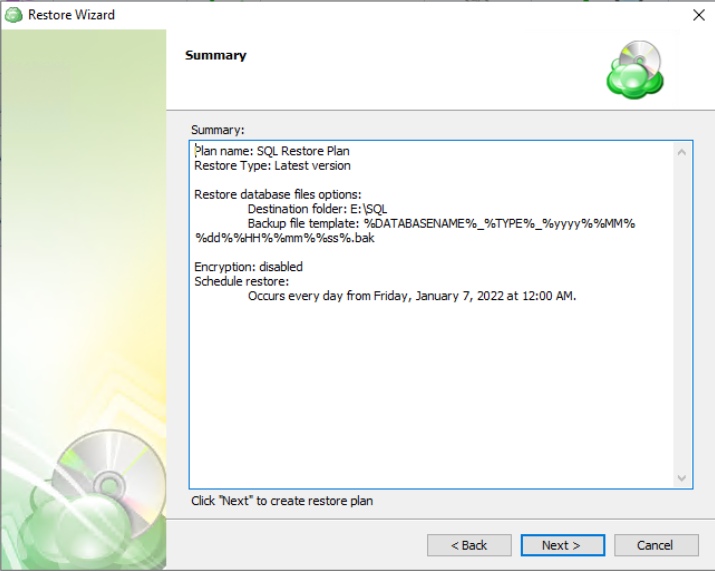
Step 15
After clicking next on the previous step, the Restore Plan is created. The final step is to acknowledge this and determine whether to run the backup immediately or for it to wait until the next scheduled occurrence.
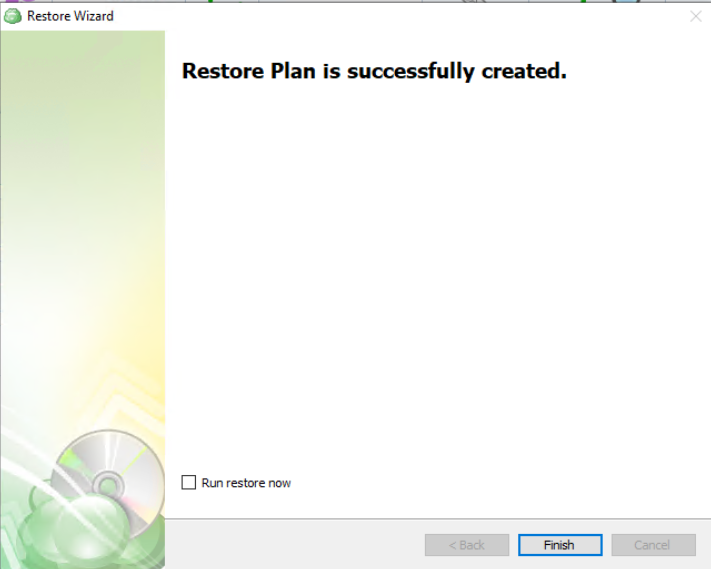
Restore MS SQL Files in Management Console
Step 1
In the Management Console, open Backup > Computers page.
Step 2
Find the computer hosting the MS SQL instance to which you want to restore a previously backed up MS SQL files, then click the computer name or the Configure icon in the Backup Plan Status column.
Step 3
In the side panel, navigate to the Restore plans tab. Click on the +Add New Plan button and select MS SQL files restore plan from the drop-down menu.

Step 4
The first step when creating a new MS SQL restore plan is to decide whether to run it a single time immediately after plan creation, or give it a name and save it for later.
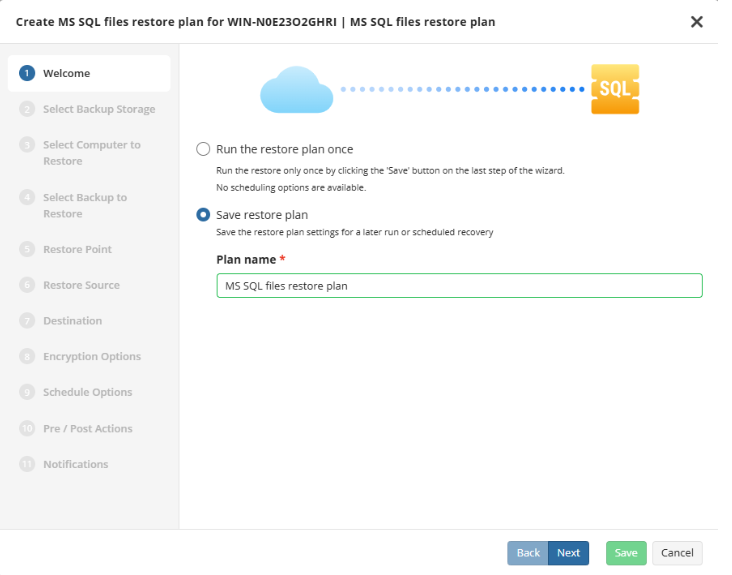
Run restore once will execute the restore immediately upon completing the wizard
Save restore plan will allow you to schedule the plan to run at a later time and also schedule repeating restore operations, if needed
It is recommended to use a descriptive name which will distinguish the plan from others
Step 5
Next, select the storage which contains the desired data.
Step 6
With the backup storage selected, the next step is to select the computer associated with the backup which you would like to restore.
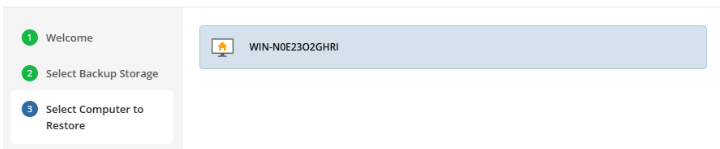
Step 7
Next, you will be presented with a list of available backup types for the selected host. Select the “SQL Server Instances” option to continue.
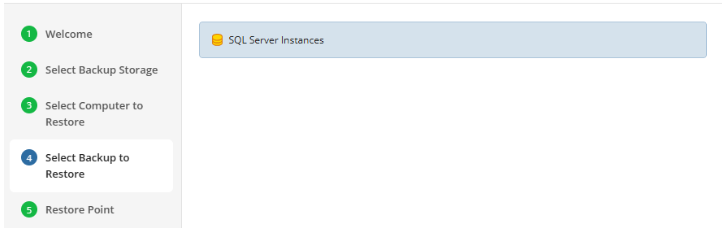
Step 8
The next step is to select the desired point in time to restore to.
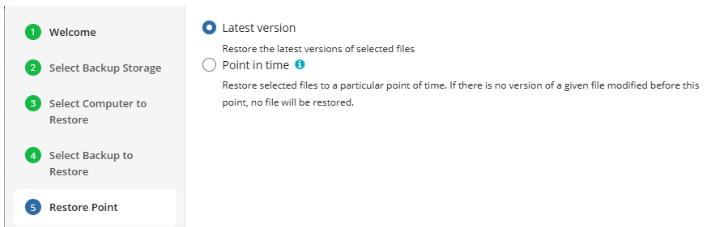
If there is no exact match for the point in time selected, the application will automatically select the closest previous restore point
Step 9
Next, select which database to restore.
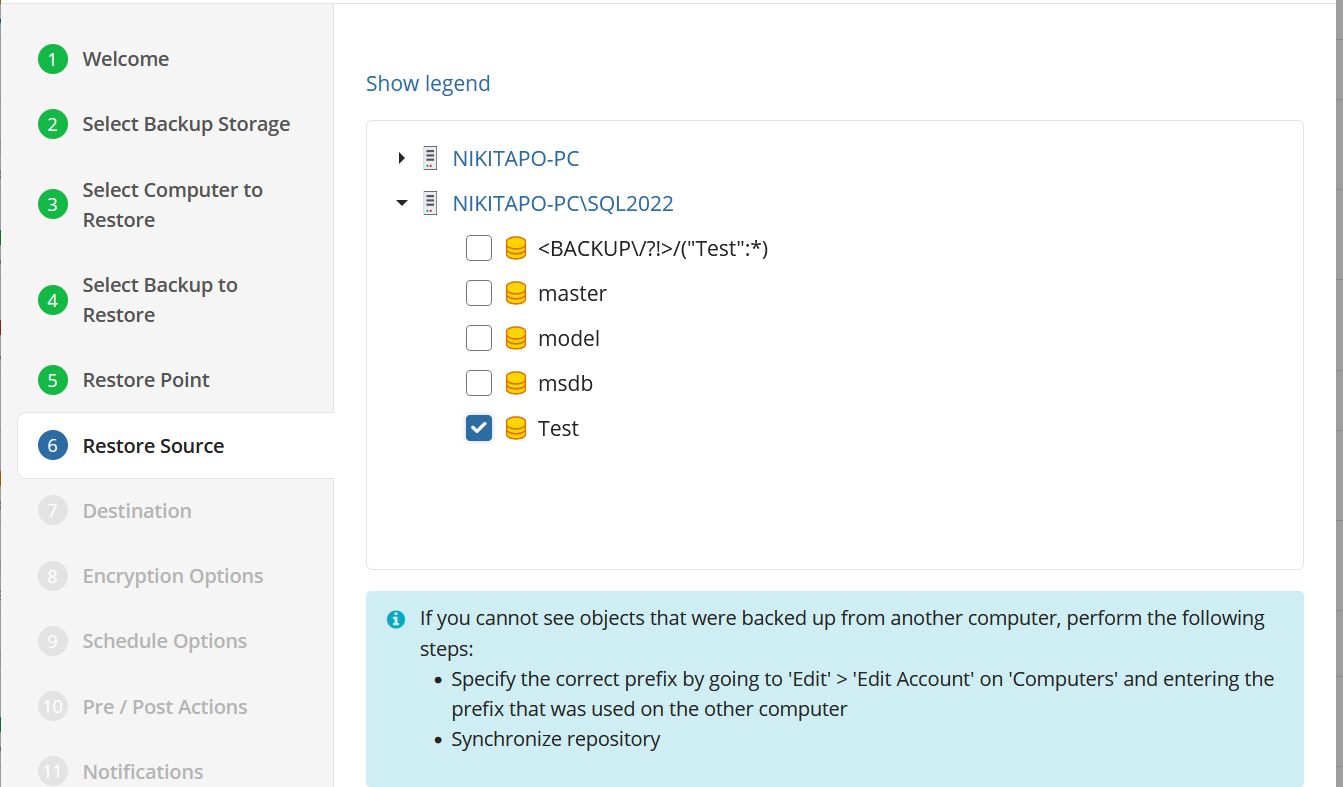
Step 10
The next step asks you to provide the paths the database files will be restored to, and you will be given options to overwrite an existing database or restore the database with a new name.
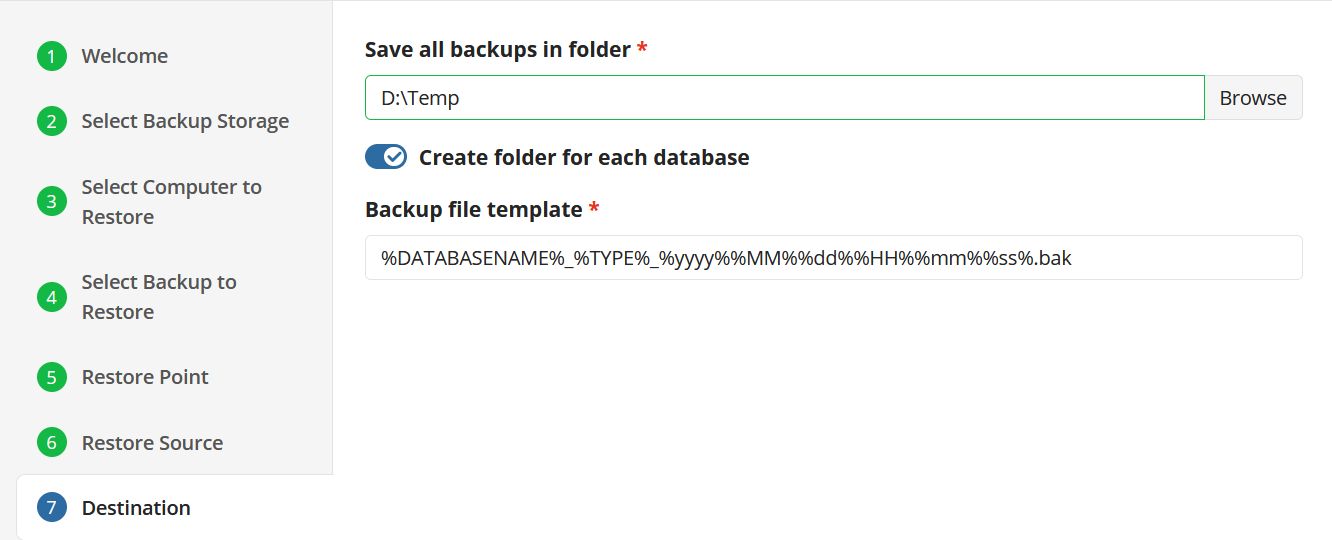
Step 11
If the backed up data was encrypted, the next step will be to enter the password for decryption. If the password is incorrect or missing, the restore plan will fail and you will need to edit the plan to input the correct password.

Step 12
Next, if you opted to save the restore plan, the next step is to specify how the plan should be triggered.
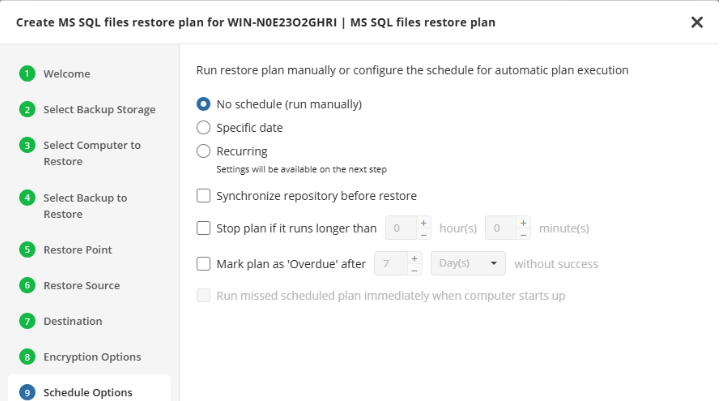
- No schedule (run manually): Use this option only when you wish to execute the Restore manually.
- Specific date: Use this to schedule a one-time Restore at the specified date and time.
- Recurring: Using this option enables you to schedule recurring restore operations based on the criteria in the following step.
Glacier Smart Restore (optional)
If you restore data from the S3 Glacier Flexible Retrieval or Glacier Deep Archive storage classes, specify Smart Restore options.
Step 13
With Recurring selected on the previous step, you are then prompted to define the time and frequency the plan should execute.
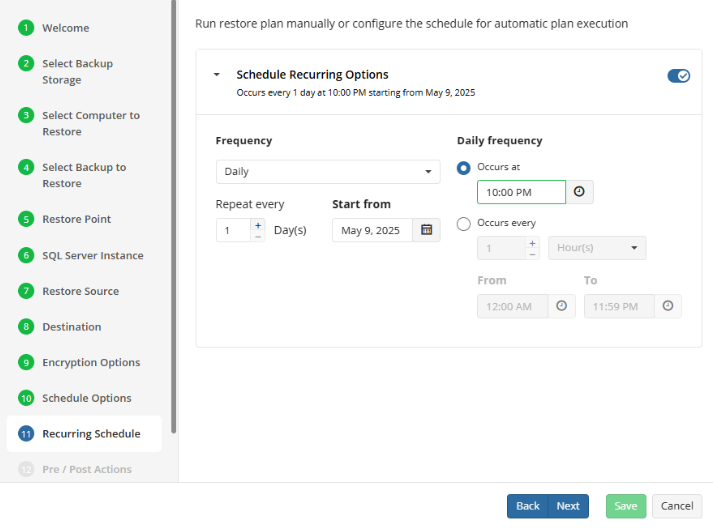
In addition to scheduling the restore, other options are available regarding notification and management of long running or missed plans.
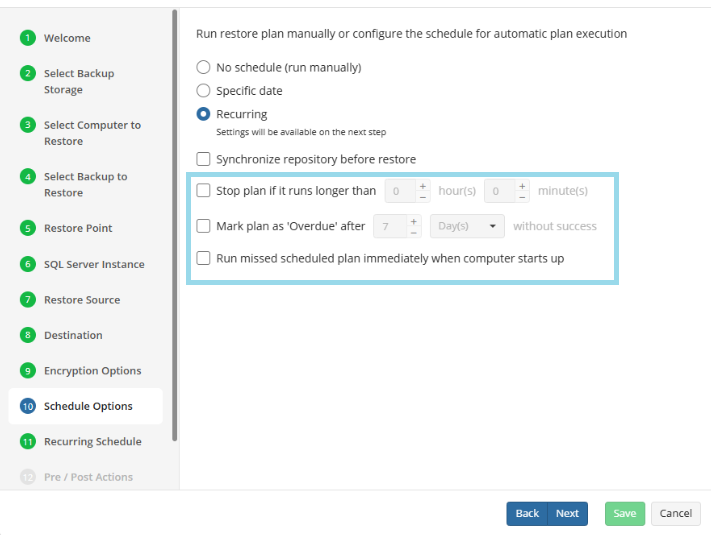
Do not use the “Stop the plan if it runs for:” option if you have a slow or unstable internet connection
Enabling the “Run missed scheduled restore immediately when computer starts up” option will ensure that the restore plan will begin automatically after the computer starts up if it was unable to run at the scheduled time. This is only recommended for desktops and laptops. For servers, it is recommended that you run the restore plan manually when all maintenance works are completed to avoid adversely affecting server performance and internet bandwidth during working hours
Step 14
he Pre/Post Actions page allows the execution of custom scripts before and/or after the running of a backup task.
Step 15
The final step is to review the notifications settings. The default settings applied at the Company level are selected by default, however you are also able to specify custom options per plan.
Step 16
Click on Save when you are happy with your selections. If the plan is set to run only a single time and has no set schedule, it will automatically start. Otherwise, if it is set to run only once and is scheduled, it will display in the list of plans until the scheduled time. If it is only set to run once, then when it completes successfully it will remove itself from the list of plans. Only Restore Plans which are saved will remain in the list for future use.
Item-Level Restore
Restore Items from Backup Plan using Backup Agent
To restore items from an image-based, files, Hyper-V or VMware backup plan using Backup Agent
Step 1
Launch the Managed Backup, then navigate to Backup Storage tab. Select your storage account, then open the list of plans for the computer and select “Image Based”.

Step 2
Select the generation and restore point (date) you want to restore a file or folder from.

Step 3
A list of volumes that are included in the system image backup will be displayed.

Step 4
Expand the volumes and find the individual files that you would like to restore from the Image-Based backup. If your backup was encrypted, you need to enter the password to view the available folders and files.
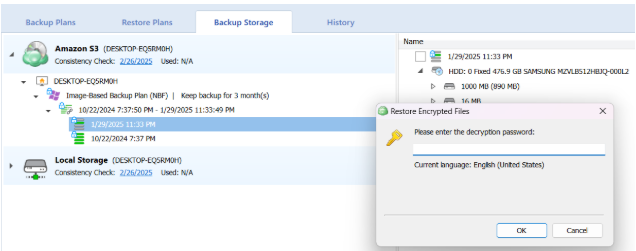
After entering the right password, you can expand the folders and select a file or folder you would like to restore.
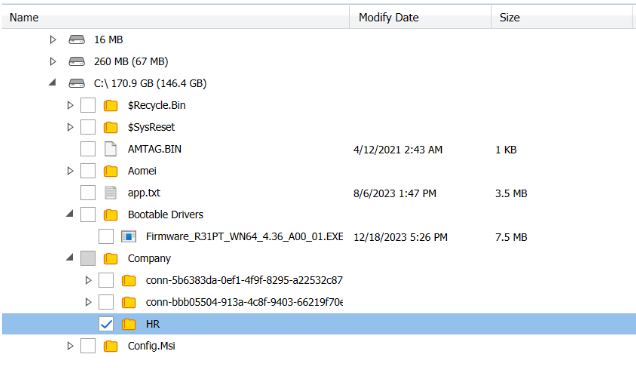
Step 5
You can select multiple files or folders, then right-click to proceed with “Quick Restore”.

Step 6
Select the location where you want to restore the files to and click OK.

Step 7
You will be automatically redirected to the Restore Plans tab where you will see the progress of your Quick Restore job.

If the plan fails, it will remain in the Restore Plans tab displaying the cause and the error code.
If the Quick Restore job completes successfully, the restore plan will automatically disappear and you can view the restored data.
Restore Items using the Quick Restore App
This feature is only available for computers running Windows.
Step 1
Navigate to the Management Console and select the Computers page on the main menu. Locate the computer which backup dataset you wish to restore from and click on the name of the computer in the Computer name column.
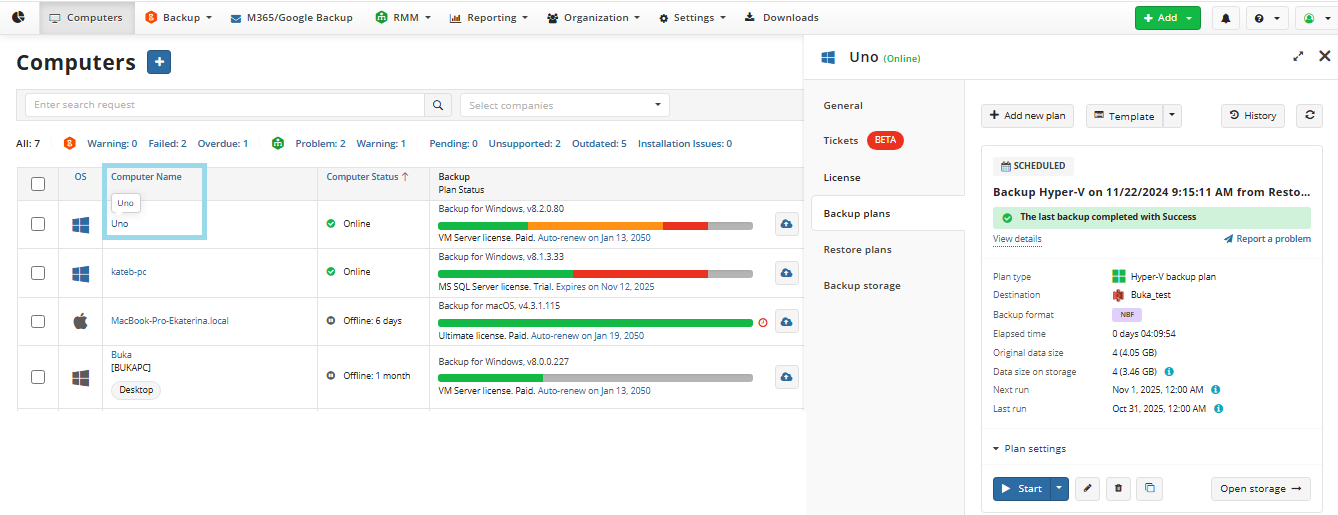
Step 2
Select the Backup Storage tab and then click on the Quick Restore App button for the storage account you want to restore from.
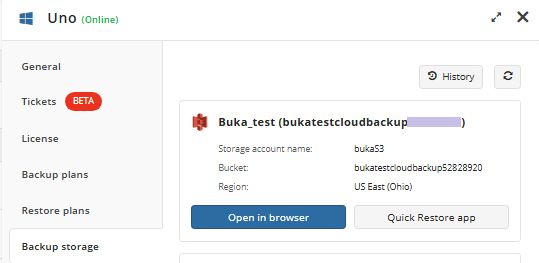
Step 3
You should see a pop-up dialog suggesting to run or download the Quick Restore app.

If this is the first time you are launching the Quick Restore, make sure to download and run the installer file, if it is not started automatically:

Once the Quick Restore is installed, allow it to make changes on your computer, as prompted. If nothing happens, click "here" in the dialog.

Step 4
Using the Quick Restore application, you can select the backup plan and restore point.
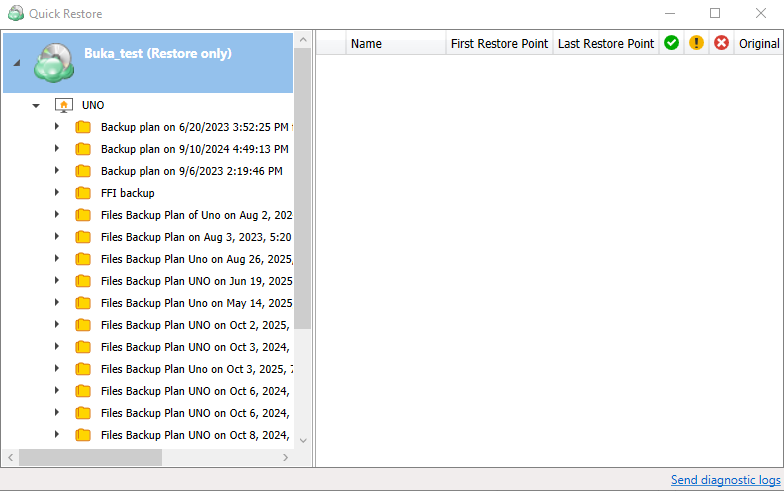
Step 5
Additional metadata retrieval might be required. Click on Run now.
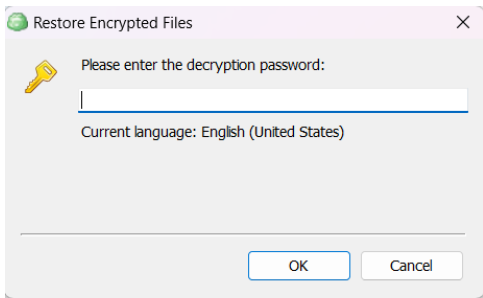
If your backup was encrypted, you need to enter the password to view the available folders and files:
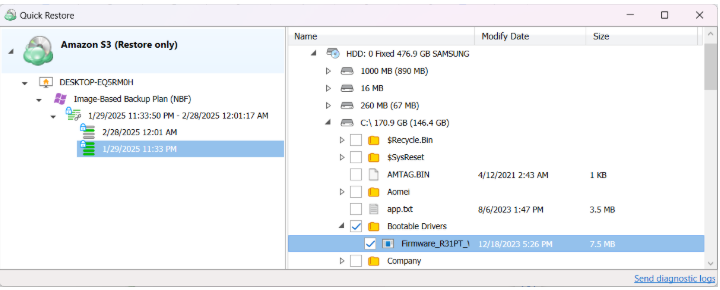
After entering the right password, you can and select file(s) or folder(s) you would like to restore:

Step 6
Right-click on a file or folder and proceed with “Quick Restore”.
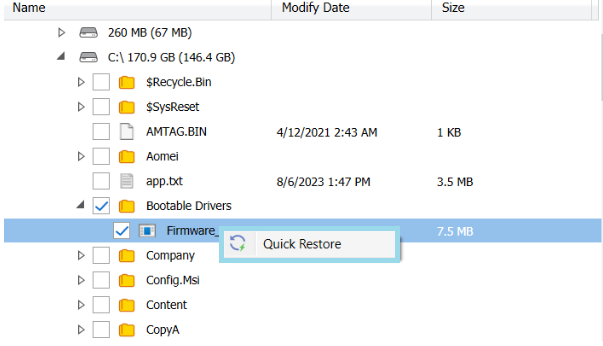
Step 7
Select the destination folder for your restore job.
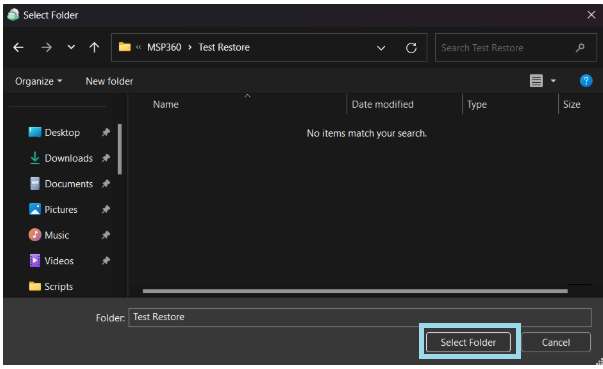
Step 8
The progress bar will appear once the restore process has started:
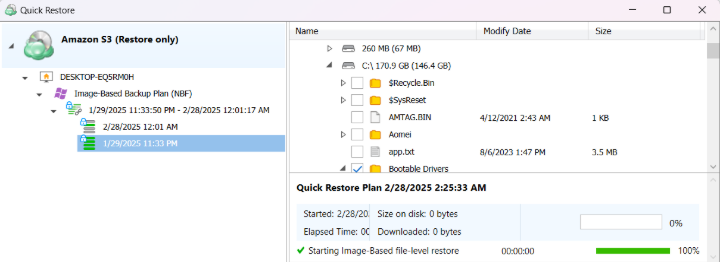
Once the Quick Restore plan is complete, you should see restored files in the destination folder.
Restore Items Using Backup Storage Browser
This feature is only available for computers running Windows.
Step 1
Navigate to the Management Console and select the Computers page on the main menu. Locate the computer which backup dataset you wish to restore from and click on the name of the computer in the Computer name column.
Step 2
Select the Backup Storage tab and then click on the Open storage button for the storage account you want to restore from.
Step 3
Expand the volumes and find the individual files that you would like to restore from the Image-Based backup.
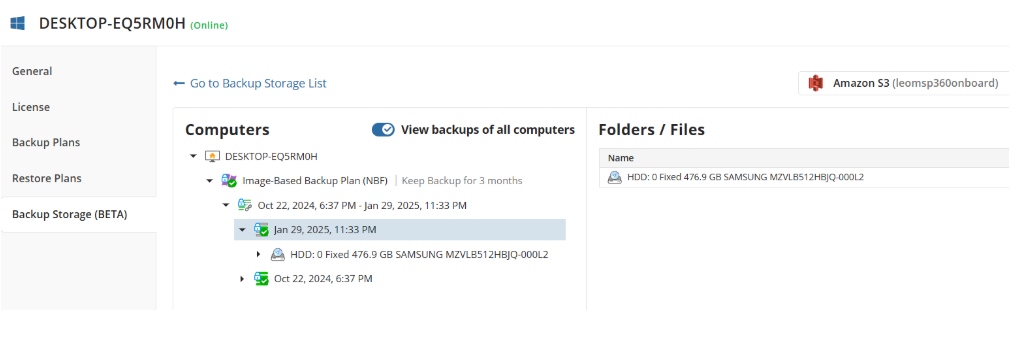
Step 4
If your backup was encrypted, you need to enter the password to view the available folders and files.
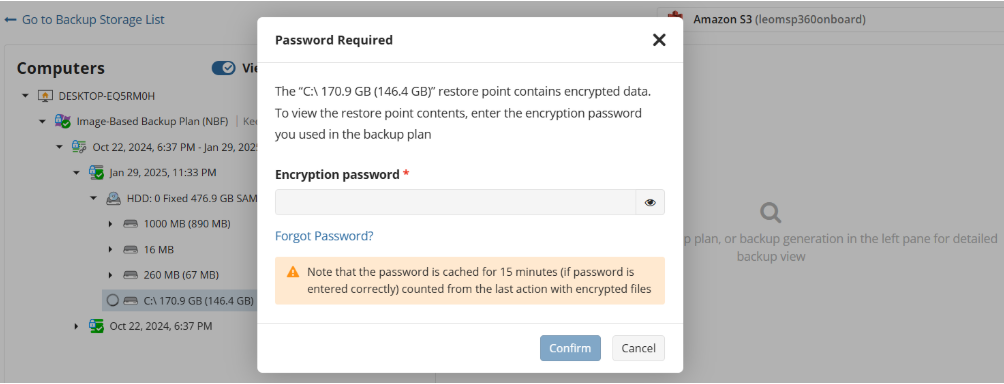
After entering the right password, you can select file(s) or folder(s) you would like to restore.
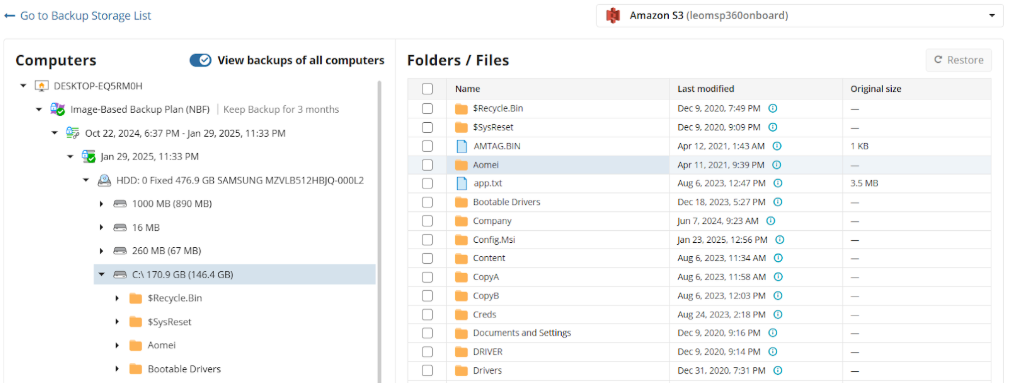
Step 5
Proceed by clicking the “Restore” button in the top right corner of the window.
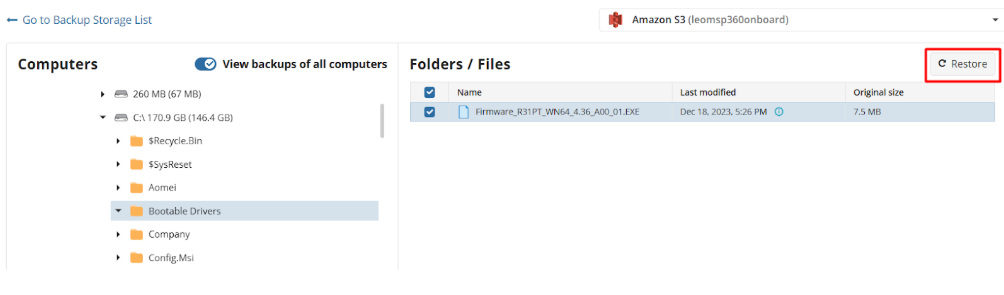
Step 6
Select the target computer and destination folder for the restore.
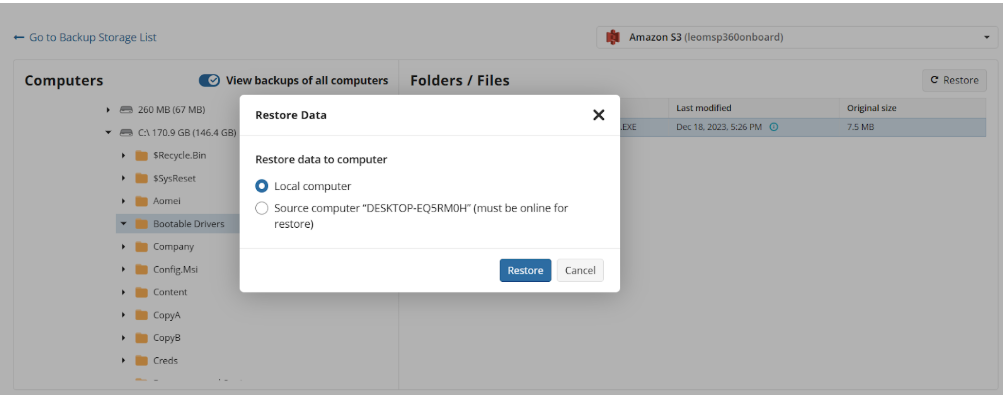
- Local Computer: If you select the Local computer (where you are logged into the Management Console) option, the portal will open the "Quick Restore” application.
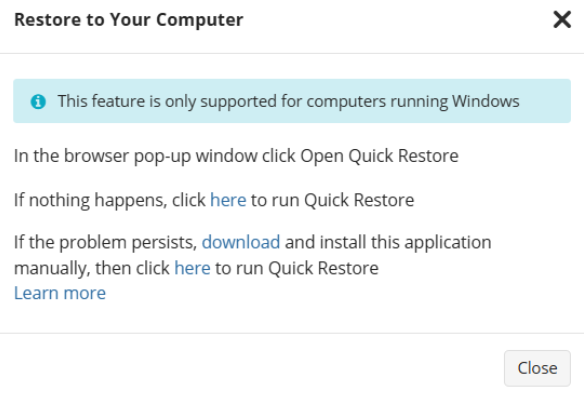
After launching the Quick Restore, the application will prompt you to select the destination folder:
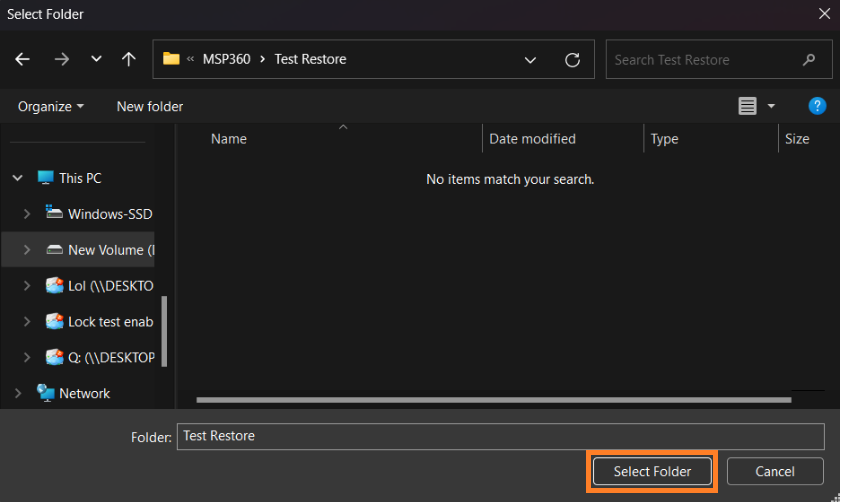
If the data was encrypted, you will need to enter the password:
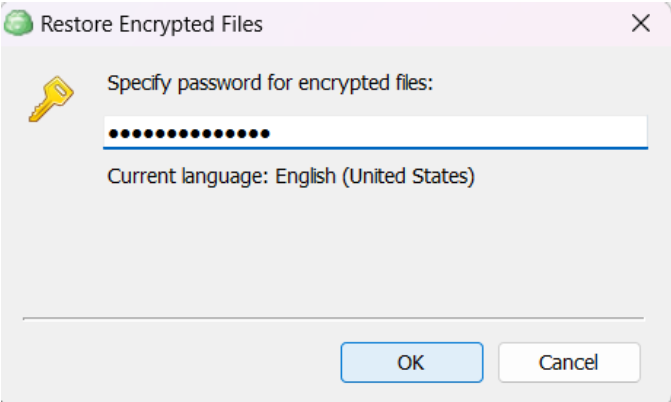
A progress bar will appear. Once the Quick Restore job is complete, you can navigate to the destination folder by clicking on the “Open containing folder”:
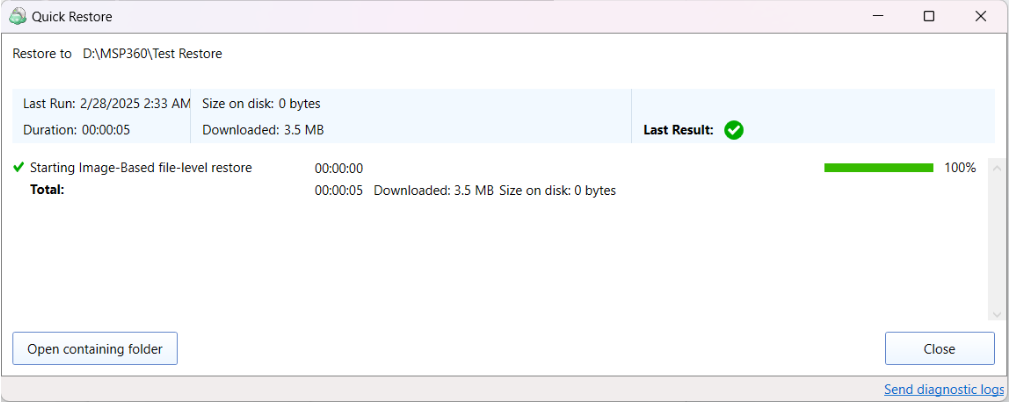
- Source computer You can select the Source computer option if the machine is online to perform the restore job.

You will need to specify the destination path in the Restore to field and provide the encryption password.
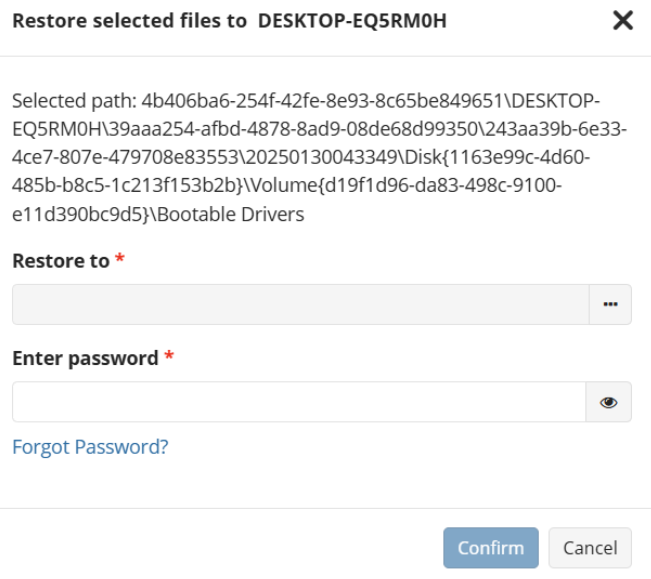
You can open the file tree view by clicking on the options next to the Restore to field:
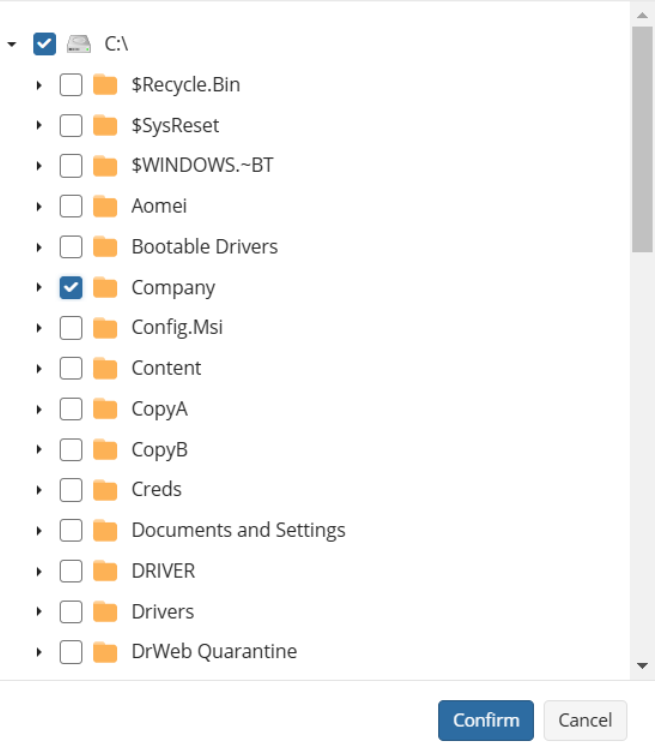
Once you click Confirm, the restore operation will begin. You should see the related notification messages in the right bottom corner of the Management Console.
Disaster Recovery (Bare-Metal Recovery) with Managed Backup
What Is Bare-Metal Recovery?
Bare-Metal Recovery (or Bare-Metal Restore, or BMR) is a way to recover a source computer on a target computer with no installed operating system - also called a bare-metal machine. To do this, you need a backup of the system image (a complete copy of your source computer) to restore everything as it was.
When Do You Need Bare-Metal Recovery?
You might need Bare-Metal Recovery in these situations:
- After a ransomware attack.
- When your computer hardware fails.
- Disaster recovery scenarios.
- To set up multiple computers with the same configuration using a master image.
Basic Bare Metal Recovery Scenarios
Management Console
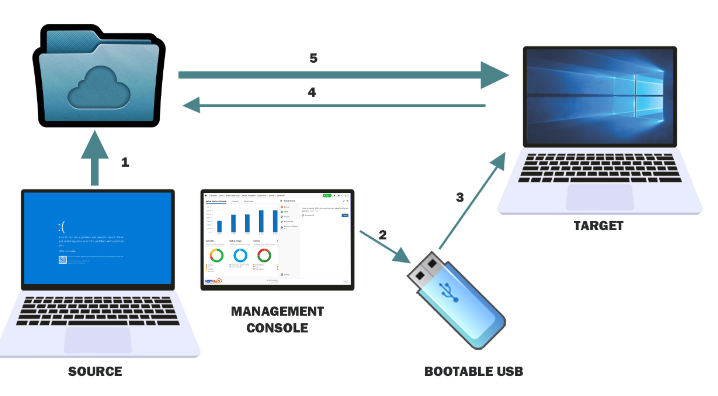
- Ensure a successful image-based backup is available in backup storage.
- Create a bootable USB drive or ISO image using the Bootable USB tab of the Downloads panel.
- Boot the target machine from the bootable USB or ISO image.
- Create a restore plan.
- Wait for the restore plan to complete successfully.
Backup Agent
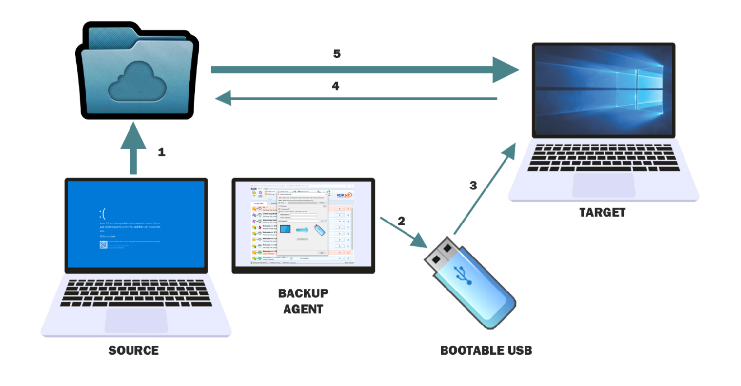
- Ensure a successful image-based backup is available in backup storage.
- Create a bootable USB drive or ISO image using the Backup Agent.
- Boot the target machine from the bootable USB or ISO image.
- Create a restore plan.
- Wait for the restore plan to complete successfully.
What You Need for Bare-Metal Recovery?
- A successful Image-Based Backup of source computer on backup destination
- Bare-Metal Recovery USB or ISO image file.
- An internet connection (Ethernet) to access Management Console and the backup storage where the successful image-based backup of the source computer is stored.
- Valid trial or paid Backup license
Bare-Metal Recovery Options with Managed Backup
- Option 1. Combined Local/Remote Bare-Metal Recovery (recommended):
- Some steps must be done by someone near the target computer.
- Most of the recovery steps can be performed via the Management Console using web-based Connect session
- Internet access (Ethernet) is required.
- Option 2. Local Bare-Metal Recovery:
- Recovery happens on-site using local backup storage.
- Internet access (Ethernet) is required.
- Option 3. Remote Bare-Metal Recovery to a Secondary Disk:
- Any machine with the Backup Agent can be used to restore an image from a backup to a secondary disk. The disk needs to be attached via the SATA interface. After the restore is finished, the disk can be installed into the target system
- Internet access (Ethernet) is required
References:
Combined Local/Remote Bare-Metal Recovery
- [Create a Bootable USB media as described below.
- (Optional) Add boot-critical drivers.
- Perform Bare-Metal Recovery using the instructions in this document.
Local Bare-Metal Recovery
- [Create a Bootable USB media as described below.
- (Optional) Add boot-critical drivers
- Perform local Bare-Metal Recovery using the instructions in this document.
Remote Bare-Metal Recovery to a Secondary Disk
- Connect an HDD or SSD drive to a source computer using a SATA connection. Ensure the Backup Agent is installed on the computer and has an MSP360 user account with access to the backup destination where the successful image-based backup of the source computer is stored.
- Follow the restore procedure described in the article using the Restore as physical disk option.
- Once the restore process is complete, install the drive into the target machine and configure the system to boot from this drive.
Create Bootable USB Drive
To perform a bare-metal recovery, you need to create a bootable USB drive on a computer running Windows. This bootable USB will contain a pre-boot environment, and the backup data for restoration will be retrieved from the backup storage specified in your image-based backup plan.
USB Drive Requirements
- Minimum Capacity: 1 GB
All data on the USB drive will be permanently erased. Please ensure that you have backed up any important data from the drive before proceeding
Creating a Bootable USB Drive Using Management Console
To create a bootable USB drive, proceed as follows:
- Open the Management Console.
- Select Downloads.
- On the Bootable USB tab, click Create.
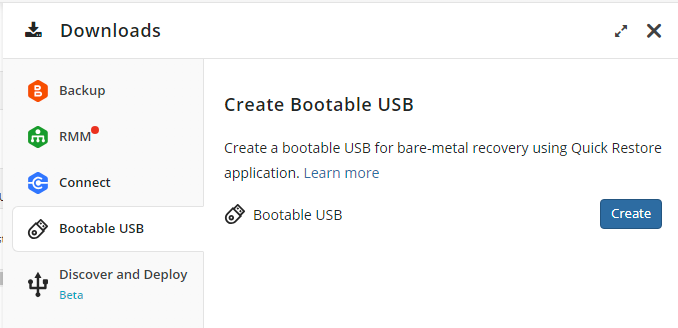
Launch the Quick Restore application when prompted.
Insert the USB drive you want to use as a bootable recovery tool.
Select USB drive in the Create Bootable USB dialog.
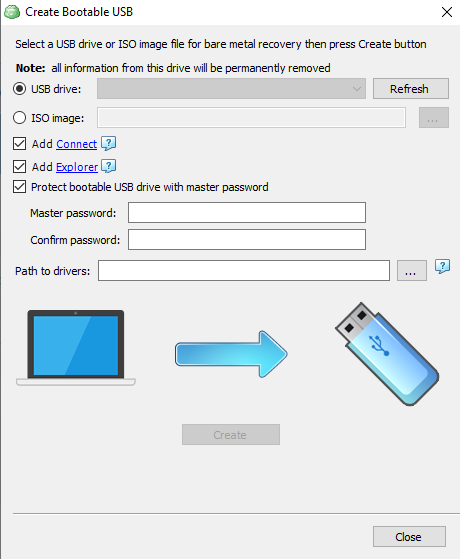
Select the Add Explorer checkbox to include the Explorer application for browsing your cloud storage and for cloud-to-cloud data transfer needs.
Select the Add Connect checkbox to include the Managed Connect application on the bootable USB drive to enable secure, remote access during Bare-Metal Restore or recovery scenarios. When the system is booted from the USB, Connect can be used for remote access. You can initiate a connection from the Management Console:
- Using web browser interface
- Using desktop app by means of a PIN code.
Set a master password. You will be prompted to protect the recovery tool with a master password for security. It is recommended to create a strong password and store it securely.
Add specific hardware drivers (optional). If your system requires specific drivers, collect them in a folder and specify the path in the Path to drivers field. When adding drivers to the recovery disk, only INF, CAT, and DLL files are supported. Driver packages provided by vendors in ZIP, RAR, 7Z, or EXE formats cannot be used directly. The INF files are essential, as they reference all necessary driver files. To simplify the process, you can organize the drivers by placing them in separate subfolders within a main folder. The selected folder will be scanned recursively to include all relevant driver files.
Example: These files will work properly:
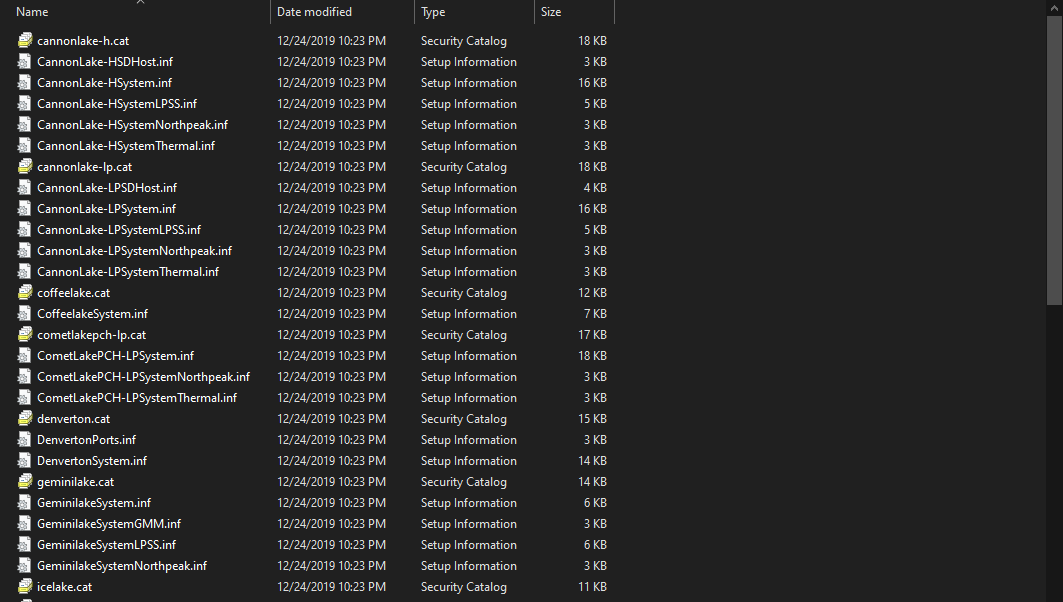
These files will not work properly:

- Click Create.
- If prompted, download and install both Windows ADK and Windows PE add-on. Refer to the following Microsoft documentation for instructions on how to choose the right set for your environment.
- In most scenarios, it is recommended to select Windows ADK 10.1.26100.1 (May 2024) and the Windows PE add-on for this ADK support the following OS releases:
- Windows 11, version 24H2 and all earlier supported versions of Windows 10 and 11
- Windows Server 2025, and Windows Server 2022
- To get required software:
- After all tools are successfully installed, click Create again.
- In most scenarios, it is recommended to select Windows ADK 10.1.26100.1 (May 2024) and the Windows PE add-on for this ADK support the following OS releases:
- Once USB drive creation is complete, click Close. Your USB device now contains the necessary boot files in the folder called Boot.
Creating a Bootable USB Drive Using Backup Agent
- Open the Backup Agent.
- Verify Backup Storage:
- On the Backup Storage tab, ensure that the storage account associated with the image-based backup is correctly configured with the correct backup prefix. You will need to use the same backup prefix during the recovery procedure on the target machine.
- This step can be done later, but it may be more convenient to do it now to avoid issues in the pre-boot environment.
- Insert the USB Drive you want to use as a bootable recovery tool.
- Run the Backup Agent and click Create Bootable USB.

- Select USB drive in the Create Bootable USB dialog.
Add Connect (optional). Select the Add Connect checkbox to include the Connect application on the bootable USB drive. To add Connect, select the Allow to Add Connect to the Recovery Disk checkbox in Settings > Global Agent Options.
Select the Add Explorer checkbox to include the Explorer application for browsing your cloud storage and for cloud-to-cloud data transfer needs.
Set a master password. You will be prompted to protect the recovery tool with a master password for security. It is recommended to create a strong password and store it securely.
Add specific hardware drivers (optional). If your system requires specific drivers, collect them in a folder and specify the path in the Path to drivers field.When adding drivers to the recovery disk, only INF, CAT, and DLL files are supported. Driver packages provided by vendors in ZIP, RAR, 7Z, or EXE formats cannot be used directly. The INF files are essential, as they reference all necessary driver files. To simplify the process, you can organize the drivers by placing them in separate subfolders within a main folder. The selected folder will be scanned recursively to include all relevant driver files.
Example: These files will work properly:
These files will not work properly:
- Click Create.
- If prompted, download and install both Windows ADK and Windows PE add-on. Refer to the following Microsoft documentation for instructions on how to choose the right set for your environment.
- In most scenarios, it is recommended to select Windows ADK 10.1.26100.1 (May 2024) and the Windows PE add-on for this ADK support the following OS releases:
- Windows 11, version 24H2 and all earlier supported versions of Windows 10 and 11
- Windows Server 2025, and Windows Server 2022
- To get required software:
- After all tools are successfully installed, click Create again.
- In most scenarios, it is recommended to select Windows ADK 10.1.26100.1 (May 2024) and the Windows PE add-on for this ADK support the following OS releases:
- Once USB drive creation is complete, click Close. Your USB device now contains the necessary boot files in the folder called Boot.
Creating Bootable ISO Image File
To perform a bare-metal recovery, you need to create a bootable ISO image file on a computer running Windows. This bootable ISO image will contain a pre-boot environment, and the backup data for restoration will be retrieved from the backup storage specified in your image-based backup plan.
Creating a Bootable ISO Image File Using Management Console
To create a bootable ISO image file, proceed as follows:
- Open the Management Console.
- Select Downloads.
- On the Bootable USB tab, click Create.
Launch the Quick Restore application when prompted.
In the dialog box, select ISO image, then specify a full path to the ISO image file to create.
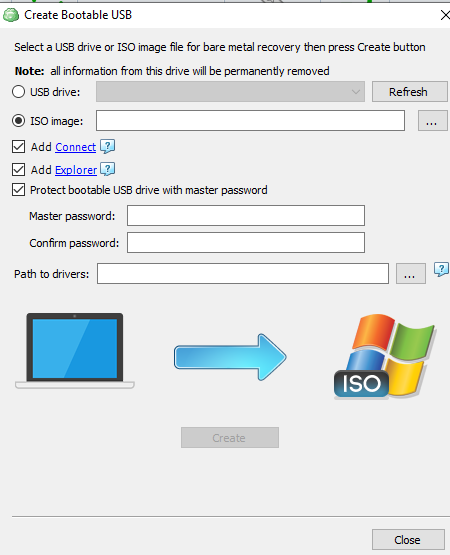
- Select the Add Connect checkbox to include the Managed Connect application on the bootable USB drive to enable secure, remote access during Bare-Metal Restore or recovery scenarios. When the system is booted from the USB, Connect can be used for remote access. You can initiate a connection from the Management Console:
- Using web browser interface
- Using desktop app by means of a PIN code.
- Select the Add Explorer checkbox to include the Explorer application for browsing your cloud storage and for cloud-to-cloud data transfer needs.
- To protect a recovery tool with a master password for security reasons, select the Protect bootable USB drive with master password checkbox, then specify the password. It is recommended to create strong passwords and keep them in a safe place.
- Add specific hardware drivers (optional). If your system requires specific drivers, collect them in a folder and specify the path in the Path to drivers field. When adding drivers to the recovery disk, only INF, CAT, and DLL files are supported. Driver packages provided by vendors in ZIP, RAR, 7Z, or EXE formats cannot be used directly. The INF files are essential, as they reference all necessary driver files. To simplify the process, you can organize the drivers by placing them in separate subfolders within a main folder. The selected folder will be scanned recursively to include all relevant driver files.
Example: These files will work properly:
These files will not work properly:
- Click Create.
- If prompted, download and install both Windows ADK and Windows PE add-on. Refer to the following Microsoft documentation for instructions on how to choose the right set for your environment.
- In most scenarios, it is recommended to select Windows ADK 10.1.26100.1 (May 2024) and the Windows PE add-on for this ADK support the following OS releases:
- Windows 11, version 24H2 and all earlier supported versions of Windows 10 and 11
- Windows Server 2025, and Windows Server 2022
- To get required software:
- After all tools are successfully installed, click Create again.
- In most scenarios, it is recommended to select Windows ADK 10.1.26100.1 (May 2024) and the Windows PE add-on for this ADK support the following OS releases:
- Once the ISO image file is created, click Close.
Now you can use this ISO image to recover your system on another physical or virtual machine by mounting it as an external drive.
Creating a Bootable ISO Image File Using Backup Agent
- Open the Backup Agent.
- Verify Backup Storage:
- On the Backup Storage tab, ensure that the storage account associated with the image-based backup is correctly configured with the correct backup prefix. You will need to use the same backup prefix during the recovery procedure on the target machine.
- This step can be done later, but it may be more convenient to do it now to avoid issues in the pre-boot environment.
- Specify the path to ISO image file you want to use as a bootable recovery tool.
- Run the Backup Agent and click Create Bootable USB.
- Select ISO image in the Create Bootable USB dialog, then specify a full path to the ISO image file to create.
- Add Connect (optional). Select the Add Connect checkbox to include the Connect application on the bootable ISO image file. To add Connect, select the Allow to Add Connect to the Recovery Disk checkbox in Settings > Global Agent Options.
- Select the Add Explorer checkbox to include the Explorer application for browsing your cloud storage and for cloud-to-cloud data transfer needs
- Set a master password. You will be prompted to protect the recovery tool with a master password for security. It is recommended to create a strong password and store it securely.
- Add specific hardware drivers (optional). If your system requires specific drivers, collect them in a folder and specify the path in the Path to drivers field.When adding drivers to the recovery disk, only INF, CAT, and DLL files are supported. Driver packages provided by vendors in ZIP, RAR, 7Z, or EXE formats cannot be used directly. The INF files are essential, as they reference all necessary driver files. To simplify the process, you can organize the drivers by placing them in separate subfolders within a main folder. The selected folder will be scanned recursively to include all relevant driver files.
Example: These files will work properly:
These files will not work properly:
- Click Create.
- If prompted, download and install both Windows ADK and Windows PE add-on. Refer to the following Microsoft documentation for instructions on how to choose the right set for your environment.
- In most scenarios, it is recommended to select Windows ADK 10.1.26100.1 (May 2024) and the Windows PE add-on for this ADK support the following OS releases:
- Windows 11, version 24H2 and all earlier supported versions of Windows 10 and 11
- Windows Server 2025, and Windows Server 2022
- To get required software:
- After all tools are successfully installed, click Create again.
- In most scenarios, it is recommended to select Windows ADK 10.1.26100.1 (May 2024) and the Windows PE add-on for this ADK support the following OS releases:
- Once ISO image file creation is complete, click Close.